
Created by Masahiro Sakurai, the disgustingly cute, ever-ravenous Kirby is one of Nintendo’s most popular characters. Accordingly, I’m dedicating most of July to celebrating the pink puff-ball.


Released: 24 February 2023
Originally Released: 24 October 2011
Developer: HAL Laboratory / Vanpool
Original Developer: HAL Laboratory
Metacritic Scores: 79% / 8.6
Also Available For: Nintendo Wii (Original Release); Nintendo Switch 2 (Deluxe Version)
Quick Facts:
Return to Dream Land initially began as a GameCube title and quasi-sequel to Kirby 64: The Crystal Shards (HAL Laboratory, 2000), before development stalled and shifted to the Nintendo Wii. Widely praised for its fun gameplay and colourful visuals, the game was remade (with additional abilities and modes) for the Nintendo Switch in 2023 to similarly positive reviews.
Gameplay and Power-Ups:
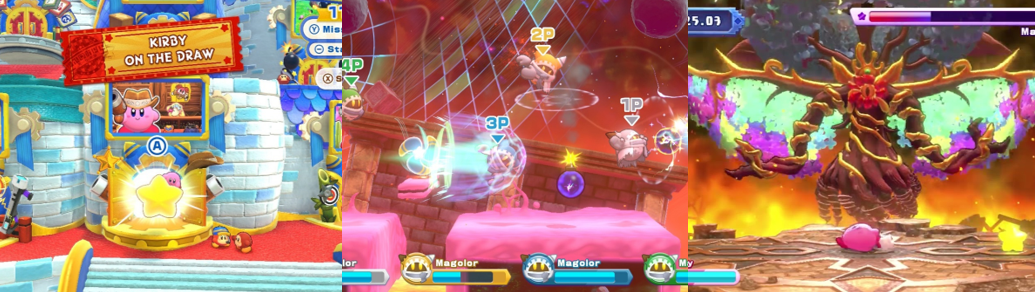
Kirby’s Return to Dream Land Deluxe is a 2.5D action platformer for up to four players, though your single player game is sadly limited to the titular pink puffball. This adventure sees Kirby and his friends journeying to five initial levels (called “Worlds”) with up to six Stages each (including a dedicated boss stage) to help the mysterious magician Magolor repair his ship, the Lor Starcutter. Once done, Magolor takes Kirby and the others to his home world, Halcandra, to challenge the final two, far tougher Worlds and battle the true final boss. Players enter Worlds and Stages via a world map, hopping between each on a Warp Star and entering Stages through doors like previous 2D Kirby titles, with each Stage unlocking as you progress. All of Kirby’s usual abilities return, with the game offering two control setups. I chose “Type A”, which maps Kirby’s swallow and attacks to B and his jump and indefinite float to A. Players can perform a slide attack by pressing down and A, press down after swallowing an enemy to acquire their abilities, and hold Y to discard an ability (which is also forced from you if you take too much damage). Kirby gets special items that are mapped to X, allowing him to restore health or switch abilities on the fly, and players can hold any shoulder trigger to guard against attacks. You can dash by double-tapping left or right, grab food and drink to replenish your health, and collect either 1-ups or 100 coloured Point Stars for extra lives. The Invincible Candy also returns to make you temporarily invulnerable and four new items make their debut: the balloon bomb (which inflates and threatens to explode the longer you hold it), candle (which lights up dark caves), the Prism Shield (which protects against falling enemies and hazards), and the Stomper Boot (which lets you safely pass over spikes and bounce off enemies and hazards).
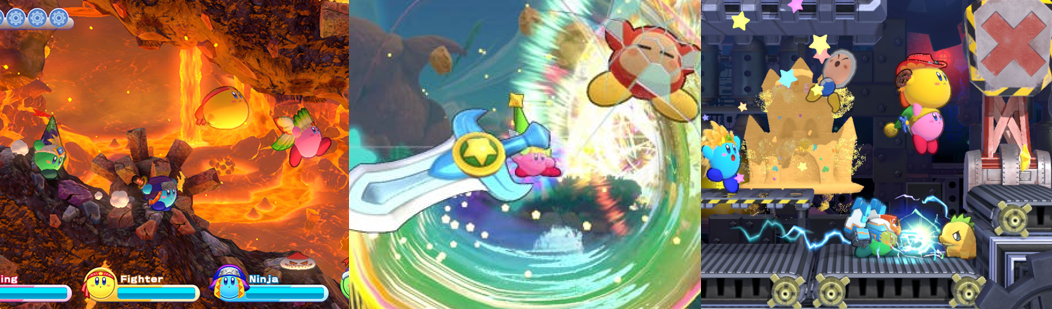
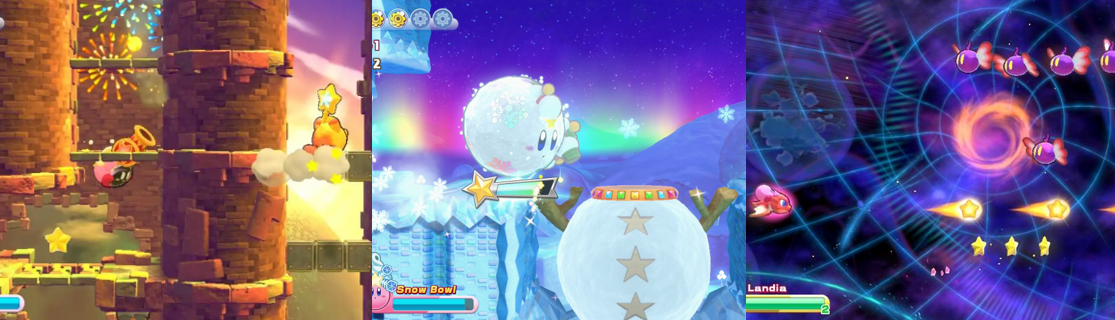
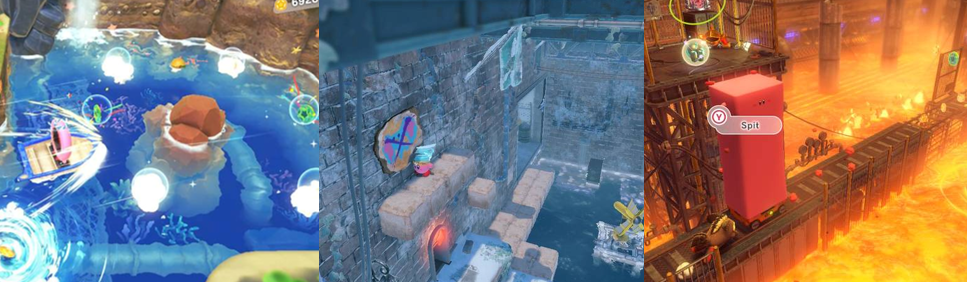
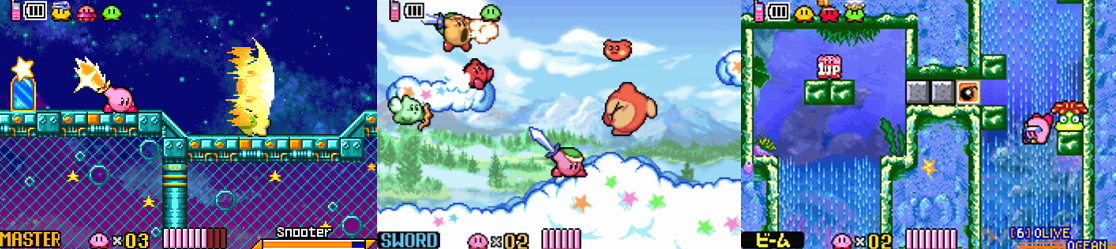
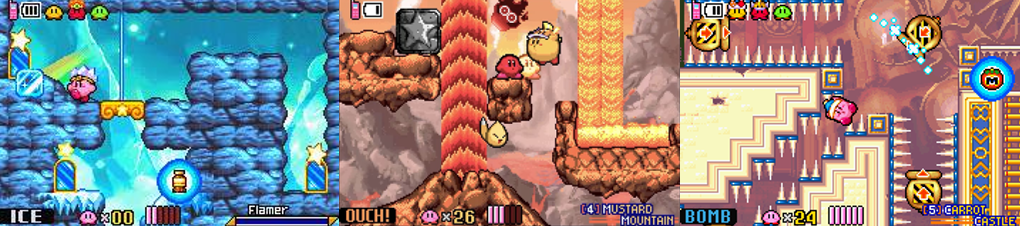
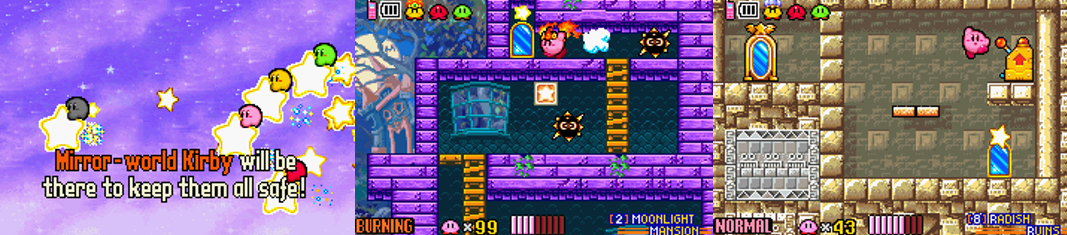
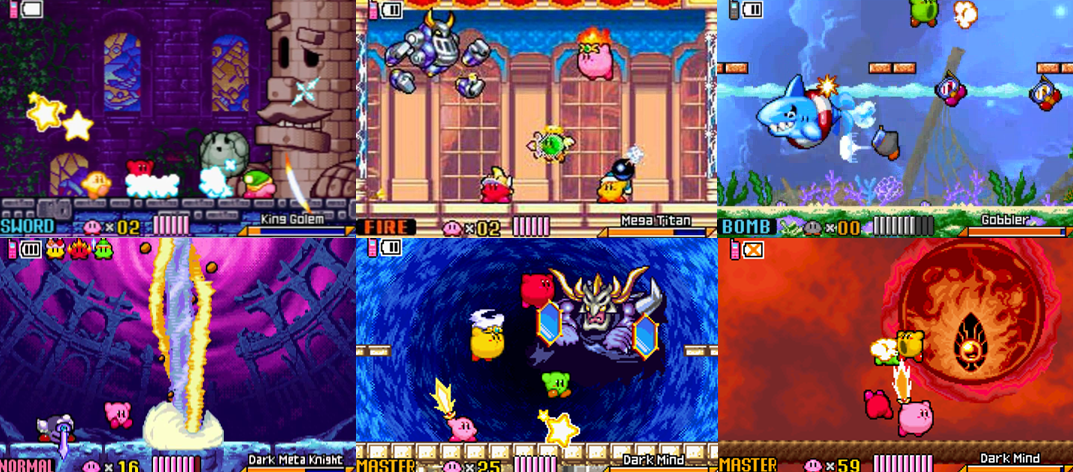
Kirby has a new ability here: the Super Inhale, executed by holding B, which sucks up giant enemies or blocks and spits out a massive projectile that’s perfect for clearing a path when being chased by a Dimension Wall in the optional Dimension Rift areas. Kirby also gains limited, but extremely powerful, Super Abilities by defeating or consuming super enemies. These obliterate any enemies and even destroy the environment and hazards and are essential for accessing the Dimension Rifts, obstacle courses where you’re chased by an energy wall and must rely only on Kirby’s basic abilities (until you reach the resident Sphere Doomer/s). You must wiggle the left stick to charge the Grand Hammer and smash blocks or shunt power lines into position, tap B to plough through enemies and obstacles with Snow Bowl, and occasionally wiggle the left stick to deliver a killing blow with Ultra Sword. Kirby also acquires three new copy abilities not present in the original game. Mecha is easily one of the best as it gifts you a little mecha suit to fire mortars, a single or charged beam, drop mines, rush in with a flaming punch, and greatly boosts your flight. Festival sees Kirby perform a dance to turn enemies into Point Stars while Sand is one of the most useful against bosses as you can rapidly kick up sand and damage enemies with a twister-like sandstorm. Classic abilities like the Cutter, Stone, and Sword all return, with added combos and functions (such as holding up to charge a sword beam). Fire lights fuses and melts ice blocks, while Ice and Water douse flaming blocks and the latter slows you to surf over lava. Spark protects you with an electrical shield and summons lightning bolts, Beam sees you attack with a magic wand that passes through blocks, and Bomb blows up certain blocks to clear a path. You can wall jump and toss kunai with Ninja, attack underwater with Spear, and clear away all enemies with Mike. Sleep is generally placed to mess up your run as it forces Kirby to take a nap, while Whip lets you snag items through blocks and Hammer smashes certain switches. Additionally, Energy Spheres will unlock rooms on the Lor Starcutter to switch abilities between Stages.
Kirby’s adventure is littered with familiar platforming challenges, from moving and temporary platforms, to outrunning boulders, dodging giant cannons in the foreground and background, and being blasted along by wind or rushing water. Sometimes, Kirby must illuminate dark caves or utilise an Invisibility Stone to become intangible; others, he must carry keys to doors for goodies, stunting his ability to fight back. Kirby must grab or hit switches to progress, sometimes needing copy or Super Ability to pass through barriers or doors, and utilises ladders, doors, and floating platforms to progress. Lava bursts from the floor, Kirby slips on ice, spiked walls, ceilings, and floor increase as you progress, and there are many crushing hazards to avoid. Kirby must also watch out for giant mallets, conveyer belts, and avoid the many bottomless pits, though players can earn additional Point Stars by tapping A at the right time in the Goal Game after every Stage. You utilise automated and manual cannons to blast about, sometimes timing button presses to avoid being crushed, swim in waterfalls and pass through walls to reach goodies, and race enemies to acquire their key before they fall off the level. You’ll float or Hi-Jump up narrow shafts, descend with Parasol or on a lift, avoid spiked pistons and duck under platforms when the ceiling drops, and reshape the environment with levers. “White Wafers” sees you dodging spiked wheels and rolling ice balls and tossing Balloon Bombs to movable blocks, and has a door maze inside a frozen palace. Flaming balls float about and slowly rain like meteors in “Dangerous Dinner”, “Nutty Noon” has you scaling a tower inside and out, and “Another Dimension” offers a sidescrolling shooter-‘em-up section where you spit or charge fireballs, dash through narrow gaps, and blast enemies after allying with Landia, a multi-headed dragon.
Presentation:
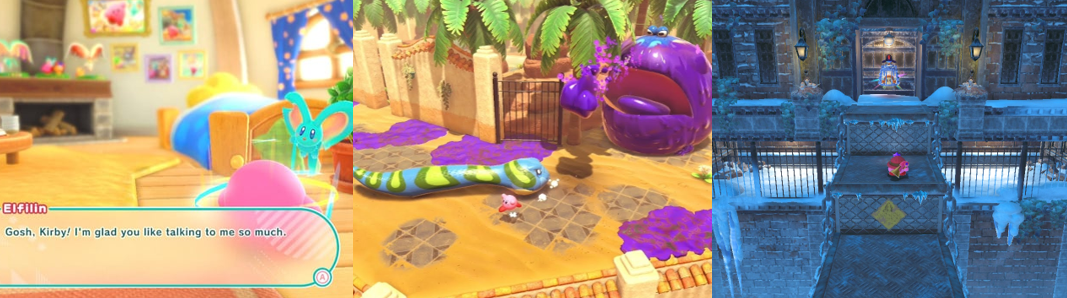
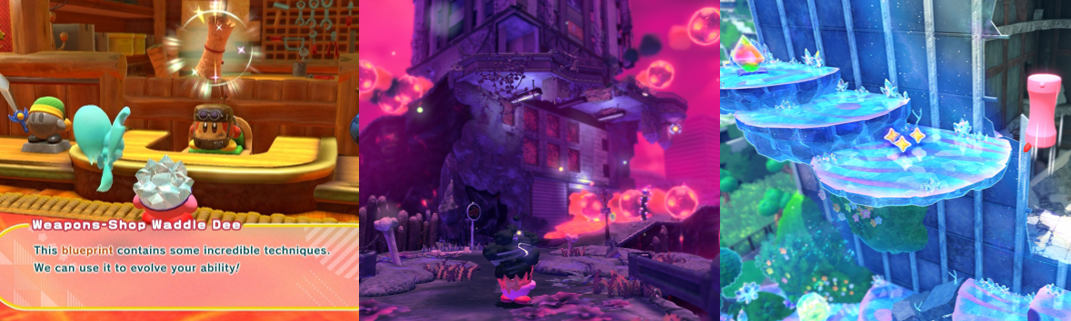
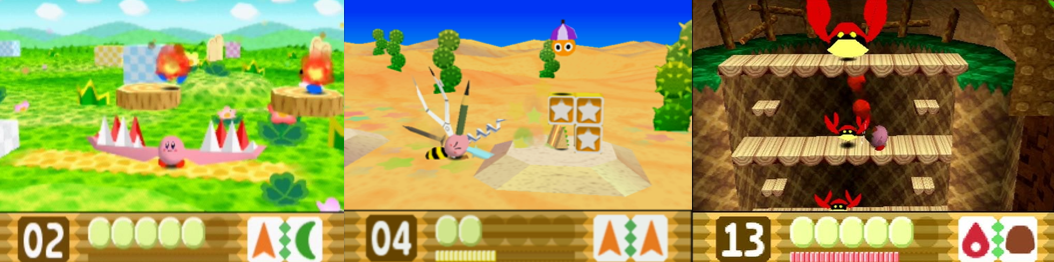
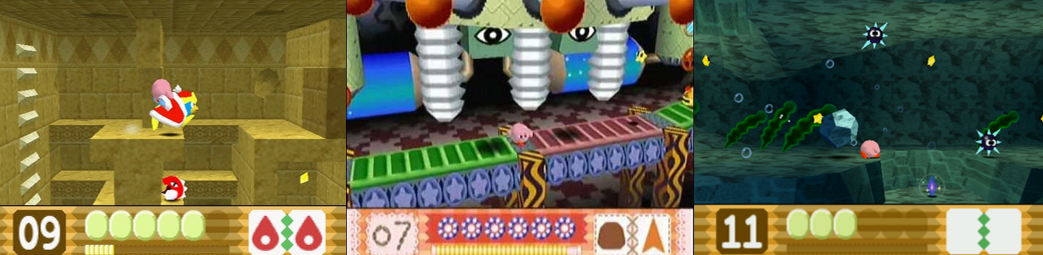
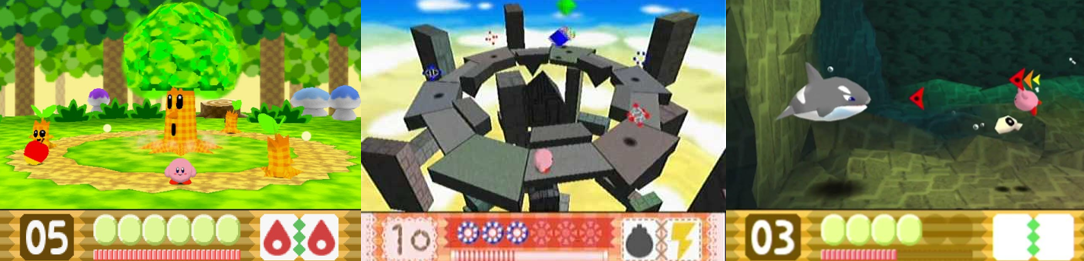
Return to Dream Land Deluxe is an absolute joy to look at. Everything about the game pops with vibrant colours and sickeningly cute visuals, with Kirby swinging his arms when idle, adopting new forms with each copy ability, and even donning masks after meeting certain conditions. The game greatly benefits from the polish of modern hardware to iron out the rough edges of Kirby 64 and expand the environments, with the backgrounds being full of little details like raging volcanoes, blizzards, rainbows, and floating islands. The foreground also impresses as plants gift Point Stars or health items as you pass and can be interacted with in different ways, from cutting ropes to lower platforms to destroying cliffsides and plugging volcanoes with your Super Ability. Kirby looks squishier than ever, crying when hit or dying and performing his little victory dance after defeating a boss, and the game wisely uses the in-game graphics and speech bubbles to tell its story. This is peppered with some storybook-like moments to show Magolor’s plight and eventual heel turn, though the story largely takes a backseat, as you’d expect from a Kirby game. The music is suitably jaunty and whimsical, but nothing really struck me as particularly memorable. I did like the ominous atmosphere in the Dimensional Rifts, which take place in a swirling, cosmic void and constantly have you on edge as the Dimensional Wall threatens to crush you. The game also performs extremely well, with no noticeable slowdown even with all the colourful enemies and massive hazards respawning and filling the screen. While the world map is a bit basic, it’s fairly lively as a Waddle Dee appears to provide wares and you’re often asked to jump, fly, or swim about to access each Stage. There are some fun effects with the Super Abilities, too, like enemies smashing into the screen, and little touches like Waddle Dees swinging on ropes, Halcandra Dees on treadmills or conveyer belts, and ancient ruins and giant mini bosses spawning to gift copy abilities you need to access hidden doors or goodies.
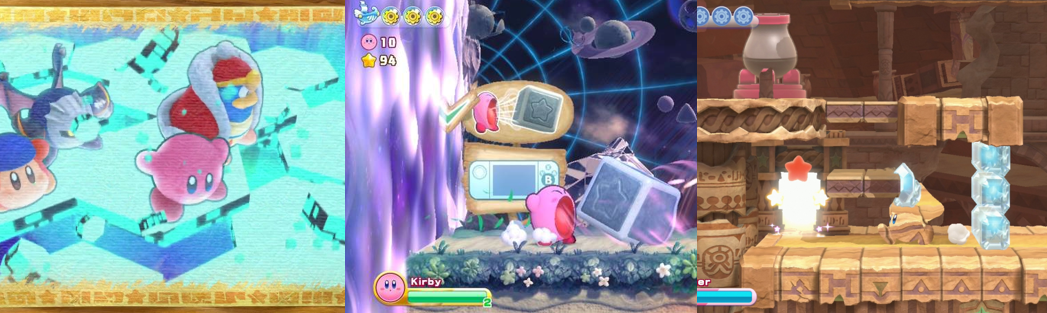
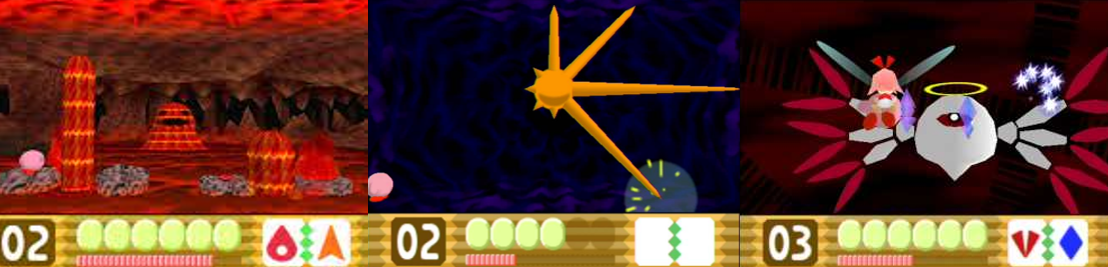
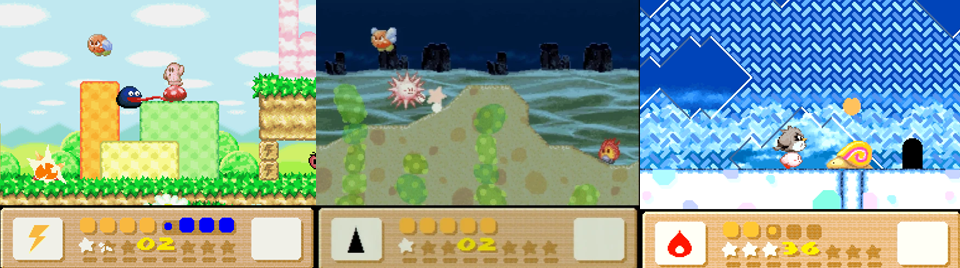
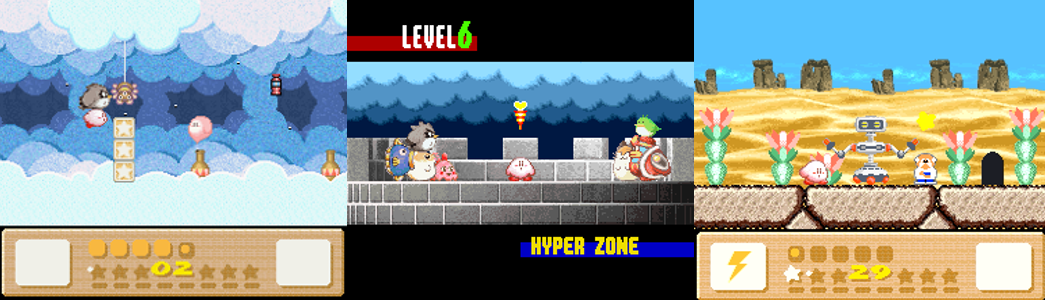
Return to Dream Land Deluxe sticks very closely to the usual Kirby playbook when it comes to its Worlds, emphasising vibrant, cartoonish environments and whimsical, fantastical locations rather than complicating Kirby’s tried-and-tested gameplay. Thus, players explore the plains and treetops of “Cookie Country”, hopping about inside giant tree trunks and to wooden platforms above a dense forest, explore desert ruins and ancient pyramids in “Raisin Ruins”, marvelling at the sand geysers and running from rolling boulders, and explore coral caves in “Onion Ocean”, a tropical beach littered with dangerous palm trees and piers and featuring a calypso soundtrack. “White Wafers” sees you slipping about on ice as snow falls and an aurora borealis glitters overhead, with you traversing a frigid mountaintop and ice palace, while “Nutty Noon” is a series of floating islands high in the sky that includes fluffy cloud platforms, wind currents, and a gigantic stone tower. Halcandra offers the game’s toughest Worlds and most unique visuals, with “Egg Engines” being a massive, hazardous factory full of conveyor belts, crushing hazards, giant mallets and cannons, and pistons. “Dangerous Dinner” sees you traversing an active volcano, dodging lava plumes, magma balls, and surfing over lava as cinders waft on the breeze. “Another Dimension” and the finale see you traversing a surreal, cosmic environment much like the Dimensional Rift areas, one full of flaming hot, crushing obstacles, meteors, and gigantic crystalline balls that fill the screen and a hypnotic intergalactic kaleidoscope looms in the background. Some Worlds have more Stages than others to help ease you into the challenge, some offer more rewards than others, and some mix and match gimmicks from other areas, especially at the end when the game throws everything at you. It never feels cheap or unfair, though, as the game is very generous with health and lives, though you must be on your toes in the endgame as things can get very hectic, especially in the Dimensional Rift areas where you’re given less time to make jumps or clear a path.
Enemies and Bosses:
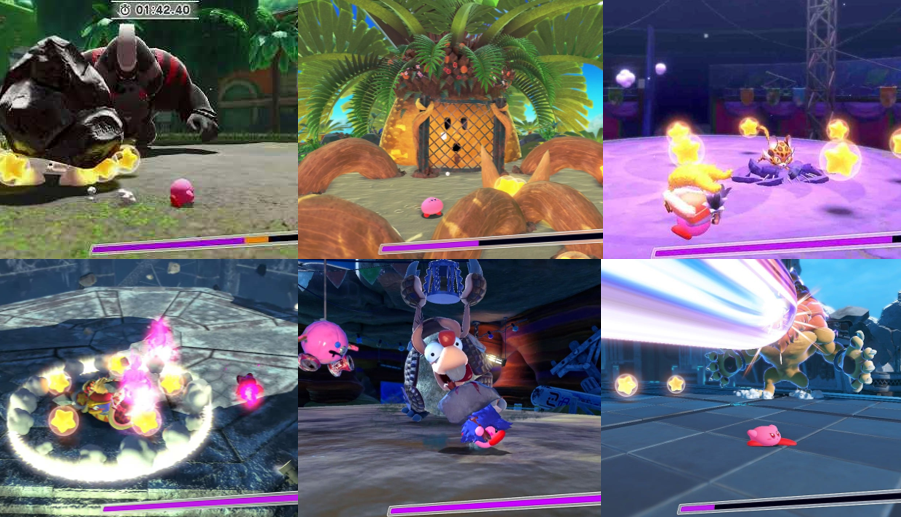
Unsurprisingly, most of Kirby’s long-time enemies return in this gorgeous adventure. Waddle Dees and Waddle Doos wander about firing beams from their eyes or floating on parasols but also have giant armoured variants and stitched together puppets that spew three of them upon defeat, alongside a super variant that holds the Flare Beam. Shotzos continue to fill the screen with cannonballs, Bronto Burts flitter about in the sky, Broom Hatters sweep the floor, and Sir Kibbles swing their swords in a slashing combo. Chillys emit a freezing blast, Knuckle Joes unleash a flurry of punches, Poppy Bros. Jrs toss bombs, and Sparkys try to fry you. Tootlebams attack with confetti, sentient swords and bows often protect Point Stars and 1-ups, Mumbies and Scarfys relentlessly pursue you, Barracu and large, voracious enemies burst from walls, lava, and water to chomp down on you, and Mechamechs hover about firing mortars or a charged beam. Owlgufs toss razor-sharp feathers, Hot Heads breathe fire, Crabys attack from the seabed by extending their claws, Comos descend on spindly webs, and Babuts drain your health bar. Giant variations of some enemies often block your path but they’re easily swallowed and turned into massive projectiles, and the super variants didn’t seem to be any tougher than their regular versions, though they do yield Super Abilities to get you into Dimensional Rifts. Enemies constantly respawn as you move offscreen so you can backtrack for different copy abilities, if necessary. They also sometimes drop health items and swarm in groups, either falling from above after you destroy a bomb block, littering the narrow tunnels as you run from boulders, or floating up as you descend in an elevator.
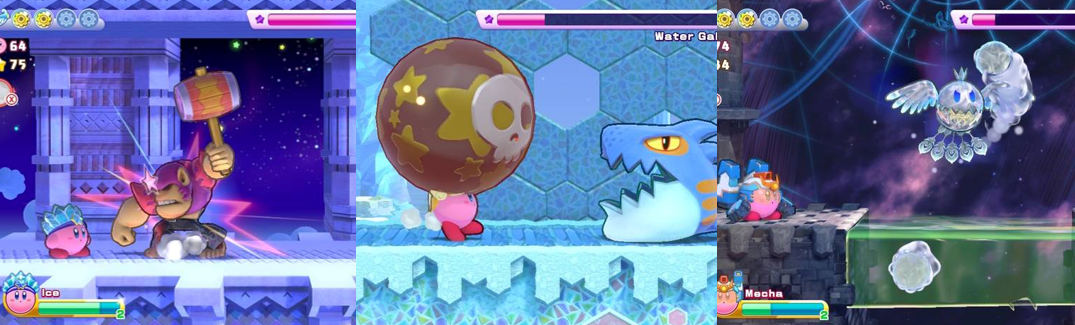
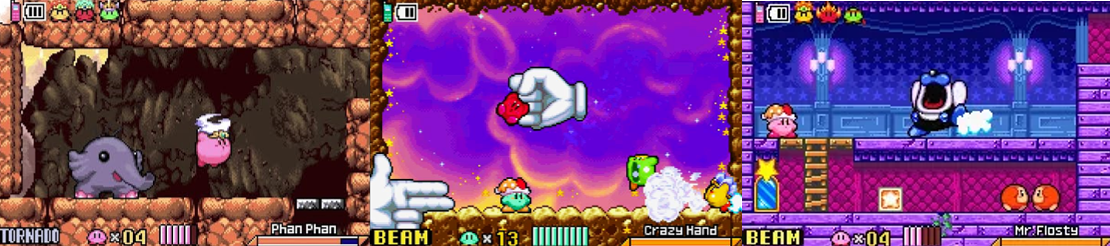
A whole bunch of brand-new mini bosses offer a mid-Stage challenge and yield a copy ability to access optional areas. Bonkers is the sole returning mini boss and once again wields a massive hammer that he twirls around and swings in between slowly leaping about, tossing explosive coconuts, and charging across the arena. His super variant follows the same pattern but gifts the Grand Hammer upon defeat, but attacks much faster. Dubior is a UFO-like enemy that teleports about, fires a lightning bolt, spawns miniature copies, fires electrical orbs, and rushes at high speed. Gigant Edge is a heavily armoured knight who hides behind a massive shield and swings a huge sword that can emit a shockwave projectile. Kibble Blade is similarly armoured but attacks with a large boomerang-like projectile that curves upwards, rams into you, tosses his boomerang from mid-air, and tricks you by throwing it in the opposite direction. King Doo is a gigantic Waddle Doo who fires a beam whip from his massive eye, charges up a beam projectile, and fires it while jumping about, too. Moundo simply tries to crush you by leaping up, riding a whirlwind, and twirling across the frozen floor to shrug off your attacks. Like their smaller cousins, the Water Galboros spit water in an arc and a spray and slide about on a water wave, alongside firing simultaneous water projectiles. You sometimes fight two mini bosses at once, which can be quite a challenge, and eventually decimate them with Ultra Sword in the endgame. The Sphere Doomers are the most persistent mini boss, however, as at least one is fought in every Dimensional Rift area. These bat-like creatures fly and dart about, conjure energy balls, fly in like a missile from the background, and charge across the screen. Battling them is made tougher by increasing environmental hazards, such as pits, water, and lava, though the Sand ability made short work of them in my experience.

There are also six all-new bosses, with only Whispy Woods returning from previous games, though all have a “pinch” mode where they get faster and stronger and are made much tougher when battling their “EX” variants in the game’s harder “Extra” mode. As ever, Whispy Woods drops apples or enemies from its leaves and spits cloud puffs, but it can also inhale and eat you and spawn spiked roots. The genie-like Mister Dooter mainly attacks by tossing skulls or bombs or by trying to crush you with a butt stomp. Mr. Dooter also leaps higher using a tornado and bounces about on low health and boasts a flaming punch combo. Fat Puffer can pose quite a challenge as it barrels around as a massive rolling ball that’s difficult to avoid and tries to squash you, spits out water blobs and largely harmless enemies, and causes stalactites to rain from the cave ceiling. It can also fire a massive water geyser and doubles in size after losing half its health. The ape-like Goriath is a tricky target to hit as it leaps between walls, tosses snowballs from above, throws punches using its stretchy arms, and blasts out a spread of fireballs. It also attacks the ground to drop you to lower levels, ricochets about in a rage, and dive bombs at you as you’re busy avoiding its spiked projectiles. You eventually battle the Grand Doomer, a far larger version that also attacks with energy spheres. The Grand Doomer can teleport, fly out from one of four dimensional rifts, and bite down on you from a puddle. It also fires homing shots and fires a rapid slew of spheres from one side to the other before encasing itself in armour, forcing you to swallow a super enemy and chip away at its shield with Ultra Sword.
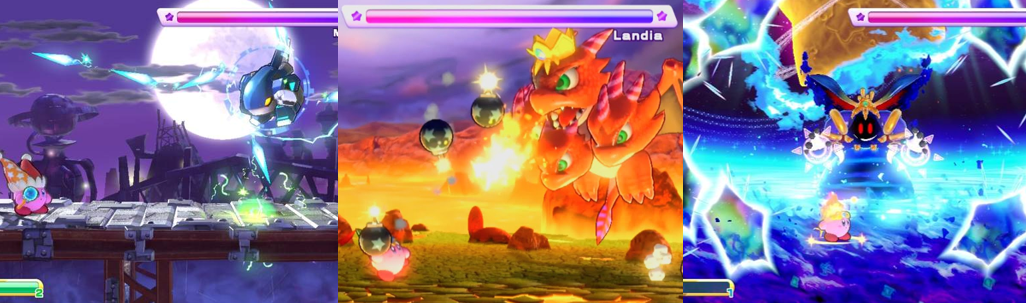
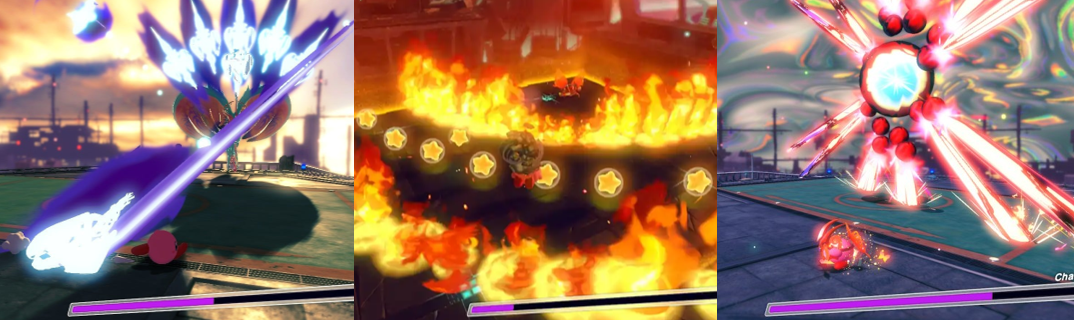
In “Egg Engines”, players battle the Metal General, a shark-like robot that rapidly attacks with a cyber-katana, fires electrical darts, and spins its laser blade like a propeller. The Metal General also spits homing missiles or a massive rocket, which it also flies to attack from the background or from above, briefly covering the arena with flames. The Metal General also drops mines, spawns minions, and tries to dive bomb you, making it a formidable boss. Initially positioned as the main antagonist, Landia is a multi-headed dragon who hovers above and spits fireballs, dive bombs, and whips up a damaging wind. He also performs a tail whip attack, breathes fire, and sends fireballs across the ground. Eventually, he splits into four dragons who each spit fireballs down at you and conjure a criss-cross energy beam that can be difficult to avoid. They also play volleyball with their fireballs and eventually reform, but the Sand ability should decimate them before that happens. Landia then aids you against the Lor Starcutter, which rapidly fires single and spread shots, sends blades at you, launches energy sphere charges, and fires a massive energy cannon, later spinning around to increase the danger, though your charged shot will make short work of it. Magolor then takes the spotlight as the final boss in a two-stage battle that sees your health carry over between phases. In the first phase, Magolor teleports about, launches destructible orbs, conjures spikes, and throws fireballs from the background. He also creates a star-shaped black hole that you must avoid being sucked into or else you’ll be pummelled, fills the screen with a massive energy blast, and protects himself with armour, forcing you to use various Super Abilities to finish the phase. In his final form, Magolor is even more aggressive, conjuring rifts, spikes, a faster and greater spread of orbs, blasting between two portals, and eventually attacking with bastardised versions of Super Abilities.
Additional Features:
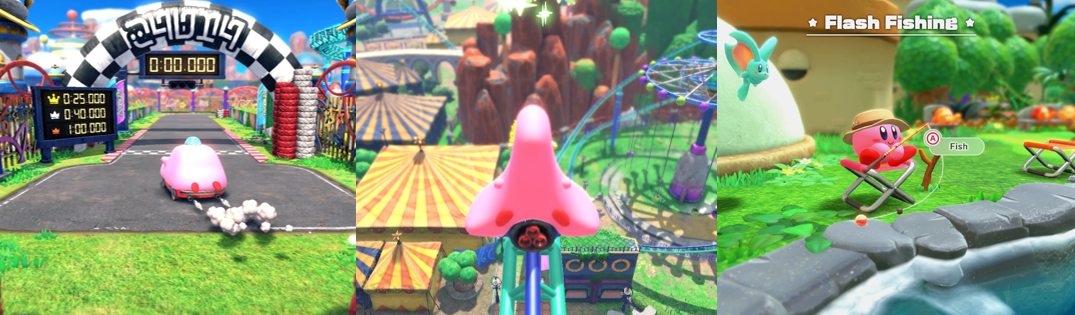
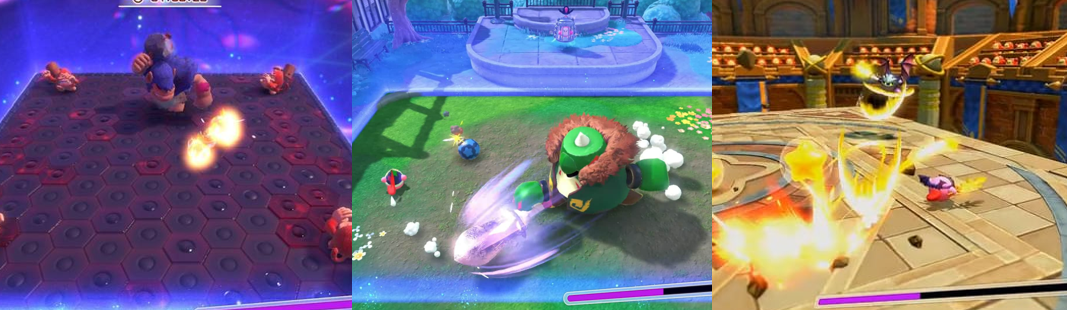
There are 120 gear-shaped Energy Spheres to collect, with two awarded each time to defeat a Sphere Doomer, some hidden behind special doors and challenges, and others requiring precision platforming, exploration, or Super Abilities to find. These unlock rooms on the Lor Starcutter where you can freely pick from any copy ability, tackle timed challenges for each copy ability, or play mini games. The ability challenges see you racing to the exit collecting coins for points, being awarded a bonus for each enemy you kill and losing points when you take a hit, all to gain a gold, silver, or bronze medal and add to your overall completion percentage. The mini games are modelled after Kirby Super Star (HAL Laboratory, 1996) and see you timing button presses to attack enemies in “Samauri Kirby”, cracking the planet’s core in “Crackity Hack”, and playing in a shooting range, catching eggs, or colouring lines on a checkerboard to drop enemies to their doom. These games are also played in Merry Magoland, a theme park environment eventually populated by bosses and other NPCs and where the Stamp Tickets you collect in each Stage award items to use and masks to wear. As you progress, you’ll unlock music to listen to and cutscenes to watch; you can also read up on some of Kirby’s past adventures. A boss gauntlet is also unlocked, which sees you battle each boss in consecutive fights with limited health-restoring items and copy abilities offered between rounds.
Clearing the game unlocks “Extra” mode, which halves your health and the value of Point Stars, and presents a much more challenging version of the main story. In this mode, enemies and hazards are tougher and bosses gain new aggressive “EX” versions that sport new colour palettes and have new forms, such as the Metal General linking up with the HR-D3 mech suit. Clearing the main story also unlocks “Magolor Epilogue: The Interdimensional Traveler”, an additional, post-game story where you guide Magolor across twenty remixed stages within the fragmented Another Dimension to regain his magical powers. Unlike Kirby, Magolor cannot inhale, float, or copy enemy abilities. Instead, he briefly levitates with A, fires Magic Spheres with B (eventually charging a longer, stronger beam and his powerful Magolor Cannon), and drops bombs with down and B. Magolor must defeat enemies, building combos for Magic Orbs, which upgrade his abilities. New ones are also unlocked, allowing Magolor to spawn spikes, pass through certain walls, extend his health bar and attack range, and unleash more powerful attacks to clear away enemies and obstacles. Magolor quests for five Fruit Fragments, which are earned by defeating remixed versions of some of the main game’s bosses. Mr. Dooter now sports electrical attacks and can teleport using his magician’s hat, Fat Puffer becomes Fiery Puffer and attacks using flames rather than water, Goriath becomes Hydriath and adds splash damage to his attacks, flinging bubbles rather than fireballs and dropping water rather than rocks, and Magolor battles a flock of Raging Doomers who swoop about and leave behind explosive clouds. Eventually, Magolor battles the Crowned Doomer in a tricky two-phase battle that sees it launching electrical spheres, firing a laser beam barrage, dropping bombs, attacking from portals, and even summoning Raging Doomers! Once it’s beaten, Magolor battles the Master Crown, a gigantic, sentient tree that fires its roots through portals, spawns large explosive apples, fires a sweeping laser from its eye, summons minions, and comes crashing into the area before finally being defeated with the Ultra Sword.
Final Thoughts:
I had a lot of fun with Kirby’s Return to Dream Land Deluxe, which beautifully translates the best of Kirby’s 2D adventures into a colourful and enjoyable 2.5D romp. The game was endlessly enjoyable to play, offering colourful visuals and a bunch of super fun copy abilities to keep you busy, with the Super Abilities added a bit of extra oompf to the gameplay and offering an optional challenge for completionists. While it would’ve been nice to see the Worlds deviate from the usual Kirby formula, the sheer variety on offer more than made up for it as there’s a lot to see and do between the various game modes and mini games. I imagine the game is a lot of fun in co-op, and was disappointed that I couldn’t play as Meta Knight, but this didn’t drag the experience down for me. Bosses were big and progressively challenging and the game had a picture-perfect difficulty curve, gradually increasing the challenge as you progress to the endgame and offering a harder mode to those who’ve mastered the base game. I really enjoyed Magolor’s epilogue, too, which offered a unique twist on the usual Kirby gameplay and nicely remixed the bosses. I’d go as far as to say that this is the best Kirby game I’ve played so far; it’s so adorably charming and a joy to pick up and play in short bursts. I was perfectly happy to go back and search for missing Energy Spheres to unlock new mini games and masks, enjoyed testing myself in “The Arena”, and went out of my way to challenge every aspect of Magolor’s epilogue to fully power him up ahead of the final boss. Honestly, I think the only things that hold this back are the reliance eon a traditional life system and not letting you play as other characters outside of co-op. Otherwise, Kirby’s Return to Dream Land Deluxe is a beautiful, whimsical adventure that was a pleasure to experience and I’d highly recommend to Kirby fans old and new.
My Rating:
Great Stuff
Did you also enjoy Kirby’s Return to Dream Land Deluxe? Which of the new modes and features was your favourite compared to the Nintendo Wii version? Were you also disappointed that you were restricted to Kirby in solo mode? Which of the bosses and Super Abilities was your favourite and did you ever find all the Energy Spheres? Did you enjoy Magolor’s epilogue and ever clear the “Extra” mode? Which Kirby videogame is your favourite? Comment below with your thoughts on Kirby’s Return to Dream Land Deluxe and support me on Ko-Fi for more reviews like this.


You must be logged in to post a comment.