Sonic the Hedgehog was first introduced to gamers worldwide on June 23 1991 and, since then, has become not only SEGA’s most enduring and popular character but also a beloved videogame icon. Thus, in keeping with tradition, I’m dedicating some time to celebrate SEGA’s supersonic mascot.
Released: 18 October 2018 Developer: Dimps
Metacritic Score: 59 Also Available For: Nintendo Wii U and PC
Gameplay and Power-Ups: Sonic Lost World is a 3D and 2.5D hybrid action platformer that continues the high-speed “Boost” formula that popularised Sonic’s 3D titles. As was the style at the time, this is a single-player experience, with Miles “Tails” Power only appearing in cutscenes, though Sonic gains temporary power-ups by collecting benevolent alien “Wisps” scattered around the “Lost Hex”. The standard Sonic formula returns, with players collecting Golden Rings to survive most hazards, encouraged to finish stages (or “Zones”) quickly to earn letter grades, and bashing Badniks to free woodland critters. As ever for 3D Sonic titles, players lock-on to nearby targets (Badniks, springs, rails, etc) after jumping with either A or B. While jumping destroys Badniks and certain obstacles with Sonic’s patented Spin Attack, tapping A or B again performs a double jump or launches Sonic at his target. You can chain multiple Homing Attacks together and must often quickly tap the button to hop between rails, clear gaps, or cling to rockets. A new feature in Sonic’s arsenal is a mid-air somersault attack, performed by pressing X or Y after jumping. This sends a blast of wind-like energy towards your target, stunning it for a few seconds so you can bypass their defences or hit their weak spot, and this is essential when confronted with giant Badniks that must be destroyed to reveal springs or teleporters and such. Pressing X or Y in mid-air when not locked onto an enemy performs a bounce to give you extra height, Sonic clambers over some ledges, air bubbles keep him from drowning, and you earn extra lives by grabbing Sonic Icons, collecting five Number Rings, or for every 100 Rings. Hitting capsules also gifts you some returning power-ups, like the returning temporary invincibility, ten additional Rings, and three elemental shields. The aqua shield allows you to breathe underwater, the lightning shield attracts nearby Rings and keeps you from being hurt by electrical hazards, and the flame shield resists all fire hazards.
Run up walls, power-up with Wisps, and wrestle with the 3DS to control Sonic.
Unlike other 3D Sonic games from this era, there is no Boost option in Sonic Lost World. Instead, you hold down the Right trigger to run, which is essentially the same but lacks the fast-paced, action-packed feeling of ploughing through hordes of Badniks and instead highlights the game’s slower pace. The big new gimmick is “parkour”; hold R or hit boost pads to run up walls, tapping X or Y for a boost and to keep from falling and hitting A or B to hop between walls. You can quick step around corners and to avoid enemies and use the Left trigger to better position the camera, but I found this mechanic very finnicky and that I was more likely to simply plummet to my death or be forced to repeat a wall run due to poor hazard placement. As mentioned, some Wisps return, with you tapping the lower screen to activate them and collecting Wisp capsules to top up the energy bar, though you’ll lose your shield if you use a Wisp. You can Drill!! through certain dirt or cut through water with the Yellow Wisp, attract items and enemies to float with the Indigo Wisp, and ricochet off walls and ceilings with the Cyan Wisp. You can also zap to nearby coils and targets with the Ivory Wisp, blast about as the explosive, fiery Red Wisp, or wrestle with the Nintendo 3DS’s god-awful gyroscopic controls with the Gray Wisp. Wisps are relatively sporadic, though some Zones require them to be cleared, with you desperately topping up your meter to avoid a fatal fall or being devoured by gigantic enemies. The Yellow Drill dispels whirlpools, the Gray Quake destroys certain blocks and activates big switches, and Indigo Asteroid lets you float to faraway platforms. Players also earn “Materials” by completing Zones, earning more for “S” or “A” ranks. These upgrade Tails’ Lab and allow him to create remote controlled (RC) vehicles, which can be transferred to the Wii U version so a second player can drop bombs, turn Sonic invisible, or slow him down. If you lose too many lives here, a golden RC Vehicle flies over the environment or become invisible and invincible, allowing you to bypass trickier sections. Finally, one item per life can be stored on the touchscreen, which is handy in a pinch.
Some dull puzzles and aggravating sections bog down the more action-packed moments.
These are quite prevalent in Sonic Lost World since basically every Zone takes place over a bottomless void. When Sonic speeds off uncontrollably or is met by gaps, temporary platforms, or tricky jumps, you’re likely to fly to your doom, which is very frustrating. Spikes regularly appear to screw up your parkour, you must often defeat Badniks to progress, or you’ll be hitting or rolling objects onto switches to activate or move platforms. There are often branching paths, with some having hard jumps or chasms dotted by rails and Spinners, loops, springs, and bouncy bumpers regularly appear, and you’ll be floating or being pushed along by fans. The screen often tilts and rotates in 2.5D sections, which can be very disorientating; you’ll use motion controls to steer high-speed rockets; the environment often pops up as you race along; and some platforms swing ominously. Quicksand and marsh water slow you, teleports loop you around, and you’re often asked to explore in different directions, tackling different puzzles to activate switches or teleporters. Pistons crush you, gravity sometimes fights against you, and you’re often pushing objects about. There’s one part where you must roll giant apples into holes and then into a giant blender, freezing gusts must be blocked by large snowballs, and you occasionally go sky diving, holding X, Y, or R to dive faster. Sometimes, you run around spheres in a mad rush trying to defeat all enemies or find switches, occasionally forced to barrel about with the aggravating Gray Wisp. Bouncy clouds and tubes are commonplace, as are moving platforms that you must ride to progress and giant springs that launch you to other parts of the Zone. Zones go on for ages, with multiple checkpoints and escalating platforming and puzzle challenges, which can be irritating. You’ll frantically hop to rails (often dodging enemies and hazards), ricochet about Casino Night Zone-style pinball tables trying to score a bingo, dodge lava pits and flame pillars spawned by Zavok’s Mech Dragon, and trick enemies into activating switches.
Presentation: At first glance, Sonic Lost World is quite impressive. The game features prerendered cutscenes with full voice acting, though they’re obviously compressed compared to its Wii U counterpart, with no in-game models being used to convey the game’s story. This involves Sonic reluctantly teaming with Doctor Eggman against the Deadly Six, driving a wedge between him and Tails, Dr. Eggman faking his death, and the Deadly Six briefly brainwashing Tails to fight his buddy. There’s a pseudo map screen where players freely choose which Zone to play or visit Tails’ Lab, and the music is very jaunty and catchy. There are even remixes of “Sonic Heroes” and “Reach for the Stars” tossed in, which was nice, and I loved how the game brought the Flickies and bonkers, surreal aesthetic of the original games to life after years of fusing real-world elements into the franchise. Sonic gets impatient when you leave him, runs with a lovely 3D recreation of his classic spinning legs, sprouts catchphrases and voice lines, and your goal is to hit the classic animal capsule at the end of each Zone. However, there’s a distinct blurriness to the visuals, one only exacerbated when you inch on the 3D slider. While the depth is impressive, the colours pop, and giant Badniks fly at you in 3D, this option remains headache inducing and is best left off. There is also lots of pop up, with spiralling paths literally appearing as you run and environments loading as you’re pinballed about. This means some Badniks and hazards appear out of nowhere, it’s not always clear where you’re heading, causing you to miss rails or landings, and the Homing Attack has a noticeable lag that causes many unnecessary and aggravating deaths. Sonic Lost World generally has two playfields: cylindrical and spherical 3D worlds or 2.5D obstacle courses that recreate some classic Sonic environments, like Green Hill Zone and Casino Night Zone. The 3D sections take a lot of inspiration from the Super Mario Galaxygames (Nintendo EAD Tokyo, 2007 to 2010), being spherical, cylindrical, and/or blocky worlds offering a mixture of high-speed action and tricky platforming. Unfortunately, Sonic Lost World’s 3D Zones all take place in a void, so you can rocket to your death with ridiculous ease.
While colourful and impressive, Sonic Lost World can be blurry and messy at times.
This is made more irritating by the clunky parkour mechanics and the split-second timing required to switch rails or hop to platforms in later Zones, though it’s the motion controls that really screw you up since they make your movements so erratic and loose. There are seven areas with three Zones and a boss, and each Zone is broken down into multiple sections separated by giant springs or teleporters. Things start familiar enough in Windy Hill Zone, a decidedly Green Hill Zone environment featuring boulders, totem poles, caves, waterfalls, and you running from a giant Caterkiller. Loops, bridges, and spiralling paths are introduced here, while Desert Ruins Zone sees more obstacles coming your way. You must jump to move over quicksand, explore a darkened tomb, and hop to platforms as Zomom’s Ganmen blows you back and blasts you with its eye beams. Tropical Coast is like the love child of Angel Island Zone and Emerald Coast, featuring calypso music and underwater sections alongside palm trees and islands. The Yellow Drill is super useful for navigating the underwater mazes, which easily turn you around thanks to that annoying screen tilt, and this is also where you’ll find that giant blender. Frozen Factory Zone starts you snowboarding down a snowy mountain, pulling off tricks and griding across rails, before having you creep along narrow platforms, plug up freezing hazards, and desperately avoiding giant snowman heads to hit switches. Silent Forest Zone is a dense jungle full of sticky marsh water, spring-loaded flowers, and a grind through night-time ruins as Zor’s Owl Mech searches for you and alters the environment, confusing the already troublesome platforming sections. Sky Road Zone starts very basic, with just an open sky background, and heavily focuses on bottomless pits, but also transitions to a neon city and pinball aesthetic. It’s capped off by far more treacherous, Windy Hill Zone sections that burst into flame, requiring you to pop water balloons or grab a fire shield. There’s a lot of variety in each Zone, for sure, but perhaps a bit too much at times as they quickly outstay their welcome, especially when the game blasts you down pits and calls it a challenge.
Enemies and Bosses: Many of Dr. Eggman’s most recognisable Badniks return here; in fact, there’s surprisingly few new enemies and some returning Badniks even sport new mechanics. Motobugs race about, Newtrons crawl along walls to screw up your wall running, Buzz Bombers hover about taking shots at you, Jaws patrol the waters, and Orbinauts catch you off-guard when you’re stringing together homing chains. Spinners and Batbrains act as “bridges” over gaps, though some Spinners zap you and cause you to fall to your death. Caterkillers and Sandworms are noticeably prevalent, coming in gigantic sizes and requiring you to stun them to hit their weak spot, while Crawl now sports a projectile attack. Those bloody Metropolis Zone Slicers return to fling your blades mid-jump, Cluckers (both small and giant) pop up to blast cannonballs at you, and even Egg Pawns prove troublesome as they run about flailing their arms. Balkirys swarm, Grabbers and Antlions lurk from above, and Penguinators endlessly respawn to slide across ice. Clucker variants hop into mine carts to chase you across rails, giant robotic turtles sport shell cannons, and huge mechanical blowfish often guard switches and teleporters. These bigger enemies are best stunned to halt their attacks or lower their defences, which you’ll also use to stun Zeena’s Snowman Mech as it relentlessly pursues you. this allows you to rapidly attack it, causing it to temporarily press switches. Often, switches and teleporters and such cannot be accessed until you’ve defeated a certain number of Badniks, usually a giant one, and even bigger variants often chase you and instantly kill you if they touch you. Some of the Deadly Six appear in the Zones, such as Zazz appearing in the background of Windy Hill Zone and tossing his Moon Mech at you. The Deadly Six act challenge you at the end of each area and are battled again in Lava Mountain Zone, where they’re tougher, have altered attacks, and you have less time to hit them.
Bosses can be quite fun, when they’re not forcing motion controls and insta-deaths.
Zazz rolls around on his Moon Mech, trying to crush you, so race away and knock him off to pummel him on the ground, avoiding his shockwaves and star projectiles. Zomom attacks atop the block-headed Ganmen, raining fireballs and vulnerable in the rear (and to Indigo Asteroid), and running around in a rage at the end. Master Zik was a pain as he’s protected by a ring of fruits. When he rolls one, jump and hit it from behind to pierce his barrier and attack him, and use the Yellow Drill to deal big damage. Zeena can also be a headache, especially in Lava Mountain Zone, as her giant snowman constantly pushes you back. You must push towards her and attack her mech’s belly for an Ivory Wisp, and then latch onto the enemies to zap her, which gets very annoying. This is nothing compared to Zor, though, who charges up a devastating eye beam from afar on his Owl Mech. You must quickly hop in the cannon and whirl around like an idiot with the gyroscopic controls to locate his mech, with more fakes and less time to attack him in Lava Mountain Zone. Zavok is comparatively easier but still troublesome as you’re in freefall, have little idea of where he is, and he blocks your Homing Attack. You must avoid his dragon’s fireballs and lasers (with the circling laser attack being especially frustrating) to hit him from behind, or grab the Cyan Wisp to decimate his health bar. After battling all six again in teams, you finally fight Dr. Eggman in a repurposed Death Egg Robo, racing towards him on a never-ending path like in Sonic Colours. You must avoid the Eggrobo’s increasingly troublesome Wisp-like attacks, which include lasers and electrical bolts, numerous fireballs, rocks kicked up by his drills, boulders, and an insta-kill black hole that’ll have you rage-quitting! After avoiding his attacks, you must hop about to select the mech’s limbs and unleash a counterattack, barrelling into the cockpit and eventually mashing B to deal the final blow.
Additional Features: Each Zone that isn’t a boss battle or Lava Mountain Zone contains five Red Star Rings, with their collection being helpfully displayed prior to starting a Zone and during it. Collecting all fifteen Red Star Rings unlocks an “Extra level” for Zone for an additional challenge and beating those unlocks an even tougher final boss! Beating the game also unlocks “Hard Mode”, applicable by pressing Y prior to starting a Zone, if you want to make this finnicky game even more challenging. If you want Tails to build every RC Vehicle, you’ll need to grind away at each Zone to get those “S” and “A” ranks and earn better Materials, though this only really seems to benefit those with the Wii U version. There’s a time attack and a “VS. Mode” for players to go head-to-head with a friend in virtual reality races. You can also visit Tails’ Lab to listen to the soundtrack or view the game’s blurry cutscenes, or use the 3DS’ “StreetPass” feature, apparently to unlock additional missions but I’ve never actually used this. This version includes seven Special Stages, which can be replayed from the main map after you’ve beaten them, and the seven Chaos Emeralds. These Special Stages are similar to the classic Blue Sphere ones and have you flying through a cosmic void collecting Orbs and avoiding walls, electrified hazards, and navigating mazes. You have a strict time limit that decreases with each Chaos Emerald, so you must snag those time bonuses, and your reward is being able to tap the screen when you have 50 Rings to become the all-powerful Super Sonic. Unfortunately, while the Special Stages are doable and welcome, you’ll end up spinning around like a moron and giving yourself a headache as you’re forced to use motion controls to direct Sonic’s movements, making these more of a chore than they need to be.
Final Thoughts: This is only the second time I’ve played Sonic Lost World, which says a lot about how memorable it was. While the game is undoubtedly the best-looking Sonic game on the Nintendo 3DS, the execution of its new mechanics was troublesome, at best. I’ve never really cared for the Deadly Six and find them extremely one-dimensional and generic, though I admit that they did make for somewhat unique boss battles that subverted the usual Sonic formula. I’m also not a big fan of the Wisps, especially as their powers mean Sonic’s friends take a back seat, and their inclusion seems like more of an afterthought. While some Zones looks really good and the music is very catchy, others are painfully uninspired and they all drag on for far too long. There’s maybe too much crammed into each area (and this title), with all sorts of weird gimmicks being thrown at the player as though SEGA were desperate to copy Super Mario Galaxy and then make it unique by slapping unnecessary bells and whistles onto it. The constant bottomless pits were a headache, the parkour mechanics were clunky, and the forced gyroscopic controls were frustrating. It might’ve been okay if these were limited to the Zor fight and the Special Stages but tying them to the rockets and Gray Wisp was a kick in the teeth. The RC vehicles could’ve been really fun but they’re not really implemented here, the tilting and rotating effects were aggravating, and the weird not-quite-boost run mechanic just made the game feel slow. It’s nice that the developers tried to break up the action with some puzzles, but these are a drag and Sonic Lost World is much more fun when you’re blasting off at high speed, quickly hopping to rails and platforms and bopping Badniks. The stun mechanic was weird, too, Sonic takes forever to recover when hit, and it’s just far too easy to lose a bunch of lives on what should be simple sections made difficult by the half-baked mechanics. It’s a shame as it does have a certain visual appeal, even with all the pop-up, but Sonic Lost World fumbles more than it succeeds, making it a disappointing swansong for Sonic’s days on the 3DS.
My Rating:
⭐⭐⭐
Rating: 3 out of 5.
Pretty Good
Did you enjoy Sonic Lost World? What did you think to the parkour mechanics and gyroscopic controls? Were you annoyed or happy to see the Wisps return? Do you agree that Zones stretched on for too long and had too many gimmicks? What did you think to the Deadly Six? Did you ever collect the Chaos Emeralds and defeat the Eggrobo? Which of Sonic’s Nintendo 3DS titles is your favourite and how are you celebrating Sonic’s anniversary this year? Whatever your thoughts on Sonic Lost World, share them below, support me on Ko-Fi, and check out my other Sonic content!
In the decades since his first dramatic appearance in Detective Comics, Bruce Wayne/Batman has become a pop culture icon. The brainchild of writer Bob Kane, Batman was brought to life by artist Bill Finger and has been a popular staple of DC Comics over the years. Accordingly, September celebrates “Batman Day”, the perfect excuse to celebrate comic’s grim and broody vigilante.
Released: 1 April 2014 Originally Released: 25 October 2013 Developer: Armature Studio Also Available For: Nintendo 3DS, Nintendo Wii U, PC, PlayStation 3, PlayStation Vita
The Background: Batman’s “troublesome” relationship with videogames was changed for the better when Eidos Interactive, Rocksteady Studios, and celebrated Batman writer Paul Dini collaborated on the critical and commercial success Batman: Arkham Asylum (Rocksteady Studios, 2009). This was followed by a bigger and better sequel, Batman: Arkham City (ibid, 2011), that was even more lauded, an achievement Rocksteady Studios didn’t take lately. Eager to capitalise, Warner Bros. Interactive Entertainment turned to WB Games Montréal to develop a prequel while Rocksteady worked ona third game. Although it received a fair amount of praise, Batman: Arkham Origins(2013) was largely seen as mediocre and derivative. Yet, Warner Bros. doubled down on their desire to cash in on the Arkham franchise and outsourced the development of a portable spin-off title to many of those behind the Metroid Primetrilogy (2002 to 2007). Armature Studio collaborated with WB Games Montréal to ensure continuity between their titles, and the portable versions were developed to be unique for each system, though reception was mixed regarding the downgrade to portable hardware. Indeed, considering reviews criticised the bland prison setting and clunky combat, it’s surprising that the game was re-engineered to run on home consoles, though with updated visuals, controls, and maps, to deliver this slightly better receivedDeluxe Edition of the game.
The Plot: Three months after apprehending the maniacal Joker, Batman is forced into an unlikely alliance with Selina Kyle/Catwoman to quell a prison riot at the Blackgate Penitentiary, which has been taken over by the Joker, Oswald Cobblepot/The Penguin, and Roman Sionis/Black Mask.
Gameplay: Unlike other entries in the Batman: Arkham series, Arkham Origins Blackgate is a 2.5D “Metroidvania” style title that restricts Batman to a self-contained, largely linear series of environments explored and expanded by acquiring additional gadgets. While the 3DS version divided the gameplay to the top screen and the map to the lower screen, the Deluxe Edition emulates the Batman: Arkham style but on 2 2.5D plane. Therefore, players must press the ‘Back’ button to bring up a janky 3D wireframe map and check their objectives and collectibles, and use the Left Bumper to enable the trademark Detective Mode rather than tapping on the bottom screen. Similarly, LB allows you to scan the environment, pinpointing crates to open, clues to solve cases, and interactive elements in the environment (that, strangely, need to be scanned every time before use). Otherwise, the controls should be relatively familiar for anyone who’s played a Batman: Arkham game before. Holding A allows Batman to sprint and double tapping it sees him to hop over enemies to attack from behind or roll past spiked hazards. B stuns enemies with a swipe of your cape, allowing you to pummel armoured foes, while X sees Batman attack with strikes, building combos for fancier moves and additional damage. Tapping Y when the icon appears over his head counters incoming attacks, while the Right Trigger is used to crouch and enter vents. Batman’s various gadgets are selected with the directional pad, aimed with LT, and used with RT, allowing him to toss Batarangs or quickly grapple to higher ground as needed.
The game tries to emulate its main console counterparts by recreating Batman’s abilities,
Given the 2.5D restrictions, you won’t be battling large waves of enemies and foes tend to come in manageable groups and only swarm from the background and foreground sporadically. There is no level-up system like in other Batman: Arkham games so you can often bypass enemies rather than fighting them, which is sometimes preferable given that the combat feels much clunkier than in the other games. Countering, in particular, can be a bit hit and miss at times. Knife-wielding thugs and those with stun batons cut through your defences surprisingly easily and Batman seems much weaker this time around. This means electrical currents and poisonous gas drain your health extremely quickly and Batman cannot withstand even a short burst of sustained gunfire. Although Batman doesn’t have to worry about gaining experience points and levelling-up, he can still improve his suit and gadgets by finding WayneTech crates. Similarly, you upgrade Batman’s “Rush” ability (something I struggled to understand but seems to do additional damage as his combo increases) or obtain gauntlets to increase your regular damage. There are numerous helpful autosave points and you can skip cutscenes when reloading, which is even better, but it can be very frustrating to fail again and again because you were spotted and got caught in a crossfire. Arkham Origins Blackgate tries to recreate the “Predator” sections of its bigger, better counterparts but these are both painfully limited and needlessly frustrating. Detective Mode highlight enemies and objects to distract them, and Batman can toss a snare to tangle goons when up high, but there are few options to avoid being spotted. Batman can still hop into floor grates, shimmy along ledges, or sneak behind enemies to take them down or can just dive kick them. Still, you’ll mostly rely on distracting enemies or take them out by dropping hazards into them or destroying the ground beneath them.
You can explore new areas with Batman’s different gadgets and abilities.
Blackgate Prison is split into three main areas: the Cell Block, the Industrial Area, and the Administration Offices. Each has sub areas, such as a sewer system, a dock and lighthouse, and the maximum-security Arkham Wing and you’ll be going back and forth between these areas many times. In many ways the game has more in common with Batman: Arkham Asylum than the other open-world titles, meaning you’ll inevitably reach an obstacle and be forced to explore elsewhere to acquire a different gadget or a key card for your Cryptographic Sequencer. Each area has different entrances and exits and there are shortcuts you can take, but it would’ve helped speed things up to be able to return to the main map from the pause screen. Once there, you can jump to different areas, which is helpful, but it’s not always clear where you need to go or what you need to do no matter how helpful the map thinks it’s being. To be fair, if you haven’t acquired the Line Launcher then you obviously can’t cross gaps and if you don’t have the right key card you can’t open new paths. However, the game is structured to allow you to tackle the main bosses in any order provided you don’t mind backtracking. The puzzles are pretty simple and familiar and largely centred around the Cryptographic Sequencer, which launches you into a number matching/finding mini game, but you’ll also be activating consoles, grappling to switches, and using your various gadgets to access new paths scanned with your Detective Vision. Batman starts with his Batarang and grapnel gun but soon acquires the Batclaw to rip down grate covers and certain walls, the Line Launcher to cross gaps, and explosive glue to explode floors. These can also be upgraded as the story progresses, providing a shock upgrade for the Batarang to create an electrical current to activate doors and machinery, the ability to walk on your line like a tightrope and clumsily ascend up shafts, and glue gel to temporarily jam gears and mechanisms.
Presentation: As you might expect, given that it’s a conversion of a 3DS game, Arkham Origins Blackgate isn’t anywhere near as impressive as its main console counterparts but, for the most part, it looks and runs quite well. Batman’s character model fittingly gets the most attention, though he won’t show battle damage and he’s obviously limited in his animations and movements because of the perspective shift and lesser game engine. Combat is a little sluggish, unfortunately, and nowhere near as slick and satisfying as in the other games, which makes one of the franchise’s most enjoyable aspects a chore. Thankfully, much of the gameplay is focused on exploration, simple puzzle solving, and backtracking and Batman controls much better in this regard. Catwoman will help him on the comms, presenting a unique dialogue dynamic compared to talking with Batman’s usual allies. Thugs still engage in some amusing and distracting banter as you wait in the shadows, but the visuals let the game down a bit, appearing more akin to a late-PlayStation 2 or PlayStation Portable title.
Blackgate fails to impress with its drab visuals, however ambitious they may be at times.
Much like Batman: Arkham Asylum, the game is awash in drab, uninspired, grey locations. It’s all very dull and clinical whenever Batman’s indoors, with the only things separating one area from another being one might have some elevators while another has more office equipment, one will be a gothic almost steampunk sewer and the other will have more advanced cells for inmates, but none of it is very visually appealing. The lighthouse and docks are a notable exception, but I was glad to venture into the sewers (generally one of the more visually uninspiring videogame locations) just to mix things up. When I played through the 3DS version, I chose not to engage the 3D function; while it offers a decent sense of depth, the game’s too visually dull to make the most of it. As many environmental puzzles and collectibles are hidden, this means it’s usually better to play with Detective Mode activated so you don’t miss anything and can see during blackouts. The game’s cutscenes largely use a motion comic style reminiscent of Tim Sale’s artwork and they’re fully voiced. You’re gameplay is also often interrupted by cutscenes showing Amanda Waller observing and commenting on your progress, though cutscenes using the in-game engine are restricted to a few short sequences.
Enemies and Bosses: Blackgate Prison houses some of Gotham City’s most violent criminals, but they’re not the most colourful. Most of the common thugs return from the bigger Batman: Arkham games, with no new additions or interesting wrinkles added. You’ll get into fist fights with enemies, some of whom wield blunt instruments like baseball bats, but those with knives will slash at you mercilessly unless you stun them with a swipe of your cape and beat them down and those with stun batons must be hopped over and attacked from behind. You won’t have to worry about thugs using car doors as shields or coming at you with swords, or any brutish goons, but anyone with a gun should be avoided at all costs. In these instances, you’ll need to use stealth to take them down as it won’t take much to alert them to your presence and see you riddled with bullets, but easily one of the worst dangers in the game is the annoying abundance of spiked hazards lining the floors!
Bosses can be ridiculously simplistic or ridiculously frustrating, with little middle ground.
As Batman progresses further into the prison, or to facilitate this progression, he must face some of his most memorable rogues…and also Benjamin Turner/Bronze Tiger and Floyd Lawton/Deadshot…in boss battles that range from simplistic to ridiculously frustrating. First, you’ll chase Catwoman across the city’s rooftops to a construction site, then you must tap Y to evade her claw swipes and press B to stun her with your cape when prompted. If you try to attack any other time, she’ll slap or whip you away and you’ll need to be quick with your counters for the final hit as she swipes at you three times in slow-motion before going down and offering to help you out. As you explore the cell blocks, you’ll end up in a specially constructed electrified arena made for the Penguin’s amusement where you fight Bronze Tiger in a battle that’s functionally very similar to the one against Catwoman. You’ll initially need to counter Bronze Tiger’s attacks, stun him with your cape, and hit a quick combo but he also has a leaping attack that you must dodge to smack him up, and you can deal a fancy finish if your combo hits him into the electrified cage. As much as I mock him, Deadshot at least mixed up the challenge for his boss battle. Initially, you control Batman from the perspective of Deadshot’s sniper rifle, using cover to avoid being shot and making your way around the area. Then, he switches to a machine gun and will cut you down in seconds if you don’t duck down, meaning the timing to hit a nearby spotlight and blind him is very tight, but at least it wasn’t just counter/stun/attack/repeat.
These three bosses had me tearing my hair out during each encounter.
Down in the sewers, you randomly fight Cyrus Gold/Solomon Grundy, the game’s solo gigantic foe. Accordingly, he’s immune to your standard attacks and you must use Batman’s explosive gel and Batarangs to activate electrical cables to shock him when he charges over puddles. It’s probably just me but this wasn’t immediately clear and I struggled to figure out what the hell I was supposed to do but, once you figure it out and get the timing right, it’s not too difficult. This frustration continued into the fight with Black Mask. As he’s not a physical match for the Batman, Sionis sends in his goons, tosses grenades, and blasts away with his machine gun. He’s also very slippery and forces you to disable three generators in a time-consuming puzzle before waiting to gun you down the moment he spots you. You need to distract him with the nearby alarms, take out an overhead light, and use the floor grates to lure him into position to take him down, all of which was far more aggravating than it had any right to be. Easily the most difficult of the regular bosses, for me, was the Penquin. Cobblepott is flanked by armed goons who cannot be defeated without disarming them, which is extremely difficult to do. Instead, it’s better to distract them so you can drop onto the Penguin and avoid being shot to death in seconds by his shotgun. As the battle progresses, more goons and even an overhead drone makes things harder, though thankfully there is a checkpoint for the final stage.
Your greatest challenge will come, surprisingly, from the Joker and Catwoman.
In a change of pace for this series, you go one-on-one with the Joker in Arkham Origins Blackgate, to a degree. You fight him in a small, enclosed space where his minions toss grenades and the Joker races around a central obstacle, smacking you with an electrical baton whenever you get close. Accordingly, you must run in the opposite direction and time your Line Launcher to fly in and land a combo, but he’ll also take shots with his pistol, floods the arena with poisonous gas, and has the largest health bar of any boss so far. However, he’s a walk in the park compared to the final boss, initially teased as another tedious fight against Bane but which turns out to be an infuriating three-stage fight against Catwoman, of all people. Before you fight her, you’re forced to search all over finding and defusing bombs before you battle her in the same format as in the first encounter, except she’s added Bronze Tiger’s leap to her arsenal and trying to counter her claw swipes is even more difficult. After this, she blinds Batman and strikes from the darkness; your only cue to when she’ll attack is the brief glow of her goggles and a little jingle, meaning it’s way too easy to miss-time your counter and get hit. Survive this phase and she appears to duplicate, with her doubles feigning attacks and the true Catwoman striking so quickly and so awkwardly that it’s near impossible to correctly time your counters as you need to press Y slightly before the indicator appears. Oh, and you need to repeat this last phase three times, with the fakes and attacks increasing each time, making for the most irritating boss battle in the franchise since that God-awful fight with Slade Wilson/Deathstroke!
Additional Features: There are thirty Achievements on offer in the Deluxe Edition of the game, with one being awarded each time you defeat a boss or hit a continuous combo (up to 100). You’ll also get Achievements for solving detective cases, destroying Joker teeth, explosive bird cages, and replica black masks (which also unlock extras in the game’s gallery), and locating armour and full costume sets. Interestingly, there are some creative Achievements available too, such as dying from the Joker’s laughing gas, facing a different final boss each time, and defeating Grundy with the shock Batarang. While there are no Riddler Trophies, you can find and scan various clues to different criminal cases; some are hidden and others require your gadgets to uncover. What you really want, though, are the WayneTech crates containing the different Batsuit parts. Find all five of each to apply a new skin to the Dark Knight and be afforded additional perks, such as increasing your resistance to damage or just making you invincible! Although there are no Achievements tied to it, the Deluxe Edition offers “Normal” and “Hard” difficulties and you unlock “New Game Plus” after clearing the game, which carries over any Batsuits, clues, and unlocks you’ve earned but will overwrite your save data, take away your gadget upgrades, and present you with re-ordered boss battles and some new items.
The Summary: I knew that Batman: Arkham Origins Blackgate wouldn’t be as expansive or as impressive as its home console counterparts, but I held out hope that the game would make the most of its new format and genre to deliver a fun and engaging Metroidvania. In many ways, Batman suits this genre perfectly; it really opens a lot of avenues for exploration, unique use of Batman’s gadgets and abilities, and speaks to his reputation as the World’s Greatest Detective. Unfortunately, it failed to live up to its potential, the standards set by its bigger cousins, and to meet the expectations of its genre. The combat is slow, sluggish, and unreliable; you’ll try and counter an attack only to get hit and this makes fighting, especially boss battles, extremely aggravating. The Predator sequences are far too limited; I think it might’ve been better to switch to a different presentation for these sections, perhaps a little more zoomed out or isometric perspective but, as it stands, they’re just too finnicky to be anything other than a chore. Some aspects are interesting, like tracking the Penguin’s blood trail or rescuing hostage or even defusing the bombs in the game’s finale, but it’s so difficult to navigate that it’s easy to get turned around or exit an area before you’ve completed your objective. I appreciate it when a game doesn’t hold your hand but, normally, the Batman: Arkham games give you a little more direction than here, where you can just fail constantly trying to figure out how you’re supposed to take out Solomon Grundy and the Penguin or get to where the map’s directing you. I’m not really sure what makes this version so “deluxe” compared to the 3DS title as it barely improves upon the limited 3DS version. As a budget title that offers a taste of Batman’s bigger adventures, it’s not bad but, as an entry in the lauded Batman: Arkham series, it’s a clear disappointment.
My Rating:
⭐⭐
Rating: 2 out of 5.
Could Be Better
What did you think to Batman: Arkham OriginsBlackgate? Do you agree that it fails to make the most of its new format and genre? Did you also find the game world difficult to navigate or were you able to find your way without much problem? What did you think to the game’s bosses? Did you struggle against Black Mask, the Penguin, and Catwoman? Would you like to see the Arkham Origins games given more spotlight? How are you celebrating Batman Day and what is your favourite Batman videogame? Whatever you think about Batman: Arkham OriginsBlackgate, or Batman in general, please leave a comment below and check out my other reviews of the Batman: Arkham series.
On 21 February 1986, The Legend of Zelda(Nintendo EAD, 1986) was first released in Japan. The creation of legendary game designer Shigeru Miyamoto and Takashi Tezuka, The Legend of Zelda launched one of Nintendo’s most popular franchises. This year, I’ve been dedicating every Friday to Nintendo’s most famous silent protagonist, Link and his vast and enduring fantasy world of sword and sorcery.
Released: 13 February 2015 Originally Released: 27 April 2000 Developer: Grezzo Original Developer: Nintendo EAD Original Version Also Available For: GameCube, Nintendo 64, Nintendo Switch, Nintendo Wii, Nintendo Wii U
The Background: An instant classic upon release, The Legend of Zelda (mostly) went from strength to strength as the concept was refined and expanded throughout Nintendo’s handheldventures and 16-bitera. Following a long development period, the franchise made a phenomenally successfuljump to 3D with The Legend of Zelda: Ocarina of Time (Nintendo EAD, 1998). Following its success, Nintendo originally sought to create a remixed version for the ill-fated 64DD peripheral, which would eventually become the “Master Quest” version of the game. Designer Eiji Aonuma was unenthusiastic about this, so series creator Shigeru Miyamoto challenged the team to create an entirely new 3D Zelda adventure using Ocarina of Time’s assets in just one year. Aonuma recruited designer Yoshiaki Koizumi to adapt his concept of a time loop gameplay mechanic; Koizumi also (literally) dreamt up the idea of the impending threat of a falling Moon. Realising that Ocarina of Time’s players would be a little older, Aonuma purposely aimed for a bleaker, more melancholy tone for the game, which was bolstered by the Expansion Pak that allowed the game to run much smoother and boast more complex visuals compared to Ocarina of Time. The Legend of Zelda: Majora’s Mask was a critical and commercial success; reviews praised the new gameplay mechanics and it quickly gained a reputation as one of the darker, more sombre entries in the franchise. Following a handful of re-releases, and the success of Ocarina of Time’s 3D remake, Nintendo and Grezzo immediately began work on giving Majora’s Mask the same treatment. Alongside graphical improvements, the team purposely aimed to make Majora’s Mask3D more accessible and included numerous quality-of-life features that were criticised by some. Despite this, the game received positive reviews praising the updated visuals, mechanics, and new elements and the game retained its status as one of the franchise’s most under-rated entries.
The Plot: After saving Hyrule and being returned to his childhood, Link is jumped by a Skull Kid and has his horse, Epona, stolen. Pursuing the thief to the bizarre world of Termina, Link must manipulate a three-day cycle to stop the possessed sprite from destroying the land.
Gameplay and Power-Ups: The Legend of Zelda: Majora’s Mask is a 3D action/adventure game that’s built upon the same game engine as its predecessor, Ocarina of Time, and therefore shares many of the same controls, gameplay mechanics, and features. In a rarity for the franchise, players control the same Link is in the previous game, though returned to his child body (and you can change his name when starting a new file) and exploring a bizarre new land filled with many familiar, but noticeably different, characters. Link’s goal is simple: he has three days to stop the possessed Skull Kid from destroying Clock Town and all of Termina with a giant, nightmare-fuelled moon. To do this, players journey to four areas adjacent to Clock Town, tackle the dungeons (or “Temples”) found there, and defeat the bosses within to awaken the Four Giants, the only beings physically capable of pushing back the Moon. However, your mission is compounded by the ever-present time limit, the drama and side quests of the various non-playable characters (NPCS) Link meets, and the numerous magical masks he obtains along the way. Link’s abilities will be immediately familiar to any returning Ocarina of Time players: A sees you talk to NPCs, open chests, and interact with the environment while B lets you attack with your sword, swiping, stabbing, and even jumping when used in conjunction with A. The Left Trigger activates “L-Targeting”, allowing you to lock on to enemies, NPCs, and other targets and expands your attacking options by letting you raise your shield to deflect attacks and projectiles with the Right Trigger, side hop, backflip, and leap into action.
Though a child, Link is as competent as he was as an adult with his weapons and items.
You assign different weapons and items to the X and Y buttons, while other items are assigned to the I and II slot on the touchscreen for easy use. By default, your trusty ocarina and, later, the Pictograph Box are selectable from the top and bottom left of the touchscreen, which is also where you’ll find your map, health (represented as hearts), magic meter, and item and mask menu. Though a child, Link eventually acquires many weapons he utilised as an adult. These are found within the game’s Temples and are often necessary to defeat the mini boss and main boss within, as well as being used to solve various puzzles. You can acquire the Hero’s Bow and a variety of elemental arrows, allowing you to attack enemies from afar, hit switches, burn objects, and create ice platforms where indicated. Bombs and Bombchus are used to blow upon walls and discover secrets, Deku Sticks allow you to light torches, Deku Nuts briefly stun certain enemies, and you can snag on to certain targets and parts of the environment with the Hookshot to cross gaps or bring items to you. Magic Beans can be planted to create platforms to new areas, the Lens of Truth will reveal hidden paths and secrets while draining your magic, and you can capture life-restoring Fairies or store various potions in one of Link’s many bottles. Players can also strengthen their sword by following a specific side quest; though the Razor Sword is only temporary and will eventually dull, it can be further (and permanently) upgraded to the Gilded Sword. Similarly, you can earn yourself the massive Great Fairy’s Sword and obtain the light-reflecting Mirror Shield, and eventually purchase large Powder Kegs to destroy larger boulders. Link can also expand his inventory with bigger quivers, bomb bags, and wallets. Though you lose all your Rupees and ammo stock whenever you travels back in time, you can bank your Rupees in Clock Town and will find plenty of ammo by cutting up grass and defeating enemies.
Link’s masks afford him unique new abilities, though the controls can be finnicky and clunky.
The Ocarina of Time is again used to manipulate the flow of time. You’ll need to travel back in time multiple times as you’ll get a game over once you reach the end of the third day. Luckily, you can speed up and slow down the flow of time to give yourself more time to complete tasks or jump to specific time periods to complete side quests. Other ocarina songs warp you to the various Owl Statues across Termina, where you can also manually save your game, call Link’s trusty steed, Epona, once you rescue her, access certain Temples, and heal disturbed or unquiet spirits to obtain new masks. Majroa’s Mask big gimmick is the mask system; Link will assume three distinct forms (a Deku Scrub, a Goron, and a Zora) throughout the game, each with different playstyles and lacking his traditional weapons. Deku Link is small and spritely, spitting bubbles from his nose and using Deku Flowers to launch into the air and temporarily fly about like a helicopter. Goron Link is big, slow, and powerful, smashing foes with his fists, slamming the ground, and barrelling along in a spiked ball to cross gaps. Zora Link is sleek and agile, easily cutting through water, walking across the seabed, and tossing boomerang-like fins from his arms. Well, I say “easily” but Zora Link can be finicky to control, often ploughing into walls and being a pain. Each of these forms has their own musical instrument in place of the ocarina and is used not just in their main Temple, but to solve other puzzles and complete side quests, such as purchasing Deku deeds, competing in high-speed, aggravating Goron races, and racing against beavers. Link’s other masks all have special abilities, too, such as the Bunny Hood doubling his running speed, the Blast Mask exploding like a bomb, the Great Fairy’s Mask attracting Stray Fairies, and the Captain’s Hat allowing you to command Stalchildren. The Stone Mask renders you functionally invisible, the All-Night Mask keeps you awake, and the Giant’s Mask transforms Link into a hulking giant for a kaiju-esque boss battle. With the exception of the three main masks, all these masks are optional and obtained through side quests, but it pays to acquire them all to make your life (and the endgame) so much easier.
Termina is full of NPCs, mini games, and side quests that will reward you handsomely.
Termina is full of NPCs, all of whom have different thoughts on the current situation and different issues to deal with. Over the course of the three days, you’ll interact with them several times, with key events being recorded in your handy-dandy Bomber’s Notebook so you can keep track of what’s going on and when. This functionality is great for new players and for people like me, who like to efficiently complete the game’s side quests as quickly as possible. Because of the time travel and three-day loop, you’ll repeat certain events and trigger certain cutscenes multiple times, requiring you to rescue old ladies and injured witches, follow shady characters, and retrieve certain items to complete side quests. Many side quests are ongoing, requiring multiple steps (such as reuniting Anju and Kafei, which will take you right up to the last minute of game time and sees Link and Kafei working together to solve switch-based puzzles in Sakon’s hideout) or occur at specific times (such as the surreal defence of Romani Ranch against alien invaders!) Other quests are more low-key, such as using the Bremen Mask to engross little chicks, defending Cremia’s milk delivery from the Gorman Brothers, besting the various shooting galleries and fishing holes, and delivering fish to the Marine Research Lab. Other side quests can be quite involved, such as reuniting the frog choir, using all of Link’s transformations to form a band, digging up treasure with Dampé, and challenging the mini bosses to a rematch. You’ll also be using all your weapons and skills in Gold Skulltula Houses, taking pictures with your Pictograph Box, visiting Gossip Stones, and answering the Keaton’s quizzes. Your reward for these endeavours is either a new mask, a Piece of Heart to extend your maximum health, a bottle, or some Rupees, all key items to assist your adventure.
The four Temples are packed with new and familiar puzzles and fitting gimmicks.
Each Temple houses not just a new weapon and the usual map and compass, but fifteen Stray Fairies which must be freed and collected, usually by enticing them with the Great Fairy’s Mask. Find them all and you’ll earn Link’s patented Super Spin Attack (hold B to charge up a magic-draining spin attack), double your magic meter, increase your defence, and earn the aforementioned powerful (if unwieldy) Great Fairy’s Sword. It’s worth collecting these as you explore the Temples to avoid having to return later. Time is always against you in Majora’s Mask, so be sure to play the Inverted Song of Time to stave off Termina’s inevitable doom. Though the game only has four Temples, getting to them is a task in itself: Link must follow cheeky monkeys and sneak into the Deku Palace, feed and soothe the Goron Elder’s son and then use the Lens of Truth and Goron Lullaby to bypass the Biggorn protecting Snowhead Temple with a blizzard, mess about finding seven Zora Eggs to summon a giant turtle to reach the Great Bay Temple, and battle through the undead minions of Ikana Canyon and scale up a puzzle-landed rockface to reach the Stone Tower Temple. While each contains many recycled elements from Ocarina of Time (torches, switches (timed or otherwise), climbable and destructible walls, etc), each also boasts a maze-like structure and fitting gimmick. Woodfall Temple is full of poisonous water and large gaps you must fly over as Deku Link, Snowhead Temple features both lava and ice, ramps to careen over and weighted switches to pound as Goron Link, and a large central pillar that needs to be brought down to reach the boss. The Great Bay Temple is, obviously, water-based, featuring a maze of rushing currents, jet streams, and propellers. You must use the Ice Arrows to create platforms and solve puzzles and pay attention to the helpful colour-based indicators to know where new paths have opened up. The Stone Tower Temple is two dungeons in one, featuring a gimmick where you flip the area upside down to access new areas, light-based puzzles using the Mirror Shield, and plenty of opportunities to use the Elegy of Emptiness to create a soulless duplicate of Link to press down switches. As you’d expect, each Temple also contains a mini boss, a warp point, numerous small keys to open locked doors, and a big Boss Key to access the Temple guardian.
Presentation: Even in its original Nintendo 64 incarnation, Majora’s Mask had Ocarina of Time beat hands down when it comes to visuals. Although the game always had a bit of a blurry look thanks to it taxing the console (and the Expansion Pak) to its limits, the graphical upgrade was apparent right away in something as simple as Link actually having his sash and his jumping animations being more dynamic. In the 3DS version, the visuals are as improved as they were in Ocarina of Time 3D, reducing the blur in favour of clarity, adding more emotion to Link’s face, and allowing players to immerse themselves in the world (and induce a headache) with the 3D slider. At first glance, Majora’s Mask seems like a smaller sandbox to its predecessor; you spend a lot of time in one central location and there are only four Temples, after all. However, the opposite quickly proves to be true; not only are there more NPCs onscreen at any one time, their personalities, positions, and roles change across the three-day cycle, adding an unexpected level of depth and emotion to this bizarre adventure. In addition to a day and night cycle and each area of Termina sporting different weather effects and seasons, the world is far more diverse than before. Great Bay, for example, is a vast beach home to the Pirate’s Cove, Gerudo Lagoon, and Zora Cape, a coral-like town that puts Zora’s Domain to shame. Similarly, the Southern Swamp sees Koume and Kotake offer a boat ride through the sweltering foliage, a confusing monkey-filled maze, and the nigh-impenetrable Deku Palace, where the woodland folk don’t take kindly to strangers.
Termina is a diverse land with many areas to explore and environmental effects.
Easily the most impressive area, for me, was Snowhead Mountain. Like Zora’s Domain, Termina’s Goron population have been crippled by inclement weather; in this case, a raging blizzard. Snow and ice covers the environment and the weather has claimed many Goron lives and hides many secrets but, unlike in Ocarina of Time, the snow will melt when you best Snowhead Temple, just as the Southern Swamp with become more habitable. Sadly, travelling back in time undoes these actions and you’ll need to beat the Temple bosses again to re-restore the lands, but just the fact that you can undo the damage done to Termina and see NPCs celebrating in their newfound lives adds so much more gravitas to the game. It compels you to journey on and assist more NPCs, which rewards you with more lore and items, and makes Termina so much richer compared to the more stagnate Hyrule in Ocarina of Time. Ikana Canyon is a desolate, dangerous area filled with undead monsters, rolling rocks, an abandoned village, and the forgotten ruins of Ikana Castle, with its light-based puzzles and spooky inhabitants. The Stone Tower that leads you to the Stone Tower Temple is quite the feat, requiring you to scale it in various creative ways, all before you even flip the Temple on its head to tackle it upside down. Even exploring Termina Field is an adventure in itself; all sorts of respawning enemies lurk in the grasslands, and you can visit the observatory, Romani Ranch, and discover numerous hidden areas all by experimenting with your weapons, mask abilities, and exploring the rich and detailed world. Although the Song of Soaring, Bunny Hood, and Goron abilities make traversal simple, you can rescue Epona and race around on her as Young Link to tick off another desire from Ocarina of Time (though I admit that I rarely used her since she can’t access every area).
This is easily one of the darkest and most bizarre Zelda adventures.
Majora’s Mask is easily one of the most bizarre and bleak Zelda adventures. Right from the beginning, the story starts with a melancholy tone, with Link wandering the lands in search of Navi, only to have his horse and ocarina stolen by the Skull Kid and his mischievous fairy companions, lost in a strange land, and transformed into a Deku Scrub! Like in Ocarina of Time, Link is partnered with a fairy, but Tatl is no Navi; she’s rude, obnoxious, and rarely gives much help when searching for an enemy’s weak spot. Over the course of the game, the two find common ground as Tatl’s concern for her friend and her brother, Tael, grow, and Link’s courage is called upon again to aid the aggressive and slightly demonic Happy Mask Salesman in retrieving Majora’s Mask. Most interactions take place using the in-game engine and simple text boxes, but horrific (thankfully skippable) cutscenes play every time you put on a transformation mask, suitably dramatic cutscenes play when Temples rise up or NPCs are laid to rest to increase Link’s abilities, and you’ll get helpful reminders when day turns to night turns to day and the countdown to destruction looms closer. Speaking of which, the grim-faced Moon looms ominously overhead, growing closer and closer and causing small earthquakes. NPCs become more fearful or flee as the game progresses, and woe befall anyone who lets the timer runs out and must watch the Moon obliterate the land! While many of the assets, models, and elements are recycled from Ocarina of Time, they’re all much improved, with characters constantly on the move and doing their own thing, which you can track with the Bomber’s Notebook. Many musical cues and tracks return as well, though the Termina Field Overture is far more bombastic and engaging for me, and each area boasts a fittingly twisted soundtrack that’s both familiar and unique. The 3DS version changes up the presentation a bit, redesigning the countdown timer, area intros, and tidying up the graphics and assets to really make the colours pop, add helpful guidelines to certain areas, and even mixes up the puzzles and locations of certain items.
Enemies and Bosses: In keeping with the recycling of Ocarina of Time’s assets, Majora’s Mask returns many enemies from the previous game, such as the shield-sucking Like Likes, bat-like Keese (also in fire and ice variants), crab-like Tektites, Poes, Wolfos, crow-like Guays, Peahats, Octoroks (and their larger cousins), Deku Babs, Lizalfos and Dinolfos. Anyone who’s played Ocarina of Time will know how to tackle these enemies, which usually comes down to firing arrows or strategic use of L-Targeting, and the same is largely true of many of the new enemies featured here. You’ve got your normal, smaller foes like beetle-like Hiploops, electrical Dragonflies, Giant Bees, and skeletal fish, but you’ll also contend with strange foes like the Dexihand, Eyegore, and Goron-like Nejirons. Snappers are best taken out by lying in wait in a Deku Flower and exploding up beneath them; snowball-tossing Eenos are susceptible to Fire Arrows; the various ChuChus can be popped to quickly earn health and ammo; and you’re better off simply defending against or firing arrows at the “Real” Bombchus that scurry about. Some enemies will better test your swordsmanship, such as the Garos and returning Gerudos and Iron Knuckles (who attack faster and more aggressively as their armour is destroyed), while you can command the Stalchilds and even avoid or converse with Gibdos and ReDeads with certain masks. Similarly, you can bypass the Death Aros altogether with the Stone Mask, must switch to sub-weapons or play the Song of Storms when touched by a Blue Bubble, and keep an eye out for the vulture-like Takkuri flying around Termina Field to avoid having your items stolen.
Even familiar mini bosses require a bit more strategy to overcome.
Each Temple houses at least one mini boss who must be overcome, sometimes multiple times, usually to obtain the Boss Key or the dungeon’s weapon. Many of these will be familiar not just to players of Ocarina of Time, but also long-time Zelda fans: Dinolfos and Iron Knuckles appear more than once and fit into this category, for example, but Majora’s Mask sees the return of series staples such as Wart and Wizzrobe. Wizzrobe is fought multiple times in multiple Temples, teleporting about, creating illusionary doubles, and attacking with fire or ice magic. Wart appears in the Great Bay Temple and is, as usual, a giant eye surrounded by bubbles that Link must destroy to get a clear shot at its pupil, while being mindful of it firing them as projectiles and bouncing around in a frenzy. The Gekko appears twice in the game, first riding a Snapper and attacked via a Deku Flower and then encased within a giant, gelatinous substance that must be frozen with Ice Arrows and shattered to attack the slippery devil. In the Ikana Graveyard, Link chases the gigantic Captain Keeta, fending off his lackeys and hacking the giant’s legs to get his attention. You must avoid his swipes and flaming barriers and pelt him with arrows to stun him, but the main issue here is keeping up with him so he doesn’t flee (but that’s what Hylia created the Bunny Hood for!) Stone Tower Temple is home to two more tough mini bosses: first up is the Garoa Master, a teleporting assassin who drops from the ceiling and attacks with a charge. Stay away from his attacks to strike back when his guard is lowered, and be sure to keep your distance when he’s beaten as he’ll blow himself up with a bomb! Defeating him earns you the Light Arrows, which are key to dispelling the bats protecting Gomess. Gomess attacks with a scythe that can cut through your shield, so be sure to jump-slash his exposed heart when you see an opening.
Bosses have been redesigned to have new phases and weak spots, which can be aggravating.
Naturally, you’ll have to best each Temple’s boss to awaken one of the Four Giants and acquire their remains. If you played Majora’s Mask on the Nintendo 64, you’ll be in for a surprise here as each boss has been fundamentally changed, somewhat simplifying them and expanding their attack patterns to allow for new ways to beat them. First up is Odolwa, a manic swordman who dances about and strikes with a gigantic blade. Originally, you’d use arrows or bombs to stun him and strike with your sword, but now you must brave being roasted alive as Deku Link to attack from above, exposing a big slimy eye that is a recurring weak spot for the 3DS version’s bosses. I always found Goht one of the more annoying bosses; the fight takes place on a never-ending track filled with ramps and Magic Jars and sees Goht gallop along, tossing bombs, causing rocks to fall, or summoning a thunder bolt. You’re encouraged to race after him as Goron Link, picking up speed to ram him and topple him over to attack his exposed eye, but you can actually just stand by the entrance and pelt him with arrows or even toss a bomb at him to speed things up. Gyorg was initially a pretty simple affair, testing your patience by having you wait on the central platform to shoot him as he jumps over then ram into him as Zora Link. Now, there’s a second phase that’s completely underwater; you must desperately avoid the mines and detach them to stun Gyorg, blasting his giant eye where possible, something made quite troublesome with the clunky swimming mechanics. Similarly, Twinmold is completely different; originally, you’d be forced to don the Giant’s Mask and attack the worm’s heads or tails with your sword while keeping your magic topped up. Now, you only earn the Giant’s Mask after pelting the boss’s first phase with arrows and must stomp about as Giant Link engaging Twinmold in a fist fight, then grab its tail when it’s stunned. Again, this is a much more aggravating boss battle because of this; Giant Link is a slow, lumbering character compared to the slipper Twinmold and your magic drains very quickly, causing the fight to drag unnecessarily.
Majora’s many forms and difficulty are rendered mute with the overpowered Fierce Deity Mask.
Once they’re all beaten, you must return to Clock Town on the final day and play the Oath to Order. This summons the Four Giants and stop the Moon from falling, but causes the Skull Kid to freak out and the demonic Majora to assume full control. You’re then transported to the strangely idyllic Moon’s surface, where you must challenge four short, troublesome obstacle courses themed around each Temple. If you’ve collected every additional mask, you can trade them all in here and gain the Fierce Deity Mask, which can only be worn in boss rooms and transforms you into a hulking adult equipped with a massive sword that fires magic-draining energy beams when L-Targeting. This is the only way I’ve battled the game’s final boss, Majora itself, which has three distinct forms: Majora’s Mask, Majora’s Incarnation, and Majora’s Wrath. You can tackle each using arrows and bombs and traditional tactics, but I never have. I simply L-Target the weird, increasingly grotesque demon and fling sword beams at it until it’s defeated. Its attacks include charging at Link like a buzzsaw, shooting a reflectable beam of fire, circling at super-fast speeds, firing energy blasts, dodging your conventional attacks, and attacking with two disturbingly organic tentacle-like whips. Majora also attacks using the boss’s remains and by summoning spiky, spinning tops and can cut through your shield if you’re not careful, but none of this is a concern with the overpowered Fierce Deity Mask.
Additional Features: There are fifty-two Heart Pieces to find all around Termina; some are hidden in secret holes, some are up trees or require your weapons to access, some are gifted to you as rewards, and some require you to complete side quests. You’ll be dancing with the Rosa Sisters, giving a weird, disembodied hand some toilet paper, stopping a timer at exactly ten seconds, checking mailboxes, and besting the shooting galleries to acquire these helpful upgrades. Your main objective throughout the game is to acquire all the different masks, which requires interacting with all the NPCs and keeping an eye on their routines with the Bomber’s Notebook. While some masks are more useful than others, each has a specific function and will allow you to get other masks, Heart Pieces, or rewards depending on who you interact with when wearing them. Similarly, it’s worth seeking out the upgrades to Link’s sword, wallet, and items, if only to further explore the world, and making sure you bank your Rupees before resetting the three-day cycle. You’ll also find many Gossip Stones placed all over that will give you hints if you interact with them while wearing the Mask of Truth, and the Sheikah Stones return from Ocarina of Time 3D to provide you with more detailed directions if you get stuck. The manual save system has been revamped, with additional Owl Statues appearing in the game (though you can’t warp to all of them), and some of the rewards and side quests have been changed. Most notably, Link can now acquire seven empty bottles (which is, admittedly, a little excessive), with the last gifted after completing a new side quest involving the Gorman Troupe. Another new feature is the inclusion of two fishing holes, which you can either pay to use or acquire a pass to fish for various fish, though there are no rewards tied to this beyond trying to snag the legendary Lord Chapu-Chapu. Since the game resets when you go back in time, there’s no Boss Rush Mode this time around and, sadly, the developers didn’t see fit to include a mirrored Master Quest mode, though you now have three save slots instead of just two.
The Summary: The debate about which game is better, Ocarina of Time or Majora’s Mask, is seemingly never-ending and, honestly, it’s a tough choice. Majora’s Mask is definitely a more daunting challenge; I can play through Ocarina of Time with my eyes closed but I’ve never beaten Majora’s Mask without a guide, purely because I want to complete all the side quests before facing Majora at the end and have the overpowered Fierce Deity Mask on hand. Yet, Majora’s Mask is such a step up in terms of visuals, scope, and world-building. Termina feels alive in ways Hryule does not and the stakes feel so much higher since you can see how the impending doom affects the different NPCs. The three-day cycle is as daunting as it is annoying at times, resetting all your hard work but also pushing you to restore the next area and save this bizarre land. Majora’s Mask may seem smaller due to its more focused approach, but the game and its land is as big (if not bigger) than Ocarina of Time, expanding upon and improving every element of its predecessor and really making you feel the gravitas of its bleak narrative. Link may not acquire any new weapons here, but the mask-based gameplay mixes the formula up in surprising ways, changing Link’s form and altering the way you play (even if the controls can be a struggle at times). The 3DS version makes way more changes to the original game compared to Ocarina of Time 3D and, while some (like the simplified bosses and tweaked controls) can be frustrating, the benefits outweigh these issues. The expanded Bomber’s Notebook, being able to jump to specific time periods, and the changes to side quests help make the game accessible and fresh for old and new players, in my eyes. Ultimately, I think Majora’s Mask is a dark horse of the franchise; it’s an incredibly engaging experience, packed with side quests upon side quests, and more than stands alongside its predecessor as one of Link’s finest (if surreal) adventures.
My Rating:
⭐⭐⭐⭐⭐
Rating: 5 out of 5.
Fantastic
Have you ever played the Nintendo 3DS remaster of Majora’s Mask? If so, what did you think to the graphical overhaul and additional features included? Which of the masks and many side quests was your favourite? Would you like to see this version ported to the Nintendo Switch to make it more accessible? Did you own Majora’s Mask back in the day? If so, did you ever tackle the final boss without the Fierce Deity Mask? Were you a fan of the three-day cycle? I’d love to hear your memories of Majora’s Mask so leave a comment below and go check out my other Zelda content!
On 21 February 1986, The Legend of Zelda(Nintendo EAD, 1986) was first released in Japan. The creation of legendary game designer Shigeru Miyamoto and Takashi Tezuka, The Legend of Zelda launched one of Nintendo’s most popular franchises. This year, I’m dedicating every Friday to Nintendo’s most famous silent protagonist, Link and his vast and enduring fantasy world of sword and sorcery.
Released: 9 February 2023 Originally Released: 4 November 2004 Developer: Capcom / Flagship Also Available For: Game Boy Advance and Nintendo Wii U
The Plot: Apprentice blacksmith Link accompanies his childhood friend, Princess Zelda, to the Picori Festival, where monsters are unleashed by the evil wizard Vaati. With Zelda petrified, Link teams with wise-cracking magical hat Ezlo and assists the pixie-like Minish people in restoring the legendary Picori Blade to confront the threat.
Gameplay and Power-Ups: The Legend of Zelda: The Minish Cap is a traditional, 2D, top-down action/adventure game in which players take control of Link (or whatever they choose to name him), in the “toon” style of his Wind Waker counterpart, and embark on a quest to save Hyrule, and the Princess Zelda, from new sorcerer on the block, Vaati. As a Game Boy Advance title, the controls are as basic as it gets and akin to the previous handheld Zelda titles. You equip any of Link’s weapons and items to either A or B and then use that button to attack, defend, hit switches, solve puzzles, and whatever else your items are capable of. The Right Trigger performs a roll, speeding up your travel time, and also performs similar actions to A (like speaking to non-playable characters (NPCs) and opening chests). R is also the only way to open locked doors, which can be clunky as it would’ve been easier for Link to simply manually use any keys he possesses. The Left Trigger also performs a dedicated function, fusing “Kinstones” with NPCs, which I’ll detail in a bit. The + button pauses the game and brings up your inventory screen, the pretty basic map (which uncovers the more you explore and highlights notable areas), a subscreen showing how close you are to extending your health bar, total Mysterious Seashells and Tiger Scrolls, and allows you to save the game or enter “sleep” mode. As I’ll also get into in a bit, Link is joined by a hat-shaped companion, the insolent Ezlo, who constantly interrupts your gameplay to offer blindingly obvious advice that would make Navi blush. Also like Navi, you can choose to ask him for a tip by pressing -, though I’d just as soon never speak to him again. As you’d expect, Link acquires his standard sword and shield but the enigmatic Grimblade Brothers will teach additional sword techniques, such as a rolling attack, the aerial downthrust, and patented moves like the Sword Beam and Spin Attack. Some of these are more like padding, though, such as Link having to learn to attack with his sword when running with the Pegasus Boots.
Link’s traditional and new weapons are brought to colourful, cartoony life.
Many of Link’s recognisable weapons return here and function exactly as you’d expect. The bow and arrow lets you to hit eye switches and take out Eyegore statues, bombs blow up walls and discover new areas, and you can purchase a boomerang to stun targets or hit switches. This can be further upgraded into the Magical Boomerang, allowing you to manually direct it. Eventually, you can swap out the regular bombs for remotely detonated ones (though there are few benefits to this) and obtain the optional (and missable) Light Arrows for extra arrow damage. The Flame Lantern lights up dark areas, ignites torches, and burns certain enemies and spider webs. The Roc’s Cape lets you jump and glide short distances, the aforementioned Pegasus Boots let you run really fast, and the Ocarina of Wind warps you to any Wind Crests you’ve uncovered. The Minish Cap debuts three new items: the Cane of Pacci (which flips certain enemies and objects and creates temporary boosters in holes to launch you higher), the Gust Jar (which sucks up enemies, propels you across gaps when used on spring mushrooms, and turns lily pads into rafts), and the Mole Mitts (which dig through dirt). The Flippers, Grip Ring, and Power Bracelet are all passive items that don’t need to be equipped to use and let you swim and dive, climb certain walls, and pick up and toss jars and such, respectively. Link can capture life-restoring Fairies or store potions in bottles, increase his total bomb and arrow inventory with bigger bags and quivers, and also carry more Rupees by finding bigger wallets. Link’s sword is progressively empowered as you acquire the four Elements, duplicating Link into as many as four copies to push bigger blocks, step on or slash switches, and attack enemies, as well as fire a special beam that restores petrified NPCS. Finally, you can upgrade the shield into the reflective Mirror Shield, though this requires awakening a sleeping Biggoron and waiting for him to finish chewing on it.
Link’s shrinking ability doesn’t live up to its potential, and Kinstones are overused.
Link’s newest gimmick in The Minish Cap is the ability to shrink to microscopic size, courtesy of Ezlo’s magic. This is performed primarily at magical tree stumps and allows you to enter small holes, climb small steps and vines, and access out of the way places. When shrunk, you’ll interact with the pixie-like Picori tribe (or “Minish”) scattered throughout Hyrule (once you’ve consumed a Jammer Nut, that is) and be given additional side quests and assistance from them. In this form, Link takes more damage and his weapon usage is limited, but he can talk to animals and cross small lily pads. Occasionally, Minish Link enters Armos statues to activate or deactivate them and the action frequently zooms in to follow him up rafters, into the Minish towns, and through enlarged (from your perspective) areas, like in Honey, I Shrunk the Kids (Johnston, 1989). Apart from this, Ezlo is more a hinderance than anything; he’s obnoxious and rude and demanding and pops up to point out the obvious, severely dumbing down puzzles and interrupting the gameplay. The other big mechanic here is Kinstones; as you slash bushes, defeat enemies, and open chests, you’ll find several coloured Kinstone pieces. These are fused with certain NPCs to alter the overworld in different ways. This may involve spawning a treasure chest containing another Kinstone, or Magical Seashells, or a Big Rupee, or even a much tougher gold enemy for an additional challenge. Fusing removes vines to open new areas, parts waterfalls, drains ponds, and even spawns in NPCs for you to trade and train with. You can buy Kinstones, but they cost a lot and it’s not really worth it as you’ll inevitably find them on your travels, and none of the main variants are necessary to complete the story, though the benefits (extra hearts, Rupees, and training with the uncovered Grimblades) can be worthwhile. Specifically, fusing with Din, Farore, and Nayru spawns Lucky Butterflies which, when touched, increase your digging, shooting, and swimming speed. The only time you’re required to fuse Kinstones is when you find golden ones, such as in Cloud Tops, where you navigate a maze of clouds, floating about to find different halves of golden Kinstones to activate five propellers and be blasted up to the Palace of Winds.
I would’ve liked to see more creative use of the duplication feature in puzzle solving.
Link’s shrinking ability isn’t just used on the overworld; you’ll frequently shrink in Dungeons to reach new areas and progress. As ever, Dungeons contain a map, compass, and new weapon to aid your journey, as well as secret areas, switches, and stairways to other floors. Sometimes, you’ll drop or push blocks to lower levels; others, you’ll push levers to let in sunlight to melt blocks. Frequently, you must eliminate all enemies to open doors, or push jars or statues onto switches for the same effect, though it’s much more likely you’ll be duplicating Link to solve these puzzles. Tornados carry you across bottomless pits, moving platforms carry you across gaps, and floors are often covered in collapsing tiles, spikes, or rolling spiked logs that must be avoided. You’ll jump up to mesh bridges (and down through certain holes), hop up and across cloud platforms, push ice blocks into place, cross gaps using powerful wind blasts from propellers (in conjunction with the Roc’s Cape), and spring across chasms with the Gust Jar. There’s a giant rotating barrel in the Deepwood Shrine which must be rotated to progress, high-speed mine carts in the Cave of Flames that you redirect with switches, the Fortress of Winds is a veritable labyrinth of floors and dirt, the Temple of Droplets is a largely pitch-black mixture of ice and water, and the Palace of Winds offers the constant threat of falling to your doom. For the game’s final Dungeon, Vaati corrupts Hyrule Castle, transforming it into a monster-infested Hell filled with recycled enemies and hazards from previous Dungeons. While largely inspired by A Link to the Past and Link’s previous handheld entries, it’s in Dark Hyrule Castle where I saw some of the strongest parallels as exploring the Dungeons, battling Darknuts, and restoring the petrified NPCs was very similar to Link’s celebrated 16-bit adventure. Sadly, only two of the Dungeons are Minish-sized (the Deepwood Shrine and Palace of Droplets). Though you don’t really notice as you’re exploring these Dungeons, the developers did include larger variants of common enemies as boss battles. Still, I feel they didn’t take full advantage of Link’s new miniature perspective in these (or other) areas as the shrinking mechanic was more of a gimmick or hinderance a lot of the time.
Presentation: I’ll be the first to admit that I never really cared for TheWind Waker’s cartoony aesthetic. It’s grown on me over time, but I much prefer the more realistic, fantasy-orientated style of Link’s other 3D adventures. However, it works really well here; probably better than in 3D. Link is super expressive; from his grunts and yells (carried over from this 3D titles) to his messy bed hair, his look of sheer panic on a runaway minecart, and the way he races around when on fire. He’s a jaunty little cartoon sprite, bobbing along and reacting to everything around him. Ezlo is very animated as well, popping up on Link’s head to react to and comment on their surroundings or the plot, and all the NPCs are similarly cartoony and fun to behold. Many will be familiar to long-time Zelda players, such as Malon (with her milk cart and nearby farm), Dampé the grave keeper, Ingo (now a real estate developer), and Gorons intent on ploughing through a rocky underpass. Many characters fuse Kinstones with you to solve a personal crisis, such as the overworked mailman, the librarian searching for lost books, and a poor man haunted by a restless spirit. The Minish Cap is a little light on new races but there are anthropomorphic characters to find, animals to chat to (as a Minish), and, of course, the gnome-like Picori tribe. These peaceful little sprites have a main village and live in little mushroom houses or up in the rafters, their homes made out of barrels, walls made of books, and heating provided by flickering candles. When Link is turned microscopic on the overworld, a helpful bubble indicates where he is. Though his actions are limited, he has full access to his arsenal when the game zooms in, casting dirt paths with the shadows of grass and blocking his path with chestnuts and such. Minish-Link must avoid cats looking to swipe him and relies on lily pads to cross water until he gets the Flippers, and you must be on the lookout for small holes, paths of flowers, and flappable objects to progress and shrink or return to full size.
The “Toon” style really suits the traditional Zelda aesthetic and brings Hyrule to life.
The Minish Cap’s overworld and Dungeons are heavily reminiscent of A Link to the Past, mixing locations such as ruins, a swamp, and Hyrule Castle itself with areas I’m more familiar with from the 3D games, like Lake Hylia and Lon Lon Ranch. Mt. Crenel acts as a Death Mountain substitute, featuring falling boulders, climbable walls, tornados to fly you about, and a Minish mine where Melari repairs the broken Picori Sword. Like the Swamp of Evil, Castor Wilds is a murky swamp full of thorns; you’ll need the Pegasus Boots to navigate this area, and shrink to clamber inside Armos Statues within the maze-like ruins. Finally, the Flame Lantern lights your way in the desolate Royal Valley, which contains a looping maze in its haunted forest. Aside from the Minish Village, Cloud Tops and the Palace of Winds and the Temple of Droplets impressed me the most, visually. The other Dungeons are very formulaic, despite some fun perspective and depth effects, but these three have you up in the clouds or high in the sky or navigating a frozen labyrinth, respectively, which really mixes up the formula. Dark Hyrule Castle is similar, putting an ominous spin on the palace’s ornate rooms and recycling all previous hazards, but I was disappointed that the Dungeons didn’t utilise Link’s new miniature perspective to make their visuals and layouts standout more from the likes of A Link to the Past. Instead, The Minish Cap often resembles a toon-ified version of that game, doing little to stray from the usual stone trappings of those Dungeons and being a little too familiar at times. Still, there are fun touches, like the Biggoron atop Veil Falls, the big bell in the bustling Hyrule Town, guards to sneak past, and occasional weather effects. The game’s story is all relayed though text boxes, as usual, but key events are told using stained glass murals, Wind Waker-style art is showcased in the end credits, and the sprite-based cutscenes are full of cartoony life. The music is as infectious as ever, with familiar and slightly tweaked classic Zelda tracks at the forefront (many I mostly recognised from A Link to the Past and Ocarina of Time), though new areas and Minish locations have a spirited flavour that adds to the game’s whimsical, fairytale-like charm.
Enemies and Bosses: All of Zelda’s most recognisable enemies make a return in The Minish Cap, though redesigned to evoke the toon style of The Wind Waker. This is most evident in the Moblins, who charge with spears or fire arrows and have much more life and detail compared to past 2D Zelda titles In some cases. This ups the challenge represented by some enemies, such as the various Dark Knights you’ll encounter. These are essentially mini bosses and swarm Dark Hyrule Castle, defending against your attacks and landing powerful sword swipes and even boasting a charged thrust. Your best bet against these enemies is to hop over them with the Pegasus Boots and attack from behind, a tactic mirrored when facing the Ball and Chain Soldiers. Other enemies require strategic use of your other items, such as using the Gust Jar to suck up and fire out the annoying Peahats or pull the masks off Helmasaurs, tossing your boomerang at Sparks, or using the Cane of Pacci to flip Spiked Beetles and attack their vulnerable underbelly. Like Likes masquerade as Rupees and steal your items, Keatons and Takkuris make you drop Rupees on contact, Madderpillars (also a kind of mini boss) fly into a rage with you bop their noses and attack their tails, and you’ll even encounter Bob-ombs and Lakitus. ChuChus fry you, Floor and Wall Masters return you to the Dungeon entrance, and Octorocks and Deku Scrubs are subdued by deflecting their projectiles. Cloud Piranhas snap at you from the clouds, fake doors crush you, and Acro-Bandits leap from the ground in a swaying tower. You’ll also battle elemental Wizzrobes, who teleport about shooting ice, fire, or lightning; Stalfos leap and toss their bones at you; and Slugglas drop from above. By the time you reach Dark Hyrule Castle, rooms are filled with an assortment of these enemies. Though you can often simply bypass them, you’ll need to defeat a gauntlet of them before Vaati completes his macabre ritual to reach the petrified Princess Zelda in the finale.
Too few bosses require the shrinking mechanic, but they’re mostly big, fun challenges.
The Minish Cap is surprisingly light on bosses; four of its five main bosses guard an Element, which empowers your sword and duplicates Link, relinquishing a Heart Piece to extend your life bar. The first boss you battle is a gigantic green ChuChu; well, it’s actually a regularly sized one but you’re in Minish form, so it appears huge. A blue variant appears later in the game too, now sporting electrified skin, but the tactic of sucking at its “feet” with the Gust Jar and whacking it with your sword when it’s stunned remains the same. Next, you face the turtle-like lava dinosaur Gleek, which sits in a pool of lava and spits fireballs in a circular motion. You must run behind it and flip its shell with the Cane of Pacci to race up its neck and attack the crystal on its back. In retaliation, it rains rocks and breathes fire, making the fight more difficult as it progresses. Mazaal is the only one of the main bosses to incorporate the shrinking mechanic in. A strange, disembodied Aztec head and fists, he is stunned by shooting and slashing the jewels on his hands (which try to crush and hit you). You then shrink, enter his head, and attack the glowing pillar to deal damage. As the fight progresses, you use the Mole Mitts in his head and dodge a Shrink Ray attack from his eyes. The Big Octorok is fought in a shallow pool that it freezes, reducing your traction and making avoiding its pellets much harder. Well, I say “avoid” but you actually smack these back with your sword to stun it, allowing you to set fire to the petal on its back. This causes rocks to rain down and the Big Octorok to freak out; it also charges, spins around, and creates a smokescreen to limit visibility. Finally, the Gyorg Pair are easily the most unique boss in the game. This fight takes place in the skies of Hyrule on the back of two manta ray-like creatures. When riding the red one, you must dodge the smaller blue one and its fireballs and duplicate Link to attack the red one’s eyeballs. You then hop to the blue one, slashing its eyeballs, and repeat, watching for smaller green variants that fly past.
Vaati assumes some familiar forms in his attempt to spread darkness throughout Hyrule.
After battling past the many Darknuts that haunt Dark Hyrule Castle, you’ll finally confront the master swordsman and corrupted sorcerer, Vaati. Vaati takes many forms, one similar to Agahnim, one like Arrghus or Vitreous, and one like Nightmare’s final form, Dethl. The first form, “Vaati Reborn”, morphs him into a dangerous sorcerer protected by many small, spinning eyes. These encircle him, distracting you as he shoots fireballs, and must be destroyed to expose his big, eyeball-like weak spot. After enough hits, he encases the eyes in protective shields that must be sucked off with the Gust Jar. The eyes also fire vertical laser beams (just stand between them) and Vaati erratically teleports, making him a harder target to hit. For his second form, “Vaati Transfigured”, fought immediately after in a psychedelic landscape, Vaati takes his obsession with eyes to the next level. In this fight, you shoot arrows at the small sphere surrounding the central body to uncover four red eyeballs. You must then duplicate Link into the same formation and attack, continuing your assault when he’s stunned. However, Vaati spews destructible spiked balls and a spread of electrifying balls, which can be tricky to dodge especially considering his large hit box. After he’s defeated and Princess Zelda is revived, Dark Hyrule Castle collapses and Vaati’s true, final form, “Vaati’s Wrath” emerges. In this form, he pursues you, again firing balls of electricity, and sends his extendable claw arms under the ground to attack. When one pops up, stun it with the Cane of Pacci, shrink down, and venture inside to destroy the one real bladed eyeball amongst the fakes to literally disarm him. Repeat for the other arm and Vaati sends four electrical orbs your way from the small eyes in front of him, as well as a spread of larger orbs. To win, simply avoid the spread and duplicate Link in a line to deflect his smaller shots with your sword (the timing can be tricky), which will stun him and soon end his dreams of conquest.
Additional Features: As you’d expect, there are forty-four Pieces of Heart to find all around Hyrule. Collecting four will extend your life bar, so they’re worth seeking out. While some are just lying in the open, others require your items to reach or are gifted by fusing Kinstones. Opening chests, defeating enemies, and cutting grass also sees you collect Magical Seashells. Unlike the similar items from Link’s Awakening, these are essentially infinite in number (though your inventory maxes out at 999) and are traded for figurines in Hyrule Town, similar to the Pictobox side quest in The Wind Waker. This is quite a time-consuming task, however, as you must speak to the proprietor, set how many Magical Seashells you wish to trade (with the percentage of a new figurine increasing the more you wager), and then pull a lever to get an egg-like capsule containing the figure. The more places you explore and the more NPCs you meet, the more figurines you can get, with your Magical Seashells being replaced by the Carlov Medal once you obtain all 136 figurines. This, in turn, opens Baris’s house, gitfting you another Piece of Heart and the Phonograph, which acts as a sound test for the game. Similar to the Magical Seashells, there are a near-infinite number of coloured Kinstones to find. Fusing with NPCs unlocks new areas and gifts rewards that aid your quest, and completing all fusions awards you with a Tingle Trophy. Clearing the game earns you a Triforce stamp on your save game file; you can have up to three of these and also change the language to suit you. Finally, the Nintendo Switch version lets you play the European and North American releases (with subtle differences between them), rewind should you make a mistake, and create save states at will, dramatically reducing the game’s already low difficulty.
The Summary: I’ve wanted to play The Legend of Zelda: The Minish Cap for the longest time. Finding a physical copy was expensive, even unboxed, so I consoled myself with the knowledge that it would be another Zelda game that passed me by…until I upgraded my Nintendo Switch subscription and finally dug into it. Visually, the game is very impressive; colourful and lively, The Minish Cap is like playing a cartoon and I really enjoyed how it translated a Wind Waker aesthetic onto a traditional Link to the Past formula. The core gameplay is as reliable as ever; Link has some fun new toys to play with that mix things up, like the Gust Jar and Mole Mitts, though I do feel these could’ve been emphasised more. Similarly, the shrinking mechanic became tedious after a while. Generally, it’s simply anther way to get from one place to another and fuse with different NPCs rather than changing the puzzles in a meaningful way. Likewise, while the graphics represented these sections well, I think the developers could’ve done more with it, such as more bigger enemies and obstacles that meant using the duplication feature in interesting ways, rather than just hitting switches. Ezlo was also a pain in the ass, thankfully rectified in the post-game, and the Kinstone fusing got old quickly, too. This mechanic replaces traditional fetch and trading quests and is used as a shorthand for everything, limiting your exploration options and adding an element of grinding. The bosses were fun, if too few in number, but Vaati wasn’t the most enigmatic or threatening villain and the story felt uncharacteristically low stakes for a Zelda game. As a spiritual successor to A Link to the Past and the handheld games, The Minish Cap does well and the core Zelda gameplay is always enjoyable, but I don’t think this one lived up to its full potential and it ended up being more of a chore at times.
My Rating:
⭐⭐⭐⭐
Rating: 4 out of 5.
Great Stuff
Was The Legend of Zelda: The Minish Cap a staple of your Game Boy Advance library back in the day? Were you a fan of the Wind Waker art style and, if so, what did you think to the way it was implemented here? Did you enjoy the shrinking mechanic and the Kinstone fusions or did they become tedious for you, too? Did you ever fuse every Kinstone and collected every figurine? What did you think to Vaati as a villain? Would you like to see the Minish return? Which Zelda game is your favourite and how are you celebrating the franchise this month? Whatever your thoughts, share them below and be sure to check out my other Zelda content on the site.
On 21 February 1986, The Legend of Zelda(Nintendo EAD, 1986) was first released in Japan. The creation of legendary game designer Shigeru Miyamoto and Takashi Tezuka, The Legend of Zelda launched one of Nintendo’s most popular franchises. This year, I’ve been dedicating every Wednesday to Nintendo’s most famous silent protagonist, Link and his vast and enduring fantasy world of sword and sorcery.
Released: 22 September 2013 Developer: Nintendo EAD
The Background: Selling well over 6.5 million copies and widelyregarded as one of the greatest adventure games of all time, Shigeru Miyamoto’s original Legend of Zelda was a big success for Nintendo. Although its sequel was a more divisive title, it also sold well but both paled in comparison to the, game-changing, widelyacclaimedbest-seller that was The Legend of Zelda: A Link to the Past(Nintendo EAD, 1991). Not content with setting the template for the series going forward, A Link to the Past was also followed by a comic book and manga adaptation and an enhanced Game Boy Advance port. In 2009, development began on a new Zelda game for the Nintendo DS, one that emphasised communication. Miyamoto nixed this concept, however, and suggested a gameplay mechanic that would allow Link to merge onto walls as a 2D image; although this was met with praise, development was shelved to focus on launch games for the Wii U. The project was revived after the success of The Legend of Zelda: Ocarina of Time 3D(Grezzo, 2011) with an all-new team in place and reconfigured into a direct follow-up to A Link to the Past release exclusively on Nintendo’s 3DS system. The game’s top-down perspective raised a number of challenges for the team, resulting in a more slanted, 2.5D perspective to allow for greater field of view. Since the 2D mechanic had already changed their approach to puzzles and dungeons, the team also sought to give players more freedom by allowing them to rent items to proceed as they wished. A Link Between Worlds released to widespreadacclaim and became the second highest scoring 3DS game of 2013; reviews praised the innovative gameplay, the rental system and the level of challenge it offered, as well as the visuals and music.
The Plot: Apprentice blacksmith Link quests to rescue Princess Zelda from the clutches of the evil sorcerer Yuga, who seeks to resurrect the demon king Ganon using the power of the Seven Sages. When Yuga escapes through a rift into the parallel world of Lorule, Link follows, aided by a magic bracelet that allows him to merge into walls as a 2D painting.
Gameplay: The Legend of Zelda: A Link Between Worlds is a top-down, 2.5D action/adventure game that’s stylised in classic Legend of Zelda fashion; more than anything, the game is essentially an updated version of A Link to the Past, taking place in the same world, featuring many of the same characters and locations, and updating the gameplay mechanics to utilise the optional 3D effects of the Nintendo 3DS and the touch screen. Series protagonist Link is now able to travel in all directions smoothly and effortlessly with the 3DS control stick; he still can’t jump but he’s able to pick up and throw pots, small (and, later, larger) rocks, and open chests and doors with A and attack enemies with his sword using B. Holding down B will see Link charge up and release his patented Spin Attack and, when he acquires the Master Sword later on, he’ll send out an energy waves when at full health. When Link gets a shield, it’s assigned to the Left trigger; holding L will defend Link from most attacks and, later, defend against certain magical and energy-based attacks. Both of these items are automatically assigned to their respective buttons and cannot be swapped out, but Link will naturally acquire other items throughout the game which can be assigned to the Y button via the touch screen.
Link must now rent his equipment and their use is tied to an energy meter, which has pros and cons.
Items are incorporated very differently in A Link Between Worlds than in other Zelda games. While Link will still find the odd weapon or upgrade in a big chest in the game’s many dungeons, the majority of his weapons are now rented from the mysterious Ravio, a tradesman located in Lorule. Link has an energy meter that depletes as he uses each item but which will replenish over time, effectively giving him infinite ammo; energy potions found by slashing grass, smashing pots, or defeating enemies will also fill this gauge and you can even extend the length of it later in the game. When you rent an item, it’s yours to keep until your hearts are depleted; then it returns to Ravio’s shop and you need to rent it again, however you can later permanently purchase each item at the cost of a few thousand Rupees and also upgrade their efficiency and range by finding lost Maiamais throughout the two worlds. This system offers a range of freedom rarely seen in the Zelda series and effectively means you can tackle the game’s dungeons in any order you wish, however you will need to explore some dungeons first to find a key item needed to access or complete others. Personally, I’m not a huge fan of this system; I constantly walk around slashing at everything to fill up my Rupees, meaning I was easily able to rent every item and, later, purchase them all to load Link up with all of his weapons early on and a lot of the fun of exploring a dungeon is now lost as defeating a mini boss generally only yields a warp point or opens the way to the boss key rather than awarding an item.
Link can now become a 2D painting to reach new areas, avoid detection, and outsmart certain bosses.
A Link Between Worlds’ other big mechanic is Link’s ability to merge with walls and become a 2D painting for as long as his energy gauge lasts. This is often used in clever ways to add new dimensions to the dungeons, allowing you to race around the perimeter of a room or tower to reach new areas, switches, chests, and levels to progress. When in his 2D form, Link cannot attack or do anything except run, but that’s okay as you won’t have to worry about enemies until the finale. While Link cannot bypass cracks or blockades in this form, he can attach to other surfaces; so you’ll often merge with a moving block and then merge into another to reach a higher or further platform and it can be pretty interesting to play around with the mechanic. As the game progresses, this system is essential as it’s the only way to travel to and from Hyrule and Lorule; ominous dark slits appear all over the map and allow you to travel to each world and, since Lorule is in a fragmented state, you’ll need to go to certain areas of Hyrule, travel between a rift, and then work your way to your destination in Lorule. Despite this, however, I don’t think the mechanic lives up to its full potential; it’s essentially just a quirky means of solving puzzles and navigating dungeons and to travel between worlds and I do feel like the developers missed an opportunity to expand upon it with 2D sidescrolling sections or mini games. There are hidden challenge rooms you can find that often make innovative use of the mechanic, but it’s rare that you’ll need it in a boss battle and a lot of the uses it has could’ve easily been supplanted by your items.
Link’s items and new abilities will allow him to reach new areas and solve puzzles.
Thanks to the 3DS’ dual screens, the bottom screen makes item management and map navigation easier than ever. You can switch between the Hyrule and Lorule maps at the press of the screen, view your Rupee count and see how many Maiamais are hidden in each area, zoom in, and even place pins over the map (though you can’t label them so this can get a little messy). You can freely shuffle about your items and even make use of a quick-item function (though I never had a need for this); later, you receive a bell that lets you fast travel across the map courtesy of Irene the witch and her flying broomstick. This lets you fast travel to any of the weather vanes you’ve activated across the map; these vanes also act as your primary save point, which is a bit of a pain as I much prefer being able to save at any time and the vanes also have the gumption to encourage you to take a break if you’ve been playing for a while. If you’ve played A Link to the Past, the game world will be immediately familiar to you; even many of the dungeons are the same and the game has a very similar structure, with Link being tasked to find three pendants before venturing to a dark version of Hyrule to rescue the seven Sages. Link’s ability to navigate the world depends on what items you have; you won’t be able to blow up rocks without bombs, for example, or cross the desert without the sand rod or swim in water without the flippers and these items are also essential for uncovering secret caves, shortcuts, fairy fountains, and other areas. One new aspect you’ll come across a couple of times is the big bomb flower; you’ll need to press A to have this large bomb follow you and safely guide it to large cracked rocks to access new areas, but you need to be careful as one hit or knock and it’ll explode prematurely.
Puzzles and hazards feature in dungeons that’re largely vertically alignedto use the 3D feature.
For the most part, puzzles and dungeons will be immediately familiar to any Zelda player, especially anyone who’s played A Link to the Past. You’ll be lighting torches with your lamp and fire rod, or extinguishing them, to open doors or spawn chests, acquiring small keys to unlock doors, climbing ladders and stairs, riding a variety of moving, spinning, and temporary platforms, and activating a number of switches and pressure pads. Sometimes this means dragging a statue onto them, other times you need to trick a Wallmaster into hitting them, and occasionally you need to do both while standing on a third. Blue and red switches will raise and lower their respective walls, partially invisible platforms and mazes dog your progress, requiring more innovative use of flames, and you’ll be hammering down pegs or springs to reach new areas, crossing narrow platforms, and pulling or hookshotting levers to open doors. A couple of times, you’ll need to find eyeball-like orbs to toss into statues to progress, or create temporary platforms using the ice rod, or melt away blocks of ice while skidding on slippery floors. You’ll be diving into water, crossing lava pits on pop-up columns that you must also guide boulders over, riding wind currents, dropping caged bridges to create safe passage, and making use of warp tiles to fast travel about. Many dungeons require more vertical navigation to utilise the 3D function, meaning you need to find new ways to travel upwards, push statues or fall down to lower levels to reach items and doors. You’ll also need to watch for flaming hazards and spiked logs, use your bombs to bring in some light to solve puzzles, use your hookshot to pull rafts across water and lava, navigate foggy mazes, rescue a thief girl and bring her safely to the dungeon’s exit, and even travel outside of some dungeons to reach new areas. Thankfully, you can make use of each dungeon’s compass to help you find your way and you automatically have a map available when you enter, though the only way to save is to exit to the outside, which respawns any enemies you’ve defeated.
Graphics and Sound: Since I am a big fan of the classic, top-down perspective, I cannot fault A Link Between Worlds’s presentation. This was the best that a 2.5D Zelda had looked at the time and I love how the game has a kind of plasticine/figurine look that brings the characters to life in a way that recalls both the toon style and the classic Link to the Past aesthetic. Link is a squat, chubby little swordsman who grunts, screams, and pants as he attacks, gets hurt, or is low on health. He trots around nicely, all of his attacks and weapons are crisp and smooth, and he exudes a lot of personality and determination in his stances, victory poses, and facial expressions during the game’s few more dynamic cutscenes. For the most part, the game uses traditional text boxes and in-game graphics as non-playable characters (NPCs) deliver exposition or threats to Link but, sometimes, the game switches to a more cinematic presentation to showcase Yuga’s power or introduce new elements, like the 2D mechanic and Lorule.
Hyrule is largely the same as before but brought to vivid life by the colourful, 2.5D aesthetic.
As already stated, the game world is an almost exact recreation of the Hyrule seen in A Link to the Past; all the areas from that game are back, brought to life in eye-catching 2.5D and bolstered by the 3D effect if you can stomach it. There are numerous little new touches here, too, such as birds that fly away as you come close, Majora’s Mask appearing as an Easter Egg, and an array of paintings inside the now peaceful Hyrule Castle. Locations such as the Eastern Palace, Tower of Hera, Desert Palace, and Skull Woods all return, as do the Lost Woods (where you must again venture to claim the Master Sword), Kakariko Village (complete with Cuccos and blacksmith), the haunted graveyard, Zora’s Domain, Lake Hylia, and Death Mountain (complete with falling rocks from the erupting volcano). This naturally means that you’ll venture into many of the same dungeons, though the means by which you enter and their layouts and rewards are somewhat different, and that the game includes many remixed themes from A Link to the Past. One thing I really enjoyed about the soundtrack was how it slowly builds up in the early going; the full, triumphant Zelda theme doesn’t kick in until you acquire the Master Sword, allowing for a clear and recognisable feeling of accomplishment. This is matched by the progressive difficulty of the game; to start with, the dungeons are quite short, and the enemies only take a few swipes of even your normal sword to kill but, once you travel to Lorule (via a quick little cutscene that only slightly outstays its welcome), the dungeons become much more complex and the enemies, especially those on the overworld, become much tougher.
While similar to the Dark World, Lorule is its own beast, with remixed dungeons, enemies, and bosses.
Although functionally similar, both in concept and visual execution, to A Link to the Past’s Dark World, Lorule is actually a completely different, desolate parallel dimension. Despite this, many of its areas are analogous to the Dark World and its dungeons, including a ransacked version of Kakariko Village, the Thieves’ Town, a skeleton-infested perversion of the Lost Woods, a poisonous and murky swamp, and the lava-spewing horrors of Turtle Rock. Perhaps my favourite aspect of Lorule was that Death Mountain is now a frozen wasteland and home to the Ice Ruins which, while essentially a remixed version of A Link to the Past’s Ice Palace, was enough of an alteration to hammer home how different the two worlds are. This is further reinforced by the different, far more ominous overworld theme, the fragmented nature of Lorule (some areas are inaccessible without finding a rift part in Hyrule), and the tumultuous dirge hanging over the central Lorule Castle. It’s a far cry from Ganon’s Tower and the Pyramid of Power, but Lorule Castle is seeped in a dark energy that can only be breached by the Sages’ power and the Triforce of Courage and is a perverted mirror of Hyrule Castle, awash in thunder and lighting and featuring almost every gimmick seen in previous dungeons, alongside some remixed boss battles. Furthermore, Lorule is home to counterparts of Link, Zelda, and even Ganon in the form of Princess Hila, Ravio (spoilers!), and Yuga as well as a gaggle of thieves and distraught citizens just trying to survive as their world crumbles around them.
Enemies and Bosses: Both Hyrule and Lorule are populated by swarms of enemies who will be immediately familiar to A Link to the Past players. Blobs (including regular green one and electrifying yellow ones), bees, crows, Chasupas, Tektites, Deadrocks, Octoroks, Popos, rats, Poes, sand crabs, Ropes, and Like-Likes are commonplace across Hyrule but, once Yuga’s plan is set in motion, sword, spear, and archer soldiers start patrolling the overworld as well. Variants of these can be found in Lorule, such as the Dactos, Hyus, Ropas, and snap dragons but Lorule’s enemies are far more dangerous than Hyrule’s. Guys like the bomb- (or snowball) tossing Hinox, pig-like Taros, flame-spewing Zarak, shield-carrying Moblins, and far tougher Lorule soldiers can not only take a lot of punishment but also dish it out, too, immediately turning your carefree adventure into a fight for survival. And this isn’t even factoring in the formidable Lynels, teleporting elemental Wizzrobes, mummy-like Gibdos and the Freezors (who are extremely susceptible to fire…), jellyfish-like Biris, cyclopean Eyegores, mimicking Goriyas, and terrifying Wallmasters. Some enemies, like the mace-wielding soldiers, nimble Stalfos, sand worm-like Devalants, sliding Pengators, and flaming Gimos act as mini bosses in the game’s dungeons. Generally, this means they attack as a group or alongside other hazards, like flying tiles, moving platforms, or flaming obstacles, though the two flaming Heedles have lava pools in their path and require the tornado rod to defeat and you’ll need to time your attack against the Gigabari and it spawn to avoid being electrocuted.
Although easy enough in their first encounters, the game’s returning bosses are more formidable later.
The first boss you’ll face is the game’s primary antagonist, Yuga, who you first battle in the Eastern Palace. Yuga fires projectiles from across a pit hazard and hides in the wall as a painting when you get close, so you need to stun him with arrows to land a hit. As the battle progresses, Yuga gets faster and more aggressive and races around the room as a painting but you can simply wait for him to pop out to continue your assault. The second boss I fought was Moldorm, one of many returning bosses from A Link to the Past. This large, spherical worm-like thing slivers about on a small caged platform trying to knock you over the edge or down a hole into the bladed hazards below. Simply avoid this and slash at its tail to defeat it but beware as it becomes faster and more erratic as the fight progresses. I finished up Link’s initial quest by facing Margomill, a strange column with a fearsome central eye that awaits in the House of Gales; Margomill spins around the room trying to push you down the bottomless pit that surrounds the platform you battle it on. You’ll need to use the tornado rod to avoid its attack and reach its eye; however, every time you deal damage, it grows a new part to its body to make the eye harder to reach. Both Yuga and Moldrom return as mini bosses in Lorule and Hyrule Castle, respectively; while Moldorm isn’t too difficult, despite the expanding and contracting walls making it a close-quarters fight, Yuga is far more formidable. In this bout, you must strike the correct duplicate of Yuga or be forced to fend off increasing waves of enemies while avoiding his various magical projectiles. The real Yuga is identified through his glowing staff, but this battle can get pretty tough if you don’t keep your eyes open; at the same time, I found it just as easy to camp out in a corner and slash away, dodging his projectiles until I hit the right Yuga!
Bosses will be more or less challenging depending on the order youchallenge them and the items you have.
Once you’re in Lorule, you can effectively tackle its dungeons and bosses in any order provided you’re renting the right equipment. The first of the next set of seven bosses I fought was Stalblind, a monstrous spirit armed with a large sword and shield who you battle on a small platform surrounded by a bottomless pit. Stalblind makes innovative use of the 2D mechanic in that you need to merge onto his shield to stun him so you can attack, though you’ll need to avoid his dark magic. Stalblind’s attacks become more aggressive, but also more predictable, as the fight progresses; he eventually ditches his shield, busts out his own version of the Spin Attack, and even sends his head flying around to spit fire at you, though he’s left vulnerable when his sword gets stuck in the ground. As I next took on the Desert Palace next, I fought Zaganaga; this was quite a complex battle as you need to use the sand rod to create temporary platforms and reach the smaller columns to attack Zaganaga, who constantly moves around the arena and spits projectiles. Eventually, it switches to a far more devastating blast of sand and proved to be my first real challenge of the game, meaning my next boss, the returning Arrghus, was a cake walk in comparison. As long as you have the hookshot, Arrghus is barely a threat; simply extract the Arrgi surround it and destroy them, then avoid being squashed as it bounces around and the jets of steaming hot water and it’ll go down in no time. I fought Grinexx next, which is a massive rock turtle who blasts lava plumes up from a lava pit below. As it passes by the gaps in your platform, you must drop ice on it with the ice rod to damage it and eventually bring it to the surface. Then you need to attack its snapping head while blocking or avoiding its spinning shell attack and explosive shockwave for a fun battle that’s not too challenging as long as you’re quick on your feet and with the ice rod.
Repackaged bosses offer new challenges and some even require the use of Link’s new 2D abilities.
After that, I ventured to the Dark Palace and fought the Gemesaur King, which is functionally the same as A Link to the Past’s Helmasaur King; in addition to swinging its massive tail, the Gemasaur King spits crystals in a spread and is protected by its gem-encrusted helmet, which you must shatter with bombs. Once this is destroyed, Rupees scatter about, the Gemesaur King’s projectiles increase, and it snuffs out the torches to try and trample you in the dark. Relight the torches to expose it and unload with your sword to finally put it down for good but watch for its bite and surprising speed! The Knucklemaster awaits in the ominous Skull Woods; a giant Wallmaster encased in a gauntlet and sporting another glaring eye, this creature mainly attacks by flying at you as a clenched fist. You need to merge with the walls or use the tornado rod to avoid this attack and stun it so you can hit it, but it’ll get pissed off and try and squash you, which also causes it to destroy large chunks of the floor and thereby restrict your movements, but this was still another fun and pretty simple boss battle. The last of the regular bosses I fought was Dharkstare, which is basically the same boss as A Link to the Past’s Kholdstare; you need to melt its protective ice barrier with the fire rod while avoiding it as it hops about. You can then attack the unshielded monster, but it’ll speed up and become more aggressive as it takes damage; Dharkstare also encases you in use using a triangle of freezing energy and can be quite a frenetic boss, but it’s not too challenging to tackle, even when it doubles its freezing projectiles, despite the slippery ground and bottomless pit.
Yuga channels the power and ferocity of Ganon for an epic, multi-stage final battle!
Once you’ve rescued the seven Sages, you’ll venture into Lorule Castle. Here, you’ll battle Moldorm, Gigabari, and Arrghus again in slightly different and more taxing encounters, alongside battling a Lorule soldier wielding a flaming mace; defeating all four will break the seal on the door and allow you to reach the top floor of the castle and its throne room, where Hilda (who had previously offered assistance as a disembodied voice) turns against you to acquire the Triforce and save her land. Her agent in this endeavour is an empowered version of Yuga, who fuses with Ganon’s Dark Beast form and gains both his dark power and the power of the Triforce of Courage for a two-stage final battle that’s fundamentally very similar to the final showdown against Ganon from A Link to the Past. Yuga Ganon wields a large trident that blocks your attacks and he also teleports around the throne room; you need to avoid his swipes and strike from behind with your sword, or from a distance with your bow. As he takes damage, Yuga Ganon will add thrusts and a charging attack to his arsenal, as well as rain projectiles down on you and toss his trident in a spinning arc. Once you’ve defeated his first form, he’ll absorb Hilda and the Triforce of Wisdom; now, he floats above the arena and launches projectiles that you must deflect back at him in a game of dead man’s volley. Succeed and he’ll be forced into a 2D painting; since he’s invulnerable to conventional damage, Zelda will gift you the Bow of Light, which you can only use when you’re in 2D and in this battle. You need to merge with the wall, distract him with a Light Arrow, then unmerge and merge behind him to force him out of the wall so you can attack with your sword. After that, Yuga Ganon adds a charge to his 2D attack, forcing you out of the wall faster, and finally shrugs your arrow off entirely, forcing you to fire it in the opposite direction for the final blow, with him summoning purple blasts of energy that turn into unblockable and unkillable bats between hits
Power-Ups and Bonuses: As ever, Link will pick up Rupees and hearts to purchase new items and replenish his health, respectively. Fairy fountains will also refill his health, or yield small fairies that you can catch in a net and keep in a bottle to refill some of your hearts when you’re defeated. Link can also store various potions in his bottles, which he can have brewed up for him by gifting the various monster parts he finds to an old witch. Link’s maximum health can be increased by finding four Pieces of Heart or defeating bosses, which yields a Heart Container; as mentioned, he can also increase his energy gauge by finding the Stamina Scroll but he can find a Blue and Red Mail that will not only change his outfit but also dramatically increase his resistance to damage. Finally, the Bee Badge has wild bees help rather than hinder you, the Zora’s Flippers allow you to swim and dive in water, and the Pegasus Boots let you charge around with the Right trigger to knock down keys or shake Maiamais, Rupees, or apples out of trees. Many of Link’s most recognisable weapons return in A Link Between Worlds; the bombs, boomerang, hookshot, and bow are all present and accounted for and function exactly as you’d expect. I never really found much use for the boomerang, especially compared to the fire and ice rod, which are essential for a couple of dungeons. The sand rod is only really useful in and around the Desert Palace, same with the tornado rod, which I didn’t use much past the House of Gales. You can also get a pair of Hint Glasses, which will expose a helpful ghost who will offer assistance in exchange for a Play Coins (acquired automatically if you walk around with the 3DS in your pocket). You can also purchase scoot fruit and foul fruit, which allow you to quickly exit dungeons and defeat all onscreen enemies, respectively, and upgrade the efficiency, range, and effectiveness of each of Link’s weapons by finding all one-hundred lost Maiamai and bringing them to their mother.
Additional Features: These lost Maiamai are all over Hyrule and Lorule; you’ll hear them squeak when they’re close by and your map will show you how many are in a given arena, and you’ll need to knock them out of trees, uncover rocks, cut down grass, and push them off walls using your 2D ability. Finding all one-hundred will upgrade Link’s Spin Attack to the more powerful Great Spin Attack in addition to powering up each of his weapons. There are also five bottles to be found, with some being gifted after you complete tasks, though there’s no trading sequence to complete here. There are a couple of challenges available to you, from navigating obstacle courses to races, Rupee-collecting games, and Octoball Derby, all of which yield Rupees or a Piece of Heart. There are twenty-eight Pieces of Heart to be found, either in hidden caves, these mini games, or accessed using your different items and collecting them all with vastly increase your chances at the Treacherous Tower, where the Tower of Hera once stood. In here, you’ll face off against waves of enemies in three different difficulty modes, with each one costing more to take on, culminating in a boss battle and earning you higher Rupee rewards and eventually an upgraded net. You can also acquire a pouch that lets you use two items instead of just one, find Master Ore that is used to upgrade the Master Sword, and completing the game will unlock the more challenging “Hero Mode” for you to play through.
The Summary: This was only my second playthrough of The Legend of Zelda: A Link Between Worlds, and I first cleared it before I beat its predecessor, A Link to the Past, and yet I really enjoyed this fun little handheld throwback to a new-bygone era of Zelda gaming. Don’t get me wrong, I enjoy the large, expansive open world nature of modern Zelda games but the top-down, 2D/2.5D perspective is very nostalgic and timeless for me and always my preference. The game looks and sounds fantastic; at the time, it really was the most visually impressive revamp of the classic Zelda style and it’s great to see this world come to life with this plasticine aesthetic. I enjoyed how the game was both familiar and yet different enough to be its own beast; it’s extremely similar to A Link to the Past and, in many ways, is a modern remake of that game but has enough new mechanics to be unique. I may not have loved the rental system, energy gauge, or the 2D mechanics, but they added new levels of freedom to the tried-and-true Zelda gameplay; I just think they could’ve done a little more with them rather than make them simple gimmicks. Although I didn’t play with the 3D effects on, the game is nicely geared towards it with a lot of vertical sections; I enjoyed the remixed tunes and locations, and the returning or altered bosses, even though the game was a little too easy at times thanks to my habit of farming Rupees and your ability to hold 9999 right off the bat (wallet restrictions might’ve helped with this). Ultimately, this was a really enjoyable, classic Zelda experience with a sprinkling of fun new mechanics and colourful characters that worked perfectly as a follow-up to A Link to the Past while still expanding upon that game’s lore in interesting ways.
My Rating:
⭐⭐⭐⭐
Rating: 4 out of 5.
Great Stuff
Have you ever played The Legend of Zelda: A Link Between Worlds? If so, how do you think it compares to A Link to the Past and did it work as a sequel for you? What did you think to Lorule and do you think there was enough to distinguish it from the Dark World? Did you enjoy the rental system and Link’s ability to turn into a 2D painting? Which of the dungeons, bosses, and weapons was your favourite? What did you think to the visual presentation of the game and the incorporation of the 3D mechanic? Did you ever find all of the lost Maiamai and fully upgrade Link’s arsenal? How are you celebrating the franchise this month? Whatever your thoughts on A Link Between Worlds, leave a comment below or share them on my social media.
Sonic the Hedgehog was first introduced to gamers worldwide on 23 June 1991 and, since then, has become not only SEGA’s most enduring and popular character but also a beloved videogame icon and, in keeping with tradition, I will be dedicating the entire month to celebrating SEGA’s supersonic mascot.
This review has been supported by Chiara Cooper. If you’d like to support the site, you can do so at my Ko-Fi page.
Released: 20 June 2013 Originally Released: 22 September 1995 Developer: SEGA Original Developer: Aspect Also Available For: Game Gear, Gamecube, PC, PlayStation 2, PlayStation 4, PlayStation 5, Xbox Series S/X, Xbox One
The Background: Thanks to SEGA largely ignoring them these days, many people forget that Sonic’s iconic and much-lauded Mega Drive titles were accompanied by a fair few videogames for their 8-bit consoles. The 8-bit versions of Sonic the Hedgehog (Ancient, 1991) and Sonic the Hedgehog 2 (Aspect, 1992) were considerably different from the 16-bit counterparts, featuring entirely different Zones, gameplay gimmicks, and features, and this continued to Sonic’s other8-bit titles, which tended to be more experimental compared to the mainline games. This is best evident in Sonic’s long-time kid sidekick, Miles “Tails” Prower , getting a few spin-off titles of his own, with this particular game facing criticism upon release for its slower pace and only really finding its fans later in life as retrospective reviews appreciated the role-playing elements of the game, though the back-tracking and inventory management was seen as a downside. Since Tails Adventure was a Game Gear exclusive title back in the day, I didn’t play it until it was featured in Sonic Adventure DX: Director’s Cut(Sonic Team, 2003) and, even then, I never actually sat down and put effort into playing through it until I picked up this Nintendo 3DS port of the game.
The Plot: Before Tails met Sonic the Hedgehog, the two-tailed fox cub used his various gadgets and inventions to travel across Cocoa Island to liberate it from the Battle Kukku Empire, an evil empire that sought to conquer the world using the legendary Chaos Emeralds.
Gameplay: Tail Adventure (oddly referred to as “Tails Adventures” in-game) is a 2D, sidescrolling action/adventure game that emphasises slow-paced exploration and backtracking, making it more like a “Metroidvania” style game than a high-speed platformer. Players are placed into the role of cute little two-tailed fox Tails, who plods along a number of fairly samey island environments tossing bombs, acquiring new gadgets, and using his twin tails to fly to new areas. Although you don’t have to contend with a time limit when playing, Tails’ flight is restricted by a meter, which drains the longer you fly; rather than tapping A to gain height, this will cancel the flying state so you need to use up on the directional pad (D-pad) to get higher and you can extend your flight meter by finding the six Chaos Emeralds across the game’s stages. The B button sees you make use of your currently equipped item; Tails starts off with a regular bomb, which can be tossed when standing still or dropped when flying, but can carry up to four at once and you can switch between them from the pause screen by pressing left or right on the D-pad. Tails can look up and duck down to scroll the screen vertically, which is useful for spotting enemies just out of sight or spikes, and can even toss bombs while ducking to take out smaller enemies. He will also automatically clamber up small ledges and walls when near to or jumping to them, but his default walking speed is incredibly slow and you’re not able to perform signature Sonic moves like the Spin Dash or Super Sonic Spin Attack without a specific gadget.
Tails embarks on his own solo adventure with his trusty bombs and helicopter tails.
As ever, Golden Rings are your life source; however, this time around, you lose a certain number of Rings depending on how you take a hit and they act more like traditional hit points in a role-playing game. You can pick up Rings from defeated enemies or find them either lying around a level or behind destructible walls and they’ll respawn when you leave the area, allowing you to farm them if need be, and Chaos Emeralds will also increase your maximum Ring count. Once you clear a stage (each of which is generally comprised of about three different screens with different paths accessible by your different gadgets and skills and capped off with a boss battle), Tails can navigate across Cocoa Island using a map screen. From here, you can jump back to Tails’ House at any time to swap out your gadgets, review your password (necessary to continue your game when you get a game over), or kit out Tails’ submarine, the Sea Fox. When in the Sea Fox, the game becomes a sidescrolling shoot-‘em-up of sorts as Tails explores new areas underwater, blasting at enemies and blocks with missiles and mines to reach new areas on and around Cocoa Island. Like Tails, the Sea Fox can be equipped with up to four different gadgets but it also comes with a drill appendage to plough through walls, though you’ll need to manually turn the submarine around with the A button, which can be a bit clunky.
Hop in the Sea Fox and explore your environments to find new gadgets and solve puzzles.
The bulk of the game is focused on exploration; at first, you’re somewhat limited to where you can go and will be teased by upgrade pods and areas of each stage that you can’t reach yet. Tails can blow through blocks and walls, push rocks and springs to climb and get higher, and often has to contend with blasts of wind that either hold him down, push him back, or blast him upwards. Many stages are rife with spikes, fireball-spewing lava pits, or in pitch black darkness, requiring careful navigation or new gadgets to get through; others are slightly maze-like and contain multiple exits, with some depositing you back on the map screen rather than advancing you forwards. Each time you get a new item or gadget, it’s worth equipping and experimenting with it to see how it might open new paths to new upgrades or stages in places you’ve already explored, and this is actively encouraged as it’s the only way to complete the game. You’ll be revisiting many areas but especially returning to Lake Rocky as you upgrade the Sea Fox, and a number of stage hazards will slow you down; you’ll have to redirect conveyor belts with your wrench, blow through walls with your bombs or napalm, dodge missile turrets, press switches to lower electrical barriers, and send your little Remote Robot through small gaps to grab items or solve puzzles. Occasionally, you’ll need to perform some tricky platforming, often with enemies hovering right in the way, making your way upwards on drafts of air and watching for ceiling spikes; other times, you’ll be hopping around on rapids and being blasted around under water (with no fear of drowning, thankfully), and returning to Tails’ House again and again if you get halfway through a stage and realise you don’t have the right item equipped (though there is a teleporter than makes this much faster than going back through the whole stage).
Graphics and Sound: If you’ve played any of the other 8-bit Sonic videogames, Tails Adventure will look and sound very familiar to you; many of the sounds (such as Ring collection and boss hits) are recycled from those games and the music is right in line with the jaunty chip tunes of those often overlooked titles. While the heads-up display is very sparse, even for an 8-bit Sonic title, the game does suffer from noticeable slowdown when there’s a lot happening onscreen. Not only does the game include include the signature “SE-G-AA!” jingle during the opening and a brief opening sequence in which Tails and Flickies are panicked by the Battle Kukku Empire, other cutscenes play when bosses appear or when Tails hops into the Sea Fox. Tails also has a cute idle animation where he digs in the ground or fiddles with his wrench, his flying sprite changes and becomes more dynamic as his meter increases, and he even has a pretty spectacular death animation that sees him sent flying.
While the environments can be a bit bland, the sprites and animations are pretty good.
There are twelve stages in Tails Adventure, though many are quite similar, with recycled foregrounds and sprite elements being recoloured and shuffled about. There are some interesting visuals considering the limited hardware, however; Volcanic Tunnel is full of flickering fire, and lava pits, and Cavern Island is beset by water rapids. While the second part of Polly Mountain is similar to Volcanic Tunnels except requiring the Night Vision item to cope with the darkness, the first part is very vertical, with a pretty impressive landscape in the background and gusts of wind to contend with. Green Island sees you venturing through hollow trees, Caron Forest has a big waterfall in the background, vines hanging down, and tree trucks as bridges. When in the Sea Fox, you’ll explore underground coral reefs and hop around on rapids above water as you blast at enemies and, after conquering all of the main stages, the Kukku Empire’s Battle Fortress rises from the map and you end up exploring a purely mechanical location that recalls classic Sonic stages like Scrap Brain Zone.
Enemies and Bosses: The Battle Kukku Empire is made up of heavily-armed birds and robotic enemies not unlike Doctor Eggman’s Badniks; the Battle Kukku Empire’s birds pilot little hover pods and mechanical walkers, firing projectiles or flamethrowers at you, or fly around dropping bombs on you. Smaller ones can be harder to hit and move a lot faster, quickly being spawned in from gates, and the Kukkus will pilot their own submarines and even snipe at you from behind the environment by the end. You’ll also have to contend with robotic bats and mice, but probably the worst enemy in the game is a simple beehive that keeps spawning in bees until you destroy it, which causes the queen to pop out and chase after you, so it’s best you use your Napalm Bomb to quickly dispatch these little buggers.
A number of mechanical bosses will test your bomb-throwing prowess.
There are eight bosses to contend with throughout Tails Adventure, with one fought twice and some new upgrades being acquired after defeating them, and the first one you’ll battle with is the Bird Walker amidst the flaming background of Poloy Forest. This is a pretty simple boss that stomps and hops towards you and tries to fry you with its flamethrower; you can toss your bombs at it, or fly over it and drop them, but it’s worth noting that it can also shoot flames from behind. At the end of Cavern Island, another mechanical boss awaits: Mecha Golem (5-gou), which attacks with a swinging arm, causes boulders to rain from the ceiling, and takes a few more hits to destroy as you have to first blast off its cockpit to expose the pilot, and then continue attacking to finish it off. A similar boss is faced at the end of the Volcanic Tunnel; entirely stationary, it sits there firing a whole mess of projectiles at you. Some of these can be destroyed and you can avoid others by flying behind it and attacking the cockpit, but this was actually the most difficult boss in the game for me because of the sheer number of projectiles onscreen and the slowdown they caused. After finally getting the Sea Fox upgraded, you’ll encounter the Kukku Cruiser in Lake Rocky, which is a pretty simple and non-threatening boss battle as you simply avoid the depth charges it drops and unload on it with your Anti-air Missile until it goes down in flames.
The Battle Kukku Empire’stop dogs offer some diverse challenge.
The Battle Kukku Empire’s executives are somewhat more memorable boss battles; the first one you face is Battle Kukku XVI (or “Speedy”), a green rooster who initially confronts you on Polly Mountain in what amounts to a race. While you can throw bombs at Speedy and it registers as a hit, you’re actually supposed to avoid him (and the ceiling spikes) as you fly up without the restriction of your regular meter. Speedy will dart down at you like an arrow and can be tricky to avoid but gives up a Chaos Emerald once you reach the top. You’ll fight him properly on the Battle Fortress at the end of the game, however; this time, Speedy travels around the arena and fires a big projectile bolt at you. You need to anticipate where he’s going to appear or come around next and toss a bomb at him before quickly dodging his projectile and being hit by him as he barges past you, which can be tricky. Doctor Fukurokov also awaits on the Battle Fortress, though you don’t battle him directly; instead, he drops you into a mechanical arena full of lasers and spikes but these won’t harm you as you’re directing your Remote Robot through a narrow maze and having it drop a rock on the doc’s head. Finally, after besting Speedy, you’ll fight with the final boss, Great Battle Kukku XV; this large bird grabs and throws you if you get too close and tosses bombs at you. While you can fly over these, and him, to avoid many of his attacks, he becomes much more aggressive as you deal damage, spewing out bombs and walking across the arena to make himself a more difficult target to hit.
Power-Ups and Bonuses: To begin with, Tails is quite limited in his abilities; he can throw a regular bomb and replenish one Ring of his health with each Golden Ring he picks up, but he won’t become more versatile without exploring high and low for Chaos Emeralds to increase his flight meter and maximum Ring count and acquire additional gadgets to progress further and increase his attack repertoire. Tails can acquire new bombs that help him progress in different ways; the Remote Bomb can be rolled through small gaps and remotely triggered to destroy anything blocking your progress, the Large Bomb destroys all onscreen enemies and bigger obstacles, the Napalm Bomb sends a burst of flames out for wide coverage and to get past dense grass, and the Triple Bomb sends a spew of explosions out. You can also acquire Night Vision goggles to light up dark areas, Speed Boots to dramatically increase Tails’ walking and flying speed, a Hammer for a close-range attack, and a Helmet to deflect enemy projectiles.
Tails has a variety of gadgets and upgrades available to him to help him fight and progress.
Tails can use his Wrench to reprogram conveyor belts, teleport back to his house with the Teleport Device to save you backtracking, and lift heavy objects with the Super Glove while the Item Radar helps you find hidden items and the “Raido” lets you change the in-game music, Probably Tails’ most useful item is the Remote Robot, and indestructible little robot that you can direct, hop, and fly through narrow passageways to solve puzzles, and you can also grab Sonic, Fang, and Knuckles items to perform a Spin Attack, increase your chances of finding Rings, and punch enemies, respectively. The Sea Fox can also be upgraded with new weapons, such as mines and Anti-air Missiles to clear enemies or blocks below and above you, respectively, and the Vulcan Gun and Proton Torpedo to shoot down enemies in front of you. You can speed yourself up, gain the ability to jump up rapids by holding A and releasing it at peak charge, destroy all onscreen enemies with the Spark, and use Extra Armour for an invincibility that protects you until you leave the current screen.
Additional Features: There are six Chaos Emeralds and a total of thirty-four gadgets to be found in Tails Adventure. While you’ll naturally come across many of these, especially the ones that are necessary to progress, others are more hidden and optional. When you finish the game, you’ll be told your percentage of items found, but it appears as though you can’t return to your cleared save file as selecting ‘Continue’ simply restarted the game for me. Naturally, this 3DS version of the game allows you to save at any point with its save state feature, but you can also apply borders to the game, including a Game Gear border to recreate the original gaming experience.
The Summary: Although I never owned a Game Gear growing up, Tails Adventure has been on my list for a long time. I’ve dabbled with it, generally on Sonic Adventure DX: Director’s Cut, but never actually sat and properly played it until now. It’s definitely a curio amongst Sonic’s vast library of videogames and obviously very different from its mainline titles. That’s not necessarily a bad thing, though; if you like Metroidvanias then there’s a bit of that flavour here, if maybe a little dumbed down for kids. The game has a very slow, deliberate, whimsical pace, feel, and aesthetic to it that makes it very visually appealing, if not necessarily too challenging or action-packed. It can be tricky and an obstacle to try and figure out what gadgets you need to progress and which stages to revisit and when to get everything you need, and a lot of the environments are a bit bland and repeated, but it was fun discovering new pick-ups and upgrades for Tails and his cool little submarine. I enjoyed how it wasn’t just Dr. Eggman and his Badniks and that the villains were visually interesting and quirky and I’d love to see the Kukku Empire crop up again in a videogame some time. Tails fits this genre of videogame very well so I could totally see this getting a revisit or a new coat of paint similar to Captain Toad: Treasure Tracker (Nintendo EAD Tokyo, 2014) if SEGA ever actually decided to dust off their sadly forgotten 8-bit titles. With some fun, cartoony sprites, a variety of interesting weapons to and secrets to find, and some wacky boss battles, Tails Adventure more than makes up for it slack of challenge and the limitations of its hardware with its presentation and tight gameplay.
My Rating:
⭐⭐⭐
Rating: 3 out of 5.
Pretty Good
Are you a fan of Tails Adventure? Did you enjoy the emphasis on exploration and item usage as opposed to high-speed adventuring? Which of Tails’s gadgets was your favourite to use? What did you think to the Battle Kukku Empire and their quirky bosses? Did you ever own this on the Game Gear or did you play it in a later compilation or port? Would you like to see the Sonic franchise dabble in other genres using their many characters such as this? Whatever your thoughts on Tails Adventure, leave them below or drop a comment on my social media and be sure to check out my other Sonic content!
So, for no better reason than “Mar.10” resembling Mario’s name, March 10th is widely regarded as being “Mario Day”, a day to celebrate Nintendo’s portly plumber, an overalls-wearing mascot who literally changed the videogame industry forever and shaped the home console market of the nineties.
Released: 27 January 2014 Originally Released: 10 May 1999 Developer: Nintendo Original Developer: Nintendo R&D4 Also Available For: Game Boy Color
The Background: After his debut in Donkey Kong(Nintendo R&D2/Ikegami Tsushinki, 1983) and graduating to his own arcade title alongside his brother, Luigi, Shigeru Miyamoto’s Mario took the world by storm with Super Mario Bros. The game was extremely popular, selling over 40 million copies and was pivotal to Nintendo saving the videogames industry from destitution. The game is also no stranger to being ported to other systems; it was a 16-bit makeover for Super Mario All-Stars (Nintendo EAD, 1993) and re-released on the Nintendo Wii to commemorate its twenty-fifth anniversary but, before that, though, Super Mario Bros. was ported to the Game Boy Color in this version of the game. Although Super Mario Bros. Deluxe suffered from a smaller screen size due to its new portable format, the game featured a few new features, such as additional animated elements, challenge modes, compatibility with the Game Boy Printer, and bonus levels, all of which saw it ranked as one of the greatest Game Boy games of all time and it was highly praised for its additional features. The game later made it onto the Nintendo 3DS Virtual Library, and gamers were even able to receive a free copy by registering their Nintendo Network ID, which further bolstered the game with the 3DS save state features and finally gave me my best opportunity to play through this classic title after years of struggling with Mario’s classic 2D efforts.
The Plot: The Mushroom Kingdom has been invaded by Bowser, King of the Koopas, and this wacky army, the Koopa Troopas. After transforming the citizens into inanimate objects and kidnapping Princess Toadstool, Mario and Luigi set out to liberate the Mushroom Kingdom and rescue the princess from his clutches!
Gameplay: As an updated port of perhaps gaming’s most famous 2D, sidescrolling platformer,Super Mario Bros. Deluxe looks, sounds, and plays exactly the same as Super Mario Bros. except you have reduced visibility due to the screen size and the scrolling is a little janky at times. This basically means that the left side of the screen catches up to you pretty fast, which can be an issue as you can’t freely backtrack in the level (or “World”) so it can cause you to plummet to your death if you’re not careful, and it’s not always immediately clear what dangers or goodies are above or below you, meaning you need to use the directional pad to shunt the screen up and down for a better look but, otherwise, the controls and presentation are exactly what you’d expect from Nintendo’s breakout title. You’re played into the overalls or Mario (or Luigi, if you press the Select button prior to entering a World), who can run by holding B or Y and jump by pressing A. Mario will cain extra height and distance if you hold down the jump button and jump from a run, and jumping on enemies is his primary way of dispatching them. While Mario’s physics are pretty tight and responsive, he can be slippery and awkward at times, especially when bouncing off springs, but Luigi is even worse since he has far less traction and a less manageable, higher jump.
Run and hop around squashing baddies, clearing gaps, and swimming through treacherous waters.
As ever, your goal is to move from the left side of the screen to the right and reach a goal flag within a time limit; this timer is pretty generous and it’s only on later Worlds where the game throws repeating paths at you that it can get a bit tricky reaching the end in time. Mario hops about, bouncing off enemies and hitting blocks to progress, but also has to clear longer gaps with the aid of a spring or moving, weighted, or temporary platforms or smaller ones by running over them. Throughout the Mushroom Kingdom, you’ll find a number of pipes; some of these can be entered to reach secret areas, usually full of Coins, and provide you with a shortcut, but you can also go out of bounds sometimes and find a Warp Zone to skip ahead to a later World. For the most part, you’ll be exploring the block-and-gap-landed Mushroom Kingdom, with only a few different obstacles (either “stairs” or blocks, more gaps, or long stretches of land with enemies to bump off) distinguishing them, but you’ll also venture into underground areas somewhat reminiscent of caves (which tend to be a bit more claustrophobic had have more elevator platforms) and also underwater a couple of times. Here, you’re completely defenceless without a Fire Flower or Super Star and must rapidly tap A to swim ahead; you don’t need to worry about air, which is helpful, but there does seem to be sections where you’re pulled down towards the bottom of the screen (and your death). Although there’s a score counter in the game, it’s more for bragging rights than anything else and doesn’t seem to award you extra lives, though these are awarded for consecutively defeating enemies. Furthermore, while there are no mid-World checkpoints, you can save and end your game at any time from the pause menu and you’re given three save files to play with, and the game keeps track of your lives and completion progress on the new (albeit limited) overworld screen.
Graphics and Sound: Super Mario Bros. Deluxe appears to be an exact recreation of the original title, so it’s Super Mario Bros. as you know and love it and in all its 8-bit glory, though there are a few graphical additions to the water and lava to make them more lively. This means, of course, that animation frames are low, and the presentation is quite basic, but the game is still a colourful and pretty ambitious title, with Mario and Luigi’s sprites being the obvious standout. Sure, they have no idle animations, but they can grow and shrink and change colour from power-ups, do a little slide/turnaround pose when you quickly change direction, perform a breaststroke underwater, and have a little death animation when you stupidly run into an oncoming Koopa shell. Enemies receive even less animation but remain memorable simply because they’re so quirky and weird; mean little mushrooms, hammer tossing turtles, and pouting fish fill the screen, with all of them popping out from the backgrounds thanks to their unique colour palettes, and there’s never a question of not being able to see where you’re going or what you’re doing (as long as it’s not too high up or below you).
Some minor improvements and new additions bolster the classic 8-bit graphics.
The game also seems to pop a little more and run a little smoother, potentially because of the better hardware, and all the classic Super Mario Bros. tunes are here to settle in your ear for the rest of the day. There’s no many, granted, with only a handful of different tunes playing in the game’s different areas, but they’re all chirpy and catchy and help keep everything very whimsical. Sadly, there’s really not much variety in the Worlds; the Mushroom Kingdom stages sometimes have more pipes or blocks or platforms, or slightly different hills or even mushroom platforms at some point, but the closest they get to actually looking any different are the rare occasions when they receive a minor palette swap to simulate night or have brick castle walls in the background. The underwater levels are very visually appealing with their bubbles and seaweed, but are few and far between, same as the underground sections, but the game does impress with its end of World melody and jingle (a little flagpole raises and fireworks go off when you clear Worlds) and in the lava-filled stone castles you must conquer to clear each World. There’s no in-game story offered at all, but a Toad will tell you that the princess is in another castle at the end of every World and there’s fun little animations of the castle crumbling on the new overworld screens, so that’s a nice touch.
Enemies and Bosses: Naturally, all the enemies you’ve come to know and love from Super Mario titles appear and made their debut in this title. The first enemy you’ll come across are the Goomas (pretty unthreatening sentient mushrooms that wander about and can be flattened with your jump) and the Koopa Troopas. These come in two colours (red and green) and a flying variant that can either catch you off-guard in mid-air or act as a temporary jump boost. When you defeat a Koopa Troopa, you can hit their shell to send it flying into other enemies for a score and life bonus but be careful as it’s just as likely to ricochet back at you. You can do the same to the Buzzy Beetles, but these guys are smaller, harder to hit, and are immune to your fireballs. Also of great annoyance are the piranha plants to pop out from pipes, usually when you least expect it, the squid-like Bloopers (who erratically swim about underwater), and Cheap Cheaps (who often dive up out of the water as you run over bridges).
You’ll dodge many enemies and fake Bowsers in you quest to take out the real Koopa King.
By far the worst regular enemies you’ll encounter, though, are Lakitu and the Hammer Bros. Lakitu hovers overhead (just out of reach) and drops Spinys across the stage , though you can take both of these out if you have a Fire Flower. The Hammer Bros usually attack in twos and from higher ground, tossing hammers in a tight arc that can be tough to jump over and even tougher to land with your jump as the window where they’re vulnerable is incredibly small. As for bosses, there’s technically only one in the entire game but you must battle him eight times and each time you have to endure a lava-filled obstacle course and/or pick the correct path to reach him, and this is, of course, Bowser. While seven of the eight Bowsers are actually his minions in disguise, each one attacks just like the real thing; perched over a bridge, Bowser moves back and forth, hops up and down, and spits fireballs at you. Some castles include a moving platform overhead for you to use to get behind him, and the fights become tougher as the amount of projectiles he spits increases, he adds a load of hammers to his arsenal, and Lava Bubbles will pop up from the magma below. However, the strategy to defeating Bowser remains the same every time: either blast at him repeatedly with a Fire Flower until he’s done in, or hop over him (or pass through him after taking a hit) and jump on the axe to remove the bridge beneath him and send him to the lava below.
Power-Ups and Bonuses: Coins are scattered all throughout the Mushroom Kingdom. Collecting these adds to your score tally and will net you an extra life once you get one-hundred of them, after which the counter resets to zero. Your Coin counter carries over between Worlds and you’ll often find bunches of them hidden away beneath pipes or along higher paths. You can also grab a 1-Up Mushroom for an extra life as well, or a Super Mushroom to grow bigger and become Super Mario/Luigi. This lets you take a hit without dying and allows you to smash certain blocks by hitting them from beneath, which can uncover secret routes. A Fire Flower lets you throw bouncing fireballs with the B button, which is great for taking out most enemies (and Bowser) from a safe distance, but you’ll revert to you basic, smaller form if you take a hit in either of these states. Finally, there’s the Super Star, which grants you a brief period of invincibility from all onscreen hazards except bottomless pits and lava pools; consecutively defeating enemies in this state will net you extra points and, eventually, an extra life.
Additional Features: One of the primary reasons I was actually able to finish the game this time around was due to the additional features offered by the Nintendo 3DS, most notably the save state feature, which lets you create a save point wherever you want so you can recover from mistakes much faster and easier, though the base game includes a number of additional features, too. Although you initially can’t backtrack to previous Worlds, you’ll be able to select which World to revisit on your save file after clearing the game. This also unlocks a new, far more challenging adventure, which you can play by selecting the star option when loading your save file. This replaces all Goombas with Buzzy Beetles, speeds up the enemy’s walking speed, reduces the size of elevator lifts, adds more fire bars, and removes the power-ups from the game. New Super Mario Bros. Deluxe also includes a ‘Challenge’ mode that sees you exploring the game’s Worlds once again, this time in search of Red Coins and Yoshi Eggs to unlock content in the game’s Toy Box.
The game’s additional modes and unlockables add a great deal of challenge and replay value.
Once you accumulate 100,000 points in the main game, you unlock ‘You VS. Boo’, a race against a Boo across rejigged Worlds hitting new blocks to clear the way so you can get ahead of the ghost, which can naturally pass through walls. Once you beat the Boo, it’ll get replaced by faster and faster different coloured variants to test your high score. When you earn 300,000 points in the main game, you’ll unlock Super Mario Bros. for Super Players (indicated by the Luigi face now on the main title screen), which is a remake of Super Mario Bros.: The Lost Levels (Nintendo EAD, 1986). This game gives you only one save slot and provides thirteen new, much tougher Worlds, a new item in the injury- (or death-) dealing Poison Mushroom, alongside palette swaps of enemies and a wind that makes jumping even trickier. You can also partake in a ‘VS Game’, which is a two-player challenge mode that’s exactly the same as ‘You VS Boo’ but pits you against another human player, a Toy Box that offers a variety of toys for you to unlock and use, and a Fortune Teller mini game that awards you extra lives on a new save file. Every time you defeat each of the eight castles, a Toad will be added to the Mystery Room which will show you animations or artwork to print out on the Game Boy Printer, you’ll receive medals for clearing the different game modes, and there’s even a calendar included if you want to keep track of the days of the week.
The Summary: I’ve carried the shame of never having beaten Super Mario Bros. for most of my life; to be fair, I didn’t own any of Nintendo’s home consoles until the Nintendo 64 so I didn’t really play any Super Mario titles that weren’t on the Game Boy or played through emulators, and my attempt to play it on the Nintendo Wii was largely just me messing about rather than actually sitting down and trying to finish it. Knowing that the Nintendo 3DS Virtual Console wasn’t long for this world, I jumped at the chance to get Super Mario Bros. Deluxe while I could can give it a go and finally achieved that long-elusive goal of finishing this classic platformer, and I was mostly happy with the results. The game is fun, bright, and full of a steady challenge; while it can be too simple at some times and a little frustrating at others with its obstacle placement, it’s fun hopping about and using the skills you’ve mastered over the course of the game to dash past and jump around the later Worlds. While there’s not a lot of variety to the Worlds and the graphics are very basic, I can excuse that since it was an 8-bit title from the mid-eighties and it still holds up as an entertaining little adventure to keep you busy for a long afternoon. While it’s a shame that a version of Mario Bros. (Nintendo R&D1, 1983) included as well, I won’t hold that against it as the additional features added to this game, including mini games, The Lost Levels, and extra challenges, really make Super Mario Bros. Deluxe the definitive 8-bit version of Nintendo’s classic platformer.
My Rating:
⭐⭐⭐
Rating: 3 out of 5.
Pretty Good
Did you enjoy Super Mario Bros. Deluxe? What did you think to the additions made to the game and how do you feel it compares to the original videogame? Did you play Super Mario Bros. as a child and, if so, what are some of your memories of the game? Did you ever find all the Warp Zones and complete the new challenges introduced in this version of the game? Which of the classic Super Mario titles is your favourite? Are there any retro videogames you didn’t complete until later in like? Whatever your thoughts on Super Mario Bros. Deluxe, feel free to leave a comment below by signing up or drop your thoughts on my social media, and be sure to check back for more Mario content this March!
Upon the release of Pokémon: Blue Version and Pokémon: Red Version(Game Freak, 1996), a new craze swept through playgrounds across the world. An entire generation grew up either playing Pokémon, watching the anime, playing the trading card game, and watching the feature-lengthmovies as clever marketing and a co-ordinated release and multimedia strategy saw Nintendo’s newest franchise become not just a successful videogame franchise but a massively lucrative and popular multimedia powerhouse that endures to this day. Accordingly, February 27th is now internationally recognised as “National Pokémon Day”, which I’m expanding to an entire month of Pokémon every Tuesday in February.
Released: 26 January 2018 Originally Released: 14 December 2000 Developer: Nintendo Original Developer: Game Freak Also Available For: GameBoy Color
The Background: I’ve talked before not just about Pokémonbut also about how Pokémon: Gold Version and Pokémon: Silver Version (Game Freak, 1999) are my favourite games in the franchise. Thanks to the success of not just the first Generation of Pokémon videogames but also an aggressive multimedia strategy, Pokémon became an instant cultural phenomenon across the world, and yet the developers originally intended for Pokémon: Gold and Silver to be the final entries in the series. The sequels immediately sought to improve upon the gameplay, graphics, and mechanics of the first games; developed exclusively for the GameBoy Color, the game would feature a greater colour palette, backwards compatibility withthe previous games, a real-time internal clock, and one-hundred new Pokémon to collect and battle (in addition to two new Types, Dark and Steel). Although many of these Pokémon were dropped, or significantly redesigned, during the game’s development, Nintendo offered the otherwise-inaccessible Celebi as a promotional extra and Pokémon: Gold and Silver were highly anticipated by me, personally, thanks to the new Pokémon cropping up in the animeand movies.
Anticipation was high for all-new Pokémon videogames thanks to the anime and the franchise’s popularity.
This Generation stands out for me for including things like a day/night cycle, breeding, and including the entire region of Kanto as post-game content and, like Pokémon: Blue and Red, Pokémon: Gold and Silver were not only highly praised at the time but also soon followed by a third entry, Pokémon: Crystal. While essentially the same game, Pokémon: Crystal was a trend-setter for the franchise, allowing players to choose the gender of their avatar, including partially animated battle sprites, featuring a whole additional side-story revolving around Suicune and the Unown, and debuting the ever-popular Battle Tower for players to further test their mettle. Again, thanks to Pokémon’s popularity and including additional elements as an incentive for a further purchase, Pokémon: Crystal was well received upon release and has been noted as one of the bestPokémon games. Many elements from Pokémon: Crystal became series staples in subsequent releases, and featured prominently in the Gold and Silver remakes, and the game was later released on the 3DS Virtual Console with the Celebi event included as standard.
The Plot: The time has come to receive your first Pokémon from Professor Elm and challenge the Gym Leaders and Pokémon of the Johto region. However, your journey is disrupted by your mysterious rival, who stole one of Professor Elm’s Pokémon, and the villainous Team Rocket, who seek to return the group to their former glory. Things are further complicated when you cross paths with Eusine, who has made it his life gal to earn the respect of the legendary beast Suicune.
Gameplay: As I said, I regard the second generation of Pokémon games as my favourite in the franchise; I remember going out of my way to get Pokémon: Blue when it first came out, and then snapping up Pokémon Yellow Version: Special Pikachu Edition (ibid, 1998) simply because of how popular the franchise was, and me and my friends were so eager for new Pokémon games that we readily downloaded barely-translated ROMs of Gold and Silver just to experience them. I had Pokémon: Silver back in the day, but always wanted Pokémon: Gold and never had the chance to play Pokémon: Crystal as I was firmly into collecting for the Game Boy Advance by then, so I jumped at the chance to get it before the 3DS Virtual Console shut down for good simply because of how much I enjoyed Pokémon: Silver and Pokémon: HeartGold (ibid, 2009). Essentially, Pokémon: Crystal is the same Pokémon you know and love: the game is a top-down role-playing game (RPG) in which players get to first pick their gender, name their avatar, select from three starter Pokémon, and embark on a journey to raise a well-balanced team, challenge the Johto Gym Leaders, and take on the Pokémon League. As was the style at the time, Pokémon: Crystal isn’t prone to holding your hand; you can talk to non-playable characters (NPCs) for clues, tips, lore, and some instructions but you’re mostly left to your own devices, though the game often bars your progress behind impassable objects like trees, bodies of water, or battling trainers that can only be bypassed by defeating Gym Leaders or acquiring Hidden Machines (HMs). As before, Pokémon: Crystal utilises an extremely simple control scheme that lets you organise your party, equip and use items, and save your progress or alter settings quickly and easily, and the user interface is vastly improved over the last games, with your pack now divided into pockets for key items PokéBalls, and healing items and even lets you set an item to the ‘Select’ button for quick use.
Pick your Pokémonand head out into Johto to tackle a whole new crop of Trainers and challenges.
As ever, gameplay is divided into exploring the overworld and one-on-one battles against wild or trainer-owned Pokémon. On the overworld, you’ll chat to NPCs with A, activate switches and pressure pads, and pick up items; if you walk into grass, caves, or surf on water, you’ll soon encounter a wild Pokémon, which switches the game to a battle screen where you and your opponent take turns to inflict damage or status effects on each other, or use in-battle items to heal or relieve status effects or try and capture the Pokémon. You can also run from wild Pokémon (as long as you’re a higher level), but not from a Trainer battle, and many wild Pokémon can also now flee from battle, which can make capturing them trickier. Pokémon battles are dictated by a “Type” system that’s basically a version of Rock/Paper/Scissors; Water-Type Pokémon inflict greater damage against Fire-Type Pokémon, for example, while Grass-Types trump Water and are weak to Fire. There are now seventeen different Types of Pokémon in the game, with Dark- and Steel-Types adding an extra dimension to battle as the previously all-powerful Psychic-Type Pokémon now have a formidable weakness in Dark-Type Pokémon and moves. While some moves, like Bite, have changed Type to align with this new system, it’s all pretty simple to figure out thanks to battle text informing you when moves are “Super effective” or “Not very effective” and external factors like your location, wild Pokémon names, and their colouring and appearance cluing you in on the best attack strategy. If you’re fishing in the sea, for example, and hook a Qwilfish (which is blue, clearly identified as a fish), it’s pretty obvious that you need to use a Grass- and Electric-Type to inflict maximum damage. At the beginning, you can pick between three different Pokémon, a Fire-, Grass-, or Water-Type, and I recommend keeping them in your party and five to ten levels higher than the rest of your team simply because they are your first Pokémon. You can choose to give this Pokémon, and any others you catch (but not ones you acquire via trading) a nickname to personalise them, and you’ll you can swap around your Pokémon’s moves at any time either in-battle or from the pause menu, or swap or release them from the PCs found in Pokémon Centers.
Level-up to become stronger, and make use of the game’s new evolution methods to discover new Pokémon.
To ease you into the game, early wild Pokémon and Pokémon Trainers are all at low-levels and you’re usually always at an advantage because your Pokémon have higher stats. Winning Pokémon battles will award your Pokémon with experience points (EXP); earn enough, and your Pokémon will level-up, which will increase their Hit Points (HP), Attack, Defence, Speed, and Special stats (now split into Special Attack and Special Defense) and thus make them more powerful. One of the best quality of life improvements in Pokémon: Crystal is the addition of an in-battle EXP progress bar so you can easily keep track of your Pokémon’s progress, and you can swap out Pokémon in battles to share EXP and level them up faster, which you’ll want to do as it’s helpful (though not necessarily necessary by any means) to have a diverse team with decent Type coverage. Don’t level-up too fast, though, as your Pokémon will disobey you if they’re too high a level and you don’t have the appropriate Gym Badge. I like to circumvent this by grinding between Gym battles; by keeping my main Pokémon five to ten levels stronger, but a few levels below the level cap, it can ensure that I’m always stronger enough for the next battle, though I did notice that I was spending more time grinding between Gyms than in my Pokémon: Yellow playthrough. Pokémon will learn new moves from levelling-up, or from Technical Machines (TMs), and it’s recommended to give your Pokémon moves that play to their strengths (if they have a high Attack stat, for example, you don’t really want to have moves that are all Special Attacks) and go against their Type (teaching Poison-Type moves to Grass-Type Pokémon, for example) so they have greater Type coverage in battle. In addition to the untrackable Effort Value (EV) points (earned by consecutively battling certain Pokémon, so defeating a bunch of Hoothoot in a row will boost your HP stat by one point), Pokémon: Crystal also introduces a hidden “Happiness” stat. the more you travel with, use, and care for your Pokémon, the happier it will become; you can boost this stat by grooming them and feeding them Vitamins (which also boost individual stats) or equipping them with certain items in order to max out their Happiness and trigger their evolution.
You can shrug off status effects with Berries, and new HMs offer more exploration options.
As before, battles and gameplay are as hard as you make them; if you don’t bother levelling-up a diverse team, then battles will eventually become harder to win. You can avoid a Trainer battle by staying out of the sight line of Trainers, but I recommend battling every Trainer you come up against to strengthen your team and earn PokéDollars, and some Trainers will even give you their phone number and call you with tips or for a rematch. Trainers are much more capable this time around; not only do they have all the same options as you when it comes to swapping and healing their Pokémon, but they also don’t have to worry about running out of Power Points (PP). Pokémon can still only know four moves at a time, so you’ll have to either replace an existing move to learn a new one or visit the Move Deleter to do this outside of levelling-up or to forget HM moves, and each move has a certain number of PP. When you’re all out, you can’t use that move anymore and will eventually either have to use “struggle” (which inflicts recoil damage to you), replenish PP with a Berry or Elixir, or restore your Pokémon at a Pokémon Center. If you’re not careful in battle, your Pokémon will end up “fainting” when their HP is drained and, if all your Pokémon faint, you’ll “white out”, lose some money, and respawn at the last Pokémon Center you visited. As before, you also need to be wary of status effects, which can cause Pokémon to flinch (basically miss a turn), become confused (often resulting in them hurting themselves), miss their attacks, fall sleep or become paralysed or poisoned (which also drains HP when on the overworld), burned, or frozen. While some attacks and items will also boost your stats and your chance at inflicting greater damage with a “Critical Hit”, Pokémon: Crystal features far more moves that power up and negate certain Types, like Sunny Day and Rain Dance buffing Fire- and Water-Types, respectively. You can undo these status effects using certain items, and can have your Pokémon hold Berries that they’ll automatically eat when inflicted with a status effect or at low HP or PP to help them shake off these debilitating effects.
New mechanics and quality of life improvements make the game much more fun to play.
Victory in Trainer battles earns you PokéDollars to spend in PokéMarts and at vending machines on healing items, hold items, Vitamins, single-use power-ups, and other useful gear to help you in battle or with raising your Pokémon. Items and Pokémon can be stored in PCs when required (you can still only have six Pokémon at a time, so any additional Pokémon are automatically transferred to your PC) but you can choose to have your mother save some money for you, which will award you with extra items and toys to furnish your bedroom with. Although you still only get one save file, you can manually save your progress at any time on the overworld and I recommend saving frequently, and especially before Gym Leader battles or encounters with Legendary Pokémon so you can reset if you make a mistake. Just like before, you need to defeat eight Gym Leaders to earn their badges and challenge the Pokémon League while also working on completing Professor Oak’s PokéDex by capturing Pokémon. The PokéDex has also received an upgrade, making searching for and viewing Pokémon much easier, but you’ll still only be able to fully complete it by trading with Gold, Silver, and even the Generation One games using the “Time Machine” function and by evolving Pokémon through battle, raising their Happiness, using special stones, or by trading (often now with them holding a special item). You can manually cancel some evolutions, and even have Pokémon hold an Everstone to suppress their evolution, which is sometimes recommended as Pokémon learn moves faster in their weaker forms and some moves can only be learned prior to evolution. Another new feature in this game is breeding; each Pokémon is either male, female, or gender neutral and you can leave two Pokémon at the Day Care to be raised outside of battle or, if they’re compatible, breed either a pre-evolution like Pichu and Igglybuff or a slightly stronger version of an existing Pokémon with moves they wouldn’t normally learn. When Pokémon breed, you’re given an egg; these eggs will hatch after you’ve taken a certain number of steps or cycled a certain distance, and breeding can be a great way or filling up the PokéDex quickly alongside regular battling, though you won’t be able to breed Legendary Pokémon and some take longer to produce an egg than others.
Of all the side quests, the one involving Suicune is the most prominent.
A Pokémon’s gender is clearly visible next to their name in battle, and a further quality of life feature is that you’ll see a little PokéBall next to a wild Pokémon’s name to indicate that you’ve caught it, and the game is littered with similar helpful additions mainly tied to your PokéGear. This device houses your map, phone, and a radio which lets you listen to shows offering tips or music that will either wake up Pokémon or put them to sleep and allow you to track the mysterious goings-on at the Runs of Alph. Here, you’ll investigate strange symbols and encounter the useless Unown, though there are slide puzzles to play here and twenty-four different variations of this Pokémon to find and record for a nearby scientist. Your progress is again restricted by trees, water, and dark caves, but now you also have to content with waterfalls and whirlpools. You can again get past these obstacles with HMs, which again double as faster ways of traversing the map: Fly, for example, lets you fly to any Pokémon Center on the map, but you can also use Dig to quickly exit caves (especially useful when you’re out of Escape Ropes), Teleport to warp to exits, and acquire a bicycle (but, sadly, not a skateboard) to dramatically increase up your movement speed. Many of the same minor puzzles return from the last game, meaning you’ll be pressing switches or pushing boulders or using teleport pads to get around, though you’ll also encounter slippery ice, a strange plant that can only be moved using a special water bottle, and numerous instances where the local Gym Leader is either busy with another task or won’t battle you until you’ve complete a side quest. These primarily involve the returning Team Rocket, who have been cutting the tails off Slowpoke, take over the radio tower, and steal vital components from the Kanto power plant. When team Rocket is in town, you’ll need to clear them all out to make the Gym and other areas accessible, but you’re also hounded by your rival, a red-haired boy who stole a Pokémon from Professor Elm and is obsessed with power. Other side quests include searching for a Farfetch’d in Ilex Forest, competing in a bug-catching contest, fetching medicine for a sick Ampharos, feeding Berries to a poorly Miltank, exploring Dragon’s Den, and capturing a strange Gyarados at the Lake of Rage. This will most likely by your introduction to “Shiny” Pokémon, extremely rare palette swaps of Pokémon that occasionally appear in battle. Perhaps the most prominent side quest here involves the Legendary Beasts, specifically Suicune; the three beasts are released into the wild early into the game but, while you’ll randomly encounter Entei and Raikou while wandering around and be left tearing your hair out as they constantly flee from battle, you’ll come across Eusine in his search for Suicune as you journey around Johto and eventually be able to tackle the elusive beats one-on-one to add it to your collection.
Graphics and Sound: Obviously, Pokémon: Crystal is still going to be noticeably limited compared to later games in the series, but the improvements between this game and not just the first generation but even Gold and Silver are pretty impressive. I never thought of the Game Boy Color as being an especially powerful device compared to the original Game Boy, but this game is huge compared to the first games, with a vibrant colour palette that is far more detailed than what we saw in the first games. Towns and routes are much more visually interesting, with grass and trees and plants swaying and bobbing as you explore, the town and route names popping up onscreen, and a distinctly Japanese aesthetic to the far more impressive interiors of buildings. All of the sprites have been given a complete makeover, meaning overworld sprites and battle sprites are far more diverse and detailed; there are new Trainer classes available in the game, new animations for the PokéBalls, and not only a bunch of new moves added to the game but much more interesting and visually exciting attack animations, with more frames and colours being utilised to really make the most of the Game Boy Color’s capabilities. Although you can’t have a Pokémon follow you around like in Pokémon: Yellow, Pokémon now have little animation frames when they appear onscreen, sparkle when they’re Shiny, and even their menu and HM sprites have been overhauled to make them more distinctive.
It’s amazing how much better Pokémon looks, sounds, and plays on the Game Boy Color hardware.
While Johto’s towns and areas aren’t really all that different from Kanto’s, and are probably a little less visually diverse than I’d like, there’s still some fun locations to explore here. Goldenrod City has a Game Corner and a large PokéMart like Celedon City, but also an underground passage, a radio tower, an ice cave, and the Magnet Train which can allow swift access to and from Johto to Kanto; structures like Bellsprout Tower, Burnt Tower, and Tin Tower are not only great places to train ut also key to catching the game’s Legendary Pokémon; and you can even explore a lighthouse (which is full of holes to fall down) and the entirety of Kanto! Perhaps the biggest new feature in this generation was the inclusion of a day/night cycle; at the start of the game, you set the date and time and, as day turns to night, the palette changes accordingly and this even affects the evolution and appearance of some Pokémon. Different NPCs and events will also happen on certain days, and noting the date and time is essential for completing the PokéDex and acquiring certain items. Although the game is bolstered by some jaunty, memorable little chip tunes and Pokémon cries are much improved, the sound is still a bit of a weak spot here; you can tune into different radio channels to change the music though, which is fun. While your pack is far easier to navigate, its capacity is still limited, but storing and retrieving items is much easier this time around, as is rearranging the order of items in your pack, and you can interact with far more on the overworld: Berry plants, Pokémon blocking your path, and even certain trees can all be interacted with to pick-up items or trigger a battle, and you can again use the Itemfinder to seek out hidden items. Like in Pokémon: Yellow, Pokémon: Crystal features an all-new intro sequence, this one focusing on Suicune and the Unown, and you can even choose to play as a girl if you like (though this has no impact on the gameplay other than changing your sprite).
Enemies and Bosses: In your quest to conquer the Pokémon League, you’ll battle a wide variety of Pokémon both in the field and in use by various Pokémon Trainers. Wild and Trainer Pokémon begin at low levels, generally between three and six, but get progressively stronger as you advance to new areas and when you’re called for a rematch, which will help you to grow stronger on a rising curve. Your ability to weaken these Pokémon for capture or defeat them is directly tied to your Pokémon’s current level and moves; if your Pokémon is weak and only knows moves like Bubble and Leer or bring an Electric-Type into a forest or a Bug-Type into a cave you’ll struggle to advance. The same applies to Pokémon Trainers; they start off using one or two weak Pokémon like Sentret and Spinarak but eventually use more formidable and evolved Pokémon. They’ll also withdraw them, heal them, or buff them with items and, while you can exploit the enemy A.I. at times, Pokémon Trainers tend to use moves that have a Type advantage over your current Pokémon. Pokémon: Crystal introduces new moves that can prolong or frustrate battles as well; Protect will render your next attack useless, Spikes will damage any Pokémon you send into battle, and some moves, like Dynamic Punch, not only hit hard but also inflict confusion on their victim. Still, with enough grinding and a diverse team, you can easily overcome every opponent you face; simply take some time between Gym battles to level-up, develop specific stats if that’s your jam, and bringing your team as close to the level cap as possible, utilising moves that are super effective and sharing EXP wherever possible, and you can easily trample over the opposition once you’ve gotten past the uphill battle at the start of the game.
Team Rocket are back and you’re hounded by an arrogant rival with a superiority complex.
After being absent for a few years, Team Rocket has come back but they’re far less of a threat than in the first generation; these nefarious individuals are easily identified by their black attire and caps and will impede your progress until you’ve cleared them out of towns, towers, and buildings. When exploring their hidden base in Mahogany Town, you’ll be constantly beset by the gang when you walk in front of security cameras, though Pokémon League Champion Lance is on hand to help you out by healing your team. When you encounter them in the radio tower, you’ll have to battle a Rocket Executive posing as the tower’s director, and they’ve been cutting off Slowpoke tails to sell them earlier in the game, but Team Rocket’s grunts really aren’t much of a threat and tend to stick to common Pokémon like Rattata, Muk, and Zubat. In comparison, your rival is much more malicious than Blue from the last game; this guy (often dubbed “Silver”) is not just rude, arrogant, and obsessed with training only the most powerful Pokémon, but also a conceited bully, pushing you away and past you and refusing to help fend off Team Rocket since it doesn’t suit his goals. Unfortunately, the rivalry between you isn’t as big of a factor as in the last game; the rival pops up at various points throughout the game, but it’s easy to forget he even exists and he doesn’t even end up being the Pokémon League Champion, which is a shame as it would’ve been easy to have him be the mastermind behind Team Rocket’s return and maybe tie him into the Ruins of Alph and Suicune sub-plots. Your rival will steal whatever starter Pokémon has a Type advantage against yours (in my case, he took Chikorita) but eventually expands his team to include Sneasel, Golbat, Magneton, Alakazam, and Gengar to give him good Type coverage across the board. However, a diverse and high-levelled team can easily send him packing in every encounter; in my playthrough, I barely even needed to swap my Pokémon out between each round thanks to teaching my Feraligatr Bite, Ice Punch, Surf, and Dynamic Punch and going into every encounter at least ten levels higher than him, making him a visually interesting but hardly challenging successor to Blue.
You’ll occasionally need to complete some side quests or solve a puzzle to battle the Gym Leaders.
A whole new world to live in means eight all-new towns and eight new Gym Leaders to battle, each specialising in a specific Pokémon Type and often (but, oddly, not always) protected by a number of protégés and some light puzzles, such as a maze, obscured path, or the pushing of boulders. Other times, Gyms will be empty, locked, or otherwise barred and you’ll need to complete a side quest to gain entry. While you don’t have to fight the Gym Leader’s minions, I recommend it so you don’t miss out on some EXP and cash, and it’s again recommended to have a diverse team on hand (though you can often helpfully find wild Pokémon nearby that can counteract the Gym’s specialty). Your first challenge is Falkner, who uses Flying-Type Pokémon; as long as you don’t have a Grass-Type on hand and, honestly, why would you?) this isn’t anything to worry about and you can improve your chances by taking a slight detour and catching a Ground-Type Phanpy. Bugsy is a walk in the park if you have a Fire-Type, though I felt the pinch against his Scyther’s Fury Cutter since I opted for Totodile instead of my usual Cyndaquil. Most players run into a brick wall when faced with Whitney and her Miltank, which can deal increasingly more devastating damage with its Rollout attack, but I honestly had no trouble besting it was a Level 28 Croconaw using Bite and Ice Punch (though a Fighting-Type Pokémon or moves are your best bet against her). Neither Morty or Chuck are much of a challenge either since you can take both out with Psychic-, Dark-, and Electric-Type moves, while Fire- and Water-Types are your best bet at taking out Jamsine’s Steelix. Electric- and Fire-Types will also allow you to make short work of Pryce’s Ice-Type Pokémon (indeed, the hardest thing about him is skidding about on the icy floor of his Gym) and, while Clair’s Dragon-Types can be intimidating and easily paralyse you, they’ll also fall pretty quickly if you have Ice-Type Pokémon or moves on hand. Defeating each Gym Leader awards you a badge that increases the game’s level cap, powers up certain stats, and allows you to use HMs outside of battle to reach new areas, and also awards you some useful TMs, like Dynamic Punch and Shadow Ball, but take care after defeating Whitney as you won’t immediately earn her badge and must talk to one of her underlings to convince her to hand it over.
The best of the best await at the Pokémon League…unless you’re levels ahead of them…
Once all of the Gym Leaders are defeated, you’re ready to take on the Pokémon League. To reach the League, you need to use your HMs to navigate through Tohjo Falls and the cavernous Victory Road, where you’ll battle your rival once more and encounter some high-level Pokémon to help push your levels higher. You’ll want to make use of the makeshift Pokémon Center and PokéMart right before the Elite Four to heal up and maybe stock up on restorative items since you again need to battle all four Trainers, and the champion, consecutively to become the champ. Each of the Elite Four has a full team of Pokémon, with a general speciality in mind but also Type coverage to keep you on your toes; your first challenge is Will, who uses Psychic-Type Pokémon but, thankfully, these are dual-Types so you can use Dark-, Ghost-, Electric-, and Fire-Type moves to easily cut through his Pokémon, though you could be caught off-guard by confusion or freezing if you’re not careful. Next up is Koga, upgraded from a Gym Leader to one of the Elite Four and still rocking the Poison-Types, making him easy pickings for your Ground- and Flying-Type attacks. The only member of Elite Four to return from the first generation is, ironically, one of the weakest of that game, Bruno. Though he’s got a bigger, more diverse team, he’s still a Fighting-Type specialist so you can easily best him with Psychic-Type moves. These are slightly negated against Karen, however, since she has Dark-Types on hand but, again, her Pokémon are dual-Types so you can balance things out with Fire- and Water-Type Pokémon. Your final challenge is against Lance, the Dragon-Type expert who’s now the Pokémon League Champion. Lance is easily the toughest Trainer battle so far…on paper, at least…since he has three Dragonites and even fan favourite Charizard on his team. However, but this point my Feraligatr was way overpowered and I managed to sweep his whole team using Bite, Surf, and Ice Punch without any issue. Toppling the Elite Four sees you and your team again entered into the Hall of Fame and declared Pokémon League Champion; you can battle the Elite Four again and again to earn more cash and level-up your team, but you’ll find challenge enough awaiting you in the post-League content.
Some of Kanto’s Gyms have undergone a bit of a reshuffle, with Blue installed as your final opponent.
Becoming the Pokémon League Champion earns you a ticket to board the S.S. Aqua and travel to Kanto, where you can not only explore the entirety of the region from the first game, battling new Pokémon Trainers with higher-level Pokémon, but also take on the eight Kanto Gym Leaders once more! Because you start in Vermillion City, the order you battle the Gym Leaders is mixed up; some are missing their puzzles and protégés as well, and all have bigger, more diverse teams and, though you’ll earn their Badges and they’ll be added to your total, you can’t view these on your Trainer Card and only two of them will award you TMs after you beat them. First up is Lieutenant Surge, now rocking two Electrode and an Electabuzz alongside his signature Raichu, but he was nothing compared to my overpowered Donphan. I got a bit mixed up and fought Misty next, which you can only do after fighting past the Nugget Trainers and interrupting her date; while her Water-Type Pokémon don’t stand much of a chance against a good Electric-Type Pokémon, this won’t help you against her Quagsire so maybe switch to a Grass-Type instead. I battled Erika next, who can be frustrating with her tendency to use Full restore, cast Sunny Day, and her ability to drain HP from your Pokémon, but at this point my Feraligatr’s Ice Punch and Suicune’s Aurora Beam were more than enough to topple her. Koga’s daughter, Janine, now resides in Fuschia City’s Gym but she uses Poison-Types just like her dad so you can get past her in much the same way you did him, and Brock and Sabrina are similarly easily taken out using Water- and Dark-Types, respectively. Since Cinnabar Island was wrecked by a volcanic eruption, you won’t find much of anything there except a Pokémon Center and Blue, the Viridian City Gym Leader, who directs you to the similarly barren Seafoam Islands to battle Blaine. Neither Blaine nor Blue have any underlings to worry about and, while Blue’s team is as diverse and powerful as ever, yours should be more than up to the task of matching him blow for blow and recapturing the Kanto Gym Badges.
As if Red wasn’t tough enough, the Legendary Beasts will flee from battle and the new Birds take a lot of Balls to snag!
With these in your possession, Professor Oak allows you access to Mount Silver and the game’s most taxing challenge of all: a battle against Red, the protagonist from the first game, who’s well-rounded team not only has great Type coverage but is also in the high-seventies (with his Pikachu being the highest-level Pokémon you’ll face in the game at a whopping Level 81). While battling Red is tough in and of itself, it’s made all the more difficult by the fact that you need all the GMs to even reach him, meaning you’re at a severe disadvantage since you’re either down a couple of Pokémon to make room for a HM slave or have had to substitute better moves for HMs. Aside from red, there are some one of a kind Pokémon to find in the wild, too: Sudowoodo block your paths and need triggering with the Squirtbottle, you’ll need to tune into Kanto’s radio stations to awaken the Snorlax blocking your path, a Shiny Gyarados waits in the Lake of Rage, and you’ll encounter a wild Lapras in Union Cave’s basement every Friday. Although Kanto’s Legendary Pokémon are entirely absent (the power plant is now up and running, Seafoam Islands is a simple cave, Victory Road has been rearranged, and Cerulean Cave is inaccessible), Johto’s are literally out and about to find. Entei and Raikou will randomly appear in different areas of Johto, fleeing immediately (or using Roar to scare your Pokémon off) and forcing you to use the PokéDex to track them down and use moves like Spider Web and Mean Look just to have a chance at catching them, damage and status attacks you inflict will carry over even if they flee, however, but these two are still a massive headache to get a hold of and Pokémon: Crystal makes things unnecessarily difficult by forcing you to have caught all three Legendary Beasts to even spawn an encounter with Legendary Bird, Ho-Oh, atop Tin Tower. Conversely, one of my favourite Pokémon, Lugia, can only be fought at Whirl Islands after reaching Pewter City and acquiring the Silver Wing, and all of these Legendary Pokémon (and some wild Pokémon) can be a chore to catch unless you inflict sleep or paralyse and whittle them down to a slither of health as they just love to break out of PokéBalls and, unlike the last games, where you obviously used the instant-catch Master Ball on Mewtwo, it can be tough to decide which Pokémon to use your Master Ball on here (though I’d recommend Ho-Oh).
Power-Ups and Bonuses: Both Johto and Kanto are littered with pick-ups to be found, gifted from NPCs, or bought from PokéMarts. All the same healing and restorative items from the last games return, such was Potions, Revives, Awakenings, and Antidotes, though you can now find various Berries that have the same function and can be held and automatically used by Pokémon in battle. As you progress, PokéMarts will start to sell more advanced items, like Hyper Potions, Max Revive, Escape Ropes, PokéDolls to help you flee battles, and likes of X-Attack for a one-time stat boost. Vitamins and evolutionary stones a far harder to find on the overworld, but can be bought from Goldenrod and Celadon City’s Department Stores and are great for raising individual stats and quickly evolving Pokémon, and you’ll also find Nuggets to sell for cash (and sell most items you find) and key items like the Itemfinder, EXP All, and various rods. Another new addition to the game are held items that give your Pokémon certain boosts and buffs; Quick Claw can make them move faster, fr example, while Amulet Coin will double the cash you earn and Leftovers will see them restore a little bit of health between every move. Many of these will increase the power of certain Types, such as Charcoal powering-up Fire-Types, and some are even needed to be held for Pokémon to evolve.
There are more items than ever before, and even your radio can help you out in a pinch.
As ever, you’ll need a steady supply of PokéBalls if you want to catch ‘em all; these again come in three purchasable types (regular PokéBalls, slightly better Great Balls, and even better Ultra Balls), with the Master Ball being a one-of-a-kind, never-fail PokéBall that is best saved for a Legendary Pokémon. You can also find Acorns in trees and, when you give these to Kurt in Azalea Town, he’ll turn them into one of seven new PokéBalls after a day of waiting: Level Balls make catching lower level Pokémon easier, Friend Balls increase a Pokémon’s Happiness stat faster, Lure Balls make it easier to catch Pokémon encounter while fishing, Moon Balls make it easier to catch Pokémon that evolve using a Moon Stone, Heavy Balls are best used against heavier Pokémon, Fast Balls can be useful against Pokémon like Entei and Raikou who like to flee from battle, and Love Balls increase your chances of catching Pokémon of the opposite gender to your own. Like last time, TMs can only be used once, while HMs can only be unlearned using the Move Deleter, and different Pokémon level-up, breed, and hatch at different speeds and at different times of the day; some don’t learn useful moves for some time, others don’t learn any decent moves at all (I’m looking at you, Unown!) or moves that boost their stats, which is useless to me as I prefer to fill my move slots with offensive moves. Some Pokémon also don’t evolve at all, which can lower the incentive on using them as you don’t see as much progression when battling with them, while other Pokémon have abilities like Sweet Scent that can attract wild Pokémon, and you can also have Pokémon hold various mails to send messages to other Trainers you trade with.
Additional Features: Although Generation two added one-hundred extra Pokémon to the original 151, “only” 223 are actually obtainable within the base Pokémon: Crystal game so you’ll need to trade with Gold, Silver, Red, Blue, and/or Yellow in order to complete the PokéDex and fulfil Professor Oak’s life dream and earn yourself a nifty little certificate for you efforts. A lot of your post-game time and energy will be spent catching, raising, trading, and breeding Pokémon to fulfil this objective, and the day/night cycle and new additions to the gameplay mean you are given far more options to evolve and acquire Pokémon. As mentioned, you can store a limited number of phone numbers on your PokéGear and battle Trainers again when they call you, or travel to Viridian City and make use of the Trainer House to battle either a random challenger or the last human player you fought against, which remains a fun addition, and battles and trades such as this are a great way to extend the life of the game and motivate you to getting your team up to the maximum level. Also, you’ll be spending a lot of time in the Game Corners trying to buy or earn the coins necessary to get those elusive Pokémon and traipsing around Johto trying to lure out the Legendary Beasts, but this generation of Pokémon remains my favourite for its unmatched post-Elite Four content.
Travel to Kanto in the post-game, tackle the Battle Tower, and spawn in a Celebi to catch!
As mentioned, you get to travel to Kanto after becoming the Pokémon League Champion! This, effectively, doubles the timespan of the game but, while Kanto is now populated with much tougher Trainers than before, your team should be more than capable of winning the day. Still, I’ve always loved this feature, and Kanto is notably different, too; towns, caves, and routes have been switched about, new Pokémon are included, and certain areas are either inaccessible or altered, which really shows the flow of time since the last games. You can talk to Red’s mother in Pallet Town, where you find out he took off and hasn’t been seen in years, get the power plant back up and running so you can hop on the Magnet Train, and pay a visit to the new radio tower in Lavender Town, which replaces the haunted Pokémon Tower. Viridian Forest is now gone, as is Cerulean Cave, and Mount Moon is much shorter than before, but I loved seeing Blue installed as the Viridian Gym Leader and just being able to explore this region again and really wish that subsequent Pokémon games had done something similar. Pokémon: Crystal is also notable for being the first game to include the Battle Tower; located just off the coast off Olivine City, this facility lets you battle other Trainers and awards you Vitamins for consecutive victories. Though never really something I’ve enjoyed, the Battle Tower is a fun extra inclusion, and even offers level and Pokémon restrictions to keep you from using Legendary Pokémon. Best of all, though, is that the 3DS version of the game includes the GS Ball event, meaning you can place the GS Ball in a shrine at Ilex Forest to spawn the elusive Celebi and finally, legitimately, catch the little blighter!
The Summary: I’ll be the first to admit that, when it comes to the second generation of Pokémon games, I’m extremely biased when it comes to these games. For me, this was when Pokémon was at its peak of popularity; we were so desperate to play these new games and so captivated by the new Pokémon and mechanics, and while I’ve enjoyed Pokémon games since these, none of them have quite been able to recapture the magic of Johto. Consequently, it was an absolutely joy to finally play through Pokémon: Crystal; the game is such a massive step up from its predecessors, improving and refining basically everything from the first game and adding much-needed quality of life mechanics like the EXP bar, better item and Pokémon management, and vivid, impressively detailed graphics for such a basic handheld system. The new features offered in this generation were also fantastic; the day/night cycle was a fun little inclusion, one I missed from the Game Boy Advance titles, and adding breeding really helped to speed up PokéDex completion as you could raising Pokémon traditionally whilst also getting in the steps to hatch and egg and get Pokémon to breed all at the same time. Adding the ability to rebattle previous Trainers was great too, though the constant interruptions from phone calls does get annoying; while I love the aesthetic, detail, and colour of the game, I have to admit that Johto doesn’t really stand out all that much and is basically like a reskin of Kanto for the most part, but Pokémon: Crystal adds a few extra bells and whistles to compensate for that. Animating the Pokémon, for starters, really helps to make the game feel much more alive, as do all the additional attacks and battle animations that help the game feel faster, more action-packed, and less like a Tiger Electronics LCD game like in the first generation. Being able to play as a girl was a nice inclusion, as was the attempt to expand on the Legendary Beasts by giving Suicune a larger role, but ultimately these aspects and the rival system weren’t as prominent as they could’ve been. Thankfully, the new Pokémon more than make up for this, with some of my all-time favourites being found in Johto (Ampahros, Lugia, Houndoom, Typhlosion, and Marill, to name a handful), and I loved seeing how the world has changed since the last game. Of course, this is best seen in the still-unmatched post-game content; letting you travel to, explore, and challenge Kanto once more was an ingenious idea and makes the game feel so much bigger than even some of the Nintendo DS titles, which generally settled for the Battle Frontier and little else. Add to that the tough-as-nails battle against Red, the ability to trade to the previous generation, and the addition of Celebi to the game and you have what very well may be the definitive version of classic Pokémon for me.
My Rating:
⭐⭐⭐⭐⭐
Rating: 5 out of 5.
Fantastic
Are you a fan of Pokémon: Crystal Version:? How do you think it compares to the original gamesand which of the second generation titles was your favourite? What did you think to the new mechanics introduced here, like breeding, genders, and the day/night cycle? Did you struggle against Whitney and her Miltank? What did you think to the rival? Did you enjoy getting to revisit Kanto and did you ever capture Entei and Raikou? Which of the Pokémon games, and titular monsters, is your favourite? How are you planning to celebrate National Pokémon Day this year? Whatever your thoughts on Pokémon, sign up to leave them below or drop your comments on my social media and be sure to check in next week for more Pokémon content!
Upon the release of Pokémon: Blue Version and Pokémon: Red Version (Game Freak, 1996), a new craze swept through playgrounds across the world. An entire generation grew up either playing Pokémon, watching the anime, playing the trading card game, and watching the feature-lengthmovies as clever marketing and a co-ordinated release and multimedia strategy saw Nintendo’s newest franchise become not just a successful videogame franchise but a massively lucrative and popular multimedia powerhouse that endures to this day. Accordingly, February 27th is now internationally recognised as “National Pokémon Day”, which I’m expanding to an entire month of Pokémon every Tuesday in February.
Released: 27 February 2016 Originally Released: 12 September 1998 Developer: Nintendo Original Developer: Game Freak Also Available For: Game Boy
The Background: Although I’ve talked about Pokémonquite a bit in the past, a review of one of the classic titles is long overdue. Initially developed as Capsule Monsters, Pokémon was the brainchild of game designer Satoshi Tajiri, who spent his childhood collecting insects and sought to make a videogame around the same subject, one that emphasised exploration and collecting rather than needless violence. It was the legendary Shigeru Miyamoto who suggested producing two GameBoy cartridges to realise Tajiri’s dream of allowing players to trade and battle using the system’s Link Cables. Artist and long-time friend of Tajiri Ken Sugimori spearheaded the designs of the titular Pokémon alongside a handful of others (including Atsuko Nishida) than ten people who conceived the various designs for all 151 Pokémon, and the original Pocket Monsters: Red and Green proved an immediate hit in their native Japan and were soon followed by a third version, Pocket Monsters: Blue, which included upgraded sprites, alternative dialogue, and other gameplay tweaks. This was the version of the game that served as the basis for Pokémon: Blue and Red, which became an instant cultural phenomenon upon release in the West.
Just as Pokémon: Yellow was influenced by the anime, so too did it impact later Pokémon videogames.
For its international release, Pokémon was accompanied by an aggressive multimedia marketing strategy and ancillary merchandise; much of this revolved around franchise mascot Pikachu, who was at the forefront of the still-ongoing anime series, which served as the perfect accompaniment to the videogames. So popular was Pikachu, and the anime, that a fourth version of the game was produced to capitalise on both; Pokémon: Yellow Version not only featured all-new battle sprites and gameplay mechanics, but also contained characters, references, and alterations based on the anime. The game was made to coincide with the franchise’s first feature-length adventure, was the last Game Boy title released for the system outside of Japan, and became the fastest-selling handheld game of all time upon release. Because it was essentially the same highly praised videogame as before, Pokémon: Yellow Version was highly praised; while some questioned its release and viability considering all-new Pokémon games were set to be released, critics noted that the game offered just enough to keep fans and newcomers happy. Pokémon: Yellow Version was pretty influential; the gameplay mechanic of having a Pokémon following the player’s avatar around would return in later titles, the game received amanga adaptation, and it was eventually released on the 3DS Virtual Console with the ability to communicate with the then-current Pokémon titles.
The Plot: The time has come for you and your childhood rival to receive your very own Pokémon from Professor Oak, However, you arrival too late and are lumbered with a disobedient Pikachu to accompany you as you challenge the eight Kanto Gym Leaders in a bid to become a Pokémon Master. Your journey is also fraught with danger as the vindictive Team Rocket seeks to steal Pokémon for their own nefarious ends, to say nothing of having genetically created the most powerful Pokémon of all!
Gameplay: Just like its predecessors, Pokémon Yellow Version: Special Pikachu Edition is a top-down role-playing game (RPG) in which players are introduced to the wonderful world of Pokémon by the kindly, if forgetful, Professor Oak. After naming your avatar and your rival, you’re charged with heading out into the Kanto region, exploring fields, caves, and buildings in search of Pokémon, powerful native creatures that are used to trade, raise, and battle with other Pokémon Trainers. If you’ve played Pokémon: Red, Blue, or even Green before, you’ll be immediately familiar with the concept but, even though it lacks the influx of hand-holding and mandatory tutorials of the modern games, Pokémon: Yellow does a good job of introducing you to the context and mechanics of the game and then sending you on your way to figure things out for yourself or find clues by chatting to the many non-playable characters (NPCs) scattered throughout Kanto. Since it released on the Game Boy, Pokémon: Yellow has a very simply two-button control system and user interface; I say “simple” for this latter aspect as it’s both easy to navigate and incredibly restrictive. You can open your bag to view your inventory from the pause screen, and your items will be listed in the order you picked them up; you can shuffle them about using the ‘Select’ button but your inventory is limited, so you’ll need to deposit some items on your PC to make room. Your PC inventory is similarly arranged; everything’s in a list here and there’s no onscreen text to tell you what items do, so it can be a little tricky to navigate and figure things out at times. Gameplay is divided into two distinct modes: exploring towns and other areas, and battling Pokémon. In the former, you wander around on a four-way grid, chatting to NPCs with A, activating switches, and picking up items; if you enter grass, you’re very likely going to trigger an encounter with a wild Pokémon, who also spontaneously attack in caves and when traversing the sea. When this happens, the game switches to a battle screen in which you and your opponent take turns to inflict damage or status effects on each other, or use in-battle items to heal or relieve status effects or try and capture the Pokémon. You also have the option to run, however if the opposing Pokémon is at a higher level than yours or you’re in a Trainer battle this option is either limited or completely restricted.
A diverse team with wide Type coverage is key to besting your opposition and growing stronger.
Pokémon battles operate using a “Type” system that is, essentially, a version of Rock/Paper/Scissors; Water-Type Pokémon will be more effective against Fire-Type Pokémon, for example, while Grass-Types trump Water and are weak to Fire. There are fifteen different Types of Pokémon in the game and each has different capabilities against the other; Normal-Type Pokémon moves won’t have any effect against Ghost-Types and will barely touch Rock-Types, for example. It’s a pretty simple system to figure out and battle text will always tell you if moves are “Super effective” or “Not very effective” so you can figure out the best course of attack; location, Pokémon names, and their colouring and appearance can also clue you in on the best attack strategy, too. So, if you’re in a cave and encounter a Zubat, you’ll probably want to use an Electric- or Rock-Type attack to inflict maximum damage and if the opposing Pokémon is blue or encountered at sea, it’s mostly likely a Water-Type. Unlike in the previous games, you’re forced to start your journey with a Pikachu, one who refuses to stay in its PokéBall and who follows you around on the overworld. You can interact with Pikachu at any time and the game stresses treating it well so that it shows more affection towards you, though unlike in the modern games this has no real in-game benefits and you can just as easily deposit it in a PC and never use it. Having Pikachu is an issue in the early game as your first real challenge is Rock-Type Pokémon Gym Leader Brock, so you’ll need to explore the nearby towns and fields to catch a Fighting- or Grass-Type Pokémon to actually stand a chance against his Pokémon, but the game has a pretty consistent difficulty curve. Early wild Pokémon and Pokémon Trainers are all low-level Pokémon with limited moves, and you’re generally always at an advantage as your Pokémon usually always have higher stats. Pokémon battles will award you with experience points (EXP); earn enough, and your Pokémon will level-up, which will increase their Hit Points (HP), Attack, Defence, Speed, and Special stats and thus make them more powerful and more capable in battle. Unlike in later games, there’s no onscreen indication of your EXP progress unless you manually head into the menu screen, which can make levelling-up a bit of a chore.
Be mindful of the nearest Pokémon center as you’ll need them to heal from battles and status effects.
While you can get pretty far with just one or two powerful Pokémon, it’s recommended that you have a diverse team with decent Type coverage in their moves; many Pokémon can learn moves either from levelling-up or from Technical Machines (TMs) that are of a different Type, so you can have a Water-Type Pokémon bust out Ice- or Psychic-Type moves, which can make them more useful in battles, and you can both swap out your Pokémon to share the EXP gained from battles and earn hidden Effort Value (EV) points by consecutively battling certain Pokémon (so, for example, if you battle a bunch of Geodude in a row, you’ll gain an extra boost to your Defence when you level-up) and you can also find (or purchase, for an extortionate price) Vitamins that will boost individual stats. While it’s important to consider things like this in battle, and the moveset of your diverse team, it’s not always that necessary and is only as complicated as you make it; I usually settle for my starter Pokémon being about ten levels higher than my other Pokémon, then train up the rest in teams of two (usually Water/Fire, Electric/Psychic, and a wild card) to have a consistently strong team. If you walk in front of another Pokémon Trainer, they’ll initiate an inescapable battle with you; in a Trainer battle, you can’t run or catch the opposing Pokémon, and trainers have all the same options as you while not being limited by Power Points (PP). This means that they can swap out their Pokémon, heal or buff them, and they can attack without fear of running out of PP; each move has a different amount of PP, from five to thirty, which dictates how often you can use that move. When you run out of PP, you can’t use that attack anymore until you replenish it with an Elixir or restore your Pokémon at a Pokémon Center; if all your PP is drained, your only option is to “struggle”, which inflicts some serious recoil damage, so it’s wise to use your best moves sparingly. In battle, Pokémon will take damage; when their HP is drained, they’ll faint and need to be revived with a Revive or for free at a Pokémon Center but, if all of your Pokémon faint, you’ll “black out”, lose some money, and respawn at the last Pokémon Center you visited. You also need to be wary of status effects, however; some Pokémon attacks will cause you to flinch (essentially miss a turn) or become confused (which can cause your Pokémon to hurt themselves) and, in this version of the game, have a tendency to miss entirely or land “critical hits” for extra damage, but Pokémon can also be put to sleep, paralysed, poisoned, frozen, and burned, all of which will either drain your HP or leave you vulnerable to attack. You can undo these status effects using certain items, but even if you emerge victorious your Pokémon will still steadily lose health on the overworld if poisoned, so you’ll either need to keep your inventory well stocked or be mindful of the nearest Pokémon Center.
Level-up your Pokémon to evolve them, give them nicknames, or store them in Bill’s PC system.
Winning Trainer battles also nets you PokéDollars, which you can spent in PokéMarts and at vending machines on healing items and other useful gear to help you out in battle or in raising your Pokémon. Items and Pokémon are stored in PCs when you run out of room (you can only have six Pokémon at a time, so any additional Pokémon are automatically transferred to your PC, though you’ll need to heal them if you choose to use them) and the game allows you to manually save your progress at any time (though you only get one save file to use). I recommend saving frequently, and especially before Gym Leader battles or encounters with Legendary Pokémon as this allows you to reset the game on the off-chance that you’re defeated, thus sparing you from losing money. You’re given two primary goals in the game: Battle the eight Gym Leaders to earn their badges and challenge the Pokémon League and complete Professor Oak’s PokéDex, which you do by capturing every Pokémon in the game. When you encounter a Pokémon, its basic data is stored in this encyclopaedia so you can see where it appears on the overworld; you can then hunt it down and catch it and either try to capture its next form or “evolve” it by levelling-up, using special stones, or trading it. The majority of Pokémon will evolve into at least one extra form through levelling-up, which will add their new form’s data to the PokéDex and make them stronger; you can cancel evolution at any time by pressing B and this is sometimes recommended as Pokémon learn moves faster in their weaker forms and some moves can only be learned prior to evolution. Similarly, each Pokémon can only know four moves at a time; when it grows strong enough to learn a new move, you can choose to either replace an existing move or not learn the new one, but you’ll need to visit the Move Deleter to do this outside of levelling-up or to forget Hidden Machine (HM) moves. When you capture a Pokémon, you’re given the option of nicknaming it; again, this doesn’t really do anything beyond personalising them to your Trainer and your characters are limited, but it’s a nice touch for making your team unique.
Side quests, some basic puzzles, and some fun little mini games are on offer to spice things up.
Navigation in Pokémon: Yellow is pretty simple; you can get a town map early on (or view them in Pokémon Centers) that shows you the different towns, locations, and “Routes” you can travel, but your progress is constantly restricted by trees, bodies of water, dark caves, and patches of grass. You can climb ladders to reach different levels of caves, hop over ledges for shortcuts, and get past these obstacles with HMs but you’ll progressively earn more convenient ways to travel across the map. Pokémon like Abra can Teleport you back to the last Pokémon Center you visited, Escape Ropes will allow you to quickly exit any areas you’re in, you’ll acquire a bike that dramatically speeds up your movement speed, and you’ll eventually be able to fly and surf to quickly get around the overworld. Some areas will require some rudimentary puzzle solving, generally involving pressing switches (either hidden ones or by pushing boulders onto them) to open doors, teleporting using special pads, or spinning around in maze-like environments. You’ll also be given some fetch quests to complete that will open up new areas and gift you items, need to acquire keys and tickets to open doors or access locations, and be able to trade (or buy…) with NPCs to acquire new Pokémon. Trading can also be done in Pokémon Centers, which allows you to trade Pokémon with a friend (or battle them, if you like) to get Pokémon that aren’t in the game or evolve certain Pokémon, like Haunter/Gengar. Traded Pokémon level-up faster then regular Pokémon, though you can’t change their nicknames and they’ll always have the Trainer ID of their original Trainer. You also need to be mindful of levelling-up too quickly; if you’re Pokémon is too high a level, and you don’t have the appropriate Badge, they may disobey you by ignoring your commands or loafing around. In addition to the slot machines available to play in the Celadon City Game Corner and the Safari Zone in Fuchsia City (which gives you a time limit to catch rare Pokémonby baiting or angering them), Pokémon: Yellow also adds printer functionality for the Game Boy Printer and a cute little mini game that lets you net points by pulling of mad tricks with your surfing Pikachu!
Graphics and Sound: Since it released on the original Game Boy, Pokémon: Yellow is pretty limited in terms of its graphics and visual presentation compared to later games in the series, but I think these early Pokémon games still did a really good job of making the most of their limited hardware. While most of the towns don’t really look that different, they vary in size and colour palette and all have a unique music track associated with them; some have larger buildings like the Celadon City Department Store, a science museum, and the haunted Pokémon Tower, while others are flanked by caves, bodies of water, or are literally islands in the middle of the ocean. Towns all contain a number of houses with NPCs to talk to, some of whom will give you hints, items, or side quests to progress further; Routes are sometimes blocked by trees or a sleeping Snorlax, and you’ll find fun elements to interact with, like a Super Nintendo Entertainment Systems (SNES) in your bedroom, Mr. Psychic, and Copycat. Routes are generally littered with Pokémon Trainers, grass, and items to find but some items are hidden from view; you can tap A to pick these up at random but an Itemfinder will help by emitting a beep whenever a hidden item is nearby, and HMs like Cut and Flash will make short work of trees, grass, and dark caves to help you progress.
Though essentially the same game, Pokémon: Yellow is bolstered by a new colour palette and new additions.
Sprites are all pretty adorable as well; while many NPCs all look the same, they have a lot of personality in the things they say and all have an appreciation or some kind of advice to give regarding Pokémon. Your avatar is clearly recognisable despite the limited graphics and colour palette, and you’ll always be able to spot your rival, Gym Leaders, and agents of team Rocket thanks to their unique sprites and accompanying themes. In Pokémon: Yellow, Pikachu is your constant companion, waddling around behind you on the overworld and spitting out a grainy, but ambitious, cry of “Pika!” when thrown into battle. Pikachu has unique entrance and exit animations in battle since it doesn’t use a PokéBall, but otherwise battles remain largely the same; limited animation frames are used to convey the impact of moves on Pokémon and the moves themselves are represented by the screen shaking, flashing lights, and partially animated sprite work that is largely reused over and over. You can actually turn battle animations off in the settings, which speeds the game up a bit, but takes away some of the fun in my opinion; still, the frame rate can struggle a bit at times both in and out of battle, and you’ll find the Pokémon cries are a little distorted because of the hardware. Pokémon: Yellow completely overhauls the in-battle sprites of the Pokémon and adds in numerous influences from the anime in the form of additional NPCs who gift you new Pokémon, Chansey’s being in Pokémon Centers, and Jesse and James of Team Rocket fame, which helps add a little visual flair to the game but I really don’t care for many of the new battle sprite designs. Finally, all of the jaunty, memorable tunes are here to enjoy in all their chip-tune glory, and the game features a brand new intro video and theme tune as well.
Enemies and Bosses: As you journey around Kanto, you’ll encounter a variety of wild Pokémon out in the field and in use by a number of different Pokémon Trainers. Wild Pokémon start off at a low level, usually between three and six, and stay at that level in each area; a level four Caterpie you encountered in Viridian Forest will stay level four when you return in the post-game, but wild Pokémon levels increase as you journey to new areas, meaning you’ll face progressively tougher opposition as you go on, which will help you to grow stronger on a rising curve. Your ability to weaken these Pokémon for capture or defeat them entirely is directly tied to your current level and the moves you know; if your Pokémon are under-levelled, you’ll face a tough time even with the Type advantage, but if you bring a Normal-Type into a cave or a Fire-Type to the sea then you may struggle even if you’re at a higher level. This is true of the Pokémon Trainers you encounter; while they start off pretty simple and use weak Pokémon like Rattata and Pidgey, they eventually use more formidable and evolved Pokémon and also have more on hand. They’ll also withdraw them, heal them, or buff them with items and, while the enemy A.I. can be janky and easily exploitable at times, Pokémon Trainers tend to use moves that have a Type advantage over your current Pokémon. Still, with the right training regime and a diverse team, you can easily overcome every opponent you face; simply take some time between Gym battles to level-up, maybe focus on developing certain stats, and bringing your team as close to the level cap as possible, utilising moves that are super effective and sharing EXP wherever you can, and you can easily trample over the opposition once you’ve gotten past the uphill battle at the start of the game.
As if Team Rocket wasn’t bad enough, your asshole rival constantly pops up to challenge you.
Your most persistent foes in the game are the nefarious Team Rocket; easily identifiable by their black attire and caps, this gang of Poké-nappers have taken over buildings and even entire towns in a bid to steal Pokémon for their own evil uses or to acquire technology like the Silph Scope and Master Ball. For the most part, Team Rocket grunts aren’t much different from other Pokémon Trainers you encounter and are actually fairly predictable as they stick to common Pokémon like Zubat and Ekans, but you’ll also have to battle the duo of Jesse and James a few times throughout the story as these buffoons have been added in as sub-boss battles in key areas of the game. Like their anime counterparts, Jesse and James use Koffing/Weezing, Ekans/Arbok, and Meowth in battle and even spout their famous catchphrase, though they’re basically just another grunt to fight past rather than being pivotal to the plot. Another recurring obstacle is your rival; this arrogant and rude little git will pop up at the worst times, challenging you to a battle to prove his superiority over you and changing up his team as the game progresses to show how he’s tried to amass the most powerful Pokémon team possible. Unlike in the previous games, your rival starts off with an Eevee, which he eventually evolves into either Flareon, Jolteon, or Vaporeon (in my case, it was Flareon), and your rival will be both the first Pokémon Trainer you battle and the last as he eventually manages to become the Pokémon League Champion in keeping with his annoying ability to always stay one step ahead of you. While your rival can be a tricky customer, a diverse and high-levelled team can easily fend him off; in my game, he ended up with a team of Sandslash, Alakazam, Exeggutor, Cloyster, Magneton, and Flareon so it’s simply a case of shuffling your team so that your Water-Type goes out first and then swapping out your Pokémon between each knock out so you can hit a super effective move or have a better chance to resisting his attacks. Probably his biggest advantage is speed, as he often has Pokémon that have higher Speed stats, his Type coverage, and his eventually use of Potions and buffs to keep his team going strong but you can overcome him at every turn if you just take the time to do some grinding.
Eight Gyms await you, some with puzzles to solve beforehand, but they’re easily bested with grinding.
In your quest to challenge the Elite Four, you’ll need to travel to at least eight different towns and battle the eight Kanto Gym Leaders. Each Gym Leader specialises in a specific Pokémon Type and is protected by a number of protégés, but some Gyms even include little puzzles that you have to solve. You’ll need to investigate the bins in Lieutenant Surge’s Gym to lower the electrical barrier protecting up, navigate an invisible maze in Koga’s Gym, take an optional quiz in Blane’s Gym, and travel along spinning pads in Giovanni’s Gym. Other times, Gyms will be closed, locked, or otherwise barred and you’ll need to go on a short (or long, in the case of the last Gym) side quest to gain access but, once inside, you can often choose to avoid fighting the minions if you don’t feel like it (but I don’t recommend this as you’ll miss out on some EXP and cash). Since each Gym specialises in a Pokémon Type, the game pushes you to have a diverse team on hand, but you can often find helpful Pokémon in the wild nearby that can counteract the Gym’s specialty. Things start off relatively easily; as long as you can grab a Mankey, you can easily take out Brock, and your Pikachu will absolutely trounce Misty, but things can get difficult when fighting Lt. Surge and his Raichu…unless you’ve been grinding or snagged a Diglett from the nearby cave. By the time you reach Koga, you should be powerful and varied enough to easily overcome every subsequent Gym, though he and Erika can cause issues by inflicting status effects with their Poison- and Grass-Type Pokémon. Blaine can also be tough because of his powerful Arcanine, but you can easily overpower him with a Water-Type if you’ve been training one for a while. Giovanni, the leader of team Rocket who you battle prior to tackling him in his Gym, is heralded as Kanto’s most powerful Gym Leader but, while he has some intimidating Pokémon on hand, his focus on Ground-Type moves means a Water- or Flying-Type can significantly neuter this threat (especially if you snagged Articuno earlier).
The Elite Four are a tough prospect, but bested with smart training, item use, and a diverse team.
Defeating the Gym Leaders nets you not just a big cash payout and their Gym badge, but also a TM that allows you to teach their favourite move to one of your team. You’ll need every one of these Gym Badges, and most of the HMs, to navigate through Victory Road, a cave full of high-level Pokémon (and a great place to level-up your team) that stands as your final challenge before the Elite Four, the most formidable Pokémon Trainers in all of Kanto but, before you can reach them. Thankfully, there’s a makeshift Pokémon Center and PokéMart right before the Elite Four, so you can heal up and buy some restorative items before tackling them, and you’ll probably need these as you have to face all four Trainers in a row, and the champion, without any healing breaks in between, so you’re left with your team and the items you have on you. Lorelei and Bruno don’t really pose much of a problem; focusing on Water- and Ice-Type and Fighting-Type Pokémon respectively, you’re in a great position to overwhelm them with your Pikachu, which should be about level sixty by this point, and an Ice- or Psychic-Type Pokémon like Kadabra or Poliwrath. Agatha is a bit of a hurdle, however; specialising in Ghost-Type Pokémon, her Gengar’s love to confuse you, put you to sleep, and drain your health with their moves, so again it’s helpful to have a strong Psychic-Type Pokémon on you. Lance is probably the most unique challenge in the whole game as he utilises Dragon-Type Pokémon, a Type that you really don’t encounter anywhere else in the game except in the safari Zone. Sporting powerful moves like Thunderbolt, Hyper Beam, Ice Beam, and Dragon Rage, his Dragonairs and Dragonite can be tough to get past unless you have Ice- or Dragon-Type Pokémon or moves of your own, which you definitely will if you snagged Articuno our taught Ice Beam to someone on your team. After you topple the,, and the champion, Professor Oak registers you and your team in the Hall of Champions and you can review this, and any subsequent victories, from your PC after the credits roll.
Four powerful, Legendary Pokémon await you in the game’s toughest areas.
Although you’re given a multitude of opportunities to catch the wild Pokémon encountered in the game, some are much rarer than others. In Mount Moon and the Fighting Dojo, you’ll be given the opportunity to pick from one of two Pokémon (with the former being fossilised and needing to be restored on Cinnabar Island), immediately meaning that you won’t be able to acquire the other without trading. You can win (or buy) Game Coins to purchase rare Pokémon in Celadon City, encounter unique Pokémon like Kangaskhan and Dratini in the Safari Zone, and, while you’ll battle an enraged Marowak, the only way to acquire one is to evolve a Cubone. Similarly, you’ll have just two chances to capture a Snorlax as the bulbous Pokémon block your path in two places, but you’ll only get one chance to catch the three Legendary birds, Articuno, Moltres, and Zapdos. These powerful elemental birds are found in Seafoam Islands, Victory Road, and the Power Plant, respectively, and you absolutely need to save before battling them as they won’t appear again if you knock them out and save after. You’ll also need a hefty supply of PokéBalls, Pokémon moves that inflict paralysis, freezing, or sleep, and a whole lot of luck and patience as the game’s annoying tendency to have balls “miss” can make these battles needlessly frustrating. When trying to catch the bird son this play through, I continuously ran out of Ultra Balls or kept knocking the birds out, but then random managed to catch each within five throws of a weaker Great Ball, so go figure. After besting the Elite Four, Cerulean Cave will open up; this cavernous area is a great place to level-up and find some new items, but is also home to the most powerful Pokémon in the entire game, Mewtwo. This genetically-engineered, Psychic-Type Pokémon can deliver massive damage with Psychic and even heal itself with recover but, while it’s entirely possible to capture it using status effects and Ultra Balls, it’s much easier to simply toss the never-miss, one-throw capture Master Ball at it and add it to your team to wipe out all subsequent challenges.
Power-Ups and Bonuses: As you explore the wide land of Kanto, you’ll find plenty of pick-ups strewn around, be gifted them from NPCs, or will be able to buy a variety of items from PokéMarts. These include healing items like Potions, Super Potions, and Hyper Potions, restorative items like Revive and Max Revive, and status-healing items like Awakening and Antidote. These are relatively commonplace, though are not widely available across the region; the PokéMart in Pewter City will forever sell the basic PokéBalls and Potions, while only the more expensive items are available in Celadon City and at Victory Road. Other items can also be acquired that can aid you in battle; PokéDolls can help you flee from battle, the likes of X-Defend will boost your stats for that battle, and you can snag a PokéFlute that lets you wake up sleeping Pokémon without having to constantly buy Awakenings. Vitamins and evolutionary stones are far harder to find on the overworld, but can be bought from Celadon City’s Department Store and are great for raising individual stats and quickly evolving Pokémon to their more powerful forms, and you can also fend of random encounters with repels, find Nuggets to sell for cash (and sell most items you find), a Coin Case to play slot machines, and key items like the Itemfinder and EXP All if you capture enough Pokémon to appease Professor Oak’s aide.
Buy, find, or acquire items to boost your abilities, progress the story, and learn new moves.
One of the most common items you’ll need are PokéBalls; these come in three purchasable types (regular PokéBalls, slightly better Great Balls, and even better Ultra Balls) and you’ll need a lot of them to complete your PokéDex, especially as they often miss when tossed at their target. The Master Ball is a one-of-a-kind, never-fail PokéBall that is best saved for Mewtwo, and you’ll also need to plan out exactly how you want to use your TMs as these can only be used once. Some can be bought for Game Coins, but mostly you get one use and that’s it; conversely, HMs can be used multiple times but you’ll need to visit the Move Deleter to unlearn them. As you level-up, your Pokémon will learn new moves, with their most powerful moves becoming available if you put the effort into raising them. Some are harder to evolve than others as they level-up slower or don’t learn decent moves for some time, others mainly learn moves that boost their speed, attack, or defence, which doesn’t help me as I prefer to fill my move slots with attacking moves. Some Pokémon also don’t evolve at all, which can lower the incentive on using them as you don’t see as much progression when using them.
Additional Features: Of the 151 Pokémon available in this generation, 137 are available to catch or own in Pokémon: Yellow either by evolving or trading in-game. As you play, you can consult with Professor Oak on your progress and he’ll offer feedback and tips for where to catch new Pokémon, and you’ll need the three fishing rods and the HMs to find all the Pokémon available in the game. Even if you catch or evolve everything available, you’ll still need to trade with a copy of Pokémon: Red and/or Blue to complete the PokéDex; although you unfortunately still have no legitimate way to acquire the elusive Mew, you don’t need it to complete the PokéDex and will be gifted with high praise from Professor Oak and even a certificate from the game’s developers. While many of the areas you visit are mandatory, some are optional; you can explore caves to find new Pokémon and shortcuts, bring water to checkpoint guards to make travelling a lot easier, and tackle the Fighting Dojo to earn either Hitmonchan or Hitmonlee. Although there’s no way to battle any of the Pokémon Trainers or Gym Leaders again after you’ve beaten them, the aforementioned Seafoam Islands, Victory Road, and the Power Plant all include diverging paths that lead to one of the Legendary Birds, and you can challenge the Elite Four and the champion over and over again to level your team up to the maximum level and earn big cash to spend in the Game Corner and snag those rare Pokémon and items. You can revisit the Safari Zone as often as you can afford the entry fee and search about for the rare Pokémon found there, and pull off a few glitches to both allow these Pokémon to appear in the overworld and duplicate your items (though you risk corrupting your save file if you do this). Post-game content is primarily focused on completing the PokéDex and travelling to the Cerulean Cave to capture Mewtwo; otherwise, you’ll probably be spending most of your time grinding, capturing, or trading and battling with other players using the online functionality.
The Summary: It’s been a long time since I played the first generation of Pokémon and it is a little jarring returning to a simpler time before many of the gameplay mechanics and quality of life improvements that were introduced in subsequent games. The core gameplay is still there, and it’s just as simple to get to grips with the mechanics once you get going, but there’s no denying that things are much slower and more aggravating in Pokémon Yellow Version: Special Pikachu Edition. The lack on an in-battle EXP bar, the messy organisation of the PCs and inventory, and not being able to keep track of the Pokémon you’ve caught outside of viewing the PokéDex make things a bit tedious as you’re constantly going back and forth and scrolling between menus (you even need to manually activate HMs rather than the option simply appearing when you press A near objects). Battles are made incredibly frustrating due to the janky A.I. that sees critical hits, confused attacks, missed moves and missed PokéBalls dragging things down, and many of the new artwork for the Pokémon really is incredibly ugly. On the plus side, though, this remains a timeless gaming experience; everything you loved about the first generation of Pokémon is here, plus a little more thanks to the influences from the anime: while it’s annoying that you can’t evolve your Pikachu, it’s cute having it following you around and saying its name and playing the surfing mini game, and I loved seeing Jess and James pop up as opponents (I just wish they had played a bigger role in the narrative). Pokémon Yellow Version: Special Pikachu Edition is certainly the definitive game of the first generation, allowing you to acquire all three of the Kanto starters and offering a variety of Pokémon previously exclusive to its predecessors and even including new layouts for some areas. While subsequent sequels quickly made these first games irrelevant by improving every aspect of the presentation and gameplay, there’s still a lovely hit of nostalgia to be found here and Pokémon Yellow Version: Special Pikachu Edition remains as entertaining now, despite its flaws, as it was back in the day.
My Rating:
⭐⭐⭐
Rating: 3 out of 5.
Pretty Good
Did you enjoy Pokémon Yellow Version: Special Pikachu Edition? How do you think it compares to the original games, and which of the first generation titles was your favourite? Did you enjoy having Pikachu as your partner or did you just leave it in a box? Which of the Gym Leaders did you struggle against? Did you nickname your Pokémon and who made it into your final team? Did you ever complete the PokéDex? Which of the Pokémon games, and titular monsters, is your favourite? How are you planning to celebrate National Pokémon Day this year? Whatever your thoughts on Pokémon, sign up to leave them below or drop your comments on my social media and be sure to check in next week for more Pokémon content!
After the release of Sonic the Hedgehog(Sonic Team, 1991), Sonic had firmly established himself as the hot new icon on the block and catapulted SEGA to the forefront of the Console Wars. Anticipation was high for a sequel and, in keeping with their aggressive marketing strategies, SEGA dubbed November 24, 1992 as “Sonic 2sday”, a marketing stunt that not only heralded the worldwide release of the bigger, better sequel but changed the way the videogame industry went about releasing games for years to come.
Released: June 2013 Originally Released: 29 October 1992 Developer: SEGA Original Developer: Aspect Also Available For: GameCube, Game Gear, Master System, Nintendo Wii, PC, PlayStation 2, Xbox
The Background: I went into great detail about just how important a release Sonic the Hedgehog 2 (SEGA Technical Institute, 1992) was for SEGA; hot off an aggressive marketing campaign and the incredible sales of the first game, Sonic 2 saw SEGA’s supersonic mascot catapulted into mainstream popularity and success. Like with the first game, SEGA also commissioned an 8-bit version of the game; unlike its predecessor, Sonic 2’s 8-bit version was developed by Aspect and, unlike its 16-bit counterpart (and despite the game’s title cards), it did not feature Sonic’s new sidekick, Miles “Tails” Prower, as a playable character. Similar to the 8-bit version of Sonic the Hedgehog, I first played the 8-bit Sonic 2 on the Master System, before its 16-bit counterpart, and the game was noticeably different from its equivalent. Despite being more difficult on the Game Gear, the 8-bit Sonic 2scored high upon release and, even years later when it was re-released on Nintendo’s Virtual Console, it was praised for not being a mere clone of its Mega Drive cousin.
The Plot: Doctor Eggman is back! This time, he’s kidnapped Sonic’s new friend, Tails, and invaded South Island in search of the six Chaos Emeralds once more. Only Sonic has the speed, the skills, and the attitude to bust up Dr. Eggman’s Badniks, find the Chaos Emeralds, and rescue Tails from the egg-shaped madman’s grasp.
Gameplay: Like its predecessor, and pretty much every Sonic the Hedgehog videogame, Sonic the Hedgehog 2 is a 2D, sidescrolling action/platformer in which you must guide Sonic through seven stages (referred to as “Zones”) with three levels (referred to as “Acts”) each. Unlike in the 16-bit game of the same name, Sonic’s arsenal remains unchanged from the previous title; pressing any button will see him become a whirling ball of spikes and allow him to break open power-up monitors and smash Dr. Eggman’s Badniks with his patented “Super Sonic Spin Attack” and you can also put him into a similar spin by pressing down on the directional pad (D-Pad) when running along or down slopes. Pressing up or down also lets you scroll the screen vertically but, otherwise, that’s it for Sonic. While he doesn’t have the Spin Dash here, Sonic is noticeably much faster than in the last game; the game, overall, runs much smoother than its predecessor and there are numerous quality of life improvements as well. While the heads-up display (HUD) is still limited, with your Golden Rings counter still rolling over to zero after you collect more the ninety-nine Rings and your life counter capped at nine despite you accumulating more lives in the end of Act score screen, you can now recollect a few Rings when you’re hit, which is a hell of a boon over the last game, and there’s far less periods of slowdown unless you’re underwater.
The game’s much bigger and smoother than its predecessor, if still restricted by its hardware.
There are, however, some noticeable omissions that make the game much harder. Gone are the Arrow Monitors and neither Signposts or Starposts are present, meaning that you’ll need to restart the entire Act if you lose a life. There’s also far less benefit to finishing Acts with fifty Rings or more; sometimes you’ll get a Ring or life bonus but there are no Special Stages to play this time around and, while extra life monitors can be found in Zones (usually off the beaten track or hidden behind hidden walls), these bonuses are much less prevalent than in the last game. Finally, while it’s great that the sprites are bigger and much more detailed, screen size is a real issue in the 8-bit Sonic 2; I don’t recall it being as big an issue in the Master System version but the Game Gear version definitely suffers from bottomless pits, spike pits, and other hazards being hidden off screen and, in a first for me, respawning Badniks whenever you leave the screen. Where the 8-bit Sonic 2 excels, though, is in its clear desire to mix things up a bit more. It bares absolutely no resemblance to its 16-bit counterpart and instead features entirely different Zones; while some are familiar, and their gimmicks are similar, the two are like night and day. This is seen right away in the first Zone, Underground Zone, which is a far cry from the bright, colourful levels that generally open Sonic games. This Zone features destructible blocks (which make their 8-bit debut here), ceiling spikes, lava pits, and, of course, the mine cart gimmick that appears again later in the game. Sonic’s options while riding a mine cart are limited to simply jumping from it before he meets a sudden end but your options are even more limited in Scrambled Egg Zone’s fast-paced tubes.
Spike pits are plentiful but the game’s finicky bubble and hang glider are a massive aggravation.
Similar tubes last you around in other Zones but these will require split-second decision making on your part and will often return you to the beginning of the maze, at best, or spit you out onto a spike pit or into the path of a Badnik at worst. You can also skim over the surface of the water in Aqua Lake Zone and explore its underwater ruins, collecting air bubbles to breathe and desperately fighting with the game’s clunky controls as you navigate Sonic through narrow, spike-filled tunnels while trapped in a big bubble. The 8-bit Sonic 2 also features the game’s trademark loop-de-loops, which appear most prominently in Green Hills Zone, a stage that features many uphill slopes and blind jumps over long spike pits. You’ll also roll around on spinning cogs in Gimmick Mountain Zone, bash through Dr. Eggman-branded blocks in Crystal Egg Zone, and generally find that most of the game’s Zones are much bigger and more difficult to navigate as a result. By far the absolute worst Zone in the game is Sky High Zone; at first, it’s a pretty typical sky-based level but, once you get past the collapsing platforms, sneaky spike pits, and figure out which clouds can be run along or bounced off, you’re met with the worst gimmick in this (or any) videogame: the goddamn hang glider! Controlling this damn thing is the hardest thing ever as you must have a lot of speed built up to stay airborne, tap left on the D-Pad in just the right way to gain height, and will fall to the ground (and usually your death) if you press the jump button, hit the ceiling, or hit a wall. All they had to do was have it so that you tapped up to stay afloat but, as it is, the controls are extremely counterintuitive and I have no doubt that many players’ experiences of the 8-bit Sonic 2 ended the moment they were forced to use this damn thing.
Graphics and Sound: Sonic the Hedgehog 2 is a marked improvement over its predecessor in terms of presentation; apart from the aforementioned differences in screen size, there’s next to no discernible difference between the sprites and Zones of the Master System and Game Gear versions. Sonic’s sprite is thus bigger, more colourful, and much more cartoony; he has a whole new idle pose where he shrugs his shoulders with indifference when left idle and a whole bunch of new animations thanks to the game’s new gimmicks. Sadly, the Badniks don’t really get the same upgrade; you’ll encounter the same handful of enemies in every Zone and most of them are just recycled versions of Motobugs, Crabcrawlers, and Newtrons, with none of them really standing out.
Zones are bigger and more varied but have very sparse backgrounds.
The game’s Zones are quite the mixed bag; on the one hand, I absolutely love how they’re completely different from the 16-bit version and they’re definitely very unique, with some big and detailed foreground elements. On the other hand, the backgrounds are actually less detailed than before, with only Gimmick Mountain Zone really impressing me with its background elements. While Green Hills Zone is somewhat derivative, it distinguishes itself from its predecessor by having more slopes and (unfair) spike pits. Aqua Lake Zone might be similar to Aquatic Ruins Zone and Labyrinth Zone but stands out by allowing you to take the upper path across the water or using the new bubble mechanic. It was also quite the bold strategy to start the game with the dank and dreary Underground Zone but the use of mine carts and lava helps to make it a fun and simple enough opening stage.
Jaunty music, odd-ball Zones, and some fun little cutscenes add to the game’s flavour.
Perhaps the most bonkers Zone is Crystal Egg, which is populated by flying fish Badniks, cacti plants, falling crystal blocks, and a maze of translucent scenery that is a far cry from the mechanical hellscapes of most final Zones. Indeed, Scrambled Egg Zone (which bares more than a few similarities to Hidden Palace Zone from later Sonic titles) arguably would have been a better choice for the final stage, especially as the final boss is fought in an arena that’s more like Scrambled Egg Zone than Crystal Egg Zone. In addition to featuring a short opening cutscene, more detailed title cards (which replace the map of the last game and, oddly, feature Tails accompanying Sonic), and the traditional ending cutscene (including a cute little sprite of Tails), the game’s music is also quite a step up. Still featuring jaunty, catchy chip tunes, Sonic 2’s music is much longer and more layered than in its predecessor and more than makes up for the game’s less impressive sound effects (though the “SE-GA!!” chant at the beginning was a welcome and unexpected addition).
Enemies and Bosses: As I alluded to above, the 8-bit Sonic 2 kind of drops the ball when it comes to its Badniks; once again, the only time you’ll see Sonic’s woodland friends dancing about is when you free them from the Dr. Eggman-branded flying saucer at the end of Act 3 and you’ll encounter the same handful of baddies in every Zone. There’s only really one new one (the hovering turtles, or “Game-game”, which are a constant pain in the ass) but some returning Badniks have been given an upgrade; Bomb, for example, spews pellets when it explodes and Buton appears as a more fearsome version of Ball Hog but lacks the former’s bomb-throwing ability.
Dodge Dr. Eggman’s bombs to destroy the Antlion and watch for the Goose’s little minions!
Rather than taking on Dr. Eggman in Act 3 of every Zone, you’ll instead have to battle the mad scientist’s six “Master Robots”, which each one appearing as a large, mechanical creature. As before, you’ll have to navigate through a few obstacles to even reach the boss without the aid of any Rings, which can be a pretty tall order when spikes and hazards are much more prominent this time around. Indeed, Dr. Eggman even inexplicably saves you from an unavoidable dip in lava to force you into battling the Antlion Mecha, a mechanical beetle that waits for you at the bottom of a steep slope. To defeat the Antlion Mecha, you have to jump over or avoid the bombs that bounce in from the left side of the screen so that they damage the boss instead of you. This is much easier said than done thanks to the slippery slope and the Game Gear’s reduced screen size; also, Dr. Eggman will rush in to try and ram you near the end so be sure to hop over him. The Goose Mecha requires a lot less strategy; it drops little Mecha Hiyoko around the clouds that you must take out and then bobs around the arena shooting projectiles at you. Simply ram it in the head and avoid getting hit and it’ll go down pretty easily.
Unlike the last game, many Master Robots require a more strategy than just head-on attacks.
Strategy rears its head again when you face the Mecha Sea Lion; if you try and attack as you would a normal Badnik, the Mecha Sea Lion simply balances Sonic on its nose and tosses him around. You can only damage it when its blowing up a red balloon; attack this before it can launch it at you and you’ll land a hit but, otherwise, this is a pretty simply battle. Similarly, the hardest thing about tackling the Pig-Boar Mecha is the spikes on its back and the rocks it causes to fall from the sky. Jump over it when it charges and it’ll stun itself, leaving it vulnerable for a quick hit before charging at you again, kind of like a mixture of the Emerald Hill Zone and Mystic Cave Zone bosses. The Pig Mecha can also be quite a pain; not only is it arguably the hardest boss to even reach thanks to you needing to spring your way over vast spike pits but it also can only be damaged when not curled up into a ball and the window of opportunity to strike is quite small. The Pig Mecha will roll, jump, or fly across the arena and screen trying to hit you and then uncurl to taunt you, making it functionally very similar to the fight against Mecha Sonic in the 16-bit game.
Defeat Silver Sonic without the Chaos Emeralds and you’ll never see the good ending.
Speaking of Sonic’s robotic doppelgänger, you’ll encounter Silver Sonic at the end of Scrambled Egg Zone. Despite its sleeker, more futuristic appearance, though, Silver Sonic is far easier to take on; it tries to slap you with an extending arm and will repel your Spin Attack with one of its own but is otherwise very easy to attack when it’s standing out in the open or trying to charge at you with its rocket boots. If you didn’t find the five Chaos Emeralds before this boss, your game will end here but, if you did, Silver Sonic relinquishes the sixth and final Emerald and you get to play Crystal Egg Zone. This culminates in a final battle against Dr. Eggman; this time, he summons spinning energy balls, arena-filling electrical storms, and little thunderbolts to try and kill you but, while this fight is certainly more harrowing than in the last game, it’s actually more about patience and timing. Sonic must hop into the tubes and circle the arena over and over, popping out to land a hit only when the timing is right and the hazards are gone, which can take some time and be a bit frustrating. Once you defeat Dr. Eggman, he’ll flee once more but, rather than delivering a final blow, Sonic is content to be reunited with Tails.
Power-Ups and Bonuses: Oddly, Sonic the Hedgehog 2 actually includes less power-ups than its predecessor. You can still find monitors in Zones that will grant you an extra ten Rings or an extra life, but there are no longer shield monitors and I don’t recall seeing any speed-up shoes, either. The invincibility is still present, though, and not only appears far more often but is actually required to reach the Goal Post in some Zones as it’s the only way of safely crossing the spike pits.
Additional Features: Like the previous game, playing the 8-bit Sonic 2 on the 3DS is highly recommended; the game is much tougher than its predecessor so the save states are massively helpful when trying to hunt down the six Chaos Emeralds. With no Special Stages to play, you once again have to hunt for the gems in Zones, with all of them being found in Act 2 this time around. However, these are much harder to get to than before, requiring you to stay on higher paths when it’s almost impossible to do so, jump through hidden walls that don’t look any different to other parts of the environment, and making pixel-perfect bounces on springs. They’re also far more important than in many Sonic titles as, if you don’t have all five by the time you fight Silver Sonic, you can’t play the final Zone or rescue Tails; indeed, the game’s bad ending heavily implies that Tails dies as a result of your inadequacies! Sadly, you’ll probably see this ending a lot without a guide; the Master System version has a convoluted level select code that used to help me out a lot as a kid but legitimately beating this game with the good ending takes a great deal of skill…and it’s not like you get to play as Tails for your efforts, or at all for that matter.
The Summary: Sonic the Hedgehog 2 contains many quality of life improvements over the original; the game is bigger, with more colourful and detailed sprites, has a more developed soundtrack, more Zones, and runs a lot fast and smoother (especially when underwater). There’s loads of fun new gimmicks introduced here that help the game stand out from its 16-bit counterpart; the two are like night and day, with each Act being a little different from the last and new mechanics at your disposal so that it isn’t just more of the same Sonic action. However, at the same time, there’s noticeably less; no Special Stages, no real incentive to finish Zones with Rings, less power-ups, and the noticeable absence of Sonic’s two-tailed companion. Not only that but the game is far more difficult, almost unreasonably so, and made even trickier by the Game Gear’s lower screen resolution. Tracking down the Chaos Emeralds this time around was an absolute chore rather than being fun and making it so that you have to have them to even play the full game was a bit of a stretch. However, by far the worst thing is that damn hang glider; it basically derails the entire game as it’s almost impossible to control and, while you can finish Sky High Zone (and even acquire its Chaos Emerald) without using them, I can’t help but feel like this mechanic could have been better implemented. Overall, I’d say it’s definitely a worthwhile inclusion to your library but do yourself a favour and get it on a console like this that allows for save states as it makes the game far more enjoyable.
My Rating:
⭐⭐
Rating: 2 out of 5.
Could Be Better
What did you think to the 8-bit version of Sonic the Hedgehog 2? How do you think it compares to its predecessor and its Mega Drive counterpart? Which of its unique Zones is your favourite? Were you annoyed that Tails was reduced to a hostage rather than being a playable character? Did you ever manage to get the hang of the hang glider and find all the Chaos Emeralds? How are you celebrating “Sonic 2sday” this year? Whatever your thoughts on Sonic 2, and Sonic in general, drop a comment below.


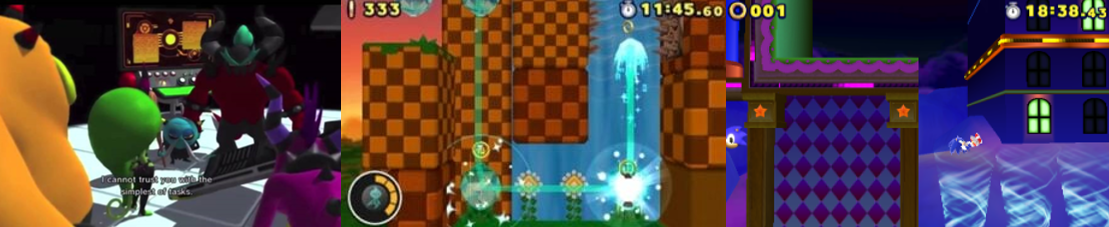


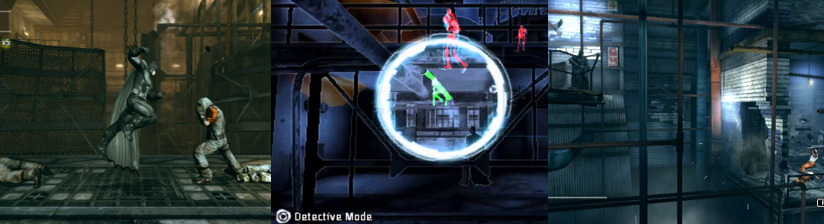
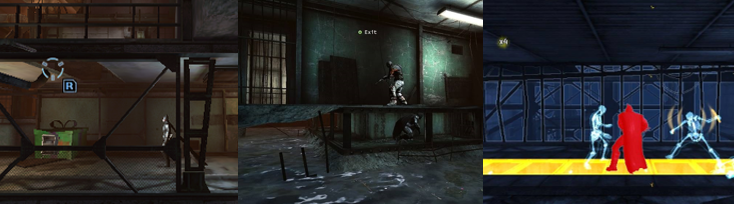
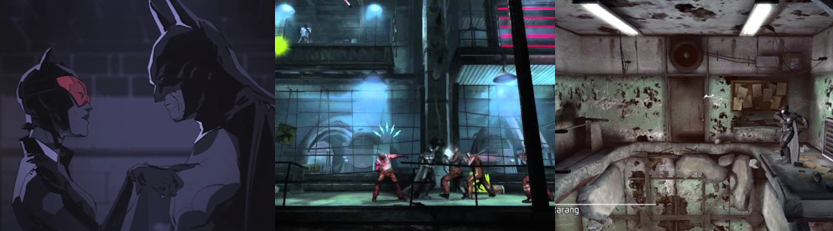
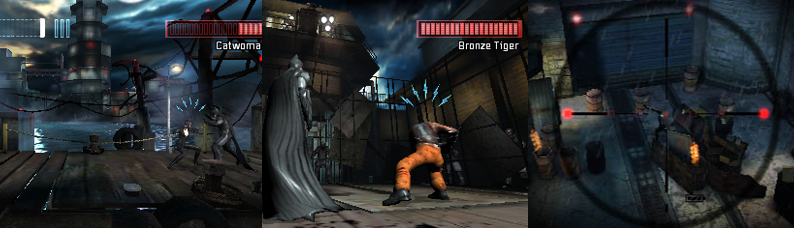
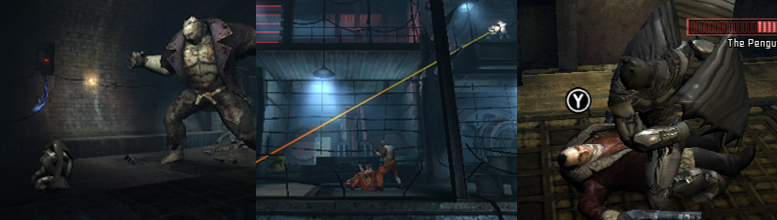
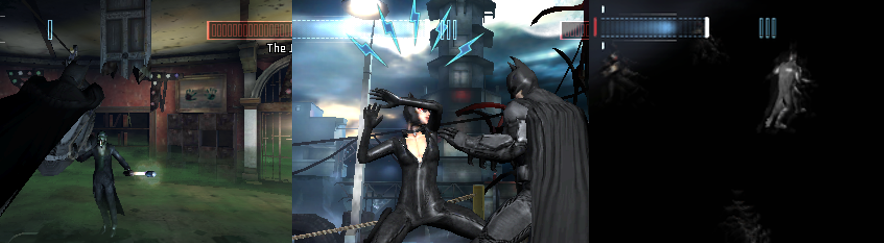


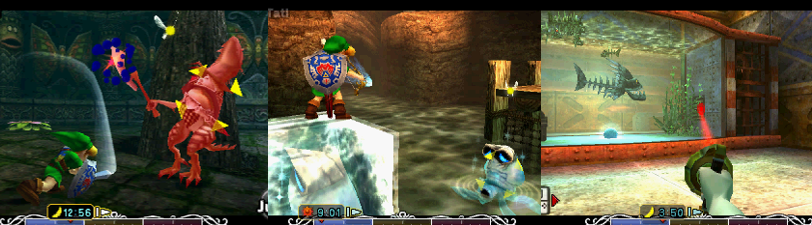
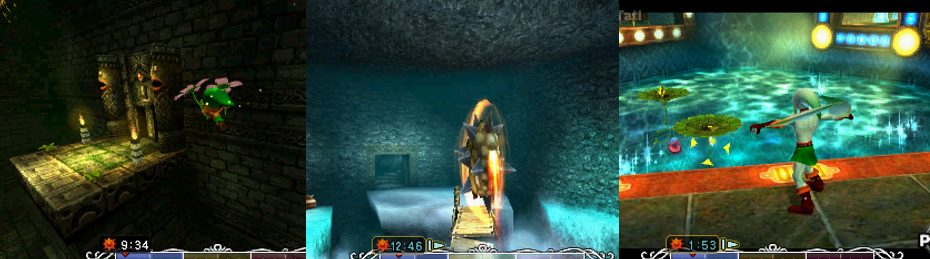
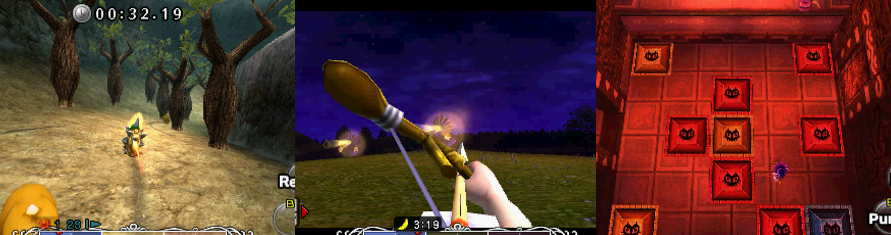
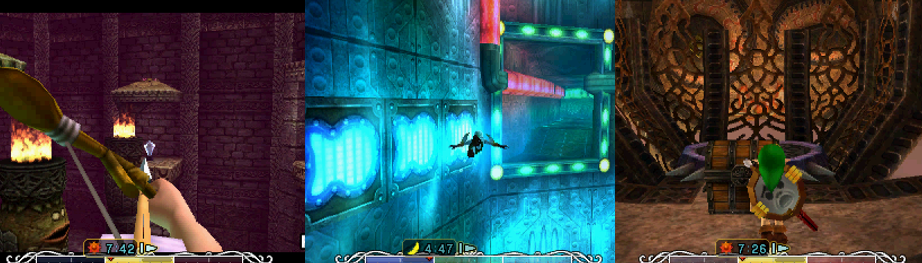


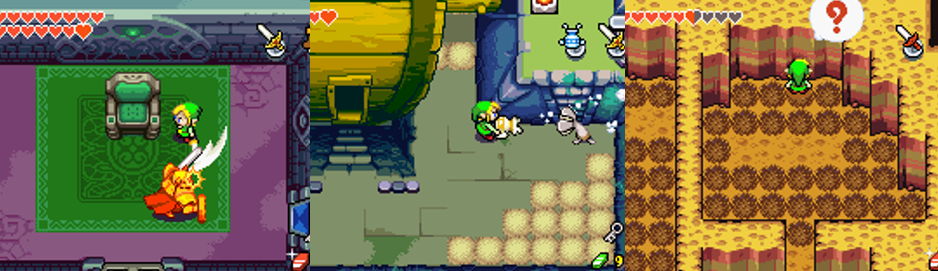
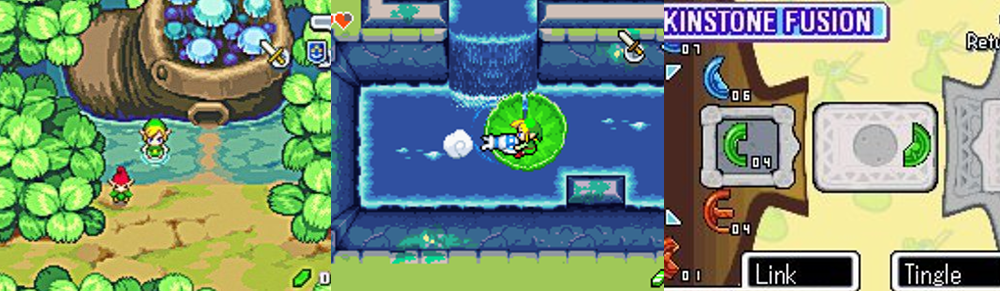
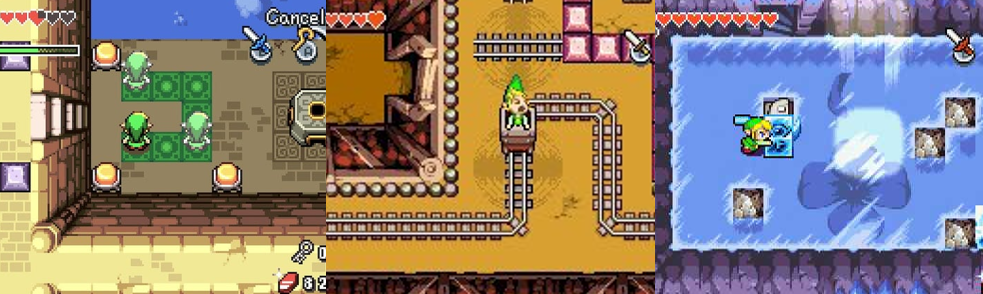
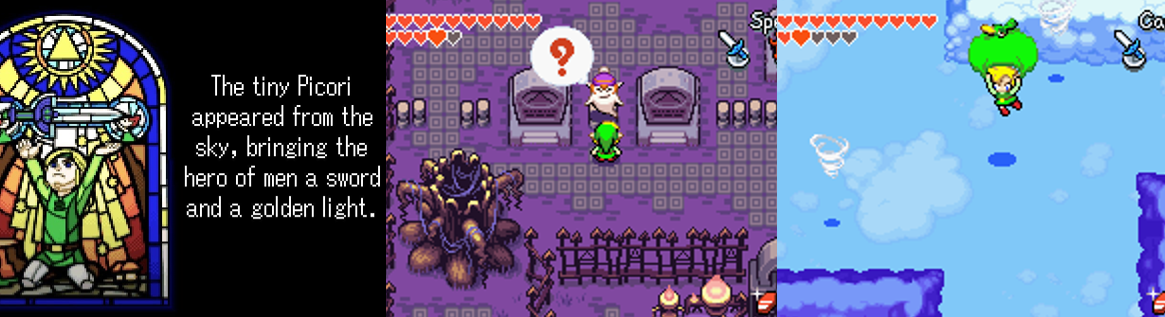
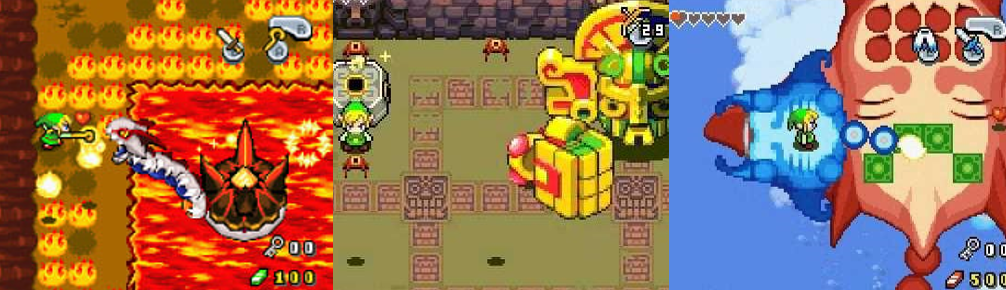
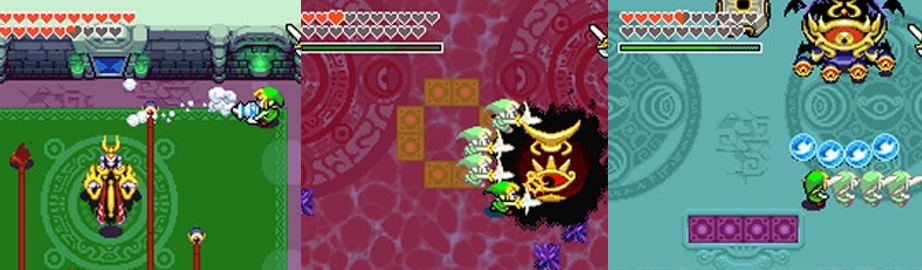


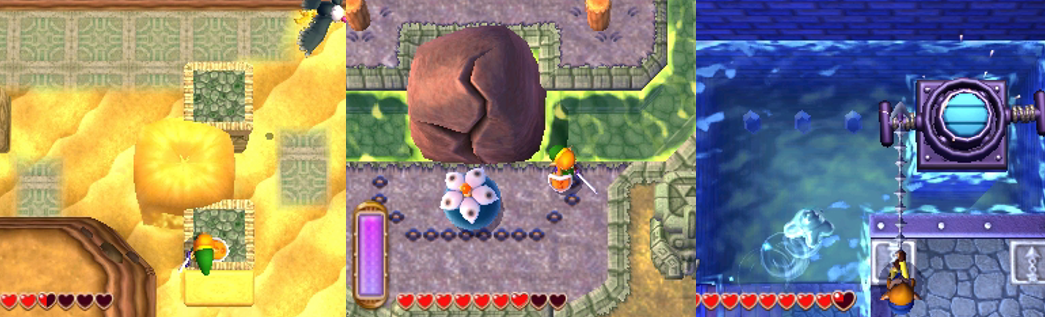

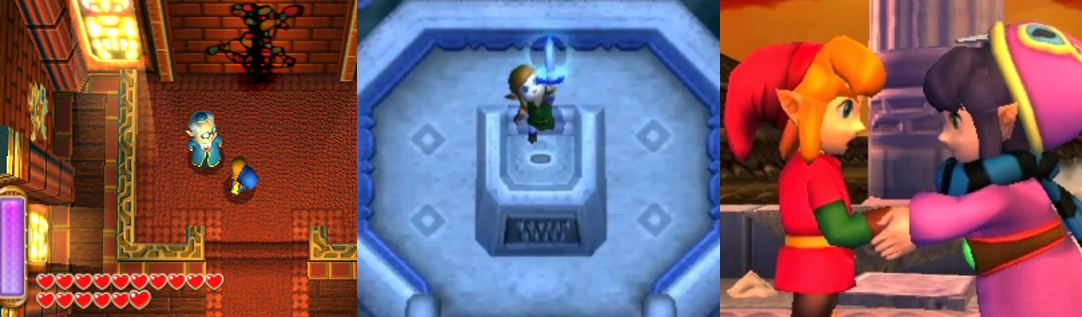
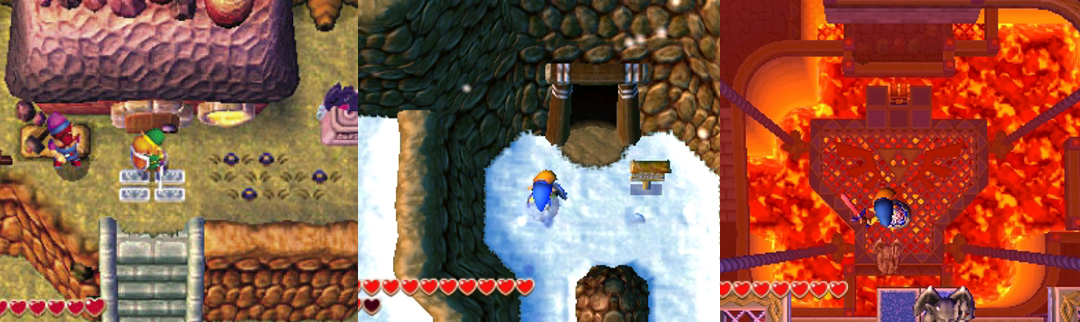

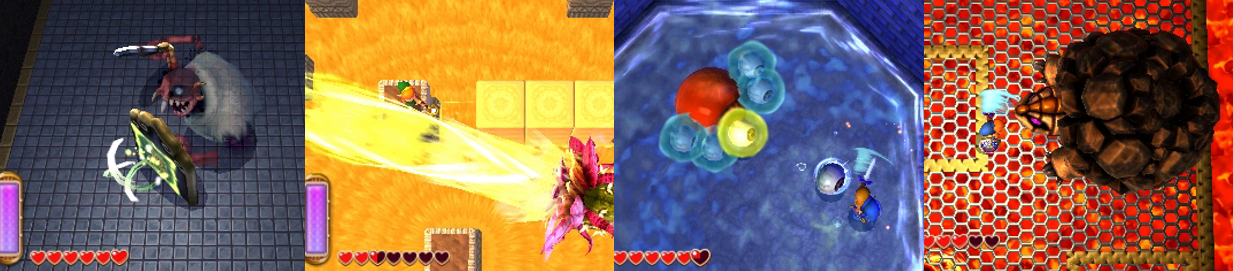
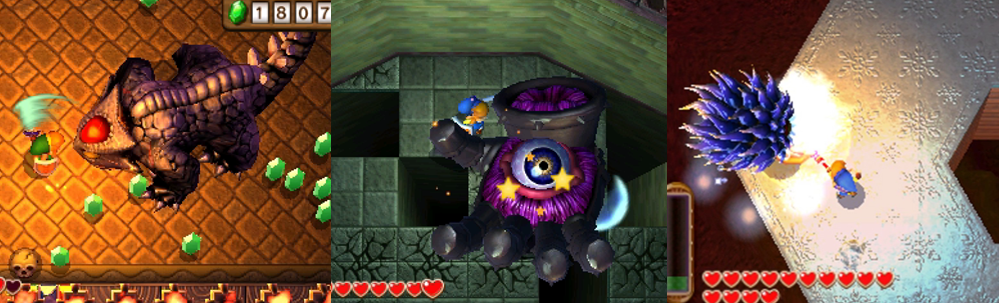


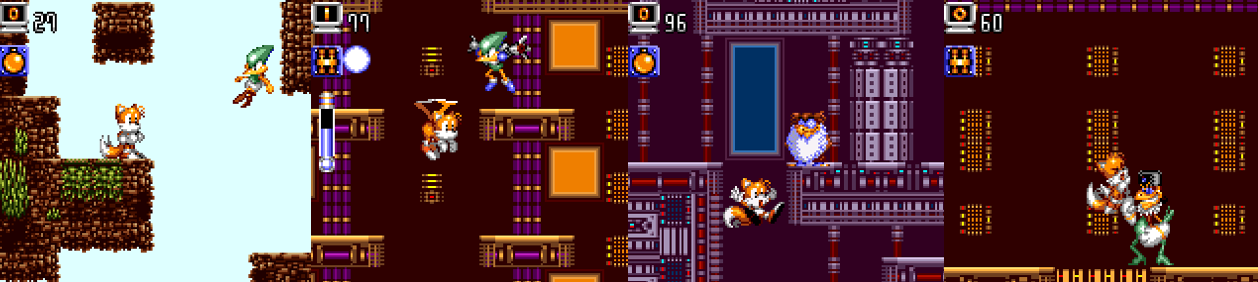
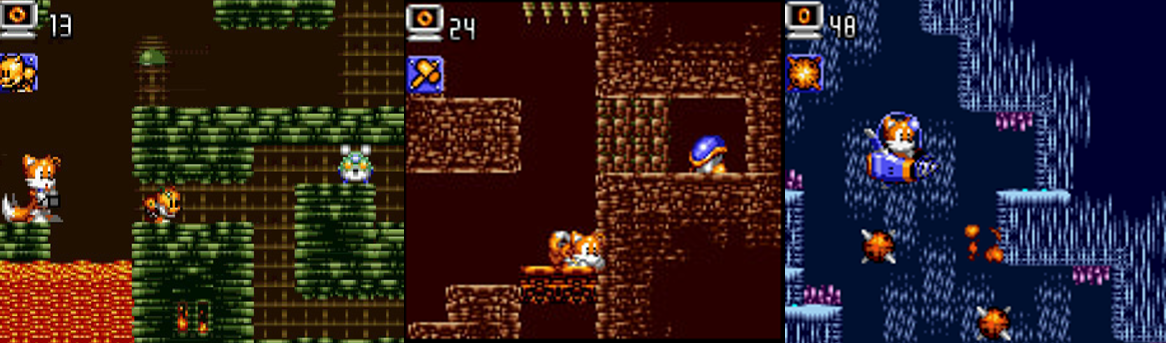


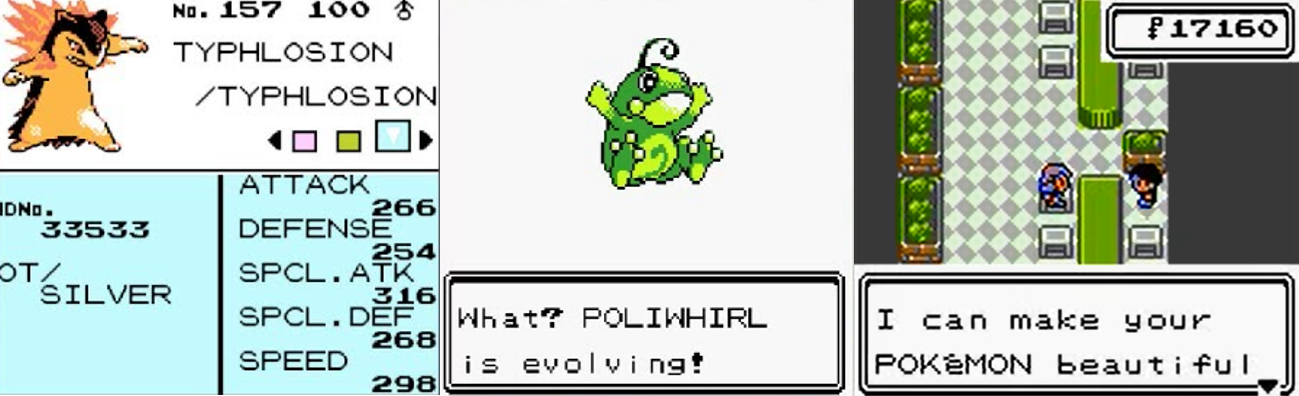


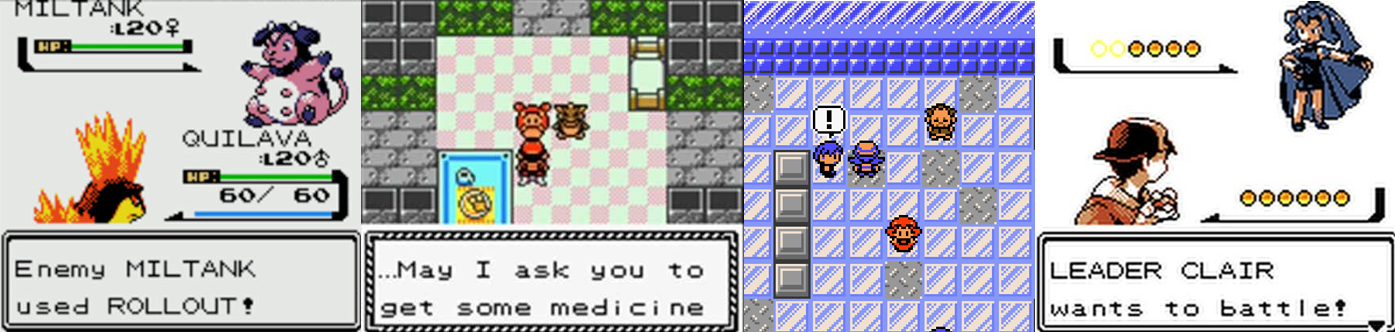

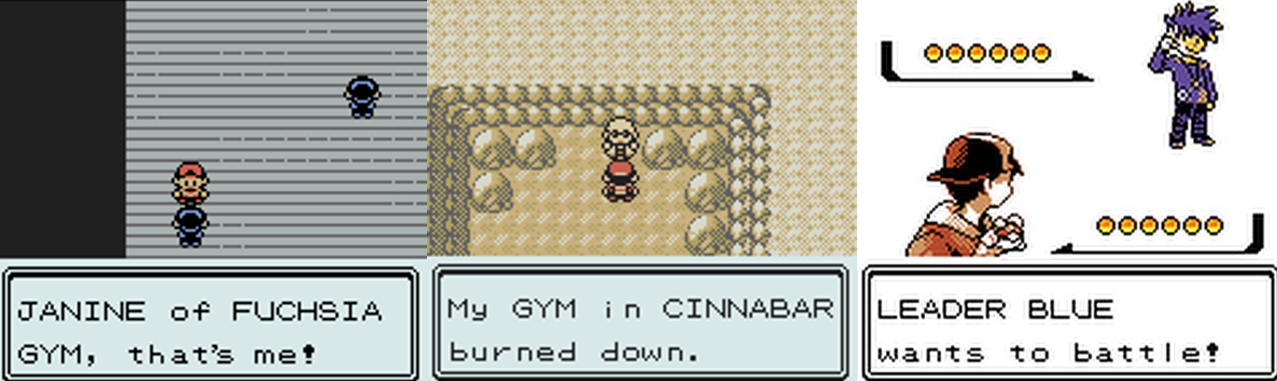
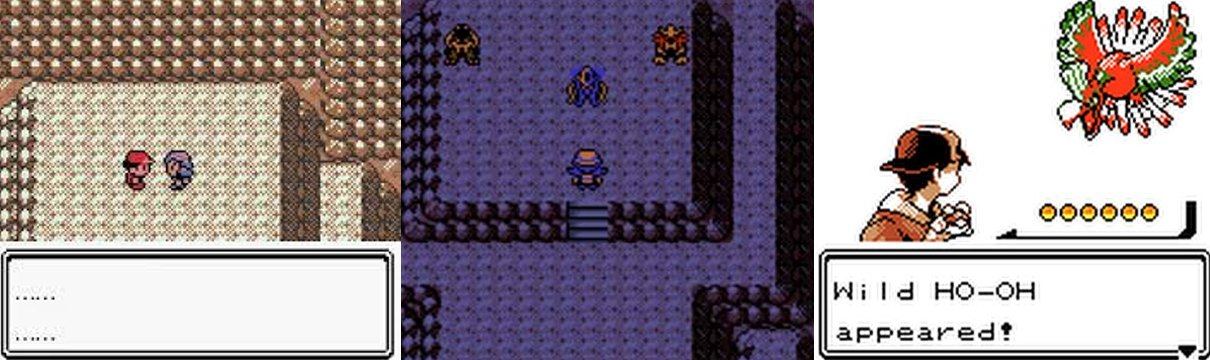
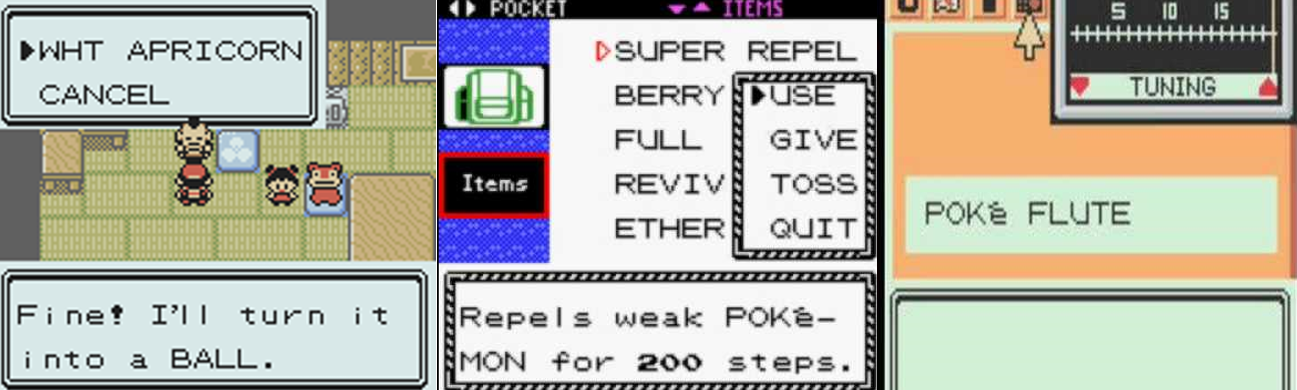


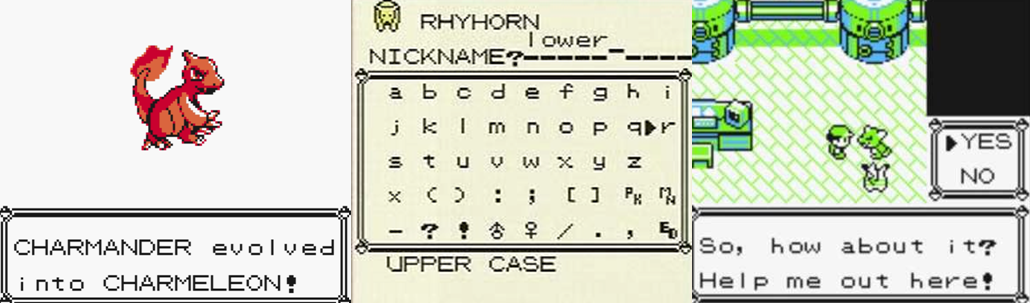

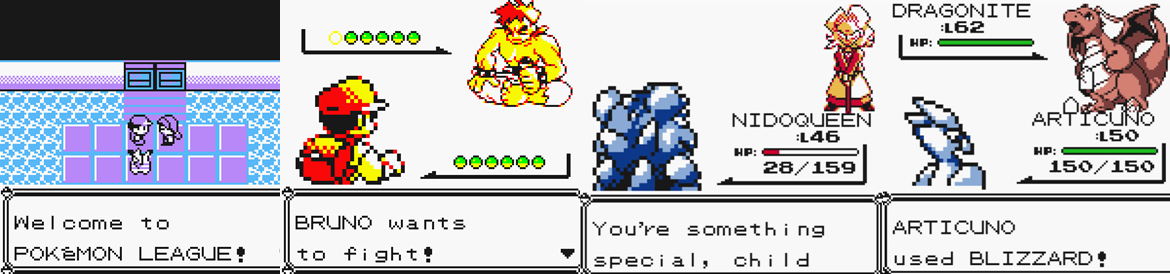


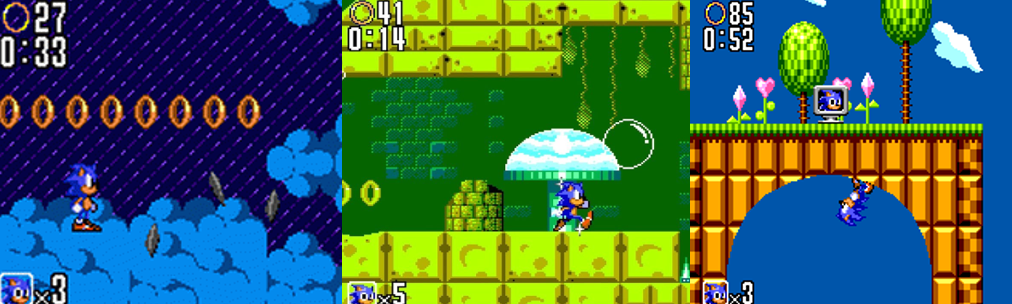
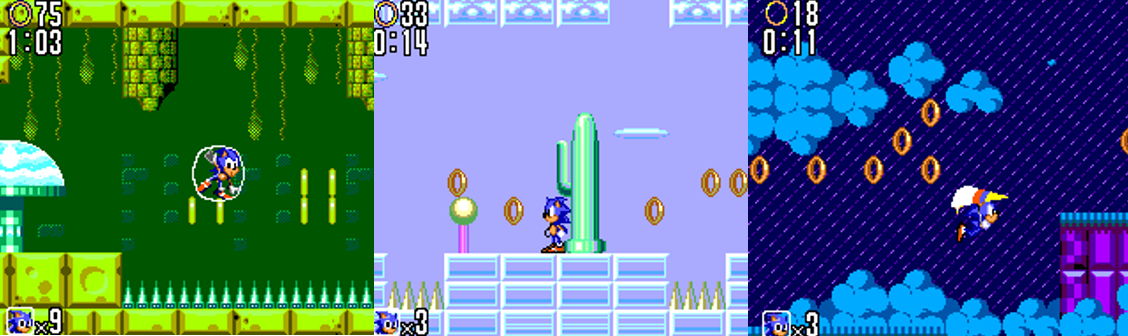

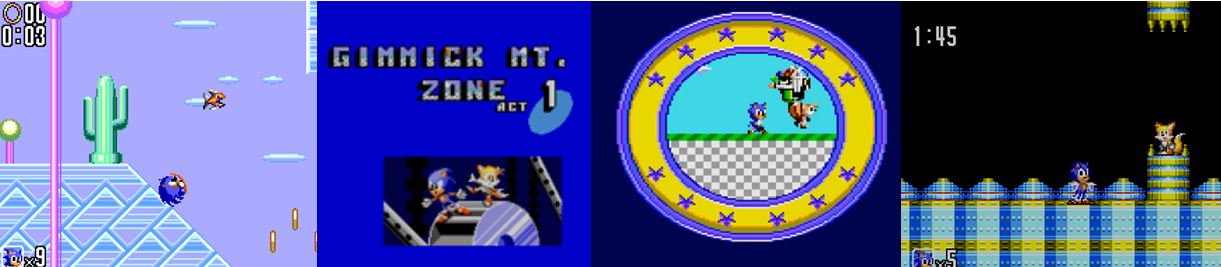

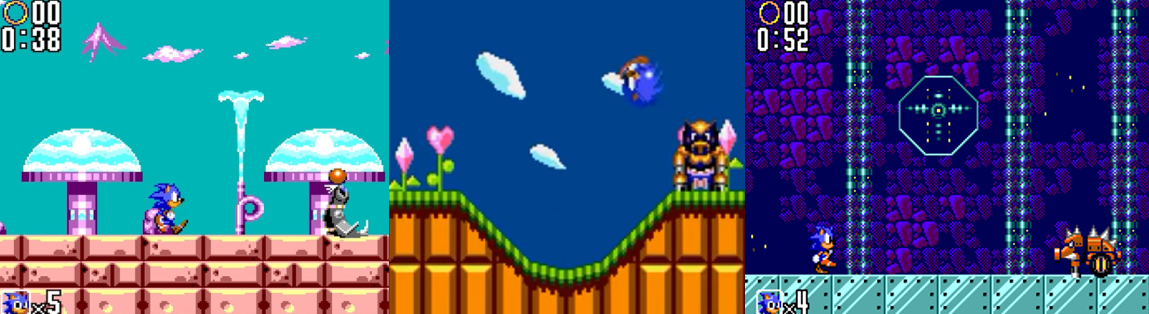
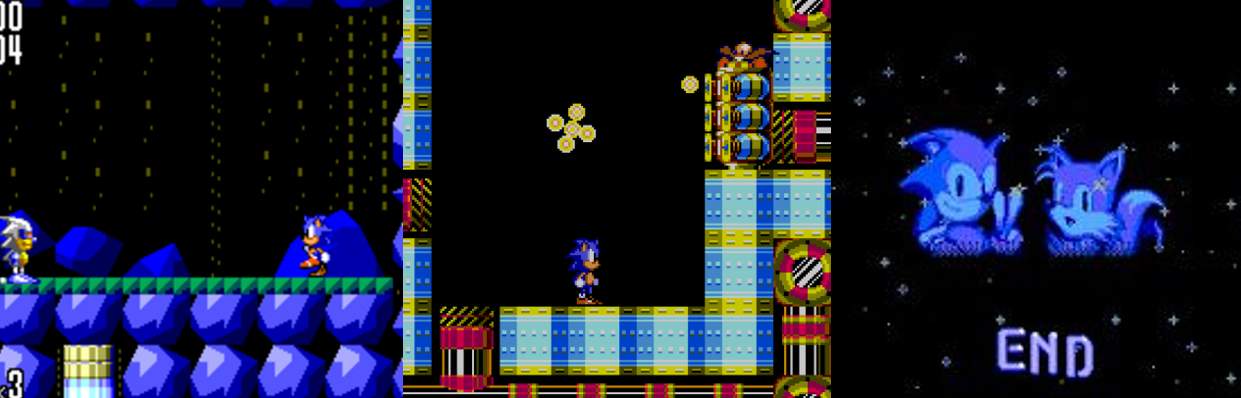


You must be logged in to post a comment.