Back Issues [Crossover Crisis]: Zero Hour: Crisis in Time!


Cover-dated April 1985, the first issue of Crisis of Infinite Earths (Wolfman, et al) precipitated the destruction of the “Multiverse” and what better way to celebrate than with a “Crossover Crisis” of my own?


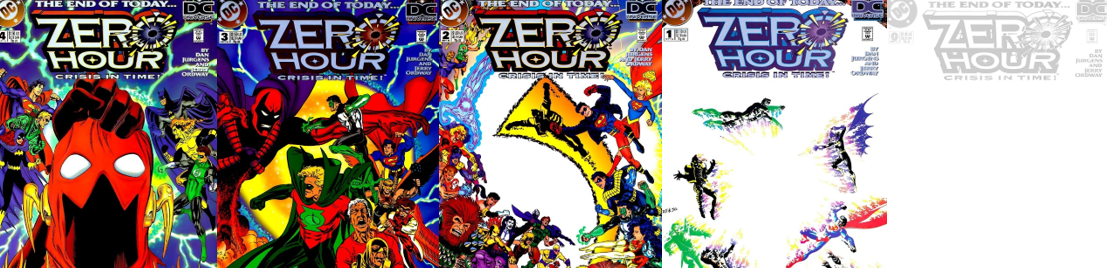
Published: September 1994

Writer/Artist: Dan Jurgens

Quick Facts:
After DC established an infinite number of parallel worlds in Showcase #4 (1956), writers like Mark Wolfman became frustrated with this concept and spent two years planning Crisis on Infinite Earths, one of the greatest comic book crossovers. However, while the likes of Clark Kent/Kal-El/Superman and Wally West/The Flash benefitted from this reboot, others like Carter Hall/Hawkman did not so writer/artist Dan Jurgens sought to correct this about ten years later with Zero Hour: Crisis in Time! Accompanied by numerous tie-in issues and occurring during the “Dark Age” of the industry, the story is largely regarded as a confusing, poorly executed mess that created more problems than it solved.

The Review:
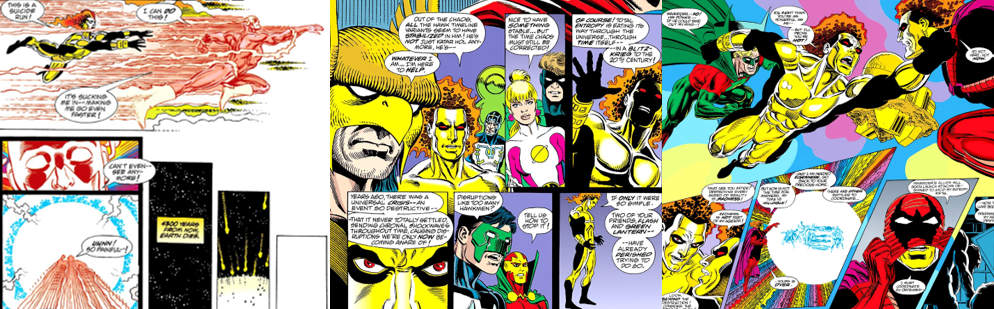
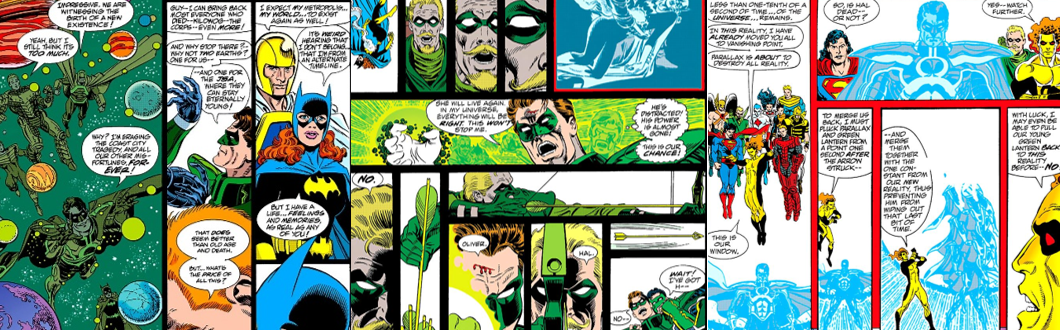
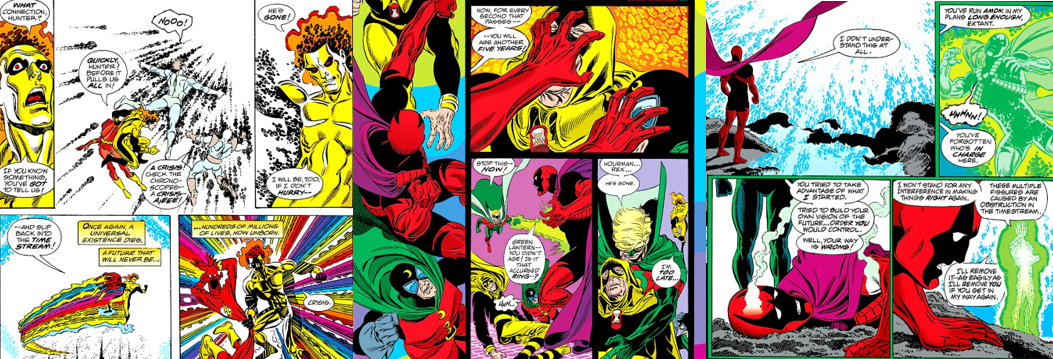
As if numbering this miniseries in reverse order (so the story starts in issue #4 and concludes in issue #0) wasn’t unique enough, each page and/or panel takes place at different times, both literally and relatively, making this a confusing time-based tale. The story begins at the literal end of time, when destructive, unstoppable entropy has engulfed the cosmos. Here, an unseen force executes the mysterious Time Trapper while berating the cloaked figure and others like him for flaunting their omnipotence and yet allowing injustice to prosper. This powerful, unseen figure then harnesses entropy’s destructive power and vows to end the universe’s suffering. His actions (unseen at this point but probably related in one of the event’s many tie-in comics) are detected by Metron, the scientific advisor to almighty Darkseid, who’s so concerned by the unravelling universe that he defies his master and seeks out allies to halt annihilation. Our first indication that something is very wrong with time occurs in Gotham City, where the Joker’s latest killing spree is unexpectedly ended by Barbara Gordon/Batgirl, apparently back in her prime and perplexing even Bruce Wayne/Batman since she was dramatically paralysed by a gunshot some time ago. The enigmatic Linear Men, who monitor and safeguard time from a pocket dimension, then observe entire timelines being erased, dispatching Matthew Ryder/Waverider and Rip Hunter to investigate. In the 64th century, Wally West/The Flash notices the surreal light engulfing the world and learns from Waverider that entropy is ceaselessly making its way back through time, wiping out everything in its path. Though Waverider’s powerless to stop it, Citizen Abra/Abra Kadabra and the Linear Men suggest that the Flash create a super-speed vortex. However, Waverider realises all-too late that the effort is futile and is unable to keep the Flash from running to his untimely doom just like his mentor in the previous Crisis, resulting in the death of the 64th century and Waverider vowing to honour Wally’s sacrifice.

Waverider desperately gathers the forces of justice to stand against Extant and this time rifts.

Their next stop is 57000 A.D, where a youthful Harold “Hal” Jordan/Green Lantern (plucked from before he became the malicious Parallax) is currently battling entropy. Green Lantern’s efforts only feed the destructive force, however, causing it to obliterate Hal and Rip. Before he dies, Rip tells Waverider to research the previous Crisis. Disregarding an anomaly in the timestream, Waverider returns to Vanishing Point and is horrified to learn of the last Crisis and frantically heads to Earth for help, arriving to find Hawkman fluctuating between his various incarnations, Alan Scott/Green Lantern randomly de-aged, and reminding Jay Garrick/The Flash of Barry Allen’s fate while simultaneously informing him of Wally’s leaving Jay heartbroken at having lost the men he considered sons. When Waverider transports the Justice Society of America (JSA) to Vanishing Point, they’re mysteriously separated and attacked by the malevolent Extant. Metron recruits Batman and Superman, who call an emergency meeting of all costumed heroes (though Metron fails to enlist Jim Corrigan/The Spectre’s help as he’s unconcerned by natural disasters). Already rattled from experiencing his own time anomalies, Superman stops to assist the debuting Bartholomew “Bart” Allen II/Impulse (displaced from the 30th century) and recruits him. Earth’s heroes discuss the time anomalies, which see heroes pop in and out of existence, the various Hawk-beings merged into a single, God-like entity, and timelines to merge as the Crisis worsens. Waverider brings the group up to date (inspiring Guy Gardner/Warrior to attempt to change Hal’s fate) but quickly teleports to Vanishing Point when he senses the JSA are in trouble. When he arrives, Extant has killed Al Pratt/The Atom and Kent Nelson/Doctor Fate and rapidly aged Doctor Charles McNider/Doctor Mid-Nite and Rex Tyler/Hourman (to the point that he dies). Although the grief-stricken Alan’s ring is depleted, Waverider gets his comrades to safety and confronts Extant, horrified to find his future self behind the mask and not Hank Hall/Monarch as he suspected!

Parallax is revealed to be the mastermind behind the Crisis and wishing to reset time in his image.

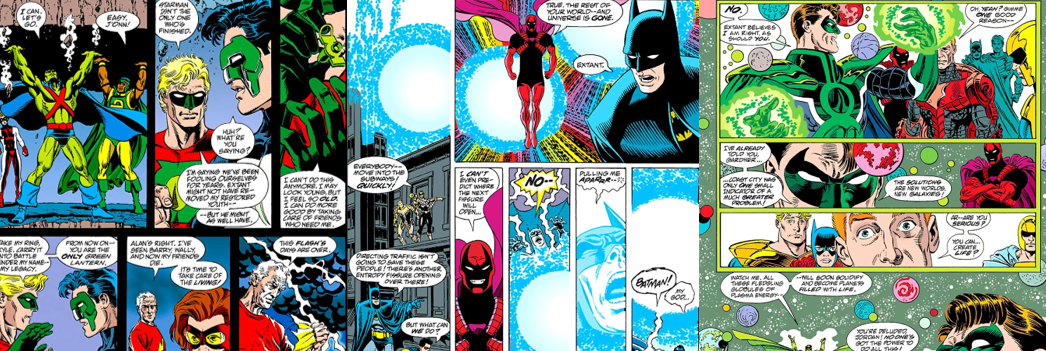
Extant reveals that he’s the amalgamation of Waverider, Monarch, and others, having assimilated incredible powers, amassed an army, and spread entropy to birth a new world. Extant teleports Waverider and the others away since it’s too soon for them to fight, though the shattered, aged JSA quit from superheroics due to their losses, officially making Kyle Rayner the only Green Lantern. Inspired by their sacrifices, Superman and the others transport to the 30th century with Metron. As they struggle to halt the entropy, Kara Zor-L/Power Girl suddenly goes into a mystical labour, and Warrior suddenly sprouts weapons by mere thought, they’re attacked by Extant’s brainwashed Team Titans before the man himself attacks…as his future self watches on! Waverider desperately teleports the others away right before Extant plunges his hand into his body and absorbs his incredible time-based energy, assuming Waverider’s guise and completing his time loop as an unseen other retrieves Alan’s discarded power ring. Returned to the 30th century, Metron has Superman and Princess Diana Prince/Wonder Woman hurl his “Mobius Chair” into the entropy rift and Captain Nathanial Adam/Captain Atom pour his full power into it, creating a Boom Tube that successfully dispels the rift. Unfortunately, entropy continues to ravage the timelines, shredding John Henry Irons/Steel and leaving Warrior distraught. Still, angered at his plans being disrupted and his armies defeated, Extant’s past and present-selves merge to ponder the rampant entropy rifts, only to be blind-sided by a greater power for attempting to usurp his plans for reality with the rifts, which erase Impulse and Michael Carter/Booster Gold. Luckily, Jay convinces guilt-trips he Spectre into joining the fray right before he also dies and the few survivors flee to Vanishing Point to restore Waverider. Although he arrives too late to save the Batman from being torn apart by a random rift, Waverider leads the assault against Extant (which leaves Doctor Ray Palmer/The Atom de-aged to a teenager!), only for Parallax to finally assert himself as the man behind the destruction of time!

Although Parallax’s mad ambitions are stopped and reality is reset more naturally, the cost is high.

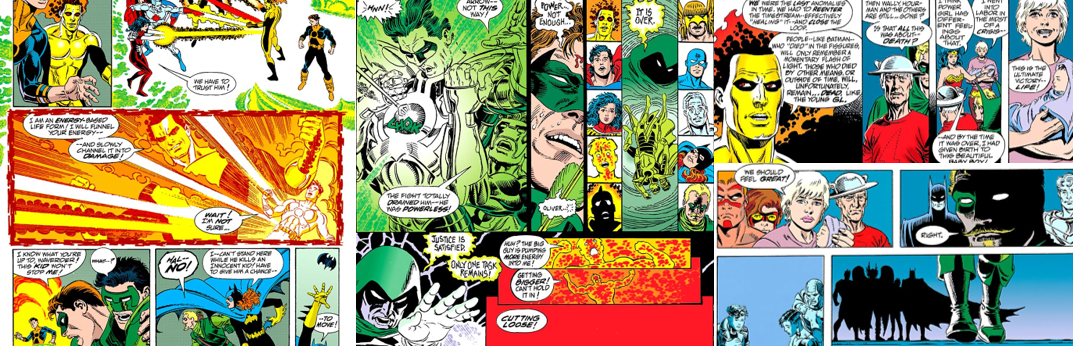
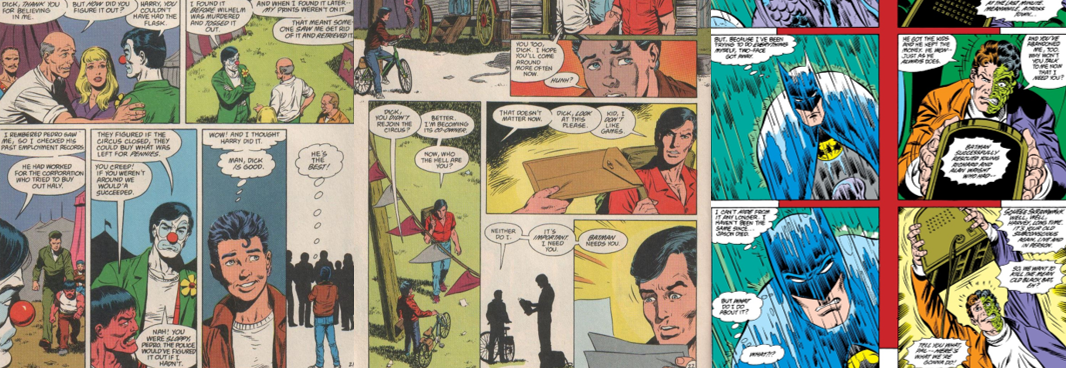
Determined to re-write reality to undo all the injustices they’ve suffered, Parallax wills entropy to engulf all that ever has or will be in the hopes of starting fresh, reshaping reality from a pocket dimension of pure, white space as the handful of shocked survivors watch. Although Guy and the others think he’s mad, Parallax vows to ensure all of them, even the time displaced Batgirl and Extant, get the world they desire, utilising leftover chronal energy and cosmic power from the first Crisis to effectively make himself a God. Having saved a handful of others and spirited them away to Vanishing Point, Waverider proposes piggybacking off Parallax’s efforts and restarting the universe in a more natural way, rather than allowing Parallax to decide who exists and who doesn’t, bringing them into conflict with Batgirl and those who want their worlds back. Lamenting having to fight his old allies and amazed that they would oppose his promise of paradise, Parallax easily fends off Superman and even the wrathful Spectre. While Oliver Queen/Green Arrow tries in vain to reach his friend and laments how far he’s fallen, Waverider has Superman and a few others channel their awesome powers through him, which he then redirects to confused outcast Grant Emerson/Damage, with the remorseful Batgirl sacrificing herself to protect the boy from Parallax’s fury. Heartbroken by how far his friend’s fallen, Green Arrow does the only thing he can and fire an arrow at the weakened Parallax, seemingly killing Hal and leaving the stage clear for the super-charged Damage to spark a new big bang. Thanks to Waverider’s intervention, Superman and the others watch as a new timeline forms, restoring many lost during the Crisis but leaving others, like Batgirl, lost to memory. Although Power Girl rejoices at having birthed new life in this new world, Green Arrow is left devastated and the survivors are both rattled and haunted by the experience, which caused numerous changes to their history (such as Warrior losing his armour and Batman no longer knowing who killed his parents, and the “Modern Age” of superheroes having only started “10 Years Ago” with the debut of Superman).

Final Thoughts: 
As I really started getting into comics during the 1990s, Zero Hour: Crisis in Time! was possibly the first Crisis event I ever read (or, at least, the one I read the most). I’ve only ever read the main five issues and a few of the tie-in and aftermath issues, which mainly dealt with our heroes encountering other versions of themselves or bizarre time anomalies. However, I would probably advise that you seek out the complete event as the main story can be confusing without context. For example, Superman says he encountered his Kryptonian parents and different versions of Batman, Warrior’s left devastated by some unexplained loss, and it’s clear that key events are missing from the main story. This may be the first DC event where the tie-in issues were semi-required to fully grasp what’s going on, which does impact the story as it’s so crammed with characters and events that it’s difficult to keep track of what’s happening and a chore to read at times. Every panel is stuffed with heroes and word bubbles, with many just standing around aimlessly, justifiably confused, or summarily executed by the entropy rifts. This means Raymond “Ray” Terrill/The Ray is left spouting “Cool!” and hovering in the background before randomly helping to kick-start the new big bang, and powerhouses like Matrix/Supergirl are as powerless to stop the destruction as the likes of Richard “Dick” Grayson/Nightwing, who joins Batman in a futile attempt to save lives. However, I did like that the heroes were determined to save as many as they could, and to intervene when the timelines merged, even though it was blindingly obvious they couldn’t stop the entropy, and how devastated they were when they inevitably failed. The stakes are definitely high and the heroes are constantly fleeing, reeling from their losses, or trying new ways to halt the destruction, keeping tensions high as they constantly fail.

This confusing mess of a Crisis is bogged down by copious exposition and cluttered action.

However, the pacing is all over the place. One minute, things are going a mile a minute; the next, things grind to a halt, and the cluttered panels are filled with endless dialogue as Waverider describes what’s going on. This really comes to a head in issue #0, where Waverider plucks the survivors from a microsecond of time and they witness the rebirth of the universe, all while Waverider waffles on about how they have one shot to re-join the timestream and it must be at the exact moment. He then explains, in great and confusing detail, why the likes of Batgirl (and, it’s assumed, Kyle) are dead but Batman and the billions of others are alive. Conveniently, this is because those latter examples died before the timeline reset; but anyone killed afterwards is really, truly dead. This does tie into Green Arrow’s grief and anger as he’s devastated at being forced to kill his best friend, despite having no choice as Hal was clearly mad with power and had appointed himself judge and jury over all lives and timelines. Green Arrow gets into a physical and ethical debate with Batgirl regarding this as Batgirl simply wants to live, just as the other anomalies want their worlds and lives back, and they briefly defend Parallax since he promises to give them everything they want. Though impressed by Batgirl’s spirit, Green Arrow echoes Warrior’s sentiments and believes Parallax isn’t qualified to make these decisions since it defies the natural order, but Oliver is distraught at being forced to take such extreme actions and this informed his characterisation for a while in the aftermath. Sadly, this comes far too late in the main story to be as impactful as it could be. I’m sure it’s fleshed out more in a tie-in comic but it’s noticeably lacking here, just like Warrior’s desire to undo Hal’s corruption and restore the Green Lantern Corps, which ends up being just one of many sidebars that aren’t resolved in the main story.

Extant and Waverider don’t make for compelling characters, making the story more dull than exciting.

As Zero Hour features time travel shenanigans, it makes sense for it to be confusing story and that the likes of Metron and Waverider must rattle off a lot of exposition. It gets frustrating as every issue reiterates a lot of this information, and if you’re not a big fan of Waverider, like me. I liked the twist that Extant was a gestalt entity comprised of different time-based powers and people, reducing him to an energy-based being with no real identity who sowed destruction for this own ends. I quite like Extant and feel he got short-changed here as he was rendered completely impotent once Parallax emerged from the shadows. Consequently, I think Zero Hour would’ve been far better and more coherent if Parallax had been the antagonist from the start, going around time destroying and absorbing power from the likes of Extant, the Time Trapper, and Waverider, just to give the story more focus and really emphasise how shocking it is when the JSA are de-aged and killed and characters are erased. This would’ve been a natural evolution of his original turn when he destroyed the Guardians of the Universe and would’ve made for more drama as his former allies lamented his madness and struggled with fighting him, rather than Extant constantly unmasking to be different people, and could’ve even seen Hal’s past self confronted by his future, corrupted counterpart. While the art is okay, Zero Hour suffers from having far too many characters crammed into every panel, making it difficult to keep track of who’s still around or not. I liked the depiction of entropy erasing characters and timelines, especially as a metaphor for DC literally streamlining their time, but the execution was lacking as it left Hawkman a combined entity rather than simply resetting him and I always come out of this story wondering what the purpose was beyond being a cluttered celebrating of DC’s colourful characters. Sadly, it falls very short and everything that happened in it was rewritten eventually, with even Parallax being redeemed, making the entire story forgettable and pointless.

My Rating:

Rating: 2 out of 5.

Could Be Better

Were you also disappointed by Zero Hour: Crisis in Time!? Were you able to follow all the time-based nonsense and exposition? Are you a fan of Waverider and Extant or did you also find them dull characters? Which of the deaths was most impactful or senseless to you? Were you a fan of Hal’s turn as Parallax and do you agree he should’ve been the sole villain here? Did you like the changes made to DC following Zero Hour? Which Crisis event was your favourite and what are some of your favourite cosmic events? Tell me what you thought about Zero Hour: Crisis in Time! in the comments and donate to my Ko-Fi to suggest other Crisis events for me to cover.

Back Issues [Robin Day]: Batman #440-442 / The New Titans #60-61


In April 1940, about a year after the debut of Bruce Wayne/Batman, DC Comics introduced “the sensational find of [that year]”, Richard “Dick” Grayson/Robin. Since then, many have assumed the mantle and the Dynamic Duo have become an iconic staple of DC Comics.


Story Title: “A Lonely Place of Dying”

Story Title: “Part 1: Suspects”
Published: 31 August 1989 (cover-dated: October 1989)
Writers: George Pérez and Marv Wolfman
Artist: Jim Aparo

Story Title: “Part 2: Roots”
Published: November 1989 (cover date)
Writers: George Pérez and Marv Wolfman
Artists: George Pérez and Tom Grummett

Story Title: “Part 3: Parallel Lines!”
Published: 28 September 1989 (cover-dated: November 1989)
Writers: Marv Wolfman
Artist: Jim Aparo

Story Title: “Part 4: Going Home!”
Published: December 1989 (cover date)
Writers: George Pérez and Marv Wolfman
Artists: George Pérez and Tom Grummett

Story Title: “Part 5: Rebirth”
Published: 2 November 1989 (cover-dated: December 1989)
Writers: George Pérez and Marv Wolfman
Artist: Jim Aparo

Quick Facts:
Initially created to literally replace Dick Grayson as Robin, readers came to dislike Jason Todd when he was reimagined as a bratty street kid, leading Jim Starlin and Dennis O’Neil to dramatically kill the new Robin off in the iconic “A Death in the Family” (1988). While Jason’s death haunted Batman for years, a new Robin debuted almost exactly one year later in this five-issue crossover story. Created by Marv Wolfman and Pat Broderick as the opposite of Jason and possessing keen deductive skills to rival Batman, Timothy “Tim” Drake saw a dramatic redesign for the character and was popular enough to not only get his own solo book, but also be widely considered the best incarnation of Robin.

The Review:
Our story opens with the Batman in bad shape and tussling with the Ravager, a sadistic masked psychopath who’s been on a killing spree. Although the Batman’s cut and bruised from the Ravager’s attacks and knives, he turns the killer’s golden chain against him and sends him plummeting off dam. Limping to the Batmobile. Batman stumbles back to Wayne Manor, where his faithful butler and father figure, Alfred Pennyworth, cares for him as he struggles against a fever, exhaustion, and his wounds. In his frazzled state, Batman completely missed that a mysterious individual photographed his fight and has been following his career for some time. An avid fan of Batman and the Dynamic Duo, this individual notes that Batman’s been getting more reckless and violent since Jason’s death and longs for the confident, compassionate Batman of old. These concerns are echoed by Alfred, who candidly expresses worries for Bruce’s mental health, which has severely impeded his judgement and impacted his physical health, though Bruce ignores these concerns and suits up for another night’s patrol. Following the Ravager’s failure, his shadowy employer, baited by a voice from a radio that’s actually his own delusions, arranges a trap for the Dark Knight by manipulating mob boss Gerry Syke. Naturally, the Batman shows up, triggering a firefight. While dispatching Sykes’ mooks, Alfred’s words rattle around Batman’s head (“think with our heads, not with our fists”) and he realises he’s been too distracted to see the obvious clues (everything related to the Ravager and the break-in points to the number two in some way) and that former district attorney turned scarred crime boss Harvey Dent/Two-Face is back in town! Meanwhile, Batman’s mysterious teenage stalker tries to contact Dick Grayson/Nightwing, learning from a concerned Princess Koriand’r/Starfire that Nightwing left the Teen Titans, leading him to discover that Dick returned to Haly Circus.

Concerned for Batman’s welfare, fanboy Tim Drake tries to persuade Dick to return as Robin.

Dick is heartbroken to learn from Harrison “Harry” Haly that the circus has been struggling financially and suffered some bizarre accidents, though he jumps at the chance to be part of their swansong show. Although the teen briefly panics when hot-headed lion tamer Wilhelm is suddenly killed by a lion, he’s amazed when Dick swoops to ensnare the beast, though it’s the final straw for Haly. While pondering the strange “jinx” cursing the circus, Dick spots the teen as he’s chased by some of the staff and is amazed to learn the boy not only knows his true identity but also suspects drunkard Harry the Clown doped the lion. However, Dick masquerades as Harry and tricks little person Pedro and circus strongman Samson/Mister Muscles into revealing they were behind everything as part of a plot to buy the circus for peanuts. After helping Haly out by becoming a co-owner, Dick confronts the teen, who shows him pictures of Batman and begs him to return to his mentor’s side as Robin, concerned that Bruce is on a downward spiral without him. Back in Gotham City, Batman and Two-Face brood over how best to lure each other out, with Two-Face stressing over the best way to concoct a scheme related to the number two that will both kill his foe and net a profit, vetoing every suggestion with a flip of his coin. Simultaneously, Batman mulls over Two-Face’s possible targets, ruling out the obvious and trying to think of an enticing target for the villain. Ironically, Two-Face settles on kidnapped twin child actors Alan and Richard Wright and flips out when he learns that Club Gemini is holding a poker tournament with a $22 million grand prize. Thus, the two are compelled to abandon their plans to address the other situation, unable to deny their obsession towards justice and greed, respectively, resulting in the kids being saved and Two-Face missing out on the cash thanks to a coin toss.

Inspired by Batman and Robin, Tim reluctantly steps up to save Batman from himself.

Meanwhile, Dick brings the boy, Tim Drake, to Wayne Manor, where Alfred is as amazed by the boy’s knowledge as Tim is awestruck by the opulent abode. Encouraged by them, Tim reveals that he first met Dick on the day his parents were killed. Though traumatised by the murder, Tim was fascinated by the Batman, who comforted the grieving Dick, and had recurring nightmares of that night. Thus, when Tim saw Robin performing Dick’s patented quadruple somersault on television, he realised that Bruce and Dick were Batman and Robin and avidly followed their careers, inspired to hone his body and mind. Believing Batman and Robin need to live again, Tim begs Dick to reclaim his mantle but Grayson refuses, having established himself as Nightwing. Indeed, Nightwing is angered at the suggestion and races off to Batman’s aid, believing Robin should stay dead, much to Tim’s dismay. Although Alfred’s rattled by Tim’s probing questions, he can see how much Batman and Robin mean to the boy and shares some insight into Bruce and Dick’s tumultuous relationship, revealing the two are as stubborn as each other. This stubbornness is what drives Batman to lead Nightwing to him through surreptitious means rather than simply asking for help, though he orders Nightwing to hold back when he (as in Batman) scopes out Two-Face’s possible location. Inside, Batman’s disturbed to find the house literally turned upside down. Struggling to figure out what it means, and constantly snapping at Nightwing and almost calling him “Robin”, Batman refuses to rest until he figures out what’s going on, meaning they walk right into Two-Face’s trap and become so distracted by the mystery that they’re caught off-guard by the bombs Dent planted in the house, leaving them trapped beneath the rubble and Two-Face practically giddy with manic glee.

Though reluctant to take on a new partner, Batman’s impressed by Tim and agrees to a trial run.

Although Alfred insists that they must stay in the Batcave and trust that the heroes will overcome the situation, Tim refuses and dons Dick’s old Robin costume, convincing the grieving manservant to help. After overcoming his self-deprecating madness, Two-Face exits the building and blows up another charge only to be attacked by the new Robin. Though amazed to see the Boy Wonder alive, Two-Face spitefully fights back with a brick and a piece of scrap metal, compelling Alfred to intervene. This allows Robin to send Two-Face slinking away with a punch and to shift the wreckage and free Batman and Nightwing, though Batman is unimpressed and chastises the boy. Once outside, however, Alfred and Nightwing praise Tim’s deductive instincts, bravery, and physical skill, though Batman refuses to endanger another youth. When Tim stresses the importance of Robin to keep Batman from being reckless and to send a message to the underworld that the Dynamic Duo are more than just flesh and blood since “Robin” is as much a symbol for justice as Batman or even regular police officers. Tim then further proves his worth by revealing he slipped a tracking device on Two-Face, allowing the three to confront Dent at a scrap yard, where Batman reveals he truly does care as he freaks out when it seems like Robin and Nightwing are killed and seemingly accepts Tim as part of the team after apprehending Two-Face. Back at Wayne Manor, the four discuss the situation further, with a reluctant Bruce begrudgingly admitting that Tim made some good points and agreeing to take it one day at a time since Tim still needs to earn their trust, despite all his enthusiasm. The story ends by revealing that the voices Two-Face was hearing were not only real, but belonged to a bed-bound Joker, who relishes the chance to kill Robin again…

Final Thoughts: 
I’m somewhat biased towards “A Lonely Place of Dying” as the fifth part was the first Batman comic book I ever owned outside of the annuals and collections I picked up here and there. Consequently, while I was aware of Dick’s tenure as Robin, I had little experience with Jason and this was my first, true Robin origin story, meaning Tim has a special place in my heart as perhaps the best to ever don the pixie boots. I was very invested in this era of Batman, meaning Jim Aparo is the artist I most associate with “classic” Batman adventures. While his art is as sublime as ever here, I am disappointed by how rigid everyone, especially Batman, appears at times. When the characters leap into the action, they pop off the panels but, when at rest or pondering Two-Face’s next hit or what’s to do about Tim, they often appear lifeless and stilted. I’m also a little confused about the age gap between Dick and Tim. Tim states he’s thirteen years old and that he met Dick when they were both kids. The art makes it seem like there’s only a couple of years between them in the flashback, yet Dick is a full-grown adult, and Tim is somehow a teenager. Still, “A Lonely Place of Dying” has some fascinating insight into the nature of Batman’s relationship with Robin, with it being explicitly stated that Batman has become more reckless and violent since Jason died and that he needs a partner to keep him from driving himself into an early grave. Batman’s reluctance to take another partner is understandable given what happened to Jason, but his pig-headedness is fuelled by this guilt, blinding him to how close he’s come to death in the time since Jason died and how the legend of the Batman has grown beyond his control to make Batman and Robin a necessity.

Tim might be a little too perfect at times but he’s a far better fit for Robin than Jason.

“A Lonely Place of Dying” is another great example of how Two-Face is often a litmus test for new Robins, being just dangerous enough to be a formidable threat but not as dangerous a challenge as, say, the Joker. I loved how obsessed Two-Face was by his compulsions, how he drove himself to madness figuring out the perfect bait for Batman and couldn’t fight the urge to flip his coin or chase a more enticing target. I liked that he was duped into thinking he’d gone mad and that his scarred side was talking to him and how close he came to ultimate victory thanks to how distracted Batman is by his grief and arguing with Nightwing. Naturally, this story is a showcase for newcomer Tim, who’s depicted as the polar opposite of Jason and even Dick, being a more cerebral and emotionally stable youngster thanks to being inspired by Batman and Robin and coming from a normal (if somewhat wealthy…and crucially alive) family. Tim may have fantasised about being Robin, but never dreamed it would be possible; his goal is simply to reunite Bruce and Dick. However, Tim doesn’t hesitate to take up the mantle when his idols are in danger and argues passionately for the role, easily winning over Alfred and Dick and, eventually, convincing Bruce, too. As much as I like Tim, though, he does come across as a bit too perfect here. It’s impressive that he deduces Batman and Robin’s identities, but he only does this because he has personal experience with both so that gave him an edge. Tim says that he’s kept up with his studies and worked out a bit, but Alfred compares him to Dick in his prime at one point, which seems a bit ridiculous as Tim’s no circus acrobat and only bests Two-Face by sheer luck and determination. Still, he’s shown to be likable, capable, and enthusiastic and greatly impresses Nightwing, making Tim a far better fit than the rebellious Jason. While Tim wouldn’t get his iconic custom costume until he passed Bruce’s trials, this was a great introduction to the new Robin and went a long way to establish Tim as one of the best to serve in the role.

My Rating:

Rating: 3 out of 5.

Pretty Good

Did you enjoy “A Lonely Place of Dying”? Were you disappointed to see a new Robin debut just a year after Jason’s death? Did you like Tim at the time or did you think he was a little too perfect? Do you like seeing Two-Face used as a litmus test for Robins? What do you think of the idea that Batman needs Robin to keep him from going off the deep end? Which Robin is your favourite? Whatever your thoughts on “A Lonely Place of Dying”, and Tim Drake, leave a comment below and donate to my Ko-Fi to suggest other Robin stories for me to cover in the future.

Wrestling Recap: Razor vs. HBK (WrestleMania X)

The Date: 20 March 1994
The Venue: Madison Square Garden; New York, New York
The Stakes: Ladder match for the Intercontinental Championship

The Commentary: Vince McMahon and Jerry “The King” Lawler
The Referee: Earl Hebner
Dave Meltzer’s Rating: 4.75

The Build-Up:
Few wrestlers has as much backstage power as “The Heartbreak Kid” Shawn Michaels back in the day. Alongside his buddies “The Kliq”, Shawn politicked his way to advantageous positions and ensured the spotlight was on him and his friends, such as “The Bad Guy” Razor Ramon. Razor and HBK feuded throughout 1993, with HBK famously being stripped of the Intercontinental Championship in September, only to declare himself the true champion after Razor won the belt in a battle royale. HBK stole Razor’s gold chains to escalate the rivalry, which culminated in the World Wrestling Federation’s (WWF) first-ever pay-per-view ladder match.

The Match:
This is one of the rare WWF matches where the competitors are both claiming to be the champion, meaning the ladder match was set to determine the “undisputed” Intercontinental Champion. Shawn entered the match with all his usual arrogance and swagger and accompanied by his hulking bodyguard, Diesel, while Razor tempted fate by walking underneath the ladder set on the rampway during his entrance. Once the bell rang, the two competitors got into a tie-up and exchanged fundamentals before Razor gave Shawn a receipt for poking him in the eye by landing a falling chokeslam. Shawn ducked some clotheslines, took control with a running neckbreaker, and sent Razor outside after being knocked down by a shoulder tackle. When Diesel helped soften up the Bad Guy with a big clothesline, the referee ejected him, much to Shawn’s chagrin, and Razor again got his comeback by clotheslining Shawn outside. HBK quickly cut Razor off when he started removing the protective floor pads and soon tossed Razor to the exposed concrete after countering a Razor’s Edge attempt in the ring! With Razor stunned, Shawn shunted a ladder into Razor’s chest. Shawn followed up by driving the ladder into Razor’s gut in the ring and then repeatedly smashing it into his ribs and across his spine as he lay prone on the canvas. Finally, Shawn threw the ladder at Razor’s back and made his first try for the belts, only for Razor to yank Shawn’s tights down (earning him a diving elbow drop for his trouble).

Razor triumphed in this slower, more methodical but nonetheless engaging ladder match.

After fixing his tights, HBK set the ladder up near a corner and used it to land a diving splash. Razor got some payback by toppling the ladder with Shawn on it, sending HBK crashing to the ropes. While scuffling in the ring, the competitors collided and fell to the mat for a breather; though Shawn recovered first, he was sent flying into the ladder in the corner when Razor reversed an Irish whip. Razor followed Shawn outside and attacked with the ladder, targeting the back and catapulting Shawn into the apparatus from the rampway. A ladder shot to the face sent Shawn tumbling from the ring and allowed Razor to climb for the first time, but HBK cut him off with an awkward diving axehandle. Both struggled up the ladder from either side before battling up the top, an exchange Razor won after suplexing Shawn from the ladder. A dropkick from HBK sent Razor tumbling soon after, however, and Shawn doubled down by hitting Sweet Chin Music to KO Razor. Dissatisfied, Shawn hit a scary-looking piledriver and crushed Razor with a ladder-assisted splash from the corner. Shawn then positioned the ladder over Razor’s downed body and made his climb, only for Razor to recover and shove HBK crotch-first onto the ropes, leaving him dangling from his ankle. Thus, Shawn was helpless to stop Razor climbing the ladder and retrieving the belts to secure the victory in this impressive early ladder match. While tame by today’s standards, there’s something very effective about building a wrestling match around a ladder rather than peppering the bout with high spots. Neither man did anything too crazy, though those ladder shots looked pretty hard and Shawn definitely got a chance to show off with his use of it as a weapon. The match did wonders for Razor, who came out of it looking extra tough from all the punishment he endured.

The Aftermath:
Now regarded as one of the greatest ladder matches in WWF history, Shawn and Razor’s WrestleMania X bout set the blueprint for many subsequent ladder matches and is generally thought to be one of Scott Hall’s greatest moments. Sadly, Razor’s reign with the Intercontinental Championship would be short-lived as Shawn helped Diesel defeat the Bad Guy for the belt a few weeks later, kick-starting Diesel’s disastrous push towards the WWF Championship. Razor won the belt back at the 1994 SummerSlam, lost it to “Double J” Jeff Jarrett at the following WrestleMania, and then became the first man to win the belt three times by recapturing it from Jarrett in another ladder match. After losing the WWF Championship to Diesel at WrestleMania XI, HBK and Razor clashed in another ladder match for the Intercontinental Championship at the 1995 SummerSlam, with Shawn capturing the belt this time. Although Razor made history again by winning the belt a fourth time, drug issues saw him suspended for six weeks and Hall jumped ship to World Championship Wrestling (WCW) following this to begin one of the greatest stories in wrestling history…

My Rating:

Rating: 3 out of 5.

Pretty Good

Did you enjoy this historic ladder match between HBK and Razor Ramon or do you think it’s over-rated? Were you surprised to see Razor absorb so much punishment? Do you think the right man won? Did you like that the ladder was more of a prop than the focus of the match? What are some of your favourite matches from these two competitors? What’s your dream WrestleMania match? Like this review and leave your thoughts before, then donate to my Ko-Fi to suggest more Razor and/or HBK matches for me to review.

Back Issues [Deadpool Day]: Cable & Deadpool #1-6


February 1991 marked the debut of Wade W. Wilson, the wise-cracking, fourth-wall-breaking Merc With a Mouth, one of Marvel’s most popular anti-heroes. Sideshow even rechristened April 1st as “Deadpool Day” to give fans an excuse to celebrate all things Deadpool.


Story Title: “If Looks Could Kill” (Part 1 to 6)

Published: 19 May 2004 (cover-dated: July 2004)
Writer: Fabian Nicieza
Artist: Mark Brooks

Published: 21 April 2004 (cover-dated: June 2004)
Writer: Fabian Nicieza
Artist: Mark Brooks

Published: 19 May 2004 (cover-dated: July 2004)
Writer: Fabian Nicieza
Artist: Patrick Zircher

Published: 16 June 2004 (cover-dated: August 2004)
Writer: Fabian Nicieza
Artist: Patrick Zircher

Published: 21 July 2004 (cover-dated: September 2004)
Writer: Fabian Nicieza
Artist: Patrick Zircher

Published: 18 August 2004 (cover-dated: October 2004)
Writer: Fabian Nicieza
Artist: Patrick Zircher

Quick Facts:
As instructed by then-chief editor Jim Shooter, Chris Claremont and Bob McLeod create the New Mutants, Mutant youngsters tutored by time travelling Mutant Nathan Summers/Cable as (eventually) X-Force. This also saw the debut of Fabian Nicieza and Rob Liefeld’s Deadpool, a composite of James “Logan” Howlett/Wolverine, Peter Parker/Spider-Man, and (most infamously) DC Comics’ Slade Wilson/Deathstroke the Terminator. Years after establishing himself, Deadpool famously partnered with his frenemy, Cable, in team-ups that would define them as one of Marvel’s most entertaining and chaotic duos.

The Review:
Our story begins with Wade lounging around his apartment, aimlessly flicking through channels until called about a job. Although Wade’s initially reluctant as his client, the One World Church, is based in France as he mistakenly believes the United States is at war with France, he soon dons some synthetic skin and jets over there with the promise of a big payday. He’s met by the less-than-inconspicuous robed representatives of the church, who accept Wade’s gruesome, scarified visage as they’ve been “cleansed” of their identities and rendered androgynous, blue-skinned monks by their order. Though Wade warns them about preaching to him, he meets with their Prime Minister, Anton Kruch, at their colony and, though dubious, learns that the order has purged themselves of all material goods and societal boundaries. Inside the church’s high-tech mansion, Deadpool learns that Sunic Pharmacopoeia created a synthetic virus that could destroy or greatly benefit mankind, and that his mission is to retrieve the “Façade Virus” from their German facility. The toxin was created by Hans Beimer, a scientist currently being mind scanned by Cable. After advising a Mutant bellboy to reach out to Professor Charles Xavier/Professor X, Cable asks Irene Merryweather at the Daily Bugle to fill him in on Sunic, whom he suspects are up to no good. However, he finds the facility in chaos as Deadpool is cutting, shooting, and blasting through the security. Disturbed to find his old nemesis ransacking the place, Cable takes Wade’s advice and “[blows his] mind” with his telekinetic powers but is concerned to find the Façade Virus has been stolen and Beimer has been exposed to it, rendering him a blubbering mess of tumours, and realising too late that the fear he detected in three of the staff was actually guilt from the thieves. These “Spammers” experience different side effects from the virus, with Gunther Herschein/Sour Kraut being violently sick, Asahiri Aoki/Go-Go finding her skin extremely malleable, and Tuatola T’Tuana Timōn/T-5 seemingly unaffected.

Cable and Deadpool clash when it comes to a potentially dangerous man-made virus.

When his telepathic, city-wave search for the three proves futile, Cable calls Irene to learn their real names before running into Deadpool again. As Wade’s been contracted to steal the virus and hopefully help disfigured people like himself and Cable’s made it his mission to destroy it, the two seem destined for a conflict, only for Cable to blow Deadpool’s brains out again. By the time Cable reaches Sour Kraut, he’s literally melting from the virus after using it to masquerade as a movie star in a misguided attempt to cause anarchy. Despite his dismissive attitude towards Sour Kraut, Cable permits him a swift death and then confronts T-5 as he’s gunning down civilians and shouting about government hypocrisy. Chastising T-5’s hypocrisy, Cable easily brings him down and then evaporates Go-Go’s bazooka before extracting the virus from her as she did the others. The effort leaves Cable physically and mentally drained, allowing Deadpool to get the drop on him and bring the sample back to the church so its disciples can forgo the agony associated with their physical transformation. However, the church betrays him and harvests his unique accelerated healing factor to stabilise the virus, allowing them to quickly and efficiently transform everyone into their followers with a simple injection. Luckily, Cable’s ridiculously overpowered telekinetic abilities kept him from being killed and he takes some time to heal from the mental strain in Switzerland with a fully healed Professor X. Since Cable has purged his body of the “techno-organic virus” that held back his powers, Professor X worries that he’s overexerting himself, especially as he’s easily able to hold the returning virus at bay and push himself beyond his previous limits. Brushing these concerns aide, Cable asks for advice about how to best utilise his incredible powers while he still has control and Professor X warns him against employing them in a God-like manner to “fix” society’s ills.

Deadpool seemingly becomes transformed into the church’s loyal acolyte.

While infiltrating the church, Cable reluctantly apologies for the position the delirious and helpless Deadpool has found himself in and the two bury the hatchet through a psychic rapport, though Cable postpones rescuing him to scope out Kruch’s operation while functionally invisible. Kruch preaches of eliminating strife and bigotry by remaking everyone in their image and presents a fully transformed and brainwashed Deadpool to his congregation, who immediately exposes Cable, though Kruch insists that the church is no threat. Cable is amazed to see that Deadpool’s been cured of his mania and anger, though he’s sceptical about Kruch’s vision of world peace. Invited to witness the first test of the “Deliverance”, Cable and Deadpool witness Kruch’s plan to “infect” the world using electrical transmissions beamed into the eyes, afflicting Cable with the Façade Virus. When Cable decides to use it for himself, he unwittingly allows the virus to run rampant within him, sending his Mutant and technological abilities haywire and leaving him wide open for Deadpool’s sudden attack. After fending Wade off, Cable threatens Kruch was castration if he doesn’t tell him how to stop the virus. When Deadpool redoubles his attack, he ends up tossed into his dorm room, his healing factor struggling with the virus as he struggles with his sanity, slipping back into his costume to attack Cable. Stunned to learn that there is no cure for the Façade Virus, Cable’s easily overwhelmed by Deadpool since the infection is causing his techno-organic virus to spread like wildfire. Conveniently, Cable crash-lands into the church’s armoury, allowing him to blast his way into the facility, only for Deadpool to attack again, convinced that Cable’s become the very thing he claimed to fight against.

Tensions between Cable and Deadpool remain high after Cable takes Kruch’s plan for his own.

Upon seeing Cable transformed into a bizarre, tentacled grotesque as the combined Façade and the techno-organic virus partially melts and ruins his body and his cyborg parts, Deadpool briefly takes pity on him but refuses to use his blood to cure Cable. Although Deadpool believes that Kruch can eliminate xenophobia, which justifies taking away people’s opinions, he’s stopped in his tracks when his body also begins to melt from the Façade Virus. Though he keeps talking nonsense even as he melts into a pile of goop, Deadpool cannot drag himself to Cable’s paralysed form to cure them both. Luckily, Cable uses his telekinetic powers to draw Deadpool’s liquified remains to him, restoring him and literally puking up the restored Deadpool. Pissed at being deceived by Kruch, Deadpool insists on accompanying Cable to Sunic’s Singapore office, where Merryweather tells him the church has fled, though Cable leaves the visibly cured Wade to find his own way there. Although Cable arrives first, he’s intercepted by Doctor Edward Lansky/Lightmaster, who attacks with blades at blinding speed and ends up teleported into the Moon’s orbit. While Cable agrees with Kruch’s philosophy for world peace and anticipated that he planned to spread the Façade Virus through Lightmaster, he redirects Dr. Lansky’s counterattack into the Singapore Deliverance Device, spreading a modified version of the virus across the world and turning them pink instead of blue. Cable then flies over the world reassembling his old space station and worrying Merryweather so much that she asks him to visit her in person. Knowing he’d use his teleporter, and that the incident has genetically bonded Cable with Deadpool, Merryweather leads Cable into a confrontation with Wade, one Cable easily ends by repeatedly tearing Deadpool apart with teleporters. Cable then restores everyone to normal and proclaims himself a saviour, unwittingly restoring Deadpool’s gruesome visage. Deadpool then vows to abuse their biological link to keep tabs on Cable and ensure he doesn’t let his God complex go to his head, a sentiment shared by the X-Men.

Final Thoughts: 
I was expecting a lot more from Cable and Deadpool’s first team-up. On the plus side, the art is pretty much flawless. While I prefer Cable as a man-mountain and it was jarring to see him so trim, lacking in ostentatious accessories, and relying on his awesome psychic powers, the art had a very kinetic and colourful style to it. The few fight and action scenes we get are frantic and detailed and I particularly enjoyed how expressive Mark Brooks and Patrick Zircher make Deadpool, despite his disappointing lack of time in his costume. This is Deadpool at his most self-referential and wacky, with him constantly chattering nonsense and making timely pop culture references to Dennis the Menace and Brigitte Nielsen. I liked that Deadpool is haunted by his ghastly appearance, which leaves him a cross between “Ryan Renolds [sic] and a shar-pei”, and that this seems to inform his defence of the One World Church. Sadly, this isn’t as developed as I’d like. Indeed, when Deadpool hears Kruch’s pitch, he’s sceptical and only in it for the money, then he’s suddenly fighting Cable to the death over the Façade Virus even before he’s pumped full of it and seemingly indoctrinated into the order. It seems Deadpool is only half-heartedly on Kruch’s side, with him finally achieving inner peace thanks to his restored visage (even if he is blue) and believing there’s a small chance the church can end conflict and bigotry. However, this isn’t as explicit as I would’ve liked. It seems Deadpool’s been brainwashed, then he seemingly denies that. Then, he makes amends with Cable a couple of times and then turns on him, suddenly convinced Cable wants to conquer the world by perverting the Façade Virus, which kind of comes out of nowhere, and Wade turns against Kruch when he suffers the horrendous side effects of the virus.

While the art is great, the plot and characterisations are distractingly haphazard.

This is much more of a Cable story, one centred on his conflicting morality regarding his incredible powers, which are stronger than ever. Having witnessed apocalyptic futures and a lifetime of conflict and suffering, Cable is obsessed with saving the world and is tempted to use his almost God-like powers for the greater good even if it means putting himself on a pedestal. Indeed, Cable is ridiculously powerful here, forgoing any weapons but his telekinetic abilities and easily rendering himself invisible or having psychic conversations from half a world away. Cable sees a logic in Kruch’s twisted vision for the world, which would make “all as one” as a homogenised, placid species. Although Cable believes Kruch is taking away people’s opinions, it’s not clear to me how Cable’s plan for the Façade Virus is any different beyond making people pink instead of blue. He spreads the virus and worries friends and foes alike by reconstructing his space station, but seemingly does nothing despite claiming to have full control of the virus. He then restores everyone and is apparently heralded as a hero, though I’m not sure how or why, inspiring Deadpool, the X-Men, and others to believe he’s gone “too far”. I can just about understand Deadpool’s behaviour being all over the place as he’s nuts, but I don’t get why Cable’s characterisation is so radically different panel to panel and issue to issue. I can only assume it was part of an ongoing story arc, but it made this first six-part story unnecessarily difficult to read. The dialogue bounces around so much I had trouble keeping track of what was going on or why the two were fighting and I was left disappointed that this wasn’t a more action-packed, unhinged team-up between the titular Mutants.

My Rating:

Rating: 2 out of 5.

Could Be Better

Did you enjoy the first story arc of Cable and Deadpool’s team-up comic? Were you also disappointed that it wasn’t a more action-packed story? Can you explain why Deadpool was so devoted to the One World Church and what the hell was going on with Cable? What are some of your favourite moments between Cable and Deadpool and how are you celebrating Deadpool Day today? Let me know what you thought down in the comments and donate to my Ko-Fi to suggest other, better Cable and/or Deadpool content for the site.

Game Corner [Mario Month]: Super Mario 3D World + Bowser’s Fury (Nintendo Switch)


So, for no better reason than “Mar.10” resembling Mario’s name, March 10th is widely regarded as being “Mario Day”, a day to celebrate Nintendo’s portly plumber, an overalls-wearing mascot who literally changed the videogame industry forever and shaped the home console market of the nineties.


Released: 12 February 2021
Originally Released: 21 November 2013
Developer: Nintendo EPD

Original Developer: Nintendo EAD Tokyo
Also Available For: Nintendo Wii U (Original Release)
Metacritic Scores: 89 / 8.6

Quick Facts:
Following the critical acclaim of Super Mario 3D Land (Nintendo EAD Tokyo, 2011), a blending of Mario’s 2D and 3D mechanics, the developers explored ideas for a follow-up for Nintendo’s ill-fated Wii U console. Desiring intuitive controls and unique movement in a 3D space, the team developed a new cat suit to enable players to climb walls and producer Yoshiaki Koizumi lobbied to make Princess “Peach” Toadstool a playable character. The game was met with universal acclaim and inspired a spin-off series based on its diorama-like minigames and this enhanced port. Despite high sales and reviews praising Bowser’s Fury’s experimental, open-world mechanics, reviewers were frustrated by the game’s inconsistent performance, uninspired challenges, and its more chaotic presentation.

Gameplay and Power-Ups:
Super Mario 3D World is a 3D/2.5D hybrid action platformer that mixes gameplay elements from the New Super Mario Bros. series (Nintendo EAD, 2006 to 2019) with his 3D adventures, allowing for a limited degree of movement on the whimsical Sprixie Kingdom overworld and in certain stages (referred to as “Courses”) while also offering traditional, sidescrolling platforming. The game supports up to four players in simultaneous co-op, with players initially picking between the classic Super Mario Bros. 2 (Nintendo R&D4, 1988) line up of Mario, Luigi, Peach, and Toad (though a blue-coloured version). While each character shares the same controls and many basic abilities, they all play a little differently: Mario is the all-rounder, Luigi is faster can extend his jump by kicking his legs but is very slippery, Peach is slower but can float for short periods, and Toad is the fastest but has a stunted jump. As ever, players collect yellow Coins (with 100 granting an extra life, also gifted by 1-Up Mushrooms or defeating multiple enemies in a row), play against a timer (extended by collecting +Clocks), and must reach a flagpole to finish each Course. Players can hop to platforms and bop on heads using A or B, holding it to jump higher and tapping it to swim, and run by holding X or Y. ZL or ZR see you crouch to fit through narrow gaps and you press B to jump, or press a trigger in mid-air for a ground pound (performing a boosted jump if you hit B as you land). Rotate the left stick and hit B to perform a spinning jump, hold a trigger and press Y to roll or press B for a long jump, and press Y in mid-air for a jumping roll. Characters perform a wall jump by jumping against walls, perform a side flip with a flick of the left stick and a press of A/B, and spawn a reserve power-up by pressing up on the directional pad (D-pad), with left allowing you to scan an Amiibo and down activating snapshot mode. You can also hold Y to grab and throw items (like Koopa shells and snowballs), with the projectile collecting Green Stars and Stamps, and you can bash blocks for Coins and power-ups or hit POW Blocks to wipe out all onscreen enemies.

Your platforming abilities are bolstered by a new cat suit, team up moves, and a dino surfing.

When hit, your character loses their power-up and/or reverts to a “small” form, though you can power back up with any item and will return to your base “super” form by passing a checkpoint. The classic Super Mushroom grows you to normal size, the Fire Flower lets you toss bouncy fireballs with Y to light torches and defeat enemies, the Super Stars turns you invincible for a short period, and the Super Leaf garbs you in a Tanooki suit to whip enemies with your tail or flutter jump. Super Mario 3D Land’s Boomerang Flower and the Double Cherry let you toss boomerangs with Y or produce up to four duplicates to activate weighted platforms. The returning Mega Mushroom grows you to gigantic sizes to smash through the environment, and the Super Leaf spawns an invincible Tanooki suit if you struggle to clear a Course. The game’s big gimmick is the Super Bell, which puts you in a cat costume and lets you scramble up walls, swipe with your claws with Y, and perform a claw dive by pressing Y in mid-air. The game greatly emphasises this, with special ramps and goodies purposely hidden unless you have the power-up, and you can even grab a Lucky Bell to become a golden statue off a ground pound for extra Coins. You can hop into ice skates to better cross slippery ice, and grab a Goomba Mask to stop Goombas attacking you, the Cannon Box to fire cannon balls to blow up weak walls or hit far away switches, the Light Box to light up dark areas and dispels ghosts, and the Propeller Box to fly and hover for short periods. You’ll also jump on Plessie to careen down rapids, flying off ramps, bopping on enemies, and passing through rings for extra Coins. Captain Toad also transports you to a diorama-like world that limits your movements since the explorer can’t jump. In these fun little side sections, you must rotate the diorama with the right stick and hit switches to rotate the environment, move platforms, or use pipes to collect five Green Stars all while avoiding enemies and hazards since Captain Toad cannot attack.

Explore as Captain Toad, hop to platforms, and brave haunted mansions in search of Green Stars.

When exploring the overworld, you’ll find Toad Houses to grab random power-ups, slot machines to gain extra Coins, and find hidden areas in each Course that lead to more goodies. While your main goal is the end flagpole, each Course hides three Green Stars needed to unlock additional Courses and boss castles. Some Green Stars are in plain sight, others require power-ups to reach, and others are hidden in alcoves or out of the way areas, so it pays to explore. You can use pipes to warp across stages, hop to moving and temporary platforms, and must avoid spikes, fire bars, fireballs, and crushing Thwomps (though these can also boost you to higher ground). Some Courses have a strict time limit; some contain clouds the blast you above the clouds for a quick run through the sky; and some contain blocks that extend horizontally or vertically to cross gaps. Some Courses contain deadly lava or toxic gunk, others see you swimming through water and avoiding vortexes and spiked hazards, while haunted mansions contain door mazes and Boos masquerading as flagpoles and items. You’ll clamber to moving and flipping fences, race across conveyer-like platforms, explore behind waterfalls, and navigate tricky platforming sections where every jump flips coloured platforms. You’ll also have to light up tiles to progress, use spring pads, hit switches to generate tracks to keep from falling, and even tap the screen in some Courses to open doors. Mystery Boxes on the overworld warp you to timed platforming and combat challenges to earn additional Green Stars, Bullet Bills must be tricked into destroying certain blocks (or bombs must be tossed), and you’ll race through autoscroller sections to hop across a speeding train, avoid blasts from tanks, or to keep from being devoured by ravenous Fuzzies! You’ll also be avoiding searchlights, hopping to turning platforms and jumping between cogs, swinging from trapezes, chasing panicked rabbits, being blasted along by dash panels, gingerly hopping to seesaw platforms, and traversing invisible platforms to snag goodies and reach the flagpole.

Your open-world adventure is continually interrupted by bad camera angles and Bowser’s attacks.

In Bowser’s Fury, you only play as Mario (with all the same abilities and power-ups as in the main game), though a second player can jump in as Bowser Jr. If you don’t have a friend, Bowser Jr. will still automatically help out, attacking enemies and grabbing items and interacting with the environment when you touch the screen, and you can customise how much he aids you from the settings. This game is akin to Super Mario Odyssey (Nintendo EPD, 2017), with Mario tracking down Cat Shines like Power Moons. Each area has four islands or sub-areas that hide five Cat Shines and a bunch of additional ones. The easiest Cat Shines are at the foot of lighthouses, which will clear the goop covering them to offer tips and additional power-ups (with multiples of each held in reserve), though you’ll also be collecting Blue Coins and five Shine Shards to earn additional Cat Shines. Others are earned by fending off enemies in an enclosed arena, racing across the water on Plessie, running to a specific point against a time limit, finding a key to unlock a cage, chasing a suspiciously familiar “Fury Shadow”, and defeating mini bosses. You’ll be clambering up walls, desperately running around rotating blocks and cylinders, avoiding lava pits, dealing with switch switches, and hopping to moving and temporary platforms and blocks, tapping the screen to reveal invisible areas and blasting across gaps with cannon-like pipes. Wearing the cat suit lets you spin special wheels or fling yourself about using special coils, and you’ll again need bombs and ice skates to progress. The purpose of the Cat Shines is to clear up the goop, uncover the “Giga Bell”, and access new areas, but you’re constantly under threat from the Kaiju-like “Fury Bowser”. After a short time, Fury Bowser rises from the oil and bombards the island with falling spikes and unleashes his devastating fire breath, though these can be used as temporary platforms and will shatter “Fury Blocks” to uncover additional Cat Shines. Fury Bowser’s rampage ends after a short time but can be dispelled by collecting Cat Shines and using the lighthouses. You can also engage him directly by activating the Giga Bell, though the mechanic does quickly grow tiresome despite how epic and ominous hiss appearance is.

Presentation:
Super Mario 3D World is as gorgeous and colourful as you’d expect from a Mario title. All the usual tropes and mechanics are here, from vivid overworlds, warp pipes, an abundance of mushrooms and various platforms, to quirky moments like Goombas panicking when they spot you and Boos going shy when you make eye contact. Each character plays differently, which I very much appreciated, and is accompanied by gibberish sound bites and cries of enthusiasm or pain, celebrating with a victory pose at the end of each Course. Mario and Luigi even lose their hats when in their “small” forms and characters scamper about with meows when wearing a cat suit, a gimmick also adopted by the game’s title screen and many enemies. Similarly, translucent pipes are everywhere in Super Mario 3D World, with the Fire Flower and Fire Bros. even shooting down them, alongside new gimmicks like the ice skates and 2.5D reimagining of the tank stages from Super Mario Bros. 3 (Nintendo EAD, 1988). Courses and Worlds adopt recognisable aesthetics such as sunny hills, dark underground passages, deserts full of quicksand, and ominous castles full of lava. The game’s jaunty soundtrack features remixes of returning themes and enjoyable beats, though nothing really stood out to me as all that memorable. There aren’t too many cutscenes here save for the intro and outro, though there’s often a little cutaway when you enter a castle or confront a boss. Similarly, the story is mostly conveyed through an omniscient narrator and pantomime, with both being employed to amusing effect in Bowser’s Fury, where Bowser Jr. conveys his thoughts and concerns through crude paintings. The overworld is quite lively at times, with new areas and shortcuts popping up as you progress and collect Green Stars, and it’s fun seeing the captive Sprixies both crying for help on the overworld and waiting at the flagpole after you defeat the boss guarding them.

Some impressive, colourful visuals and a large sandbox make this a visual treat, even by Mario’s standards.

Unfortunately, the Courses aren’t all that inventive in Super Mario 3D World. While not surprising as Mario games always stick to a well-crafted formula, it is a bit disappointing seeing the game rely on the same gimmicks and aesthetics as previous titles. While each World’s overworld has a theme, Courses don’t always reflect that: you’ll explore rolling hills, haunted mansions, and toxic swamps whether the overworld is a desert, in the clouds, or at the beach. Some Courses are pitch black, requiring the Fire Flower or Light Box to illuminate the way; other times, you run around in silhouette, pushing over Bowser standees and hopping to blocks. Sometimes, you jump into paintings or use mirrors to see goodies hidden behind you; other times, the game pays homage to Super Mario Galaxy (Nintendo EAD Tokyo, 2007) or features Easter Eggs celebrating the “Year of Luigi”. Some Courses adopt a quasi-third-person perspective and are pure 3D platformers, while others incorporate 2.5D sidescrolling, with the perspective often shifting mid-Course, especially if you’re in water or riding platforms. Some Courses are autoscrollers, forcing you to race away on a 2.5D plane or desperate jump as Fuzzies consume the ground. Panels shift and move, the ground and cog-like platforms turn over bottomless pits, and you’ll hop across and racing down lit-up blocks to avoid plunging to your doom. The Courses are all very colourful and have a fair bit going on, with hidden areas access by pipes or hopping to suspicious out of the way alcoves, and a fair bit of depth in the background, though I did sometimes struggle with the camera perspective, which led to me repeating certain jumps or get confused about where I was. This is even worse in Bowser’s Fury, where the camera is a constant headache, sticking either too close to Mario or being obscured by the environment. I enjoyed the quasi open-world nature of this mode, which basically acts as a scaled down version of Super Mario Odyssey, and the additional rain and ominous storm effects really added to the ambiance and panic when Fury Bowser awoke. However, it can be difficult to navigate the islands as the map isn’t much help and you’re not given much indication on where to go or when the areas have spawned new Cat Shines.  

Enemies and Bosses:
Hordes of Goombas, Koopa Troopers, Boos, Cheep-Cheeps, Spinys, and Piranha Plants all return and many are bolstered by their own cat power-ups. Goombas also slide around in ice skates or attack in totems, sometimes with Fire or Hammer Bros. atop them, and Piranha Creepers stretch out from pipes and walls to make hopping across lily pads even trickier in the swamp stages. Boos disguise themselves as items and flagpoles and Big Boos loom out of walls and chase you through shifting mansions, Parabones constantly rebuild themselves, Stingbys incessantly pursue you, and Conkdors try to crush you with their beaks. You can hop to higher areas or goodies using bouncy Biddybuds, uncover frog-like Coin Coffers hiding in bushes and topple bigger, meaner Galoombas, and will find mouse-like Skipsqueaks running on rolling platforms and adorable Blocksteppers marching to the game’s soundtrack. Bullet and Banzai Bills fire from cannons, often homing in on you, different bro variants Boomerang, Fire, and Hammer) and teleporting Magikoopas act as mini bosses and you’ll be precariously hopping onto giant Ant Troopers to cross spike beds. Spikes toss pointed logs to upset your jumps, Brolders pop from the ground in lava Courses but can be thrown as projectiles, Bullies try to push you to your doom, and Charvaarghs and Fuzzies instantly kill you if touched. Walleyes try to block you, Ty-foos can blow you off the Course, you must plan your jumps and positioning to avoid being hurt by flipping spiked squares, jump over flaming shockwaves emitted by Ring Burners, and avoid Rammerheads when swimming through tight underwater passages. Cat variants of many of these enemies also pop up in Bowser’s Fury, alongside the fleet-footed Fury Shadow and kittens corrupted by Fury Bowser’s goop, though they otherwise function exactly the same, despite their cuter appearance.

Some unique and lively bosses add a surprising level of challenge to the game.

The brutish Boom Boom and the more effeminate Pom Pom regularly appear as boss battles in enclosed arenas, with Boom Boom whirling his stumpy arms like a dervish, temporarily turning invisible, and ricocheting off the walls as a spinning shell. Pom Pom prefers to throw shurikens and spawn duplicates to disorientate you, though bouncing on each of their heads three times will do them in. Cat variants of both also appear in Bowser’s Fury, though the strategy remains the same. This is true of the Cat Prince Bully, a variation on the armoured Prince Bully from World 6. When first encountered, you must force the Prince Bully into one of the pipes lodged into the arena walls to compress him and attack and, in both encounters, players must watch for his charged fireball. The regal Hisstocrat also pops up twice, first in World 2 and then in World Bowser, with subtle differences between them (their gender, for one thing, and raining either boulders or fireballs). In both encounters, players must avoid the falling hazards and scamper up snakes to attack Hisstocrat’s weak spot, being careful not to linger as the snake columns will bite and Hisstocrat will destroy them. Players will also battle Boss Brolder in a sweltering volcano, avoiding his lava trails and hitting the Brolders he spawns to toss them at him. This can be a gruelling fight in World Castle as flaming Splorches also patrol the small platform and King Brolder’s attacks are far more aggressive. The jester-like Motley Bossblob is also fought several times, with this trickster transforming into a bulbous form that bounces around, producing shockwaves, and splitting into gelatinous orbs that scatter across the circus-like arena. Finally, there’s King Ka-thunk, a giant Ka-thunk who flips about the arena and tries to skewer you with his spikes. To beat him, simply stand in the middle to avoid being hit and jump or butt stomp onto his backside, though be wary as his movements speed up. All these bosses return in “Boss Blitz”, the final Course in World Flower, where you must run the gauntlet against them all with no power-ups and no checkpoints.

While pretty simple in his base form, Bowser becomes a menace when powered up or on a rampage!

In addition to hopping along his trains and tackling his tank brigade, players will naturally battle Bowser on numerous occasions. The first time is at the end of World 1, where he awaits atop his keep and drives his bitchin’ muscle car. Bowser accelerates away from you, forcing you to chase, dodging pools of lava left behind by his fireballs. Bowser tosses bombs that you must kick back to deal damage to his car and eventually send him packing. This fight is revisited in World Castle, though made much more gruelling as the “road” is littered with hazards such as spikes, gaps, and flame bursts, alongside Bowser’s usual and much more lingering fireball attacks. Bowser’s bombs can also have a short fuse this time, or are thrown at odd angles, or you’ll have a hard time hitting them due to the obstacles, though projectile-based power-ups help chip away at his car. In the finale of World Bowser, Bowser grabs a Super Bell and transforms into “Meowser”, a gigantic, cat-like form that scampers up and down a tower, bursts from walls to swipe at you with his huge claws or his Tanooki-like tail, and breathes fire. You can scare him off by hitting POW Blocks but cannot attack him directly, and Meowser even duplicates himself with a Double Cherry to make the frantic climb even more tense. This is actually a fun platforming challenge, however, and an incredibly simple boss. Once you reach the roof, you must hit a Super POW Block four times before the duplicated Meowsers finish you off, sending him into the gloop-infested islands of Bowser’s Fury. Here, Fury Bowser awakens and causes havoc, prompting you to activate the Giga Bell and transform into Giga Cat Mario to fend him off. In this titanic fight, you can melee attack Bowser but mainly attack by butt stomping his exposed belly after dodging his shell slam. Bowser charges at you, leaving a trail of goop that slows you down, spits fire, rains spikes across the environment, produces shockwaves, and spawns bombs and pillars you can use against him. After the fifth encounter, players battle Giant Bowser, riding around on Plessie to dodge his projectiles and ramming a crystal to damage his vulnerable belly.

Additional Features:
There are a whopping 380 Green Stars to find in Super Mario 3D World, many hidden out in the open, spawning after collecting eight Green Coins, or hidden behind platforming or combat challenges or in obscure areas. You can earn additional Green Stars in the Captain Toad and Mystery Box challenges, which test your puzzle solving, platforming, and combat prowess, and earn others for battling mini bosses like Boom Boom when they appear on the overworld. Green Stars unlock additional Courses and adds a special stamp to your save file, with another awarded after beating the game. There are also 85 Stamps to find across each World and in Sprixie houses, with players earning a piece of character art for each one, and players can track their progress regarding these collectibles by pressing the – button on the overworld. Courses and Worlds also contain hidden exits and optional routes, hidden areas where you can stock up on Coins and extra lives, and even Luigi cameos to celebrate Mario’s brother. Clearing the main game unlocks Luigi Bros., a modified version of the original arcade Mario Bros. (Nintendo R&D1, 1983), and opens World Star, World Mushroom, World Flower, and World Crown. These Worlds feature much tougher, remixed Courses with tighter time limits, tougher enemies and challenges, and rematches against previous bosses. Clearing the “Super Galaxy” Course unlocks Rosalina, a slow character with a spinning attack, as a playable character, and you’ll also be encouraged to replay previous Courses to set new times and high scores. There are 100 Cat Shines to collect in Bowser’s Fury, with additional ones appearing after you clear the game alongside a useful quick travel feature. Grabbing all the Cat Shines alters the final battle with Giant Bowser and also awards an alternative ending and grants Mario and Bowser Jr. some new cat duds.

Final Thoughts:
You can never really go wrong with a bit of Super Mario. The franchise excels by taking what should be a repetitive and tired formula and presenting it with colourful visuals and crisp controls, constantly delivering top-notch titles despite recycling the same gimmicks. Super Mario 3D World doesn’t stray far from this formula, presenting fun, varied 2D and 2.5D worlds that get progressively more challenging and reward exploration, skill, and trial and error. The game heavily relies on the Super Bell power-up and constantly reminds you of the cat suit by dressing enemies up as kitties but, while the suit is fun to play as, it’s not really doing much new and its abilities are somewhat limited. I liked seeing the Tanooki Suit return and useful power-ups like the Boomerang Flower, though the Mega Mushroom was similarly wasted and the Double Cherry was more of a hindrance. While I had fun with the Courses and the different gimmicks, it was a bit disappointing seeing the same assets recycled and not tying each World to a specific theme. The Captain Toad sections were a fun distraction, and it was enjoyable hunting down Green Stars, though having to backtrack to collect more to unlock new areas can be a pain. The bosses were all visually interesting and generally unique, save for the repetitive battles with Boom Boom and Pom Pom, though the final battle with Meowser was a bit simple. Bowser’s Fury makes up for it with its epic depiction of Fury Bowser and open-world aesthetic. However, the camera ruins the immersion, it was a bit confusing figuring out where to go, and Fury Bowser’s repeated attacks quickly become more aggravating than entertaining. Still, I had a lot of fun with Super Mario 3D World + Bowser’s Fury and there’s a lot to see and collect, and a decent challenge on offer. Super Mario 3D World features everything you could want from a 3D/2.5D hybrid Mario title and constantly rewards you with collectibles and power-ups. While Bowser’s Fury feels a bit tacked on, limited, and a like a poor man’s Super Mario Odyssey, I liked how it offered a different twist on the main game’s mechanics and challenged the player in different ways that leaned into open-world exploration.

My Rating:

Rating: 4 out of 5.

Great Stuff

Did you enjoy Super Mario 3D World + Bowser’s Fury? How do you feel it compares other Mario titles, specifically the New Super Mario Bros. games? Which of the playable characters was your favourite and what did you think to the Super Bell power-up? Were you disappointed that each World didn’t stick to a set theme? What did you think to the Captain Toad challenges and the boss battles? Did Fury Bowser also annoy you, and did you enjoy the open-world aspects of Bowser’s Fury? Did you ever collect all the Green Stars and Stamps and best the additional Worlds? Which of Mario’s Switch games was your favourite and how are you celebrating Mario’s birthday this year? Whatever your thoughts on Super Mario 3D World + Bowser’s Fury, feel free to share them below, support me on Ko-Fi, and check out my other Mario content!

Game Corner [Mario Month]: Paper Mario (Nintendo Switch)


So, for no better reason than “Mar.10” resembling Mario’s name, March 10th is widely regarded as being “Mario Day”, a day to celebrate Nintendo’s portly plumber, an overalls-wearing mascot who literally changed the videogame industry forever and shaped the home console market of the nineties.


Released: 10 December 2021
Originally Released: 11 August 2000
Developer: Intelligent Systems

Also Available For: Nintendo 64, Nintendo Switch 2, Nintendo Wii, Nintendo Wii U, iQue Player
Metacritic Scores: 93 / 8.8

Quick Facts:
Though Super Mario RPG: Legend of the Seven Stars (Square, 1996) enjoyed rave reviews, it took nearly five years to get this spiritual successor. When Square bowed out due to other commitments, Nintendo turned to HAL Laboratory and Intelligent Systems, with art director Naohiko Aoyama crafting Paper Mario’s distinctive mixture of 2D and 3D graphics. Originally conceived as Super Mario RPG 2 and produced for the ill-fated Nintendo 64DD add-on, the game aimed to be a cute, kid-friendly adventure. Paper Mario has been met with critical acclaim and is widely considered one of the role-playing games (RPG) of its era.

Gameplay and Power-Ups:
Paper Mario is a 2D/3D hybrid RPG in which players guide a craft paper version of Mario (and his new allies) through a diorama-like version of the Mushroom Kingdom across nine chapters (including the prologue), assisting non-playable characters (NPCs), becoming stronger through battling, and liberating the captive Star Spirits from Bowser’s minions. Players are given four save files and no difficulty options or settings before venturing into this quasi-cel-shaded adventure. Helpful signposts and some NPCs provide gameplay hints (sometimes for a small fee), and the game’s menus do a decent job of telling you what does what and when. Like in Super Mario RPG and most RPGs from this era, the controls are pretty simple, with players using A to jump, interact with the environment, confirm selections, and talk to other characters, B to speed up onscreen text and exit menus, and performing a spin with ZL to cover more ground. Outside of battles, the right stick toggles the heads-up display, opens the partner and item menus, and allows some partners to perform actions, like Kooper flying at enemies in his shell to initiate battles or Mario holding Watt to light up dark areas. As you progress and locate treasure chests, you acquire battle items for Mario that can be used on the overworld, allowing you to strike enemies or hit switches with Mario’s hammer with B or perform a ground pound or spin jump by pressing A in mid-air. These either initiate battles, activate switches, or uncover hidden Star Pieces, which you trade for Badges. In battle, you select attacks with A and switch characters with ZL, tapping A as enemies attack to reduce damage or ward of status effects like poisoning or dizzying.

Mario has a few fun attacks and special abilities up his sleeve.

Unlike other RPGs, Mario’s stats don’t increase from levelling-up and he doesn’t earn experience points. Instead, most battles award “Star Points”, with players earning more depending on how long the fight goes and how many enemies are defeated. Once you earn 100 Star Points, Mario levels up and you can increase either his maximum Health Points (HP), Flower Points (FP), or Badge Points (BP). As you explore, you’ll find or purchase Badges to equip; each one costs BP to equip, so you may need to shuffle them about or upgrade your BP to hold more. These add additional attacks and buffs to Mario, such as allowing him to strike multiple enemies, shrink them, or knock them into each other. Performing these actions costs FP, with both HP and FP being restored at Toad houses, by hitting Heart Blocks, or by collecting or using items. Your partner’s special attacks also cost FP, so you must be mindful of your attacks or risk running out. When performing special attacks, you must complete various actions, such as holding or tapping A at the right time, moving the left stick, or matching button presses. Success increases the power and effectiveness of your attack, though you must be aware of what Badges you have equipped and which enemies you’re facing as some attacks won’t harm armoured foes or you take damage if your enemy has a spiked head. Badges also increase your maximum HP and FP, trade attack power for defence (and vice versa), and allow you to use more items in battle. Defeating enemies and smashing blocks also awards Coins, which you can spend on items and Badges. Mario’s inventory is painfully limited but you can store items at various shops and use them to restore HP and/or FP, heal status effects, attack all enemies, knock them over, and increase your attack or defence. Upon rescuing each Star Spirit, Mario also gains a Spirit Power, which drains his Star Energy (though this refills automatically, and manually, over time). This allows him to restore some HP and/or MP, put enemies to sleep, temporarily immobilise enemies, attack them all at once, or potentially instantly defeat any non-boss enemy. Unfortunately, only Mario can use Star Spirits and items, which can make battles needlessly tedious when you’re low on HP, FP, or Star Energy.

Mario’s new partners offer some fun abilities and even Peach gets a chance to be useful.

Mario is joined by friendly versions of his most recognisable foes, with each offering different special abilities in and out of battle. Mario superfan Goombario offers hints about each location and attacks with a headbutt, Kooper (my go-to partner) attacks multiple enemies and hits switches from afar with his shell, Bombette destroys cracked walls, Parakarry carries you across small gaps and is great for targeting flying enemies, Lady Bow turns you invisible and intangible (as long as you stay still) to sneak past enemies or pass through objects and attacks, Watt lights up dark areas and boosts Mario’s attacks or paralyses enemies, Sushie can be ridden across water, and Lakilester floats you over spike pits and lava while tossing multiple spike balls at enemies. You can only have one partner at a time and it’ll cost you a turn to switch to them in battle, and you share your HP and FP with them (though enemies rarely attack them), though you can freely switch on the overworld. Each can be upgraded using hidden Super Blocks, adding additional attacks to their repertoire, though I rarely used Goombario or Parakarry in battle. As you clear chapters, you’re treated to an interlude where you control Princess “Peach” Toadstool as she sneaks about and spies upon Bowser and his minions, learning key information to relate to Mario using her tiny star companion, Twink. These are essentially stealth missions, with players avoiding detection and later utilising a magical parasol to transform into one of Bowser’s guards. Peach must also whip up a cake using specific instructions to woo Gourmet Guy and even participates in the game’s final battle by powering Twink up with her enthusiasm. Mario’s also aided (though mostly forced to rescue) Kolorado, a Koopa archaeologist, is carried to the Yoshi-filled Lavalava Island by a friendly whale, and sporadically aided by the wizard Merlee, who buffs your attack, defence, or rewards at random depending on how much you pay. Chet Rippo also doubles your HP, FP, or BP at the cost of decreasing one of the other stats, though I saw little overall benefit to wasting money on this.

Puzzles, platforming, fetch quests, and tasks are abundant in this colourful adventure.

Things start off pretty simple in Paper Mario, with it being obvious where you need to go and the limited map being quite useful. As the game progresses, the map becomes less useful, and you must chat with more NPCs and use your partners to visit new areas. Warp pipes take you to the sewers for additional goodies or fast travel you to previous areas, there’s a train you must get moving to progress, and a haunted forest to traverse by paying attention to the background. While Toad Town acts as your central hub, each location includes an item shop and Toad house and other NPCs who aid you if you speak to them or help them out. At Dry Dry Outpost, you must go back and forth chatting with NPCs to track down head thief Moustafa and acquire a key item to get through the looping desert. When in Lavalava Island, you must search all around, crossing water on Sushie, to find the mischievous Yoshi kids, you’ll gather various items to use in Boo’s Mansion to access the throne room and recruit Lady Bow, and you’ll be hopping in and out of the Shy Guy’s Toy Box to retrieve the items the Shy Guys stole from Toad Town and get the model train within moving to new platforms. Like Super Mario RPG, Paper Mario marries some traditional platforming and puzzle solving with RPG gameplay, with you jumping to platforms, finding keys to open doors and free Toads, and using blocks or stairs to explore. You must hit various switches to uncover hidden paths or activate bridges, plug up magma to avoid being roasted, dive under bridges, smash through wooden panels, and even shift the environment to take alternative paths. Even dead ends can lead to goodies or hidden areas if you send Bombette out or light them up with Watt. When you reach the Shiver Region, Mario’s comically accused of killing the mayor and players must prove his innocence, only for the mayor to simply have been in shock! Players must sneak past (then frantically run from) Tubba Glubba, venture down the different paths of Flower Fields doing glorified fetch quests to plant a beanstalk up to the clouds, smash giant blocks, and raise or lower staircases to progress.

Presentation:
Paper Mario takes a page out of Yoshi’s solo ventures to present a colourful mishmash of traditional 2D sprites and 3D graphics, with the game’s locations all being rendered with a 3D pop-up book aesthetic. This certainly adds some fun character and depth to each location as the camera pans and moves in interesting ways, with buildings often collapsing like cardboard as you enter and exit and Mario flattening down to take a nap. When in battle, the backgrounds maintain the pop-up book aesthetic but with a 2.5D bent, making them (and the entire game) appear to be an elaborate stage play. Despite being a flat, 2D sprite, Mario and his companions showcase a great deal of charm and character in their victory poses and their fun, whimsical dialogue (although Mario never speaks). I especially liked the outrage Mario’s partners voice when he’s amusingly accused of murder and the sass Peach shows when constantly discovered by Bowser, who’s as childish as ever despite having unlimited power. Ironically, however, Mario’s animations are surprisingly limited, which speaks to the simplistic gameplay of the game’s battles. This is true of his partners and enemies, though Koopas will topple over, enemies spin around in a daze before poofing out of existence, and some mini and main bosses even taunt you or transform mid-battle. Although it took me some time to adjust to the visual presentation of Paper Mario, I enjoyed how colourful and daft everything was; the game leans into humour in a big way and is consistently presented as a casual RPG throughout. I was a bit disappointed to see Luigi and other Mario characters sidelined, but it was fun seeing all the enemies you usually bop without a second’s thought are actually thriving races. It was amusing seeing Goombas and Koopas be so enamoured by Mario, to have him partner up with friendly versions of a Bob-omb and Lakitu, and to explore the environment using their unique abilities. The game’s storybook aesthetic is carried through to its cutscenes and interludes, and the cheerful soundtrack, though I must admit that no tunes stuck in my head after my playthrough.

A colourful, engaging adventure with some fun humour and beautiful visuals.

While Paper Mario isn’t exactly taxing the Nintendo 64 and plays things way too safe in a lot of ways, it performs really well and there’s a lot of visual variety in keeping with the Mario franchise. You start at Mario’s house where he and Luigi venture to Toad Town, only for Bowser to abscond with Peach’s entire castle and Mario forced to venture into deserts, haunted forests, and perilous mountains to liberate the Star Spirits. Toad Town alone has loads to see, from the post office to Club 64 at the docks and the dojo, but then you have places like Koopa Village (which you must save from a Fuzzy attack) and Lavalava Island’s Jade Jungle (which is full of hidden paths and little islands and leads to the hazardous Mt. Lavalava). Every location is full of NPCs and some change according to the story as Mario settles unrest, solves problems, or completes often tedious tasks. Flower Fields is perhaps the most engrossing area, sporting a hedge and pipe maze, thorny pits you must float over, and berries to collect and deliver, though I strangely enjoyed the confusing, twisted Forever Forest and even Dry Dry Desert. Each area sees you performing some convoluted tasks to reach a fortress or structure, in which you must get keys, hit switches, and progress towards the boss. Once you save all the Star Spirits, you ascend to Bowser’s Castle, taking a back entrance, rescuing captive Toads, avoiding lava and fire hazards, before reaching Peach’s all-too-quiet castle. Anyone who’s played Super Mario 64 will recognise the layout, though it’s been expanded to include a kitchen and other rooms and given a dark, ominous atmosphere thanks to being corrupted by Bowser’s evil. Other, more surreal areas also exist, such as Star Haven (a cosmic town populated by sentient stars and reached by traversing a mystical bridge formed by the Star Spirts) and Shooting Star Summit, where shooting stars fall harmless and the Star Spirits beg for your help. Additionally, the battle backgrounds change depending on where you are, adding a bit of variety to them even if the battle gameplay can get a bit tiresome at times.

Enemies and Bosses:
Many recognisable Mario enemies pop up in Paper Mario, respawning when you leave areas, though oddly failing to drop SP if you return at higher levels or battle undead enemies like Dry Bones or Gloombas. None of the regular enemies are especially difficult, sporting one or two attacks, but they do become more durable as you progress and appear alongside others who can make even simple enemies more troublesome. Goombas attack with a headbutt, sporting spiked hats to fend off Mario’s jumps or taking to the skies to avoid his hammer. Koopas are similar, though attack from a distance with their shells, while Fuzzies bite you to steal your HP and restore theirs and Bob-ombs explode in a kamikaze attack after being hit. Bullet Bills are endlessly fired by blasters, Monty Moles toss dirt, Boney Beetles, Clefts, and Koopatrols must be knocked over to make them vulnerable, and Bandits temporarily keep you from using items or certain attacks. Pokeys must be cut down to size, Bzzap!s defeated before they can poison you, and Duplighosts transform into your partner and gain their attacks! Colourful Magikoopas hover on broomsticks, fire magical blasts, and heal or buff their allies, some enemies (like the Groove Guy) call in backup or are engulfed in flames to deal fire damage, the various Clubbas hit hard with spiked maces, and Hammer Bros toss a bunch of hammers (or a single, powerful hammer). Some enemies are vulnerable to elemental attacks, such as the Bubbles and Embers and Frost Piranhas, while bigger, slightly more formidable enemy variants act as mini bosses, such as the Blue and Red Goomba Bros who hound Goombario, the giant Gloopers who lurk in the sewers, spitting ink and bopping your head, and the vulture-like Buzzar who attacks on Mt. Rugged, flinging his feathers and proving a formidable (if optional) challenge in the early game.

Despite Jr. Troopa’s persistence, the early game bosses aren’t too challenging.

Similarly, Mario may encounter Stone Chomps in Dry Dry Ruins and must battle the Big Lantern Ghost to recruit Watt, which can be annoying as you must attack his lantern to light up the arena but not so often that he extinguishes the flame, and his attacks often incapacitate your partner. Players can also choose to pay off or fight Kent C. Koopa, a large, short-sighted Koopa who squashes Mario with a ground pound and needs two hits to topple over. When on the outskirts of Starborn Valley, players can either flee from or fight the ghost-like Monstar, though this is merely for show, and must answer questions about the game and its characters when confronted by the Guard Door. The half-hatched Jr. Koopa constantly hounds you between chapters, adding new attacks and becoming tougher as the game progresses. At first, he’s quite weak but then he gains wings to limit your attack options, wields a magical rod, protects himself and attacks with a spiked attachment, unleashes a lightning blast, and even heals himself. While it takes some time for bosses to become more problematic, you do face a lot of them, and they can be difficult if you have the wrong partner or waste turns so be sure to use the Heart and Save Blocks often helpfully placed right before them. Your first challenge is the enchanted Goomba King, who fights alongside the Blue and Red Goomba Bros, though you can easily defeat all three by attacking the Goomut Tree. Next, you track down the elusive and strangely familiar Koopa Bros, who attack in a makeshift Bowser mech and then in a totem formation, with you needing to topple them over and using Kooper to hit all four at once. Tutankoopa guards Dry Dry Ruins, summons a Chain Chomp to attack and distract you, and you must find and battle Tubba Blubba’s disembodied heart to save the Boos of Gusty Gulch. You’ll need Watt to tackle the Shy Squad, who rob Toad Town and attack as a swarm, on stilts, and in a totem like the Koopa Bros, before General Guy steps in with his toy tank…thing. General Guy tosses bombs and fires lightning bolts from the tank’s lightbulb, so I’d suggest targeting that first.

Managing your partner and FP is crucial to succeed against the tougher late-game bosses.

Things ramp up when you face the Lava Piranha, which is accompanied by two Lava Buds that join it in spitting projectiles. After you damage it enough, the spiked plant catches fire, necessitating the use of elemental attacks, and it adds a more powerful fire breath attack to its arsenal. I particularly struggled against Huff N. Puff, who spawns Tuff Puffs every time he’s hit which not only attack you but are consumed by him to restore his HP! You must tap A to reduce the damage of his wind breath, and to mitigate his lightning attack, and pop his Tuff Puffs (while still damaging him) so they don’t bolster his attacks or HP. The Crystal King wasn’t a pushover either as he summons Crystal Bits, freezes you, duplicates himself (with two of the three being intangible), and heals himself to undo all your hard work. While Bowser is unbeatable at the start of the game, he’s more vulnerable in the endgame, though he can make himself invincible with the Star Rod so you must cast Star Beam (which doesn’t cost FP but wastes a turn) to remove the spell. Bowser attacks with claw swipes (which can poison you so be sure to equip a nullifying Badge), fire breath, and a shockwave that incapacitates your partner. He also heals, grows, and becomes immune to the Star Beam thanks to Kammy Koopa. After knocking the old witch off with Peach and Twink, you gain the Peach Beam to dispel Bowser’s magic and continue the fight (with full HP and FP). Though Bowser’s lightning bolt, ground pound, and healing are aggravating, using Watt to power up Mario’s Mega Jump saw me to a hard-fought victory.

Additional Features:
There are 160 Star Pieces in Paper Mario, with many found by whacking or ground pounding certain tiles while others are out in the open or inside chests. If you take these to Shooting Star Summit, you can trade them for Badges, of which there are sixty-nine (nice!) varieties. These can either be found or bought, but you’ll need to upgrade Mario’s BP stat to equip the most Badges as some cost more BP than others. You can also acquire duplicates, allowing you to further boost Mario’s HP or FP, which are capped at fifty apiece (while the BP cap is thirty and Mario’s maximum level is twenty-seven). Although there’s no post-game content, there’s plenty to do, such as finding all the Special Blocks to upgrade your partners, finding all twenty-five of Parakarry’s lost letters, having Tayce T. cook up unique items, and taking on Chuck Quizmo’s quizzes. Your rewards are pretty much always Star Pieces or Badges, however, and there are no additional characters, worlds, or bosses to unlock. However, if you challenge the Toad Town dojo, you’ll face five additional battles against some tough opponents, culminating in a superboss showdown with the dojo’s Master, earning a diploma for each victory and changing some NPC dialogue to reflect your achievement. You can also purchase up to ten Li’l Oinks to populate a small farm in Toad Town, gaining rare items every time a Li’ Oink leaves the pen, and unlock Rip Cheato’s shop for some rare (and expensive) items. Otherwise, you can abuse the Nintendo Switch’s save state feature to help with some of the game’s trickier battles, though it’s still worth fighting every enemy and thinking strategically about which stat up level-up.

Final Thoughts:
I was hesitant about playing Paper Mario, despite how much I enjoyed Super Mario RPG. I assumed it would be a fun, colourful, whimsical little adventure with simple RPG mechanics and puzzles. And, mostly, I was right: Paper Mario isn’t going to be taxing most hardened RPG players, but there’s nothing wrong with a casual gaming experience. However, I was surprised by the difficulty spike near the end game, mainly because it feels forced due to the strange way levelling-up works and how limited your partners and their abilities are. So many battles would’ve been much easier if your partner could use items or Star Spirits and, while some Badges mitigate this, it can get annoying. While the visual presentation can be a little jarring (and disappointing given it’s not a true 3D RPG), the pop-up-book aesthetic works really well and made everything very charming and humorous. Similarly, while I was disappointed to see Luigi get the shaft again, I quite enjoyed Mario’s new partners and seeing a different side to his enemies, who have their own societies and towns and such. While I felt the game dragged in the middle, padding out the runtime with fetch quests and tedious puzzle solving, it usually led to a fun boss battle and some new abilities to make things easier. I enjoyed the variety in each area, who there was a lot to see and do and discover, and the little interactions between Mario and the NPCs. I was also a fan of the Peach-centric interludes, which were a nice break from the main gameplay loop, and how each partner’s abilities encouraged backtracking and exploration. While I don’t believe Paper Mario is better than Super Mario RPG, it was definitely a fun experience in short bursts. It lacked a lot of deeper RPG mechanics and features I expect from the genre, outstayed its welcome at times, and the BP gimmick needlessly handicapped the player’s abilities, but it was very bright and carefree and is probably worth your time if you need a break between more challenging RPGs.

My Rating:

Rating: 3 out of 5.

Pretty Good

Did you enjoy Paper Mario? How do you think it compares to Super Mario RPG and later games in the series? Which of Mario’s partners was your favourite and did you like seeing his enemies expanded upon? Do you agree that the combat and gameplay got repetitive after a while? Which Badges did you equip for your playthrough? Did you ever find all the letters and defeat all the dojo’s combatants? Which Super Mario spin-off is your favourite and how are you celebrating Nintendo’s mascot this month? Feel free to share your memories and opinions of Paper Mario in the comments and subscribe to my Ko-Fi for more Mario content.

Back Issues [Stark Sunday]: Tales of Suspense #46


Anthony “Tony” Stark/Iron Man first lived, walked, and conquered in March 1963 and has gone through numerous armours and shot to mainstream superstardom thanks to Robert Downey Jr.  


Story Title: “Iron Man Faces the Crimson Dynamo!”
Published: 9 July 1963 (cover-dated: October 1963)

Writers: Stan Lee and Robert Bernstein
Artist: Don Heck

Quick Facts:
Stan Lee, Larry Lieber, and Don Heck’s questionable hero has fought many colourful villains over the years, such as many iterations of his Soviet counterpart, the Crimson Dynamo. First appearing as Doctor Anton Vanko and mirroring escalating tensions between America and Russia, versions of this villain have long-dogged Iron Man and directly influenced his live-action counterpart, Ivan Vanko/Whiplash (Mickey Rourke).

The Review:
Our story is set mid-way through the infamous “Cold War”, a period of animosity between the United States and Soviet Russia. Nikita Khrushchev (“the “Mr. Big” of the Iron Curtain”), visits Professor Anton Vanko (the titular “Crimson Dynamo”), a man even Khrushchev hates and fears. However, since Vanko is the “world’s greatest expert on electricity”, Khrushchev begrudgingly tolerates Vanko’s lofty arrogance. Amusingly, the animosity and resentment between the two is mutual, though Khrushchev begrudgingly sets his hostilities aside to see Vanko’s latest breakthrough. Although Khrushchev is initially sceptical when Vanko dons an elaborate, spiked, armoured suit said to give his control of electricity, the First Secretary is amazed when the Crimson Dynamo obliterates a robotic duplicate of Iron Man. Khrushchev’s nerves are further shot and his doubts fully settled when the Crimson Dynamo commands a tank to stop mere inches from the First Secretary’s face and then reduces it to wreckage. Though impressed by the demonstration, Khrushchev is left rattled and secretly vows to dispose of Vanko once he’s outlived his usefulness as he presents a threat to Khrushchev’s position. Before that, Khrushchev appeals to Vanko’s vanity and orders him to head to America and scupper Tony Stark’s operations at Stark Industries, and destroy his “bodyguard”, Iron Man, to weaken America’s military and eliminate one of their greatest scientific minds and heroes. The story jumps ahead two weeks and halfway across the world to the testing site of Stark’s latest missile, where Stark’s chauffeur, Harold “Happy” Hogan, and his secretary, Virginia “Pepper” Potts, are busying arguing as Pepper decides to question Happy’s courage and be unnecessarily mean to him. Still, inspired by their concerns over the missile’s safety, Stark heads to his office to slap on a special “collapsible extensible armour” to oversee the missile launch as the gold-plated Avenger.

The Crimson Dynamo systematically attacks Stark’s facilities, sabotaging his reputation.

And good thing, too, as the Crimson Dynamo just happens to be waiting in the nearby forest. As soon as the missile launches, the Crimson Dynamo messes with its circuits, causing the missile to suddenly plummet to the ground, endangering the crew onboard (making it more of a rocket than a missile…) and those below. Luckily, ol’ shellhead intercepts the missile and slows its descent, allowing it to land clumsily, but far less dangerously. The effort leaves Iron Man dazed and provides the Crimson Dynamo with a perfect demonstration of his abilities. While Stark puzzles over what could’ve fried the missile’s circuits, the Crimson Dynamo spends days targeting Stark’s plants, destroying his rockets, electrical equipment, weapons, and facilities (all with no loss of life, conveniently), all from a distance and anonymously. Stark’s so dumbfounded by the massive, nationwide assault that he suspects every enemy nation is targeting him. As if the risk of losing his military contracts isn’t bad enough, the fat cats in Washington, D.C. also decide to investigate Stark, fearing he may be sabotaging his plants to weaken the American military (because paranoia was rife during the Cold War!) Though Happy and Pepper vow to stick by Stark, he’s desperate for his unseen adversary to expose himself. Similarly, Vanko is frustrated that Iron Man didn’t show up during his rampage so he dons his armour once more and openly attacks Stark’s research centre, correctly conveniently surmising that ol’ shellhead must be there. After urging Happy and Pepper to flee, Stark slips on his armour and finally comes meets his armoured foe, immediately recognising that the Crimson Dynamo wields similar electric powers to him.

Iron Man easily bests the Crimson Dynamo and turns him away from the Commies with a simple ruse!

This allows Iron Man to erect an invisible force field to negate the Crimson Dynamo’s electrical bolts and also propels him into the air to avoid being fried when the Crimson Dynamo electrifies the ground. Iron Man then emits static to interfere with the Crimson Dynamo’s electric signals and challenges him to counter his abilities, frustrating Vanko and driving him to boast of his mission to destroy Stark’s operations, allowing Iron Man to take a recording of the confession for later. Aware of the universal truth that “all Commies are chronically suspicious of each other”, Iron Man lures the Crimson Dynamo into the woods, uprooting and chopping down giant oak trees to cage his armoured foe since, for all Vanko’s vaulted genius, he never built a pair of rocket boots or a rocket pack into his armour! Iron Man then grabs the Crimson Dynamo and flies him to the coast, threatening to dunk him in the water and kill them both from the resultant electric shock. The Crimson Dynamo immediately begs for his life and is convinced to surrender, much to Iron Man’s pleasure. Once safely on the pier, Iron Man offers the Crimson Dynamo a pair of special earplugs to eavesdrop on Khrushchev’s orders to execute Vanko once he’s defeated the armoured Avenger. Although this is another ruse by Iron Man, the Crimson Dynamo buys the deception and is incensed to learn that his Communist masters planned to kill him; he even doubles down and thanks Iron Man for opening his eyes! Incredibly, Iron Man offers Vanko the chance to put his genius to work for a country that appreciates him and the Crimson Dynamo accepts, revealing that the Commies are holding a fortune in gold for sabotage purposes and being given a job at Stark Industries for his intel! Naturally, Khrushchev is left incensed by this betrayal and vows to make Iron Man pay for stealing away his top scientist.

Final Thoughts: 
Well, this was shit. Okay, maybe that’s a little harsh, but this was such a nothing, throwaway story that really could’ve been so much more. The Crimson Dynamo should’ve been positioned as Stark’s equal and Communist opposite, a brilliant inventor and industrialist who’s deeply committed to his country and willing to do anything to defend it, even if it means launching pre-emptive attacks against the United States. Imagine a Tony Stark without a moral compass, a man who puts his genius and technology to work to destroy, rather than defend. That could’ve been a really unique twist, especially if the story had been spread out over two issues. Instead, we get this mess of a story that’s full of weird moments. Like, why is there a crew onboard the missile? What sense does that make? Wouldn’t they die once it hits its target? They’re literally there to add some stakes when the Crimson Dynamo sabotages the missile, but just changing the dialogue to say it’s a “rocket” would’ve made all the difference. Then, the Crimson Dynamo attacks a whole bunch of Stark’s facilities and Iron Man isn’t there for any of them? Stark seemingly makes no effort to try and track down their saboteur, instead assuming it’s multiple assailants all acting in conjunction and spending his days worrying about losing his lucrative military contracts. He’s left blindly hoping for his foe to make a mistake, which isn’t a great strategy, and lucks out when Vanko gets annoyed by Iron Man’s absences. I also didn’t like seeing the American government suspect Stark of being a traitor. This cropped up a lot back then and I get it’s emblematic of the Cold War, but it was stupid to think Stark would cost himself millions of dollars and willingly destroy his reputation, and it made Iron Man’s belief that all Communists are distrustful of each other that much weaker. If the Reds had been betrayed as backstabbing, immoral assholes and the Yanks as united, honourable people, it would’ve made the parallels and differences between Iron Man and the Crimson Dynamo that much more impactful. As is, it just reads like we’re all as bad as each other. Which is true, but still…

Sadly, the Crimson Dynamo fails to be all that he could be and the story is weaker because of it.

The Crimson Dynamo certainly look the part. He’s got pretty cool, spiked armour like an iron maiden and all these fancy, somewhat vague “electrical powers”. He can blow up robots with a button, tear tanks apart with electrical bolts, screw up circuitry from afar, and destroys many of Stark’s facilities without being seen. His armour is pretty cool, being all red where Iron Man is all gold and having ridges and spikes all over him while Iron Man is sleek and smooth. Vanko is said to be this renowned expert in electricity and he certainly bothers Khrushchev, who’s intimidated by Vanko’s ambition, arrogance, and power. However, while the Crimson Dynamo deals a heavy blow against Stark, he’s undone by his arrogance as he gives up his one advantage so he can satisfy his desire to destroy Iron Man and is immediately humiliated once the fight starts! Seriously, Iron Man barely breaks a sweat with this guy as he deflects his one attack, messes up his systems, and easily cages him with trees because Vanko can’t fly! What the hell kind of flaw is that? How do you base so much of your armour and weaponry on Iron Man but omit the fucking rocket boots!? Then, Vanko is easily tricked into surrendering, and betraying his country, and revealing Commie secrets, all because he was made to believe that Khrushchev wanted him dead! I assume that Vanko is later revealed to be working as a double agent or something; that’s the only explanation for the abrupt ending, which barely acknowledges the crimes Vanko committed! I was expecting so much more from this story, a true mirror match and clash of politic and moral ideologies from these similar, but radically different scientists and investors. Instead, it’s another bog-standard, “villain-of-the-week” story designed to show how awful the Soviets are compared to the righteous and capable Americans.

My Rating:

Rating: 2 out of 5.

Could Be Better

Were you also disappointed by the Crimson Dynamo’s first appearance? Did you also think that Vanko failed to live up to his full potential as a dark counterpart to Stark? Were you also amazed at how ineffectual the Crimson Dynamo was against Iron Man? What are some of your favourite Iron Man vs. Crimson Dynamo stories? Which of Iron Man’s armours is your favourite and how are you celebrating Iron Man this month? Share your thoughts in the comments, like this review, and donate to my Ko-Fi to support the site.

Mini Game Corner [Mario Month]: Mario Party (Nintendo Switch)


So, for no better reason than “Mar.10” resembling Mario’s name, March 10th is widely regarded as being “Mario Day”, a day to celebrate Nintendo’s portly plumber, an overalls-wearing mascot who literally changed the videogame industry forever and shaped the home console market of the nineties.


Released: 2 November 2022
Originally Released: 18 December 1998
Developer: Nintendo

Original Developer: Hudson Soft
Also Available For: Nintendo 64
Metacritic Scores: 79 / 7.8

Quick Facts
After Super Mario 64’s (Nintendo EAD, 1996) critical and financial success. Nintendo followed up with a series of spin-off titles, with Mario Party being one of the most lauded. Mario Party was geared towards multiplayer gameplay and set the blueprint for a sub-series of Mario videogames (and numerous copycats). Widely praised, especially when played with friends, Mario Party’s mini games were celebrated for their variety and challenge, though some complained of hand injuries. Nintendo long avoided re-releasing the first title in favour of its sequels or new games, though some of its mini games were revamped in the Mario Party: The Top 100 (NDcube, 2017).

The Review:
As you might’ve guessed, Mario Party is a party game where players compete against their friends or computer-controlled opponents, rolling dice and making moves and playing various Mini-Games, across six initial board-like stages and two unlockable areas, to become the “Super Star”. Players pick from six recognisable characters, though they all play the same, which is a shame considering Wario (my go-to) and Donkey Kong are known for their strength and Luigi is known for his low traction and high jumping, characteristics that sadly don’t factor into the Mini-Games. Players are guided by Toad and a friendly Koopa Troopa, who teach the rules, award Coins and Stars, and detail the controls and objectives. When starting a game, you can set the number of human and computer players, set the difficulty level, and establish how many “turns” it takes to finish. You then select a board, with each sporting different gimmicks and difficulty ratings, and finally hit a rolling dice to decide the order of play. Unfortunately, there’s no way to speed up the games and you must sit and watch as each player takes their turn, navigates the board and its hazards and gimmicks, and competes in single-player Mini-Games, which gets very tedious. Mario Party’s controls are super simple: you press A to hit dice and confirm selections or to jump or swim in some Mini-Games, press B to exit menu screens, view the entire map from the main board, or attack or speed up in some Mini-Games, use A and ZL to perform a butt stomp, and press the Right trigger for an alternative view of the main board map. Your goal is to do circuits of the board, collecting Coins from Blue Spaces and Mini-Games and reaching Toad to buy a Star, avoiding Red Spaces (which sap your Coins) and Bowser spaces, where possible. The player with the most Stars (or Coins, in the event of a tie), wins, and players are awarded additional Stars for having the most Coins, winning the most Mini-Games, or landing on the most “Happening Spaces”.

Navigate colourful boards, dealing with hazards and earning Coins and Stars to claim victory.

Happening Spaces do different things depending on the board but generally swap Toad’s position with Bowser’s, which can be good or bad depending on where you are on the board. If you land on a “Chance Time Space”, you play a roulette-style game where you hit spinning dice to swap Coins or Stars between players, which can again aid or hinder you. Bowser Spaces see the Koopa King challenging you to tougher Mini-Games where you lose more Coins if you fail, or initiate a faster Chance Time game where he steals your Coins, or he forces you to buy a useless item. You’ll also encounter ghostly Boos who steal Coins from any player for free or grab a Star from them for a small fee, Bob-Ombs blast you across Wario’s Battle Canyon, and Koopa Troopa awards 10 Coins each time you pass him. When you’re close to the end, this is upped to 20 and each Blue and Red Space gifts or removes additional Coins. Players can take alternate paths in most boards, either by selecting an arrow, paying to pass a Thwomp or a Whomp, activating a trap, or depositing Coins  to open or shut doors. When playing Princess “Peach” Toadstool’s Birthday Cake board, you can plant one of four seeds to be shunted towards Bowser or Toad or plant Strawberry Seeds to spawn Piranha Plants that steal Stars from passing players. Upon completion, your Coins and Stars are deposited in the Mushroom Bank to spend them at the Mushroom Shop to purchase helpful items. These earn you additional interest on your Coins, double or half your current Coin stock, unlock the credits and sound test, and can remove Boos or Koopa Troopas from some boards. Other items randomly award or take away Coins, randomly switch player positions, and randomly spawn a Boo, Bowser, or Koopa Troopa, none of which I found particularly useful. While some boards are quite simple to navigate, others force you to take different paths to avoid Bowser or reach Toad, while others have you hopping around seemingly at random to reach Toad. Wario’s Battle Canyon was the worst for this as the Bob-Omb cannons keep switching targets and some areas are filled with Mini-Game Spaces or Red Spaces, which drags the tedious game out even more.

Though often frustrating, the Mini-Games are the best part of this tedious party game.

The main draw of Mario Party are the Mini-Games, which are played either solo, in a free-for-all, in teams, or pit one character against the other three. It seems to be random which player is fought against in these latter Mini-Games unless you land on a Bowser Space, where you’re usually on the defensive. Each Mini-Game has a time limit and has you capturing the most Coins. You’ll dig through dirt to locate treasure chests, dive to the ocean floor (with or without a partner) to grab treasure while avoiding Bloopers and sharks, toss a Bob-omb between players to avoid being blown up, and play a Mario-themed version of musical chairs where you must race to the big red mushroom and its treasure when the music stops. You’ll be desperately cutting out shapes as accurately as possible, warping Bowser’s face like the face manipulation minigame in Super Mario 64, alternating button presses to inflate a Bowser balloon, and smashing Coin Blocks. In Skateboard Scamper, you must frantically tap B to skateboard along a crumbling path, jumping over Thwomps and snagging floating Coins, while Box Mountain has you smash boxes for Coins, Grab Bag has you playing “capture the flag” with loot, and Platform Peril has you awkwardly hopping between falling platforms not unlike Rainbow Ride. Some Mini-Games have you frantically wrestling the game’s odd momentum and physics to avoid falling in water, such as Mushroom Mix-Up, Bumper Balls, Hammer Drop, and Bombs Away. Tipsy Tourney sees you completing a picture puzzle by running over squares, Mario bandstand has you tapping A at the right time to play a song, Shy Guy Says has to tapping either A or B to avoid being set adrift, and Cast Aways sees you clumsily flicking the left stick to try and snag floating loot. You’ll be running from Boos as you carry a lightbulb through a haunted corridor, playing jump rope with flames, spinning about like crazy in Slot Car Derby, and trying to (or hoping that) drop a treasure chest through a pipe maze.

Greater challenges await if you can stand to put in the time to grind for Coins and Stars.

In one-on-three Mini-Games, you must all attack a player dressed as Bowser (or avoid those attacks), play bowling, smash Coin Blocks with a massive hammer, gingerly cross a tightrope (or blast the player with your cannon), try not to snap your console futility wriggling free in the Crane Game, butt stomp a raincloud to have a Piranha Plant eat a player (or desperately outrun it), play tug o’ war, and splash about in a paddle boat. Two-on-two games see you randomly paired with another player for some bobsled racing, wiggling the left stick to hobble across a desert, stealing and dunking a bombsketball, and pumping a handcar and steering into tight corners to avoid falling in lava. I rarely got to play a single-player Mini-Game but these see you matching picture squares, playing a slot machine, smacking the right Boo out of a gaggle of ghosts, playing whack-a-mole with Piranha Plants, and pounding tree stumps. Mini-Games are purchased from the Mini-Game House to be freely played but, while they’re the best part of the game, it does get tedious when you play the same ones over and over or must watch players tackle them alone. Mario Party is also quite challenging even on the easiest difficulties as it’s very easy to do laps of a board and not buy any Stars or for players to steal all your Coins and Stars. While the Nintendo Switch’s save state feature helps with this, it won’t help with the game’s janky-ass mechanics that see what should be random actions be pre-determined, ensuring you land on the wrong spaces or are robbed. The computer generally always targets you, which doesn’t help, and it gets very annoying being denied a Star thanks to the board shifting. If you collect 100 Stars, you unlock the Eternal Star board and you can buy Bowser’s Magma Mountain for a mere 980 Coins, finishing each board sees the Power Stars change the map and title screen, and there’s even a special Mini-Game Island that challenges you to play and win all fifty Mini-Games. This mode utilises a life system, with players earning extra lives for every 100 Coins and losing lives when they fail a Mini-Game, and also includes some helpful shortcuts. Clearing every Mini-Game and setting records and beating Toad to the goal unlocks the Bumper Ball Maze Mini-Games, though I’d say this mode is only for die-hard Mario Party players.

Final Thoughts:  
I was hesitant to play Mario Party as I didn’t like the idea of being screwed over by chance or landing on bogus spaces, but I figured I could manipulate the save state system to counteract this. Unfortunately, the game isn’t designed that way; if Mario rolls a six, he rolls a six each time you reload and if Yoshi chooses to swap your Stars with Peach then you’re losing those Stars. Things started out decent enough; the game’s very colourful and whimsical, even with the low-poly models, and I liked how each board had different gimmicks. Unfortunately, things become very tedious very quickly as there’s no way to fast forward or skip computer-controlled player turns, dragging each game out even with the least amount of turns selected. It’s also frustratingly easy to lose Coins and Stars thanks to spiteful players, some games see you earn less Stars because Toad keeps fucking moving (!), and I got annoyed at being forced to watch or play a Mini-Game every thirty seconds. Luckily, the Mini-Games are fun and, in many ways, the campaign is just window dressing for these games, which I’m sure led to many fallouts between friends back in the day. While some or more aggravating than others, they’re bite-sized challenges that can (mostly) be easily mastered, meaning it’s probably better to stick with Mini-Game Island than tackle the main boards. My opinion may be skewed because I played alone against three computer-controlled opponents, but I quickly lost patience with Mario Party. It annoyed me that the characters didn’t have different stats or abilities to make them unique and I wasn’t enthusiastic about grinding for all the Coins and Stars to unlock the bonus boards. I’m also even less enthusiastic about the series as a whole and have no plans to play other Mario Party games, though maybe that Top 100 game would be more my speed.

My Rating:

Rating: 2 out of 5.

Could Be Better

Do you think I was too harsh on the original Mario Party? Which of the playable characters was your go-to and were you also disappointed they didn’t have unique attributes? Did you also find the main game tedious or do you have fond memories of playing with your friends? Which of the boards, Mini-Games, and gimmicks was your favourite? Did you ever unlock the bonus boards and best Mini-Game Island? Which Mario Party game is your favourite and how are you celebrating Mario’s birthday this year? Whatever your thoughts on Mario Party, share them below and, if you want to see me tackle other Mario Party titles, drop a donation on Ko-Fi!

Wrestling Recap [3:16 Day]: Austin vs. Triple H (No Way Out ’01)


This image has an empty alt attribute; its file name is 316day.png

“Talk about your psalms, talk about “John 3:16”…Austin 3:16 says I just whupped your ass!”
With those immortal words, spoken on 23 June 1996, beer-swigging, finger-gesturing anti-hero “Stone Cold” Steve Austin became a mainstream icon!


The Date: 25 February 2001
The Venue: Thomas & Mack Center; Paradise, Nevada
The Stakes: “Three Stages of Hell” grudge match (singles match, street fight, cage match)

The Commentary: Jim “J.R.” Ross and Jerry “The King” Lawler
The Referee: Earl Hebner
Dave Meltzer’s Rating: 4.75

The Build-Up:
One of “Stone Cold” Steve Austin’s most persistent foes was “The Game” Triple H, and their feud became deeply personal in 2001, when Triple H revealed he orchestrated the hit-and-run attack that put Austin on the shelf for most of 2000. This seemingly came due to a lukewarm reception to the driver being revealed as Rikishi, leading to Austin attempting to kill both men as recompense. Austin and Triple H continued to screw with each other in the build, leading to this match being signed to settle their differences once and for all.

The Match:
After years of battling for the Intercontinental and World Wrestling Federation (WWF) Championships in all kinds of matches, Steve Austin and Triple H sought to end their blood feud in this “Three Stages of Hell” match. Essentially a two out of three falls match, the contest was specifically set up to have a different stipulation for each round. First, the rivals fought in a regular one-on-one match; then, the rules were thrown out for a street fight; and finally, if necessary, they would battle in a steel cage. Given how heated the issues were between Austin and Triple H, the match naturally began with a slugfest as Austin unloaded on the Game, kicking the shit out of Hunter in a corner. Although Triple H reversed a whip into another corner, Austin immediately knocked him down with a clothesline and went for the mounted punches, awkwardly pouncing on Triple H after the Game dodged a Stone Cold Stunner. Though momentarily stunned from landing on the ropes, Austin countered a Pedigree attempt and followed Triple H to the outside, bashing his head off the steel steps and focusing on his left arm, repeatedly ramming it into a ring post. This meant Triple H couldn’t hook the Pedigree on the second attempt and Austin continued to wear down the arm with kicks and an uncharacteristic armlock, wrenching on the arm and finally landing the Lou Thesz Press and scoring the first two count. Austin followed up with a spinebuster but ate a boot when he went for his signature second rope elbow drop, which allowed Triple H to build a comeback with neckbreakers and repeated knees to the back of the Rattlesnake’s head.

After wearing each other down in the ring, the heated rivals brutally brawled at ringside.

After a few kicks to the gut in a corner, Triple H thumbed Austin in the eye and knocked him down with a chop block, switching his focus to Austin’s left leg and smashing it against a ring post. Although Austin rammed Triple H’s shoulder into the same post to relieve the pressure, Triple H returned to targeting Austin’s leg once back in the ring, slapping on the Figure Four Leglock and grabbing the ropes for extra leverage. However, Austin successfully countered the move to put pressure on Triple H, leaving himself hobbled and helpless to stop Triple H dropping some elbows to the damaged joint. After scrambling upright and bashing Triple H’s nose off a turnbuckle pad, Austin hit another Lou Thesz Press and his running elbow for another two count but settled for a clothesline when the Game countered another Stunner attempt. Triple H countered a third into another neckbreaker for a near fall before they countered roll up attempts. Despite kicking Austin in the balls, Triple H finally ate a Stone Cold Stunner when he went for a diving axehandle, losing the first fall and kicking off the street fight stipulation. Austin immediately capitalised by tossing Triple H outside and landing suplexes on the rampway, bashing Hunter with a miniature television monitor, and tossing a few steel chairs into the ring before pursuing Triple H through the crowd and dumping him back in the ring. Austin whacked a steel chair across Triple H’s spine and then battered him with it as he writhed on the canvas for a two count. After more brawling at ringside, Austin brought out Mick Foley’s barbed wire 2×4, only to take a shot to the face and get busted open. However, he still reversed a Pedigree to send Triple H crashing through the Spanish announce table.

Things escalated into a bloody brawl by the end, with Triple H barely snagging ultimate victory.

After hitting Triple H with a beer can, Austin chucked him back in the ring, only to just barely kick out after taking a shot from the ring bell and a neckbreaker onto a steel chair. Triple H then countered a sleeper hold with a back suplex onto a steel chair and still couldn’t put Austin away, so he tried to Pedigree Austin onto the chair and was tossed back outside. Austin then split Triple H’s head open with a chair shot and the steel steps and desperately fought back when Triple H tried to hit him with his trusty sledgehammer. Back in the ring, Triple H countered another Stunner with a sledgehammer shot and then finally hit the Pedigree to take the second fall. Thus, the steel cage lowered and Triple H instantly took advantage by launching Austin into the mesh walls. Triple H then thrust the barbed wire 2×4 into Austin’s face, earning himself a chair shot to the head, a trip into the cage wall, and that same razor wire weapon to his face. When Triple H kicked out at two, Austin choked him with the weapon and ate a DDT to a steel chair when Triple H fought back. After kicking out of the follow-up cover, Austin unloaded with a slugfest, causing Triple H to scramble up the cage. After fighting on the ropes and smashing each other’s heads off the steel supports, Austin landed crotch-first on the top rope but immediately answered back by tossing Triple H to the mat for a near fall. Things escalated further when both men hit their finishers, only to kick out before the three count, driving Austin to grab the barbed wire 2×4 and Triple H to grab his sledgehammer. Both bashed each other at the same time, but Triple H happened to collapse on top of Austin, scoring the win in this hellacious match (though Austin got the last laugh by landing a final Stunner as Triple H staggered up).

The Aftermath:
Interestingly enough, this was the last time Steve Austin and Triple H faced each other in a one-on-one match. As Austin had won the Royal Rumble the previous month, he switched his focus to his main event WWF Championship against the Rock, which saw him capture the belt but sell his soul in the process. Triple H, meanwhile, complained that his victory meant he should be in the main event of WrestleMania X-Seven and thus drew the ire of the Undertaker. Despite losing to the American Bad Ass at that event, Triple H bounced back by forming the most unlikely alliance of all time, joining forces with Steve Austin as the “Two Man Power Trip” and dominating the WWF thanks to the backing of WWF Chairman, Vince McMahon. Triple H captured the Intercontinental Championship and teamed with Austin against the Undertaker and his half-brother, Kane, defeating them for the Tag Team Championships. Unfortunately, Triple H’s 2001 ended abruptly after a horrendous quadricep tear, meaning he missed the ill-fated “Invasion” that saw a paranoid and erratic Steve Austin desperately cling to his beloved WWF Championship. Although Triple H returned in time for the 2002 Royal Rumble, he and Austin never faced each other in the ring again as Austin briefly parted ways with the WWF before retiring in 2003. Still, this match is widely regarded as one of the best matches the two ever had.

My Rating:

Rating: 4 out of 5.

Great Stuff

Did you enjoy the Three Stages of Hell match between Steve Austin and Triple H at No Way Out 2001? Which fall or stipulation was your favourite and who did you want to win? Were you disappointed that all the limb targeting was forgotten by the end? Did you enjoy seeing the two resort to extreme weapons? Which of Austin and Triple H’s matches is your favourite and how are you celebrating 3:16 Day this year? What dream match would you have liked to see him involved in? Let me know what you think about “Stone Cold” Steve Austin down in the comments, send me £3.16 on Ko-Fi, and go check out my other wrestling content across the site!

Movie Night [Friday the 13th]: Jason Goes to Hell: The Final Friday


Long considered an unlucky day due to superstitions involving the number thirteen and religious connotations, Friday the 13th is equally well-known as a long-running series of slasher movies. As a result, this is clearly the best opportunity to take a look at the Friday the 13th (Various, 1980 to 2009) horror series and to commemorate this unlucky and dreaded date.


Released: 13 August 1993
Director: Adam Marcus
Distributor: New Line Cinema

Budget: $3 million
Box Office: $15.9 million
Rotten Tomatoes Scores: 15% / 23%

Quick Facts:
After years of distancing himself from his slasher franchise, Sean Cunningham returned in hopes of a crossover with the Nightmare on Elm Street series (Various, 1984 to 2010). Though it would take about ten years to see this and Paramount Pictures sold New Line Cinema everything but the franchise title, Cunningham was adamant about taking the series in a new direction after a deliberately stereotypical opening. The film was also filled with references to other horror franchises and featured a startling new look for Jason Voorhees (fan favourite Kane Hodder) courtesy of Al Magliochetti.

The Review:
Things start out very familiar in this second attempt at a “final” entry in the long-running slasher franchise. Jason Goes to Hell opens some twenty years after Jason Voorhees was believed drowned as a child in Crystal Lake. After two decades of characters either warning that Jason is alive or mocking the idea that Jason is alive, Jason’s legend has become public, with scheming news reporter Robert Campbell (Steven Culp) openly discussing Jason on his show and Crystal Lake residents like rambunctious diner owner Joey B. (Rusty Schwimmer) shamelessly profiting from Jason’s myth. This predictability and familiarity are all the Federal Bureau of Investigation (FBI) need to trap the monstrous killer, as Agent Elizabeth Marcus (Julie Michaels) wanders about an abandoned cabin at Crystal Lake to lure Jason out. Looking more hideous and ridiculous than ever, with his mask fused to his tumour-ridden head (though with no explanation of how he returned to Crystal Lake from Manhattan), Jason is lured into an ambush. A crack squad of FBI agents pump Jason full of assault rifle fire and reduce him to flaming body parts with a mortar, seemingly ending his reign of terror and causing Crystal Lake to celebrate accordingly. This makes for a very surprising opening but it also a bad omen for things to come, as Jason Goes to Hell deviates so wildly from the formula and lore of the franchise that it’s essentially unrecognisable as a Friday the 13th film. While Campbell interviews infamous bounty hunter Creighton Duke (Steven Williams), who coyly alludes to Jason being beyond death and offers to finish the job for $500,000, Jason’s remains are taken to coroner Phil Hant (Richard Gant) at the local morgue.

Enigmatic bounty hunter Duke is the best and most wasted part of this bizarre entry in the slasher franchise.

Hant is suddenly mesmerised by Jason’s black, still-beating heart, which compels him to consume it and, in doing so, the coroner is possessed by Jason’s evil spirit! Acting through Hant, Jason immediately returns to his killing spree, offing assistant coroner Eric Pope (Dean Lorey) and two FBI guards (Tony Ervolina and Kane Hodder) before returning to Crystal Lake. Since he has foreknowledge of Jason’s abilities and knows the terrifying secret behind his curse, Duke journeys to Crystal Lake and accosts waitress Diana Kimble (Erin Gray), demanding her help in defeating Jason since she’s secretly Jason’s hitherto unknown sister! Duke’s lewd ways and notoriety see him upset Diana and anger her man, Sheriff Ed Landis (Billy Green Bush), who arrests Duke for his insolence. Undeterred, Duke patiently waits for a chance to escape and is provided one when down on his luck Steven Freeman (John D. LeMay) is brought in later in the film, having been accused of killing Diana. Desperate to protect his ex and the mother of his baby, Jessica Kimble (Kari Keegan), Stephen rises to Duke’s bait and demands answers about Jason, sacrificing two of his fingers to learn that Jason has been wearing bodies this whole time, jumping to new hosts when he wears them out, and can only be killed or reborn through his bloodline. Stephen’s exploration of the newly revealed “Vorhees” mansion suggests that Jason’s mother (or father) dabbled with the Necronomicon Ex Mortis, suggesting Jason was cursed from birth to be some kind of human/Deadite hybrid. Duke also alludes to a history with Jason, though we only get scant details of this, which is a shame as Steven Williams is easily the best part of this car crash of a movie. Charismatic and eye-catching, Duke makes a hell of an impression in double denim, long black trenchcoat, and cowboy hat, to say nothing of his knowing smirk and silky-smooth voice. While it would’ve made way more sense to bring back Tommy Jarvis (Various) or rewrite the film to focus on Duke defending Jessica and her baby, Duke is one of the franchise’s more memorable characters and it’s a pity to see him wasted and offed so unceremoniously.

The film’s crippled by uninteresting leads and a complete rewrite of the series lore.

Instead of following a self-righteous Duke on a quest for revenge, we’re left with Steven, a weedy nerd who apparently skipped town or disappeared after getting Jessica pregnant and has been trying to make amends since. While Diana wants to help the kids repair their relationship and Jessica constantly asks after him, Jessica has shacked up with Campbell and joins Sheriff Landis in condemning Steven when he’s found cradling Diana’s dead body. In fact, save for a horny hitchhiker (Kathryn Atwood), Officer Randy Parker (Kipp Marcus), and Ward B. (Adam Cranner), the entire community turns on Steven and hounds, attacks, or berates him. Having witnessed Jason murder Diana while possessing Deputy Josh Burton (Andrew Bloch) and then jump from Josh into Campbell, leaving Josh to dissolve into a gloopy mess, Steven’s desperate to protect Jessica, having learned that she’s Jason’s niece, and stunned to finally meet his daughter, baby Stephanie (Brooke Scher). Though physically no match for Jason (or anyone, for that matter), Steven constantly surprises with his quick reflexes and guts, offering his fingers to Duke in return for information, brawling with Randy, and gunning down Jason’s possessed bodies to protect his estranged family. Unfortunately for him, Jessica is not interested in associating with him, despite asking after him a few times. She refuses to see him (though is happy for him to meet Stephanie) and constantly ditches and even attacks him, despite him saving her from the possessed Campbell and desperately getting her to safety. Jessica seems to be in denial, despite witnessing horrific and unexplainable events, even when confronted by Duke at the Voorhees house and told her destiny. It’s only when Jason is horrifically reborn through her mother’s corpse that Jessica finally gets a clue and takes up the Kandarian dagger to fight off the undead menace, and only after Steven has almost been dragged to Hell that she finally shows him some affection (though I don’t blame her for shunning him as he’s a complete dweeb).

Jason’s now a demonic, body hopping force hell-bent on possessing his last family members.

Everything you know about Jason is completely turned on its head or thrown out the window in this bizarre entry, which has only superficial connections to the previous films and goes out of its way to rewrite the long-standing lore. Though still a hulking, rotting, undead killer, Jason is far more vocal than ever, grunting and even moaning constantly as he stomps about. Jason’s also now inarguably a demonic figure and his superhuman durability, strength, and regenerative powers are made explicitly supernatural, potentially due to the “Book of the Dead” (though this may have been a prop planted by Campbell…) Jason also now has an extended family, with his sister, Diana, laughably working in Crystal Lake as a waitress rather than fleeing to avoid her family name. Aside from a handful of victims who get in his way or act as hosts, Diana is Jason’s primary target as he can only be reborn through his bloodline. Otherwise, Jason jumps from bodies as a squealing, demonic slug-thing that squirms from his mouth and rapidly deteriorates any non-Voorhees. This means Kane Hodder only appears very briefly as Jason, with others assuming his mannerism as Jason hunts down his family and Jason’s true self only appearing in reflections (…for some unexplained reason). Those possessed by Jason exhibit the same supernatural strength and durability, essentially becoming zombies who shrug off bullets and bash people’s teeth down their throat and easily recover from being run over. This bizarre new ability also gives Jason some anonymity as nobody suspects his presence even when Campbell is suddenly stalking around covering blood and tossing fools aside, and Jason even inexplicably talks while possessing Randy to fool Jessica into killing Sherriff Landis, potentially suggesting the possessed have some awareness of what’s going on. Still, while the idea of a body-hopping, demonic Jason is interesting, it doesn’t align with the previous films and makes this more of a generic, slightly bonkers horror film as it lacks Jason’s iconography and depicts him so differently that he’s essentially completely different character.

Despite some gruesome gore and interesting kills, this is just another generic horror offering.

Although cut to pieces by censorship like its predecessors, the unrated/director’s cut adds a bit more blood and gore to the black sheep of the franchise. Sadly, many kills lack the same visceral appeal as others in the series simply because Jason isn’t physically onscreen doing the deed. While making his way into town, Hant-Jason detours to murder three hitchhikers picked up by Steven who camp at the remains of Camp Crystal Lake. This delivers not only one of the best sex scenes in the franchise but also one of the best deaths, as Deborah Caldwell (Michelle Clunie) is skewered through the back with a tent pole and torn in half right at the point of orgasm! Diana’s simply stabbed in the back to meet her end, but this is the catalyst for all the animosity that follows Steven, and Josh’s gruesome end more than make sup for this. His body rapidly deteriorating from Jason’s presence, Josh passes Jason’s demonic slug into Campbell and then melts from the inside out, leaving his jaw on the floorboards and reducing him to a bubbling mess of melting flesh. Campbell’s body shows signs of distress much faster than Josh’s but also goes on a far more public rampage, crashing through the police station in search of Jessica and bashing two officers’ heads in before being briefly gunned down. Campbell-Jason pursues Steven and Jessica to Joey’s diner, where he snaps Wade’s arm, smashes Joey’s face, and mutilates Shelby B. (Leslie Jordan) with the deep fat fryer before tossing him into a wall. Waitress Vicky Sanders (Allison Smith) tries to fight back with a spear, only for Campbell-Jason to impale her on it before crushing her head. Despite being positioned as the one most capable of battling Jason, Duke is disappointingly ineffectual, succeeding only in distracting Jason as he lunges for Jessica. Handicapped by a leg injury, Duke can only spit his defiance in Jason’s scabby mask and get his back broken.

A simple stab with a magic dagger and Jason is dragged to Hell forever…or for almost ten years.

Now awkwardly positioned as a quasi-Deadite, Jason’s goal here is to return to his more familiar (if more ungainly and monstrous) form, taking out anyone in his way and possessing new bodies to get close to his remaining bloodline. It’s bloody convenient that he magically has other family members to hunt down as no mention was ever officially made of there being anyone other than Jason and his mother, not to mention how convenient it is that Diana and Jessica stuck around Crystal Lake. Despite his broken fingers and being battered by former friends and Jason’s avatars, and constantly being ditched by Jessica, Steven races to the Voorhees mansion to help Jessica, who’s presented with a magical dagger by Duke and torn between who to trust when Sheriff Landis and Randy both show up claiming to help her. Unfortunately, Jessica choses poorly and Randy-Jason tries to possess Stephanie, only to be beheaded by Steven. Undeterred, Jason’s demonic slug-thing crawls out and possess Diana’s dead body (which Campbell stuffed in the basement for ratings), inexplicably returning Jason to his familiar, hockey-masked self rather than being reborn in a new body. After killing Duke, Jason targets Jessica so Steven steps in again, tackling Jason through a window and somehow going toe-to-toe with him thanks to Jason choosing to simply toss him around rather than rip his heart out. This distraction leaves Jason wide open for Jessica to stab him with the dagger, triggering an unearthly storm and ethereal light and demonic hands to pop from the ground to drag Jason to Hell. Amazingly, Jessica hesitates to help Steven when the demons grab him by proxy but eventually gets her shit together, drags him to safety, and finishes the job, watching as Jason’s dragged into the ground. While Steven and Jessica walk away, shell-shocked but having rekindled their romance, Jason’s dishevelled mask is claimed by the clawed hand of Freddy Krueger (Kane Hodder), completing Jason’s descent into the netherworld.

Final Thoughts:
A common criticism about the Friday the 13th franchise is often that it’s very predictable and rarely deviates from a set formula. While there’s something to be said about taking comfort in the familiar, it’s true that the formula got stale and tiresome over time. Ever since Jason become a zombie, the franchise has tried new gimmicks to put a spin on things, but Jason Goes to Hell goes above and beyond that by largely discarding everything that’s recognisably Friday the 13th, robbing it of the visual iconography of Jason and his tropes and presenting a far less interesting, much more generic horror film. It would’ve been so much better and made way more sense to have Jason’s mask possess others, perhaps even transform them into a version of his misshapen form, rather than have him be this weird, demon slug-thing that may or may not be a Deadite. To make matters worse, Jason Goes to Hell suddenly introduces an extended family for Jason rather than finally shedding some light on his father, forces us to follow boring-ass Steven and flaky Jessica, and completely wastes the charisma and allure of Creighton Duke by merely making him a supporting character. There was so much potential in opening some years prior with a young Duke, having him survive an encounter with Jason, and then pursue Jason’s return (through his mask), tracking down Jason’s absent father to keep him from rebirthing Jason and perhaps defending Stephanie from Jason’s ire. Or, you know, bring someone back as Tommy Jarvis instead of creating Duke so you have that in-built history. While some of the kills are nice and gruesome, Jason’s descent into Hell was absurd, resulting in a lacklustre and nonsensical “end” for the iconic slasher, who barely appeared in the movie. Jason Goes to Hell: The Final Friday is a terrible send-off for the titular killer and seems embarrassed by the franchise, going out of its way to strip away everything that makes Friday the 13th fun and replacing it with Easter Eggs and so much nonsense that I doubt even avid fans of the franchise find much to like (and I should know!)

My Rating:

Rating: 1 out of 5.

Terrible

Were you disappointed by Jason Goes to Hell: The Final Friday? What did you think of Jason’s bizarre new look and new supernatural abilities? Were you frustrated by the body-hopping gimmick or did you find it an intriguing wrinkle in the lore? Do you agree that Creighton Duke should’ve been the main protagonist? Did you buy that Jason was dead for reals this time? Which Friday the 13th movie is your favourite? Let me know your thoughts on Friday the 13th (the movie, franchise, and day), support me on Ko-Fi, and check out my other horror content.