Released: 21 December 2018 Originally Released: 30 June 1982 Developer: Nintendo R&D2 Also Available For: Arcade, Atari, BBC Micro, Coleco Adam, ColecoVision, Family Computer Disk System (Famicom), Intellivision, GameCube (via Animal Crossing (Nintendo EAD, 2001)), Nintendo 3DS (Virtual Console), Nintendo Entertainment System (NES), Nintendo Wii, Nintendo Wii U (Virtual Console)
A Brief Background: In early 1980, Nintendo were in a spot of bother; their plans to expand into North America with Radar Scope (Nintendo R&D2/Ikegami Tsushinki, 1980) had failed, so then-president Hiroshi Yamauchi tasked young designer Shigeru Miyamoto to create a new arcade cabinet to turn things around. After plans to adapt popular comic strip character Popeye fell apart, Miyamoto took inspiration from Beauty and the Beast (Barbot de Villeneuve, 1740) and King Kong(Cooper and Schoedsack, 1933) to create Donkey Kong (Nintendo R&D1/Ikegami Tsushinki, 1981), a financial and critical success that introduced players to “Jumpman”, who would go on to become Nintendo’s mascot, Super Mario. During Donkey Kong’s development, many of the team’s concepts had to be cut due to time and hardware constraints. As they worked to develop these further, and given Donkey Kong’s success, the team developed a follow-up title that was initially planned to star the cantankerous ape himself before a smaller, more manageable substitute was created. Although Donkey Kong Jr. is now one of Nintendo’s more obscure characters, having largely been supplanted in the 16-bit era, Donkey Kong Jr. was very successful in its native Japan. Reviews praised the colourful presentation and gameplay loop and the game became very popular in the competitive play arena.
The Review: Donkey Kong Jr. is, essentially, more of the same game as its predecessor. Like Donkey Kong, players can pick from four game modes: two single-player options and two two-player options, with “Game B” being the more difficult of the two as it includes more onscreen enemies. Regardless of which mode you pick, Donkey Kong Jr. utilises the same simplistic control scheme as before, with A being the only button you need to press to jump over enemies, to vines, and across platforms. Donkey Kong Jr. has the rare distinction of being perhaps the only Mario-adjacent videogame where the portly plumber is an antagonist. Players now control the titular Donkey Kong Jr., a stout baby ape who slowly clambers up vines, quickly slides down them, and whose only method of attacking the many critters Mario sends out to obstruct him is to touch various fruits high up on vines; these will then fall, destroying any enemies beneath them. While Donkey Kong Jr. is a far more complex-looking sprite, with a humorous and over the top death animation and being slightly more animated overall, he’s no less clunky and actually less useful than Mario was in the last game as his hit box is bigger and he doesn’t get a hammer power-up. There is a spring on one screen, but it’s just as likely to send you plummeting to your death as it is to the next platform, so you’ll need to carefully time your jumps to avoid enemies and snag some points. But don’t take too long; like in Donkey Kong, the longer you take, the lower your bonus score will be upon completing a screen, which in turn impacts your high score. While you don’t seem to earn extra lives by accumulating points and there’s no high score table to display your best score, it is displayed at the top of the screen and is the only goal available to work towards so you may be somewhat protective of this.
Junior must clamber up vines, jump over hazards, and use keys to rescue his dad from Mario.
Donkey Kong Jr. is comprised of four screens that repeat in a nigh-never-ending loop until you finally die, with the enemies increasing in number and aggression the more you play. In three screens, your goal is to reach the top, acquire a key, and scare off Mario, and this culminates in a final showdown where you need to take down the devious plumber and rescue your kidnapped father. In the first screen, you simply navigate between vines being careful not to fall in the static water below or even drop a short distance as both will instantly kill you. In the second screen, you’ll bounce on the spring to smaller moving platforms and use a pulley to cross a gap and, in the third screen, you’ll hop over electrical hazards that erratically move back and forth across the platforms. Finally, you’ll climb up six chains, pushing six keys up to a bridge and avoiding bees and little alligators. Once you’ve pushed all six up to the top, the bridge is destroyed, Mario is defeated, and Donkey Kong is rescued and it all begins again until you either lose all your lives or quit from boredom. Although the game lacks the iconic music of its predecessor, each screen has some fun little jingles and sound effects but nothing especially innovative. Donkey Kong and his son are the most colourful and visually interesting sprites, with Mario only impressing due to him wielding a whip this time around, and the enemies are simply snapping alligators, egg-dropping birds, and electrical bolts. Naturally, this version allows you to create save states and rewind the game if you make a mistake, effectively destroying any difficulty curve it might’ve had and reducing the average playtime to around ten minutes.
The Summary: Donkey Kong Jr. reeks of cheap, money-grabbing desperation. Donkey Kong was an innovative and popular arcade release and it’s obvious that Nintendo simply wanted to capitalise on that with a “new title”, but there’s very little new about this game. Sure, moving to vines is different and having to time fruit-grabbing to defeat enemies adds a little more strategy and I quite liked the final showdown with the keys on the chains, but the gameplay experience is largely the same and lacks a lot of the nostalgia and charm of its predecessor as the setting is so weird. Even now, it’s bizarre seeing Mario as a whip-cracking antagonist. Donkey Kong Jr. has a lot of visual appeal, but I wonder if this game might’ve been better if Junior actively chased Mario across the stages? Or if a two-player mode saw one player as Junior and the other as Mario trying to intercept him? I feel like Nintendo could’ve bundled these two games together into one experience at the time, creating an eight-screen loop where you first track down and capture Donkey Kong and then switch to Junior to rescue him, but, as is, I can’t see myself choosing to play Donkey Kong Jr. over its more popular and nostalgic predecessor.
My Rating:
⭐⭐
Rating: 2 out of 5.
Could Be Better
Did you ever own Donkey KongJr. for the NES back in the day, or play the arcade version out in the wild? How do you think it compares to Donkey Kong? What did you think to Junior and seeing Mario as an antagonist? How far did you get in the game before you failed or quit? Which Donkey Kong videogame is your favourite and why? How are you celebrating Donkey Kong’s anniversary this year? Whatever your thoughts on Donkey Kong, feel free to leave a comment below or on my social media, and check out my other Donkey Kong (and Mario) content on the site.
Sonic the Hedgehog was first introduced to gamers worldwide on June 23 1991 and, since then, has become not only SEGA’s most enduring and popular character but also a beloved videogame icon and, in keeping with tradition, I have been dedicating the entire month to celebrating SEGA’s supersonic mascot.
Released: 15 November 2005 Developer: Dimps / Sonic Team
The Plot: When Doctor Eggman steals the seven Sol Emeralds, their stoic guardian, Blaze the Cat, journeys to Sonic’s world to recover them. However, her nemesis, Doctor Eggman Nega, has followed her and in search of the seven Chaos Emeralds, leading Sonic the Hedgehog to oppose his mad plot for worldwide destruction.
Gameplay: Sonic Rush is a 2.5D action platformer much like most classic Sonic titles and his 2D outings on the Game Boy Advance. Players can initially only control Sonic but will unlock new character Blaze after clearing the first level (known as a “Zone”). As is often the case, each Zone is comprised of two stages (or “Acts”), with a third dedicated to a boss battle against either Dr. Eggman or Eggman Nega. By entering the “Options” menu on the main menu screen, players can tweak some of the game’s settings, setting it to Easy, Normal, or Hard (which I believe impacts the amount of lives you start with and hits bosses take), disable the ten minute time limit for Acts, listen to the game’s soundtrack, or allow a friend to download a demo version of the game to their Nintendo DS. One new feature rarely seen in 2D Sonic titles is the presence of a world map; styled after the map screen in Sonic Adventure 2 (Sonic Team USA, 2001), this allows players to wander about a static screen to replay previous Zones or visit their allies. Miles “Tails” Prower and Cream the Rabbit will offer encouragement and enthusiastic support to each character, keeping track of how many lives they have, how many of the Chaos and Sol Emeralds they’ve collected, and the percentage that their worlds have unmerged (reduced as you clear Zones). Despite visually appearing very different, and their contrasting personalities (Sonic is all brash and happy-go-lucky and Blaze is quiet and reserved), Sonic and Blaze play in almost exactly the same way, visit the same Zones (albeit in a different order), and battle the same bosses (just with different madmen at the helms), though Blaze doesn’t have to worry about beating Special Stages to acquire her Emeralds.
Sonic and new ally Blaze can blast through Zones with their new Boost mechanic and abilities.
Both characters can jump with a press of A or B; holding the button lets them jump a bit higher and pressing down and A or B charges up either the Spin Dash or the Burst Dash so you can blast ahead in a burst of speed. When jumping, you can press the right bumper to perform an air dash as Sonic or Blaze’s Burst Hover, which gives her a little more airtime courtesy of a rocket boost from her boots. Unfortunately, Blaze is little more than a reskin of Sonic; her gameplay is slightly different thanks to her limited hover but it’s essentially exactly the same as Sonic’s, lacking additional features such as climbing or flying to really make her stand out despite her visual appeal, to the point where I wonder if it might’ve been better to have Blaze be incapable of boosting just to make her gameplay a bit different and challenging compared to Sonic’s. When flying off ramps, springs, or propelled through the air, you can press B, A, and R to perform tricks; these will both boost you higher and further, which is necessary to reach platforms and switches, and build up your “Tension Gauge”. When partially or completely full, you can hold down X or Y to blast off with the Super Boost or Fire Boost, respectively, which sees you plough through Badniks and breakable walls at breakneck speeds, completely invulnerable and surrounded by waves of supersonic or flaming energy. This boost mode allows Sonic Rush to reach speeds classic Sonic games could only dream of and is essential for outrunning giant rolling balls, blasting through enemies and Acts alike, building momentum with some of the game’s gimmicks, and entering Special Stages. It can be unwieldy at times, though; just as you should exercise caution with your trick moves, you should use the boost sparingly as you could overshoot platforms or run head-first into one of the game’s many bottomless pits. Sonic and Blaze can also grind on rails to pick up speed and perform tricks, fill the Tension Gauge by defeating enemies, and make use of giant bullets and hovering UFO-like vehicles, though these latter two are equally cumbersome due to being difficult to control and having to use the Nintendo DS’s dual screens to navigate.
Despite a few new gimmicks, both characters sadly share the exact same playstyle.
Sonic Rush uniquely uses the dual screens to spread its action out vertically; you’ll often by sprinting down slopes from the top screen to the bottom, which is quite fun, and you’ll need to pay attention to the top screen when planning jumps to avoid Badniks or spot platforms and switches. Otherwise, the bottom touchscreen is mostly relegated to menus and the Special Stages, which I’ll talk about later, and the bulk of the game is comprised of tried-and-true Sonic gimmicks. You’ll grab Golden Rings to survive hits and earn extra lives when you collect 100, suck in air bubbles when lumbering underwater, run through loops, bounce from springs, and avoid or be frustrated by sudden spiked hazards as you blast through the game’s seven Zones. There’s a lot that’s familiar about Sonic Rush; the ramps, boosters, and many of the Zones and enemies are modelled after Sonic Adventure 2 and married with a tweaked version of the classic gameplay mechanics, effectively bridging the gap between the “Classic” and “Modern” iterations of Sonic and laying the foundation for Sonic’s mid-2000s Boost-centric gameplay. You’ll spring from bungees, be blasted about by water jets and cannons, jump to moving or temporary platforms, boost into giant propellers to cover greater distances, resist the urge to pull off tricks after being blasted through the sky by rocket sledges, temporarily light up rails and platforms or ride blocks of light by hitting switches, run along the ceilings, and even be whisked through the cloudy sky on a hang glider (though, thankfully, it’s a largely automated section that’s much easier to control this time). Often, you’ll be trapped in a small arena and have to destroy all onscreen enemies to escape, sometimes while avoiding crushing hazards; other times, you’ll swing from chains and ropes (again resisting the urge to press any inputs except to jump to safety) and desperately avoiding instant-kill lasers or the numerous bottomless pits. These cheap hazards crop up from the first Zone and only increase by the time you reach Dead Line; it can be extremely aggravating being in the swing of a fun boost run, pulling off nifty tricks and building momentum, only to cause yourself to fly past a platform or spring or through a rail and plummet to your death.
Graphics and Sound: Although Sonic Rush employs traditional sprite art for its backgrounds and environments and even oddly includes some Sonic Advance-style sprites in its endings, character models are all polygonal this time around, which is a bit hit and miss. Sonic and Blaze make a big show of looking up, dying, and encouraging you to get a move on but lack a lot of the detail seen in the Game Boy Advance games as their character models are a bit blocky and indistinct at times. Sure, they express a lot of personality when pulling off tricks, vocalising their enthusiasm, and when clearing an Act and getting their final letter grade, but I can’t help but think it might’ve been better if the environments were polygonal and the characters were nicely-animated sprites instead. On the plus side, despite the bland title screen and menu selection, Sonic Rush has an absolutely killer soundtrack; Hideki Naganuma and Teruhiko Nakagawa went above and beyond to really produce some infectious ear worms. This is evident from Sonic’s first Zone, Leaf Storm and its upbeat “Right There, Ride On” tune and continues with tracks like “Back 2 Back”. Every Zone makes an impression with its soundtrack, which really helps the game stand out from the usual punk rock tunes of the main console games and the traditional chirpy music from the classics. Cutscenes are a bit of a mixed bag; the story is primarily told using barely animated in-game models accompanied by dialogue boxes and you’ll see the same cutscenes repeated over and over after you defeat each boss, though there are some fun cameos here and there.
While the environments looks great, I’m not impressed with the polygonal models.
As mentioned before, Sonic Rush’s Zones are modelled after Sonic Adventure 2’s, for the most part. Leaf Storm is like a 2.5D version of Green Forest, Mirage Road resembles Hidden Base/Sand Ocean, and Huge Crisis takes place on battleships and in the middle of a Naval fleet like Metal Harbor. Other Zones are a little more traditional, with the Casino Night/Carnival Night Zone-inspired Night Carnival and Dead Line essentially being another run-through of a Death Egg-style space station. There’s quite a bit of detail packed into each Act, though they can be a little barren of enemies at times; you’ll see critters freed from every enemy or fluttering about, vines twisted over rails, flashing neon billboards, and fighter jets all lurking in the background. Hieroglyphics, giant stone statues, and fast sand slides await in Mirage Road, with these latter two gimmicks enlarging the character models as they’re brought closer to the camera. Similarly, you’ll precariously run along fencing, parachute past enemies and spikes in Altitude Limit, and illuminate entire areas with spotlights or glowing platforms in Night Carnival. Sonic’s opening Zones, Leaf Storm and Water Park, made the strongest impression on me; I enjoyed the ripple effect on the water, that you can run across it, and the Greece-inspired architecture in Water Park and the sheer colourful depth of Leaf Storm that helped to showcase the upgrade in power from the Game Boy Advance. Sadly, even these Zones are let down by an abundance of death pits, but the way the action spreads across both screens can be really fun, especially when you’re building up speed. The touchscreen comes to the forefront in the Special Stages, which are modelled after Sonic 2’s half-pipe stages and see you using the stylus (or your finger) to control a fully 3D Sonic model as he grabs Rings, avoids obstacles, and hits numbered targets to score extra Rings.
Enemies and Bosses: There are two types of robotic enemies you’ll encounter in Sonic Rush: Egg Pawns and the minions of the Eggman Empire modelled after those seen in Sonic Heroes (Sonic Team USA, 2003) and security droids not unlike those employed by the Guardian Units of Nations (G.U.N.) in Sonic Adventure 2. Egg Pawns are the most common and have a few variants, from being relatively harmless to packing rifles and bazookas and even blocking your direct attacks with shields. A larger variant, the Egg Hammer, also appears, usually when you’re confined to on area, and takes multiple hits to defeat and could be classified as a mini boss. You’ll also encounter Dr. Eggman’s flying forces, often placed right where you’re about to spring into the air or dive-bombing you when you’re navigating a bottomless pit or bed of spikes or dropping bombs on you at the worst possible time. Egg Bishops also reappear from Sonic Heroes, though they’re limited to simply firing projectiles from their wands. Knight Pawns also appear but, despite their fun armoured appearance and lance, they’re simply another Egg Pawn to plough through, same with the G.U.N. Hunter that can catch you with its bullets but is otherwise just there to build up your Tension Gauge. Sadly, no classic Badniks appear but you often get a great feeling of empowerment ploughing through multiple enemies with your boost attack, which I guess is a good compromise.
Though large, bosses are repetitive and time consuming chores you fight multiple times.
Each Zone ends in a boss battle against either Dr. Eggman or Eggman Nega; sadly, both pilot the same machines so, while you’ll battle them in a different order with each character, both Sonic and Blaze have the same boss encounters with the same strategies employed each time, making for a bit of a repetitive experience. Bosses are fought either on a single platform or a circular loop, with their health measured on the bottom screen where Tails or Cream constantly shout encouragement, end in a dramatic freeze frame, and the arenas hold a handful of Rings to keep you going. The first boss you fight is the Egg Hammer Mega, a snake-like mech that tries to crush you with singular or multiple head slam and sends its cockpit rolling across the ground to try and damage you. Simply dash out of the way then its head slams down, jumping over any shockwaves, and ram the cockpit to do damage. This boss is repeated in Huge Crisis, where it now launches missiles from the battleship in the background and charges up an instant-kill slam, and it was during this fight that I realised how long-winded the game’s bosses are as there’s a lot of waiting around and few opportunities to attack. Water Park sees you battling the Egg Turtle; although much of this fight is underwater, you won’t have to worry about drowning and must simply avoid the mech’s belly flop and propeller butt, smacking its glowing head whenever you get the chance. Things pick up a little when you fight the Egg Beetle; you need to hit the explosive ball it sends rolling at you when its spikes are withdrawn and it’s flashing to do damage, often a couple of times when it jumps over you, and avoid the bombardment of projectiles when the mech takes to the sky. Similarly, you’ll need good timing when fighting the Egg Libra; you need to hit the weighted ball when its shield drops to lower the cockpit and land a hit, then avoid the bolts running across the ground and use the springing robot to score an extra hit, which can be a bit frantic as there’s a lot happening onscreen. Finally, in Altitude Limit, you’ll battle the Egg Eagle, one of the toughest and most annoying bosses because of how long the battle takes. You’ll need to avoid its bullet barrage and frantically mash A and B when it lands and tries to blow you off the platform! You can score a hit when it lands and tries to peck at you, but it’s a small window and it’s easy to take damage so you’ll need to be quick with your reactions.
After settling their differences, Sonic and Blaze must team up against the Eggmans!
When you reach the end of Dead Line, you’ll battle ither Sonic or Blaze in a one-on-one fight not unlike the Hidden Palace Zone bout against Knuckles the Echidna. Both have the exact same moves as they do when playing as them in the game but seem to be nerfed in their intelligence, meaning it’s pretty simply to bop or dash into them to whittle their health down, but you’ll need to mash A and B to win the boost-off head-to-head at the end. The main story ends in a battle against the titanic Egg King, which sees you frantically dodging its sporadic eye lasers and jumping over up to three shockwaves when it smacks your platform. You then need to hit its arm and run towards the cockpit for a hit, but hold down when prompted or you’ll be flung off. The Egg King also tries to smush you with a double axhandle smash and speeds up its attacks as the fight progresses, eventually ramming into the platform for a kamikaze attack at the end that you have to quickly avoid to land the final blow. Once you’ve acquired all seven Chaos Emeralds, Sonic and Blaze power-up to their Super forms for a Doomsday Zone-esque showdown with the two Eggman’s underwhelming Egg Salamander. This is fought on each screen, with each hero taking it in turns to avoid or destroy asteroids, dodge lasers, and land a hit, which switches the action to the other screen and character. The Egg Salamander shoots laser orbs at Super Sonic which must be awkwardly bounced back into it using the Super Boost (A or B); it also swipes at you with its claws, and you’ll need to grab Rings to keep from powering down. Burning Blaze has to charge up and launch a fireball with A, which has a significant delay and is equally difficult to aim. She can also have her Rings sapped when the mech tears open a hole in the fabric of space/time, and this is another fight made unnecessarily tense and frustrating by how long it drags on, how difficult it is to land hits, and how few windows of opportunity you get (though I found that when I respawned after a late stage death, I didn’t have to start all over again, which was unexpected).
Power-Ups and Bonuses: All the power-ups seen in the Sonic Advance games return here; you can add anywhere from one to fifty Rings to your tally with a Super Ring box, gain temporary invincibility or earn an extra life, or protect yourself from a bit with a barrier or attract nearby Rings with its magnetic variant. The new power-up on the block here are the two Tension Gauge boxes, which partially or fully fill your boost meter, usually right before you need to use it to get past a section of an Act.
Additional Features: When playing as Sonic, you’ll need to keep your Tension Gauge filled to the maximum for when you stumble upon Special Generators; grab onto these and hold X or Y to open the rift to the Special Stage, though keep in mind that you can only challenge one Special Stage per Act. So, if you want to try for a different Chaos Emerald, you’ll need to complete the Act and replay it; if you earn a Chaos Emerald in an Act and then enter another Special Stage in the same Act, you simply replay the same Special Stage. Special Stages aren’t too bad this time around; based on Sonic 2’s half-pipe, they task you with acquiring two totals of Rings, avoiding spikes and other hazards and flicking Sonic off the pipes to grab Ring clusters or hit springs. When you do, you’ll need to quickly tap the numbered icons for a Ring bonus; you can also hit boost pads and switches to grab bigger Ring clusters, but your skill at Sonic Rush’s Special Stages all comes down to the quality of your touchscreen and how good your stylus game is. It can be janky and awkward making precise or quick movements and you’ll often miss large clusters of Rings trying to get others, though the fact you can easily access and practise the Special Stages makes them leagues better than any in the Game Boy Advance games. Collecting all seven Chaos Emeralds unlocks the final “Extra” story, which is the only way you can play as Super Sonic and Burning Blaze. Otherwise, you can replay previous Acts to try and get all S-ranks for bragging rights or try out the game’s multiplayer mode, in which two players race head-to-head as Sonic and Blaze to finish Acts the fastest, though I’ve never played this mode. Sadly, there’s no boss rush to unlock or even the ability to watch back the game’s cutscenes, though I guess you could try playing on a harder difficulty if you want a bit more of a challenge.
The Summary: This is my first time playing Sonic Rush in over a decade, certainly since I first completed it. I always had pretty fond memories of it; the visuals, Blaze’s design, and the action-packed gameplay stood out, especially because it was the first Sonic game to incorporate the Boost mechanic, but it was surpassed not just by the sequel but by other, bigger Sonic games. Revisiting it now was a lot of fun; the environments, especially, look fantastic, really translating a lot of the visual style of the 3D games of the time into a handheld title and I especially enjoyed being able to let loose with the boost and plough through enemies. Sadly, the polygonal models aren’t as appealing and I didn’t like how long-winded and repetitive the bosses were; sure, Blaze fights them in a different order but nothing else is different about them, which is very disappointing. Blaze, in general, was a bit of a let-down in this regard; she plays the same as Sonic except for a bit more airtime and her Zone order being mixed up, meaning the difficulty curve of her story is a bit out of whack yet she’s paradoxically easier to play as since you don’t have to worry about Special Stages. I like her design, but I do think her gameplay should’ve been altered to make her more like a “Hard Mode” compared to Sonic’s “Normal”. While the Special Stages can be finnicky, I liked that I was actually able to access and beat them all and the Act layouts, while sometimes a bit barren and strewn with instant-death traps, where much improved, showing the developers learned from their mistakes on the Game Boy Advance. I really liked the verticality of the game and how it used the dual screens in an interesting way, but this was a bit of a barebones presentation for such a powerful handheld. It’s great as a fun, back-to-basics return to Sonic’s roots, with just enough familiar and new mechanics to make things exciting, but there’s not a lot of incentive to revisit it once you’ve unlocked and beaten the “Extra” story and there are a few too many missed opportunities to really make Blaze’s gameplay as unique as her appearance.
My Rating:
⭐⭐⭐
Rating: 3 out of 5.
Pretty Good
Was Sonic Rush a part of your Nintendo DS library back in the day? What did you think to the new boost mechanic and the way it utilised the dual screens? Were you a fan of Blaze, and were you also disappointed that she was basically a reskin of Sonic? What did you think to the game’s bosses and Special Stages? Did you ever defeat the Egg Salamander, and were you a fan of Eggman Nega? Which of Sonic’s handheld adventures is your favourite and how are you celebrating him this month? I’d love to know your thoughts and memories of Sonic Rush so leave them in the comments, or on my social media, and be sure to check out my other Sonic content.
Sonic the Hedgehog was first introduced to gamers worldwide on June 23 1991 and, since then, has become not only SEGA’s most enduring and popular character but also a beloved videogame icon and, in keeping with tradition, I have been dedicating the entire month to celebrating SEGA’s supersonic mascot.
Released: 20 December 2001 Developer: Dimps / Sonic Team Also Available For: Android, Nintendo Wii U (Virtual Console, Japan only), J2ME, and N-Gage
The Background: After a long development process and strategic planning to create a mascoticonic enough to rival Super Mario, SEGA’s initial success with Sonic the Hedgehog expanded into mainstream popularity with Sonic the Hedgehog 2 (SEGA Technical Institute, 1992). Sonic was on a serious roll at this time; the spectacularSonic 3 & Knuckles(ibid, 1994) was too big for one cartridge, became one of the best classic Sonic games, and was naturally followed by…numerous disappointing spin-offs before making the jump to 3D in 1999. As wellreceived as Sonic Adventure (Sonic Team, 1999) and Sonic Adventure 2(Sonic Team USA, 2001) were, however, SEGA was in dire straights; numerous delays, blunders, and over spending saw them lose their foothold in the home console market, bringing the “Console War” of the nineties to an anti-climatic end. Now focusing on software development, the unthinkable happened when SEGA produced ports of the Sonic Adventure games for Nintendo’s often-underappreciated GameCube console and, to commemorate the tenth anniversary of the franchise, SEGA turned to Dimps to create a 2D throwback to the classic games that also incorporated the art style and some mechanics from the 3D games. The result was Sonic Advance, which became a best-selling Game Boy Advance title and was met with largely positive reviews. Critics lauded the presentation and tight gameplay mechanics, though elements like the Special Stages and an overreliance on nostalgia were criticised. Still, Sonic Advance was regarded as one of the best Nintendo games and helped solidify SEGA ’s new relationship with Nintendo; it was followed not just by two sequels, but numerous handheld spin-offs and spiritual successors that further refined the gameplay and mechanics for Sonic’s portable adventures.
The Plot: Doctor Eggman has returned, with his sights once again set on enslaving woodland creatures into metallic Badniks, gathering the legendary Chaos Emeralds, and constructing an elaborate space base! Luckily, Sonic the Hedgehog and his friends – Miles “Tails” Prower, Knuckles the Echidna, and Amy Rose – are on hand to oppose his evil schemes once more.
Gameplay: When Sonic Advance released, the Sonic franchise was firmly in the midst of its 3D era. 2D, sidescrolling action-based platformers were out for the Blue Blur and elaborate, action-packed 3D rollercoasters with varying gameplay were in, so Sonic Advance was a bit of a throwback to Sonic’s classic 2D roots, and in many ways the long awaited fourth entry in the classic series. In addition to the plot being as basic as the classics, the control scheme is immediately familiar to anyone who’s played Sonic 3 & Knuckles: A lets you jump, pressing it again initiates a jump attack or move, you use up and down to scroll the screen and duck under obstacles, and press down and A to charge up a Spin Dash for a speed boost. You can pick from four characters – with Amy Rose making her playable debut in a sidescrolling game – and journey through seven levels (known as “Zones”), with two final Zones awaiting after clearing certain objectives, with each Zone split into two parts (known as “Acts”) and featuring a boss battle in each Act 2. Players must collect Golden Rings to stay alive, with the glittering Rings scattering when you’re hit so you can collect them again, and race against a ten-minute time limit, which can thankfully be disabled in the “Options” menu. This menu also allows you to pick between “Easy” or “Normal” mode (with the differences I believe boiling down to how many lives you start with and the amount of hits bosses take), configure the control scheme, and select different language options, though there is no story text to worry about here as everything’s taking its cue more from the 2D games than the 3D ones when it comes to storytelling.
Each character’s unique abilities changes the way you play and the game’s difficulty.
So far, so familiar. However, gameplay changes depending on which character you pick, with Tails effectively being the easy mode thanks to his propeller-like twin tails and Amy being the hard mode since she doesn’t curl into a ball. Each character has different abilities to traverse Zones and take out enemies; you can perform Sonic’s Insta-Shield by pressing A twice, pressing B sees him perform a sliding ground somersault, and you can perform a back jump by pressing B and then A (though I found little use for this). Sonic can also pull off a limited and frankly useless mid-air dash by pressing right and A twice and is somewhat limited in his options since he can’t fly or climb, so his gameplay is more about speed and ploughing head-first through obstacles. Tails can, of course, fly for a short time by pressing A twice, and his tails will often inflict damage on whatever’s underneath him. When in water, Tails can doggy paddle indefinitely by tapping A and pressing B on solid ground sees him whip his twin tails in a melee attack. Knuckles has a shorter jump height but makes up for it by being able to glide with a double tap of A and cling to and climb most walls. He can also swim by tapping A and perform a standing three-punch combo with A, though I didn’t have much use for this as the regular spinning and rolling methods work fine. Amy, however, is all about mele attacks; she can’t curl into a ball or Spin Dash, making her much more vulnerable, but she is armed with her signature Piko-Piko Hammer. You can smash enemies with B, use down and B to spring into the air with a hammer-assisted jump, and hold down and B when jumping to spin with the hammer, all of which is quite slow and clunky and makes battling bosses quite a chore for Amy. Amy can also take a giant leap by pressing down and A and can slide ahead by pressing right and B, but she sure does present a significant challenge even for seasoned players since she lacks all the basic Sonic abilities. Sonic and Amy can also hop on rails to do a bit of grinding and each character can grab overhead poles to shimmy along, bounce to higher areas using springs, run through loops, smash boulders or ice to occasionally reveal item capsules or springs, and must grab air bubbles to keep from drowning when underwater.
Gimmicks old and new are far more fun than the annoying enemy and hazard placement.
In terms of gameplay and stage design, Sonic Advance keeps things quite safe: Zones start off pretty simple, utilising recycled gimmicks and certain aesthetic themes from the classic games, but things become very cheap, frustrating, and difficult as the game progresses. You’ll be hopping to moving and temporary platforms, avoiding spikes, and trying to stick to the higher, faster path in most Acts but you’ll also be forced into the sluggish water, have to ride zip-wires, be blown into the air by fans, and pinball all over the place on bumpers. At first, enemies and hazards aren’t too difficult to avoid; the Game Boy Advance screen does limit your view a lot of the time, meaning it’s easy to jump or spring head-first into a projectile or unseen Badnik, but later Zones like Angel Island Zone and Egg Rocket Zone can easily see you jump, fall, or be blasted into a bottomless pit for a cheap death. Boost pads are used sparingly, thankfully, but are present, as are tunnels, air cannons, spinning spiked platforms, conveyer belts, bouncy platforms (and clouds), and lava pits. Ice Mountain Zone sees you riding iceberg floats, Angel Island Zone incorporates rolling boulders and sand gimmicks from Sandopolis Zone, and Egg Rocket Zone splits apart as you traverse higher, taking you further into the atmosphere, and briefly utilises the Death Egg Zone’s gravity mechanic. Claws will carry you across gaps, you’ll need to run on spheres to reach higher platforms, you’ll be jumping to swinging chained hooks, riding jets and streams of water, and dodging crushing hazards and warping across Zones. A lot of it is immediately familiar to long-time Sonic gamers, with just enough of a twist to make it more unique, but much of the game relies on slower, strategic platforming, blind jumps, or cheap deaths and enemy placements. Luckily, you can still hit lampposts to create a checkpoint if you die; collecting 100 Rings grants you an extra life, and there are 1-Up capsules hidden about the place. However, I actually found myself playing on zero lives at one point, which rarely, if ever, happens to me when playing 2D Sonic games and speaks to how challenging the later Zones can be largely due to placing Badniks, spikes, and bottomless pits just out of view to mess up your run.
Graphics and Sound: There’s a reason I used the Sonic Advance sprites and backgrounds back when I used to make sprite comics; they are absolutely gorgeous and really capture the feel of the Sonic Adventure games and artwork. Sonic and his friends are full of life and personality, more than ever before; not only to they perform idle poses when left alone, urging you to get moving, but that also jig about with enthusiasm whenever you leave them standing. Although the introduction cutscene is extremely basic and focuses on the characters rather than delivering any kind of ground-breaking story, the in-game sprites more than make up for this; each character has lots of frames of animation, always pops against the background no matter how busy it gets, and performs a little victory pose when clearing Acts and bosses. Sadly, the music doesn’t fair as well; outside of some fun, if underutilised, remixes from the classic games, I found myself largely forgetting the themes for each Zone and the Game Boy Advance’s sound chip seems poorly suited to bringing the kind of energy I expect from a Sonic title. The stage select screen is also very basic and, while the ending makes up for this by featuring some fun sprite art and big victory poses, it’s simply a rehash of Sonic 2’s ending and doesn’t really offer anything new.
Despite some impressive sprites, some Zones are needlessly cluttered and unsightly.
The same can also be said of the Zones; while it’s great to start off in a beach location for a change, Neo Green Hill Zone owes a lot to Green Hill Zone and Emerald Coast. Casino Paradise Zone is simply Casino Night Zone, though lacking a few of its gimmicks; Ice Mountain is basically Ice Cap Zone, Angel Island is an ancient ruins retread of Sky Sanctuary, and Egg Rocket Zone is a mish-mash of Launch Base Zone, Wing Fortress Zone, Flying Battery Zone, and Death Egg Zone. This continues in Cosmic Angel Zone and X-Zone, which are basically Death Egg Zone all over again, and even the final area, Moon Zone, is a reskin of Doomsday Zone. However, for the most part, the recycled gimmicks and aesthetics are presented just differently enough to make them unique: Neo Green Hill Zone has sandy beaches, wooden piers, and a thick overgrowth; Secret Base Zone is an industrial hell-hole full of lava, girders, and swamped by searchlights; you can see fireworks in the background of Casino Paradise, which incorporates balloons to reach higher areas; snow falls in Ice Mountain Zone, where snow and ice cover the trees and rails and ground, there’s a hell of a view of what I assume is the Mystic Ruins in Angel Island Zone, and I enjoyed seeing the big rocket boosters and the separating sections of Egg Rocket Zone. Unfortunately, many areas are also quite loud and cluttered; Secret Base Zone is a mess of conflicting oranges and browns, for example, and Cosmic Angel Zone is a nauseating kaleidoscope of purple and grey that is distracting to look at. For the most part, the game runs really well; it can be slow at times, but mostly you’ll be blasted along at breakneck speed, outrunning the camera and most likely smashing into an obstacle or to your death. Had the game been a little more zoomed out, featured some catchier tunes, and rethought its colour palette and layout, it might’ve improved my experience. As is, though, these elements make the later Zones a chore to play and the homages to the classics more annoying than endearing.
Enemies and Bosses: Dr. Eggman’s Badniks are all heavily inspired by the mechanical enemies seen in the classic Sonic games and Sonic Adventure; we’ve got the Crabmeat-like GamiGami, the Rhinobot-like Rhinotank, the Coconuts-like Kiki, the Jaws-like Drisame that burst out of walls at the worst possible moments, and the Burrobot-like Mogu that are also placed in the most annoying areas, like right when you need to jump or dash through. Lizard- and frog-like Badniks Hanabii and KeroKero roll or hop about spitting projectiles, Stingers do their best Buzzer and Buzz Bomber impression by blasting projectiles at you right as you’re making a tricky jump, bat-like Slots swoop in from offscreen, and the jellyfish-like Kuraa add to their annoyance by briefly erecting an electrifying shield. As is tradition for a Sonic title, smashing Badniks releases a cute little woodland critter and nets you some points, and they’re often placed at the apex of jumps, right in your path, or near spikes. Speaking of which, spikes can be on the floor, walls, and ceilings, sometimes shoot up from the ground to ruin your day, and are occasionally on spinning platforms. You’ll also need to avoid being roasted by fireballs in Secret Base Zone, watch for crushing cubes in Casino Paradise Zone, hop to small rising stone platforms (often while avoiding spikes) in Angel Island Zone, and trust your fate to the will of the gaming gods when making blind jumps over the constant death pit in Egg Rocket Zone.
While bosses start off easily enough, later game encounters can be quite tricky, especially with Amy.
Naturally, every Zone culminates in a boss battle; you’ll face off against Dr. Eggman eight times in a regular playthrough, and a final time after finding all seven Chaos Emeralds, with each encounter seeing him man a new contraption and featuring two phases to the battle. The Egg Hammer Tank awaits in Neo Gren Hill Zone; a strange combination of the Egg Wrecker and Egg Mobile from Sonic 1 and 2, this fight sees Dr. Eggman driving from left to right and right to left trying to smash you with a massive hammer, and erratically bouncing about when near defeat. Dr. Eggman mans the Egg Press machine in Secret Base Zone for a boss not a million miles away from the first phase of the final boss of Sonic the Hedgehog: Triple Trouble(Aspect, 1994); Dr. Eggman hops around trying to squash you, then does a big jump off screen that you need to anticipate to finish him off. Casino Paradise Zone features one of the easiest boss battles; Dr. Eggman emerges from one of several pipes, while his spiked Egg Ball tries to hurt you. Simply duck down in the middle and ram him when he appears; not even the two speeding up near the end present much challenge here. Ice Mountain Zone’s Egg Spider ramps up the difficulty, however, as the fight takes place underwater and Dr. Eggman is completely out of reach. You need to use the icicle hazards he drops to reach him, and take a breath of air, but this can be tricky as they fall randomly, in greater numbers near the end, and your movements are super sluggish underwater. Dr. Eggman isn’t fought in Angel Island Zone or Egg Rocket Zone, but returns in the Egg Snake in Cosmic Angel Zone, a boss that’s considerably difficult for Amy. Dr. Eggman’s pod is protected by spikes so you and to wait for him to flip over to hit him, all while dodging his projectiles and his craft as it slides back and forth, which is particularly hard to do with Amy since she can’t Spin Attack.
Despite a fun fight with Mecha Knuckles, the final battles with Dr. Eggman are disappointing affairs.
In Angel Island Zone, you’ll battle Mecha Knuckles; at first, this fight is very similar to the one against regular Knuckles from Sonic 3 & Knuckles and sees Mecha Knuckles glide about, throw punches, and try to Spin Dash into you. A few hits destroys its outer shell and reveals its true metallic self, which now spits missiles at you! When you reach the X-Zone, you’ll first endure a fun gauntlet against two classic boss battles, the Egg Wrecker and the Egg Mobile, not unlike in Sky Sanctuary Zone and with nothing changed about your attack strategy. Sadly, this is followed by an underwhelming battle against Dr. Eggman’s Egg X, a spinning cannon-like mech that spits bouncy explosive balls, tries to ram you, and grabs and shakes you with a mechanical pincer. While this appendage can be tricky to avoid and jump over, it’s ridiculously easy to bash Dr. Eggman as he flies past or stops to fire a projectile, making for a really disappointing final boss to the main portion of the game. Naturally, after collecting all seven Chaos Emeralds with any character, you’ll unlock the true final boss, the Super Egg Robot, a humanoid mech fought by Super Sonic on the surface of the Moon. Unfortunately, as I’ll detail later, I’ve never experienced this boss battle but I can tell you that your time is limited as Super Sonic’s Rings constantly deplete, meaning you’ll need to grab more to stay alive and in the fight, and that you must use the Super Sonic Boost with the B button to dodge or destroy incoming lunar rocks spewed up by Dr. Eggman. The Super Egg Robot also blasts you with a sweeping eye laser, causes energy pillars to erupt from the ground, and spews out orbs that will either incapacitate you for a few seconds or yield Rings when destroyed. The Super Egg Robot can also block your attacks with its drill-like arms, is constantly flying away from you, and can only be damaged by hitting its head. Although the music and presentation seem quite epic, it does seem a relatively simple encounter, and defeating Dr. Eggman awards you with the true ending…which honestly isn’t really all that different to the regular ending, just with more of that impressive sprite art and animation.
Power-Ups and Bonuses: All the classic Sonic power-ups are on offer in Sonic Advance, this time in capsules like in Sonic Adventure. You can snag five, ten, or a random number of Rings, grab a temporary speed-up or invincibility, and occasionally gift yourself an extra life. You can also find a shield (or “Barrier”) that will protect you from damage for one hit, though it looks really unsightly here, or grab the Magnet Barrier for the same benefit with the added bonus of attracting any nearby Rings. That’s it, though; there are no other elemental shields, no new power-ups to find, and very little reason to explore your environment. As mentioned, each character boasts a mele attack, which is a fun alternative, but you can just as easily use the classic Spin Attack to defeat Badniks so there’s not much us for these attacks…unless you’re playing as Amy, who is entirely reliant upon them.
Additional Features: As in the classic 2D Sonic titles, you can enter Special Stages to try and collect one of the seven Chaos Emeralds, however the way you get to these Special Stages is a bit different to what we’ve seen before. You need to find a Special Spring hidden in each Act, something Sonic and Amy will struggle to do, which grants you one try at easily one of the worst designed Special Stages in the franchise. You’re on a snowboard and constantly falling down a ringed shaft full of Rings, obstacles, and bombs. You can speed up your descent with A or perform a trick with B, which increases your Ring count, and can boost along paths of Rings, though it’s extremely difficult to actually collect Rings due to the odd angle. The perspective is all out of whack, meaning you often pass over or right by Rings, and in all my years of owning and playing this game, I’ve never completed a single Special Stage; hell, I’m lucky to even find a Special Spring, let along snag a Chaos Emerald! Collecting all seven unlocks the Moon Zone and the final battle against the Super Egg Robot, though this is the only way you get to play as Super Sonic. Beyond that, there’s a sound test in the “Options” menu, a Vs. mode that allows players to battle against each other or compete in races to collect the most Rings or find hidden Chao, even if you only have one cartridge between you, and a Time Attack mode for those who want to impress with their best clear times. If you enter a button code on the character select screen, you can play as Sonic with a computer-controlled Tails following him like in Sonic 2, and you can even visit the Tiny Chao Garden. In here. you can raise and pet a Chao, feeding it fruit or giving it toys to play with using Rings you collect in the main game and in the mini games within the garden that see you matching cards or playing rock/paper/scissors. You can also transfer this Chao to and from the GameCube Sonic Adventure games, which you’ll probably want to do as the Tiny Chao Garden’s features are far more limited than its bigger brothers.
The Summary: I have a lot of nostalgia for Sonic Advance. It was still a novelty to see Sonic games released for Nintendo consoles at the time and I liked that it was a throwback to the classic 2D games, capturing the spirit of what made them so enjoyable, recontextualising a lot of the gameplay and gimmicks in new locations, and giving it that Yuji Uekawa aesthetic I enjoyed so much at the time (and even now). Technically, the game is solid enough; the physics work, Act layouts aren’t too dissimilar from the classics, and it offers a decent level of challenge, with some unfair moments peppered in the late-game Zones. I really liked that you could pick from four playable characters right from the start, and that Amy was included, and that their different abilities correlated with how difficult the game can be. I enjoyed most of the new Zones, despite how much they borrowed from the previous games, and really liked how this game bridged the gap between Sonic 3 & Knuckles and Sonic Adventure by incorporating elements from both. Unfortunately, it’s not perfect; and when it’s bad, Sonic Advance is quite a chore. First of all, it’s quite slow and is restricted by the Game Boy Advance’s screen size; Act layouts can be aggravating at times, with enemies and hazards placed just offscreen for maximum frustration, and I really didn’t like the way you access and play Special Stages. It’s rare that I fail to collect the Chaos Emeralds in a Sonic game and I’m still frustrated that I can’t do it over twenty years later. The bosses were quite fun, if a little easy, but the X-Zone boss was pathetic and the soundtrack was pretty forgettable. I liked the addition of the Tiny Chao Garden, though more could’ve been done with this, and it’s safe to say that Sonic Advance just plays things a bit too safe, something its sequels would address and improve upon with new mechanics and unique features. Still, there’s a lot to like in Sonic Advance; it really was the closest thing we had to a Sonic 4 at the time, and it was surprising to me that later 2.5D throwbacks didn’t take more inspiration from it and its sequels, but it’s hard to deny that it’s a sub-par experience compared to its successors and even Sonic 3 & Knuckles.
My Rating:
⭐⭐⭐
Rating: 3 out of 5.
Pretty Good
Did you own Sonic Advance back in the day? If so, did you enjoy it and how do think it’s aged, especially compared to its sequels? Which character was your favourite and did you like their expanded move sets? What did you think to the Zones on offer and the recycling of previous gimmicks? Do you think the game played it too safe or do you consider this the true Sonic 4? Did you ever collect the Chaos Emeralds and, if so, how and what did you think to the Special Stages? Which of Sonic’s Game Boy Advance titles is your favourite and how are you celebrating Sonic’s anniversary this year? Whatever your thoughts on Sonic Advance, leave a comment below or on my social media and go check out my other Sonic content!
The first issue of Kevin Eastman and Peter Laird’s Teenage Mutant Ninja Turtles (TMNT) was published in May of 1984. Since then, the TMNT have gone on to achieve worldwide mainstream success thanks not only to their original comics run but also a number of influential cartoons, videogames, and wave-upon-wave of action figures. Even now, the TMNT continue to be an influential and popular commodity, proving that some fads don’t die out…they just get stronger!
Released: 9 November 2009 Developer: Ubisoft Nagoya
The Background: Like so many kids back in the day, I was super into the Teenage Mutant Ninja Turtles (known as Teenage Mutant Hero Turtles here in the United Kingdom). The “Heroes in a Half-Shell” dominated playgrounds in the years prior to the rise of Mighty Morphin’ Power Rangers(1993 to 1996) and Pokémon(1997 to present) thanks to a slew of toys, merchandise, videogames. Konami’s original arcade title largely set the standard for subsequent TMNT videogames, with many of the franchise’s most revered titles being arcade-style beat-‘em-ups. By 2009, almost forty TMNT videogames had been released in arcades and home consoles, with most of them either being sidescrolling beat-‘em-ups or brawlers. It’s perhaps no surprise, then, that developers Ubisoft Nagoya turned to this tried-and-true gameplay style for this Nintendo DS-exclusive title. Unfortunately, there’s not a lot of information out there about the development and thinking behind this game, but I can say that it doesn’t seem to be one of the franchise’s more successful or revered games. While the presentation, references, and concept of the game drew some praise, the gameplay, button configuration, and graphics were criticised and the game was seen as a shallow effort to lure in fans with the promise of a throwback to the celebrated arcade games of old.
The Plot: After returning from an adventure in the far future, the TMNT are faced with the threat of a cybernetic version of their greatest enemy, Oroku Saki/The Shredder, who sends his futuristic Foot Ninjas back through time in a bid for world domination!
Gameplay: Teenage Mutant Ninja Turtles: Arcade Attack is a 2.5D sidescrolling beat-‘em-up in which the bulk to the game’s action takes place on the bottom screen, while the top screen displays your current score, rank, and plays the story cutscenes. Players can pick between the four Ninja Turtles, with each one having different strengths and weaknesses in addition to their trademark weapons: Leonardo is an all-rounder, Donatello has the best reach but is the slowest, Raphael has the worst reach but is the most powerful, and Michelangelo is the fastest and most agile of the four. Each of the TMNT has their own combos that are performed with successive presses of B or A, with the former attacking with their weapon and the latter seeing them kick. You can jump with X and perform jumping attacks by pressing B or A in mid-air, or hold down or tap the Y button to block or counterattack enemy attacks. A also allows you to revive your partner when they’re knocked down and to pick up weapons and health restoring food, while Y and B lets you grab and toss or launch enemies and pick up or push objects like barrels and traffic cones. Although there’s no dash function here, you can press the directional pad and Y to back flip out of harm’s way (even launching into a flying kick with A or B) or to sidestep, though I found both of these actions to be finnicky and unreliable. As you wade through enemies, you’ll build up a Co-Op Gauge; when it’s full, and flashing, you can press Y and B together to perform one of three powerful co-op moves, such as a giant swing, a diving shell smash, or the classic tossing of enemies towards the screen. However, I was only ever able to pull off the swing so it’s probably better to try to others with a human partner using the DS’s wireless feature.
Battle through eight boring stages with repetitive and dull gameplay and combat.
Even when you’re playing alone, you’ll be accompanied by a computer-controlled partner who you can select before a stage; the CPU does a decent job of fending off enemies but, while you can revive them, there’s no option for them to return the favour. If you’re defeated, you can spend some Shells to continue on from that point; otherwise, it’s back to the beginning of the stage for you. Shells are earned by performing well in stages; as you pummel enemies, you’ll build up a combo meter that increases your grade. At the end of a stage, this is factored into your overall score (alongside other data, such as how many hits you landed, how much damage you took, whether you used a Shell to continue, and such) and translates into more Shells for you to use to either continue or unlock extra game modes from the main menu. These modes are also made available by playing through the game’s story mode, which is comprised of eight stages, each of which is surprisingly long and light on interactive elements. You’re asked simply to run at an awkward right angle towards the edge of the screen, fighting between one and four enemies at once, with no bonus stages or much in the way of gameplay variety beyond the odd instance where you have to jump up to a higher level, mash B in a quasi-quick-time event when your clash weapons with an enemy, or the obligatory rising/descending elevator stage near the end of the game. There are four difficulty modes to choose from, with enemies being faster, smarter, and tougher on the higher settings in return for higher scores being on offer. The easiest setting, “Normal”, isn’t especially difficult to play through as you rarely face more than four enemies at once, but the enemies can be quite cheap and the gameplay isn’t really rewarding enough to make bashing them up all that enjoyable.
Graphics and Sound: TMNT: Arcade Attack seems to be a little confused about its identity; the story is told using animated comic book panels that are modelled after the original Mirage Comics, which is amazing, but the plot seems to be rooted in the continuity of the 2003 to 2009 cartoon series despite the logo being closer to the original 1987 series. The game doesn’t include the classic TMNT theme song, or any notable music or voice acting, which really doesn’t help improve the experience or shake off the sense that this was a slapped together budget title to cash in on the franchise. While the black and white cutscenes are really good and perfectly capture the spirit of the original comics (and even include some funny running gags such as Mikey struggling with his nunchakus), the in-game graphics opt for a bright, colourful cel-shaded style that is similar to Teenage Mutant Ninja Turtles: Turtles in Time Re-Shelled (Ubisoft Singapore, 2009) but far less appealing; character models are distinctly low resolution, blocky, and lack idle animations. Their attacks are nice and fluid, however, and they have entrance and stage victory animations, and it is fun seeing them pull off more elaborate attacks when you punch in button combos, but the models are a far cry from the appealing sprite work of its predecessors.
While the cutscenes are great, the in-game presentation is generally clunky and lifeless.
Environments equally as disappointing; the game does its best to recreate the locations of previous TMNT brawlers, placing you on the city streets, in a construction site, having you battle trough dark alleyways, the surprisingly clean sewers, across rooftops, and through an office building but there’s no real personality or excitement in these environments. Even when you get transported to the far future, you’re restricted to a traditional Japanese temple and a futuristic lab, with only cyberspace really having much to offer in terms of visuals. None of the stages have any hazards or obstacles to avoid; there’s not much really happening in the background, enemies simply drop in from the top of the screen or dramatically appear on screen rather than bursting from behind signs and such, and the stages go on for far too long, which really makes the game a drag. You’re also restricted in your movements; you can’t always move beyond the awkward angle of the game’s linear path, or backtrack too far, and you’re never asked to climb ladders or to transition to other screens as the game does all of this automatically. Stages do try to be a little distinct from each other by featuring different breakable objects, from tyre stacks to discarded televisions and pixelated cubes, but it’s not enough to make the environments any more interesting and, again, they pale in comparison to the 2D arcade games of yesteryear.
Enemies and Bosses: Since this game is all over the place with its visual identity, I’m not really sure what you’re fighting here half the time. You start off beating up nameless, disposable street punks; the bigger variants attack with a hockey stick and can tank through your attacks, and you’ll learn that most of the enemies can block your attacks and grab and hurl you just like you can to them. Other punks will toss grenades, which can be hard to see and avoid as they seem to drop them right as you’re jumping in for an attack, but once you reach Stage 3 you’ll find some cybernetically enhanced members of the Foot Clan. As ever, these come in different colours and with different weapons; the basic ninjas can slide tackle you, others toss concussive grenades or shuriken, others wield laser pistols or will rush at you with katana swipes, and others shoot arrows or rockets. You’ll also battle hoards of Mousers, who swarm the screen and jump and bite at you or blast you with laser projectiles from their mouths, but at least you don’t have to worry about them clamping down on your hands and you can toss enemies into each other for extra damage and even send them flying with breakdance-style wake-up attacks.
Only four of the five bosses are worth talking about, and they’re all sadly disappointing experiences.
Eight stages means five bosses (strangely, the first, third, and sixth stages don’t have boss battle…), each sporting a life bar but lacking disposable minions to distract and frustrate you. Your first test is against a golden Foot Ninja variant who wields two katana swords, back flips about the place, slides at you, and sports a jump attack. He’s not too difficult to take out as he’s basically just a tougher version of the regular Foot Ninjas, but Hun represents the game’s first real challenge. This hulking bruiser carries a bazooka that allows him to not only fire missiles from a distance but also doubles as a devastating melee weapon; he can absolutely tank your hits and smash you in the middle of a combo, too, so it’s best to wait for him to taunt you or become momentarily stunned from his attacks. Karai attacks at the end of the sewer stage; easily the fastest boss, she attacks with katana blades, tosses shuriken from mid-air, flies at you with a kick, and loves to endlessly block your attacks to make the battle needlessly long and aggravating. A cybernetically enhanced version of Doctor Baxter Stockman awaits in the far-flung future, proving the most versatile boss so far. His enhancements let him hover about with a burst of flaming jet, he knocks you flying with an electrical burst if you get too close, has a sliding uppercut and an electrically-charged fist, and blasts a Kamehameha-like laser across the screen that leaves him momentarily vulnerable to a good combo. Finally, you’ll battle the Cyber Shredder in cyberspace; this fearsome foe sweeps the arena with a wide red laser, flies at you with a spinning attack, emits a concussive blast after being knocked down, causes the ground to burst into flames, whips at you with a tentacle-like appendage, and dashes with a claw swipe or knee strike. The trick here is to hit and run, really; just leap in, hit a combo, and side step away until he’s open for another flurry and he’ll eventually go down.
Power-Ups and Bonuses: As is to be expected from a TMNT game, you can restore your health by eating pizza found by smashing various objects around each stage; additionally, if you find some chop suey, you’ll restore a portion of your health. This is the first TMNT videogame I’ve ever played where you can actually pick up and use additional weapons; wooden boards, steel pipes, and stop signs can be tossed at enemies or used as temporary melee weapons and you can even toss shuriken, grenades, and destructible objects (though the latter will greatly reduce your walking speed).
Additional Features: Perform well in each stage and you’ll earn yourself Shells that can be used as a continue if you’re defeated or to unlock additional gameplay modes. You can take on a Stage Attack to compete for the highest score and rank, a Survival mode against an endless wave of enemies, and a boss rush, all of which must be purchased with your Shells. Completing the story unlocks every stage in the game for you to replay at your leisure, though there’s no way to rewatch the game’s cutscenes outside of playing the story. While there aren’t any skins or unlockable characters, the TMNT do receive a futuristic glow up from Stage 6, though you can’t apply these at will, and of course TMNT: Arcade Attack can be played on higher difficulties or alongside a friend if they also have a copy of the game.
The Summary: I’ve played a lot of Teenage Mutant Ninja Turtles videogames and, while many of them are basically mindless beat-‘em-ups with little on offer than the simple thrill of beating the piss out of countless colourful enemies, they still had more on offer than this misfire of a title. I get the idea behind Teenage Mutant Ninja Turtles: Arcade Attack: a quick, cheap, arcade-style brawler to appeal to fans of the TMNT’s old beat-‘em-ups, but the execution falls flat in almost every department except for the motion comic-like cutscenes and the shallow diversity of the combos. There’s a lot about the game that’s modelled after these arcade titles, particularly in the environments and the simple, pick-up-and-play format, but it just can’t live up to those titles because of the way it presents itself. Not only is it all over the place in terms of its identity, the presentation of the gameplay has this weird isometric angle, there are hardly ever any enemies onscreen, and the lack of environmental hazards or visual interest really hurts the title. It’s a shame as this would’ve been so easy to get right if the game had simply been a 2D brawler with 3D style backgrounds, or even more akin to Turtles in Time Re-Shelled, which was a far better 2.5D conversion of the classic arcade visuals. A disappointing lack of bosses and recognisable TMNT characters and enemies also keeps the game from being as good as it could be, as does the monotony of the strangely long stages, and I wasn’t impressed by the revive function not really working in single player. There are some decent unlockables, at least, but it’s undeniable that there are better TMNT games to play, with Teenage Mutant Ninja Turtles 3: Mutant Nightmare (Konami Computer Entertainment Studios, 2005) looking like a far better option for DS players.
My Rating:
⭐⭐
Rating: 2 out of 5.
Could Be Better
Have you ever played Teenage Mutant Ninja Turtles: Arcade Attack? How do you think it holds up against previous TMNT beat-‘em-ups? Which of the TMNT was your favourite to play as and why? Did you enjoy the Mirage Comics-style cutscenes and do you agree that the game’s identity is a bit muddled? Were you disappointed by the graphics, environments, and bosses? Did you ever unlock and clear every mode in the game? Which TMNT videogame is your favourite? How are you celebrating the TMNT’s debut this month? Whatever your thoughts on the TMNT, leave a comment down below or on my social media and pop back for more TMNT action!
So, for no better reason than “Mar.10” resembling Mario’s name, March 10th is widely regarded as being “Mario Day”, a day to celebrate Nintendo’s portly plumber, an overalls-wearing mascot who literally changed the videogame industry forever and shaped the home console market of the nineties.
Released: 3 September 2020 Originally Released: 21 September 1990 Developer: Nintendo Original Developer: Nintendo EAD Also Available For: Game Boy Advance, Nintendo 3DS, Nintendo Wii, Nintendo Wii U, Super Nintendo Entertainment System (SNES) Classic Edition, SNES
The Background: After the videogame industry crumbled under the weight of overpriced consoles and mediocre titles, Nintendo basically saved the industry with the runaway success ofSuper Mario Bros. (Nintendo EAD, 1985). Despite its bizarre development, Super Mario Bros. 2(Nintendo R&D4, 1986) was also a highly praisedbest-seller, and Mario’s star only rose thanks to the unique marketing strategy behind Super Mario Bros. 3 (ibid, 1988) and that game also being a critical and commercial hit. In 1990, Nintendo were preparing to launch the 16-bit powerhouse that was the SNES and getting back into the thick of the “Console Wars”. Although the developers had to adapt to the new hardware, producer and Mario creator Shigeru Miyamoto was excited by the prospect of imaging new ideas, such as finally implementing a dinosaur companion for Mario. The goal was to refine Mario’s mechanics, impress gamers and critics with the SNES’s graphical capabilities, and deliver a fun, but challenging, gameplay experience to help sell their new console. Super Mario World exceeded in this goal; the award-winning game became the best-selling title for the SNES and has been inundated with widespreadcriticalacclaim ever since its release. The game was adapted into cartoons and comics, resulted in an equally successful spin-off series for Yoshi, in addition to being ported and remastered to new consoles over the years. Its legacy is so strong that it was naturally included as a launch title for the Nintendo Switch Online service in 2020, which is the version I’m reviewing here.
The Plot: When Mario, Luigi, and Princess “Peach” Toadstool visit Dinosaur Land, the princess is kidnapped by Bowser, King of the Koopas. Alongside their new dinosaur friend, Yoshi, the Super Mario Bros. must liberate the island from Bowser’s Koopaling progeny and confront Bowser in his castle to rescue the princess.
Gameplay: Like its predecessors, Super Mario World is a 2D, sidescrolling platformer in which players play as ether Mario or Luigi and journey across seven levels (referred to as “Worlds”) and two bonus Worlds, hopping on Bowser’s minions, collecting power-ups, and grabbing Coins for points and extra lives, all while racing against a timer. As is also tradition, the game features two play modes; one where you go solo and one where you switch between the brothers after each level to allow two players to go head-to-head, taking different routes on the large, varied, interconnected overworld and lending extra lives if required. Unlike in previous 2D Super Mario games, you can’t change the control scheme here, so you’ll be pressing B to jump (ranging from a little hop to a higher jump the longer you press the button) and swim, A to perform the new spin jump (which allows you to defeat certain armoured enemies and break blocks beneath your feet) and holding X or Y to run. You can get quite a bit of speed this time, too, which allows you to glide and fly across levels when you’re powered up by the Cape Feather or run up walls in certain situations. You can also hold X or Y to grab items like Koopa shells, blocks, and keys; these can now be thrown upwards, increasing your range of attack options and opening up new areas to explore. Finally, you can look up, scroll the screen with the left and right triggers, and duck; if you run and duck, you can slip through small gaps and reach bonus areas and secret exits.
Traverse a colourful new land using Mario’s new companion and power-up!
Interestingly, I didn’t notice any difference between Mario and Luigi; Luigi doesn’t jump higher or have less traction, meaning the differences between the two are a simple palette swap, which is odd considering they played differently in Super Mario Bros. 2. The brothers are joined by a new companion in this game, Yoshi. If you hit enough blocks, you’ll eventually spawn in a Yoshi egg, from which this helpful little dinosaur will hatch. Players can ride Yoshi and press X or Y to extend his sticky tongue and eat fruit or enemies, the latter of which can either be swallowed, spat out as Koopa shells, allow Yoshi to breathe fire, and add a “flutter” motion to his jump. Yoshi allows players to do everything they normally can but with the added bonus of acting as a permanent shield; when hit while riding Yoshi, you won’t power down and can simply hop back on him to continue onwards, but you can’t use your Fire Flower abilities while riding him and Yoshi isn’t able to climb vines and won’t accompany you into fortresses or castles. Yoshi can also gain the ability to fly, easily allowing you to cheese through levels, and you can sacrifice him for a boost jump if you’re feeling sadistic. Some levels also include different coloured Mini-Yoshis; carry these until they eat five pieces of fruit or enemies or a single power-up and they grow into an adult Yoshi, and other levels see you riding atop bulbous Monty Moles to safely cross spiked hazards. Mario and Luigi can also use springs to get around, often needing to pick up and toss them to clear higher obstacles, and these are much easier to control than in Super Mario Bros.: The Lost Levels (Nintendo R&D4, 1986); swimming and autoscrolling levels also return, but again I had no issues in dealing with these as the game’s mechanics were so refined. Another new addition is the “Item Stock” in the heads-up display (HUD); if you’re already powered up, new power-ups you acquire are stored in this box and will automatically drop down when you take a hit (or press ‘Select’), which can be a life saver, though you can’t stockpile power-ups on the overworld anymore. Another new feature is the addition of checkpoints mid-way through levels, which I find interesting as these levels felt shorter and far less frustrating than Super Mario Bros. 3’s; hitting this while in your base form will also automatically power you up, too.
The game’s challenge is very fair, offering fun visuals and incentives to keep playing.
Super Mario World gives you three save files to play with and the chance to manually save at certain points, such as after toppling a Koopaling or visiting a Switch Palace. Every level has a secret exit, sometimes accessed via a key or by taking a different route; this allows access to new areas on the overworld and to secret levels and Switch Palaces, where you activate giant-coloured switches to make their corresponding-coloured blocks solid and thus protect you from hazards in levels. This opens the game up to some replay value as you explore each level looking for secrets and new paths, and you’re given some hints towards this through the Message Blocks that convey story text and helpful tips. As ever, you can hop into pipes to find shortcuts, bonus areas, and explore caves and flooded sections; you can take vines up to the clouds, ride platforms, hop off Koopa Paratroopers, and make use of temporary blocks and platforms. Many Worlds contain Ghost Houses that are filled with shy Boos and feature a maze-like element; you’ll need to find the correct door, often by generating temporary platforms or paths using a Switch Block, all while avoiding the ghostly enemies and bottomless pits within. Other levels are autoscrollers that force you to make split-second decisions with your jumps; castles and fortresses are filled with lava, narrow hallways, rotating spiked maces, and crushing Thwomps, often all at once and in close-quarters situations to test your mettle. You’ll need to awkwardly create paths using Control Coins, activate spotlights in Bowser’s Castle, and deal with pipes that now go up and down and blast you through the sky. The background can also move vertically, requiring you to quickly take refuge in safe areas, and you’ll even be climbing on fences, bashing enemies and flipping around to the other side to avoid dangers. Massive, spiked columns crushing trunks, suffocating tar, painful spikes, and bottomless pits increase in their abundance, but Super Mario World is quite generous with its lives; you can find hidden areas where you play mini games to earn a whole bunch of extra lives, in addition to 1-Up Mushrooms popping out from blocks, the background, and being awarded for collecting Coins and defeating enemies.
Graphics and Sound: I was a SEGA kid growing up, so my exposure to the SNES came mainly from a friend who owned the console and a few games. Because of this, I’ve long been fascinated by the “other side” and, when I think of SNES, Super Mario World is one of the first games I think of because of its absolutely gorgeous presentation. This was a dramatic step up from Mario’s 8-bit adventures, featuring a colourful (and surprisingly unique) set of Worlds that really showcased the little things that made the SNES so impressive. Things like Mario’s cap flying back when he falls and bopping fruits on the trees to a touch of parallax scrolling, sprite zooming, and the ever-changing overworld mean Super Mario World remains the quintessential 2D Mario experience for me. Sure, there’s no difference between the brothers other than a palette swap but they’re much bigger and more detailed than ever before here; the addition of Yoshi also cannot be understated, especially as it wasn’t possible to include a character like this in Mario’s 8-bit adventures, and I loved how much quirky, cartoony humour was packed into the enemies, who swoop at you, are very expressive, and appear so much more versatile than simply wandering aimlessly around. Although Super Mario World recycles many of its music tracks for its various Worlds, this is the game I think of when I think of Mario music; every tune is so catchy and upbeat and stays in your head, and I relish hearing that end of level jingle and seeing Mario throw up the peace sign each time.
The game is deceptively big, colourful, and includes more story than ever before.
Super Mario World’s Worlds veer slightly away from elemental themes and more towards the fantastical; you’ll still be exploring thick forests, crossing bridges and bodies of water, venturing into caves, and hopping to mushroom-themed platforms, but there’s a fitting prehistoric bent to the majority of the game. Caves are filled with tar, glittering crystals, or frozen masses of ice; you’ll see hills and mountains in the backgrounds, cross plains filled with dinosaur-like enemies, and ride across lava on platforms made of skulls! Some Worlds are shorter than others, like the sky-themed Twin Bridges with its log platforms and track-based platforms guarded by saws, or contain unique overworld elements, like the Forest of Illusion, which requires you to explore to find the right exit and open up more of the map screen. Spooky levels like the Ghost Houses and the Sunken Ghost Ship impressed in their ambiance; there’s an ominous fog in the air, a creepy melody playing, and lightning flashing in the background, and I loved how the Sunken Ghost Ship was a wrecked recreation of the various Airships from Super Mario Bros. 3. The overworld changes as you find new exits, creating shortcuts and even changing seasons as you find more exits; this also allows you to take a shorter, far easier path to the final fight in the Valley of Bowser and avoid the pain of navigating the doorways and challenge of the longer path. Story is emphasised much more here, with text and fun little cutscenes pushing you onward after clearing each castle but, while Luigi’s sprite features in the cutscenes, the story text doesn’t change to reference him, which is a bit of a shame.
Enemies and Bosses: Many of Mario’s common enemies make a return here, including Goombas, various Koopa Troopers, Boos, the always-annoying Lakitu, and Bullet Bills, but these also come in new variants, meaning you’ll see rings of Boos, Boos disguised as blocks, and Boos that aren’t as shy as their peers and attack from the shadows, Super Koopas that dive from above, and many of them fill the screen either as expected or floating along in bubbles. Super Mario World sees the debut of enemies such as Magikoopas (who teleport in to fire a magical blast and are immune to our regular jump), Wigglers (who get very mad when you hop on them), the screen-filling Banzai Bills and Big Boos, alongside large, weird green bubbles, a lava dinosaur, and other dinosaur-themed enemies who wander about, breathe fire, or take a couple of hits to defeat. By far the most aggravating new addition is Chargin’ Chuck, a turtle protected by American football gear who can charge at you (destroying any blocks in their way), duplicate themselves, toss various projectiles (from footballs to rocks), summon other enemies, and prove highly resistant to your attacks thanks to their padding. You’ll also have to watch out for the Amazing Flyin’ Hammer Brother, who swoops overhead tossing an endless supply of hammers at you, and Sumo Brothers, who spawn flaming pillars with their jumping stomp.
Although enjoyable and cartoonish, the boss battles are a little too repetitive and easy.
In the game’s fortresses, you’ll battle four Reznors, fire-spitting Triceratopses on small, rotating platforms stationed over a bridge that slowly disintegrates over a pool of lava. The only way to attack the Reznor’s is from beneath, which is pretty simple despite their many fireball projectiles. In the Donut Secret House, you’ll battle a Big Boo, one that doesn’t freeze when you face it and instead fades in and out; while Big Boo can’t hurt you, his regular Boo minions can, and you’ll need to grab the blocks conveniently placed underfoot to defeat him. Like in Super Mario Bros. 3, you’ll have to defeat Bowser’s children, the Koopalings; but, while they differ in their abilities since they no longer have magic wands, they’re no less disappointing since all but one of them recycle three specific attack patterns. Iggy and Larry Koopa are fought on a tipping platform in a lava pool where you must avoid their shell attack and fireballs and bop on them to force them into the lava, Morton and Roy run up the arena walls and try to drop on you from above, and Lemmy and Wendy O Koopa fire bouncing projectiles and decoys, but you can easily avoid these and hop on them when they pop out from the pipes. The only Koopaling with his unique attack strategy is Ludwig von Koopa, who spins about in his shell and spits fireballs, but none of the Koopalings present much of a challenge and they’re actually easier to beat than before! When you finally reach the Valley of Bowser, you’ll battle the Koopa King on the castle roof; while a unique battle since you can only damage Bowser by timing throws of his Mechakoopas, it also doesn’t present much of a challenge. Bowser hides in his Koopa Clown Car, floating out of reach and tossing Mechakoopas in the first phase; in the second, he tries to crush you with a massive ball, and the third sees him bounce around in desperation. Between each phase, fireballs will rain from the sky and Peach will toss you a Super Mushroom, making this battle even easier, and I was a bit disappointed that it didn’t require you to do anything other than toss stuff upwards so it hits Bowser’s head.
Power-Ups and Bonuses: All of Mario’s signature power-ups return here, including the Super Mushroom, 1-Up Mushroom, the always-useful Fire Flower, and the invincibility-granting Super Star. Mario can again commandeer Lakitu’s cloud to briefly fly over levels, collect Coins for points and extra lives, and can even find rare Moon items that grant three extra lives. In addition to Yoshi, Super Mario World’s new power-up is the Cape Feather, which adds a cape to your sprite to swipe away enemies, slow your descent, and rocket you into the sky with a fun (if, at times, clunky) gliding/flying mechanic that can reach new areas and exits, cheese entire sections, and see you crashing into the ground for a massive area attack. You can also grab a Power Balloon to temporarily become inflated and cross gaps, collect five Yoshi-branded Dragon Coins in each level for a 1-Up, and grab random power-ups from Roulette Blocks.
Additional Features: There are ninety-six exits to find in Super Mario World, with the total amount you’ve found being tracked on your save file; there are also four Switch Palaces to find, up to three secret areas for most levels, and a whole bunch of Dragon Coins to collect if you feel like giving yourself an extra challenge. Finding secret exits is the only way to warp to Star World, which not only offers additional platforming challenges but also acts as a fast travel point across the overworld. Clearing Star World unlocks the game’s greatest challenge, Special Zone, which boasts eight demanding levels that owe their difficulty to Super Mario Bros.: The Lost Levels. Although there are no additional or remixed bosses to fight here, you’ll need all your patience and platforming skill to get past their gaps and wild enemy placements. Clearing this World permanently changes the overworld to an autumnal theme and changes some of the enemy sprites to have comical Mario faces, and you can skip right to this state (and access all hidden levels) by selecting the “SP Version” of the game from the Nintendo Switch Online menu. Naturally, this version of the game includes helpful save states and rewind functions; you’ll also find additional cutscenes and gameplay changes (particularly to Luigi), and various unlockables and enhancements in the Game Boy Advance version.
The Summary: I’ve played Super Mario World before, on original hardware, emulation, and the SNES Mini and I have beaten it in the past, but never in a proper, sit-down, focused playthrough like this. After struggling with 2D Mario, and being aggravated by Super Mario Bros. 3, I was worried that I was in for more of the same here, but it was pleasantly surprised by how much I enjoyed this gameplay experience. Mario and Luigi are so much better to control here now that they’re not slipping and sliding all over the place; the levels are fun, colourful platforming challenges with perfectly fair hazards and completion requirements; and the overall presentation is the best that 2D Mario has ever been, even accounting for the various 16-bit remakes. Although the game felt a little shorter and lacking in some features, it’s got some fun secret paths and invites exploration, as well as back-loading the adventure with some pretty challenging bonus levels. I really enjoyed how it carried over certain Mario tropes (the stone-and-lava castles, the whimsical nature, the underground and water sections, etc) without falling into the cliché of having elemental-themed Worlds. The dinosaur theme was fun and one I’d like to see revisited in a future game; Yoshi made for a fantastic new mechanic and companion, more than making up for the otherwise disappointing power-ups. While I was again let down by the bosses, I can’t fault Super Mario World; it just is SNES-era gaming to me and its many positives, particularly in the visuals, the soundtrack, the controls, and the level of challenge it offers, more than outweigh any concerns so I’m very happy to have finally given it the time and attention it deserves.
My Rating:
⭐⭐⭐⭐⭐
Rating: 5 out of 5.
Fantastic
Was Super Mario World in your SNES library back in the day? How do you feel it compares other Mario titles, specifically the 2D adventures? What did you think to Yoshi and the new cape power-up? Did you ever discover all the secret exits and beat the secret Worlds? Were you also disappointed by the boss battles? Would you like to see a return to Dinosaur Island? How are you celebrating Mario’s birthday this year? Whatever your thoughts on Super Mario World, feel free to share them below or drop a comment on my social media and be sure to check out my other Mario content!
So, for no better reason than “Mar.10” resembling Mario’s name, March 10th is widely regarded as being “Mario Day”, a day to celebrate Nintendo’s portly plumber, an overalls-wearing mascot who literally changed the videogame industry forever and shaped the home console market of the nineties.
Released: 11 July 2003 Originally Released: 23 October 1988 Developer: Nintendo R&D2 Original Developer: Nintendo R&D4 Also Available For: Nintendo Entertainment System (NES), Nintendo Switch Online, Nintendo Wii, Nintendo Wii U, Playchoice-10, Super Nintendo Entertainment System (SNES) Classic Edition, SNES
The Background: Following the infamous videogame crash after an influx of numerous overpriced consoles and mediocre titles, Nintendo were propelled to the forefront of the dying market by the unprecedented success ofSuper Mario Bros. (Nintendo EAD, 1985). Surprisingly, considering the game’s success and popularity, development of its sequel became one of the most bizarre stories in all of gaming. Since the difficulty of Super Mario Bros. 2(Nintendo R&D4, 1986) caused concern for Nintendo of America, whimsical Mario clone Yume Kōjō: Doki Doki Panic was retooled into an official Super Mario Bros.sequel and, despite its vast differences, became a highly praisedbest-seller. After briefly toying with employing an isometric perspective for the third game, developer Shigeru Miyamoto sought to both return to Mario’s roots and vastly expand upon his world and repertoire through new power-ups and a gaggle of new mini bosses based both on his staff and famous classical musicians. A shortage of ROM chips saw the release of Super Mario Bros. 3 significantly delayed; however, Nintendo used this time to employ a unique marketing strategy by licensing their products to be included in the kids adventure film The Wizard(Holland, 1989), with Super Mario Bros. 3 featured as a centrepiece. This resulted not only in many watching The Wizard just to get a glimpse of Mario’s latest adventure but also in the game becoming a best-seller for the NES and being universallypraised upon release. Super Mario Bros. 3 was so influential and celebrated that it formed the basis of a new Super Mario Bros. cartoon and the game has received several ports, including a 16-bit remaster for the SNES as part of Super Mario All-Stars (Nintendo EAD, 1993). This version of the game served as the basis for the later Game Boy Advance port, which was the fourth in the Super Mario Advance series of re-releases for the popular handheld. Featuring updated graphics and vocal performances from Mario voice actor Charles Martinet, Super Mario Advance 4 was also compatible with the short-lived e-Reader add-on (unless you lived in Europe) and the game was met with equally positive reviews that lauded the recreation of Mario’s classic gameplay and the expansion of his world and abilities, despite the smaller screen resolution and lack of additional content.
The Plot: When the Koopalings, the children of the Koopa King Bowser, conquer each of the seven kingdoms of the Mushroom World by stealing magical wands from their kings, it’s up to the Super Mario Bros. to travel to each kingdom, retrieve the stolen wands, and confront Bowser his own realm, the Dark Land.
Gameplay: As is generally the case for a classic 2D Super Mario videogame, Super Mario Bros. 3 is a 2D, sidescrolling action/platformer in which players must make their way through eight Worlds, each containing up ten Levels, running, jumping, and hopping from blocks and fantastical enemies to reach an end goal, this time in the form of a square that, when hit, will award an item card (collecting three of the same will award an extra life). This version of the game offers three save files and you can pick two ways to play, either as Mario alone or as Mario and Luigi, with you swapping between characters after losing a life or from the overworld map, and even being able to lend extra lives to the other player if they’ve run out. The controls are as simple as you could want from this type of game: A is for jumping and B is for running. However, holding A will see you jump higher and further, holding B for an extended time sees you build up the P Meter and break out into a sprint to cover greater distances (or even fly with certain power-ups), and you can also pick up blocks and certain enemies with B, similar to Super Mario Bros. 2, which can be tossed at other enemies or used to blow up or break through blocked walls. Pressing down will not only see you crouch to avoid projectiles but also allows you to slide down slopes to take out enemies or fit through small gaps when running, though I found it’s usually easier to use the character’s smaller base form to accomplish this. While both Mario and Luigi have the same capabilities, there are differences; Luigi is taller and has a little flutter jump to make him a superior jumper, but he’s also much slipperier to control and that’s really saying a lot considering how poor Mario’s traction is in this game!
Mario is back, bigger than ever and with a whole host of new abilities at his disposal!
Although it’s a shame to go from playing as four characters to just two, Super Mario Bros. 3 makes up for this by being absolutely massive! Each World has its own distinctive overworld, with different layouts, animations, and music accompanying them; you move across the map to access each Level or a Toad House to play a mini game, but you can also use pipes to warp around to different areas, access shortcuts, and take on optional battles against the likes of the Hammer Bros. for additional power-ups. While you’re not free to go wherever you like, there are options to skip Levels using these power-ups and other shortcuts, though you won’t get a “Perfect Clear” if you don’t conquer each Level and Fortress contained in each World. Levels are presented as short obstacle courses that gradually test your patience, platforming skills, and deductive reasoning; things start out simple enough, with you jumping to blocks, over gaps, and warping about using pipes against a variable time limit, knocking off enemies to increase your score and earn extra lives, but things quickly become very tricky once the hazards and requirements start to ramp up. Falling or temporary platforms, moving platforms, and projectile spitting enemies are commonplace here, as are respawning enemies, nigh-invincible enemies (unless you have a block or power-up handy), and you’ll often find yourself either trapped in a tight corner or sent plummeting to your death thanks to various hidden blocks popping up at the worst possible times! Sometimes, you’ll hit a block and a power-up will pop out; mostly, you’ll get Coins, but other times a climbable vine will lead to a secret power-up room, a P-Switch to grab some Coins, or the Level’s exit. Other times, you need to hop to erratic moving platforms, bounce off flying enemies for an extra boost, toss Bob-ombs to break through walls, or even grab a series of Starmen to make yourself invincible and bypass spikes, snapping piranhas, and flame bursts. Each World ends with you battling across the Koopaling’s Airships, dodging Bullet Bills, cannonballs, hopping across bolts, and avoiding jet flames as the screen bounces and tilts about. In World 8, you’ll also have to hop across tanks in a horizontal scroller, dodging many of the same obstacles, which naturally represent some of the hardest and most aggravating challenges in the game.
You’ll need all the help you can get to beat the rising difficulty and tricky platforming challenges!
While many of the game’s hazards and enemies will inevitably repeat, they are often used in creative and more difficult ways later in the game, from simple stuff like mixing different enemies into the Levels to more annoying inclusions, like constantly respawning enemies or platforms coming to life beneath your feet, or having to bounce perfectly off music note blocks and run across falling platforms. You’ll sometimes have to swim underwater, tapping A or making use of the Mario’s new Frog Suit power-up to more efficiently bypass Cheep-Cheeps and Bloopers; other times, the Levels autoscroll horizontally, vertically, and diagonally, putting your reaction times and platform skills to the test. There are also a number of looping mazes, often involving pipes or the lava-infested Fortresses, with some having exits so obscure that you’ll have no choice but to consult a guide (World 6-5, for example, traps you in an endless loop and forces you to awkwardly fly up a specific part of the stage using the Raccoon Suit while holding a Koopa shell to break through some blocks and reach the exit, none of which is very intuitive). As if the small platforms, singular blocks, and broken bridges aren’t bad enough, you’ll also have to contend with projectiles, blocks coming to life, timid ghosts who chase you when your back is turned, bottomless pits, instant-death lava, temporary moving platforms that you must jump on to change their direction to progress upwards, suffocating quicksand, leaps of faith, and treacherous platforming nightmares up in the clouds. Thankfully, you have infinite continues; when you lose all your lives, you can continue on with a fresh stock, though your score resets to zero. You’re prompted to save your game after clearing every Fortress and Airship, though you can manually create a temporary save at any time from the pause menu if you need to take a break. Gameplay is mixed at the Toad Houses, where you play various mini games for power-ups and extra lives; these reset after you lose all your lives and continue your game but can be really tricky. One sees you having to stop sliding tiles at just the right time, which I found all-but impossible; one sees you turning over cards to find doubles; the other has you picking from three chests; or you can fight a couple of Hammer Bros. to earn a chest containing a random power-up.
Graphics and Sound: This version of Super Mario Bros. 3 may very well be the best, visually speaking; while some changes were inevitably made to accommodate for the Game Boy Advance’s hardware and software specifications, the presentation is absolutely top-notch. The game pops with vibrant colours at all times, with some fun visuals in the backgrounds (such as big green hills, pyramids, clouds, and Bowser portraits), and a lot of visual variety even when some Levels recycle assets from others (the Fortresses, Airships, and most underwater Levels are the most obvious examples). Palm trees, icy platforms and slippery, snowy landscapes, unstable or incomplete bridges over water filled with ravenous fish or bubbling lava, and block- or cloud-based environments are commonplace, as you’d expect, but you can also venture underground into dank caves, crystalline mines, and sewage systems filled with a network of pipes and a wraparound screen feature similar to the original Mario Bros.(Nintendo R&D1, 1983). World 4 was one of my favourites as everything is gigantic here, including the pipes and enemies, turning even regular Koopas into monstrous foes, but I quite enjoyed the jaunts into the desert areas, even with that maniacal sun chasing after me! World 6 was one of my least favourites as everything’s covered in snow and ice, making a slippery game a hundred times more difficult to play, and the pipe mazes of World 7 also caused quite a headache. Things get suitably ominous in World 8, a lava-filled hellscape full of tanks, submarines, and airships; even the overworld is affected, restricting your vision until you clear certain Levels, and dropping you into darkened deserts and deep jungles filled with tricky platforming sections.
The game is whimsical and colourful, with some fun tunes and great visual variety.
One added benefit to being on the Game Boy Advance is the inclusion of voice samples; Mario and Luigi will shout with joy and wail in pain whenever they snag a power-up or lose a life, respectively, and the game is bolstered by some of the catchiest tunes in the entire franchise. While many of these are recycled across the game’s many Worlds, they never fail to be infectious and keep things whimsical, even when you’re tearing your hair out because you somehow slipped off a platform or weren’t quite pixel-perfect enough to make a jump. A couple of cutscenes also help punctuate the action; dialogue boxes have the Toads pleading for help when you reach each World’s castle and see the state of their king (there’s even a Yoshi cameo at one point); you’ll see the brothers hop onto the Airships and fall from the sky in triumph after securing each magic wand, and Princess Peach (and, later, Bowser) leaves letters for you containing words of encouragement and rare power-ups (or, in Bowser’s case, a final challenge). If you manage to get to the secret warp zone, you can skip ahead to different Worlds, which alters the order you play the game and also results in different cutscenes playing (such as seeing the Koopalings invade a castle beforehand) if you, for example, skip right to the final confrontation before besting the other Worlds. World 3 also has you control a little raft to get to different Levels and Toad Houses, World 2 contains pyramids for you to scale and conquer, and World 8 is littered with tanks and dangerous optional squares that pit you against some of the game’s toughest foes while hopping across a lava pit using precarious platforms! Although neither character has any idle animations, they can transform into a variety of super fun different forms with their different power-ups and everything runs very smoothly. This version of the game even includes a brand new opening cutscene, styled like a pantomime, in which Peach begs for help after the Koopalings attack, and you’ll even spot her screaming for help when battling your way through World 8.
Enemies and Bosses: Unlike Super Mario Bros. 2, which featured entirely new and fantastical enemies, Super Mario Bros. 3 features the return of many of Bowser’s most recognisable minions: Goombas, Koopa Troopas, Bloopers, Bullet Bills, Cheep-Cheeps, Spinys, Piranha Plants, and the ever-annoying Lakitus are constant hazards across each of the game’s eight Worlds. Spinys will drop from the ceiling and dash at you, Koopas will re-emerge from their shells if you hold them too long, and both them and the Goombas can be seen fluttering around with wings this time. The Hammer Bros. also return, usually guarding the end of Level goal or as mini boss challenges on the overworld; boomerang and fire-flinging variants also crop up, as do larger Sledge Bros., who can stun you with a ground slam. The only enemy to return from Super Mario Bros. 2 is the Bob-ombs, who will be endlessly spat out of cannons or spawn into areas where you need to use them to break certain blocks, and Super Mario Bros. 3 sees the debut of Mario staples such as the Thwomps (massive, angry blocks that try to crush you), Boos (shy ghosts who freeze when you’re facing them), Big Bertha (a massive Cheep-Cheep who’ll swallow you whole if you get too close), Chain Chomps (ravenous Pac-Man-like mouths attached to chains), and Dry Bones (skeletal Koopas that reassemble after being jumped on). You’ll also have to try and dodge the annoying wrenches tossed by the endlessly respawning Rocky Wrenches on the Airship Levels, be aware of spikes and blocks tossed by smaller enemies, hop across gaps on giant cannonballs, quickly jump over laser-spitting Bowser Statues, and run for your life when the Angry Sun swoops out of the sky!
Considering how tough it is to get to them, it’s a shame there’s not more variety to the Boom Boom fights.
While you can challenge the Hammer Bros. and their variants by landing on them on the overworld, it is possible to skip these confrontations; when you battle them, it’s highly advisable that you have the Fire Flower power-up, which makes short work of their constant stream of projectiles, and defeating them can net you a nifty rare power-up and make traversing the overworld a little easier. These mini bosses might be optional, but if you’re going for 100% completion then you’ll definitely have to battle one at the end of World 8-Tanks and you’ll need to go head-to-head with Bowser’s primary henchman, Boom Boom, on numerous occasions. Boom Boom awaits at the end of every Fortress in the game and acts as a mini boss throughout World 8; generally, getting to him is tougher than the battle itself as Boom Boom waits at the end of lava-, fireball-, Thwomp-, and hazard-filled obstacle courses that can really test your endurance. Boom Boom himself is fought in an enclosed arena, sometimes with mid-air blocks that act as obstacles, sometimes with an icy floor to send you sliding right into him, and sometimes he takes to the sky with wings and dive bombs you. In each fight, the strategy is the same: Boom Boom will wander back and forth, occasionally leaping at you with his spiked shell or diving at you from the sky, and you must hop on his head three times (or blast him three times with a power-up) to be victorious. If you’re playing the Nintendo Switch version, or the Japanese version of this game with the e-Reaper feature, you’ll also battle two Boom Booms at once on the World-e map, but I have to say that fighting this guy over and over, sometimes up to four times for each World, quickly grew as tedious as the multiple encounters with Birdo in Super Mario Bros. 2 and it’s a real shame that more variety wasn’t included here (like giving Boom Boom different power-ups or having more hazards in the arena).
There’s not much to the game’s bossbattles, with even Bowser being pretty simple to best at the end.
Sadly, this disappointment also extends to the Koopaling you encounter at the conclusion of each Airship. Each Koopaling wields a magic wand that fires a projectile into the cramped arena and jumps around, often retreating into their spiked shell to protect themselves, and can be defeated in three hits. While Wendy O. Koopa and Iggy Koopa can jump a little higher than others, which can mess up your attack strategy, Roy and Ludwig von Koopa can stun you by creating earthquakes, which leaves you vulnerable to their slow magic projectiles. Wendy and Lemmy Koopa are probably the most unique and memorable of the seven as Wendy fills the screen with candy rings that bounce all over the place and Lemmy rolls about on a magical ball firing smaller balls that can hurt you or be used as platforms to avoid his erratic rolling and bop him on the head. Again, though, while each of the Koopalings looks different and has slightly different attack patterns, they’re all basically the same; if you can reach them with a Fire Flower or Hammer Suit then you’re laughing, but the hardest thing about most of them is that you have the suffer through the entire Airship course all over again if you die fighting them. Their father, Bowser, appears only as the final boss of the game; after enduring some of the game’s hardest Levels, defeating more Boom Booms and dodging a whole host of enemies and hazards, you’ll reach Bowser’s Castle, a maze-like shrine to the Koopa King with branching and looping paths and lava pits. Bowser himself spits fireballs at you that you must duck or jump over and will leap into the air to crush you with a butt stomp; simply dash underneath him and cause him to destroy some of the blocks. Do this three times in the same area (or manage to blast him with enough projectiles) and he’ll plummet to his doom, leaving you to free Princess Peach and restore the peace to the land. You’ll also battle him twice more in World-e, with one battle being functionally the same and the second being made harder by the presence of unbreakable blocks included on the floor.
Power-Ups and Bonuses: After being disappointed by the lack of power-ups in Super Mario Bros. 3, I’m happy to say the Super Mario Bros. 3 goes above and beyond with its power-ups! Staples such as the 1-Up Mushroom, Super Mushroom, and Fire Flower return, granting an extra life, an extra hit, and the ability to throw fireballs, respectively, alongside Coins that grant extra lives when 100 are collected and the Starman, which grants brief invincibility. Super Mario Bros. 3 also debuts some brand new power-ups that have since become franchise staples, such as the warp whistle and cloud that will teleport you across the overworld, Blue Coins (though they have no additional value), hammers to break overworld blocks, and a music box to send enemies to sleep in this same area. Mario and Luigi also have some new forms here, such as the Frog Suit (which allows greater movement when underwater at the cost of impeding land movement), the Hammer Suit (which lets you toss a bunch of hammers and protect yourself from projectiles and the cost of sliding down hills), and by far my favourite Mario power-ups: the Super Leaf and Tanooki Suit. These grant you cute little raccoon ears and a tail (or a full raccoon suit, respectively) that lets you attack with a tail swipe, flutter jump by tapping A, and fly through the sky after building up enough speed. Pressing down and B while wearing the Tanooki Suit also transforms you into a statue to avoid damage from enemies and projectiles, and you can fly indefinitely when awarded with a P-Wing, easily allowing you to soar over the game’s more troublesome sections. There’s also an additional, somewhat secret power-up in the game; if you defeat a the shoe-wearing Goombas in World 5-3 in just the right way, you can hop into the shoe and safely pass over spikes and defeat spiked enemies, all while retaining any other power-ups you already have.
Additional Features: There are eight Worlds to explore in Super Mario Bros. 3, but that doesn’t mean you have to conquer every Level or Fortress found in each. The warp whistle and Lakitu’s Cloud items will let you skip entire Worlds and Levels if you wish, though you won’t be greeted with a “perfect” completion screen and the score on the save file menu won’t be at its maximum until you beat every Level in the game. There are numerous extra lands and shortcuts to find on the overworld that lead to Toad Houses where you can play mini games for extra power-ups, but some just lead to dead ends unless you beat Levels to unlock the gates or use a hammer item to smash the rock blocking your path. The NES and SNES versions of the game see players compete head-to-head to see who will challenge a Level, but this is entirely absent from this game as a traditional two-player mode is omitted. As mentioned, there is a whole extra World to explore included here, one that includes power-us, collectibles, and features from previous and subsequent Super Mario games, but it’s locked out from the European version of the game so the only way you can play World-e is to either import the game, cards, and e-reader or just play the re-release on Nintendo Switch Online. However, this version does still include a 16-bit remake of Mario Bros. that you can select from the main menu. This version of the game can be played with others and features all-new backgrounds, assets, and music; new POW Blocks, the Super Mario Bros. 2 power squat jump, and quality of life features have also been included, but there are no mirror mode, harder difficulty, or other unlockables included in this version of Super Mario Bros. 3.
The Summary: I knew what I was getting into when I chose to play this version of Super Mario Bros. 3; I didn’t actually have to play the Game Boy Advance version as I could’ve made things a lot easier on myself and played the Nintendo Switch Online or SNES Mini version but I decided that I wanted to experience the game on real hardware, especially as I just so happened to own the Game Boy Advance cart. In the end, I was conflicted: on one hand, this is a massively enjoyable platformer, with some of my favourite tunes and power-ups and containing a sprawling, surprisingly varied gameworld. Super Mario Bros. 3 definitely set a new standard for the franchise, which would pretty much always include an overworld, multiple power-ups, shortcuts, and battles against the Koopalings. Levels are short, action-packed obstacle courses that will really test your skills as a player; there are a lot of opportunities to snag new power-ups, different ways to tackle each Level depending on what you have in your inventory, and I the overall presentation is whimsical and fanciful. However, on the other hand, Super Mario Bros. 3 can be hard as balls sometimes! Now, granted, I’m not the most accomplished 2D Mario player; I often struggle with the precision platforming, abundance of death pits and instant-death traps, and Mario’s notorious lack of traction, but I was frequently left frustrated with Super Mario Bros. 3’s repetitive and uninspired bosses, almost unfair level of challenge, and the unintuitive methods required to beat certain Levels. For a game as big as this is, it’s really a shame that so much gets recycled; I don’t understand why every World ends with an Airship when assets for a Tank and Submarine-based variant exist in World 8 and could’ve mixed things up a bit. I don’t get why every Fortress has to include a fight against Boom Boom when we could’ve fought a Sledge Bro or Big Bertha or given him some different power-ups. And the final battle against Bowser was pretty underwhelming, to the point where I was expecting a second phase and genuinely surprised when the ending cutscene played. In the end, this is easily the best of the NES Mario games; it’s large and packed full of stuff to do, but is mired by a difficulty curve that is just a little too frustrating for me at times (though probably well within the skills of a more accomplished Mario gamer).
My Rating:
⭐⭐⭐
Rating: 3 out of 5.
Pretty Good
Did you enjoy Super Mario Bros. 3? Which version of the game is your favourite and which console did you first play it on? Were you disappointed that there weren’t more characters to play as or did you feel like the new power-ups made up for this? Did you also struggle with the traction and platforming challenges on offer here? Were you disappointed by the repetitive stage design and bosses or did the sheer size of the game balance this out? Which power-up or World was your favourite, and did you ever play through World-e? How are you celebrating Mario’s birthday this year? Whatever your thoughts on Super Mario Bros. 3, feel free to share them below or drop a comment on my social media and be sure to check out my other Mario content across the site!
So, for no better reason than “Mar.10” resembling Mario’s name, March 10th is widely regarded as being “Mario Day”, a day to celebrate Nintendo’s portly plumber, an overalls-wearing mascot who literally changed the videogame industry forever and shaped the home console market of the nineties.
Released: 10 April 2019 Originally Released: 3 June 1986 Developer: Nintendo Original Developer: Nintendo R&D4 Also Available For: Famicom Disk System, Game & Watch, Game Boy Advance, Game Boy Color, Nintendo 3DS, Nintendo Wii, Nintendo Wii U, Super Nintendo Entertainment System (SNES) Classic Edition, SNES
The Background: After the videogame industry crumbled following an influx of overpriced consoles and mediocre titles, Nintendo effectively saved the industry with the blockbuster success ofSuper Mario Bros. (Nintendo EAD, 1985). However, despite that game’s success, the development of its sequel is one of the most bizarre stories in all of gaming; Super Mario Bros. 2(Nintendo R&D4, 1986) released in Japan a year later and was basically a remixed version of the first game, one that was much harder and therefore ran the risk of alienating Western gamers. Thus, Nintendo of America thought it more prudent to reskin whimsical Mario clone Yume Kōjō: Doki Doki Panic into an official Super Mario Bros. videogame and were rewarded with a critically acclaimedbest-seller. As for the original Super Mario Bros. 2, it also proved a best-seller in Japan, one that became notorious for its high level of difficulty and obscurity as the “black sheep” of the franchise. It would be some seven years before Western gamers got to officially experience the game when it was re-branded as The Lost Levels and given a 16-bit makeover for Super Mario All-Stars (Nintendo EAD, 1993). Since then, the game as been included in subsequent ports and re-releases (including the Nintendo Switch Online service, which I’m reviewing here), but has never lost the stigma as being one of the most difficult games of its era.
The Plot: The Mushroom Kingdom has been invaded by Bowser, King of the Koopas, and his Koopa Troopa army. After Bowser transforms the citizens into inanimate objects and kidnaps Princess Toadstool, Mario and Luigi set out across the hazardous Mushroom Kingdom to rescue the princess from his clutches!
Gameplay: If you’ve played the original Super Mario Bros. then you’ll know exactly what to expect from The Lost Levels. Players are given four save files, two control schemes, and two characters to pick from, Mario and Luigi. You can’t swap between the two after picking one and their basic controls are what you’d expect: I chose control scheme “Type B”, which mapped jump to the A and Y buttons and the dash function to B and X. You can hold down the dash button to run faster, which enables you to clear greater gaps and even jump higher, something that’s absolutely necessary in this game since large, bottomless, instant death gaps are plentiful and you’ll need to make precise jumps with very little room to manoeuvre to blocks that are just out of reach. As ever in 2D Super Mario games, traction can be an issue; it’s not uncommon for Mario to simply slip off platforms and blocks to his doom because of his momentum and this issue is exacerbated when playing as Luigi, who slips all about the place but can also jump higher and further and fall slower than his big brother. Your basic goal is also exactly the same as in Super Mario Bros.: race against a timer towards a flagpole at the end of each World and battle against one of Bowser’s fakes in a suitably ominous and hazardous castle before having a final showdown with the Koopa King.
A greater level of challenge awaits in this glorified expansion.
So far, everything’s very familiar but you’ll notice the enhanced difficulty and skill required from the moment you start World 1-1; obstacles and enemies are far more plentiful compared to the first game and you’ll be required to perform all manner of frustrating actions, such as perfectly timing running jumps across death pits, ducking to slide under narrow passages, and avoiding a myriad of hazards, including fire bars (including much longer variants and ones crammed into cramped corridors), leaping Cheep-Cheeps, and the game’s newest hazards on the block, the Poison Mushroom and upside-down pipes containing hungry Piranha Plants. Platforms and blocks are often hovering over death pits and bodies of water, with many either collapsing beneath you, being much smaller than you’d expect, or tricky to jump to. You can make use of springs to rocket out of frame and cross larger gaps, and a wind gimmick for the same effect, but it’s incredibly difficult to judge how to use and control these mechanics, especially with all the enemies onscreen. You’ll also have to make use of Koopa Paratroopers and Bullet Bills to gain an extra boost to higher or further areas, navigate coral reefs full of enemies (including fire bars), and make use of shortcuts using vines and pipes to pick up Coins for extra lives that you most definitely will require to succeed. By far the worst aspect of much of the game’s platforming is how precise you need to be; you often need to dash and jump across multiple blocks and platforms, sometimes from a complete standstill, to progress, or awkwardly drop down to lower platforms or pipes, which is incredibly frustrating as you’re just continuously falling to your death over and over. Not only that but invisible blocks will often box you in or drop you to your death and many of the castle stages loop around, requiring you to somehow intuit (or guess through trial and error, or just use a guide like I did) that correct path, all while desperately trying to not get hit or killed before reaching the boss.
It’s going to take all of your skill (and patience) to overcome this frustrating game.
You’ll often be riding small platforms across wider gaps, bopping on enemies or hopping over blocks to continue onwards, or making use of weighted platforms to gain a bit of extra height for a tricky jump. Some Worlds contain a long stretch of broken bridges, with Cheep-Cheeps flying in all over the place to hurt or indirectly aid you with an extra boost. You’ll need to run and jump beneath Piranha Plants, duck at the last second and in tight corners to avoid being hit by fire bars, and even encounter enemies and hazards in bizarre places (like Bloopers being outside of the water and Koopa Troopas being in the water!) If you found Super Mario Bros. too easy, then The Lost Levels is the game for you! Almost every World plays like some kind of nightmarish debug mode or test stage, with every hazard and enemy in Mario’s then-limited library dotted haphazardly around every screen to sap you back to your base form or steal another of your lives. Mario can only take one hit before reverting to his small form, whether he has a Fire Flower or not, and extra lives aren’t exactly plentiful; because of the Poison Mushroom’s threat, you’re better off relying on Coins for extra tries but I am honestly astounded that anyone was able to play through this game back in the day without the benefit of the Switch’s save states and rewind features. Since you can’t go back (unless you’re in a looping level), you’re often stuck with very little room to charge up a jump and the sheer amount of trial and error required to beat even the earlier stages is almost laughably frustrating. You’ll need to hop from spring to spring, barely being able to judge where you’ll land and often just bouncing pathetically or slipping to your doom, get smacked in the face by a Hammer Bro or a Bullet Bill if you run too far ahead, and the amount of times I got stuck, the timer racing down, trying to hop up to blocks just out of reach was endlessly annoying. You really need to flawless with your jumps and the way you bounce off enemies; underwater, things are generally a lot easier as you just have to swim past hazards but even then you have to be careful not to get sucked below the screen, meaning The Lost Levels offers a challenge beyond what I think even the most hardened NES players were used to back in the day.
Graphics and Sound: Thanks to the 16-bit coat of paint offered by Super Mario All-Stars, The Lost levels looks fantastic; there’s a whimsical, fairytale-like quality to everything and Worlds are bolstered by traditional Super Mario overworld, underground, underwater, and castle themes. Although Mario and Luigi can’t look up, their sprites are big and chunky so you never lose track of them and they always stand out against the backgrounds, which is where much of the game’s appeal came from for me. Worlds have been remixed not just in their difficulty and enemy and hazard placement, but their visuals as well; grass sprouts from the ground, snow covers the landscape, many Worlds now take place at night beneath a blanket of blinking stars, and you’ll see smiley faces on hills and clouds scrolling past lazily as you frantically avoid enemies and obstacles. It’s everything you’d expect from this era of Super Mario; flag poles raise as you reach your goal (Mario even throws up a peace sign to celebrate), coral weeds ripple underwater, and you always know when time is about to run out or you’ve picked up a power-up.
While the 16-bit overhaul makes it very nice to look at, many gimmicks and assets are recycled.
The variety on offer in the game’s Worlds is, however, sadly lacking; you’ll see the same handful of environments repeated again and again, just with different configurations of enemies. This means a lot of those night skies and snow, vaguely mushroom-shaped hills, and waterfalls and rapids beneath random assortments of platforms but it does mean you’ll encounter tougher and more annoying enemies like the Hammer Bros. and Bullet Bills in places you might not expect. The best environments, at least visually, are the castles; you’ll see portraits of Bowser, staircases, and big wooden doors in the backgrounds, flashes of lightning through the windows, and be assaulted by lava and other fire hazards. Another great environment is when you head up into the clouds, which is very whimsical, or the few occasions when you spot Goomba columns and looming castles in the background. The game runs nice and smoothly, meaning many of my pratfalls were down to my lack of skill, but is completely devoid of any story. However, to compensate for this, you’ll spot different enemies revealing themselves as posing as Bowser and rescue a bunch of different Toads in each castle, with their animations and skylarkings helping to numb the pain you feel each time you realise the princess is in another castle and you have another gauntlet to endure. When you do finally rescue Princess Toadstool, you’re rewarded with a nice bit of sprite art of Mario getting a kiss and then challenged to continue on to even harder Worlds, where the placement of enemies, platforms, and hazards becomes even more ridiculous!
Enemies and Bosses: Every enemy for Super Mario Bros. returns here, but in new and surprising configurations that can make even basic enemies like Goombas and Koopa Troopas more dangerous. For example, these guys might spawn in on stairs or walk on destructible blocks above you, meaning you can accidentally drop them down to your level, often boxing you in with them, and they can appear near firebars, Bullet Bills, or other hazards and tricky areas to trip you up and act as additional boosts for your jumps. You need to be especially careful with Koopa Troopas as they will right themselves when hit or their shells will come flying back at you, but this is useful for taking out bigger groups of them and other enemies. Way more enemies appear onscreen at any one time here than in Super Mario Bros., as evident in the Worlds where Cheep-Cheeps constantly leap out from water or the void, Koopa Paratroopas fly about, and Lakitu hovers overhead. Lakitu is at his dirt worst here, dropping Spineys and getting in the way of your jumps and springs and you can’t even steal his cloud for an advantage. Buzzy Beetles also cause a problem as they can’t be defeated with your regular jump, Worlds are often littered with Bullet Bills firing both high and low to constantly keep you guessing and on your toes (or to act as a makeshift bridge across gaps, if you’re feeling brave) and I rarely saw a pipe that wasn’t hiding a Pihana Plant!
All the Hammer Bros. and fake Bowsers around can’t stand up to your Fire Flower!
The most prominent enemies you’ll encounter, though, are the excess of Hammer Bros. that now populate many of the Worlds; sometimes there’s just one, sometimes two or three, but they’re always annoying as they hop up and down blocks and toss a whole mess of hammers at you. If you have a Fire Flower or a Super Star then they’re much easier to deal with but, without these, you’ll need to strategically run underneath them and bump the block they’re standing on, risk a hit to just get away, or time your runs or jumps to get past them, which can be tricky. Additionally, you’ll also face Bowser at the end of each castle; however, these are all fakes except for the final boss of Worlds 8-4 and D-4. As ever, there are two ways to defeat Bowser and his fakes: either run under him when he jumps or jump over him when you can to hit the axe and drop him to his doom or plug away with fireballs if you have a Fire Flower. Bowser’s strategies are very predictable and repetitive, but no less dangerous; you’ll see his fireballs long before you encounter him and these can be tricky to avoid when there’s a fire bar, low ceiling, or blocks restricting the arena. Eventually, Bowser will toss hammers at you like a Hammer Bro, making him even tougher without a Fire Flower, and you’ll have to battle his fakes as sub-bosses in Worlds 8-4 and D-4, which can also be quite the challenge without a Fire Flower. Bowser’s sprite is also quite large, and he tends to hop about and move back and forth, meaning you might take a hit trying to get past him, but you can easily do that to defeat him with no trouble at all in almost every encounter.
Power-Ups and Bonuses: Sadly, there’s nothing new on offer here; you can pick up Coins scattered throughout every World and hidden in “bonus” areas and grabbing 100 will grant you an extra life. Occasionally, you’ll find 1-Up Mushrooms in blocks to also get an extra try, but make sure you’re not fooled by the damaging Poison Mushroom. You can also find Super Stars to make yourself temporarily invincible, which is great for barging through waves of enemies, but your most useful power-up to have on hand is the Fire Flower. This makes the Hammer Bros. and bosses a breeze and gives you a much needed edge, but be careful not to accidentally blast a Koopa Paratroopa you need to reach a higher area. I have to say, though, that it’s a bit of a shame that there wasn’t at least one new power-up to go alongside with the Poison Mushroom and add a little more variety to the aggravating gameplay.
Additional Features: At first glance, The Lost Levels is as barebones as Super Mario Bros.; there’s no two-player option here, despite Luigi’s presence, and your main option for experiencing a different game is to switch to the green-clad plumber. However, many Worlds continue hidden paths to bonus areas containing Coins and acting as shortcuts, and there’s even a few Warp Zones you can use to skip ahead to later Worlds. Although I was sometimes able to break through the ceiling and bypass some underground levels, I never actually found any Warp Zones in my playthrough, meaning I was dumped into World 9 after rescuing Princess Toadstool and tasked with taking on an even tougher challenge. What follows are five new Worlds (World 9 and World A to D) that contain even more random, hazardous, and downright despicable enemy and obstacle placements. If you manage to best the main game, these will push you to breaking point as you need to spring-jump over bodies of water, cross small elevator platforms, and make even more insane jumps to reach the flagpole. More Hammer Bros. and fake Bowsers await you here as well to really pile on the challenge and I was surprised by how the game just kept going and going! However, I have to say again that the Switch’s rewind and save state feature is the only reason I pressed forward; the amount of times I had to rewind certain jumps and sections showed me that I wouldn’t have a chance without these features so I honestly have no idea how anyone played this or the NES original back in the day as it’s just excruciating difficult!
The Summary: I was really anxious about playing Super Mario Bros.: The Lost Levels. Of all the 2D Super Mario games, it’s the one I’ve played the least and considering how much I struggle with the gameplay and mechanics of the original Super Mario Bros., I wasn’t exactly relishing tackling a much harder challenge. I can totally understand why The Lost Levels didn’t make it out of Japan as Super Mario Bros. 2; not only is it insanely difficult compared to the first game, there’s just not enough different about it. For me, the game would work much better if it were scaled down a little and incorporated into Super Mario Bros. as the second, harder game mode for experienced players. I can imagine a lot of gamers might’ve been disappointed to find that this version of Super Mario Bros. 2 was just the first game remixed, recycled, and ramped up to be ball-breakingly hard and I’m glad that it’s become more of a curio than a staple of the series. The Lost Levels is a treat to look at; I love the 16-bit overhaul and the little touches here and there, but again I think more could’ve been done to make it a stronger alternative to other 2D Mario games, such as an additional power-up, maybe a bit more variety in the bosses and Worlds other than just re-skins, or just allowing players to swap between Mario and Luigi between Worlds. Ultimately, your enjoyment of The Lost Levels depends entirely on how good you are at Super Mario Bros. but I’d wager even competent players will struggle to beat the game’s maddening levels and hazards. Because of this, I definitely recommend playing a version of the game such as this with the quality of life safety nets they offer, but can’t really recommend it beyond that unless you feel like having your skill as a Mario gamer put to the ultimate test.
My Rating:
⭐⭐
Rating: 2 out of 5.
Could Be Better
Are you a fan of Super Mario Bros. The Lost Levels? Do you prefer it to the US version of Super Mario Bros. 2? What did you think to the difficulty and challenge on offer here? Were you disappointed by the lack of new power-ups? Did you manage to beat the game without rewind or save state features? How are you celebrating Mario’s birthday this year? Whatever your thoughts on Super Mario Bros. The Lost Levels, feel free to share them below or drop a comment on my social media and be sure to check out my other Mario content!
So, for no better reason than “Mar.10” resembling Mario’s name, March 10th is widely regarded as being “Mario Day”, a day to celebrate Nintendo’s portly plumber, an overalls-wearing mascot who literally changed the videogame industry forever and shaped the home console market of the nineties.
Released: 3 September 2020 Originally Released: 14 July 1993 Developer: Nintendo Original Developer: Nintendo R&D4 Also Available For: Arcade, Game Boy Advance, Nintendo Entertainment System (NES), Nintendo Wii, Nintendo Wii U, Satellaview, Super Nintendo Entertainment System (SNES) Classic Edition, SNES
The Background: When the videogame industry crumbled following an influx of overpriced consoles and mediocre titles, Nintendo swooped in and effectively saved the industry with the runaway success ofSuper Mario Bros. (Nintendo EAD, 1985), which marked an early victory in the subsequent “Console Wars” of the mid-nineties. However, as successful and popular as that game was, development of its sequel is one of the most bizarre stories in all of gaming; Super Mario Bros. 2 (Nintendo R&D4, 1986) released in Japan a year later and was, essentially, a remixed version of the first game that included a higher challenge of difficulty. When Nintendo of America saw this, they were wary of alienating their players, especially as videogames were only just recovering from the industry crash of 1982, so they decided it would be better to reskin whimsical Mario clone Yume Kōjō: Doki Doki Panic into an official Super Mario Bros. videogame. Although the gameplay was noticeably changed from its predecessor, Super Mario Bros. 2 was both a best-seller and highly praised; when it came time for Nintendo to release their game-changing SNES, Nintendo not only developed a 16-bit remaster of Super Mario Bros. 2 for the Super Mario All-Stars (Nintendo EAD, 1993) compilation title, they also included a 16-bit version of the original version of the game, though retitled The Lost Levels(ibid). Another remastered version of Super Mario Bros. 2 was later released on the Game Boy Advance, and all versions of the game were made available on the Nintendo Switch Online service, which is the version I am looking at here.
The Plot: While sleeping, Mario dreams of a staircase leading to Subcon, a mysterious dreamland facing invasion from the villainous frog tyrant Wart. When Mario awakens, he recruits his brother, Luigi, Toad, and Princess “Peach” Toadstool to help liberate Subcon from Wart.
Gameplay: Like its predecessor (and the vast majority of the classic Super Mario Bros. videogames), Super Mario Bros. 2 is a 2D, sidescrolling platformer but that’s about where the similarities to Super Mario Bros. end. The game is made up of seven Worlds, each with three different levels (except for World 7, which has only two); the timer is gone, as is the player’s score, but players can still jump with A or B and run by holding either X or Y (these controls can also be slightly tweaked from the game select menu). You can use the dash to jump higher and further, but combat is made far more methodical and clunky by the fact that you can no longer defeat enemies by jumping on them. If you jump on an enemy’s head, you’ll simply stand on them as they wander or fly around or take damage and you can only defeat enemies by holding X or Y to pick them up (or pull up various vegetables, bombs, and other offensive items from grass patches) and then toss them at other enemies. While this is similar to the combat mechanics of one of my favourite Mario spin-offs, Wario Land: Super Mario Land 3 (Nintendo R&D1, 1994), it’s made all the more awkward as you need to time your throws carefully to knock out enemies and enemies respawn the moment the screen scrolls along, meaning it’s usually better to just avoid enemies altogether. Additionally, you can’t climb vines or ladders while holding throwable items, though there are times when the screen loops horizontally like in the original Mario Bros. (Nintendo R&D1, 1983), which can help you avoid enemies and hazards.
Mario and friends have new abilities but rely on tossing objects at their foes.
Another new mechanic is the charged jump ability shared between the four playable characters. By holding down on the directional pad, your character will duck and begin to flash; pressing A or B will then see them jump higher than normal, which is crucial to reaching out of the way platforms. This time around, players can pick from four different characters, each with slightly different gameplay mechanics. Mario is an all-rounder, with average speed and jumping abilities, and is the most familiar and easiest to control; Luigi is taller, has a higher jump, and can also perform a “flutter jump” for extra height and distance but is a bit slower and slipperier than Mario. Toad is the smallest but also the strongest, but his jumping ability is so bad that you’ll be relying on the charged jump to reach higher platforms; Peach is also quite tall and can glide along using her dress, but she’s also the weakest and the slowest of the four. You can pick your character at the start of every stage or after losing a life, and it can help to break up the gameplay to switch them up; you also might find it better to pick Luigi or Peach for stages that require more horizontal traversal or are focused more on platforming as their extra jumping powers can be useful here. There are no flagpoles to reach here; instead, your goal is to go from the left side of the screen to the right (except for one level where you need to ride an albatross to the left), defeat a mini boss (usually a coloured variant of Birdo) and grab a Crystal Ball to open the Mask Gate and complete the level.
While magic doors and vertical areas are common, there’s not much gameplay variety.
Another major change is the incorporation of a heart-based life meter; players start with five lives and can take two hits, though these can both be extended by finding Hearts, uprooting 1-Ups, or winning the bonus stages you play after clearing each level. If you only have two hearts and take a hit, you’ll shrink to a smaller form but will grow again upon replenishing your life bar and your life bar automatically resets to two at the start of every level. Another new mechanic is the use of secret doors; you’ll often uproot a bottle of Magic Potion that, when thrown, creates a door to “Sub-space”, a brief, inverted version of your current location where you can often find 1-Ups and Coins to play the bonus games. You’ll also be charged with retrieving keys to open locked doors; once you grab a key, Phantos will relentlessly chase you until you find and unlock the door, which can be harrowing and frustrating especially when trying to avoid other enemies. Bottomless pits are again commonplace, but you’ll also have to contend with spikes, conveyer belts, destructible walls and platforms, and occasionally have to commandeer an enemy (or a temporary magic carpet) to bypass gaps or quicksand. There are no underwater levels in Super Mario Bros. 2, but you’ll often be hopping across logs to get past waterfalls, digging through dirt while avoiding Shyguys in gameplay similar to Dig Dug (Namco, 1981), stacking up Mushroom Blocks to reach higher platforms, climbing chains, vines, and ladders to progress, and even hopping into the odd rocket ship to travel even higher.
Graphics and Sound: Since this version of Super Mario Bros. 2 was remastered for the more powerful SNES, the graphical upgrade from the first game is immediate and obvious. However, you’ll still see an improvement in the sprite details, colours, and quality even if you play the original 8-bit version, where everything is far more vivid and defined compared to the basic pixel art of Super Mario Bros. However, as impressive as it is that we’re actually able to play as four relatively distinct characters, with their own strengths and weaknesses and detailed sprites, some corners have been cut; none of the characters has an idle animation and they can’t look up, for example, and the intelligence and presentation of the enemies leaves a lot to be desired (many simply wander in predictable patterns, often to their deaths, or constantly spawn in to cause you headaches). Although the game’s soundtrack is still limited to a few tracks, they’re very jaunty and memorable and, in my view, some of the more influential themes and sound effects in the early games. Another new feature here is the inclusion of text that actually explains the (admittedly weak and bizarre) story and the use of large, partially animated pixel art in the ending, which includes a somewhat questionable bestiary rather than developer credits.
Despite the colourful graphics, things disappointingly get very repetitive very quickly.
As disappointing and awkward as I found the combat to be, I was equally disappointed by the level variety on offer in Super Mario Bros. 2; like the first game, locations are limited, recycled, and generally just palette and asset swaps, which really limits the game. While there are many times when you can enter a jar or a door and travel to cave-like areas or enter large stone towers or pyramids to tackle vertical-scrolling platform challenges, you’ll mostly be going from left to right through the same plains, deserts, and waterfalls in every World. Occasionally, you’ll see something different in the background, like the starry night sky or mountaintops or pyramids, or you’ll be in an ice-themed world covered in snow and ice blocks, or venture into a pyramid filled with hieroglyphics, but it all gets very samey very quickly. Things only really get visually interesting in the boss rooms, which feature colourful LEGO-like blocks, and in Worlds 4 and 7, where you have to hop across whales and use their waterspouts to progress across the hazardous water and which takes place amongst the clouds, respectively.
Enemies and Bosses: While Super Mario Bros. 2 features an entirely new set of enemies (the Goombas are completely absent and the only hint of Koopa Troopers is when you unearth shells to toss at enemies), it also introduces some of the most recognisable enemies to the franchise. Right at the forefront are the Shyguys, diminutive, masked baddies who wander to and fro, constantly spawn from pots, or hop up and down and spit projectiles at you. This game also marks the first appearance of the Bob-omb (an anthropomorphic bomb that wanders about until it explodes are can be tossed to defeat enemies or break open certain walls) and Pokey, a wriggly caterpillar-type enemy that you can use to ride over quicksand. Other enemies include the bird-like Tweeters, fireball-spitting Pansers, rideable enemies such as Pidgit and Ostro, Cobrats (snakes the ambush you from jars and spit at you) and you’ll even come across Shyguys rolling around on cannons! The Phantos are easily the most annoying enemy; these mask-like bastards come to life when you grab a key and chase you until you drop the key or unlock the door; they cannot be picked up and can only be defeated if you grab a Starman (and even then another one spawns in!)
There’s a startling lack of variety and challenge in the game’s repetitive bosses.
Although you’ll face a mini boss at the end of every level and each World is guarded by an actual boss, Super Mario Bros. 2 equally fails to impress in both departments. The most common recurring mini boss is Birdo, with a different-coloured variant fought in every first and second level and each one spitting more projectiles at a faster rate or being in a slightly more awkward position, such as on the high ground, on a conveyer belt, or in an enclosed area. Birdos will spit out eggs which you must jump on and toss back at them; occasionally, you’ll have to use Mushroom Blocks instead or even ride their eggs to clear large gaps, but you’ll always have to watch out for their fireballs and can defeat them with three hits. Fighting Birdo is basically preparation for each of the game’s bosses, with the first, Mouser, setting the bar low for the rest of the game. Mouser pops up three times and each time you need to intercept or pick up his bombs and toss them back at him to damage him, which can be tricky as the fuses are quite short and he tends to move about on his platform a lot. The hydra-like Tryclyde also appears twice; both times it spits a bunch of fireballs from its heads and you need to toss Mushroom Blocks at it to be victorious. Thankfully, things get a little more interesting (and challenging) when battling Fryguy, Clawgrip, and the Mask Gate; Fryguy will float about a bit harmlessly enough but splits into four smaller Fry Guys upon defeat, the crab-like Clawgrip throws rocks at you like he’s Donkey Kong in an interesting spin on the Mouser fight, and the sentient Mask Gate caught me completely off-guard as I wasn’t expecting the exit to come alive and start attacking me! Once you’ve bested all of these using the same tactic of grabbing items and throwing them at them until they keel over, you’ll battle Wart to decide the fate of Subcon. Unlike the other bosses, Wart is invulnerable except for when his mouth is open and he’s spitting a spray of bubbles into the arena; this is your brief opening to grab a vegetable from the Dream Machine in the background and toss one at him to score a hit. Successfully dodge his one attack and hit him six times and Wart will be defeated, liberating the land and waking Mario from his slumber.
Power-Ups and Bonuses: Although players are far less reliant on power-ups to stay alive thanks to the new life bar system, some familiar power-ups do exist in Super Mario Bros. 2; you can uproot mushrooms to helpfully increase your maximum heart count, grab a 1-Up mushroom for an extra life, and snag Coins to play the bonus game and win a few more extra tries. As you play, you’ll also spot cherries dotted all over the place; while these appear to have no purpose, if you grab five in a row it’ll cause a Starman to spawn, which will grant you a brief period of invincibility. Similarly, when you defeat eight enemies in a row, a Heart will float up from the bottom of the screen so you can replenish your health. The POW Block also returns and will instantly defeat all onscreen enemies when thrown, and (after plucking four vegetables in a row) you’ll also unearth a stopwatch that will briefly freeze all enemies.
Additional Features: There really isn’t much of anything extra to do or see in Super Mario Bros. 2; there’s no two player mode (though you can still take it in turns to tackle each level, I guess), no hard mode to unlock, and the only real replay value is in tackling different levels with different characters and exploring any areas of Sub-space you might’ve missed. When you finish the game, each character is given a “contributor” tally that I assume displays how often you picked that character, but it’s ultimately meaningless and there isn’t even a high score table for you to work towards. You can save and continue (or save and quit) from the pause menu at any time, but this is somewhat negated by the Switch’s save state ability and life-saving rewind function, which I am not ashamed to say I exploited at every opportunity to cheese past the game’s more frustrating sections or revert back to before I entered a dead end or down the wrong path.
The Summary: I was really on the fence about playing through Super Mario Bros. 2; not only do I notoriously struggle with Mario’s early 2D adventures, but I also wasn’t looking forward to the awkward gameplay mechanics introduced in this game. I really don’t like that enemies suddenly can’t be defeated by jumping on them, which severely limits the game’s action-orientated gameplay and forces you to take things much slower and more cautiously as you pick up enemies or unearth vegetables to toss at foes, only to miss your target and be left either taking a hit or simply rolling your eyes and bypassing the enemy completely. While the visuals are colourful and fun, the lack of variety in the locations and bosses was really disappointing; I got very tired of seeing the same plains and backgrounds repeated over and over and battling Birdo more times than I could count. Similarly, while it seems fun and adds a little spice to have four slightly different characters available to you, I really only noticed a difference in gameplay when playing as slippery, unwieldy Luigi or Peach and I definitely felt the absence of some decent power-ups, like the Fire Flower. Similar to the dramatic left-turn Nintendo took with Zelda II: The Adventure of Link(Nintendo R&D4, 1987), Super Mario Bros. 2 is just too different from its predecessor; the use of a traditional life bar system and hampering Mario’s jumping abilities just makes this another bog-standard platformer and easily one of the most bizarre and forgettable pit stops in the portly plumber’s career, no matter how prominent some of its enemies and characterisations might’ve been for the franchise.
My Rating:
⭐⭐
Rating: 2 out of 5.
Could Be Better
Did you enjoy Super Mario Bros. 2? How do you feel it compares other Mario titles, specifically the first Super Mario Bros.? Which of the playable characters was your favourite and why? Do you prefer this version over the Japanese version of Super Mario Bros. 2? Were you also disappointed by the lack of variety in the environments and boss battles? What did you think to Subcon and would you like to see Wart return to the franchise? How are you celebrating Mario’s birthday this year? Whatever your thoughts on Super Mario Bros. 2, feel free to share them below or drop a comment on my social media and be sure to check out my other Mario content!
On 21 February 1986, The Legend of Zelda(Nintendo EAD, 1986) was first released in Japan. The creation of legendary game designer Shigeru Miyamoto and Takashi Tezuka, The Legend of Zelda launched one of Nintendo’s most popular franchises. This year, I’ve been dedicating every Wednesday to Nintendo’s most famous silent protagonist, Link and his vast and enduring fantasy world of sword and sorcery.
Released: 22 September 2013 Developer: Nintendo EAD
The Background: Selling well over 6.5 million copies and widelyregarded as one of the greatest adventure games of all time, Shigeru Miyamoto’s original Legend of Zelda was a big success for Nintendo. Although its sequel was a more divisive title, it also sold well but both paled in comparison to the, game-changing, widelyacclaimedbest-seller that was The Legend of Zelda: A Link to the Past(Nintendo EAD, 1991). Not content with setting the template for the series going forward, A Link to the Past was also followed by a comic book and manga adaptation and an enhanced Game Boy Advance port. In 2009, development began on a new Zelda game for the Nintendo DS, one that emphasised communication. Miyamoto nixed this concept, however, and suggested a gameplay mechanic that would allow Link to merge onto walls as a 2D image; although this was met with praise, development was shelved to focus on launch games for the Wii U. The project was revived after the success of The Legend of Zelda: Ocarina of Time 3D(Grezzo, 2011) with an all-new team in place and reconfigured into a direct follow-up to A Link to the Past release exclusively on Nintendo’s 3DS system. The game’s top-down perspective raised a number of challenges for the team, resulting in a more slanted, 2.5D perspective to allow for greater field of view. Since the 2D mechanic had already changed their approach to puzzles and dungeons, the team also sought to give players more freedom by allowing them to rent items to proceed as they wished. A Link Between Worlds released to widespreadacclaim and became the second highest scoring 3DS game of 2013; reviews praised the innovative gameplay, the rental system and the level of challenge it offered, as well as the visuals and music.
The Plot: Apprentice blacksmith Link quests to rescue Princess Zelda from the clutches of the evil sorcerer Yuga, who seeks to resurrect the demon king Ganon using the power of the Seven Sages. When Yuga escapes through a rift into the parallel world of Lorule, Link follows, aided by a magic bracelet that allows him to merge into walls as a 2D painting.
Gameplay: The Legend of Zelda: A Link Between Worlds is a top-down, 2.5D action/adventure game that’s stylised in classic Legend of Zelda fashion; more than anything, the game is essentially an updated version of A Link to the Past, taking place in the same world, featuring many of the same characters and locations, and updating the gameplay mechanics to utilise the optional 3D effects of the Nintendo 3DS and the touch screen. Series protagonist Link is now able to travel in all directions smoothly and effortlessly with the 3DS control stick; he still can’t jump but he’s able to pick up and throw pots, small (and, later, larger) rocks, and open chests and doors with A and attack enemies with his sword using B. Holding down B will see Link charge up and release his patented Spin Attack and, when he acquires the Master Sword later on, he’ll send out an energy waves when at full health. When Link gets a shield, it’s assigned to the Left trigger; holding L will defend Link from most attacks and, later, defend against certain magical and energy-based attacks. Both of these items are automatically assigned to their respective buttons and cannot be swapped out, but Link will naturally acquire other items throughout the game which can be assigned to the Y button via the touch screen.
Link must now rent his equipment and their use is tied to an energy meter, which has pros and cons.
Items are incorporated very differently in A Link Between Worlds than in other Zelda games. While Link will still find the odd weapon or upgrade in a big chest in the game’s many dungeons, the majority of his weapons are now rented from the mysterious Ravio, a tradesman located in Lorule. Link has an energy meter that depletes as he uses each item but which will replenish over time, effectively giving him infinite ammo; energy potions found by slashing grass, smashing pots, or defeating enemies will also fill this gauge and you can even extend the length of it later in the game. When you rent an item, it’s yours to keep until your hearts are depleted; then it returns to Ravio’s shop and you need to rent it again, however you can later permanently purchase each item at the cost of a few thousand Rupees and also upgrade their efficiency and range by finding lost Maiamais throughout the two worlds. This system offers a range of freedom rarely seen in the Zelda series and effectively means you can tackle the game’s dungeons in any order you wish, however you will need to explore some dungeons first to find a key item needed to access or complete others. Personally, I’m not a huge fan of this system; I constantly walk around slashing at everything to fill up my Rupees, meaning I was easily able to rent every item and, later, purchase them all to load Link up with all of his weapons early on and a lot of the fun of exploring a dungeon is now lost as defeating a mini boss generally only yields a warp point or opens the way to the boss key rather than awarding an item.
Link can now become a 2D painting to reach new areas, avoid detection, and outsmart certain bosses.
A Link Between Worlds’ other big mechanic is Link’s ability to merge with walls and become a 2D painting for as long as his energy gauge lasts. This is often used in clever ways to add new dimensions to the dungeons, allowing you to race around the perimeter of a room or tower to reach new areas, switches, chests, and levels to progress. When in his 2D form, Link cannot attack or do anything except run, but that’s okay as you won’t have to worry about enemies until the finale. While Link cannot bypass cracks or blockades in this form, he can attach to other surfaces; so you’ll often merge with a moving block and then merge into another to reach a higher or further platform and it can be pretty interesting to play around with the mechanic. As the game progresses, this system is essential as it’s the only way to travel to and from Hyrule and Lorule; ominous dark slits appear all over the map and allow you to travel to each world and, since Lorule is in a fragmented state, you’ll need to go to certain areas of Hyrule, travel between a rift, and then work your way to your destination in Lorule. Despite this, however, I don’t think the mechanic lives up to its full potential; it’s essentially just a quirky means of solving puzzles and navigating dungeons and to travel between worlds and I do feel like the developers missed an opportunity to expand upon it with 2D sidescrolling sections or mini games. There are hidden challenge rooms you can find that often make innovative use of the mechanic, but it’s rare that you’ll need it in a boss battle and a lot of the uses it has could’ve easily been supplanted by your items.
Link’s items and new abilities will allow him to reach new areas and solve puzzles.
Thanks to the 3DS’ dual screens, the bottom screen makes item management and map navigation easier than ever. You can switch between the Hyrule and Lorule maps at the press of the screen, view your Rupee count and see how many Maiamais are hidden in each area, zoom in, and even place pins over the map (though you can’t label them so this can get a little messy). You can freely shuffle about your items and even make use of a quick-item function (though I never had a need for this); later, you receive a bell that lets you fast travel across the map courtesy of Irene the witch and her flying broomstick. This lets you fast travel to any of the weather vanes you’ve activated across the map; these vanes also act as your primary save point, which is a bit of a pain as I much prefer being able to save at any time and the vanes also have the gumption to encourage you to take a break if you’ve been playing for a while. If you’ve played A Link to the Past, the game world will be immediately familiar to you; even many of the dungeons are the same and the game has a very similar structure, with Link being tasked to find three pendants before venturing to a dark version of Hyrule to rescue the seven Sages. Link’s ability to navigate the world depends on what items you have; you won’t be able to blow up rocks without bombs, for example, or cross the desert without the sand rod or swim in water without the flippers and these items are also essential for uncovering secret caves, shortcuts, fairy fountains, and other areas. One new aspect you’ll come across a couple of times is the big bomb flower; you’ll need to press A to have this large bomb follow you and safely guide it to large cracked rocks to access new areas, but you need to be careful as one hit or knock and it’ll explode prematurely.
Puzzles and hazards feature in dungeons that’re largely vertically alignedto use the 3D feature.
For the most part, puzzles and dungeons will be immediately familiar to any Zelda player, especially anyone who’s played A Link to the Past. You’ll be lighting torches with your lamp and fire rod, or extinguishing them, to open doors or spawn chests, acquiring small keys to unlock doors, climbing ladders and stairs, riding a variety of moving, spinning, and temporary platforms, and activating a number of switches and pressure pads. Sometimes this means dragging a statue onto them, other times you need to trick a Wallmaster into hitting them, and occasionally you need to do both while standing on a third. Blue and red switches will raise and lower their respective walls, partially invisible platforms and mazes dog your progress, requiring more innovative use of flames, and you’ll be hammering down pegs or springs to reach new areas, crossing narrow platforms, and pulling or hookshotting levers to open doors. A couple of times, you’ll need to find eyeball-like orbs to toss into statues to progress, or create temporary platforms using the ice rod, or melt away blocks of ice while skidding on slippery floors. You’ll be diving into water, crossing lava pits on pop-up columns that you must also guide boulders over, riding wind currents, dropping caged bridges to create safe passage, and making use of warp tiles to fast travel about. Many dungeons require more vertical navigation to utilise the 3D function, meaning you need to find new ways to travel upwards, push statues or fall down to lower levels to reach items and doors. You’ll also need to watch for flaming hazards and spiked logs, use your bombs to bring in some light to solve puzzles, use your hookshot to pull rafts across water and lava, navigate foggy mazes, rescue a thief girl and bring her safely to the dungeon’s exit, and even travel outside of some dungeons to reach new areas. Thankfully, you can make use of each dungeon’s compass to help you find your way and you automatically have a map available when you enter, though the only way to save is to exit to the outside, which respawns any enemies you’ve defeated.
Graphics and Sound: Since I am a big fan of the classic, top-down perspective, I cannot fault A Link Between Worlds’s presentation. This was the best that a 2.5D Zelda had looked at the time and I love how the game has a kind of plasticine/figurine look that brings the characters to life in a way that recalls both the toon style and the classic Link to the Past aesthetic. Link is a squat, chubby little swordsman who grunts, screams, and pants as he attacks, gets hurt, or is low on health. He trots around nicely, all of his attacks and weapons are crisp and smooth, and he exudes a lot of personality and determination in his stances, victory poses, and facial expressions during the game’s few more dynamic cutscenes. For the most part, the game uses traditional text boxes and in-game graphics as non-playable characters (NPCs) deliver exposition or threats to Link but, sometimes, the game switches to a more cinematic presentation to showcase Yuga’s power or introduce new elements, like the 2D mechanic and Lorule.
Hyrule is largely the same as before but brought to vivid life by the colourful, 2.5D aesthetic.
As already stated, the game world is an almost exact recreation of the Hyrule seen in A Link to the Past; all the areas from that game are back, brought to life in eye-catching 2.5D and bolstered by the 3D effect if you can stomach it. There are numerous little new touches here, too, such as birds that fly away as you come close, Majora’s Mask appearing as an Easter Egg, and an array of paintings inside the now peaceful Hyrule Castle. Locations such as the Eastern Palace, Tower of Hera, Desert Palace, and Skull Woods all return, as do the Lost Woods (where you must again venture to claim the Master Sword), Kakariko Village (complete with Cuccos and blacksmith), the haunted graveyard, Zora’s Domain, Lake Hylia, and Death Mountain (complete with falling rocks from the erupting volcano). This naturally means that you’ll venture into many of the same dungeons, though the means by which you enter and their layouts and rewards are somewhat different, and that the game includes many remixed themes from A Link to the Past. One thing I really enjoyed about the soundtrack was how it slowly builds up in the early going; the full, triumphant Zelda theme doesn’t kick in until you acquire the Master Sword, allowing for a clear and recognisable feeling of accomplishment. This is matched by the progressive difficulty of the game; to start with, the dungeons are quite short, and the enemies only take a few swipes of even your normal sword to kill but, once you travel to Lorule (via a quick little cutscene that only slightly outstays its welcome), the dungeons become much more complex and the enemies, especially those on the overworld, become much tougher.
While similar to the Dark World, Lorule is its own beast, with remixed dungeons, enemies, and bosses.
Although functionally similar, both in concept and visual execution, to A Link to the Past’s Dark World, Lorule is actually a completely different, desolate parallel dimension. Despite this, many of its areas are analogous to the Dark World and its dungeons, including a ransacked version of Kakariko Village, the Thieves’ Town, a skeleton-infested perversion of the Lost Woods, a poisonous and murky swamp, and the lava-spewing horrors of Turtle Rock. Perhaps my favourite aspect of Lorule was that Death Mountain is now a frozen wasteland and home to the Ice Ruins which, while essentially a remixed version of A Link to the Past’s Ice Palace, was enough of an alteration to hammer home how different the two worlds are. This is further reinforced by the different, far more ominous overworld theme, the fragmented nature of Lorule (some areas are inaccessible without finding a rift part in Hyrule), and the tumultuous dirge hanging over the central Lorule Castle. It’s a far cry from Ganon’s Tower and the Pyramid of Power, but Lorule Castle is seeped in a dark energy that can only be breached by the Sages’ power and the Triforce of Courage and is a perverted mirror of Hyrule Castle, awash in thunder and lighting and featuring almost every gimmick seen in previous dungeons, alongside some remixed boss battles. Furthermore, Lorule is home to counterparts of Link, Zelda, and even Ganon in the form of Princess Hila, Ravio (spoilers!), and Yuga as well as a gaggle of thieves and distraught citizens just trying to survive as their world crumbles around them.
Enemies and Bosses: Both Hyrule and Lorule are populated by swarms of enemies who will be immediately familiar to A Link to the Past players. Blobs (including regular green one and electrifying yellow ones), bees, crows, Chasupas, Tektites, Deadrocks, Octoroks, Popos, rats, Poes, sand crabs, Ropes, and Like-Likes are commonplace across Hyrule but, once Yuga’s plan is set in motion, sword, spear, and archer soldiers start patrolling the overworld as well. Variants of these can be found in Lorule, such as the Dactos, Hyus, Ropas, and snap dragons but Lorule’s enemies are far more dangerous than Hyrule’s. Guys like the bomb- (or snowball) tossing Hinox, pig-like Taros, flame-spewing Zarak, shield-carrying Moblins, and far tougher Lorule soldiers can not only take a lot of punishment but also dish it out, too, immediately turning your carefree adventure into a fight for survival. And this isn’t even factoring in the formidable Lynels, teleporting elemental Wizzrobes, mummy-like Gibdos and the Freezors (who are extremely susceptible to fire…), jellyfish-like Biris, cyclopean Eyegores, mimicking Goriyas, and terrifying Wallmasters. Some enemies, like the mace-wielding soldiers, nimble Stalfos, sand worm-like Devalants, sliding Pengators, and flaming Gimos act as mini bosses in the game’s dungeons. Generally, this means they attack as a group or alongside other hazards, like flying tiles, moving platforms, or flaming obstacles, though the two flaming Heedles have lava pools in their path and require the tornado rod to defeat and you’ll need to time your attack against the Gigabari and it spawn to avoid being electrocuted.
Although easy enough in their first encounters, the game’s returning bosses are more formidable later.
The first boss you’ll face is the game’s primary antagonist, Yuga, who you first battle in the Eastern Palace. Yuga fires projectiles from across a pit hazard and hides in the wall as a painting when you get close, so you need to stun him with arrows to land a hit. As the battle progresses, Yuga gets faster and more aggressive and races around the room as a painting but you can simply wait for him to pop out to continue your assault. The second boss I fought was Moldorm, one of many returning bosses from A Link to the Past. This large, spherical worm-like thing slivers about on a small caged platform trying to knock you over the edge or down a hole into the bladed hazards below. Simply avoid this and slash at its tail to defeat it but beware as it becomes faster and more erratic as the fight progresses. I finished up Link’s initial quest by facing Margomill, a strange column with a fearsome central eye that awaits in the House of Gales; Margomill spins around the room trying to push you down the bottomless pit that surrounds the platform you battle it on. You’ll need to use the tornado rod to avoid its attack and reach its eye; however, every time you deal damage, it grows a new part to its body to make the eye harder to reach. Both Yuga and Moldrom return as mini bosses in Lorule and Hyrule Castle, respectively; while Moldorm isn’t too difficult, despite the expanding and contracting walls making it a close-quarters fight, Yuga is far more formidable. In this bout, you must strike the correct duplicate of Yuga or be forced to fend off increasing waves of enemies while avoiding his various magical projectiles. The real Yuga is identified through his glowing staff, but this battle can get pretty tough if you don’t keep your eyes open; at the same time, I found it just as easy to camp out in a corner and slash away, dodging his projectiles until I hit the right Yuga!
Bosses will be more or less challenging depending on the order youchallenge them and the items you have.
Once you’re in Lorule, you can effectively tackle its dungeons and bosses in any order provided you’re renting the right equipment. The first of the next set of seven bosses I fought was Stalblind, a monstrous spirit armed with a large sword and shield who you battle on a small platform surrounded by a bottomless pit. Stalblind makes innovative use of the 2D mechanic in that you need to merge onto his shield to stun him so you can attack, though you’ll need to avoid his dark magic. Stalblind’s attacks become more aggressive, but also more predictable, as the fight progresses; he eventually ditches his shield, busts out his own version of the Spin Attack, and even sends his head flying around to spit fire at you, though he’s left vulnerable when his sword gets stuck in the ground. As I next took on the Desert Palace next, I fought Zaganaga; this was quite a complex battle as you need to use the sand rod to create temporary platforms and reach the smaller columns to attack Zaganaga, who constantly moves around the arena and spits projectiles. Eventually, it switches to a far more devastating blast of sand and proved to be my first real challenge of the game, meaning my next boss, the returning Arrghus, was a cake walk in comparison. As long as you have the hookshot, Arrghus is barely a threat; simply extract the Arrgi surround it and destroy them, then avoid being squashed as it bounces around and the jets of steaming hot water and it’ll go down in no time. I fought Grinexx next, which is a massive rock turtle who blasts lava plumes up from a lava pit below. As it passes by the gaps in your platform, you must drop ice on it with the ice rod to damage it and eventually bring it to the surface. Then you need to attack its snapping head while blocking or avoiding its spinning shell attack and explosive shockwave for a fun battle that’s not too challenging as long as you’re quick on your feet and with the ice rod.
Repackaged bosses offer new challenges and some even require the use of Link’s new 2D abilities.
After that, I ventured to the Dark Palace and fought the Gemesaur King, which is functionally the same as A Link to the Past’s Helmasaur King; in addition to swinging its massive tail, the Gemasaur King spits crystals in a spread and is protected by its gem-encrusted helmet, which you must shatter with bombs. Once this is destroyed, Rupees scatter about, the Gemesaur King’s projectiles increase, and it snuffs out the torches to try and trample you in the dark. Relight the torches to expose it and unload with your sword to finally put it down for good but watch for its bite and surprising speed! The Knucklemaster awaits in the ominous Skull Woods; a giant Wallmaster encased in a gauntlet and sporting another glaring eye, this creature mainly attacks by flying at you as a clenched fist. You need to merge with the walls or use the tornado rod to avoid this attack and stun it so you can hit it, but it’ll get pissed off and try and squash you, which also causes it to destroy large chunks of the floor and thereby restrict your movements, but this was still another fun and pretty simple boss battle. The last of the regular bosses I fought was Dharkstare, which is basically the same boss as A Link to the Past’s Kholdstare; you need to melt its protective ice barrier with the fire rod while avoiding it as it hops about. You can then attack the unshielded monster, but it’ll speed up and become more aggressive as it takes damage; Dharkstare also encases you in use using a triangle of freezing energy and can be quite a frenetic boss, but it’s not too challenging to tackle, even when it doubles its freezing projectiles, despite the slippery ground and bottomless pit.
Yuga channels the power and ferocity of Ganon for an epic, multi-stage final battle!
Once you’ve rescued the seven Sages, you’ll venture into Lorule Castle. Here, you’ll battle Moldorm, Gigabari, and Arrghus again in slightly different and more taxing encounters, alongside battling a Lorule soldier wielding a flaming mace; defeating all four will break the seal on the door and allow you to reach the top floor of the castle and its throne room, where Hilda (who had previously offered assistance as a disembodied voice) turns against you to acquire the Triforce and save her land. Her agent in this endeavour is an empowered version of Yuga, who fuses with Ganon’s Dark Beast form and gains both his dark power and the power of the Triforce of Courage for a two-stage final battle that’s fundamentally very similar to the final showdown against Ganon from A Link to the Past. Yuga Ganon wields a large trident that blocks your attacks and he also teleports around the throne room; you need to avoid his swipes and strike from behind with your sword, or from a distance with your bow. As he takes damage, Yuga Ganon will add thrusts and a charging attack to his arsenal, as well as rain projectiles down on you and toss his trident in a spinning arc. Once you’ve defeated his first form, he’ll absorb Hilda and the Triforce of Wisdom; now, he floats above the arena and launches projectiles that you must deflect back at him in a game of dead man’s volley. Succeed and he’ll be forced into a 2D painting; since he’s invulnerable to conventional damage, Zelda will gift you the Bow of Light, which you can only use when you’re in 2D and in this battle. You need to merge with the wall, distract him with a Light Arrow, then unmerge and merge behind him to force him out of the wall so you can attack with your sword. After that, Yuga Ganon adds a charge to his 2D attack, forcing you out of the wall faster, and finally shrugs your arrow off entirely, forcing you to fire it in the opposite direction for the final blow, with him summoning purple blasts of energy that turn into unblockable and unkillable bats between hits
Power-Ups and Bonuses: As ever, Link will pick up Rupees and hearts to purchase new items and replenish his health, respectively. Fairy fountains will also refill his health, or yield small fairies that you can catch in a net and keep in a bottle to refill some of your hearts when you’re defeated. Link can also store various potions in his bottles, which he can have brewed up for him by gifting the various monster parts he finds to an old witch. Link’s maximum health can be increased by finding four Pieces of Heart or defeating bosses, which yields a Heart Container; as mentioned, he can also increase his energy gauge by finding the Stamina Scroll but he can find a Blue and Red Mail that will not only change his outfit but also dramatically increase his resistance to damage. Finally, the Bee Badge has wild bees help rather than hinder you, the Zora’s Flippers allow you to swim and dive in water, and the Pegasus Boots let you charge around with the Right trigger to knock down keys or shake Maiamais, Rupees, or apples out of trees. Many of Link’s most recognisable weapons return in A Link Between Worlds; the bombs, boomerang, hookshot, and bow are all present and accounted for and function exactly as you’d expect. I never really found much use for the boomerang, especially compared to the fire and ice rod, which are essential for a couple of dungeons. The sand rod is only really useful in and around the Desert Palace, same with the tornado rod, which I didn’t use much past the House of Gales. You can also get a pair of Hint Glasses, which will expose a helpful ghost who will offer assistance in exchange for a Play Coins (acquired automatically if you walk around with the 3DS in your pocket). You can also purchase scoot fruit and foul fruit, which allow you to quickly exit dungeons and defeat all onscreen enemies, respectively, and upgrade the efficiency, range, and effectiveness of each of Link’s weapons by finding all one-hundred lost Maiamai and bringing them to their mother.
Additional Features: These lost Maiamai are all over Hyrule and Lorule; you’ll hear them squeak when they’re close by and your map will show you how many are in a given arena, and you’ll need to knock them out of trees, uncover rocks, cut down grass, and push them off walls using your 2D ability. Finding all one-hundred will upgrade Link’s Spin Attack to the more powerful Great Spin Attack in addition to powering up each of his weapons. There are also five bottles to be found, with some being gifted after you complete tasks, though there’s no trading sequence to complete here. There are a couple of challenges available to you, from navigating obstacle courses to races, Rupee-collecting games, and Octoball Derby, all of which yield Rupees or a Piece of Heart. There are twenty-eight Pieces of Heart to be found, either in hidden caves, these mini games, or accessed using your different items and collecting them all with vastly increase your chances at the Treacherous Tower, where the Tower of Hera once stood. In here, you’ll face off against waves of enemies in three different difficulty modes, with each one costing more to take on, culminating in a boss battle and earning you higher Rupee rewards and eventually an upgraded net. You can also acquire a pouch that lets you use two items instead of just one, find Master Ore that is used to upgrade the Master Sword, and completing the game will unlock the more challenging “Hero Mode” for you to play through.
The Summary: This was only my second playthrough of The Legend of Zelda: A Link Between Worlds, and I first cleared it before I beat its predecessor, A Link to the Past, and yet I really enjoyed this fun little handheld throwback to a new-bygone era of Zelda gaming. Don’t get me wrong, I enjoy the large, expansive open world nature of modern Zelda games but the top-down, 2D/2.5D perspective is very nostalgic and timeless for me and always my preference. The game looks and sounds fantastic; at the time, it really was the most visually impressive revamp of the classic Zelda style and it’s great to see this world come to life with this plasticine aesthetic. I enjoyed how the game was both familiar and yet different enough to be its own beast; it’s extremely similar to A Link to the Past and, in many ways, is a modern remake of that game but has enough new mechanics to be unique. I may not have loved the rental system, energy gauge, or the 2D mechanics, but they added new levels of freedom to the tried-and-true Zelda gameplay; I just think they could’ve done a little more with them rather than make them simple gimmicks. Although I didn’t play with the 3D effects on, the game is nicely geared towards it with a lot of vertical sections; I enjoyed the remixed tunes and locations, and the returning or altered bosses, even though the game was a little too easy at times thanks to my habit of farming Rupees and your ability to hold 9999 right off the bat (wallet restrictions might’ve helped with this). Ultimately, this was a really enjoyable, classic Zelda experience with a sprinkling of fun new mechanics and colourful characters that worked perfectly as a follow-up to A Link to the Past while still expanding upon that game’s lore in interesting ways.
My Rating:
⭐⭐⭐⭐
Rating: 4 out of 5.
Great Stuff
Have you ever played The Legend of Zelda: A Link Between Worlds? If so, how do you think it compares to A Link to the Past and did it work as a sequel for you? What did you think to Lorule and do you think there was enough to distinguish it from the Dark World? Did you enjoy the rental system and Link’s ability to turn into a 2D painting? Which of the dungeons, bosses, and weapons was your favourite? What did you think to the visual presentation of the game and the incorporation of the 3D mechanic? Did you ever find all of the lost Maiamai and fully upgrade Link’s arsenal? How are you celebrating the franchise this month? Whatever your thoughts on A Link Between Worlds, leave a comment below or share them on my social media.
Upon the release of Pokémon: Blue Version and Pokémon: Red Version(Game Freak, 1996), a new craze swept through playgrounds across the world. An entire generation grew up either playing Pokémon, watching the anime, playing the trading card game, and watching the feature-lengthmovies as clever marketing and a co-ordinated release and multimedia strategy saw it become not just a successful videogame franchise but a massively lucrative and popular multimedia powerhouse. Accordingly, February 27th is now internationally recognised as “National Pokémon Day”, which I expanded to an entire month of Pokémon this February.
Released: 16 November 2018 Developer: Game Freak
The Background: Pokémon was an instant cultural phenomenon back when the games first dropped, taking playgrounds by storm and dominating almost every aspect of my generation through a slew of merchandise. I remember being so adamant about purchasing Pokémon: Blue Version that I bought it brand new rather than getting a cheaper copy of Pokémon: Red Version and my friends and I routinely played at school or on the Nintendo 64 thanks to Pokémon Stadium (Nintendo EAD/HAL Laboratory, 1999). Although the developers originally intendedmy favourite games/generation of Pokémon, Pokémon: Gold Version and Pokémon: Silver Version(Game Freak, 1999) to be the final entries in the series, Pokémon videogames continued to be developed, with new features, improved graphics and mechanics, and a whole bunch of new Pokémon being introduced in each generation. Yet, in all that time, we never really got a proper version of Pokémon on home consoles; they were always spin-offs, battling games, or neutered versions of the main role-playing experience, which remained exclusive to Nintendo’s handhelds. Nintendo’s development of their Switch console changed that, however; thanks to the Switch’s unique ability to be both a handheld and a home console, players were finally able to experience a main series Pokémon game in glorious high definition with the release of Pokémon: Let’s Go, Pikachu! and Pokémon: Let’s Go, Eevee! (ibid, 2018) Though remakes of the first Pokémon games, the Let’s Go games (like pretty much all Pokémon games) proved both successful and popular.
The Plot: The time has come for you and your childhood rival to receive your very own Pokémon from Professor Oak and challenge the eight Kanto Gym Leaders in a bid to become a Pokémon Master. However, your progress is fraught with danger as the nefarious Team Rocket seek to steal Pokémon for criminal acts, in addition to genetically creating the most powerful Pokémon of all!
Gameplay: Essentially, Pokémon: Let’s Go, Eevee! is exactly the same Pokémon game we’ve been playing for decades now, though this is only to be expected as it’s another remake of the original games. Like otherPokémon titles of this calibre on the Nintendo Switch, the game is played from a top-down, slightly isometric perspective that evokes the style of the Game Boy and Nintendo 3DS Pokémon titles; while the gameplay retains a simple control system (you control your avatar with the left stick, make selections with A, back out of decisions with B, and bring up the in-game menu with X), you can choose to play with the Joy-Cons attached (my preferred style), separated, or even use the Poké Ball Plus accessory when catching Pokémon. Interestingly, Pokémon: Let’s Go, Eevee! is somewhat light on the handholding; Professor Oak will run you through the basics of Pokémon at the start of the game, as always, and non-playable characters (NPCs) offer hints, tips, and additional information regarding battling, catching, trading, and raising Pokémon, but gameplay isn’t interrupted every few minutes for a tutorial or bout of exposition, which actually makes the game feel a little too barebones at times as it seems content to simply offer a graphical and mechanical overhaul of the original games. Still, the modern conveniences are well welcome; items are divided into “Pockets” in your bag, allowing you to quickly find, use, and arrange healing items, evolution stones, Technical Machines (TMs), and candies to restore, power-up, or evolve your Pokémon. Unfortunately, you can’t assign an item to a quick button like in later Pokémon games but, to be fair, you really don’t have much need for this since items like the fishing rods and bicycle are missing this time around. Your inventory space now seems to be unlimited, which is even better, so you never have to worry about trekking back to a PC to dump items to pick up others.
I wasn’t a fan of the game’s new motion-sensor catching mechanics.
As ever, wild Pokémon will be encountered all over Kanto, hiding in grass, bopping in the sea, and emerging from the ground when in caves. This time around, the Pokémon all clearly appear onscreen; while they can spawn out of nowhere and swarm all around some locations, you can see where they are and even get an idea of how big or small or rare they are thanks to on-screen colourings and indicators, meaning it’s easier than ever to spot a shiny Pokémon or avoid an encounter altogether since random battles are effectively a thing of the past here. New to this game is the “Combat Point” (CP) mechanic, which allows you to see, at a glance, how good a Pokémon’s stats are, and Pokémon naturally still have “natures” that determine their statistical growth. Once you encounter with a wild Pokémon, you’ll see how different Pokémon: Let’s Go, Eevee! is from its predecessors and contemporaries; the game switches to a first-person perspective and essentially borrows the gameplay mechanics and functionality of Pokémon Go (Niantic, 2016). You can select different Poké Balls, with each one having a different capture rate, one of numerous berries which can calm the Pokémon down, make them easier to catch, or increase your chances of acquiring items and bonuses from a successful capture, get some help, or flee from the battle. You won’t be inflicting damage on the wild Pokémon; instead, you must ready your Poké Ball, wait for the Pokémon to settle down, and toss the Poké Ball between some coloured rings to try and snag it. The level, size, and rarity of the Pokémon generally determine show difficult it is to catch, but even low-level Pokémon can burst out of Poké Balls if your throw is bad or just to be annoying, and you have to be quick and accurate as wild Pokémon can flee from battle. Some certain Pokémon, like the Legendary Birds and the two Snorlax, will need to be battled before you can catch them, which gives you about five minutes to whittle their Hit Points (HP) down before switching to this new capture system. Since I’ve never played Pokémon Go, I wasn’t a fan of this new mechanic, which basically boils down to mindlessly tossing Poké Balls, trying to get a “Excellent!” rating, and swinging the Switch around like an idiot to get a better aim. It’s an extremely different strategy and mindset for long-term players, one that encourages you to catch every single Pokémon you see as this is the primary way of earning experience points (EXP) and levelling-up. Thankfully, Poké Balls, Great Balls, and Ultra Balls are easily obtained from shops and NPCs, but I found this forced mechanic too the “Gotta Catch ‘Em All” tag line a little too literally.
In addition to traditional battles, you can pet and feed Eevee to keep it happy.
Pokémon Trainers are still a thing, so you’ll still have the chance to take part in some traditional battles. Here, you and your opponent take turns to inflict damage or status effects on each other or use in-battle items to heal or relieve status effects. You can’t run from a Trainer battle, but you can switch your Pokémon between rounds, which you’ll want to do when your opponent uses a different “Type” of Pokémon to yours. As ever, this is like Rock/Paper/Scissors, making Water-Type Pokémon “Super effective” against Fire-Type Pokémon, Fire-Types melt Ice-Types, and Fighting-Type Pokémon shatter Rock-Types. Thanks to onscreen text, the advantages of the modern user interface, and the colourings of certain Pokémon, it’s a pretty simple system to figure out. Trainers have all the same options as you, so they can switch their Pokémon at any time, heal or buff them with items, but can attack without fear of running out of Power Points (PP). Each move is limited by PP; when it runs out, you’ll need to use an Elixir or heal up to restore it or risk resorting to “Struggle”, which inflicts serious recoil damage. While it’s possible to succeed with just one or two powerful Pokémon, it’s best to have a diverse team with decent Type coverage in their moves; thankfully, Pokémon: Let’s Go, Eevee! makes this even easier by including far more moves and TMs, especially for your Eevee, to allow for greater Type coverage with each Pokémon. Similar to Pokémon Yellow Version: Special Pikachu Edition (Game Freak, 1998), you’re forced to start with a specific Pokémon, in this case Eevee. Sadly, you can’t evolve Eevee, but certain NPCS will teach it a number of super useful elemental moves, allowing it greater Type coverage than usual. Eevee is your constant companion and can be petted and fed berries to increase your bond with it; this affords you benefits in battle, such as Eevee holding on with 1HP or shaking off status ailments. This’ll also happen with the other Pokémon in your party, however; any Pokémon can follow you around, like in Pokémon: Yellow and Pokémon HeartGold and SoulSilver (ibid, 2009), allowing you to interact with them to see how they’re doing, ride certain Pokémon in place of the bicycle, and they’ll even sniff out or dig up items. Pokémon can also now be renamed at any time and marked with symbols, you can easily move them and their moves around as you like and, even better, you no longer need to visit a PC to move Pokémon to and from your party; you simply do this at any time from the menu, and you can also send the many wild, disposable Pokémon you’ve caught over to Professor Oak where they’ll be lost forever in return for some candies.
Eevee can be bolstered with candies and learn Secret Techniques to expand the world.
These candies take the place of the vitamins and feathers of the previous games, allowing you to feed them to your Pokémon to boost their stats (Attack, Speed, HP, etc). You’ll find these across the game as well and they’re great for quickly boosting stats, with some candies even being specific to Pokémon and giving a boost across all stats, though Pokémon will require more candies the stronger they get and some are locked behind a level cap. Levelling-up can be a bit of a chore thanks to the massive emphasis on catching Pokémon, meaning it’s best to put your money into stocking up on Poké Balls or talking to NPCs to get some extra ones to help you get more powerful. Thankfully, you can still track your progress from a handy onscreen EXP bar; by default, all Pokémon automatically earn EXP from every encounter as well, meaning levelling-up is easier and faster than ever, and you can still trade and use special stones to evolve Pokémon into more powerful forms. This also facilitates the ongoing plot of completing Professor Oak’s PokéDex, a handy-dandy encyclopaedia that tells you where Pokémon frequent and gives you insight into them. Evolving Pokémon also gives them access to newer, usually better moves, though each can only learn four moves at a time; you can either replace an existing move or not learn the new one. An NPC allows your Pokémon to relearn forgotten moves in return for Heart Scales and you can use the TMs as many times as you like, which is always useful. Even better, Hidden Machines (HMs) are now a thing of the past; instead, Eevee learns “Secret Techniques” from NPCs, generally by completing story-based side quests. These allow you to chop down trees blocking your path, light up dark caves, surf across water, and fly to Kanto’s different towns using Eevee and relegates moves like Surf and Fly to TMs. This is extremely useful as it now means you don’t need to clog up your party with HM slaves or have useless HM moves in your arsenal. As ever, your Pokémon can be afflicted with status effects that slow, damage, or hinder them; poison, burns, sleep, and paralysis are the most common though you’ll also have to watch out for moves that cause you to “flinch” and miss a turn, Pokémon avoiding your attacks, and being put into a confused state. Treat and train your Pokémon well and they’ll shake off these ailments, but you can also use various items and the ever-useful Pokémon Centers to restore your Pokémon to full health. If you go into a battle unprepared without taking advantage of the manual save feature, you may be overwhelmed and end up defeated, which’ll cost you some hard-earned PokéDollars and return you to the last Pokémon Center you visited, but you’ll also find helpful NPCs, beds, and healing zones in some areas that avoid a long trek to heal up. You also need to be mindful of levelling-up too quickly; if your Pokémon is too high a level, and you don’t have the appropriate Badge, they may disobey you by ignoring your commands or loafing around.
You’ll tackle some familiar puzzles alongside visiting a handful of new areas.
If you’ve played the original Pokémon games and their remakes before then you’ll be instantly familiar with Kanto which, despite a new coat of paint and some tweaked quality of life features, is basically exactly the same as before. You’ll be taking ladders through maze-like caves, exploring a luxury ship, fetching stuff for NPCs, and solving some rudimentary puzzles using teleporters, hidden switches, and pushing blocks to lower doors. Quite often, you’ll explore areas to acquire keys to progress, which means clearing out Team Rocket and rescuing NPCs. While the Celadon City Game Corner is still present, you can’t play the slot machines anymore; the Safari Zone is also gone, with the rare Pokémon from these areas now appearing out in the wild and the latter replaced with the Pokémon GO Park, where you can transfer Kanto Pokémon from Pokémon Go. In-game trades allow you to acquire different Pokémon and even different forms from other Pokémon regions, and you can still trade and battle with friends as long as you’re paying for the Switch’s online functionality. There’s a very limited incorporation of the “Mega Evolution” mechanic here, too; certain NPCs award you special stones that allow a small handful of Pokémon to “Mega Evolve” once per battle, making them tougher and more fearsome, and some Trainer battles will also see you facing off against a Mega Evolved Pokémon. Very rarely, you’ll also take part in double battles, either by yourself or alongside your rival, though these really don’t happen as often as they could (and should, considering how often you encounter Jesse and James of Team Rocket). Finally, you have a few rudimentary customisation options for your avatar, including gender and skin colour, and can mix and match various outfits that you’re awarded from NPCs; Eevee can also be dressed up, which is quite cute, but this isn’t as in-depth as in other Pokémon games.
Graphics and Sound: Pokémon: Let’s Go, Eevee! naturally benefits from the greater graphical processing power of the Nintendo Switch, utilising a slick, colourful 3D anime approach that really brings Ken Sugimori’s artwork to life in the best way possible. Freed from the grid-system of the original titles but not overwhelming the player in open-world gameplay, Pokémon: Let’s Go, Eevee! transforms the formally limited, pixelated environments of Kanto into far bigger, much more detailed locations. Unfortunately, there’s no day/night system and no weather or seasonal elements, but towns and routes are bright and full of NPCs to chat to, buildings to enter, and Pokémon to encounter. The characters are all instantly familiar but with a new coat of paint; your NPC and rival aren’t strictly the Red and Blue of old, looking and acting slightly different (the rival is way more friendlier and actually helps you at a few points) and Blue actually shows up to offer advice and take Giovanni’s place as the Viridian City Gym Leader. The game also takes inspiration from the anime and Pokémon: Yellow by including and expanding upon the role of Jesse and James, with their Meowth often preceding their appearances and the duo have a far greater impact on the plot by taking the place of other Team Rocket grunts and executives.
The whole game pops thanks to its colourful, 3D, anime aesthetic.
Although the game’s Pokémon are limited to the first 151 from the original games, outside of a few different forms from later games in the franchise, they’re all full of life and can get very energetic when you encounter them in the wild, bouncing, floating, and dodging about the place and even swiping at you (though this just causes your Poké Ball to miss). Pokémon also appear more or less to scale, meaning Onix bursts from the ground and dominates the screen, Voltorbs are tiny globes, and some (like Arcanine) can be rode around to speed up your movement. Each has remixed cries from the original game apart from Pikachu, which gleefully shouts its name, and Eevee, which has a series of squeaky chirps. As if making towns bigger and livelier wasn’t enough, the Gyms have also had an impressive overhaul; spectators are often present, in addition to more detailed interiors, and you’ll even be treated to special cutscenes when encountering Legendary Pokémon and such. The script seems mostly the same as before, with a few alterations here and there that kind of place it as both a follow-up and a retelling of the first two games, and all the redone tunes are as charming and memorable as ever.
Enemies and Bosses: During your Pokémon journey, you’ll battle with other budding Pokémon Trainers; their Pokémon start at low levels, generally with only one or two in their party, but you’ll face progressively tougher opposition as you progress. While you can usually predict what an enemy Trainer will do as they tend to use moves that have a Type advantage over your current Pokémon, they can sometimes surprise you and it pays to go on a mad catching spree between battles to level-up, focus on increasing certain stats, and bringing your team as close to the level cap as possible, utilising moves that are super effective and taking advantage of the shared EXP to easily dominate the opposition. As ever, your most persistent foes throughout Kanto are the nefarious Team Rocket; this gang of Poké-nappers have taken over buildings and even entire towns in a bid to steal Pokémon or technology like the Silph Scope and Master Ball for their own evil ends. Generally, Team Rocket grunts aren’t much different from other Pokémon Trainers and stick to common Pokémon like Zubat and Ratatta, but you’ll also battle Jesse and James a few times thanks to their added importance on the plot. Like in the anime counterparts, they’ll use Koffing/Weezing and Ekans/Arbok but don’t send out Meowth this time around. You’ll also encounter your rival at various points; he’ll either be one step ahead of you, join you for certain side quests, offer advice and award items, and will challenge you to test your skills. A new Trainer class in this game are the Coach Trainers; these guys must be manually challenged and will award TMs and other goodies after you best them, but generally offer a tougher or more advanced challenge compared to regular Pokémon Trainers.
After conquering the Gyms and the Elite Four, some powerful Legendary Pokémon await you.
Your Pokémon journey requires you to travel far and wide across Kanto defeating the eight Gym Leaders to earn their Badges; these increase the strength and level cap of your Pokémon and allow entry into the Pokémon League and each Gym Leader specialises in a certain Type of Pokémon (though, handily, opposing Types can usually be found nearby if you need one). Before battling the Gym Leader, you’ll need to get past their proteges and, often, a puzzle of some kind, such as pressing hidden switches, navigating an invisible or hedge maze, or teleporting from room to room. This time around, many Gyms cannot be fought until you have a certain Type or level of Pokémon, encouraging catching and grinding, though the Gym Leaders remain as simple as ever to any experienced player. After defeating the Gym Leaders, you can battle them again once a day for some extra cash, which is always appreciated as Trainer rematches are disappointingly sporadic in this franchise. Once you’ve defeated them all, you challenge the Elite Four and the Pokémon League Champion without any breaks or free health restoration between bouts. Again, these have been bolstered by the Switch’s graphical power and some of the moves and line-ups of the Elite Four have been mixed up; I mostly noticed this with Lance, who now doesn’t have those two Dragonairs. While the Pokémon League offers a daunting challenge, it’s pretty simple to stock up on Hyper Potions and Revives to help if things get tough and you can battle them as many times as you like afterwards to help level-up. Although you won’t battle wild Pokémon 99% of the time, you still encounter the likes of Snorlax, the Legendary Birds, and Mewtwo; these are timed battles and can be a bit jarring as you suddenly have to shift to the traditional style of play, subduing the opponent with status ailments and whittling their HP to zero so you can start the laborious process of catching them, essentially turning these bouts into mini bosses, of sorts.
After beating your rival, you’ll challenge the best of the best across Kanto.
As he’s a lot friendlier than Blue, your rival is far more easy-going and any sense of urgency about wiping that smug smirk off his face is gone this time around. To counter your Eevee, your rival uses Pikachu (which, annoyingly, he eventually evolves into a Raichu, which isn’t fair as you can’t evolve your Eevee) and will not only amass a well-balanced and diverse team of Pokémon by the time he beats you to the Pokémon League but can also Mega Evolve his Pidgeot during the final battle. While he often presents a slightly more formidable challenge, especially once he’s got his aforementioned Pidgeot and Raichu teamed with Vileplume, Rapidash, Slowbro, and Marowak, defeating him isn’t any harder than beating any other Trainer or Gym Leader; simply strengthen your team, swap them as necessary, and hammer away and you’ll soon be crowned the Pokémon League Champion. Your rival might not be a complete douchebag this time around, but Blue is still a smarmy git and he shows up a few times throughout the story to help fend off Team Rocket and test your mettle as a Pokémon Trainer. After you defeat Giovanni and conquer the Pokémon League, Blue installs himself as the Viridian City Gym Leader, offering one of the game’s three hardest battles, the other two being Green and Red, with Green awaiting your challenge inside the Cerulean Cave after you’ve caught Mewtwo. Once you best the Pokémon League, 153 “Master Trainers” appear all around Kanto; these guys specialise in one Pokémon and, annoyingly, you can only battle them with that same Pokémon and they’re at such a high level that you basically need to grind-train every possible Pokémon just to stand a chance against them. If you manage to defeat six of them, Red can be fought outside of the Pokémon League, with all three of the original Trainers having a diverse team of high-level Pokémon and fully capable of Mega Evolving one of their Pokémon.
Power-Ups and Bonuses: It seems like even more items, both obvious and hidden, are strewn all over Kanto; they’re either onscreen or sniffed out by your Pokémon, gifted by NPCs, or bought from PokéMarts. Healing items like the various Potions, restorative items like the Revives, and status-healing items can take care of your ailments either in battle (at the cost of a turn) or outside of battle and you can temporarily buff your Pokémon’s status with items like X-Speed. You can also buy the game’s various Poké Balls from PokéMarts (being awarded a Premier Ball with bulk purchases) but these are also freely given by NPCs, after battles, and found all over so you’re never short of catching devices. You can find nuggets and stardust to sell for big cash, special stones to evolve Pokémon, and even items that fend off wild Pokémon or draw out more powerful and rarer variants. Berries make a return to the franchise, though in a slightly different capacity; you can feed them to Eevee to improve your bond but they’re best used against wild Pokémon to make them easier to catch, though you can’t have Pokémon hold items for in-battle buffs (potentially because battling is such a secondary feature in this game). Other items are slightly changed, too; the Poké Flute can’t be used in battle, for example, moves like Teleport and Dig can’t seem to be used outside of battle, and you’ll give the guards tea (given to you by Brock) rather than water, just to mix things up.
Additional Features: Pokémon: Let’s Go, Eevee! keeps things incredibly simple with its available Pokémon; no Pokémon outside of the original 151 (and a couple of different forms and a new Pokémon) appear in the game and some are missing since you can’t get the likes of Sandshrew/Sandslash, Grimer/Muk, and Scyther in this game, requiring you to trade with a friend who owns Pokémon: Let’s Go, Pikachu! Trading is also key to evolving certain Pokémon, like Machoke and Haunter, and you’ll need another player to acquire both fossil Pokémon. Once you’ve beaten the game, there’s a little bit of post-game content to come back to; obviously, there’s the PokéDex to complete and the Master Trainers to find and challenge, though this latter is more tedious than exciting. In what will probably be a disappointment to many, there’s no Battle Frontier or anything like that, and there are no other areas to visit beyond the likes of the Cerulean Cave and Power Plant, which is disappointing to me as we don’t even get the Sevii Islands here. Mewtwo awaits in the Cereluen Cave, as mentioned, and the Legendary Birds are in the usual locations, offering inconsistently difficult encounters (I caught Articuno on my second Ultra Ball, Moltres took a few more, Zapdos was quite erratic, and I simply tossed the never-miss Master Ball at Mewtwo). Pokémon legends Red, Blue, and Green are also out there for you to battle but getting to Red isn’t the most enjoyable task available and the rewards are negligible. Similarly, beating the Master Trainers and competing the PokéDex primarily just gives you kudos and bragging rights, though you will be able to ride certain Pokémon to fly across Kanto after beating the Pokémon League, which offers a slightly different dimension to your travels. Otherwise, you can try and hunt down shiny Pokémon, look for the biggest and smallest Pokémon around, and make use of the co-op mode to journey alongside a friend and the Mystery Gift and Pokémon Go functionality to transfer other Pokémon into the game.
The Summary: Although my love for the franchise has ebbed somewhat over the years, basically to the point where I don’t really buy new Pokémon games on the regular since they’re largely the same and don’t really offer much new material, I am a fan of the series and I was somewhat interested in journeying through Kanto one more time in Pokémon: Let’s Go, Eevee! Graphically, the game is very impressive; with the series seemingly moving more towards open-world, open-ended gameplay and introducing more extraneous mechanics to the franchise, it’s nice to get back to basics, but Pokémon: Let’s Go, Eevee! is maybe a little too basic for its own good. Opting more for a fancy new coat of paint rather than really expanding upon the original games’ content in any meaningful way, Pokémon: Let’s Go, Eevee! is a fun enough nostalgia trip but lacking in many ways; not including much in the way of substantial post-game content was a disappointment, to say nothing of the laborious Master Trainers and the decision to not include Pokémon or mechanics from other regions and games (like a day/night cycle, weather effects, hold items, and such). What really soured the experience for me was the incorporation of Pokémon Go mechanics; I admit that I’m biased about this as I don’t really play or like Pokémon Go, but there wasn’t much fun to be had in tossing Poké Balls at Pokémon without much skill or thought. You simply wait for the circles to line up, and for a good opening, and just toss Poké Balls and/or berries until you catch it, making for an extremely simplistic and monotonous level-up system. I loved that Jesse and James had a bigger role, and that Blue showed up on the side and being able to battle him, Red, and even Green (though I was a little disappointed that Professor Oak wasn’t the Pokémon League Champion at the end). Riding Pokémon was quite fun, as was letting Pokémon travel beside you and giving Eevee a real personality, but the lack of customisation options and challenge was unfortunate. Overall, if Pokémon was “Baby’s First RPG”, Pokémon: Let’s Go, Eevee! is “Baby’s First Pokémon” and, while I enjoyed it well enough, it was a bit of a barebones package that played things a little too safe, and a little too quirky, for my liking.
My Rating:
⭐⭐⭐
Rating: 3 out of 5.
Pretty Good
Did you enjoy Pokémon: Let’s Go, Eevee!? How do you think it compares to the original games and their remakes, and which Pokémon game is your favourite? Did you enjoy having Eevee as your partner and what did you think to the special moves it could learn? What did you think to the new catching mechanics and did they make or break the game for you? Did you ever defeat all of the Master Trainers and Red? Who made it into your final team and did you ever complete the PokéDex? Which Pokémon is your favourite? How are you planning to celebrate National Pokémon Day this year? Whatever your thoughts on Pokémon, feel free to leave them below or on my social media.


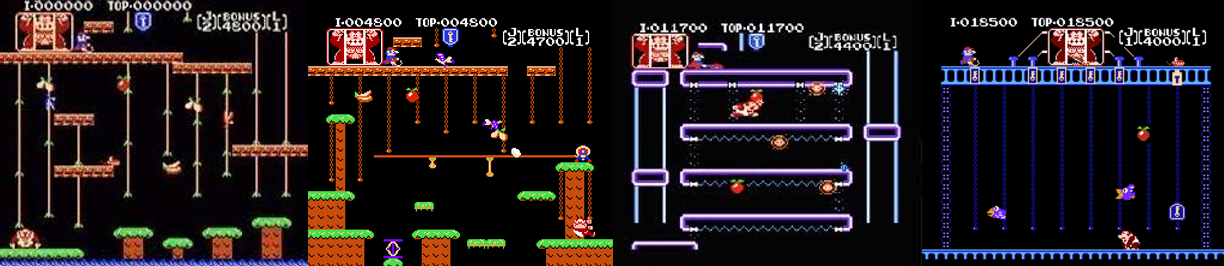


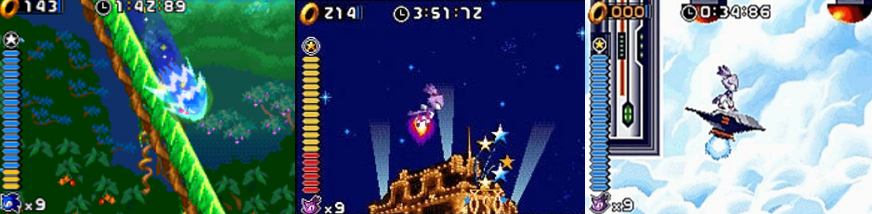
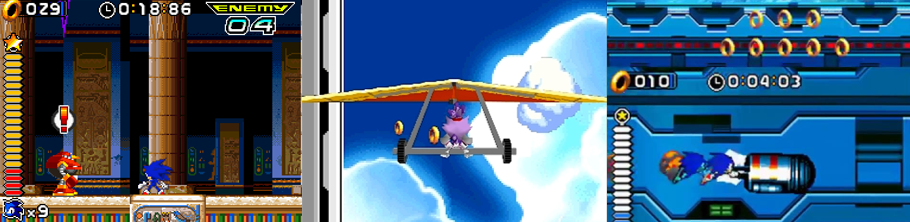
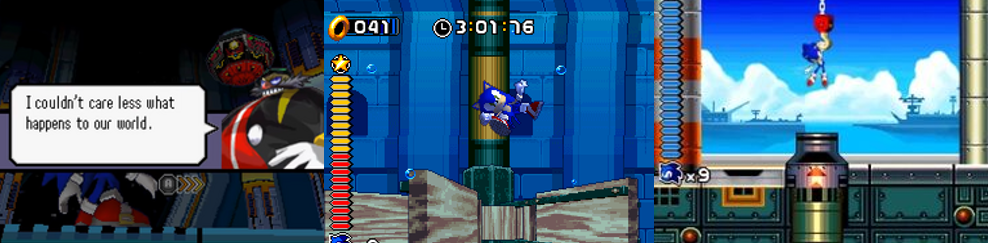
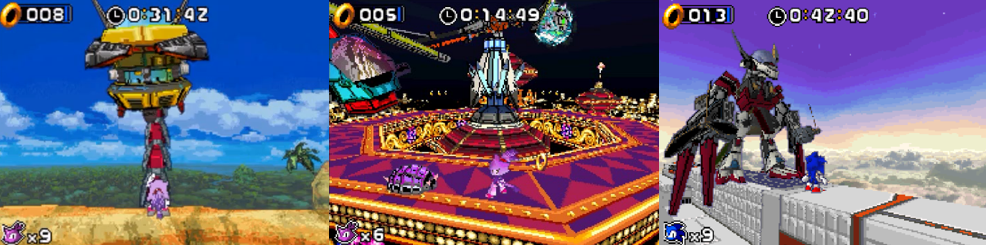
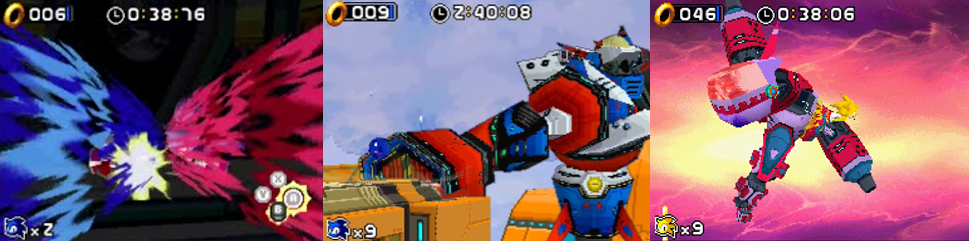


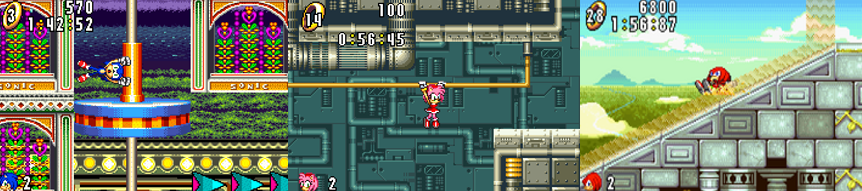
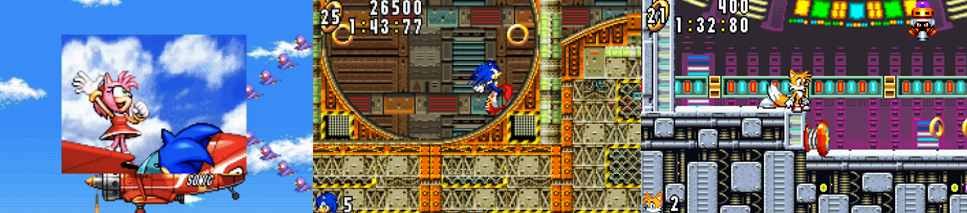
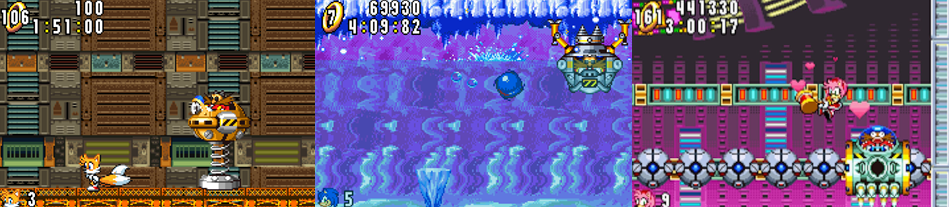
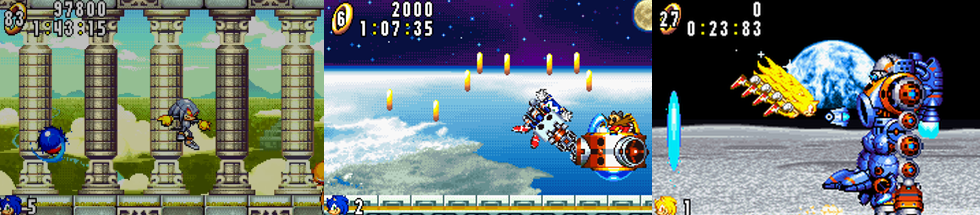


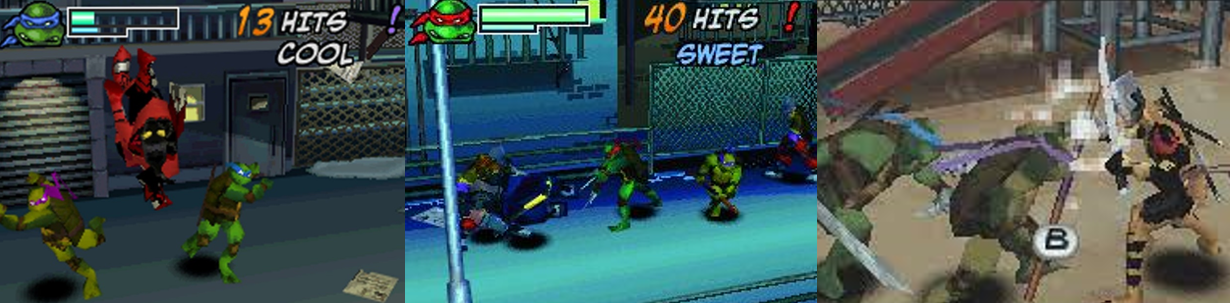
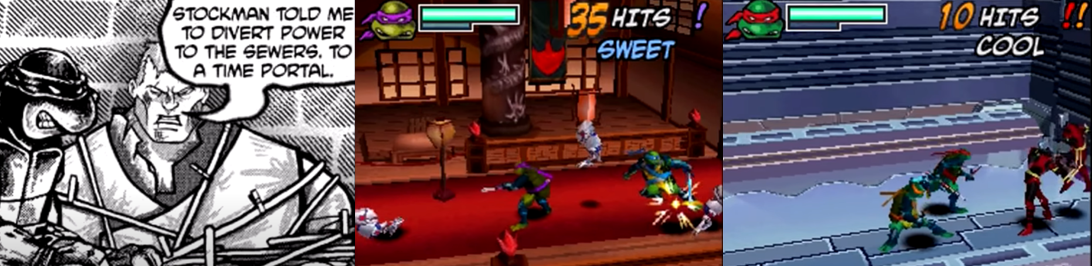


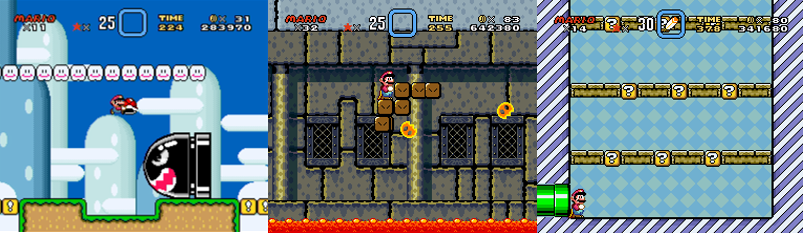

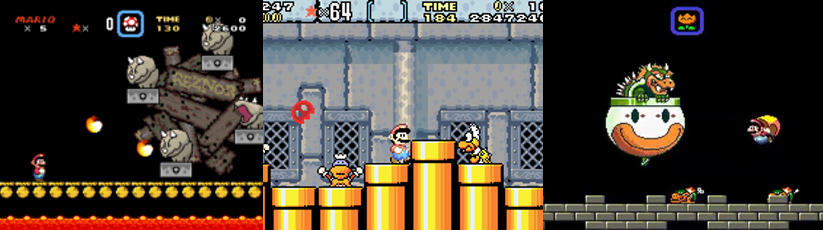


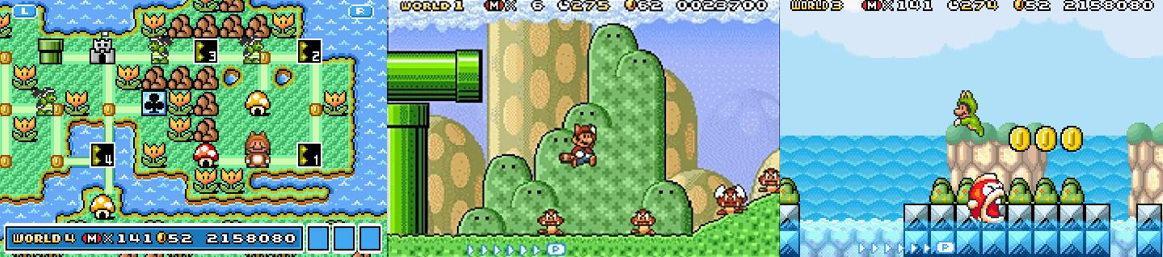
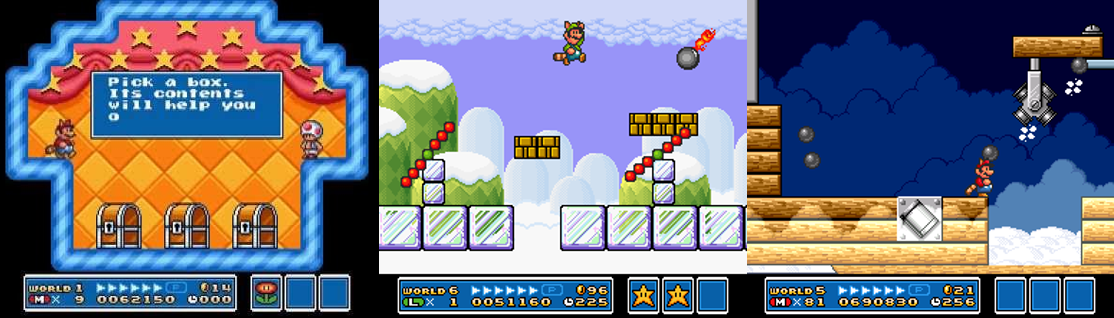


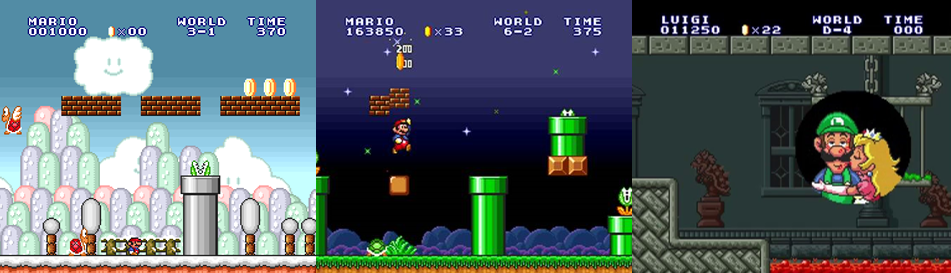


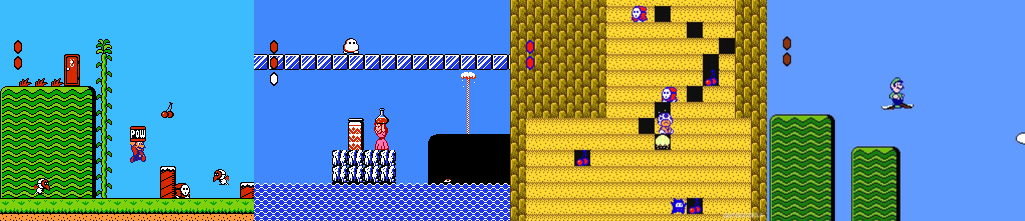


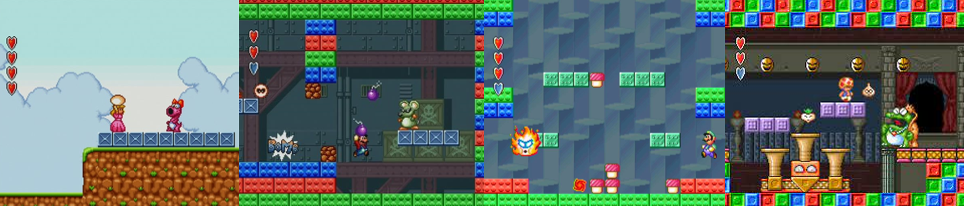


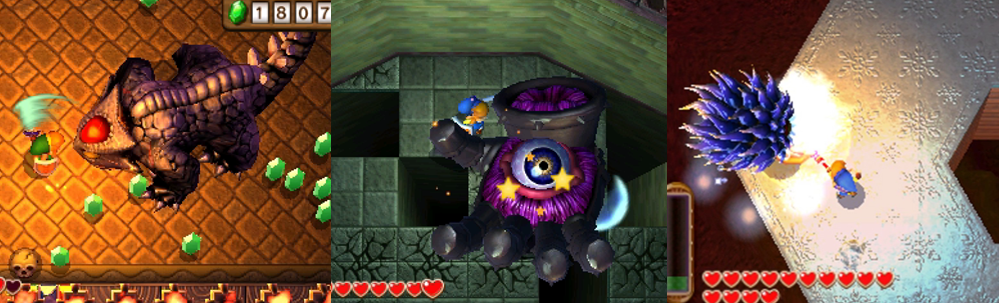


You must be logged in to post a comment.