Released: 20 October 2000 Developer: Argonaut Games
A Brief Background: The Alien films (Various, 1979 to present) have had a tumultuous history with videogames, with adaptations ranging from pixelated garbage to first-person shooters, real-time strategies and crossover titles, to survival/horror experiences. In 1997, Jean-Pierre Jeunet was given the unenviable task of resurrecting the franchise after what seemed to be a definitive end, resulting in Alien Resurrection, a minor success that was met with mixedreviews. Like its predecessors, Alien Resurrection was accompanied by tie-in comics, novels, and a videogame, one that was initially asked to simply be a miscellaneous Alien title before 20th Century Fox gave the go-ahead to retool it into a Resurrection tie-in. Argonaut Games were supplied with scripts, storyboards, and raw footage from the film as reference materials but lost numerous team members when they decided to scrap a year’s worth of development in favour of building a third-person game engine. After struggling for another year to adapt to this new engine, the concept was reworked into a first-person shooter (FPS) and Alien Resurrection became one of the first FPS titles to utilise twin stick moving in its gameplay. Ironically, the game was criticised for this decision at the time; further criticism focused on the harsh difficulty, frustrating gameplay, and inferior options compared to the likes of Quake II (id Software, 1997). Thanks to selling only 250,000 units, Alien Resurrection was deemed a failure and Argonaut Games went out of business soon after, though the pioneering title has developed a cult following over the years.
The Review: Alien Resurrection is an FPS title that sticks somewhat faithfully to the main plot of the film upon which it’s based. Consisting of ten missions with three difficulty settings (with the hardest setting limiting you to just one save point), the game sees you explore the Xenomorph infested USM Auriga and escape on the mercenary ship, the Betty, controlling one of four characters depending on which mission you’re on. Mostly, you’ll be in control of “Ripley 8”, an Alien/human clone of the Lieutenant Ellen Ripley, or Annalee Call, a female android. Other missions have you play as Call’s shipmate, Gary Christie, or Private First Class Vincent DiStephano, a soldier stationed aboard the USM Auriga. No matter which character you’re playing as, the controls and basic gameplay remain the same. You can pick from a bunch of different control settings, alongside toggling the crosshair and camera sway, and the game offers the unique option to move with the left stick and aim with the right! With the setup I chose, X allowed me to crouch and squeeze through vents and gaps, Square and Triangle cycled through whatever items I had on hand, Circle used whatever item I had equipped, and pressing in the right stick performed a quick turn. L1 and L2 cycled through my available weapons, R1 fired, and R2 allowed me to interact with the environment, turning handles and activating consoles to open doors or activate lifts and such. The only real difference between the four characters is in the weapons they use; Christie, for example, gets dual pistols (with infinite ammo like the other pistols) while Ripley gets an electric gun that charges a powerful shot. Other weapons include a shotgun, the iconic Pulse Rifle, a laser cannon, a flame thrower, and a grenade and rocket launcher, though some of these are limited to certain missions and won’t carry over between characters.
There’s little to differentiate the characters as they meander through the dark environments.
You’ll find ammo for these weapons (and the weapons themselves) strewn about the game’s dark, oppressive environments alongside helpful items. First aid kits replenish some health, flashlights light up the area (but only for a limited time and you must wait for them to recharge), security cards open doors, and the motion tracker alerts you to nearby enemies. The most useful item you’ll find is the mobile extraction unit, a super helpful bit of kit often conveniently placed near Alien eggs. You’ll need this if when a Facehugger latches onto you as it’s the only way to keep yourself from being instantly killed by a Chestburster and to open certain security doors that remain shut whenever “non-human lifeforms” are detected. Each mission has an objective tied to it, related through the pause menu and text dialogue between the characters between missions, and you’ll have to make a note of your surroundings as there’s no map and things get very samey very quickly. To make matters worse, Alien Resurrection is very dark (the game even recommends playing is the dark to heighten the immersion), so you may want to adjust your brightness settings to aid your exploration. Missions generally involve getting from point A to point B, generally a communications device to switch characters, activating consoles and disabling security systems as you go. Flickering lights, corpses, cries for help, and blood are as commonplace as explosive crates and you must watch for bursts of electricity, manual save points, and locked doors. These are often unlocked by finding vents or alternative routes to control panels but it’s pretty easy to get lost or muddle about in the dark. Things are pretty linear for the most part, but you’ll occasionally hit a wall. In just the second mission, for example, Call has just ten minutes to locate four detonator coils, which must be found and installed or it’s an instant mission failure. Later, you’re charged with destroying Ripley’s other clones, disabling forcefields, avoiding corridors lined with laser traps, finding five key cards to escape the maze-like maximum-security wing, and releasing the Betty’s docking bay clamps.
Sadly, the game’s short on bosses and its enemies are limited in their attacks.
Naturally, you’ll be attacked by Aliens as you accomplish these tasks. Regular drones go down pretty easily, and their blood doesn’t seem to hurt, but they can bleed out of the shadows and deal decent damage with their claw swipes and bites. You’ll want to blast any Alien eggs on sight as the Facehuggers are difficult to hit and your session will end pretty quickly if they latch onto you. You can use this to your advantage, however, as you can’t be double impregnated but you only have a short time before the Chestburster breaks free. The Aliens are all fully 3D models with such limited animation frames that they’re barely superior to their 2D predecessors, though they do sometimes barge through doors and scurry about on the environment. You’ll also have to battle soldiers, especially in the first few missions. These guys use cover tactics and get set upon by nearby Aliens, but their numbers dwindle as the game progresses. Like in the movie, Ripley’s failed clones merely lay on beds or are suspended in tubes for you to destroy so you’re far more likely to be disabling systems and avoiding short circuited machinery than battling elaborate Alien variants. Similarly, Alien Resurrection is disappointingly short on boss battles. You’ll face General Martin Perez, who’s flanked by flamethrower soldiers and wields a rocket launcher and shotgun, making for a particularly tough battle since the controls are so sluggish. You’ll also battle a Xenomorph Queen in a large arena completely devoid of resources. The Queen Bitch is a large target, easily strafed around and pumped with shots, but she also absorbs a great deal of punishment, though she’s limited to simple charges, headbutts, and slashes. You’ll also have several encounters with the horrific “Newborn” Alien/human hybrid, which appears multiple times in the penultimate mission. It’s also extremely limited with its attacks, though does move a bit faster so stay back and unload with the electric gun and it’ll eventually flee. While aboard the Betty and preparing your escape, it’ll reappear, completely invulnerable and confined to the ship’s narrow corridors. You must stun it with your shots and run through the Betty’s narrow, confusing tunnels, eventually taking a ventilation shaft to a control room where you suck it out into space like in the movie.
Despite its fidelity, the game is too dark and clunky to really impress.
Alien Resurrection somewhat impresses with its presentation, but only if I’m being very generous. As a PlayStation title, you can expect long load and save times, texture warping and pixelated environments as standard but the game chugs along at a snail’s pace, with none of the characters moving past a lethargic stroll. This was doubly disappointing as it would’ve been a great way to further differentiate the characters, such as having the synthetic Call and the now-superhuman Ripley move faster. Alien Resurrection does a commendable job of recreating the rusty, lived-in aesthetic of the movie, however, featuring callbacks to the first two films and recognisable areas from the film, such as the gym, the laboratory, and the flooded kitchen. This is quite a large area, full of swimming Aliens and annoying button puzzles; you must also watch your oxygen meter to avoid drowning. While you’ll hear announcements from Father, the omnipresent computer that controls the USM Auriga, voice acting is mostly limited to screams and cries for help, at least until the finale. Janky, pre-rendered cutscenes occasionally appear between missions, recreating certain scenes from the movie, though in a heavily truncated form. Aliens can be dismembered, their blood splatters on the environment, and you’ll disable flame bursts and electrical hazards to acquire key cards or progress. Unfortunately, the game is just way too dark; there’s not much variety once you’re in a mission and you’re sometimes left wandering in circles because you missed a vent or got turned around because everything looks the same. The game mostly uses ambient sounds, making for a largely dull experience, though I did like seeing corpses with holes in their chests slumped over desks, blinking monitors, and Aliens dropping from vents. There is no multiplayer option here, though you can utilise a comprehensive cheat menu to overcome the game’s difficulty and unlock a “Research Mode” that allows you to alter the appearances of the Alien models.
The Summary: I’d heard so much good press for Alien Resurrection that it almost seems as though the game is better regarded than the movie. However, I think most of those reviews rate the game because it was the first first-person shooter to use twin stick controls and it’s a surprisingly solid and faithful recreation of the movie. However, these accolades only carry it so far; behind it all, there needs to be a solid gaming experience and, sadly, there just isn’t. Alien Resurrection is essentially just another, run-of-the-mill first-person shooter, with little to differentiate it from other, more enjoyable games in the genre except the 3D models and new-fangled control scheme. It’s kind of inexcusable to have four playable characters and nothing to differentiate them except the weapons they use, something you won’t even notice if you’re playing with the cheats enabled. The gameplay cycle gets very tiresome very quickly; characters meander around as if bored and you’ll be activating the same switches and consoles over and over. There are seldom more than a handful of enemies onscreen at any one time, the selection of bosses was painfully limited, and the variety, in general, is sorely lacking. Alien Resurrection is relatively short and the environments are quite large and annoyingly labyrinthine, making it a chore to play through since it’s difficult to see what’s going on thanks to the murky graphics and overuse of shadows. In the end, Alien Resurrection is a decent enough first-person shooter with some enjoyable moments but there are far better FPS titles out there and far better Alien-adjacent videogames you could be spending your time on.
My Rating:
⭐⭐
Rating: 2 out of 5.
Could Be Better
Have you ever played Alien Resurrection? If so, where does it rank for you against the other Aliens videogames? Were you also disappointed that there wasn’t more to differentiate the characters and that the game was short on bosses? What did you think to the dual stick controls and maze-like gameplay? Which of the Alien movies or videogames is your favourite and why? Whatever your thoughts on the PlayStation’s videogame adaptation of AlienResurrection, drop them below and be sure to check out for my review of the film that inspired the game.
Released: 10 April 2010 Developer: Square Enix Business Division 1 Also Available For: PC, PlayStation 5, Xbox One, Xbox Series X/S (Intergrade Version)
The Plot: The Shinra Electric Power Company drains the planet’s “Lifestream” by harvesting its “Mako” energy, making life miserable for the lower classes. Ex-SOLDIER Cloud Strife reluctantly teams with eco-terrorist group Avalanche to oppose Shinra, only to end up defending fate itself when Sephiroth, a celebrated SOLDIER, enacts a mad plot to alter the timeline and become a God.
Gameplay and Power-Ups: Final Fantasy VII Remake is, as the title suggests, an action-orientated remake of the classic RPG Final Fantasy VII. As in the original game, players assume the role of stoic mercenary Cloud Strike, a troubled young man who wields various swords as tall as he is, and team up with some colourful characters in a bid to first stick it to a corporate conglomerate, then to defend both the world and fate itself. If you’ve never played the original game, this is a great way to experience the story for the first time. However, Remake does dabble in multiple timelines and rely on references near the later stages so some familiarity with the original is required. Those who are well-versed in the original and the series will find new gameplay options available here that mix things up. Obviously, the turn-based mechanics are gone, replaced with the franchise’s more modern third-person, active battle system. You can set up battles to somewhat resemble the original system with “Classic” mode, where attacks are automated and you simply focus on making decisions, though I chose to play on “Easy” mode and have full control over Cloud and his allies. Battles are semi-random; enemies appear and occasionally respawn in specific areas for you to battle for experience points (EXP) and Gil, but you won’t be assaulted every other step like in the original game. When in combat, Square unleashes your standard attack and holding it performs either a multi-hit swing or an automated combo, depending on who you’re controlling. Triangle activates each character’s signature move: Cloud switches between the faster, weaker “Operator” stance and the slower, more powerful “Punisher” stance, while Barret Wallace unleashes a powerful blast from his gun arm that must be recharged, Tifa Lockhart executes a whirlwind uppercut, and Aerith Gainsborough deals magical damage with Tempest. X opens the command menu, slowing the battle to a snail’s pace as you select magic attacks, items, or character abilities. Circle allows you to evade, you can guard by holding R1 to reduce incoming damage, L1 opens your shortcut menu (allowing you to quickly perform preset actions), and you can lock-on to targets by pressing in the right stick. While in the “Commands” menu, L2 or R2 issue commands to your two teammates and you can switch to them with the directional pad, though they’ll battle independently without your input.
Combat is fast and action-packed as you pummel enemies with spectacular special attacks.
Although battles are much more chaotic and action-packed, many of Final Fantasy VII’s mechanics return here. Your health points (HP) are depleted as you take damage, with characters being knocked unconscious after enough hits, and utilising spells such as Fire, Cure, or Barrier drains magic points (MP). Attacking enemies builds up the Active-Time Battle (ATB) gauge and allows you to perform certain actions. You need at least one bar to consume a restorative item, cast a spell, or perform a character’s special abilities, with stronger magic and attacks consuming two bars. These special abilities are dictated by the weapons you hold; each weapon unlocks a new ability once you use it enough, allowing you to use it whenever you like with different weapons, and these abilities essentially replace the multiple “Limit Breaks” of the original game. Limit Breaks are still present, however, and again activated when a small gar fills up during battles. Selecting a special ability or Limit Break can turn the tide of trickier battles as you’ll deal greater damage or inflict wider status effects so they’re worth experimenting with. Victory not only earns you EXP to boost your level and stats (attack, defence, speed, etc) but also nets you Skill Points (SP). These are spent in a surreal menu not unlike Final Fantasy X’s (Square, 2001) Sphere Grid and boost your stats further or grant you additional Materia slots. As you explore and interact with non-playable characters (NPCs), you’ll find Materia that can be equipped to weapons, armour, and accessories. Materia allows you to cast spells in battle, from elemental attacks like Fire, Thunder, and Blizzard, to defensive spells like Barrier and Haste, to boosting your stats and assessing enemy weaknesses. Materia also levels-up through battle and the acquisition of Ability Points (AP), and levelling-up certain Materia lets you cast more powerful spells, though these consume more MP and have a noticeable charge time. Certain weapons add elemental effects to your attacks and most enemies have some kind of elemental weakness, so having a diverse set of Materia is key to mastering the combat system. It also helps to take advantage of buffs and status draining magic, capitalise on “critical hits”, and pummel your target when they’re “staggered”.
Completing side quests and mini games nets you Summons, fast travel, and other rewards.
When facing more powerful enemies, this staggered state is crucial to victory as landing successive hits builds the “Summon” meter. If you have a Summon Materia equipped, you can call forth a powerful beast to fight alongside you. Unlike in the original game, you issue orders to the Summon from the Commands menu and it’ll fight with you until the bar depletes. There are only four Summons available, with three locked behind virtual reality missions where you must defeat them to earn them, but they’re well worth bringing out during tougher boss battles. Victory, chests, and completing side quests also nets you Gil, which you spend on items to restore your HP, MP, or remove status effects like sleep and toad, purchase weapons and accessories, and buy more Materia. You can also use it to rest in inns, but I found little use for this as the game’s littered with helpful benches that restore your party to full health and Cloud even has a free room he can rest in during the first part of the game. This meant I never bought any items and rarely used them in battle and was much more frugal with my MP expenditure than usual, especially as I took the time to complete side quests to gain greater levels and gear. At various points throughout the chapter-based story, you’re encouraged to complete side quests for the destitute inhabitants of the Slums or the boisterous locals at Wall Market. These see you finding and feeding Chocobos to unlock a fast travel system, collecting medicines, defeating enemies that’ve infested the scrapyard and other areas, finding mischievous local kids, and playing songs to cheer people up. You’re usually rewarded with Gil but you’ll also unlock new Materia or be gifted SP or certain gear. Though these side quests did feel like padding at times, it was a great way to flesh out the game’s supporting characters and develop a deeper connection to the Midgar residents, meaning it has more emotional impact when Shinra decimates the area and kills most of them as recompense for your disruptive actions.
Gameplay is mixed up with some racing, interactable, and puzzle solving sections.
While Final Fantasy VII Remake is heavy on combat, you can run from most battles and much of your time between fighting is spent interacting with party members, other members of Avalanche, and the NPCs in the Slums and other Sectors. These interactions also see you participating in various mini games, such as a squat and pull up contest where you rhythmically press buttons in the correct order, culminating in a full-blown rhythm game where a cross-dressing Cloud shows off his dance skills! There are two sections where you race along the Midgar highways on a motorcycle; both see you swinging your sword at Shinra’s soldiers or blasting them with a beam attack, though the second jaunt sees you dodging anaerial bombardment and taking on a massive tank! While most areas are sprawling and daunting in their size, your helpful mini map, onscreen compass, and the larger in-game map steer you in the right direction. Puzzles generally involve squeezing through gaps, pushing things aside, or activating consoles and levers but you’ll also be moving crates (and giving Aerith a ride) using gigantic robotic hands, switching between parties to open doors, asking Red XIII to hop along walls to pull levers, and rescuing terrified children following Shinra’s horrendous counterattack. When bringing down the Mako Reactors, you’re given a time limit to battle to safety; when infiltrating Shinra headquarters, you find and upgrade identification cards and crawl through vents; and you’ll be firing grapnel guns with Triangle to escape the Slums, blasting walls with Barret’s gun arm to find goodies, and draining water to progress in the bug-infested sewers. Shinra-branded crates are scattered everywhere, and you can smash these for items, to restore a little MP with Mako Shards, and to collect Moogle Medals to trade in the slums. You’ll be competing in the colosseum to progress the story and gain levels, searching for cats and allies, following a disconcerting trail of glowing slime, clambering on overheard poles, and shifting disused trains around in your quest. None of it’s too demanding but the game does slow down noticeably during the more padded and tedious moments.
Presentation: Final Fantasy VII Remake is absolutely gorgeous. The graphical standard is so high that it’s basically like playing through Final Fantasy VII: Advent Children(Nomura, 2005) and a far cry from the chibi-like polygons of the original! However, I did notice some texture warping in the environment now and then and a delay loading the correct, high-quality textures here and there. Still, character models are now expressive and incredibly realistic, with your party’s weapons and gear reflecting what you’ve equipped in every cutscene (so, for example, Cloud doesn’t default to the Buster Sword when you’ve equipped the Nail Bat) and them being more expressive than ever. Cloud, especially, benefits from this as the story revolves around him and him slowly coming out of his shell as he interacts with his unlikely friends and other NPCs. He’s socially awkward at times and hesitant to form deep connections, meaning he’s left quite uncomfortable by Jessie Raspberry’s advances and Aerith’s teasing. He constantly clashes with Barret, who constantly gives Cloud a hard time and it takes a while for him to see Cloud in a different light when he willingly opposes Shinra and defends Midgar. Barret is a standout character for his passionate love for the planet and his little girl, Marlene, but I was surprised to see how big a role supporting characters like Jessie, Biggs, and Wedge have this time around. They desperately try to pierce Cloud’s armour and he begrudgingly comes to care for them, making their injuries and deaths all the more impactful, but it’s obviously his care for Tifa and Aerith that have the most impact on his character. Beset by migraines and assaulted by visions of his past, a distorted version of events, and Sephiroth, Cloud is a deeply troubled young man initially just looking to get a payday who naturally assumes a leadership role and goes out of his way to protect his newfound friends, even accepting Red XII without hesitation.
Midgar has never been so lively and expansive! it’s truly awe-inspiring to behold.
These narrative moments are pivotal to Remake’s story and directly tie into your extended time in Midgar and its various Sectors. While you can argue it unnecessarily drags things out, I did form a deeper bond with the welfare of the NPCs and this area since I interacted with everyone and got a sense of their society. Remake is quite linear and restrictive at times, however; it’s rare that you’ll get lost as your destination is either clearly signposted or you’re barred from going in different directions. You can explore a bit, though, and will find nooks and crannies hiding chests, Materia, health-restoring benches, or other minor goodies. Sometimes you have to go out of your way to find these, like directing moving platforms to an area behind some giant fans that you temporarily disable to snag some Materia. The game often highlights when you might’ve missed something with characters giving you the option to go back, but you can ignore these prompts if you just want to progress. You’ll be exploring Midgar’s Slums often, venturing into the squalor and interacting with the locals at the scrapyard, orphanage, or various shops. Aerith’s church is also here, of course, as is her beautiful house. You’ll also venture deeper into the oppressive and dark, steampunk-styled streets of Midgar to visit Jessie’s family, clamber up a pillar to escape, and toil in the dank sewers beneath Don Corneo’s opulent mansion. Quite often, you’re treated to a sprawling view of Midgar, which looms over the Slums like a dark shadow or stretches to the horizon, either twinkling with lights or left in ruins. The environments all recall the pre-rendered backgrounds of the original game but in a much greater scale. This is best felt when exploring the Mako Reactors, which feel large and lived in and fully operational, and when escaping the wreckage of the Slums and venturing into Shinra headquarters.
Cloud’s emotional journey takes a dramatic twist by the end.
Shinra headquarters is a high-tech skyscraper housing offices, an luxurious library (where the mayor is hidden away like a bad secret), toilets, and a museum dedicated to Shinra’s Mako research. It’s also home to Professor Hojo’s sprawling laboratory, where his Mako experiments created abominations and super-soldiers alike. Although Cloud is beset by fragmented memories, they become much more volatile here as Professor Hojo drops hints regarding his true past and his visions of Sephiroth manifest in physical form. We get brief glimpses of Cloud and Tifa’s childhood and a fiery incident involving Sephiroth, but nothing concrete, of course. Sephiroth’s presence is much more prominent here than during the original game, with his presence altered to potentially be time displaced and often accompanied by ominous, robed spectres known as “Whispers”. These pop up at key moments to keep the timeline intact but rage out of control in the finale, engulfing Shinra headquarters and warping Cloud and his friends to a desolate, whirlwind of a wasteland for the game’s final battle. Final Fantasy VII had one of the best soundtracks in all of videogaming, to say nothing of the franchise, and it’s well represented here. All the memorable themes make a return and can be freely listened to from jukeboxes once you’ve acquired CDs from vendors and side quests, and they even dynamically shift depending on what you’re doing. While your party won’t strike poses after every battle, they do in the combat simulator and Barret likes to hum the “Victory Fanfare” after a win, which is fun. A new remix of “One-Wing Angel” plays during the final battle, which always ups the ante of these situations, and Cloud’s confrontation with Sephiroth echoes their final encounter in Advent Children and recreates the automated showdown from the end of the original game. Finally, Remake ends with a tantalising teaser for what’s to come as we witness an alternative timeline where Zack Fair survived his dramatic last stand and leaves the ultimate fate of these characters up in the air since Sephiroth’s messing with the timeline.
Enemies and Bosses: It’s been a while since I played Final Fantasy VII so I admit that I didn’t recognise many of the enemies I cut down throughout the remake. Some Final Fantasy staples are recognisable, of course, like the flaming Bombs, frog-like Hedgehog Pies, and the deceptively dangerous Tonberries. Many battles pit you against Shinra’s forces; these militant goons wield machine guns, toss grenades, hide behind riot shields, and even fly using helicopter blades. Shock troopers, faster, more annoying “elite” variants, and even 3rd class SOLDIERS also crop up, alongside turrets, small drones, and cannons. Some of these are placed amidst the environment and can be pre-emptively destroyed by Barret; others come to life from the background or pop up from holes in the ground. Shinra also employs large mechs known as “Sweepers” that boast buzzsaw appendages, flamethrowers, and missile launchers. Their clandestine operatives, Rude and Reno of the Turks, occasionally attack from a chopper and their troops are often accompanied by monstrous guard dogs seemingly bred from Red XIII. Various bizarre monsters, presumably discarded experiments or the result of Shinra’s hazardous actions, are also fought in the Slums and other Sectors. Ravenous rats, crane-like birds, disgusting insects, and weird amphibious creatures are as commonplace as living junk and bandits looking to pick a fight. Ghosts and the ominous Whispers are also encountered numerous times, alongside lizardmen, wolf-like beasts, and the truly peculiar “Unknown Entities” birthed from Professor Hojo’s lab! Many attack in groups and utilise similar magic to you, but you’ll find they invariable have elemental weaknesses, items to be stolen, or are all bark and no bite, especially if your levels and weapons are particularly strong. I’d recommended using Assess to keep a record of their weaknesses, hitting the touch panel on the controller to review each enemy afterwards, and equipping Enemy Skill to learn some of their more troubling abilities for yourself. The game also logs battle intel on each creature for you to review and this ties into the VR side quest to snag new Materia as well.
Shinra’s mechs and agents will hound you throughout the story.
Shinra’s military arm is second to none in the world of Final Fantasy VII and, consequently, you’ll be battling some massive, heavily armed mechs. The Scorpion Sentinel is a significant first boss since you’re also battling a twenty- or thirty-minute timer during the escape portion. The Scorpion Sentinel sets a precedent for the game’s bosses in that they all consist of multiple phases, with the environment changing or the boss altering its appearance and attacks as you deal damage. Able to lock on and bombard you with missiles, leap to the walls, and fire a devastating laser beam from its tail, the Scorpion Sentinel isn’t to be underestimated but, as with every other boss, can be staggered by targeting its appendages and elemental attacks (in this case Thunder) turn the tide. The Crab Warden is somewhat similar, though favouring flame bursts and electrifying the floor and with a central generator and pilot for you to target once you bust through its defences. The Airbuster continues the trend, though the difficulty of the timed fight is set by you since you can sabotage the machine while exploring the Mako Reactor. The Airbuster boasts a large beam cannon, launches its fists, and flies out of reach to pepper you with missiles. In the second phase, it sits at the end of a narrow walkway and will decimate you with its beam unless you take cover, while filling the space with laser beams in the third phase. The Valkyrie flying machine chases you down as you escape the Slums, favouring rapid-fire chainguns and explosive artillery, the tank-like Arsenal must have its wheels cut from under it on the highways, and you must swap between parties to battle the snake-like Swordipede in the depths of Shinra headquarters. This electrified mech flies about, tossing a buzzsaw and blasting you with an electrical field that can make it tough to hit. Alongside these mechs, you’ll battle Shinra’s human forces: Reno and Rude, in particular, are a troublesome duo, attacking with both speed and power. You’ll also match wits with SOLDIER 3rd Class Roche, earning his begrudging respect in a duel, and must target Rufus Shinra’s canine companions to keep him from counterattacking with a shotgun to your face!
Bizarre, monstrous creatures lurk in the shadows and burst free from Professor Hojo’s lab.
You’ll also face some large, generally grotesque monsters. If you want to summon Shiva, Chocobo and Moogle, and the Fat Chocobo, you must first defeat them in VR simulations, which isn’t too difficult given their obvious weaknesses. While competing in the Wall Market colosseum, you’re forced to fight the Hell House, a strange sentient house that’s initially immune to physical attacks, protects itself with Barrier, sends fireworks into the arena, and uses its jet boosters to stay out of reach. While in the sewers, you battle the troll-like Abzu, targeting its horns with Fire magic and avoiding its devastating pounce and poisonous water. A damaged Abzu reappears when you revisit the sewers, now accompanied by its pig-like offspring, retreating to tunnels to flood the room but otherwise retaining the same attacks. Abzu is good practice for the Type-0 Behemoth, a ravenous beast best crippled by attacking its torso and hind legs so you can target its horns, which make it otherwise invulnerable. Similar to the Whispers, who spawn the “Enigmatic Spectre” mini boss, the ghosts that haunt the trainyard are governed by the Ghoul, a poltergeist-like entity that teleports, becomes intangible, and inflicts Silence. This is merely the prelude to the Grim Reaper-like Eligor, who races around in a chariot, sweeps the floor with its eye laser, and can only be attacked from behind (preferably by ice-based magic). Finally, there’s Specimen H0512, a Cthulhu-like chimera with no elemental weaknesses, poisons and who “Slows” you with Noxious Expulsion and Mako Expulsion, slams one of your team around like a ragdoll, and spawns disgusting little minions to distract you.
Sephiroth reaches out from across time to try and undo his defeat and realise his mad goals.
Final Fantasy VII Remake includes an all-new form of Jenova, Jenova Dreamweaver, a malformed, Lovecraftian, tree-like entity fought in Shinra headquarters. This writhing, tentacled thing is rendered vulnerable by attacking its appendages, which spawn throughout the arena, pushes you back with Cast Aside, targets a single character with the hard-hitting Vengeance laser orb, and envelops itself in an impenetrable barrier with Rejection. It’s a fun, three-stage fight that keeps you on your toes, but the tension really ramps up once you enter the “Singularity” and are confronted by the titanic Whisper Harbinger. This towering monstrosity is too big and too far away to hit, but it does create three Whisper-like avatars: Whisper Rubrum, Whisper Viridi, and Whisper Croceo. Though colour-coded, they have no elemental weaknesses and instead absorb elemental attacks; they also constantly teleport and respawn, so it’s better to focus on one at a time. Deal enough damage and they’ll cast Correction, separating your party and forcing you to flee as the Whisper Harbinger wrecks the floating environment and showers the floor with lightning blasts. When Barret and Red XIII leave to attack Whisper Harbinger directly, you’ll face Whisper Bahamut, which throws explosive purple flame balls and the devastating, unavoidable Megaflare. Defeating it, and the other avatars, sees the Whisper Harbinger lose health and eventually crumble but this is a gruelling multi-stage fight that I’m not sure has checkpoints between each phase. Victory sees you confront Sephiroth, first as Cloud alone and then alongside his friends. Sephiroth is fast, casting elemental attacks, attacking with a sword beam, launching a three-swipe attack, and being the most aggressive and damaging enemy you’ll face. His Aeolian Onslaught can be tricky to dodge, his Hell’s Gate creates an explosion of light that hits anyone nearby, his Flamewall restricts your movements, and his Octoslash is effectively a one-hit KO attack. Once you deal enough damage, Sephiroth casts Meteor; you then have until the count of ten to finish him off before your whole party is decimated! This is a tough fight but also incredibly enjoyable. It echoes the Advent Children finale while also bolstering Cloud’s relationships since his friends arrive to help him for each phase of the fight.
Additional Features: Final Fantasy VII Remake has fifty-four Trophies up for grabs, with one awarded each time you clear a story chapter and when you finish the game. You’ll get additional Trophies for completing side quests, like decorating the orphanage, helping out Johnny, and defeating Summons in VR. Collecting CDs, calling upon a Summon, levelling-up Materia and your characters, and mastering weapons all award Trophies as well. While it’s easy enough to win a battle and stagger an enemy, mastering the darts mini game, receiving praise from Jessie for your motorcycle skills, completing all the squat and pull up challenges, and beating the game on “Hard” mode are a bit more taxing. “Hard” mode is unlocked once you finish the game and disables items and restricts you to healing at benches, making for a far greater challenge. Beating the game also unlocks a chapter select option so you can retry any remaining side quests all while retaining your current level and gear. Your EXP and AP is also doubled at this point, which is helpful, a play log is unlocked, and additional battles are added to the combat simulator. Completing Chadley’s Battle Intel requests lets you battle and add Bahumut and Leviathan to your team, and you’ll need to defeat all these Summons to take on the optional superboss the Pride and Joy Prototype. In addition to a bevy of options, from combat controls to camera positions, you can also upload your save file to the PlayStation 5 to continue your game there. The PlayStation 5 version is the only way to play an interlude mission involving Yuffie Kisaragi, so it’s probably better you upgrade to that version to get the full experience.
The Summary: Unsurprisingly, I’m a big fan of Final Fantasy VII. I enjoyed playing through it and have been waiting for a remake for a long time, though I never expected Square to go this far with it! I would’ve settled for a graphical overhaul of the original, with additional CGI FMVs tossed in to bolster the experience but, much like Capcom, Square went above and beyond in remaking arguably their most successful RPG and the results are clear to see. Final Fantasy has never looked better; Remake is like playing through a high-budget CGI movie, with an incredible sense of detail and depth to every environment. Making you interact with NPCs and spend more time helping them out fleshed out every character, not just the supporting roles, making them richer and more nuanced than ever. I loved the classic turn-based battle system and was worried I’d struggle here as a result, but combat is fast, fluid, action-packed, and intuitive. It’s fun issuing orders or switching to characters on the fly, taking cover, healing, or dishing out damage across the battlefield, to the point where it would’ve been great if this was a co-op experience! While the playable roster and the available gear is limited and you’re restricted to what amounts to the first disc of the original game, there’s a lot to see and do here and I liked the twist that this is more of a retelling of these events than a complete retread. The bosses were large and engaging and the sense of empowerment and progression was great; I played on “Easy” and didn’t get a single game over but enjoyed the sliding difficulty scale as the stakes increased. I’m glad it finally came to the Xbox and would gladly replay the game there, especially to experience the Intergrade add-on. Regardless, Final Fantasy VII Remake is an outstanding visual and gameplay experience, easily accessible to newcomers and packed with fan service for long-time fans, revitalising and expanding upon the original game in bold, new (and, crucially, fun) ways to present a truly amazing feat of videogaming.
My Rating:
⭐⭐⭐⭐⭐
Rating: 5 out of 5.
Fantastic
Have you played Final Fantasy VII Remake? If so, what did you think to it and how do you think it holds up against the original? Were you disappointed that the project was split into three parts across two console generations? What did you think to the Whispers and the changes made to the story? Did you enjoy getting to know Midgar more intimately here? Which of the side quests was your favourite? Did you struggle against Whisper Harbinger and Sephiroth? Would you say it’s worth upgrading to the PlayStation 5 to continue the story? Which Final Fantasy game is your favourite? Let me know your thoughts on Final Fantasy VII in the comments and be sure to check out my other Final Fantasy content on the site.
Released: 13 February 2019 Originally Released: 7 July 2000 Developer: Square Original Developer: Squaresoft Also Available For: Android, Nintendo Switch, PC, PlayStation, PlayStation 3, PlayStation 4, Xbox One, Xbox Series S
The Background: Final Fantasy VII (Square, 1997) is unquestionably one of the definitive role-playing games (RPGs) and probably the most popular Final Fantasy title, selling over twelve million copies worldwide and making its way onto many “top ten” lists. In comparison, Final Fantasy VIII (ibid, 1999), despite being a best-seller, is often the subjectofcriticism. For the ninth game, Square decided to veer away from the pseudo-futuristic settings of its predecessors and move back towards a medieval fantasy aesthetic like the original games. This fantastical setting would be home to the various anthropomorphic characters who made up the game’s cast, all of whom were designed by Shūkō Murase, Toshiyuki Itahana, and Yoshitaka Amano. Main character Zidane Tribal was purposely designed to be the inverse of his predecessors: young, agile, brash, and outspoken with an eye for the ladies, a philosophy that extended to his supporting cast and the lighter tone of the narrative. Determined to return to the roots of the franchise by reviving narrative concepts such as the Crystals, Fiends, and fantasy elements, the developers tweaked the battle system to be both familiar and slightly different, returning character classes (or “Jobs”) to the franchise to make each character unique both visually and in terms of their abilities. Final Fantasy IX became the second-highest selling game in Japan upon release and was met with critical acclaim. Reviews praised the back-to-basics approach, amusing characters, and detailed environments and character models, though main villain Kuja was seen as inferior to his predecessors In later years, Final Fantasy IX has been recognised as an under-rated entry in the franchise, which perhaps prompted Square to release this enhanced version of the game in 2019. Featuring graphical updates and helpful boosters to speed up the gameplay, Final Fantasy IX found new life and new success on modern consoles and became much more accessible as a result.
The Plot: In the medieval fantasy world of Gaia, thief Zidane Tribal kidnaps princess Garnet Til Alexandros XVII as part of a ploy by the neighbouring nation of Lindblum. However, he ends up joining forces with Garnet and a diverse cast of characters to take down her mother, Queen Brahne of Alexandria, who has sparked an all-out war between Gaia’s nations.
Gameplay and Power-Ups: Final Fantasy XI is a traditional turn-based RPG set in a fictional and very fantasy-orientated medieval land. Unlike the previous two Final Fantasy titles, players now form a team (or “party”) of up to four characters, each with their own set of skills, magic, and abilities that are analogous to the classic Final Fantasy Job system. Primarily, players control Zidane, a peppy monkey-boy thief, though you’ll control his teammates at various points and will be encouraged to view their character-building moments and forced to split the playable roster into separate teams. In terms of controls, Final Fantasy XI is nice and simple: use the control stick or directional pad to move your character around the various towns, overworlds, and locations and to select commands in battle, execute those commands. Talk to teammates and non-playable characters (NPCs), activate objects and open chests with A, and back out of menus with B. Open up the main menu with Y, challenge characters to a game of Tetra Master with X, and use Right and the Left Triggers to move the camera on the overworld. RT also enables an “auto battle” function, effectively removing control from the player in battles. In battle, you can press Y to switch characters, hold the Left and Right Bumpers to escape (if possible), and select battle commands (attack, defend, casting spells, using items, and such) from several in-game menus. Pressing the View button opens the map on the overworld (which is eventually enhanced to show location names and allow fast travel) and helpful notes when on menus (a Moogle says what each item or spell does, for example), while pressing Menu pauses the game. From the pause screen, the shoulder triggers and bumpers activate some helpful boosters, such as turning off random battles and setting your maximum attack power to 9999 and speeding up the gameplay, all while still allowing you to obtain Achievements.
Engage in fantasy battles, powering up with Trance and more powerful weapons and gear.
There are some other helpful settings in the main menu, too. You can change the borders and text speed, set your default movement speed to run or walk, turn a helpful cursor on or off so you can always locate your character, and set the battle system to turn-based or “wait”. If you set it to wait, enemies won’t attack while you’re selecting moves, easing the pressure on you. You can also turn certain camera movements on or off to further speed up the gameplay, and certain items also affect this as they increase your chances of attacking first, avoiding damage, and the speed your Active Time Battle (ATB) gauge fills up. When exploring the overworld and the various swamps, forests, caves, and castles, you’re randomly attacked by monsters. Defeating them earns you experience points (EXP), ability points (AP) for your character’s different abilities (as dictated by the gear they have equipped), Gil (Gaia’s currency), and random items (potions, elixirs, and the like). Battling also fills the ATB gauge; once full, you automatically enter a “Trance” state that increases your attack power and speed and allows access to more powerful attacks. Each character carries a weapon to inflict damage on enemies; these are applied manually or you can select “Optimise” to equip the best options. Weapons and gear can be swapped for more powerful options you either steal, find, buy, or “synthesise” in specialist shops to increase their attack power and add various buffs or status effects to your attacks. Different equipment (armour, rings, headbands, and such) do the same, allowing characters to learn abilities that can then be equipped providing you have enough AP. These increase your maximum health and/or magic points (HP/MP, respectively), have you automatically counterattack or take damage for party members, increase you chances of stealing, escaping, or attacking first, negate back attacks, and make you resistant to status effects like poison, petrify, stop, and mini. Each character has different special attacks, too: Zidane steals from enemies, Vivi Ornitier and Eiko Carol cast magic twice in a row, Quina Quen eat enemies to learn their attacks, and Freya Crescent leaps to attack from the air, for example. These abilities are then enhanced through Trance, adding more powerful attacks to your arsenal that will attack or affect multiple enemies, deal greater damage and inflict status effects upon them, or heal or revive your party, though at the cost of MP.
Summon Eidolons, ride Chocobos, and traverse Gaia in various airships.
Characters like Eiko and Garnet (who later takes the name “Dagger”) can also summon “Eidolons”, powerful creatures that deal huge damage. Other beneficial magic includes healing spells, spells that cure status effects, and spells that revive downed players, abilities also accomplished by various items, using a tent at save points, or resting at inns (though this will cost you). Google save points are all around Gaia and you can eventually summon a Moogle on the overworld with X. Moogles also teach you the game’s mechanics, sell items, weapons, and accessories, and have you ferry letters around. Some key items must also be selected from your inventory to be used, such as the Gysahl Greens that summon a rideable Chocobo at specific parts of the map, and orbs or keys to open pathways. Initially, your Chocobo simply travels across the open fields but, as you play the aggravating Hot and Cold mini game to find treasures, it’s enhanced to traverse mountains, water, and even fly. However, you’ll also get access to different ships, ones that traverse water and, eventually, the skies, allowing you to quickly fast travel. When in the castle town of Lindblum, Air Cabs take you to the different districts; Memoria features teleport pads, but mostly you use ropes or ladders to explore. When you’re not battling, you can play Tetra Master, a card game almost every NPC plays. As you explore and battle, you’ll acquire cards; these have different strength ratings that, when placed on a grid, allow you to steal your opponent’s cards. Use the arrows on each card and their strength rating to judge where best to place them and fill the board with your colour to win, though I’d recommend making liberal use of nearby save points as NPCs are unfairly skilled. While it’s largely an optional distraction, you must win a small tournament in Treno to progress the story. Speaking of which, you’re regularly prompted to watch an Active Time Event (ATE). A prompt appears onscreen and, when selected, the game shifts to an NPC or teammate as they contemplate their situation or get into mischief. These are optional, and can arguably distract from the main game, but I liken them to regular cutscenes but with a little more character.
Various mini games and additional mechanics add some (often aggravating) variety.
As is common Final Fantasy games, the difficulty scales in Final Fantasy XI; the further you progress, the more powerful enemies become, even in areas you’ve previously explored. Puzzles are generally quite simple: you’ll be activating switches and consoles, collecting items, pulling levers, and traversing mazes in different areas without too much difficulty. There is a lot of back and forth and repetition involved, though, such as when you explore Fossil Roo and change the track the spider-like gargant takes to reach the exit, or when you wander Pinnacle Rocks looking for Ramuh to piece together his fable and earn him as a summon, or taking the correct path in a looping forest to reach the Black Mage village. You’ll light candles to uncover hidden stairways, explore rooms to find hidden passages, search for your teammates when they’re captured or inevitably wander off or have an identity crisis, mashing A to escape quicksand, and cooking dinner for your party. This, like some other parts of the game, requires you to select the right order from a list to get the best results, with some decisions leading to you battling a swarm of enemies. Final Fantasy XI is full of little mini games, with many being mandatory: you jump rope in Alexandria, take part in a play and sword fight with Zidane’s friend, Blank, and question your life decisions as you swing a cage back and forth to rescue Adelbert Steiner and occasional party member Marcus. Marcus and Beatrix, General of Alexandria’s armies, temporarily join the party at various points, with the latter often teaming with Steiner in side battles. Similarly, there’s a part where you play as Regent Cid Fabool IX (who’s been transformed into frog) and must carefully sneak past a Hedgehog Pie and then balance a set of scales to rescue Zidane’s friends. When exploring Ipsen’s Castle, you can open a secret passageway by picking the correct sequence and then mix ingredients for the Ancient Aroma. In Pandemonium, you get thirty seconds to slip past light plumes and the random battles they contain to cross a temporary bridge, as well as altering some headings to activate platforms. You’ll also power up and activate orbs in Oeilvert to learn valuable lore about Terra and Garland’s plan to fuse it with Gaia.
Presentation: I loved the chibi character models of Final Fantasy VII and its industrial, futuristic steampunk prerendered backgrounds. Final Fantasy VIII was a huge visual improvement, both in terms of the more detailed character models and environments. Returning to a medieval setting for Final Fantasy IX is a shame for me as I prefer the more futuristic settings, but my God is this game full of charm! Zidane is the polar opposite of the brooding Cloud Strife and the melancholy Squall Leonhart, being peppy, agile, mischievous, and eternally optimistic. Zidane fancies himself a romantic, pirate-like figure; his charms are mostly wasted on Dagger but she warms to his enthusiasm and heart. When he learns his origins from Garland, Zidane becomes morose and lashes out at his friends, who endure tough battles to snap him out of his uncharacteristic mood. While he’s the focus of the story and gets the most character development, Zidane has competition in Vivi, a clumsy, insecure Black Mage who’s constantly feared and hated due to his destructive brethren who embarks on a journey of self-discovery. Zidane clashes with Steiner, the oafish captain of Alexandria’s guards, and Amarant Coral, a brutish thug and loner with a grudge against Zidane. Freya is an old ally of his searching for her lost love, while Eiko is a young girl with a crush on him who’s both envious of Dagger and also tries to get them to admit their feelings. Then there’s the supporting cast, such as Zidane’s roguish crew, the Tantalus Theater Troupe, who initially seek riches but are roped into saving the world, the jester-like Zorn and Thorn who constantly hound and mock the player, and the enigmatic Kuja, a flamboyant villain who lacks the menace of his predecessors but makes up for it in theatricality. It’s a very light-hearted, whimsical adventure for the most part; slapstick comedy and goofy moments pepper the narrative (especially whenever the androgynous and perpetually hungry Quina is around). However, there’s a lot of heart and emotion and high stakes as the story progresses, with characters questioning themselves and being forced to find the courage to fight for something worthwhile.
Medieval fantasy lands soon give way to surreal, alien landscapes.
While the overworld is largely similar to those of the last two games, comprising various land masses (fields, deserts, a snow region), lakes, and a vast ocean, the towns are closer to those seen in pre-Final Fantasy VII, now brought to life in more detail than ever before. The medieval and fantasy theme delivers bustling castle towns, lavishstone palaces, and quaint little villages. Technology is of a similar steampunk style, but far less advanced (airships and complex machinery aside), with towns relying on wind and water power for the most part. While it’s all very beautiful, it’s an aesthetic I find quite samey; Alexandria and Lindblum are quite similar in many ways, for example, though they get more personality after they’re attacked and left in disarray. One aspect I was keenly aware of was that each area is home to a different species, often anthropomorphic ones, and these different species intermingle throughout the game, adding to its distinct visual style and giving it a diverse world. Caverns, ice caves, great trees, murky swamps, and arid deserts filled with abandoned temples and structures are everywhere. Qu Marshes are full of tall crass and frog ponds, the Iifa Tree looms ominously and sports gigantic, twisted branches, and you’ll find isolated settlements in forests and atop mountains. Ruins, great gates, and abandoned towns add a sense of desolation but things really become surreal and visually interesting when you’re transported to Terra, a bizarre alien landscape whose architecture emphasises glaring eyes, spheres, and a quasi-magical awe. Like the chilling Black Mage production line in Dali, the warped, crystalline Terra and its main town, Bran Bal, is where the genomes (Zidane and Kuja’s people) are created as puppets for Garland’s plot. Though you only visit Terra once, its spirit lives on in the desolate landscape of Pandemonium, a ruined dimension of chaos and memory that threatens to eradicate all life.
The game has a strong visual appeal, with fun characters and rising stakes.
Unlike in previous Final Fantasy games, dialogue is delivered through speech bubbles, allowing multiple characters to talk at once and adding a level of personality not seen before. There’s no voice acting beyond a few roars and squeals and such, but each character exudes personality in their body language; Steiner even lives up to his nickname, “Rusty”, since his armour clanks as he walks. Legendary composer Nobuo Uematsu remixes classic Final Fantasy themes for this throwback, infusing every grand town and castle with a regality or sense of adventure, and every warped nightmare realm with a sense of foreboding as this whimsical adventure takes a dark turn. While no tunes were as memorable as “Dancing Mad”, “One Wing Angel”, or “Maybe I’m a Lion”, I enjoyed the fantasy score. Pre-rendered cutscenes and FMV sequences show our heroes comically swinging through the skies, emotionally reunite, and the all-out destruction of castle towns by powerful summons. Many cutscenes are standout moments, such as the characters flying the Invincible through a swarm of Silver Dragons, Dagger and Eiko summoning Alexander to repel Bahamut, and Zidane braving the Iifa Tree to rescue Kuja. Cutscenes are also told using the in-game models, of course, and these are often animated over FMV sequences. The transition is much less jarring than in previous games and, similarly, the distinction between the overworld models and the battle models is basically none this time around. Battles still load up an enclosed arena, characters still pose triumphantly as the victory fanfare plays, and their weapons change appearance as you equip new ones. Unfortunately, I did notice a considerable lag when the game loads battles that I don’t remember from the last two games. Since random encounters happen very frequently, it can get frustrating staring at a black screen and thinking the game’s crashed every other battle.
Enemies and Bosses: Final Fantasy is known for having some bizarre enemies, but Final Fantasy IX may be some of the weirdest I’ve seen from the series. Sure, you’ve got some returning faces (Bombs, the ever-annoying Cactuars and Tonberries, Goblins, Hedgehog Pies, Malboros, and such) but these are joined by literal zombies, yetis, warrior skeletons, sand golems, lizard men carrying tridents or hatchets, amorphous red blobs with too many eyes for comfort, and a strange living house on spider legs! Giant armoured tortoises, vulture-like birds, oversized beetles, large worms and crabs, ravenous wolves, and sicken toads are commonplace, existing alongside powerful dragons, chimeras, giant trolls, terrifying robe-wearing ogres, and seemingly innocuous treasure chests that turn out to be Mimics. Epitaphs are living stone statues that conjure replicas of your party, Gimme Cats yield barely any rewards upon defeat and simply demand your items, Grand Dragons and Behemoths can KO with one hit even with the boosters activated, Jabberwocks and monstrous Mistodons are the stuff of nightmares, and you’ll be caught completely off-guard by the small, sheep-like Yans and being decimated by their powerful magic. Enemies inflict harmful or aggravating status effects, confusing you, poisoning you, or keeping you from using certain attacks. They heal themselves and their allies, cast elemental magic, and even blow party members away, though many can be stolen from to acquire powerful or rare items. When visiting Treno, you can challenge a powerful monster in the weapon shop if you’re feeling brave, though sadly this is the only opportunity to do this and it’s limited to certain monsters.
Aggressive Black Mages, powerful soldiers, and monstrous plants all stand in your way.
There are many boss battles in Final Fantasy XI, and some enemies must be fought multiple times. Steiner, for example, initially tries to stop you in Alexandria; you’ll battle him three times during your escape, though he’ll either flee or be felled by a Bomb, and he’ll refuse to attack Garnet so you can use this to your advantage. You also have three unwinnable fights with Beatrix where, after you deal enough damage, she uses Stock Break or Climhazzard and flees. You’ll battle Zidane’s boss and father figure, Baku, twice, with the first essentially acting as a battle tutorial, though he’s quite clumsy and often trips. Amarant is also fought before he joins your team; his battle is interesting as he hops all around the arena, making it difficult to target him, though he also casts Death, which can be a problem as you fight him as Zidane alone. Many Black Waltz’s, bloodthirsty Black Mages, attack Gaia’s towns and are thus greatly feared. They use elemental attacks, can freeze your party members, and even utilise dual magic attacks, though the third one you encounter also refuses to attack Dagger. Red Dragons pounce in Mount Gulug (though they’re naturally weak to Blizzard) and two serpentine beasts – Ralvurahva and Ralvuimago – must be fought to pass Gargan Roo. In the early game, Dagger and Vivi are both captured by the appropriately named Prison Cage, a strange plant-like creature from the Evil Forest that sucks HP from its captives. You must be mindful of this and hurting your allies, as it’s game over if their HP drops to zero. The Evil Forest is also home to the Plant Brain, a hideous malicious bud that attacks with lashing tentacles and by casting Thunder or afflicting Darkness through Pollen, though Fire attacks and Blank’s support will win the day (at the cost of the forest).
Bosses become more monstruous and fearsome as you progress.
Your reward for rescuing Lindblum during the Festival of the Hunt is a battle against the boar-like Zaghnol, which enhances its Thunder spells and rams you with Heave. While exploring Gizamaluke’s Grotto, Zorn and Thorn manipulate the cobra-like Gizamaluke into attacking you, though the Bird Killer ability counterbalances its powerful Water spell. While exploring Cleyra and the desert of the Outer Continent, you’ll fight the ravenous Antlion, which reduces your HP to single digits with Sandstorm, counterattacks when attacked physically, and inflicts Trouble (which can only be cured with Annoytment). You’ll finally confront Zorn and Thorn, who fuse into the Lovecraftian entity Meltigemini, which poisons you and stops you earning AP with Virus, though it is weak to Fire magic. Deep in the Iifa Tree, you confront the tree-like demon Soulcage to dispel the Mist spewing from the tree. It can cast LV5 Death and infuriate party members with Mustard Bomb and its attack power is raised if you use Fire spells, but it’s undead so you can use a Phoenix Down to reduce its HP to 1 or use Life or Elixir to instantly kill it. In Fossil Roo, you spring past hazards as the Armodullahan chases them. If hit, you battle it, desperately avoiding its Death spells, until it falls down a hole but you can outrun it if you’re quick. When forced into journeying to Oeilvert to obtain the Gulag Stone, players battle the Ark, and airship-like being that can confuse your team or reduce them to 1 HP but will become a summon upon defeat. Also, when in Ipsen’s Castle, the insectile Taharka attacks when you steal the four elemental mirrors, increasing its defence when it curls into a ball but being notable susceptible to Heat, Silence, and Sleep spells.
Kuja’s threat is usurped by Garland, who’s usurped by Necron!
When the party learns of the four elemental temples, they split up to explore them and are attacked be the four Guardians of Terra, though the player only battles the Earth Guardian, a regal skeleton that attacks with Earth Shake. As you enter Memoria, you’ll battle the Nova Dragon, which tosses you with Psychokinesis, inflicts heavy damage with Twister and Tidal Wave, and counterattacks when physically hit. The four guardians are recreated by Kuja in Memoria and randomly attack as you explore: the four-armed Maliris favours Fire magic, Tiama is a three-headed dragon (almost a Cthulu-type being) that uses Wind magic and can blow you off the battlefield, Kraken is a disgusting octopus-like creature that fires Water or Ink from its tentacles or inflicts Freeze, and Lich is the Earth Guardian reborn, now more likely to cast Death. In Pandemonium, you endure a three-stage gauntlet against the Silver Dragon, Garland, and Kuja with no respite between. While the Silver Dragon favours Wind spells like the Nova Dragon, Garland likes to freeze the party with Stop (causing a game over if all four are afflicted) and obliterate their HP with Flare. In comparison, Kuja casts Demi, Ultima, and Flare Star, the latter of which cannot be protected against with Shell or Reflect. This is an unwinnable battle, as Kuja enters Trance to end the battle, and battle him (as “Trance Kuja”) again after besting the four guardians and Deathguise, another cobra-like dragon capable of annihilating ill-prepared parties with Meteor. Trance Kuja heals with Curaga, casts Flare, Holy, and Flare Star, though these same spells (or similar) can be turned against him. Once again, this is an unwinnable fight but, this time, you’re transported to the Hill of Despair and challenged to assemble a refreshed party to battle Necron, a being from beyond time and space who appears out of nowhere, drawn to Kuja’s despair. This surreal, angelic being is fought in a void and boasts powerful magic spells, including Blue Shockwave (which reduces one character to 1 HP), Grand Cross (which randomly inflicts different status ailments), and Neutron Ring to deal heavy damage. Necron can also attack four times in a row, easily pummelling the unprepared, so it’s best to have abilities like Regen, Auto-Life, and Mighty Guard enabled.
Additional Features: There are fifty-one Achievements in Final Fantasy XI, with very few obtained through simple gameplay. You’ll get one for finishing the game, sure, and for winning one, ten, and 100 Tetra Master matches, but you’ll be hard-pressed to defeat 10,000 enemies or reach level 99 without grinding endlessly. Similarly, while it is possible to view 79 ATEs in a single playthrough, if you miss even one you can’t go back and view it or tick it off on a second playthrough, same goes for buying every item from Stiltzkin the Moogle (I missed that he was in Bran Bal). While guiding the residents of Cleyra to safety, entering Trance fifty times, causing Moguo to have a tantrum, and having Vivi win the Festival of the Hunt are pretty easy, getting an encore from the nobles, catching ninety-nine frogs, and jumping rope 100 and 1000 times are more than a chore! Similarly, you’ll be playing Hot and Cold a lot to upgrade your Chocobo’s beak and uncover all the hidden treasures across Gaia, though you can obtain most of the Ultimate Weapons if you search around Memoria. Other Achievements are gained from delivering Moogle mail and repairing their Mognet, uncovering the secret of the Eidolon Wall by interacting with the images etched there, obtaining four Moonstones, capturing a golden frog, and trading thirteen rare cards to Queen Stella. If you defeat the Behemoth in the Treno weapon shop with Dagger, you’ll get an Achievement (something easier said than done even with the boosters on!), and you’ll get another for getting a Very Good Omen from the fortune feature in Dali, where you also earn a nifty model airship if you bring an NPC three coffees hidden throughout Gaia.
You’ll have to endure tedious side quests to reap the best rewards and challenge the bizarre Ozma.
Other Achievements are much more time consuming. You can’t acquire Zidane’s Ultimate Weapon unless you upgrade your Chocobo, which must also be done to find hidden treasure chests and reach Chocobo’s Air Garden. This is a hell of an ask and an aggravating task, but your reward is battling the spherical superboss Ozma, an existential cosmic being capable of fully regenerating itself and attacking before you do, decimating the party with powerful spells like LV5 Death, LV4 Holy, Doomsday, and Meteor. Ozma is also practically unreachable unless you befriend all the friendly monsters across Gaia (which also awards another Achievement). These randomly appear (accompanied by a whimsical jingle) asking for ore or diamonds or other items and allow you to attack Ozma unrestricted once appeased. The Ragtime Mouse also randomly appears throughout the overworld, challenging you answer his quiz to earn rewards and another Achievement. All the boosters in the world won’t help too much with these tedious tasks, and be careful what you activate as there are cheat boosters in the main menu that disable Achievements. If you fancy synthesising the best weapons and gear, search around in Memoria to find Hades, an optional superboss that likes to inflict numerous status ailments and reduce you to 1 HP with Judgment Sword but will synthesise the best gear upon defeat. Additionally, you can take on the Tetra Master tournament as often as you like (and challenge numerous NPCs) and pop along to the Trena auction house to win rare items, some of which are needed for Achievements. If you reach Memoria in under twelve hours, you’ll also acquire Steiner’s Ultimate Weapon, Excalibur II, and you’ll even be ranked on your treasure hunting abilities by a mysterious four-armed man. Finally, completing the game unlocks a movie gallery and an additional card game from the main menu, if you fancy checking those out.
The Summary: I first played Final Fantasy XI on the PlayStation 3 back in the day after years of being a SEGA and Nintendo kid. The darker, more melancholy and futuristic nature of its two predecessors appealed to me a lot more so it was always jarring entering a medieval fantasy world, a trope that had been done to death even back then, but the sheer visual appeal and wacky nature of the game’s characters quickly won me over. I was excited to return to Gaia, especially with the helpful boosters this version offers, and the story and characters are just as appealing as ever. Everyone has such life and personality to them and, while the game is very goofy, there’s an emotional undercurrent through it and it gets pretty dark at times when castles are being destroyed and characters are questioning their origins and morality. While I wasn’t massively blown away by the game’s locations or music, few of which really stood out for me, the diverse cast and bizarre enemies made up for it, as did the bonkers existential narrative that the otherwise simple plot descends into by the end. Gameplay is solid throughout; battles are as easy to navigate as ever, with a few tweaks to the formula to harken back to the old Job system and make characters unique through their abilities. I was a bit disappointed by the Trance state as I missed the big Limit Break attacks of the past games, but they open up new attack options and the summons are as impressive as ever. While it can lag at times and the mini games can be frustrating and the ATEs a little distracting, I think the whole package comes together nicely to pay homage to the franchise’s rich history and deliver a suitable love letter to the games that made Final Fantasy a household name. It may not be as mainstream as Final Fantasy VII or as controversial as Final Fantasy VIII, and I’d agree that it’s unfairly forgotten or overshadowed by its more successful and appealing predecessors and successors, but Final Fantasy XI is everything you could want from an RPG. Strong story, fun and engaging characters, intricate battle system, and a fair amount of replay value if you’re willing to put the time into doing tedious tasks for high rewards.
My Rating:
⭐⭐⭐⭐
Rating: 4 out of 5.
Great Stuff
Are you a fan of Final Fantasy IX? Were you pleased to see it return to the medieval roots of the series? Who was in your party in Final Fantasy IX and which character was your favourite? Were you surprised when Necron randomly appeared at the end? Did you ever find all the treasures and defeat Ozma? Whatever your thoughts on Final Fantasy IX, and the Final Fantasy series, drop a comment below and go check out my other Final Fantasy content.
Released: 26 September 2024 Originally Released: 18 December 1987 Developer: Square Enix / TOSE Original Developer: Square Also Available For: Android, Mobile, Nintendo Switch, PC, PlayStation 4, PlayStation 5, Xbox One, Xbox Series S (Pixel Remaster); EZweb, Game Boy Advance, i-mode, J2ME, MSX2, Nintendo 3DS, Nintendo Entertainment System (NES), PlayStation, PlayStation Portable (PSP), WonderSwan Color (Original / Ports)
The Background: Midway through the 1980s, videogame developer Square first branched into the Japanese videogame industry with simplistic role-playing games (RPGs), racing titles, and platformers for the Nintendo Famicom. Cautious to risk their sales, they initially refused to allow Hironobu Sakaguchi to develop a more complex RPG, however the success of Dragon Warrior (Chunsoft, 1986) saw Square reconsider this decision. Accordingly, Sakaguchi put together a small team to develop what he saw as his last chance to achieve success in the industry. Though Sakaguchi was known as a hard taskmaster, his team worked hard to conceive of the game’s turn-based battle system and lore, inspired by Dungeons & Dragons, and advocating for as much player choice as possible. Yoshitaka Amano joined the project as the character designer while Nobuo Uematsu came on board as the composer, while Nasir Gebelli was brought in to code the game and design an additional sliding puzzle minigame. Against the odds, Final Fantasy proved a critical and commercial success and a game-changing entry in the RPG genre, despite its difficulty and laborious mechanics. This success launched a slew of sequels, spin-off titles, and multimedia ventures, turning Sakaguchi’s last-gasp at success into perhaps the most prolific RPG franchise in all of gaming. Over the years, Final Fantasy has been ported to multiple consoles, adding visual and gameplay upgrades to each new version, such as the quality of life tweaks, a “Bestiary”, and additional dungeons seen in the warmlyreceived Game Boy Advance version that I first played. This rebuilt version of the game was originally exclusive to mobile platforms and Steam, before jumping to home consoles and, eventually, the Xbox series in late-2024. Although this Pixel Remaster removed some features from previous ports, it boasted a much-needed visual upgrade to the classic game and included some modern features to make the experience more accessible, resulting in a largelypraised collection of RPG classics.
The Plot: Upon arriving in the medieval fantasy land of Cornelia, four Warriors of Light are charged with rescuing Princess Sarah from the rogue Cornelian knight, Garland. However, their journey sees them embroiled in a paradoxical plot to upset the four elemental Crystals and spread chaos across the land using four mythical Fiends.
Gameplay and Power-Ups: Final Fantasy: Pixel Remaster is a spruced-up overhaul of previous 16-bit remakes of the original Final Fantasy. Accordingly, the game is a traditional turn-based RPG title in which players explore a vast overworld and various dungeons from a top-down perspective and engage in regular, random battles while exploring outside towns. As soon as you start the game, you must form a team (or “party”) of four characters, picking from six different character classes (also commonly referred to as “Jobs”). Each has different strengths and weaknesses and can be equipped with different gear, and each class is later upgraded after you acquire a specific key item and talk to the legendary king of dragons, Bahamut, which allows even a Warrior to cast magic. Due to sticking closely to the original NES version, Final Fantasy: Pixel Remaster’s actions are relatively simple, with you using A to talk to non-playable characters (NPCs), open treasure chests, enter your Airship, and to select commands from the various menus. B backs out of these menus and cancels your last order, while “Start” pauses the game. Y brings up a full screen map, which clearly shows towns and things of interest and is a godsend since this was missing in previous versions. A mini map also appears onscreen, which you can toggle with the Right Trigger. X opens the main menu, where you can tinker with either the party or the in-game settings. You can rearrange the order of your party (which changes the overworld sprite), though you won’t be placing characters in front or behind to increase or reduce damage. You can also use various items both in and out of battle, equip various gear (weapons, shields, and clothing, for example), and review or use any spells you’ve acquired from the various magic shops found in each town. When in battle, you can choose to attack, cast magic (which can only be done so many times), use items, or flee. You can still be attacked when fleeing, and you’ll forfeit any experience points (EXP) and Gil (the currency of Final Fantasy) you would’ve earned from a victory. Finally, you can enable the “Auto-Battle” option to have the CPU repeat your last inputs and speed up encounters.
Gear up your party of chosen warriors and prepare for an arduous, fantastical quest.
Battles were frequent in the original Final Fantasy, with anywhere from one to nine enemies randomly attacking after one step or more. These are a bit less annoying in the Pixel Remaster, however, and you can even toggle them off from the “Boost” menu. I’d recommend battling every enemy you encounter, not just to stock up on Gil and randomly dropped items, but also to gain EXP and level-up your party up to stand a better chance against later battles and bosses. The “Boost” menu also allows you to increase the Gil and EXP you receive, meaning you can level-up your characters and increase their stats even faster. This ups their attack power, evasion, and maximum health points (HP), enabling them to take more hits before being knocked out or more easily flee. Each class utilises different weapons and gear and has pros and cons. The Warrior, for example, can wield powerful swords and block damage with shields, but their magic is limited. The Thief attacks with high accuracy, but their gear selection is poor; the Monk can easily flee but cannot use shields and fights best bare-handed. The White and Black Mages specialise in healing and offensive magic, respectively, with the Red Mage being the jack of all trades and probably your best bet for overall coverage. Although you cannot summon powerful monsters to aid you in battle or utilise class-specific moves like stealing items or learning enemy attacks, you can use certain gear in battle to cast magic without cost. You can cast elemental magic against enemies, such as Fire, Blizzard, and Thunder, or restorative spells on your party to cure status effects like Poison or Stone and even return them to life. Magic is a bit weird in this game, with you having to buy it for extortionate prices and characters only able to learn select spells according to different “magic levels”. Better, more useful spells like Flare, Holy, and Warp can all be learned as you progress, allowing you to deal or heal additional damage, escape from dungeons, and up your attack or evasiveness, among other buffs. While some status ailments (like Darkness and Paralysis) disappear after battle, others (Poison and Stone, for example) can only by cured using magic or items; even resting at an inn won’t remove these effects, which can be aggravating.
Some dungeons have hazards to watch out for and you’ll soar through the sky in an Airship.
On the plus side, the Pixel Remaster utilises both autosaves, quick saves, and a manual save anywhere outside of a battle screen, you can find loads of treasure in each area, and you can always backtrack to cheaper inns if you’re low on Gil. Still, Final Fantasy: Pixel Remaster certainly doesn’t hold your hand. While things are pretty linear at the start, you’ll soon be left wandering the overworld with little direction on where to go and what to do. NPCs offer hints and inform you of their current troubles, but it’s mostly up to you to figure out where to go next. It’s not uncommon to stumble upon caves and blocked paths, or NPCs who require items but won’t tell you where to find them. It’s equally easy to miss crucial pick-ups or interactable elements in some dungeons, such as the Cavern of Earth, where you must return with the Earth Staff to proceed further. Most dungeons are simply mazes of tight corridors and stairs, though teleports pop up in the Flying Fortress. Some dungeons contain cracked floor tiles that drop you to lower areas, lava or spiked floors that sap your health, a maze of doors that turn you around, and even areas where random encounters are increased! Unless you battle one of the main bosses, you can’t exit a dungeon until you purchase the Warp spell, so it pays to have a good stock of healing items and to watch your resources so you can stay alive long enough to leave the more labyrinthine areas. You’ll need key items like the nitro powder, oxyale, and the magic key to unlock new areas or progress further and it’s recommended that you spend time grinding as the difficulty can spike at times, especially in the endgame. While you wander about on foot most of the time (and should therefore enable the “run” option in the settings), you soon acquire a pirate ship to cross the sea, a rowboat to travel through shallow streams, and eventually an Airship to fly over the map with no fear of random encounters (though limited places to land).
Presentation: Final Fantasy has been completely overhauled here, ditching the indistinct and outdated 8-bit graphics and adding an additional graphical flair to the 16-bit paint job seen in the Dawn of Souls (Square Enix/TOSE, 2004) version I first played. This not only brings Final Fantasy more in line with the standard set by Final Fantasy VI (Square, 1994) but also adds some visual effects to compliment the sprite work, such as fog, rushing water, twinkling snow, and more theatrical spells in battle. This also means that sprites are far more detailed and lively, towns and dungeons pop with colour and little details, and a touch of Mode 7 brings an additional gravitas to your flights around the overworld. The graphical overhaul extends to the game’s cutscenes, which introduce the basic story and show new areas unlocking or being altered by your actions. This is all bolstered by a remix of Nobuo Uematsu’s timeless score, which gives each area a distinct identity and makes boss battles more dramatic. However, as slick and detailed as the game looks, there are still some holdovers from the 8-bit days. Sprites constantly run in place, for example, and, though each character in your party can be named, they’ll never speak during the game. Still, your party exudes a decent amount of character at times, splitting out from your lead character during key events, celebrating victories, slumping in defeat, and even keeling over when afflicting with status ailments. Character sprites change when you upgrade their classes (or press the shoulder triggers) to keep things visually interesting and they’ll even whip out different gear when you equip new weapons, which was a nice touch. Battle animations are limited, with basic attacks never connecting with either party, but magic effects are very impressive, with flames bursting from the ground, tidal waves sweeping your party away, and bolts of lightning raining down. There are some nice visual effects are times, too, such as clouds passing by beneath the Flying Fortress, bosses disintegrating upon defeat, harmless bats flittering about in caves, and the Airship and Mirage Tower making their grand entrances.
The graphical overhaul brings a whole new lease of life to this classic RPG title.
Final Fantasy: Pixel Remaster has both feet firmly planted in a medieval fantasy setting. Accordingly, you’ll visit numerous towns in the shadow of large, stone castles and populated by colourful NPCs, from dwarves, to dragons, to mermaids. Some even speak with regional accents not unlike Scottish or Irish, which was a welcome detail, and others change their dialogue after you’ve liberated their towns or defeated whatever evil threatens them. Each town is very distinct, though they share common elements such as stone paths, rural brick buildings, wells, churches, and churchyards. Castle Corneria is an ornate abode of marble statues and beautiful carpets, Pravotia is a town criss-crossed by moats and under siege by Bikke’s pirates, Mount Duergar is a dwarf mine where blacksmiths toil, and Melmond is a town in ruins thanks to a local vampire. While caves and dungeons are primarily differentiated by colour palettes and different layouts, some stood out, such as the volcanic Mount Gulg, the trepidatious Cavern of Ice, and the pyramid-like Mirage Tower. Depending on where you are, the battle backgrounds also change, ranging from a swamp-like marsh to a dark cavern to a cosmic barrage of colours by the end. In-game cutscenes shine with their use of sprite-based assets, such as the king’s men hastily constructing a bridge to speed you on your quest and Bahamut majestically spreading his wings before upgrading your classes, with the game’s ending providing a sneak peek at the peace your actions have brought each location. The game performs exceptionally well, with battles loading and progressing with a slickness the NES could only dream of, though the game can still be tedious due to the constant grinding to survive its progressively more powerful enemies. The methodical nature of its genre means you may get frustrated by the barrage of battles, even with the boosts and Auto-Battle enabled, though things are far less aggravating than in previous versions thanks to the autosaving allowing for quick reloads.
Enemies and Bosses: There are loads of fantastical, monstrous, and aggravating enemies to contend with in Final Fantasy, with many being recycled as palette swaps but augmented by greater attack power, magic, or coming in larger groups. Various goblins, snakes, tarantulas, and sharks are commonplace enemies, for example, alongside more recognisable enemies such as the Sahagin lizardmen, who naturally make their debut here. Golems, crocodiles, hydras, various dragons, and undead enemies like mummies, vampires, and ghouls all crop up alongside giant worms, bizarre cycloptic creatures, wolves, tigers, and ogres. For the most part, these enemies are relatively unspectacular, lashing out with simple melee attacks and going down in just a few hits. Others, like zombies, Chimera, and the techno-organic Soldiers, both resist and are immune to certain elemental magic. Undead enemies, for example, are particularly weak to Dia spells, the different Elemental enemies will be weak to their corresponding element, and many drop items or gear upon defeat. While enemies can flee from battle, which is to your benefit, some will automatically regenerate health as the battle goes on and many eventually cast magic of their own. While this means they can blast you with Fire or strike you with Icestorm, it’s the status ailments that’ll give you the most trouble. Enemies can “slow” you, paralyse you to keep you from attacking, whittle away your health in and out of battle with poison, and halve your accuracy by inflicting Darkness. Your party can also be subdued by being put to sleep or turned to stone, or even knocked out with one hit if Death is evoked. Luckily, you can equip gear that’ll nullify many of these status effects, and use items and magic to cure them, but they can significantly impact battles even when you’re at a high level, especially when confronted by a swarm of enemies.
While things start simple with an errant knight, you’re soon battling mythological beasts!
While many treasure chests are guarded by specific encounters with the likes of Evil Eyes, Dragon Zombies, and Piscodemons, these are merely tougher enemy variants and don’t really classify as bosses. Your first test comes at the Chaos Shrine when you confront Garland, an armour-clad knight who certainly looks and talks tough and has no elemental weaknesses but is easily put down if you grind to about level twenty since he relies solely on melee attacks. After wiping the floor with Bikke’s pirates and securing a boat, you’ll cross the sea to Elfheim and investigate the Western Keep, tangling with Piscodemons and rescuing the elf-king…who turns out to be the Dark Elf monarch Astos. Like Garland, Astos has no elemental weaknesses but boasts a greater health pool and debilitating spells like Slowra, Dark, and the ever-aggravating Death. You’ll fight many variants of the Vampire boss as regular enemies after encountering him in the Cavern of Earth. Luckily, he’s weak to Fire magic and, naturally, Dia, which can make short work of him and nullify his paralysing Gaze attack. Your primary goal in Final Fantasy is slaying the Four Fiends and restoring the four elemental Crystals, and these mythical creatures represent some of the game’s most impressive and detailed sprites (even if they are mostly static). The Grim Reaper-like Lich is up first, attacking with Fira, Blizzara, and Thundara as well as paralysing you with Hold and putting your entire party to sleep. Weak to Fire, Ice, and Dia magic, Lich is the toughest enemy of the early game but is easily overcome within a few turns if you’ve optimised your equipment, levelled-up, and have the appropriate magic. Marilith is tougher still, resisting or having no discernible elemental weaknesses, roasting you with Fira and handicapping you with Darkness. This was the first real challenge I faced, but a fun one as I was at a high level and could withstand Marilith’s high attack power.
As tough as Chaos is, the game’s optional superbosses will absolutely decimate the unprepared!
Minotaurs, armoured turtles, and oriental-style monsters pepper the convoluted path to Kraken, a Cthulu-like monarch who inflicts Darkness with Ink and decimates your party with Thundara, though it’s naturally weak to Thunder attacks. The final Fiend, Tiamat, is the most horrific; a multi-headed dragon who can poison and chill the entire party with Poison Gas and Blizzard. With a high health pool and no elemental weaknesses, Tiamat can be quite the hurdle for an unprepared or under levelled party. The Four Fiends are fought again, attacking in specific spots as you explore the Chaos Shrine 2,000 years in the past. The battles are mostly the same, bar some new moves to their arsenals, though you should be a lot tougher by this point. They serve as the perfect appetiser to the game’s final boss, who turns out to be Garland, having ensured his survival with a time loop and transformed himself into the demonic Chaos! Chaos is, without a doubt, the toughest of the regular bosses, boasting a whopping 20,000 HP and no discernible weaknesses. Chaos sports some devastating attacks that can wipe out your party with ease, such as a unique version of Flare, a powerful tsunami and cyclone, and the one-hit KO Earthquake, alongside incredibly powerful elemental magic. Your best bet is to get your levels high, equip Ribbons (since Protect Rings won’t help against Earthquake), and cast Haste, Invisira, and Curaga as soon as possible. Holy and Flare are your best bet here, but it’s a gruelling battle, one only surpassed by the death machine, Warmech, a superboss that may surprise you when you approach Tiamat. Unfortunately, this version of the game removes the additional dungeons and optional superbosses from the Dawn of Souls version, meaning you’ll need to shell out a fair bit of money if you want to tackle returning faces like Gilgamesh, Deathgaze, and Shinryu, as well as an even tougher variant of Warmech, Omega, and even the ever-ridiculous Phantom Train!
Additional Features: There are twenty-three Achievements to earn in this version of Final Fantasy, with six earned from completing story-based objectives like rescuing Princess Sarah and restoring the Crystals, and three more for defeating 100, 300, and 500 enemies. You’ll get additional Achievements for getting your whole party to level 50, obtaining up to 100,000 Gil, playing the hidden slide puzzle game, and finding some and then all of the game’s treasure. There’s loads of treasure to be found in Final Fantasy: Pixel Remaster (more than you can ever carry!), and most of it is guarded by tougher enemies or hidden away in optional rooms and alternative routes in dungeons. If you’re frugal or activate the Gil multiplier boost, like me, you can easily amass enough Gil to buy new gear and spells, but you’ll eventually amass more Gil than you can carry and won’t have to worry about keeping your items fully stocked. You must search around, pay attention, or use a guide to get the best rewards, such as Excalibur and Masamune, the two most powerful swords, though getting the best spells is simply a question of cash and properly thinking about what your characters are capable of learning. Like previous re-releases of Final Fantasy, the Pixel Remaster includes a “Bestiary”, which fills as you encounter new enemies and bosses, cluing you in on their strengths, weaknesses, and the rewards they drop. Unfortunately, defeating the Four Fiends no longer unlocks the four additional areas from the Dawn of Souls remake, so you won’t get to test your mettle against those optional superbosses, though you can still go seek out the elusive Warmech if you want an extra challenge.
The Summary: I’ve only played a few Final Fantasy titles, so I’ll be the first to admit that I was wary about tackling Final Fantasy: Pixel Remaster, primarily because of the time and energy required to play it. However, I enjoyed my time with the Dawn of Souls version and this version of the game has some benefits over even that version, such the boost features that increase the Gil and EXP you earn and the Auto-Battle mode, which really benefitted my playthrough. It also helped to be able to save at any time and to be frugal with my Gil and spending, and to spend some time between dungeons levelling-up so I was prepared for future challenges. It helps that the game looks awesome; the constantly walking sprites were distracting but, otherwise, Final Fantasy greatly benefits from the graphical tweaks and improvements. This includes adding a visual flair to enhance the redrawn sprites and making battles even more spectacular with some truly impressive sprite art. The story is paper thin for the most part and the main characters largely lifeless, but the world is brought to life through the varied locations and lively NPCs, who are all different races and offer something different to the player. I enjoyed the twist at the end that Garland was creating a self-sustaining paradox and the challenge offered by the Four Fiends, though the difficulty curve was very much like a rollercoaster at times, with some debilitating attacks making even regular enemies an uphill battle if you get unlucky. It would’ve been nice to see a bit more direction about where I needed to go and what I needed to do at times, perhaps by having the priest at the various churches pointing you in the right direction, but it was fun exploring and figuring things out (and online guides are always available). In the end, while it’s obviously dated and lacks many of the more enjoyable features of its previous ports, this much-needed overhaul of Final Fantasy was a lot of fun to play through and I was glad to revisit the game it and see how many of the franchise’s recurring elements got their start, even if it’s obviously been far surpassed.
My Rating:
⭐⭐⭐
Rating: 3 out of 5.
Pretty Good
Have you ever played the Pixel Remaster of Final Fantasy? What did you think to the new additions and were you able to figure out the Magic Level system? Which character classes made up your party? What did you think to the difficulty curve and the final battle against Chaos? Did you ever defeat Warmech and complete the Bestiary? Which Final Fantasy game is your favourite? Whatever your thoughts and memories of Final Fantasy, drop a comment below, support me on Ko-Fi, and check out my other Final Fantasy content.
Released: 13 December 2022 Originally Released: 13 September 2007 Developer: Tose Original Developer: Square Enix Also Available For: Nintendo Switch, PC, PlayStation 4, PlayStation 5, Xbox One, Xbox Series S (Reunion); PlayStation Portable (Original)
The Background: You’ve heard of Final Fantasy VII(Square, 1997), right? Of course you have! The game won numerous awards and sold over ten million copies on the PlayStation alone! But the story of Final Fantasy VII doesn’t end there. Seeking to expand their scope beyond just the gaming world, Square Enix announced Compilation of Final Fantasy VII in 2003, a multimedia venture that included the fantastic computer-generated movie Final Fantasy VII: Advent Children(Nomura, 2005) and numerous spin-off titles that expanded the lore and world of Final Fantasy VII. Crisis Core, a prequel story initially exclusive to the divisive PlayStation Portable, was one such title. Director Hajime Tabata wished to exceed fan expectations with the game, which focused on the younger days of popular characters Zack Fair and Sephiroth and built upon story elements that had been laid out for both by Tetsuya Nomura. Envisioned as an action game first and foremost, the team incorporated role-playing elements to craft something of a hybrid and emphasised an element of luck to the combat through the Digital Mind Wave (DMW) system. Upon release, Crisis Core was met with generally positive reviews; while the combat was praised, critics were dividedon the DMW system but praised the game’s narrative and graphics. About fifteen years later, to commemorate Final Fantasy VII’s 25th anniversary, Square Enix developed a remake for then-modern consoles alongside Tose, one that completely overhauled the graphics, soundtrack, and voice acting. Although the story remained the same, the game was tweaked to closely align with the much-anticipatedFinal Fantasy VII remake project. Producer Mariko Sato advocated for numerous improvements to the original game, such as reducing combat interruptions, adjusting the magic speed, and including a“Hard” mode for returning players. Like the original game, Crisis Core Reunion was largely praised; while critics weredivided regarding the characterisations and the DMW system, the improved gameplay was praised and it was one of eleven recipients of an “Award for Excellence” at the 2023 Japan Game Awards.
The Plot: Before Final Fantasy VII, Zack Fair of the paramilitary organisation SOLDIER is assigned to find his mentor, Angeal Hewley, and fellow SOLDIER Genesis Rhapsodos and discovers a revelation that sets him against the malevolent schemes of his former masters.
Gameplay and Power-Ups: Crisis Core: Final Fantasy VII Reunion is a HD reimagining of the original action/role-playing PSP title. Unlike the original Final Fantasy VII (and most of the Final Fantasy games I’ve played to this point), it’s less of a turn-based RPG and more of a mission-based, action-orientated title in which players control one character (Zack) rather than a party of diverse fighters. Zack is free to roam around various 3D locations (with many being recreations of environments seen in Final Fantasy VII) and automatically engages in random battles when exploring. When in a conflict situation, Zack can attack with X; successive presses of X unleash combination attacks (with some dealing additional damage from “critical hits”), and you can target enemies by pressing in the right stick and switch to different targets by pressing the Left Bumper and the right stick. A lets you dodge incoming attacks, the Right Bumper puts up a guard to reduce damage, and you can flee from most battles by running against the edge of the barrier that pops up in each combat scenario. You use the Left and Right Triggers to cycle through your available items and use them with B, restoring health points (HP), magic points (MP), and providing certain buffs to Zack or debuffs to enemies. The Left Bumper brings up the Materia command window; eventually, you equip different Materia to the four face buttons and RB and RT, allowing you to perform elemental magic attacks, healing spells, reduce damage, apply buffs, eliminate status effects, and more if you have enough MP. Outside of battle, you can dash with RT and hold it to run (a toggle option would’ve been nice), talk to non-playable characters (NPCs), and bring up the map with X. While there’s no mini map (which also would’ve helped), you can toggle on destination markers to help guide you to your objectives from the settings menu, and set the in-game language and toggle the camera tracking.
Equip Materia to boost your attacks and use the DMW to unleash Limit Breaks and Summons.
The game’s big unique feature is the DMW system, a slot-based game of chance that automatically plays in every battle and seems to spin faster and build up the more you attack. Each spin consumes Soldier Points (SP), which are gained from winning battles and fusing Materia, and the strength of each DMW image increases as the game progresses. The game says they’re made stronger by Zack’s emotional tie to the characters represented, but your DMW avatars actually level-up in battle just like him. When three of the same images appear in the slots, press Y to perform a Limit Break or press in both analogue sticks to unleash a powerful Summon. These super powerful attacks, often accompanied by an annoying cutscene that’s thankfully skippable, can lay waste to entire foes, completely heal you and bestow buffs, level-up your Materia, and more. Additionally, during combat, you are often granted limited buffs, such as temporary invincibility or infinite MP or Ability Points (AP, consumed when you dodge, block or use Command Materia like Assault Twister or the elemental blade attacks), which is super useful in a tight pinch. Like other Final Fantasy games, you must be mindful of status effects and elemental attacks; enemies can cast Silence to negate your MP or stun you, and some are weak to certain elemental attacks and resist to others so it’s worth exploiting these weaknesses. Although the game autosaves at various points and gives you the option of retrying a battle upon defeat, there are numerous manual save points in each location. These refill your HP, MP, and AP and offer a selection of Missions to play through alongside the main story. Indeed, while you can level-up and get stronger playing the story, the best way to grind, gain new items and Materia, and improve your combat prowess is through these missions. They all have a level grade so you can judge how difficult they are and are usually quite short, consisting of a handful of battles, though others throw you against seemingly endless waves of enemies, or have you rematching bosses or defeating Summons to add them to the DMW.
Different equipment, Materia, and battling will bestow buffs and additional items.
Although you don’t acquire new weapons or equip armour, Zack does eventually inherit the iconic Buster Sword. Once you have this, you can hit X and A to enter a “Battle Stance”, increasing your attack power and chances for critical hits, and your proficiency increases as you defeat enemies in this stance. Additionally, after Zack is promoted to SOLDIER 1st Class, you gain extra items and buffs (including refilling your gauges) if you win battles in certain ways (with magic attacks, Summons, or without taking damage, for example). You can customise Zack from the main menu, setting up five equipment presets for your convenience, fusing and selling Materia, and eventually purchasing items from various shops. You’ll do this with the Gil you obtain from battle, though I honestly never bought anything as the game is extremely generous with items (which I also rarely used) and restoring your gauges. Materia is fused together to become stronger, and is also be “mastered” over time, increasing its MP cost and its power. This menu also allows you to review the mail and tutorials characters send you, review your DMW progress, and equip various accessories to Zack. These provide passive buffs, such as increasing his stats, providing resistance to elemental attacks and status effects, and more. Items and Materia are also acquired from various treasure chests lying around, completing missions for NPCs, and as required by the story. There’s a part, for example, where Zack searches for various junk to build a flower cart (and impress) Aerith Gainsborough. Other times, you’re climbing ladders, searching for keys to open doors, defeating enemies for different keys, searching for clues to find a pickpocket, activating consoles and turning wheels to open pathways, and searching for additional lore or helpful pickups.
Aggravating mini games and gimmicks compound the strange difficulty curve.
There are numerous mini games and gameplay gimmicks to break up the action, though they’re a bit hit and miss in their execution (despite awarding additional Achievements). Hidden pathways in Wutai lead to enemy troops that must be defeated to impress SOLDIER Director Lazard Deusericus and you can also choose to charge at enemies or take a stealthier approach in this section. Professor Hojo tests your skills in battle and a frustrating squatting challenge, Banora village hides numerous glowing spots that must be interacted with under a time limit, and then the village must be defended from a missile attack using carefully timed strikes. NPCs need rescuing from Shinra headquarters, spies are in Midgar, a Slums vendor challenges you to quickly grab his Materia, perfume can be blended to impress Aerith, and Junon’s perimeter must be defended from incoming enemies. Many side missions are contested under a time limit, which can be a bit stressful, but easily the most aggravating mission with Zack’s infiltration of the Modeoheim Mako Reactor. While you can simply storm in, you get an Achievement for staying out of sight, which is tricky as the guards spot you the moment you pop out from cover and you must rapidly tap Y to keep your body temperature up. There are seven wonders to find in Nibelheim, a mother trapped in a burning building, and keyholes to look through in the Shinra Manor to discover a random safe code. There’s number guessing game to play, fan clubs to join, and an annoying sniper mission where you pick off Shinra forces with an upgradable rifle. While it’s easy to retry the Modeoheim mission thanks to a nearby save point, this sniper mission doesn’t have that so you need to be fast and accurate to get that Achievement. Finally, in the end game, you’ll be battling monstrous monsters from the Lifestream to collect the Goddess Materia and running around a prison, unlocking cages and taking secret tunnels. The game has two difficulty settings, “Normal” and “Hard”. I played on “Normal” and found the difficulty oddly unbalanced. Some bosses were a complete joke, and then other times I’d be one-shotted by a damn Pachyornis! Most enemies are cut down in no time at all, making combat even more tedious and creating a bit of an uphill battle when you randomly face troublesome enemies who’ll decimate you if you don’t break their Boss Ability Gauge.
Presentation: I briefly played Crisis Core on the PSP many years ago and was mildly impressed with its PlayStation 2-quality graphics on the handheld. Things were a bit clunky and restrictive, particularly Zack’s movement and the mission-based structure of the game, but it seemed decent enough, especially the high quality FMVs. All these visuals have been upgraded here to match the presentation of Final Fantasy VII Remake (Square Enix Business Division 1, 2020). This includes an all-new soundtrack, which features remixes of classic Final Fantasy VII themes to match each location and an awesome new rendition of “One-Winged Angel”, “Vengeance on the World”, and similar rocking riffs like “Black Wing Unfurled”. Zack is given so much more personality here than in his brief, skewed appearances in Final Fantasy VII; we track his entire journey from an enthusiastic protégé to a hero in his own right and watch as he forms relationships with Aerith, Tseng, Cissnei, and his perceptions of Angeal and Sephiroth change as the narrative progresses. There’s little distinction between the FMVs and in-game graphics, though there are few opportunities for Zack’s personality to stand out in battle beyond his quips and voice clips since battles don’t end with a victory pose. Still, battle animations and explosive and varied; the Limit Breaks and Summons, especially, impress, though it can be annoying when the DMW memories interrupt the combat flow. Zack’s character model also changes as the game progresses; he gets a new uniform, takes up Angeal’s Buster Sword, and gains his trademark scar throughout the story, though it’s a shame you can’t alter his appearance further with armour or accessories. The game also includes fun cameos from familiar faces like Yuffie Kisaragi, Vincent Valentine, Cait Sith, Reno, and Rude alongside allusions to Cid Highwind and Red XIII/Nanaki and fully exploring Zack’s friendship with Cloud Strife.
Key Final Fantasy VII locations, characters, and moments are lovingly recreated in impressive detail.
The game’s locations will be immediately familiar to anyone who’s played Final Fantasy VII. Memorable towns like Midgar, Sector 7, and Junon all appear in their steampunk glory, with Zack even naming Seventh Heaven, battling on the highway outside Midgar, and taking the fight to the Wutai. You’ll spend a lot of time exploring Shinra headquarters (home to Hojo’s laboratory, a Materia processing room, and a museum to the company’s achievements) and the bustling town of Midgar, with its iconic train station and desolate Slums, complete with market, playground, and Aerith’s church. You’ll travel to Nibelheim and explore the small town and its peaceful inhabitants, the spooky Shinra Manor and the hideous secrets hidden within, and the looming Mako Reactor that houses Jenova, and then bask in the horror when Sephiroth discovers his true origins and burns the town to the ground! In the endgame, you’ll return to Banora, once Angeal’s peaceful hometown now corrupted by the emerging Lifestream, and descend into the ethereal caverns beneath it where slumbering giants and monstrous enemies await. When tackling missions, you’ll battle in the desert, at the Chocobo Farm, and in steampunk locales that bring the ambitious pre-rendered backgrounds of Final Fantasy VII to life. Things are, however, a bit restricted; you’ll revisit the same caves and enclosed areas again and again, there are few houses to enter, and locations can be surprisingly barren. Handfuls of enemies are encountered at once, with battles against bigger waves restricted to loading each group, and the mission-based structure of the combat betrays the game’s handheld routes. Having said that, though, there’s an emotionally poignant finale where players can control Zack’s last stand against Shinra’s inexhaustible forces, even battling while severely injured and near death.
Enemies and Bosses: Numerous enemies will dog your progress in Crisis Core Reunion, many of which are returning monsters from Final Fantasy VII. Zack battles various human soldiers, such as Wutai’s forces and even Shinra solders by the end game, each armed with lances, assault rifles, and grenades. More formidable variants also exist, wielding dual blades, casting elemental or restorative spells, and carrying larger weapons, like Wutai’s Crescent Unit. Perhaps the most notable humanoid enemies are the various “G” foes, imperfect and often monstrous copies of main antagonist Genesis who sport their own wings, more powerful magic, and even wield scythes or gunblades. Most of these can be put down without much issue, or by exploiting elemental weaknesses, but the numbers can be overwhelming if you don’t have the right Materia setup or are under-leveled. Naturally, various wild animals and creatures also roam the streets and wilderness of this world. Many have different names and appearances and abilities depending on the region and how far into the game you are. Bat-like Evil Eyes, demonic winged Evilgoyle, and ludicrous Hedgehog Pie are commonplace, as are elemental Bombs, spooky Jack o’ Lanterns, and insectile enemies like the annoying Killer Bees, various worms and beetles, and the lizard-like Sahagin. More bizarre foes like the egg-like Grangalan and spear-beaked Raijincho co-exist with more grotesque creatures, like the demonic Foulanders, strangely deformed Killer Stingers, and hefty Iron Claws. These are joined by mechs and robotic enemies, from disposable pawns like the Bee Saucers and Metal Saucers to more formidable, heavily armed constructs like the various Machines (which come in flying, drill, “death”, and missile variants, among others). While most enemies have an elemental weakness and some cast offensive and healing spells, many are simply there to be cut down by your attacks, meaning it’s easy to underestimate the Machines and G-variant enemies, which can almost act as mini bosses at times and, in some cases, can even be tougher than the likes of Sephiroth!
There’s a strange imbalance in the difficulty of some bosses.
Each of the game’s ten chapters but one (Chapter 7) culminates in a boss fight against at least one enemy, though some are variations of others or have multiple phases. Zack’s first test is against the monstrous Behemoth, a dog-like demon that attacks with a tail and claw swipes and serves as a tutorial for the game’s DMW system. Other variations of this creature appear later in the game, with the Behemoth King proving a steep penultimate challenge that I found more troublesome than the final boss thanks to it casting Regen on itself, having no specific weaknesses, and tanking my hits. Your mission in Wutai culminates in a battle against the duo of Vajradhara Wu and Vajradhara Tai, variants of which also crop up in subsequent missions and who are more deadly when teamed up thanks to their Limit Break, large health pool, and devastating physical attacks. After besting them, you’ll test your skills against the fire demon Ifrit, the first of many Summons who must be defeated to add them to your DMW. Ifrit sports formidable fire-based magic and attacks and you’ll need projectile magic to attack him from afar, but he’s weak to ice attacks like Blizzard. Chapter 2 sees you battling the mechanical Guard Spider, while Chapter 6 sees this improved to the more familiar Guard Scorpion. Both attack with cannons, stomps, and a hail of bullets but the latter mech also sports an EM Field attack that must be avoided. Chapter 2 ends with a battle against the dragon king, Bahamut, who can be annoying with his slam attack and Thunder Strike. In Chapter 4, you’ll battle the larger and more impressive Bahamut Fury, though I found this fight far easier as Bahamut Fury spent a lot of time just standing (or floating) around doing nothing and I easily kept it from attacking with Exaflare despite it having no elemental weaknesses.
Despite their emotional and historical significance, Angeal and Sephiroth are a bit of a let down.
Things continued to be largely manageable in Chapter 3. Here, you fight the G Eraser copy of Genesis, which is noticeably nimbler and more versatile than the three Machines that guard the chapter’s end, which are bested by bringing along thunder, fire, and ice-based Materia. The same is true for the Support Machines and the General’s Tank in Chapter 6. The drama ramps up when Angeal undergoes a horrific transformation, merging with his monstrous copies to form a centaur-like abomination not unlike Ultima Weapon. Angeal Penance is best attacked from behind since its lance has good reach. It can also magically boost its defence, charge, and unleash a bunch of physical and elemental attacks. However, despite its imposing size, this fight was pretty easy; Zack’s very emotional during it so the DMW is often in your favour, meaning this boss is all bark and no bite. Shinra scientist Hollander undergoes a similar transformation after being corrupted by Genesis’s cells. Constantly healing himself, Hollander distracts you with Land Worms and takes away chunks of HP with his Dimension Missile attack or poisons you with his breath. Being a Final Fantasy VII game, you naturally battle Sephiroth as well, most notably after he goes insane in Nibelheim. This is a two-phase battle, with the first seeing Sephiroth attacking with his impossible long sword, teleporting, and unlashing Heartless Angel and his trademark Octaslash. Sephiroth almost always has his guard up, negating many of your attacks, so just dodge, heal, and wait for an opening. Sephiroth spawns four elemental crystals that restore his health and bolster his attacks with fire, thunder, and blizzard spells. These must be destroyed using the opposing element (Fire against Blizzard, for example), and you might want to cast Dispel to remove his buffs. Though challenging, he’s actually easier than some other, less notable bosses and enemies. Once you’ve depleted his health, you then attack him on a narrow walkway. It’s game over if he pushes you back, so focus on staying alive and pummelling him with everything you have until he takes his dramatic drop into the Lifestream.
Although a formidable combatant, Genesis is sadly lacking compared to other, lesser bosses.
Edgelord antagonist Genesis, a fan of poetry and the flamboyant, is encountered and fought multiple times throughout the story. You first battle him in Chapter 5, prior to the fight with Angeal Penance, and many of the G-variant battles are tests for your one-on-one encounters with Genesis. In the first encounter, Genesis casts Regen on himself and magically increases his defence; he’s fast and tricky, attacking and Cursing you with Black Flurry and draining your MP with Osmose. Yet, I found this battle surprisingly easy; you can negate Genesis’ status effects with magics and items and simply batter him until he flees. In the finale, Genesis summons a gigantic, grotesque creature to fight on his behalf; Genesis Avatar cannot be harmed by physical attacks as it’s out of reach, so you’ll need projectile Materia like Thundaga or Ultima to chip away at it. You also need to keep your distance from his giant sword; it’ll create a shockwave when it hits and spawn G Shadow variants to distract you from attacking the Materia in the hilt. Similar to Bahamut Fury, though, this battle was a joke, especially compared to the Behemoth King and even the G Regicide that preceded it. Simply cast Wall, keep your distance when it unleashes Purgatorial Wave, keep your HP up, and attack the Materia until its defeated. After that, you’ll go toe-to-toe with Genesis once more. Again, he’s fast and can land combos on you. He can cast Apocalypse for big damage and stun-lock you with the Black Feather barrage, but he’s a ridiculously anti-climatic final boss and easily put down despite his agility, making for a dissatisfying final bout.
Additional Features: Crisis Core Reunion boasts fifty-one Achievements to earn, with one popping after completing every chapter. You’ll also get Achievements for completing some, and all, of the Missions, winning your first battle, dealing 99,999 damage, obtaining and levelling-up all DMW images, unlocking every shop, and receiving mail from everyone possible. As mentioned, every chapter features a mini game or gameplay gimmick that is tied to the Achievements; it’s worthwhile creating a backup save file as you won’t be able to retry if you miss them, fail them, or progress past that chapter. Other Achievements come from collecting equipment, fusing Materia, clearing the “Hard” difficulty, and defeating the powerful superboss Minerva, something you can only do after unlocking and clearing every previous Mission. Missions are unlocked through story progression and talking with NPCs, so be sure to talk to everyone you see. Their difficulty ranges and some are extremely tedious, forcing you to defeat up to 1000 enemies in a row or battle previous bosses and Summons, but you’re rewarded with better Materia and items and such. After you beat the game, you’ll create a clear save file and can start “New Game+”. This carries over your current level, SP, Gil, play time, items, Materia, equipment, DMW progress, Buster Sword proficiency, and mail but not the Missions you’ve completed. You also still need to unlock a lot of this stuff again, such as the additional Materia slots, shops, and Buster Sword, but I imagine it makes a second playthrough – even on “Hard” mode – much easier. Other than that, there’s not much else here; no new costumes or skins, no chapter select, and no gallery or movie theatre, which is a bit of a shame.
The Summary: As I mentioned, I played Crisis Core: Final Fantasy VII years ago when I first got a PSP. I didn’t get very far, though, mainly because I had a bunch of PSP games to play at the time and was a little put off by the strict mission-based structure of the game. Having finally played through this Reunion version, I can say that this structure is somewhat hampered at times and a little too quaint for a main console release, but it’s not as bad as I first thought. It is tedious having to go into the Mission menu and tackle each one in turn, but it was a fun way to level-up between the main story and combat was usually simple enough that they only took a few minutes to beat. The DMW system was certainly unique; the randomness wasn’t to my liking, but I enjoyed the variety in the attacks and benefits it gave you. This, along with battles constantly rewarding you, means the game can be pretty easy most of the time. Combat thus becomes quite dull very quickly as you just mash away and win, heal at a save point, and repeat until the chapter ends. There is a strange difficulty curve in Crisis Core Reunion, though; it’s really weird that Sephiroth and Genesis were so simple to defeat compared to the Behemoth King, and that enemies like the Pachyornis line could one-shot me yet I could survive Bahamut Fury with barely a scratch. This made combat a little unpredictable and annoying at times, almost as much as some of the mini games and the requirements to earn the Achievements associated with them. I enjoyed the dramatic dive into Zack’s backstory, his relationships with his mentor and peers, and his interactions with Final Fantasy VII icons like Cloud and Aerith. It was very impactful seeing Sephiroth’s downfall first-hand and playing an active role in the sacking of Nibelheim and Zack’s final stand, and the score and 3D recreations of Final Fantasy VII locations were a joy. In the end, it was an enjoyable enough action-orientated RPG but it a little clunky in its execution, with odd difficulty spikes and strange mechanics that make it fall short of its true potential.
My Rating:
⭐⭐⭐
Rating: 3 out of 5.
Pretty Good
Have you played Crisis Core: Final Fantasy VII Reunion? If so, did you enjoy it? How do you think it compares to the original PSP release and did you like the new additions made to the game? What did you think to the DMW system and the mission-based structure? Did you enjoy Zack’s narrative and witnessing Sephiroth’s downfall? Did you ever complete all the side missions and defeat Minerva? Which other Final Fantasy VII side character would you like to see take the spotlight and which game in the Compilation of Final Fantasy VII was your favourite? Whatever your thoughts on Crisis Core, or Final Fantasy VII in general, leave a comment below and be sure to check out my other Final Fantasy content across the site.
So, for no better reason than “Mar.10” resembling Mario’s name, March 10th is widely regarded as being “Mario Day”, a day to celebrate Nintendo’s portly plumber, an overalls-wearing mascot who literally changed the videogame industry forever and shaped the home console market of the nineties.
Released: 20 October 2023 Developer: Nintendo EPD
The Background: Following the collapse of the videogame industry from a slew of overpriced consoles and mediocre titles, Nintendo revitalised the landscape withSuper Mario Bros. (Nintendo EAD, 1985). Once the “Console Wars” of the mid-nineties ended, Nintendo and their famous mascot became an innovative and reliable staple of the videogame industry. After successfully transitioning into 3D gaming, Nintendo continued to pay homage to Mario’s 2D roots with hit2.5D titles. Shiro Mouri, director of New Super Mario Bros. U Deluxe (Nintendo EAD, 2012), returned to develop Super Mario Bros. Wonder and he and his team worked without a deadline, allowing them far more freedom to develop new ideas. Producer Takashi Tezuka suggested implementing a gimmick that would alter the game’s locations in fun and wacky ways, birthing the “Wonder Flower” mechanic, and features and accessibility options were implemented to make the game appealing to players of all ages. A live commentary feature was scrapped early on, long-time Mario voice actor Charles Martinet was replaced for the first time following his retirement, and Mouri also personally lobbied for Princess Daisy to be included so girls (specifically his daughters) would have more playable options. Super Mario Bros. Wonder was met with widespread acclaim; critics adored the gameplay innovations and responsive controls, and it sold 4.3 million units in its first two weeks alone.
The Plot: While visiting the Flower Kingdom, Mario and his friends are stunned when Bowser, King of the Koopas, steals the Wonder Flower, turns himself into a giant flying fortress, and wreaks havoc throughout the kingdom. Our heroes thus travel across this new land to gather the Royal Seeds and stop their nemesis.
Gameplay and Power-Ups: Like its 2- and 2.5D predecessors, Super Mario Bros. Wonder is a 2.5D action platformer, albeit one that gives players twelve characters to pick from and offers four player co-op, both on- and offline. Players journey across the Flower Kingdom collecting golden Coins (100 of which will grant a 1-Up), stomping on Goombas, and leaping to flagpoles to clear the six main stages (known as “Worlds”) alongside Prince Florian, a caterpillar-like character who pops out when you’re idle and chimes in during cutscenes. Regardless of which character you select, they all control the same with the exception of Yoshi, who can flutter jump by holding A (giving you a bit more airtime to clear gaps) and eats enemies and spits them back out with B. Otherwise, you can pick from two control schemes and choose to play with or without motion controls. The setup I chose saw me jumping or swimming with A (holding it to jump higher), running and picking up certain objects (like Koopa shells) by holding B (releasing it to launch my item upwards or straight ahead), and ground pounding by pressing ZL in mid-air to squash enemies and break blocks. Y brought up an emoji wheel to communicate to other players and X either placed a standee (used to revive players in co-op) or spawned an item balloon when I had one saved up. Pressing R performed a spin jump and jumping against walls and vertical surfaces performed a wall jump. You can also hold down when on slopes to slide into enemies, and pressing the L and R triggers together in co-op sees you become a ghost to float around stages. Also, you can jump atop and ride Yoshi players in multiplayer and press B to perform your special attacks when you have a power-up item.
Mario and friends utilise new power-ups and the Wonder Flowers to explore this new kingdom.
As you might expect, grabbing a Super Mushroom allows your character to grow and take an extra hit and break certain blocks. Get hit when in your small form and you’ll lose a life, respawning either at the beginning of the stage or from the last checkpoint you touched. Touching a checkpoint automatically causes you to grow if you’re small, rare green mushrooms grant extra lives and Fire Flowers let you toss fireballs to defeat enemies and melt ice blocks. Blue Coins appear when you hit P Switches, POW blocks defeat all onscreen enemies and break all visible blocks, and Super Stars make you invincible for a short time and add a somersault to your jump. This is all very familiar but Super Mario Bros. Wonder does add in three new power-ups. The Bubble Flower sees you throw bubbles to trap and defeat enemies and make temporary platforms, the Drill Mushroom lets you dig into floors and ceilings to reach new areas, and the Elephant Fruit transforms you into a rotund elephant that smacks enemies with its trunk and sprays water to cause various effects whenever you enter a fountain. If you have one power-up active, you’ll store the next one as a bubble, which is very useful as an extra chance to bypass tricky areas, and you can even commandeer Lakitu’s cloud or ride Missile Megs and Ancient Dragons to clear gaps. Wonder Flowers are the game’s biggest new feature and temporarily alter the game’s environments or your character’s appearance to mix things up. You’ll see Warp Pipes come to life, adopt a top-down perspective, float around in zero gravity, race to collect Wonder Tokens, ride along stampeding enemies, get chased by King Boo, and even explore in near darkness when the Wonder Flower is collected. These also transform you into new forms, such as a Goomba (stunting your jump but allowing you to safely cross spikes), a Biyon (stretching your character considerably), a Hoppycat (increasing your jump height), a floating balloon, granting you the Metal Cap power-up, and allowing you to stick to walls and ceilings as a Wubba, amongst other effects. These effects are sometimes timed but will last until you find a Wonder Seed or clear the stage and really add to the visual variety and mix up the gameplay as you never know what effect the Wonder Flower will have.
You’ll need all your skills and the game’s Badges to find all the collectibles and stop Bowser.
Sadly, this variety doesn’t extend to the playable characters as much as I’d like. Luigi jumps higher and has less traction than the others, Toad seems to have floatier jumps, and the Yoshis and Nabbit are invulnerable to damage (but can still lose lives), but Princess “Peach” Toadstool doesn’t have her glide ability and I question the logic behind having three Toads and four Yoshis rather than putting in Wario and Waluigi. Still, the game does allow for some character customisation in the form of “Badges”, which are either bought using the new purple Flower Coins (with three 10-Flower Coins hidden in most stages) and by conquering bite-sized Badge Challenge levels. You can equip one Badge at a time and each one grants different buffs or abilities, such as allowing you to glide by holding R, adding to your wall jump, increasing your running or swimming speed, and allowing you to snag platforms with a vine. Other abilities are more passive, such as allowing you to sense nearby collectibles, giving you a one-time save from instant-death traps like pits and lava, or turning every power-up into a specific item. You can also earn “Expert” Badges that further increase your running speed and add a limited double jump, turn you invisible (actually more trouble than it’s worth), add a spring to your step for added jump height, or allow you to hear strange voices. While it’s fun challenging for and collecting the Badges, I stuck with the Parachute Cap for my entire playthrough bar one or two exceptions as it was far more useful to add a short glide to my arsenal than anything else. You can also spend your Flower Coins on new standees (which are randomised), 1-Ups, Wonder Seeds, and paying off the local Poplins to repair bridges or smash rocks to create shortcuts and open new areas on the overworld. Furthermore, if you search hard enough, you’ll not only uncover new stages to challenge but also meet Captain Toad, who’ll gift you some Flower Coins, alongside visiting the locals to get Wonder Seeds or be told of regional issues caused by Bowser’s influence.
There’s a lot of challenge and variety on offer thanks to the Wonder Flowers.
While Super Mario Bros. Wonder contains many of the same gimmicks and mechanics you’d expect from a Super Mario title (platforming, taking Warp Pipes, smashing blocks, climbing vines, sliding on ice, and dodging fireballs are all common tropes recreated here), the game is structured more like an obstacle course than ever before. You’ll be taking Warp Pipes to the foreground and background, pushing pipes and blocks to clear paths, entering doors and taking leaps of faith, hopping to moving, spinning, and temporary platforms, and dashing across zip lines to reach new areas. Like many Super Mario games, there are often hidden exits to find (generally by collecting or avoiding Wonder Flowers), you’ll need to face Boos to stop them in their tracks or lure them into the light to destroy them, and bottomless pits, boiling lava, and toxic gunk will instantly end your run if you’re not careful. You must also avoid giant spiked balls, lure Bulrushes and Konks into smashing through blocks, outrun shadowy enemies who relentlessly chase you, time your jumps to avoid being hit by Hoppycats, stay out of reach of Maw-Maws so they eat enemies instead of you, and hold B to unzip the background, unwrap Mumsys, and send Revvers dashing. Sometimes, you’ll grab keys to open doors; others, you’ll be climbing or shimmying across striped poles. Often, you’ll touch Wow Buds to spawn Coins or cause platforms to appear, move, or sway. Balloons must be popped, balloon-like enemies need to be carefully bounced across to clear gaps, and rhythm platforms and mushroom trampolines will have you timing your jumps to progress higher. You’ll also cross hazards in rolling wheels or on rafts made from dinosaur fossils, and transport to the clouds using Propeller Flowers. Timer Switches activate block platforms for a short time, Bowser’s ship fires from the background, you’ll ride an out-of-control avalanche, race against Wiggler, and battle through autoscrolling sections on Bower’s battleships, dodging Bullet Bills and flame bursts that’ll test your reaction times. The difficulty spike is pretty fair, and each stage has a star difficulty to alert you to the challenge on offer. Things never get too tricky and you can always purchase additional lives from the shop, though the game does ramp up as you progress and offer incredibly tough missions up in the Special World.
Presentation: Super Mario Bros. Wonder is, in a word, gorgeous. 2.5D Mario has never looked or played better than here, with the game performing incredibly well throughout and the action never slowing down. It helps that most stages are bite-sized obstacle courses and that there’s a lot happening in every stage. Talking Flowers are everywhere, offering encouragement, calling for help, or commenting on the effects of Wonder Flowers. These, as mentioned, alter the stages so drastically that it’s almost like having two versions of most stages at times. They’ll be plunged into darkness, surreal colours bombard the player, and a kaleidoscope of bizarre and amusing effects spawn once you touch them, making for an enjoyable twist on the tried-and-tested formula. Mario and his friends might not play as differently as I’d like but they’re full of life and personality. Chattering through gibberish and pantomime movements, they hop and explore like never before, with caps flying off as you jump or fall or being swiped when you enter pipes. Your Elephant form squeezes through narrow passageways and Prince Florian pops out whenever you’re left idle or finish a stage. The game takes into account which character you’re playing as, too, with character-specific hidden blocks appearing in stages, personalised flags appearing at checkpoints and end goals, and the in-game text referring to whomever you’re controlling at that time. The music is as catchy and whimsical as ever; classic Super Mario tunes return, as you’d expect, as end of stage and power-up jingles but also for bonus stages and boss battles. The story is light-hearted and secondary to the action, for the most part, but just different enough to be unique. Peach isn’t a damsel in distress, for example, Bowser’s ominous ship form looms in the centre of the overworld, and you’re even actively searching for lost Poppins when you explore the Fungi Mines.
Mario has never looked better in this colourful, quirky adventure.
While Super Mario Bros. Wonder doesn’t break the mould that much when it comes to its stage designs, everything looks great and there are a lot of stages on offer in each World, with each sporting a unique and interconnected overworld. Things start relatively familiar in Pipe-Rock Plateau, where Warp Pipes are prevalent and you’ll be bouncing from Hoppos, before taking a turn for the surreal in Fluff-Puff Peaks. With the action mostly up in the clouds, you’ll be adding to your temporary platform in “Cruising with Linking Lifts” and slipping on icy platforms as you make way for Pokipedes on their set paths. Shining Falls adds an isometric aesthetic to its overworld and offers unique platforming challenges as the Hoppycats copy your jumps, the Anglefish fly from different directions, and you race along at high speeds on Zip Tracks. The Sunbaked Desert sees new stages appear from the arid sands as you explore or open by performing tasks on the overworld, and its stages have a tangible Arabian theme. You’ll be exploring a door maze in the Shova Mansion, gatecrashing the Ninji’s jump party, and exploring pyramid-like tombs for goodies. Things take an ominous turn in the Fungi Mines, where toxic clouds and goop lurk amongst haunted mansions and destructive rifts in the fabric of reality. The Deep Magma Bog overworld is not only the most menacing yet but also a maze of tunnels and paths. Its stages are volcano themed and feature dinosaur bones, fireballs, and flaming enemies who rush from the walls. As you explore the overworld, Kamek occasionally spawns huge Bowser-themed battleships not unlike those seen in Super Mario Bros. 3(Nintendo EAD, 1988). Here, the game becomes an autoscrollers and you’re forced to avoid numerous hazards and destroy the central core, which doubles as a baddy maker. Finally, simple cutscenes and interactions with the locals pepper the action, with the game concluding with an all-out frenzy to get the highest score during the credits as recycled (now non-lethal) hazards fly past.
Enemies and Bosses: Many of Mario’s most recognisable enemies make a return in Super Mario Bros. Wonder. Goombas will snooze in stages and wander or float about, Piranha Plants of various sizes pop up from pipes to bite you or spit fireballs, green and red Koopas trot about or flutter in the air, Bullet Bills blast across the screen, Boos shy away from your gaze, and Hammer Bros toss hammers in an annoying arc, as ever. Mechakoopas patrol Bowser’s battleships and castles, Pokeys wander the desert, Lakitus drop Spinys, Thwomps try to crush you, and Cheep Cheeps swim about underwater to get in your way. These are joined by some new enemies, with some offering different mechanics. The Babooms, for example, shoot fireworks that can be used to defeat enemies above you. Blewbirds fire their beaks, which then become platforms, Bloomps can be bounced on to clear gaps, Bulrushes can be ridden, and Wonder Hoppins can be tricked into smashing through the stage to make new paths. Mumsys must be unwrapped by grabbing their handle, Noknoks masquerade as doors, Renketsu Search Killers offer themselves as temporary, explosive platforms, and Skedaddlers spit seeds and run off with collectibles. Shovas push pipes and blocks about, Smogrins lurk near tricky jumps, you can swing across gaps by grabbing Tailys, and Wubbas will cut through sticky goo that slows you down. Spikes, flame bursts, electrical sparks, giant balls, toxic gunk, and crushing pistons are persistent hazards, with you often bouncing from enemies to avoid them or luring nearby foes into unwittingly aiding you.
The game’s disappointingly light on bosses but goes all-out for the finale.
Sadly, Super Mario. Bros Wonder is disappointingly light on unique boss battles, a trend I’ve noticed in a lot of 2- and 2.5D Mario adventures. While larger variants of certain enemies do exist (King Boo being the most memorable), they’re more like chase sections rather than boss battles. The Mecha Makers are close to a boss in that you have to avoid hazards on the conveyer belt and smash the big red button to down Bowser’s battleships, but that’s being generous. Since Bowser’s busy being a giant, living ship, you’ll instead battle Bowser Jr. to clear four of the six main Worlds and retrieve the Royal Seeds and remove Bowser’s defences. Each battle against Bowser Jr. is a two-stage affair, with the first simply having you avoid his shell spin, jumps, and occasional fireball. After one hit, he transforms into Wonder Bowser Jr. and alters the terrain and your abilities somewhat. In the first fight, either you or he will change size; in the second, the rising and falling platforms alternate between being ice or jelly; in the third, water floods the arena (either above or below); and, in the fourth, Wonder Bowser Jr. distracts you with clones and by having you fight in the dark. While these fights can be tricky without any power-ups on hand, it only takes a couple of hits to defeat Bowser’s kid and his attack pattern doesn’t change much. You never battle Kamek, which is a shame, and Bowser Jr. is ultimately done in for good in a cutscene, which is also disappointing. After braving Bowser’s Rage Stage, you’ll face off against Castle Bowser in a somewhat harrowing, multi-stage final fight. In each phase, Castle Bowser spawns more hands to rain flaming Piranha Plants or to try and slam you. You must time your jumps to gain a boost from the rhythm blocks to either dispose of the hands or smack the weak spot under his chin, which he shields with his extra hands. As the battle progresses, Castle Bowser retreats to the background and fires larger Piranha Plants that can be tricky to dodge, alternates the floor to screw up your jumps, and tosses big, spiked balls that bounce around the arena. Power-ups are occasionally deposited as well and, after enough hits, a big button appears on Castle Bowser’s head that you must propel up to to end to his latest mad scheme.
Additional Features: As mentioned, there are three 10-Flower Coins to find the game’s main stages and you’re encouraged to snag the top of every flagpole. Like the collection of Wonder Seeds, these statistics are recorded on your save file, though they appear to have no other function other than bragging rights (and, in the case of Flower Coins, allowing you to buy items). You must search high and low for every Badge Challenge and hidden sage if you want to earn every Badge in the game and enough Wonder Seeds to progress through the story. You can easily review each stage from the main map and jump to any stage where it shows you’ve missed anything, though you’ll need a guide or to pay attention to the overworld to spot when stages have secret exits. Bonus levels appear that bombard you with Coins, you can take a break by searching for Flower Tokens or taking out enemies across various arenas, and you can hunt across each map in search of Captain Toad. Eventually, you’ll unlock the Special World, where ten additional, super tough stages await, each one themed after the main Worlds and remixing hazards and enemies in new, challenging ways. Clear them all and you’ll gain access to a new Poplin House and earn yourself a congratulatory message and the Sound Off? Badge, though personally I couldn’t even clear one of the Special World’s stage…so good luck to you! Finally, of course, you can tackle any of the game’s stages in multiplayer, vying for Coins, power-ups, and a high score at the end, though I wasn’t able to play this so I can’t say how good or bad it is.
The Summary: While I usually prefer Mario’s 3D adventures due to his 2D outings being slippery and unfamiliar to my SEGA-hardened gaming skills, I’ve really enjoyed his 2.5D titles and was blown away by Super Mario Bros. Wonder. Visually, the game is such a treat to behold; I loved all the little, goofy details and the whimsical (yet familiar) nature of the Flower Kingdom. I loved the callbacks to Mario’s previous adventures, with some returning gimmicks and mechanics, and the new abilities were a real treat. While the Bubble and Elephant forms weren’t that special, the Wonder Flower mechanics really helped to inject new life into the tried-and-tested Mario formula. I loved how unpredictable it was, how it reimagined stages and decades old fixtures like Goombas and Warp Pipes in fun new ways, and how it bombarded you with such an array of visually interesting mechanics. The new Worlds were also very enjoyable; I liked how the stages were short obstacle courses that never outstayed their welcome. The level of challenge was just right, with the game being upfront about when things get trickier and the onus being on the player to have the right skills accumulated or Badges equipped. The Badge mechanic was a little wasted on me but may have more appeal in multiplayer, and I was disappointed by the poor variety of the boss battles. There really was no excuse not to have Kamek be a boss fight at least once and I do think the developers sell the franchise short by not doing more with the likes of King Boo. Similarly, the character selection could’ve been better; I don’t get why Wario and Waluigi are always shafted or why Peach and Princess Daisy don’t have unique attributes. These negatives are mere nit-picks, however, to the overall enjoyment and fun on offer in Super Mario Bros. Wonder. It really does feel like a brand-new addition to the classic games and I liked how it provided just enough of a spin on the usual formula to be a wholly unique and accessible experience.
My Rating:
⭐⭐⭐⭐⭐
Rating: 5 out of 5.
Fantastic
Did you enjoy Super Mario Bros. Wonder? How do you feel it compares to other Mario titles, specifically the previous 2.5D Super Mario games? Which of the playable characters was your go-to and were you disappointed that they didn’t have more unique playstyles? What did you think to the new power-ups and the Wonder Flower mechanic? Were you disappointed by the lack of variety in the boss battles? Did you ever conquer the Special World? How did you celebrate Mario’s birthday this year? Whatever your thoughts on Super Mario Bros. Wonder, feel free to share them below and be sure to check out my other Mario content!
So, for no better reason than “Mar.10” resembling Mario’s name, March 10th is widely regarded as being “Mario Day”, a day to celebrate Nintendo’s portly plumber, an overalls-wearing mascot who literally changed the videogame industry forever and shaped the home console market of the nineties.
Released: 17 November 2023 Originally Released: 9 March 1996 Developer: ArtePiazza Original Developer: Square Original Version Also Available For: Nintendo Wii, Nintendo Wii U, Super Nintendo Entertainment System (SNES) Classic Edition, SNES
The Background: Shigeru Miyamoto’s portly plumber, Super Mario, took the gaming world by storm with Super Mario Bros.(Nintendo R&D4, 1985). All of a sudden, videogames were back in vogue following the infamous industry crash and all-out war was on the horizon as SEGA and Nintendo pitted their colourful characters against each other. If there’s one avenue where Mario always won out, though, it was his versatility. Mario has seen considerable success with even his spin-off games, so it was perhaps only a matter of time before he ventured into the role-playing game (RPG) arena. It was Miyamoto who wished to make a Mario-based RPG and, luckily, his desire coincided with RPG developer Square longing to make a bigger impact outside Japan. Initial meetings saw the developers decide upon an isometric, action-oriented RPG that incorporated 3D models and married Mario’s platforming gameplay with the turn-based gameplay mechanics made famous in Square’s Final Fantasy games (Various, 1987 to present). The result was Super Mario RPG: Legend of the Seven Stars, which became the third highest-selling game in Japan in 1996 and was met with rave reviews that praised the graphics and soundtrack, though the battle system was criticised for being simplistic. Still, the game gained a reputation as one of Mario’s finest adventures and its popularity led not just to spiritualsuccessors and ports, but also to this modern remake. Developers ArtePlaza expanded upon the original game with new battle mechanics and updated visuals, and it was met by equallypositive reviews for its faithful, but modernised, reimagining of the SNES classic.
The Plot: After rescuing Princess “Peach” Toadstool from Bowser, King of the Koopas, Mario reluctantly joins forces with his enemy (and some new allies) when the Smithy Gang makes a play for the legendary Star Pieces.
Gameplay and Power-Ups: As the title suggests, Super Mario RPG is an RPG in which you control, battle, and interact with various characters from the colourful Super Mario franchise. Primarily, you control Mario and navigate a cutesy isometric reimagining of the Mushroom Kingdom, chatting to various non-playable characters (NPCs) such as the many Toads that make up the kingdom’s citizenship, to sentient frogs, moles, and anthropomorphic weaponry. However, Mario is joined by up to four additional companions who can be freely swapped in and out of your party from either the battle screen or the main menu, accessed with +. Oddly, there are only five characters to pick from; six would’ve made more sense to me, then you’d have two physical specialists, two magic specialists, and two durable tanks. Mario must always be in your party and your party is limited to a maximum of three. Luckily, everyone receives experience points (EXP) from battles whether they’re active or not, and they’ll even be revived with a single health point (HP) upon victory if they’re defeated. The game’s controls are somewhat situational, as you’d expect from an RPG: you press A to interact with NPCs or confirm menu selections, whether in battle or a shop, while B lets Mario jump, either to (amusingly) prove his identity or hop to various platforms, or lets you defend in battle. Y opens the “Special” menu in battle, where you select a Special move to unleash, while X opens the “Item” menu and lets you select an item to use. Similarly, you can press Y or X in the overworld to select from restorative items. You can use the Left or Right triggers to toggle the dash, or set this from the main menu using +. From here, you can shuffle your party, review their Special moves, equip weapons, armour, and accessories, review story progress from the in-game journal, and check out the Monster List (essentially a bestiary). You can also adjust the battle mechanics and the game’s difficulty, an option immediately made available upon starting the game, though I found the game’s “Normal” mode to be pretty easy to plough through.
Use each character’s special moves, or pull off a team attack, to decimate enemies.
Though triggered by touching onscreen enemies (most of which respawn indefinitely or when you leave the screen), combat is turn-based like in traditional Final Fantasy RPGs. I thought I would gain a turn advantage by preemptively touching enemies but that doesn’t seem to be the case. Your level and “speed” stat seem to determine who strikes first, though I found you usually always get the first hit unless facing a “Special Enemy” or a boss. In battle, you pick a physical attack with A; an onscreen indicator prompts you to hit A again to deal additional damage and the timing is crucial to sweeping enemies as the extra hit can damage every foe. It’s equally important to tap A at the right time when being attacked as this will either reduce the damage dealt or negate it entirely. As mentioned, you can adopt a defensive stance with B; B also gives you the option of running from a battle, something also assisted by certain items (while others allow you to restart the fight if it’s going south). You can also use Special attacks with Y, however these consume Flower Points (FP). Each attack costs a different amount of FP (at least 2 FP and sometimes as much as 16 FP) and FP is shared amongst your entire Party. This means you really have to think about using the more powerful, costly Special attacks as you might run out of FP when you need to be healed or revived. Some enemies are weak to elemental attacks like fire and lightning, which is something to consider when picking Special attacks, and you can restore and even increase your FP with Honey Syrup and various flower-based items. As you deal damage, you’ll build both a combo meter and an “Action Gauge”. When this gauge is full, you can press – to pull off a team-based attack for big damage or call in Toad for helpful buffs. Additionally, as you attack and defeat enemies, you’ll earn similar buffs that up your attack, defence, or “luck” for that battle or restore your HP. However, simultaneously, you must be wary of status effects; enemies can put you to sleep, poison you, weaken your attack or defence while upping theirs, and turn you into mushrooms or scarecrows. While all these ailments are undone upon victory and some are only temporary, you can cure them using items or magic spells, and other items (such as the various bombs and even items that summon Yoshi) will aid you in attacking or neutralising enemies. However, defeat isn’t always a massive issue; checkpoints and manual save points are plentiful and the game’s very generous with its restorative buffs. Your HP and FP is occasionally fully restored after certain battles, too, and you can of course pay to stay at various inns to refill both.
Level-up to gain new Special attacks, search for secrets, and chat to NPCs for guidance.
Each character falls into a certain class: Mario is an all-rounder, for example, while Peach favours restorative magic and Bowser is a heavy-hitter. While you’ll mostly be hitting A at the right time to increase your attack power and radius, you’ll sometimes rotate the left stick or rapidly tap or even hold down A to charge a meter. Additionally, different character combinations result in different team-based attacks and it’s important to think about each character’s strengths and weaknesses, especially when levelling-up. After accumulating enough EXP, you’ll gain a level and can pick to buff either physical power and defence, your overall HP, or magic attack and defence. You can also equip weapons, armour, and accessories to boost these stats, and others; Mario gains hammers and Koopa shells, for example, while Mallow uses sticks and cymbals, and the timing of your button presses changes with each. Accessories can also negate status effects, too, protecting you from sleep or poison, or alerting you to hidden blocks in the overworld. While your inventory isn’t unlimited, any additional items you get but cannot carry are automatically transferred to Mario’s house to use later and winning battles also earns you Coins to spend in shops, though you can also get Coins from hitting blocks and items from treasure chests. Sometimes, after winning a fight, you’ll play a game where you must find Yoshi, which doubles (or costs you) the Coins or EXP you earn. Defeating Special Enemies and opening chests also awards Frog Coins to be spent elsewhere, and you can trade Coins for points or rarer items. It pays to chat to every NPC you encounter, too, as some will gift you items, flesh out the lore, offer aid, or point you in the right direction if you somehow get lost. This isn’t easy to do as not only do you have the journal, but the overworld map includes helpful flags to point you in the right direction. Sometimes, you must talk to specific NPCs to get key items, hit switches, or even use whirlpools to walk underwater to progress and you’ll occasionally find hidden paths or doors that lead to goodies, sometimes by entering a pipe like in a traditional Mario game.
Tricky platforming, some basic puzzles, and a few fun mini games help to offer some variety.
Yes, there are some simple puzzles to solve, such as pressing switches, navigating mazes, crossing invisible platforms, remembering codes, and rearranging paintings. In the platforming sections, you’ll use springs or flowers to jump higher and regularly hop up walls or across gaps or lava pits using moving, collapsing, or temporary platforms (and even Parakoopas). Thanks to the isometric angle and Mario’s slippery feet, this can be a bit tricky but, luckily, you’ll usually land on or in water and simply loop back to try again, and even hitting lava doesn’t doesn’t drain your HP. It can be difficult to judge the distance between gaps, though, and you’re often dodging Thwomps, fireballs, and other enemies while hopping to small square platforms, which can make these sections needlessly annoying. Easily the worst instance of this, for me, was when scaling the vines to reach Nimbus Land. You must angle yourself just right (and know to jump to spawn a hidden platform) to hop to the vines and it was very easy to slip off and have to start over. Similarly, in the end game, you must tackle four out of six obstacle courses to reach Exor, two are simple battle gauntlets, two are tricky platforming sections, and two are timed quizzes! The gameplay loop is further broken up by mini games: you’ll be careening around a minecart track like Indiana Jones, tumbling down a waterfall, racing against Yoshis in the Yoshi Derby, hopping on Goombas, playing tunes on tadpoles, jumping from rolling barrels amidst a raging river, and collecting beetles. Most of these mini games can be repaid (for a price) and will net you extra rewards (as well as the Coins you can grab along the way), and you’ll eventually access a casino and even a secret super boss! Additionally, certain story events and having specific characters in your party rotation will change the overworld and battle system. For example, when in Bowser’s Keep, having Bowser in your Party causes his minions to flee and Mallow’s royal heritage gains access to the hot springs in Nimbus Land.
Presentation: I’ve only briefly played Super Mario RPG before, but I remember being a little put off by the original’s 3D-to-2D aesthetic, which made everything look a little unsightly and pixelated. That’s definitely not the case here, though! This slick remake has given everything a plasticine, diorama-like makeover that gives the impression of playing with chibi-style toys, not unlike the same aesthetic adopted by The Legend of Zelda: Link’s Awakening(Grezzo, 2019). The pre-rendered cutscenes are gorgeous; every character has a fun victory pose and does a little dance when they level-up and, while you can skip the team attack cutscenes, they look so good that I just let them play. While all the characters are lively, adorable, and animated, Mario naturally stands out from the bunch. Unlike the others, he can’t talk (not even gibberish), so he pantomimes every action, recapping the plot (sometimes too much) with an excitable enthusiasm, vehemently shaking his head at the suggestion that he’s one of Bowser’s minions, and consoling his friends (even Bowser) when they experience hardship. Bowser gets a lot of nuance here, too; he throws himself at obstacles and proudly boasts of his superiority but is humiliated at being kicked out of his keep. Our two original characters, Mallow and Geno, fare pretty well, too. Mallow starts out as clumsy and unsure of himself, but gains confidence thanks to Mario and discovering his true heritage while Geno (a puppet brought to life by a star) fights to repair Star Road with a passion, resulting in a bittersweet ending when the puppet returns to being just a toy. Equally, the game is bolstered by a jovial and familiar soundtrack. This version lets you pick from the classic soundtrack and the modern remix, with both being enjoyable, and I loved hearing familiar Final Fantasy sound effects and seeing fun Easter Eggs like a curtain that turns Mario 8-bit and references to other Nintendo properties.
While the game looks and sounds amazing, some environments were a little visually bland.
As great as the game looks and sounds, however, I was a bit let down by the environments. While the overworld map is large and varied, the actual locations you explore are a far cry from the fantastical whimsy of other Mario games. You spend a lot of time in grassy areas or underground caves, which is very familiar, or at cliffsides and near lakes, before exploring such exotic locations as…a mountain, a mine, and a haunted pirate ship (actually, that one’s not bad!) You’ll venture into the pyramid-like Belome Temple, the autumnal maze in Bean Valley, and the rocky innards of an active volcano, but it’s not all that memorable and seems incredibly safe. Things get visually interesting in Nimbus Land, Star Hill, and the Weapon’s World, but these are juxtaposed by Bowser’s uninspired keep, the relatively barren Booster Tower, and the dense Forest Maze. Many areas, such as the Kero Sewers, sea, and Pipe Vault are restrictive and linear thanks to the isometric aesthetic, looping or forcing you to solve a maze to progress, while others (Land’s End and Nimbus Castle, for example) are robbed of the scope that makes the various towns so much fun to explore. While Bowser’s Keep is simply the same lava and stone-filled castle you’d expect from the Koopa King, I liked that battles took place on the chandeliers and that there were more branching paths. The Weapon’s World and Factory stood out at the end just for offering some visual variety, with their cogs, conveyor belts, and ominous atmosphere, but I do think Super Mario RPG missed a trick in not making areas more distinct. Sure, some towns have been affected by the Smithy gang and will be restored to life and order by your actions, but why not make Mole Mountains an ice mountain with snow and such? Or do more with the water gimmick at the Seaside, perhaps have parts of Seaside Town underwater or flooded?
Enemies and Bosses: A slew of Mario’s most recognisable enemies crop up all throughout Super Mario RPG, generally acting as disposable pawns to rack up for EXP: Goombas, Spikeys, Gobys, Shy Guys (and their many variants), Bob-ombs, Piranha Plants, Bloopers, Wigglers, Chain Chomps, Boos, Lakitus and various Koopas (from Sky Troopas to bulbous Heavy Troopas and Dry Bones) and even variants of Donkey Kong show up in some form or another and, generally, aren’t much of a threat. There are exceptions, though: you can encounter numerous enemies in one battle, and mixtures of them, and some (like Dry Bones) can only be defeated by Special attacks or are susceptible to elemental attacks. Other enemies include rats, various insects like stinger-firing Buzzers, tricky Crooks and Ninjas (who can teleport, often flee from battle, and (in the latter case) launch an attack upon defeat), Pandorite (sentient treasure chests that spit up enemies), anthropomorphic vegetables, puppets and jesters, and even giant crustaceans and reanimated mastodon bones. While some enemies (like the Orbisons) can recover their health and that of their allies and others (like Stumpets and Reachers) look intimidating, some (like Geckits) are just as likely to attack themselves and their allies as they are you. Sure, some enemies are larger or inflict status effects, but they’re mostly all a joke; you easily dispatch entire groups with well-timed presses of A and without even using Special attacks. Even larger, more formidable enemies are easily trounced if you keep your level and stats high and time your button presses. Hippopos, Doppels, and Corkpedites can easily have their elemental weaknesses exploited, though you will have to be wary of Special Enemies, variants of almost every enemy who hit harder and can take more damage and should be targeted first. Also, you’ll need to watch for certain powerful or unblockable attacks; kamikaze attacks, unavoidable boulders, large explosions, and gigantic lasers can decimate your party if you’re not careful. Thus, it pays to have plenty of restorative items or keep Peach or Mallow around to restore your life or get rid of annoying status effects.
While there are many bosses to fight, few pose a significant challenge.
Battles are frequent in Super Mario RPG but ridiculously simple; I trounced most enemies simply by tapping A, meaning combat gets quite tedious at times. Unfortunately, the combat loop isn’t changed much by the game’s bosses, despite how many you’ll encounter. Your first boss battle is, fittingly, against Bowser; taking place up on the chandeliers and with Peach held hostage, you simply target the chain holding Bowser aloft and you’ll come out victorious. Next, you’ll battle the Hammer Bros, who toss hammers and up their valour but aren’t much of a threat, and have your first encounter with Croco. Croco’s a little trickier as you must chase him through a looping maze, battling waves of disposable enemies before getting to him, where he’ll bite and toss explosives and enemies. When on the Sunken Ship, you’ll battle King Calamari, a giant Blooper whose tentacles burst through the floorboards and who spits ink at you. Birdo also makes an appearance, encountered at Nimbus Castle after shattering her egg; as is her nature, Birdo spits eggs but these can be attacked to deal damage to her. Bowser’s magical minion, Wizakoopa, also appears, brainwashed to oppose his master and summoning the powerful fire-breathing dragon Bahamutt, as well as boasting elemental spells. Other bizarre bosses include the multi-headed Pihana Plant Megasmilax, the dog-like Belome (who eats party members and spits up clones), the ambitious Punchinello (who tosses various Bob-ombs), and the deluded Booster, whose circus-themed minions kidnap Peach and force her into a wedding, leading you to defeat them and attack an elaborate wedding cake! You’ll also battle the trident-wielding pirate leader Johnny and the sultry Valentina, who relies on her bird-like minion Dodo in battle, with him pecking at and whisking away party members, while she relies on numerous magical spells.
The Smithy Gang is mostly a joke until the end game, when things get tougher.
Mario and their friends quest to recover the seven Star Pieces, with most being guarded by the Smithy Gang. This gaggle of anthropomorphic weapons thus represent the primary bosses of the game, with the pogo-sword-riding Mack being the first you encounter (once you dispatch his Bodyguards, of course). Bowyer represents one of the more unique boss battles as he’ll fire arrows that disable A, X, and Y inputs for a few turns, forcing you to utilise different attack strategies or even spend a few turns defending before you can attack again. Speardovich creates a double to aid him in battle while the ridiculous (but strangely familiar) Axem Rangers force you to battle them all at once, eventually bolstered by their airship, The Blade, and its super-powerful Breaker Beam. The opening chandelier battle is revisited in the end game where you battle the katana-wielding Boomer, who switches between blue and red forms, being weak to physical and magical attacks, respectively. In the Weapon’s World, you encounter the giant alarm clock Count Down; you can knock off its Ring-a-Dings and target its sand timer to neutralise it, but it’ll unleash different magical attacks depending what time its hands land on. You’ll also battle Cloaker and Domino, with one favouring physical attacks and the other magical, and both hopping into snake-lime mechs when their partner is defeated. Finally, the Smithy Gang’s factory is home to three armour-clad, axe-swinging administrators and the diminutive Factory Chief and the devastating Gunyolk, a tank-like cannon that also uses the Breaker Beam attack alongside powerful abilities like Electroshock and Fire Saber. The Smithy Gang are usually always accompanied by minions. In the Weapon’s World and Factory, Machine Made duplicates of some bosses appear as regular enemies alongside metallic variants of regular baddies, though it’s usually better to simply focus on the boss as this ends the bout.
The final slew of bosses caught me off-guard with their difficulty spike.
While most bosses don’t pose a problem, four stand out as surprisingly formidable. First is the Czar Dragon, a gigantic (if comical) dragon comprised of Lava Bubbles. The Czar Dragon bites, casts Flame Wall and Water Blast, and fires flaming projectiles, as well as protecting itself with Lava Bubbles. Defeating it sees it rise again as Zombone, which isn’t one-shotted by Pure Water like other undead enemies (though this item does cause it to attack itself) and has even more powerful attacks at the cost of being more vulnerable to Mario’s jump attacks and Mallow’s thunderbolts. Fittingly, given his high rank and him invading Bowser’s Keep, Exor was also a tough encounter. Fought on the keep roof, Exor cannot be harmed until you take out at least one of its eyes and even then it causes trouble with Venom Drool, Aurora Flash, and Lulla-Bye. Defeating him transports you to the Weapon’s World and a final showdown with Smithy, the Smithy Gang leader and the toughest fight yet. Smithy is fought in two phases: in the first phase, Smithy fires bullets, smacks you with his large sledgehammer, and crushes the party with a giant…well, crusher. A smelter also spawns Shypers to whittle your HP down, so it’s a good idea to have Peach on hand as many of Smithy’s attacks damage the entire party. With no weaknesses, Smithy is a tough fight if you’re ill-prepared and it only gets tougher when you drop to the basement and he transforms his head into various forms (a tank, a magician, a treasure chest, and a mask). Each has their own HP and is capable of dishing out status effects, instant-KO blasts, and healing him. You can target his body to help take the pressure off, but I say just go to town on his big stupid head, keep healing and reviving as needed, and use elemental attacks on the right heads to win. But, after all that, there’s an even more powerful optional boss you can take on!
Additional Features: Considering this is an RPG, there isn’t really much to do in Super Mario RPG beyond the main story. The game is surprisingly linear, guiding you to each location with very few instances of backtracking, side quests, or fetch quests. When you are given a fetch quest, it’s generally something you do naturally. You’re given the item in one town and deliver in the next, rather than going back and forth like in other adventure games. Thus, when you beat the game and start a “Clear Data File”, you’re returned to Mario’s house before the final battle and can revisit every area but there are only a few final tasks to do. First, the Monster List needs to be completed (though this should be mostly full by this point) and you can freely listen to the game’s soundtrack. Next, you can challenge Bowser’s Keep again to acquire any additional weapons you missed when taking on the six obstacle courses. There are also 39 hidden treasure chests to find (greatly aided by equipping the Signal Ring) to snag every item in the game (though, again, this is somewhat pointless once you’ve cleared the main story). You can view the “Play Report” to see how well you did at the mini games and pay to take them on again to improve your score, stay at the luxurious Marrymore Hotel, complete a tedious guessing game to access the casino, and taken on tougher versions of the game’s bosses. Easily the most prominent additional challenge is the secret super boss, Culex. By purchasing expensive fireworks in Moleville and trading them for a special stone in the same town, you open a locked door in Monstro Town and take on the game’s toughest challenge, a 16-bit, cross-dimensional Final Fantasy being that boasts a new 3D form in this version and represents the greatest challenge on offer in the game.
The Summary: I’ve long wanted to play through Super Mario RPG. Being a SEGA kid, my only avenues for this were emulation but, even when I got the SNES Classic and Nintendo Switch Online, I hesitated to start a game because of the time needed to complete an RPG. When this remake was announced, I knew the time had finally come to change that and I have to say that it was well worth the wait. Super Mario RPG is a gorgeous, fun, surprisingly engaging romp that brings Mario and his friends (and enemies) to life in a unique way. The new battle mechanics and accessibility on offer are fantastic, meaning you’re constantly rewarded during and after battles and there’s always something to see, either in the background or the character animations and interactions. The gameplay was simplicity itself, even by classic Final Fantasy standards. Turn-based RPGs are always my preferred style for the genre, and Super Mario RPG adopts these mechanics beautifully. Unfortunately, the game is extremely easy; I didn’t mind this as I wasn’t looking for an uphill battle, but things did get a bit tedious after a while. The incorporation of “traditional” platforming mechanics was also a bit clunky, as were some of the mini games. The isometric perspective and restrictions of the genre didn’t really lend themselves to these aspects, though I appreciated the attempt to mix up the gameplay loop. While I was disappointed by some of the environment, and that Luigi didn’t appear as a playable character and that more post-game content and side missions weren’t included in this version, I enjoyed my time with Super Mario RPG. Mallow and Geno quickly grew on me, I liked seeing Bowser teaming up with Mario and Peach given more agency, and I was a big fan of the boss designs (despite how easy they were), the graphics, and Mario’s jovial animations. In the end, if you have a kid who you want to introduce to the RPG genre, you could do a lot worse than Super Mario RPG. And, if you played the original as a kid, I’d wager this is just the right hit of nostalgia for you.
My Rating:
⭐⭐⭐⭐
Rating: 4 out of 5.
Great Stuff
What did you think to the Switch remake of Super Mario RPG? Have you ever played the original and, if so, how does this compare to it? Which characters made it into your team and what did you think to the original characters created for this game? How did you get on with the simplistic battle mechanics and bosses and were you also annoyed by the awkward isometric platforming? Did you ever defeat Culex and complete the Monster List? Would you have liked to see other new features added to the game? Which Super Mario spin-off is your favourite and how are you celebrating Nintendo’s mascot this month? Feel free to share your memories and opinions of Super Mario RPG in the comments and please check out my other Mario content across the site!
So, for no better reason than “Mar.10” resembling Mario’s name, March 10th is widely regarded as being “Mario Day”, a day to celebrate Nintendo’s portly plumber, an overalls-wearing mascot who literally changed the videogame industry forever and shaped the home console market of the nineties.
Released: 26 May 2023 Originally Released: 5 August 1995 Developer: Nintendo Original Developer: Nintendo EAD Also Available For: Game Boy Advance, Nintendo 3DS, Nintendo Wii, Nintendo Wii U, Super Nintendo Entertainment System (SNES) Classic Edition, SNES
The Background: When the videogame industry collapsed under the weight of overpriced consoles and disappointing titles, Nintendo swooped in and revitalised the industry with the runaway success of Super Mario Bros. (Nintendo EAD, 1985). Despite a bizarre development, Super Mario Bros. 2(Nintendo R&D4, 1986) was also a much praisedbest-seller, and Mario’s star rosefurther following the unique marketing strategy behind Super Mario Bros. 3 (ibid, 1988). This culminated in what manyhavedeemed Mario’s greatest 2D outing, Super Mario World(Nintendo EAD, 1990), a title specifically designed to showcase the processing power of the SNES. The game also introduced one of Mario’s most popular supporting characters, Yoshi, who took the spotlight in Super Mario World’s sequel thanks to designer Shigefumi Hino. For this not-inconsiderable-task, Hino and his team opted to produce a more relaxed gameplay experience, doing away with the timer and a traditional health system and emphasising exploration. To further distinguish the game, the team introduced an egg-throwing mechanic and focused on a linear story to make the game more accessible to younger players. Artist Hisashi Nogami came up with the game’s distinctive colouring-book aesthetic, which was painstakingly brought to life by hand drawing every aspect. The game’s late release for the SNES also allowed the team to utilise everything the machine had to offer, including enlarging and rotating sprites and backgrounds. Yoshi’s Island proved a hit, eventually selling over 4 million units and being met with widespread acclaim. Reviews raved about the colourful graphics, the innovative gameplay, and the surprising scale of the title, and the game was largely cemented Yoshi’s legacy in Super Mario canon. The game was followed by a divisivesequel for the Nintendo 64, a couple of spin-off games, follow-ups for the Nintendo DS and 3DS, and many other Yoshi-centric games before being ported to multiple virtual consoles, including being made available for the Nintendo Switch Online service in 2023.
The Plot: Years ago, Kamek attacked a stork delivering baby brothers Mario and Luigi. While Baby Luigi was kidnapped, Baby Mario fell onto the back of Yoshi, whose friends helped deliver him across Yoshi’s Island, conquering Kamek’s enlarged minions and confronting the Magikoopa – and his diminutive master, Baby Bowser – to rescue Baby Luigi.
Gameplay and Power-Ups: Essentially, Yoshi’s Island is a 2D, sidescrolling action/platformer like its predecessor, but it’s also a very different gameplay experience for a typical Super Mario title. For starters, you play as one of many different-coloured Yoshi’s, each sporting the same moves and abilities, and Mario is simply a baby on your back who acts as your life meter. After starting the game and picking a save file, you can pick between two control schemes, though the default is perfectly acceptable. Yoshi jumps with the B button and holding it performs a little “flutter” by kicking his legs, giving him more airtime to reach platforms. You can chain these together when falling to extend your jump and press down in mid-air to perform a butt stomp to pound down switches and stakes, smash through the environment, and defeat enemies. Enemies are also defeated by simply jumping on them, or gobbling them up with Yoshi’s tongue. Pressing Y sees him swallow them and you can either press it again to spit them out or press down to turn them into an egg. You can store up to six eggs at a time and throw them by pressing A to bring up an aiming reticle, hold either the Left or Right bumper to steady the ever-moving crosshair, and press A again. Some enemies can’t be swallowed or turned into eggs; in the latter case, you simply spit them out again but, in the former, you use other means to defeat them. Yoshi can also get eggs from hitting blocks and Egg Plants and find them scattered around the game’s many colourful environments. Green-spotted eggs are the standard, but you can also use yellow-spotted eggs that cause enemies to drop Yellow Coins, red-spotted eggs cause them to drop two health-replenishing Stars, and Flashing Eggs cause them to drop Red Coins. This can be a bit cumbersome at times; Yoshi can only aim in an arc, so you must pause the reticle or ricochet your shot to hit your targets. However, it’s easy to get distracted with the aiming system and either take damage or fall to your death. Some enemies can even steal your eggs and, while you’re never short on replacement eggs, it can leave you vulnerable and restricted when you exhaust your supply.
Toss eggs, eat melons, or transform into various forms to progress through colourful Worlds.
Yoshi also gobbles different-coloured watermelons to gain temporary additional attacks. Green watermelons let you spit seeds, red watermelons let you breathe fire, and blue watermelons let you freeze enemies, all of which are quite powerful and often more useful alternatives to throwing eggs. Yoshi can also, oddly, briefly transform into vehicular forms, the most common being his helicopter form that sees him awkwardly fly about, avoiding enemies and collecting Coins and passing over large gaps to a Yoshi Block. Another common transformation is Yoshi’s Mole Tank that lets him automatically dig through dirt, but you’ll also become a missile-firing submarine, a small train capable of riding tracks set into the background, and a car to plough through enemies. Similarly, Yoshi pushes Chomp Rocks to decimate anything in his path and reach higher areas, and Baby Mario even briefly takes centre stage when you find a Super Star. This turns Yoshi into a giant egg and lets you control “Powerful Mario”, who’s invincible, floats using his cape, and dashes across spike beds and up walls and ceilings with Y, though you must grab more Super Stars to maintain the form. Finally, Yoshi can jump on a pair of skis in certain snow-themed Worlds, dashing down snow at high speeds and turning into an uncontrollable snowball if he hits an object. Additionally, Special Items are won by playing the game’s Bonus Challenges. Here, you can earn extra lives and special one-use items you can select from the pause menu. These include POW Blocks that turn all onscreen enemies into Stars, instant refills for your eggs, instantly grant you one of the three watermelon power-ups, reveal hidden items in the level, grant you Stars to refill your health, and transform all onscreen enemies into Winged Clouds, though you can’t use Special Items in boss battles.
Watch out for your bawling companion when you’re going for those enticing collectibles.
As mentioned, Baby Mario is Yoshi’s life meter; when Yoshi’s hit, Baby Mario floats away in a bubble, screaming his head off, and you have a few seconds to retrieve him before he’s carried away. This meter slowly refills after you save him and is replenished and boosted by collecting Stars, usually by breaking crates or shooting Winged Clouds. Enemies like the annoying Bandits, Fishing Lakitu, and propeller-powered Green Toadies can also steal Baby Mario, so you must take them out or avoid them, and you’ll want to save him as quickly as possible because that scream gets really annoying! Like previous Super Mario titles, Yoshi’s Island features a map system, but one laid out more like a storybook. There are six Worlds with eight core levels, including a mini boss fort and a boss castle, alongside two bonus levels for each World. Levels are generally just a few screens but can be quite long. I really felt like my playthrough dragged quite a bit as things can be quite slow and the map progression isn’t very exciting. Throughout each level, you can find Yellow Coins (100 grant an extra life), extra lives, floating 1-Ups, giant eggs to defeat all onscreen enemies, and Message Blocks for gameplay tips. There are thirty Stars to find, twenty red Coins, and five Flowers in each level. Sometimes these are carried by Fly Guys, sometimes you need a transformation, and sometimes Winged Clouds spawn them, but they’re often either out in the open, tucked away, or require some tricky platforming to snag. Getting them all nets you the best completion score for each level and unlocks the secret levels for each World. However, it’s not easy collecting everything as some stuff is cleverly hidden behind the foreground, requiring you to enter areas from different positions, or is just out of reach and requires some clever egg bouncing. Occasionally, you’ll find some helpful characters to give you an assist. The enthusiastic pup Poochy carries you over dangerous terrain, happily gobbling up any enemies in his path, Huffin Puffin’s chicks substitute for eggs, and large, amorphous ghosts indirectly aid you by carrying platforms through spiked passageways.
Despite its whimsical appearance, the game can be surprisingly long and challenging.
Considering it’s his home turf, Yoshi’s Island is a hazardous place for the friendly dinosaurs; areas are filled with bottomless pits, instant-death spikes and lava, haunted ruins, and small, but dangerous, enemies. While the game isn’t especially difficult, the challenge ramps up as the Worlds slowly become more like dangerous obstacle courses that will test your jumping, egg-shooting, and reaction times. Like Mario, Yoshi can be a little slippery; he makes for quite a big target and is completely vulnerable when aiming, too. Thus, it’s easy to get blindsided by enemies, especially those hiding in the background or constantly spawning from pipes. Yoshi uses hills, slopes, and hidden tunnels to get around, as well as various platforms; these rise, fall, move along a track, or require you to jump on each in turn, rotating in a wheel to progress. Sometimes you’ll be locked into a maze-like loop and need to find a key; sometimes you’ll hit Winged Clouds to create bridges or spawn vines to get higher. Other times, you’ll knock buckets into water or lava to progress, quickly hop between platforms while a Shark Chomp chases you, or be forced to stay on the move in autoscrolling sections (with some even forcing you to the left!) You’ll ride balloons, run and jump to timed destructible platforms, be flung across the screen by spinning logs, play Breakout (Atari, Inc., 1976) to destroy coloured blocks with your eggs, watch for Chomps flying from the background and creating bottomless pits, spring to higher areas, ride circles that change direction when you jump off them, and cross a chasm on a deflating giant balloon. Thankfully, you can pass through sparkling rings to create a checkpoint and lives are quite easy to build up, but things do get surprisingly challenging as the game progresses. Flipping spiked platforms, mazes of dark sewers and pipes, and claustrophobic quartz caves are juxtaposed with bright, cheery exteriors that also hide many dangers, the most annoying being the Fuzzies. These fluffy puffs fill the screen when they appear and touching them sends everything into a psychedelic haze and messes with your controls for a few seconds, meaning it’s even easier to slip or run off a platform to your doom.
Presentation: Yoshi’s Island not only plays very differently to other Super Mario games, it also looks very different. The entire game is styled after a children’s colouring book, with pastels and crayon effects used in place of traditional coloured backgrounds, giving the entire game a whimsical feel that’s perfectly in keeping with the baby-centred focus and its status as a more child-friendly gameplay experience. The Yoshis are all very fun sprites; they do a little dance when idle and react comically when hurt or performing their flutter jump. Baby Mario is very animated when separated from Yoshi, bawling his head off in his bubble and encouraging you to retrieve him as quickly as possible, and the game’s cutscenes utilise a storybook aesthetic that makes it feel like you’re playing through a bedtime picture book. Every level pops with colour and environmental effects; sometimes it’s a bright sunny day, sometimes it’s the red hue of dusk, sometimes it’s a starry night, and you’ll see birds, mountains, giant flowers, waterfalls (and lavafalls), giant mushrooms, and thin trees in the foreground. There’s a lot of depth to each area; I particularly liked levels where Chomps fly at the screen and destroy the ground, and the many caves where little details are hidden way back, and you’ll often open up tunnels by leaping at walls or avoid leaping fish and water jets when paddling through or jumping over water. Blizzards are commonplace in World 5, often blanketing the screen as you ride ski lifts and melt ice blocks, and you’re forced to navigate labyrinthine forts and castles, taking different paths to find keys or get past spike beds. It’s all very colourful and playful, which is reflected in the infectious soundtrack and amusing Yoshi sounds peppered throughout the game. This lulls you into thinking it’s a simple kid’s platformer, making the sudden challenging sections even more jarring.
The game’s visual presentation is incredible, emphasising a vivid storybook aesthetic.
Yoshi’s Island was a late release for the SNES and, as such, effectively uses all the machine’s vaulted power. Parallax scrolling and sprite manipulation are abundant, with Kamek enlarging regular enemies and inanimate objects into large bosses and huge, amorphous enemies stretching and filling the screen at times. This is equally reflected in the giant eggs and transformation sequences, and the scaling all works beautifully to add to the depth of each level. Typically, levels will consist of some common themes, such as a grassy starting area, a cavernous second area, and a final area that takes place in the skies or over a pit. You’ll venture into many dark caves, where things are far more claustrophobic and maze-like, as well as sewers or areas were it’s so dark Yoshi is lit by a single light source. While the forts and castles can be quite samey, they do mix things up a bit by featuring dilapidated backgrounds and a spooky ambiance further emphasised by the resident Boos and ghosts. The grassier areas are where the game shines for me; I love seeing fields and mountains in the background and hopping to the precarious log platforms, or taking the smaller platforms on tracks, or interacting with the environment using Yoshi’s transformations. Everything’s so lively that it’s easy to be surprised by enemies that pop up from pipes, fly from above, or sneak in from the background. I also enjoyed how the time of day changed, when the game leaned into its dinosaur theme to show skeletal remains and tar-like dirt, and the impressive quasi-3D rotating map that wasn’t utilised enough for my liking.
Enemies and Bosses: Although it takes a while to encounter them, some of Mario’s most famous enemies make an appearance in Yoshi’s Island. You’ll come across Koopa Troopers and their flying variants, the Para-Koopa, shy Boos who cover their faces when you look at them, disposable Goombas, the ever-annoying Lakitu (who tosses Spin Eggs at you), and ravenous piranha plants. The most prominent returning enemy are the Shy-Guys, who come in an assortment of colours and variations, such as hovering overhead and dropping bombs, turning giant spiked maces, fatter ones, and ones that run around on fire. Yoshi’s Island is home to some unique and annoying new enemies, too, such as Frog Pirates who’ll steal Baby Mario, somewhat familiar blue hedgehogs who defend themselves with their quills, tiny Mousers who steal your eggs, and large lava, ghost, and aquatic enemies who pop up from liquid or the walls. Some enemies are more annoying, like the inedible Ravens and the spiky Tap-Taps, while others are more tricky. Spookies can be ridden but can’t be defeated by jumping on them and will steal Baby Mario if they’re hiding a Bandit, one of the most annoying enemies in the game. Equally frustrating are the Grunts, whose spiked helmets must be knocked off to make them vulnerable, the Sluggers that deflect your projectiles, and the karate-and-ki-throwing Zeus Guys. Many enemies are small are relatively harmless, but there’s so many and they pop up so frequently that it’s easy to take a hit. Others, like the piranha plants and Blow Hards either pop up at the worst moments or are placed on walls, ceilings, and platforms when you’re trying to jump about or ride platforms. Others are very large and must be pelted with eggs to whittle them down or fend them off, and you’ll even get attacked by an enemy masquerading as a collectable Flower!
The gigantic bosses look intimidating but they’re mostly a cakewalk.
With the exception of World 6, each World boasts two bosses: a mini boss hiding in the World’s fort and the actual boss holed up in the World’s castle. Each time, Kamek enlarges a regular enemy or inanimate object, kicking off the fight, which typically involves a large but cumbersome and surprisingly limited enemy filling the screen and must be hit with eggs to defeat, with other smaller enemies or Egg Plants providing ammo. World 1 sees you battling Burt the Bashful and Salvo the Slime, which are both ridiculously easy. Simply hide in the ditches and fire eggs as Burt slowly bounces around, then pelt Salvo with eggs, shrinking him with each hit and gobbling his minions, easily avoiding the lava below. World 2 features fights against ghosts, the Bigger Boo and Roger the Potted Ghost, with the Bigger Boo requiring you to ricochet your eggs to damage him, becoming intangible, and accompanied by bat-like Fangs who act as ammo. Roger tries to push you back and spits homing blue flames but is super easy to defeat as you just need to push his plant pot until he topples over the edge. In World 3, you’ll be swallowed by a gigantic Frog Pirate and need to fire eggs at his dangling uvula, dodging his gastric acid and the gigantic enemies that also drop in, which is quite a visually fun fight. Afterwards, you battle the Naval Piranha, who’s a little tricker. You must jump when it lunges and eat the Nipper Spores, then quickly ricochet eggs to hit the target at its base, though you can apparently one-shot it before the fight even starts. World 4 sees you encounter a massive Milde who wanders back and forth, requiring you to butt stomp from above, splitting her into smaller Puchipuchi L and, finally, regular Mildes. Hookbill the Koopa had me confused for a bit; this enlarged Koopa slowly lumbers around and performs a belly flop, spitting out eggs whenever you jump on his shell, but is invulnerable until you hit his head. Hit him enough times and he’ll topple onto his shell, exposing his stomach for a butt stomp, which took me a while to figure out.
The final bosses require a little more strategy and offer a bit more challenge.
World 5’s Sluggy the Unshaven was also a bit troublesome. This ghost-like blob’s gelatinous skin sags when you shoot eggs at it, and it slowly tries to force you over the edge. However, if you target the same spot, you’ll deal damage and eventually defeat it by striking its heart. Raphael the Raven was also quite unique as he flings you to a small moon where he relentlessly chases you in a rotating circle and creates shockwaves. To damage him, you must butt stomp the wooden stakes so the opposite one pops out as he’s passing over it, which can be difficult to time due to the nauseating rotation. Finally, in World 7, the invincible Tap-Tap the Red Nose hops about until you destroy the coloured blocks and drop him in lava. Kamek then chases you through the castle, firing magical bolts and teleporting away, and you eventually battle his cantankerous master, Baby Bowser. Baby Bowser was a bit difficult to figure out, too. He toddles about in his playroom, causes big shockwaves with a belly flop, and swats Baby Mario away so he can ride Yoshi, but is completely invulnerable. Instead, you must cause your own shockwaves with a butt stomp, though Kamek embiggens the enraged turtle king for the true final battle. This takes place on the castle roof during a nighttime storm and sees Big Baby Bowser slowly stomp towards you from the background. You must dodge the rocks he rains down and his massive fireballs while simultaneously avoiding the gaps he creates in the ground and swallowing Baron von Zeppelins. You must use your eggs to blast him in the face, which can be tricky due to how far away he is. If he gets too close, he’ll instantly kill you so you must frantically target just the right place to deal damage and force him back. Repeat this seven times, being mindful of the crumbling ground as the fight progresses, and Baby Bowser finally goes down, allowing the Mario brothers to be safely delivered to their parents.
Additional Features: When you complete each level, you can tackle a Bonus Challenge if the goal ring lands on a Flower or a Mini Battle by finding a hidden key and entering a locked shack. These see you tossing or popping balloons, matching cards, uncovering matching pairs, gathering Coins against a time limit, attacking enemies with watermelon seeds, and playing roulette and a slot machine. It’s a nice distraction to play these mini games and they award Special Items and a load of extra lives, especially by abusing the Nintendo Switch Online’s rewind and save state features, which make the game a breeze even with its lengthy playtime. Each World also contains two bonus levels, with the Extra levels unlocked when you score a perfect 100 on all the regular levels. These extra levels are shorter, contain no checkpoints, and generally revolve around a gimmick, such as Poochy, traversing Grinder-infested vines, tackling a confusing maze, and a ski run down a mountain in pursuit of Kamek. The game has three save files for multiple playthroughs and you can replay all previous levels with the exception of the opening tutorial-esque stage, though I’m not sure when or how the game saves (I assume it’s after you beat each level). There are no rewards for 100% completion, so you can’t pick which coloured Yoshi you ride or choose to carry Baby Luigi or anything, and there are no two-player options here beyond players taking turns to play.
The Summary: This isn’t my first time playing Super Mario World 2: Yoshi’s Island. I’ve played it on emulators in the past as part of my fascination with the SNES library, but this is the first time I’ve completed the game. Yoshi’s Island definitely makes a strong visual impression; the story is at the forefront here, as are cute, colouring book graphics and whimsical, charming music. The sprites and environments are absolutely gorgeous and some of the best the SNES had to offer, boasting vivid areas, a greater level of detail and depth, and bundles of charm and life to every sprite. As annoying as Baby Mario’s screaming is, I liked the mechanic as a health meter and an incentive not to get hit, though it can be a mad scramble to rescue him that costs you life anyway. Unfortunately, I didn’t feel the same about Yoshi’s egg throwing; while he’s versatile enough, if as slippery as Mario, his egg-aiming and throwing gameplay can be cumbersome, especially when you’re on moving platforms or surrounded by enemies, making it difficult to make split second decisions. It worked in the boss battles, which were fun, and I really liked the enlarged sprites and technical tricks on show, though the bosses were generally a complete joke and I only really struggled with a few. The levels beforehand, though, can become surprisingly challenging. Bottomless pits and instant death traps increase, as do the moving and confusing gimmicks, and it’s often tempting to risk death to grab those elusive collectibles. Overall, this was enjoyable, but Yoshi’s Island is more fun to look at than play at times. It’s a bit slow and clunky, the levels can outlive their stay quite quickly, and there wasn’t as much variety in the Worlds as I would’ve liked or expected from a Super Mario title. Still, it’s something a little different and provides a unique, colourful twist on the usual Super Mario formula so I’d say it’s worth checking out, but I’d much rather play Super Mario World again than this.
My Rating:
⭐⭐⭐
Rating: 3 out of 5.
Pretty Good
Was Super Mario World 2: Yoshi’s Islandin your SNES library back in the day? What did you think to the new gameplay mechanics and how do you think it compares to Super Mario World? Did you enjoy the colourful, colouring book presentation and the egg-based mechanics? Were you annoyed by Baby Mario’s screaming, and did you ever score 100 on every stage? Are you a fan of Yoshi and, if so, which of his games is your favourite? How are you celebrating Mario’s birthday this year? Whatever your thoughts on Super Mario World 2: Yoshi’s Island, feel free to share them below and be sure to check out my other Mario content!
Released: 1 September 2019 Developer: SEGA Also Available For: Arcade and Mobile
The Background: Super Mario and Sonic the Hedgehog engaged in a fierce “Console War” during the nineties as Nintendo and SEGA battled to be the top dog of the videogame industry. In the end, thanks largely to wasting money on expensive peripherals and the pressures of an ever-changing marketplace, SEGA withdrew from the home console market. On the plus side, their supersonic mascot appeared on his rival’s consoles, prompting discussions of a long-awaited crossover began between their respective creators, Shigeru Miyamoto and Yuji Naka. Surprisingly, the two came together in the spirit of friendly competition once SEGA obtained the 2008 Beijing Olympic licence. Essentially a collection of Olympic-themed mini games, Mario & Sonic at the Olympic Games (SEGA Sports R&D, 2007) saw Mario and Sonic characters co-existing for the first time and its commercial success led to subsequent titles releasing annually to promote different Olympic events across the world. This year, to coincide with the Special Olympics World Winter Games, I’m looking at the 2020 iteration (and currently last) of the series. Released following a significant gap between entries and the first to appear on the Nintendo Switch, the game including story elements and events that incorporated sprites from both franchise’s classic 2D games. Retaining its branding despite the delay to the Olympic games, Mario & Sonic at the Olympic Games Tokyo 2020 attracted mixed reviews that praised the nostalgic feel of the 2D mini games but criticised the tedious story mode and limited options.
The Plot: When Bowser, King of the Koopas, and Doctor Eggman are trapped inside an 8-bit videogame console alongside Super Mario and Sonic the Hedgehog, Luigi, Miles “Tails” Prower, and all their extended supporting characters must compete in the Tokyo 2020 Olympic games to free them.
Gameplay and Power-Ups: If you’re familiar with the Mario & Sonic series of Olympic game tie-ins, you probably won’t be surprised to learn that Mario & Sonic at the Olympic Games Tokyo 2020 is a collection of Olympic-themed minigames starring the biggest names from both franchises. As ever, Mario and Sonic’s worlds are mashed together with our own, allowing these anthropomorphic and comical characters to wander around real-world locations (courtesy of not one but two overworld maps) and learn interesting facts about both franchises, the Olympic games, and Tokyo. You start the game by selecting your region, being bombarded by pop-up notifications that tell you basic stuff like what the sound settings do, and customising your player profile, assigning icons and such. From there, you have a few gameplay choices: you can jump into a quick game solo or against other players, picking from every event as they’re all unlocked from the start and setting the difficulty of each, or tackle the game’s story mode. Regardless of which option you pick, your gameplay experience will change depending on which character you play as. While the Story Mode forces you to play as certain characters, you can pick almost any character for any event in Quick Match, but you’ll need to consider their capabilities. These are pretty simple: some characters are faster, some are all-rounders, some do better with Super Moves. It doesn’t get more complicated than that and I’m not sure how much of a factor they are as basically every game comes down to how fast you can tap buttons or work the various controls. There are thirty-two characters to choose from, though twelve are only selectable in certain events (like Jet for Football and Ludwig for Fencing) and, when playing the 2D-styled “Dream Events”, your choices are limited to just eight characters.
Up to four players can tackle the game’s 3D, nostalgic 2D, and chaotic “Dream” events.
There are twenty-one Olympic events to play, ten 2D Events set during the 1964 Olympic games, and three special challenge “Dream Events”. You’ll get a chance to review the controls and success criteria prior to each event, though it’s worth pressing X during one of the many introductory scenes or after pausing to review any additional controls. Players can choose from three different ways to play, including flailing around with the motion controls or using the buttons like a normal person, though some events (like the Discus Throw and Javelin Throw) force you to use motion controls to angle your shot, making them some of the more aggravating events. Generally, you can hold the Right trigger or A at the start of an event to build power and must tap A to run or move. B is usually reserved for jumping while R or A execute a Super Move (such as a burst of speed or dancing flourish). The simplest events, like the 100m Race and 110m Hurdles, have you tapping A to run to the finish line, with players hitting B at the right time to clear hurdles and gain a boost in the latter. Most events have a foul line that will disqualify you if you cross it, some of the trickier ones have an optional practice mode beforehand, and your objective is to win every event to set a best time (or break a World Record) and earn gold medals or the top spot on the podium. If you fail an event three times in the Story Mode, you can choose to skip the event, progressing the story with no consequences, something I eventually did quite often when the events became too laborious or finnicky. I was fine with the challenge offered by, say, the Long Jump where you tap A to run, hold B to adjust your jump angle, and complete a series of button presses akin to a quick-time event (QTE), even if it took some practice. Similarly, Sport Climbing was tricky but not too taxing. You press the Left trigger and R at the start to latch on, aim your jump with the left and right control sticks, and hop to hand-holds against a time limit, avoiding spiked balls and replenishing your stamina with hearts. I also had a fair bit of fun in Boxing and Fencing, where you must time button presses and build combos, guarding against incoming attacks and frantically tapping A (in the latter) to avoid being counted out.
Skill and character choices can help with the game’s harder events, which include team-based sports.
Things took a turn whenever the events became a bit more complicated, however. It’s not too difficult timing your button presses in the Triple Jump event or pulling off gnarly tricks in the Surfing – Shortboard and Skateboarding – Park events, but you need to be on point to win those gold medals as a poor score will cost you and you often have to complete a few rounds to win, making it even more annoying. Archery was a similar issue; here, you have to think about the wind direction, the distance of the targets, and the angle of your shot. It’s a far cry from Shooting – Trap, where you just pick a square and hit a button to shoot clay discs. The Judo event also caused me a lot of headaches; you have to mess about trying to keep your balance to toss the opponent, which I just couldn’t figure out. I didn’t mind completing increasing difficult QTEs in the 10m Platform and Vault events, but tilting the left stick to match your partner’s strokes in Canoe Double (C-2) 1000m and frantically rotating the control stick to chase to the goal in Kayak (K-1) 1000m was a pain in the ass. You even play team games, like Volleyball, Football, and Rugby Sevens. I couldn’t figure out the Volleyball event; no matter how well I timed my presses of A and B and how often I hit the ball over the net, I couldn’t score a point. Rugby Sevens was a touch more enjoyable; here, you press A to pass and score a try, B to evade, and race around a pitch tackling other players and scoring a conversion by timing a press of X as a meter goes back and forth. And then there’s the aforementioned Discus Throw and Javelin, where I could just about figure out the motion controls in practice and then kept screwing up my throws when it came time to compete. If the option had been there to just use the left stick to direct my shot, it would’ve been far more enjoyable!
The minigames are some of the best parts of the game, often outshining the main Olympic events!
When playing Story Mode, you’ll alternate between moving Luigi around the 3D world of the 2020 Olympic games and Mario around the 2D world of the 1964 Olympic games, with Tails and Sonic following each. You’ll chat with other characters and non-playable characters (NPCs) like Toads and Omachao to obtain passes to other areas and compete in additional events and find glowing tickets to learn fun facts. For such small overworld maps, there’s a hell of a lot of backtracking and dialogue to skip through, and it quickly gets a bit tedious slogging through the twenty-chapter story to reunite the two groups. Occasionally, characters will ask you to complete one of ten minigames to advance the plot; these are then unlocked for free play in the Game Room. These minigames are some of the best parts of Mario & Sonic at the Olympic Games Tokyo 2020 and see you flying through the Tokyo skies in a sidescrolling shooter like in Sky Chase Zone, chasing down a bullet train, painstakingly searching Shibuya’s Hachiko Square for specific characters in a game of Where’s Wally?, and chasing down (and attacking) Dr. Eggman’s taxi in what’s somewhat similar to Rad Racer (Square, 1987). You’ll be bouncing on Cheep-Cheeps as you chase after Bowser’s river boat, sneaking through a museum, avoiding Koopas and other Mario enemies as you collect keys, and desperately trying not to fall as you scale Tokyo Tower. Other times, you’ll be beating up waves of Shy Guys or shooting Egg Pawns before they throw spiked balls at you, both options that are far more enjoyable than the game’s odd depiction of Badminton that’s essentially just a rhythm game, just press the button when prompted, using the left stick to aim your shot, and your character moves by themselves (though I found the doubles partner screwed up more than I did). You’ll also dash around an obstacle course in Equestrian – Jumping, building speed to jump fences and puddles, knock a ball back and forth in table tennis until you can hit your Super Shot, and throw hands and feet in Karate – Kumite, toppling your opponent to earn extra points. Most of the events are pretty fun but some of them are way too short and others outstay their welcome very quickly. It’s also pointless trying to master the difficult ones as you can just skip them in Story Mode, unless you’re aiming for 100% completion.
Presentation: In keeping with the tradition of this spin-off series, Mario & Sonic at the Olympic Games Tokyo 2020 is a bit of a mixed bag in this area. None of the familiar tunes from either franchise appear, leaving the game to plod along on the strength of a weak-ass, generic soundtrack that barely eases the pain of a failure. Things start off strong with a beautiful pre-rendered cutscene that showcases many of the new and returning events and shows these two franchises co-existing side y side, a visual that never gets old even if I’ll never forgive either company for not doing a more suitable crossover. It’s a bit downhill from there, though, as prerendered cutscenes are eschewed in favour of partially animated 2.5D models, endless dialogue boxes, and a parade of pop-ups. The 2D sprites and environments ease this pain a bit, but the developers limited themselves by using the sprites from Mario’s debut title, meaning he and his fellow characters have very few frames of animation. Sonic and his cohorts fare slightly better in this regard but the aesthetic is all over the place since Knuckles the Echidna’s sprites are obviously more detailed than Sonics, leading to some weird moments when the sprites are awkwardly depicted holding items. It even looks weird when they celebrate their victories or react to their failures since the developers didn’t create any new animations, so you’re left with Sonic looking annoyed and Mario flipping on his ass. Overall, I did enjoy the 2D environments and events, though; they reminded me of the many 8-bit sports games on the Nintendo Entertainment System (NES). I would’ve liked to see some 16-bit ones thrown in, even if just as additional “Dream Events”, but these retro-styled sections were the best parts of the game, despite my complaints.
The limited 3D visuals are decent but it’s the retro-styled aesthetic that really impresses.
The 3D sections hold up well, for the most part, but aren’t that dissimilar from what we’ve seen in the previous Mario & Sonic titles. You can hold B to run and characters are far more animated in 3D, spouting gibberish and sound bites and even wearing different outfits for every event. Strangely, every area felt very bland and empty, despite often being populated by at least a handful of NPCs. Eventually, larger crowds of Sonic’s Animal Friends, Chao, Shy Guys, and Toads fill certain areas and populate the stands, but they don’t help to make the areas feel very lively. Still, you’ll see NPCs like Charmy Bee and Lakitu serving as referees and other side characters operating cameras; these NPCs even get in on the action in the atrocious Marathon event. The 2D sections sported an announcer I either missed or ignored in the 3D parts and characters all gain a suitably dramatic glow and flourish when executing Super Moves. However, while event locations and interiors are far more interesting to look at, the game’s let down by its painfully bland overworlds. You can visit many real-world locations in 1964 and 2020, seeing planes fly overhead and learning their history, but it’s all stuck on a rather uninspired overworld map. This is especially disappointing considering how interactive and varied previous overworlds in the series have been, and the fact that you visit these areas time and again to find passes or charge this magical battery created by Doctor Eggman Nega. Many of the minigames again steal the show in terms of visuals, incorporating additional sprites to serve their needs and being visually akin to lost titles from Nintendo’s 8-bit heyday, which only adds to their replay factor. The game also performs really well; I noticed no slowdown or texture warping or anything like that. However, there are a lot of menus to navigate, lots of instructional text to read, and replaying events after a loss can be tedious as you have to skip a bunch of introductory scenes.
Enemies and Bosses: As you might imagine, every character in Mario & Sonic at the Olympic Games Tokyo 2020 is your enemy at some point though, luckily for you, there’s very little to distinguish them. Computer-controlled opponents have the same abilities as you, charging power, getting a starting boost, and attacking and defending just as you would. Their individual classes do become a factor, however (you may struggle to win a race against Shadow the Hedgehog when playing as Wario, for example), though you can certainly overcome these if you mash buttons faster enough or don’t screw up when playing the event. I did notice some characters seemed to be unfairly good at some events; Vector the Crocodile never struggled to toss his discus, for example, and I could never hope to match Bowser Jr. in the Javelin Throw. Admittedly, the fact that I struggled with these events probably has a lot to do with that. however, I did notice my opponents would charge their Power Gauge much faster than me, or would sprint past me at the last minute even if I had a commanding lead. The general advice here is to simply do better the next time around, something that’s easier said than done when you have to restart a Table Tennis match after playing to deuce and match point for God-knows how many rounds! Unlike in some of the previous Mario & Sonic titles, there are few examples of what could loosely be called “boss battles” here. It’s generally seen as a big deal when you challenge Dr. Eggman or Bowser, but then a lot of those events aren’t that difficult to win…to start with… Bosses (and Badniks) do appear in the Tokyo Sky Flight minigame, however, including Mecha Sonic and a variation on the classic Egg Wrecker fight, which were fun inclusions.
A handful of quasi-boss battles and harder events test your skills…and patience…
There are some exceptions, however. The Metropolitan Goal Kick minigame, for example, has you tackling Egg Pawns to grab a rugby ball and then timing a button press to kick it up the length of the Metropolitan Government Building and deal damage to Metal Sonic. As far as I could see, Eggrobos only appear in the Volleyball event, while you must tackle Boom Booms in Rugby Sevens and score penalties against Egg Pawns in Football. The twelve guest characters can only be challenged or controlled in specific events, as well, and you must best them (or skip the event) in Story Mode to unlock them. This means you’ll only see Zavok and Zazz of the Deadly Six in Boxing and Table Tennis, respectively, Diddy Kong only appears in Rugby Sevens, while Eggman Nega and Rosalina must be challenged in games of Karate – Kumite and Surfing, respectively. Depending on your level of skill, these can be difficult events; it took me a couple of tries to clear the Sport Climbing event and unlock Rouge the Bat, for example. When playing Story Mode, other playable characters challenge you to events before helping you or joining your team, meaning you must best Knuckles and Shadow in a game of Badminton (Doubles) and win a canoe race against Wario and Waluigi to gain their help. You must also defeat Bowser’s Koopalings to charge up that stupid battery and deal with Bowser, Dr. Eggman, and their minions stealing your gold medals in 1964. Both baddies challenge you to various events, with Dr. Eggman easily being overtaking in a straight-up race or in the Vault event. Once you reach the final chapter, you must pick to play as either Mario or Sonic and race Bowser in the dread Marathon. In this event, you must tap A to run, which depletes your stamina. Hitting other runners, the walls, swarms of bees, or puddles also depletes your stamina and will eventually knock you over, costing you valuable time. You can grab water with B and ride slipstreams to regain stamina, charging up for a boost or using boost pads, but this is a hell of a final ask that I ended up skipping as I never had enough stamina to beat Bowser to the finish.
Additional Features: There are 122 pieces of trivia to find in Mario & Sonic at the Olympic Games Tokyo 2020, spread out across both 1964 and 2020. You’ll get trivia by inspecting glowing tickets and talking to other characters, who’ll either ask a question or offer titbits about the characters, the Olympic games, and Tokyo. These are all saved in the Trivia section so you can re-read them if you wish or see which ones you’re missing. There are also eighty hidden “Challenges” to complete, with the obscured list available from the main menu. These are mainly tied to setting new World Records, finishing events on the hardest difficulty, scoring a set number of points, and clearing Story Mode. Finishing the Story Mode, you’re returned to the overworld upon loading your file, now able to replay all previous events and take on additional challenges in the “Dream Events”. Though there are only three of these, they’re pretty enjoyable and interesting, featuring additional power-ups and gameplay mechanics that make them perfect for multiplayer games. Dream Racing sees you racing through a mainly half-pipe-like course, performing tricks and hopping rails not unlike in the Sonic Riders series (Sonic Team/Now Production, 2006 to 2010) and attacking with items similar to the Mario Kart series (Various, 1992 to present). Dream Shooting sees you running around, awkwardly aiming your weapon with motion controls, and blasting targets, grabbing multi-shots and shooting down gliders in an arena shooter that reminds me of the Splatoon games (Various, 2015 to 2022). Finally, in Dream Karate, you attack with combos, kicks, and throws to toss your foes around and colour the floor panels, grabbing springs and Super Stars for temporary buffs. Beyond that, you can challenge the computer on harder difficulties, aim to get gold medals and break World Records, and play alongside up to four players…if you can find anyone to play with.
The Summary: As a lifelong Sonic fan (and a pretty big fan of the Super Mario games), I’m basically obligated to pick up the Mario & Sonic games whenever they release. I believe I’ve played all of them, but only on portable devices, which I think made the already aggravating gameplay all the more vexing. Free from the restrictions of the small size of Nintendo DS and 3DS screens, Mario & Sonic at the Olympic Games Tokyo 2020 is easily the most visually impressive of all the Mario & Sonic games I’ve played, offering relatively attractive 3D models and worlds that show a decent amount of personality. I can never shake the feeling like these games are just soulless cash grabs, however, and that’s reflected in how empty a lot of the arenas seem, despite the NPC crowds. Mario & Sonic at the Olympic Games Tokyo 2020 impresses with its nostalgic 2D sections, which harken back to the NES days and capture a lot of the magic of Nintendo’s 8-bit glory days. While the sprites are fun to see, they’re extremely limited and a bit difficult on the eyes because of the mishmash of 8- and 16-bit sprites. I was glad to see the game allowed for traditional controls, though the forced motion controls for some events were more jarring as a result; however, it’s a bit disappointing that so many of the events play the same. Thankfully, the various minigames offered a great distraction from the main events, which were either too short or too annoying. I honestly could’ve done with a few more of these minigames, and the “Dream Events”, as there wasn’t enough of these to offset the more annoying Olympic events. With a half-assed approach to cutscenes and some of the dullest unlockables in all of videogaming, Mario & Sonic at the Olympic Games Tokyo 2020 does little to shake the franchise’s stigma of being a collection of nonsense minigames, even with its few good points. It’s easily the best of the series I’ve played, but that’s not a very high bar and I remain bitter that we never got a more traditional crossover between the two nineties icons.
My Rating:
⭐⭐⭐
Rating: 3 out of 5.
Pretty Good
Did you enjoy Mario & Sonic at the Olympic Games Tokyo 2020? Did you also play without the motion controls? What did you think to the 2D sections and events? Were the minigames also the best part for you, or did you prefer a different Olympic event? Would you like to see more games in the series, or a proper crossover between Mario and Sonic? Which country are you rooting for in the Special Olympics World Winter Games this year? Whatever your thoughts, leave a comment below, support me on Ko-Fi, and go check out my other content for both franchises!
On 21 February 1986, The Legend of Zelda(Nintendo EAD, 1986) was first released in Japan. The creation of legendary game designer Shigeru Miyamoto and Takashi Tezuka, The Legend of Zelda launched one of Nintendo’s most popular franchises. This year, I’ve been dedicating every Friday to Nintendo’s most famous silent protagonist, Link and his vast and enduring fantasy world of sword and sorcery.
The Plot: Years after Breath of the Wild, Link and Zelda discover the rancid “Gloom” seeping from the depths beneath Hyrule, heralding Ganondorf’s return. When Zelda disappears and the Master Sword is shattered, Link turns to an ancient race to combat the Dark King once more.
Gameplay and Power-Ups: Like its predecessor, The Legend of Zelda: Tears of the Kingdom is an open-world action/adventure game in which players control Link (in one of the rare instances of him not only having that name but being the same incarnation) and explore the vast wilds of Hyrule, a diverse and treacherous land of sword and sorcery. Fundamentally, the controls and basic gameplay mechanics remain unchanged from Breath of the Wild, for better or worse. You press A to talk to Hyrule’s many and varied non-playable characters (NPCs), interact with the environment or pick up objects (stones, weapons, etc), and open treasure chests. To run, simply hold B but keep an eye on your stamina wheel as Link will quickly get exhausted unless you expand it by conquering the returning mini Dungeons (again dubbed “Shrines”). Y swings your currently equipped weapon in a simple combo; hold it to charge up a spin but, again, watch your stamina as you don’t want to end up dizzy and vulnerable. X jumps, with Link deftly hopping over most low objects or executing a jumping attack; you’ll also use this to clamber up walls and surfaces (again, stamina willing). When in combat, press ZR to target the nearest enemy and raise your currently equipped shield to fend off attacks. Successfully tap A while raising your shield to perform a “Perfect Guard” that reflects certain attacks and leaves enemies stunned (though I still can’t get the timing right). Similarly, pressing X at just the right time to dodge an attack allows you to hit a powerful “Flurry Rush” to whittle down their health. Pressing in the left stick sees Link crouch and stealthily sneak around, allowing for one-hit strikes, and you can hold down R when at full health to unleash a Sword Beam.
Link’s returning abilities are bolstered by bizarre building and fusing mechanics.
As before, Link can utilise almost anything as a weapon; sticks, skeletal arms, various swords, clubs, and axes are all acquired by defeating enemies or exploring your surroundings. Each has a different power rating that determines not just how much damage it does, but also how durable it is. The lower the rating, the more likely your weapon will shatter after a few hits. Wooden weapons also catch fire and metal weapons attract lightning, so you must swap them out or drop them to avoid taking damage or being caught short. Similarly, items like pot lids, wooden circles, and iron shields can defend against incoming attacks and have the same elemental issues to consider. Link also acquires various bows, with some firing more shots at the cost of their durability and others hitting harder; similar effects are also applied to weapons and shields. Link can also throw items and attach them to his arrows for additional effects, such as blowing up rock walls and enemy hoards with Bomb Flowers, freezing them with Ice Fruit, or setting vines and baddies alight with Fire Fruit. In Tears of the Kingdom, this comes courtesy of Link’s new Purah Pad, and upgrade to the previous game’s Sheikah Slate, which quickly allows him to “Fuse” objects to his arsenal. This is a versatile ability, allowing you to Fuse items to your swords (and even combine weapons) for added effects and damage. Fuse makes shields more durable or rocket you into the air with…well, an attached rocket…and is also essential for solving puzzles since you must cobble together wooden boards to create bridges, rafts, or more complex vehicles. You can manipulate almost anything with the “Ultrahand” ability, which telekinetically picks up objects to be awkwardly rotated to solve puzzles or piece together your creations. Eventually, you learn the “Autobuild” ability that makes this much easier but at the cost of “Zonaite”, a new mineral that powers your creations and allows your gliders to fly, your fans to blow, and your carts to roll along. Perhaps Link’s most useful new ability is “Ascend”, which sees him clip upwards through the environment when able, eliminating the need to expend stamina climbing rugged mountains and sheer walls. Link can also rewind time, to a limited degree, with “Recall”, allowing him to dart into the sky by reversing the direction of falling debris and bypass raging lava flows on makeshift rafts.
Cook meals and earn Light of Blessings to increase your maximum health and stamina.
As before, Link’s weapon inventory is painfully limited. It can be expanded by finding Korok seeds, but only one slot at a time and the cost increases as you progress. Link’s defensive options are also tied to his outfits, which are found in chests, tied to tricky side quests, or bought from various shops for ridiculous prices. Instead of relying on gathering Rupees, you’re better off selling the precious gems you find by smashing rocks with rock-Fused weapons. You’ll need to do this as Link won’t last long in extreme heat or cold without the right outfits, and some offer additional perks such as speeding up your swimming rate, rocketing you up waterfalls, resisting elements, and upping your attack and defence. Rather than collecting hearts from defeated enemies, Link can either spend Rupees at an inn, collect a “Light of Blessing” from Shrines, or cook meals. This time, any meals you cook are recorded for easy reference; meals can also have added effects, such as temporarily increasing your maximum hearts and stamina wheel. To permanently extend these, you must trade four Light of Blessings at prayer statues dotted around Hyrule to gain either a new heart container or an extra slither to your stamina wheel, a process that remains as tedious as before. Similarly, you can still sneak up on and tame wild horses, adding them to stables and calling them with a whistle. If you have a Breath of the Wild save file, your horses will even be carried over, which is nice. There is a generous fast track mechanic, as before, but you must again activate towers (revealing more of the map in the process) or beat Shrines to utilise this. Finally, you can jump from high places and glide using your Paraglider and, though you can’t drop bombs like before, you can whip out your bow and use the slowdown effect to pick enemies off and, eventually, speed up your gliding with a gust of wind.
The Sages fight alongside you, though it takes all your strength to retrieve the Master Sword.
Like in Breath of the Wild, Link is aided in his journey by reincarnations of the ancient Sages. Following the main story quest (something easily done from the extensive “Adventure Log”) sees you conquer five ancient “Temples” and encounter these allies, who then join your quest, in spirit. Tulin blasts a gust of wind that speeds up your gliding and blows over enemies; Yunobo cannonballs ahead, setting fire to grass and smashing rocks; Sidon protects you with a water shield and blasts foes with a burst of water; Riju adds a lightning bolt to your arrows; and you can pilot Mineru’s mech, attaching various accessories to essentially make a Rock ’Em Sock ’Em Robot. Each ability has a cooldown element (with Mineru’s abilities tied to Zonite) and each Saga follows you on the overworld unless dismissed, battling enemies and bosses alongside you to take some of the heat off you. Mineru is especially usefully when explore the “Depths”, a vast, pitch-black, incredible dangerous environment found beneath Hyrule and accessed via chasms. Down here, you’ll activate Lightroots and toss Brightbulbs to brighten up the area and encounter vast deposits of “Gloom”, a Malice-like substance that permanently saps your maximum health unless you recharge at Lightroots or cook special food. Mineru walks through Gloom and lava without fear, but you must watch for Gloom-infected enemies and the horrific Gloom Spawn, which essentially act as this game’s second counterpart to the Guardians (the first being the various Zonai Constructs). While it’s not necessary to explore the entirety of the Depths, you will visit there many times throughout the story, and it can be beneficial to venture down there to collect powerful weapons or Poes to obtain new clothing. Additionally, you can blast up to the skies to explore various disparate floating ruins not a million miles away from the floating islands of Skyloft. Up here, you’ll find mine carts, caves, and the remnants of the Zonai people, alongside additional Shrines and rewards. The skies are also great for scoping out points of interest on the surface, such as Shrines, towns, or the various geoglyphs that dot Hyrule’s landscape. If you’re really lucky, you’ll spot one of four elemental dragons who can be farmed for precious minerals, with one in particular (the Light Dragon) awarding the legendary Master Sword if you have enough stamina to retrieve it.
Puzzles and traversal are made more challenging with the building mechanics and spiteful Gloom.
Hyrule’s surface remains relatively unchanged from Breath of the Wild; many of the same towns, locations, and landmarks can still be found, though with some alterations. Lurelin Village has been infested with ruffians who need to be fought off, for example; the Rito Village has been beset by a blizzard; and the Gorons have become obsessed with Marbled Rock Roast. The Korok Forest and eerie Lost Woods are shrouded by an impassable mist, Hyrule Castle floats above a chasm of Gloom thanks to the “Upheaval” caused by Ganondorf’s awakening, and Zora’s Domain is polluted by sludge. You must clear out these issues with both your items and by completing Temples, which are thankfully far more visually distinct this time around. Rather than every Temple relying on a clunky rotating gimmick and a repetitive Sheikah aesthetic, they’re much more traditional in their depiction and use of elemental themes. You’ll solve a primary puzzle in each, from activating propellers to unlock giant locks, hitting gongs to release padlocks, powering up water wheels and ancient batteries, and collecting Mineru’s parts. While you do collect keys, this element is downplayed, though you still activate levers and switches (albeit with Ultrahand). Typically, you’re more likely to be moving or combining items, rolling giant balls into targets, and either using Ascend or fans to progress upwards. The Water Temple has a unique gravity gimmick that sees you float around in bubbles, you’ll get a prelude to the Lightning Temple’s boss battle before entering, and the Fire Temple is full of mine carts that require you to switch tracks by firing Yunobo at targets. Just getting to the Temples is a feat in itself, with you forced to venture higher and higher into the skies and cross flying ships to reach the Wind Temple and explore the murky Depths to find the Spirit Temple. Hyrule Castle again acts as a Temple, one guarded by powerful enemies and covering Gloom, and you must venture deep into the hazardous, Gloom-filled chasm beneath it to confront the Demon King. Shrines are far more challenging and diverse this time around, ranging from combat challenges to logic puzzles that’ll have you using Link’s Purah Pad abilities in unexpected ways or battling enemies with makeshift items.
You’ll search high and low and build all sorts to help out Hyrule’s inhabitants.
Like Breath of the Wild, Tears of the Kingdom is an unforgiving experience. Link begins with three hearts and acquiring more is a chore since you’re forced to seek out Shrines (something made much easier by completing a side quest to add the Sensor to your Purah Pad). Even then, having more health can be detrimental since it means consuming more food to replenish your health and Link is frustratingly weak at times. Even simple encounters can end in a game over, meaning it’s often better to just sprint past enemies to preserve your weapons, health, and sanity. To make matters worse, all enemies and treasure respawn when the “Blood Moon” rises, meaning the environment never gets any less dangerous. This remains a frustrating experience for me as I enjoy the combat in the Zelda games but the risk/reward of battling even simple enemies often isn’t worth it. Add to that the frustrating weather effects, which see you slip down mountains, tumble about like a ragdoll from a lightning strike, and collapse from heat exhaustion and you have a game that can be a chore to play. While the Gloom and the Depths can largely be avoided, you’ll endure both eventually and they’re a major headache as it’s not fun to stumble about in the darkness, have your hearts sapped away, and then be surprised by a Gloom-infected rematch with a boss! It seems like every NPC has a story to tell and a mission for you, be it reuniting lost Koroks, exploring wells, seeking out evidence of Zelda sightings, or bringing musicians to the Great Fairies so you can upgrade your clothing (for a small free…) Sometimes, you’re forced to battle waves of enemies or NPCs will turn out to be the aggravating Yiga Clan in disguise. Other times, you’re performing glorified fetch quests for minimal rewards or cobbling together constructs to help Addison campaign for President Hudson. Some Shrines only reveal themselves after you retrieve their crystal, either by battling a mini boss or solving some tedious nearby puzzle; others offer no challenge at all, making for a nice change of pace. Link’s building abilities can result in some remarkable craft, from boats to full-blown planes, but it can be annoying rotating pieces into position, and you’ll expend a lot of your resources to get all the pieces you need and power everything.
Presentation: Link’s model, like all the character models, appears essentially unchanged from Breath of the Wild save for some different attire and his new monster arm. When in sweltering heat, he pants and sweats; when in blistering cold, he shivers; and when standing too close to an explosion, he catches fire. Although he doesn’t speak save for some grunts, there are dialogue options here and there that show is does communicate with those around him. Other NPCs communicate through traditional text boxes or voice acting, which is generally saved for the more dramatic cutscenes and the various memories. Link’s companions have a fair bit of personality, with Yunobo being a standout for me since he’s brainwashed into turning against his people and then determined to make up for it with an enthusiastic gusto! Tears of the Kingdom takes the expansive overworld from Breath of the Wild and expands upon it considerably. The surface is largely the same from what I remember, featuring towns, swamps, mountains, a massive volcano, and rushing waters. Settlements like Kakariko Village and Hateno Village remain, with Link now having a home and encountering many of the same NPCs (some of whom recognise him and others who strangely don’t). The landscape is altered by the presence of chasms leading to the Depths but still contains hidden caves, stables, the ruins of the old world, and recognisable landmarks like the Temple of Time. Hyrule is gigantic and full of different cultures, from the distrustful Gerudo in the arid desert to the proud Zora in their waterfall kingdom. Each area has different weather effects to worry about, from stifling heat to bitter cold, something exacerbated by random thunderstorms and the titanic elemental Gleeoks. There’s also a day/night cycle present, some mist and fog effects here and there, and a real sense of the world having changed both between games and from the fallout of the Upheaval, which sees debris rain from the skies and uncovers long-forgotten ruins that you must explore and decipher.
Hyrule is bigger and more varied (and dangerous) than ever.
By their very nature, the Depths aren’t as immediately impressive simply because they’re seeped in darkness. It’s an oppressive, bleak, and dangerous environment with no inhabitants save for Ganondrof’s minions, the remains of a Zonai outpost, and Robbie’s tentative efforts to explore the Gloom-infested environment. Still, there is a lot to see here once you illuminate your surroundings; Zonai depots, lava flows, and Gloom-versions of the game’s bosses all dwell alongside Bargainer statues where you trade your Poes and rusted weapons you can take. The skies aren’t much better, being a fragmented series of ruins, tracks, and Zonai deposits that you must often glide between. The Shrines have been redesigned (for the worst, in my opinion) and returning areas like Hyrule’s labyrinths and even the elegant castle have an added danger thanks to being infested by Gloom. Shrine interiors are very similar to what we saw in Breath of the Wild, favouring substance over style and restricting your abilities so you can’t just glide to the exit. They retain the ancient mixture of science and magic from Breath of the Wild, but I remain unimpressed by how tedious it gets searching for Shrines just to get enough Light of Blessings to gain one extra heart that’s immediately shattered by Gloom. Still, as mentioned, the Temples are much improved this time around. They not only have a better visual identity but contain more interesting puzzles and a greater enemy variety. The standout for me was the Lightning Temple, which sits within a vast pyramid in the storm-swept Gerudo Desert and is home to the mummified Gibdos. I felt like a proper tomb raider shifting blocks and riding wind currents in here, though the Fire Temple also impressed by being an abandoned mine within a volcano. The Spirit Temple was the most disappointing since it simply hosts a boss battle, but the journey to it through the Construct Factory in the murky Depths was challenge enough.
The world and story have been expanded and changed by the recent, cataclysmic events.
Tears of the Kingdom makes great use of ambient sound for the most part. There’s no sweeping Zelda theme when galloping across the overworld here; just the sounds of enemies approaching or light piano tunes. This changes once you get into battles, ramping up the anxiety when you’re suddenly attacked by a spear-wielding Moblin and battling the finnicky controls as you tumble down a mountainside. Music really only plays a role in the game’s cutscenes, however, which can be replayed from the Adventure Log. Like its predecessor, Tears of the Kingdom invites you to challenge yourself; if you’re brave (or stupid), you can head right to the final confrontation (and win!) and you’re free to explore every area out of sequence, for the most part. The map and Adventure Log can quickly become cluttered with waypoints and primary and optional quests, making it difficult to remember where you’re going and what’s happening next. However, I never experienced any performance issues save for one terrifying moment where the game crashed during the Yunobo fight. The environment renders well; wild animals and NPCs roam freely with no slowdown or noticeable pop-up, though the weather effects do help mask this at times, I feel. Traversing the surface is far less hazardous thanks to the absence of Guardians but the Gloom Hands definitely get your blood pumping when they slither to life and relentlessly chase you across walls and ceilings. Long-time Zelda fans should also enjoy the various nods to previous games in the names of certain locations and NPCs, as in the last game, and Tears of the Kingdom definitely feels like a celebration of the franchise’s rich history as much as anything else. Probably the best callback for me was exploring Hyrule Castle again; though much more restricted thanks to the Gloom and the damage, it was fun revisiting the library and royal rooms. Unfortunately, the plot lost me a bit; I still don’t understand why no one makes a connection between Ganondorf and Calamity Ganon and I must have been distracted when the game explained why Zelda’s been sighted across Hyrule when she’s actually flying through the skies as the Light Dragon.
Enemies and Bosses: As far as I could tell and remember, every enemy encountered in Breath of the Wild reappears here, sporting the same strengths and weaknesses and dropping the same items upon defeat. Hyrule is full of sentient trees, jelly-like Chuchus, odd Pebblits, bat-like Keese, and rock-spitting Octoroks. These common enemies aren’t much to shout about, popping up as you explore and generally being more a nuisance than a threat, but the land is also patrolled by Ganondorf’s more organised and formidable forces. The most commonly encountered are the squawking Bokoblins, often found around campfires, guarding towers, or riding Battle Talus’s. They’re often subordinate to their more challenging silver-clad commanders, trailing behind bulbous Boss Bokoblins, or taking orders from large, goblin-like Moblin. Skeletal variants of these are also encountered, some ride horses on the overworld, and Gloom-infested variants swarm the Depths, but they’re also echoed in the cave-dwelling, ape-like Horriblins. Exploring deserts, swamps, and water-rich areas sees you surprised by the lizard-like Lizalfos, who spit water and turn invisible, and you’ll often face a double threat as Aerocudas patrol the skies. Bokoblins, Moblins, and Lizalfos wield various weapons, from swords to lances and bows, and will call for backup upon spotting you, making even a handful of them a significant threat. Various Wizzrobes are also encountered, often skipping and teleporting about and firing different elemental magic, and the Yiga Clan will jump you when you least expect it, disappearing in a puff of smoke and charging you with their blades. You’ll also contend with mummified Gibdos both on the ground and in the air, though fire- and lightning-based attacks make short work of them. Various armed Zonai Constructs test your combat prowess, acting as smaller but no less threatening counterparts to Breath of the Wild’s Guardians.
Formidable and horrific mini bosses roam Hyrule and launch surprise attacks!
Hyrule is also populated by various mini bosses. Boss Bokoblins are larger versions of regular Bokoblins that wield big clubs and can take quite a beating, caves house different elemental Like-Likes, and giant stone Talus’ assemble from the environment to catch you by surprise, with their only real weak point being the Ore Deposit on their heads. If you’re really unlucky, a massive cyclopean Hinox will wake up and chase you (though targeting the eye turns the tide in your favour), mutated crocodile-like Molduga burrow through the Gerudo Desert and in the sands of the Depths, and a combination of the two, the Frox, also appears down there, sporting the same weaknesses as both. Flux Constructs are usually found in the skies; these sentient Zonai cubes are controlled by a central cube that must be targeted before they pummel you into the stone. Master Kohga also returns, having dropped to the Depths and mastered the Autobuild ability to fashion giant trucks, flying machines, and even a mech to rival Mineru. Though he’s more troublesome this time around, he’s quite susceptible to arrows in each encounter. Before he joins your cause, you must fight the brainwashed Yunobo, dodging his cannonball-like roll in a prelude to one of Ganondorf’s devastating charge attacks. Though far less prominent (at least in my playthrough), powerful, centaur-like Lynels still exist in Hyrule, with a silver variant encountered in the Gloom-filled Depths prior to battling Ganondorf. They’re joined by the various elemental Gleeoks, massive, three-headed dragons that breathe fire, frost, and lightning and are lorded over by an even tougher king. I’m gonna be honest and say I never fought these; I saw them flying around or standing atop mountains and felt their power in the intense weather effects they emit, but didn’t dare test myself against them (or the Lynels, for that matter). Similarly, I simply fled from every Gloom Swarm so I wouldn’t be decimated by Phantom Ganon, though you’re forced to fight this terrifying foe at least twice, once when exploring Hyrule Castle and again to free the Great Deku Tree. Phantom Ganon acts as an appetiser for Ganondrof’s battle, charging with a sword, striking with a lance, causing massive shockwaves with a club, duplicating himself, and spreading Gloom everywhere in easily some of the toughest battles in the game.
The five Scourges are visually distinct and range from simple to frustratingly challenging.
Each Temple houses at least one boss, a “Scourge”, that is, thankfully, not simply a variant of Ganon this time around. You can tackle these in any order but I first battled Colgera, Scourge of the Wind Temple, a gigantic insectoid creature that flies up from within the Wind Temple and forces you to battle it in mid-air (not unlike the game’s final challenge). Colgera emerges from portals and fires ice shards from its body, unwittingly exposing its weak spot, which you must target with Fire Arrows (using Keese eyeballs to help aid your aim). Tornados keep you in the air and Tulin gives you a speed boost, but this wasn’t an especially taxing boss, even when its weak spot switches to its underbelly in the second phase. Next, I battled the Water Temple’s Mucktorok (after getting to grips with Sidon’s abilities in battle with the Sludge Like), a cackling little imp who rides a Molduga-like sludge shark. You must blast this with Sidon’s water wave, clearing a path through the sludge, avoiding its spit attack and shockwaves and chasing the slippery devil down to give it a good thrashing. To enter the Fire Temple, you first dispatch the volcanic dragon, Moragia, that’s attached to Death Mountain by flying around on a nearby Zonai flyer and firing Yunobo at it. Inside, you’ll face the Marbled Gohma, a spider-like rock beast that tries to stomp you and fires explosive chunks of rock. You must fire Yunobo at its legs, crippling it so you can pummel its eye, then send Yunobo rolling up to smack it when it retreats to the ceiling. The difficulty noticeably spikes when you face Queen Gibdo in the Lightning Temple, mainly because you’re so reliant upon Riju’s lightning attacks and lightning-adjacent attachments to your bow. The battle’s further complicated by the Gibdos she spawns in, distracting you and making things very frustrating and difficult near the end. In comparison, the Seized Construct is much easier. Fought in an electrified boxing ring with you controlling Mineru, this thing’s a breeze with the right attachments as you stun it with your arm cannon and smash it into the electrified ropes using a wrecking ball.
Ganondorf throws his forces at you, decimates your health, and then becomes a titanic dragon!
These bosses return in the Depths, if you fancy testing your skills further, and are fought as part of the final battle, much like in the last game. If you best them prior to confronting Ganondorf, however, you obviously won’t need to worry about them. The King of Evil is no joke, however, and is fought in an aggravating multi-stage battle. First, you and the Sages face four waves of Gloom-infested enemies, collecting their loot and hoping you have enough Gloom-resistant armour or food to survive the next stage. Here, you face Ganondorf one-on-one in a fight functionally identical to those against Phantom Ganon. Ganondorf switches between a sword, spear, club, and bow, inflicting Gloom damage with each hit and both parrying and perfect-dodging your attacks. With the right timing, you can whittle him down with the Master Sword; attack-boosting gear and food is a must here, as is Gloom food, but you can also fire Bomb Flowers, Rubies, and Gibdo Bones to take chunks off his health. Victory sees Ganondrof duplicate himself, gaining a ridiculously long health bar in the process. Though the Sages help you, they mostly end up cluttering the screen so it’s advisable to take to the air however you can (Fusing a rocket or Autobuilding something) to litter the battlefield with Rubies and Bomb Flowers. After many deaths, I finally got lucky and got Ganondorf back to half health, which returns the fight to a one-on-one contest. Unfortunately, the Demon King is faster and stronger than ever, sending waves of Gloom and Gloom projectiles, causing Gloom shockwaves, and charging at you, leaving a trail of Gloom in his wake. Luckily, you can strike his projectiles to stun him and, with the right food and a little luck, he’ll eventually be bested. In his rage, Ganondorf consumes his Secret Stone and transforms into a gigantic dragon! Zelda, as the Light Dragon, swoops in to save you, keeping you from falling to your doom, and giving you a boost to reach the Demon Dragon’s back. This stage is mostly a formality, however; just avoid the Gloom scales and target the Gloom pustules on the Demon Dragon’s back. When you get the chance to target the Sacred Stone on his forehead, hold Y to deliver the killing blow and then dive through the sky to rescue Zelda in freefall!
Additional Features: There are 152 Shrines to find across the skies and surface of Hyrule. Each one houses a chest that contains a weapon or some kind of treasure and also awards a Light of Blessing. With four of them, you can trade for an extra heart or an extra sliver of your stamina wheel, which can make combat and exploration much less of a headache. There are also 120 Lightroots in the Depths which, like the Skyview Towers, simply exist as fast travel points (though Lightroots also restore your Gloom-shattered hearts). There are now a whopping 1000 Koroks to find; some are under rocks, some require transporting to their friends, and some task you with solving puzzles. Finding them all expands your inventory and again awards you with a useless (but golden) piece of poop. You’ll also find loads of treasure chests in every area of Hyrule; some house Rupees or rare materials, some gift weapons, and some have clothing. Collecting all three pieces of an armour set can award additional buffs both by default and courtesy of a Great Fairy, and you can dress Link up as his dark counterpart, an enraged God, and even to resemble various enemies. Some materials can be dyed to further customise them and you can further bolster your stats by cooking food, with recipes being saved for further use. Your horses can also be upgraded and customised; by discovering stables and boarding your horse, you’ll earn “Pony Points” to trade in for harnesses and accessories to complete side quests.
Hundreds of treasures, collectibles, and side quests await in this sprawling adventure.
Speaking of, there are loads of optional missions in Tears of the Kingdom. Some are pretty simple, like liberating villages from enemy hordes or retrieving Shrine stones. Others see you gathering materials, photographing enemies and objects, investigating Zelda sightings, and recovering lost or stolen items. Completing side quests earns you Rupees and other rewards, such as food, additional shops, and even armour. Helping Robbie with his research not only upgrades the Purah Pad to detect Shrines and other targets, it also adds the “Hero’s Path” mode to the tablet so you can see where you’ve travelled and gifts you “Travel Medallions” that are essential when fighting your way to Ganondorf. Misko will mark the locations of rare treasure on your map, allowing you to find new armour sets, dogs can be befriended to dig up treasure chests, shop prices can be reduced, and the truth about Zelda’s draconification can be discovered if you explore high and low. Completing the game adds a star to your save file but returns you to your last manual save before battling Ganondorf, meaning you never get to see peace returned to the land on your save file. You can go back and finish any tasks remaining, however, exploring Hyrule Castle docks for the powerful Hylian Shield and collecting Poes to collect new gear. Tears of the Kingdom is also compatible with Amiibos, allowing you to scan in entire armour sets quickly and easily. Sadly, the Master Cycle from Breath of the Wild’s downloadable content isn’t available (though you can build a close approximation) and there is currently no additional content available for the game, but it’s not as if there aren’t hours of content to return to once you’ve completed the main story.
The Summary: Since I struggled with The Legend of Zelda: Breath of the Wild, I was hesitant to get into the sequel, and these fears were entirely justified. The weapon durability mechanic is as tedious as ever, forcing me to run from most encounters when I’d rather be fighting like in the Nintendo 64 games. Link is frustratingly fragile, easily being killed by even the weakest of enemies, and the entire game is an uphill battle to learn and improve. Link’s new abilities do mitigate these issues somewhat; you can effectively double your weapon inventory by Fusing swords and shields together, though often at the cost of holding a shield. I was also very pleased by how much easier the five main bosses were compared to Breath of the Wild’s and how much more visually unique the Temples were. Getting to them was a chore at times but it was much closer to a traditional Zelda experience once I was inside. The Shrine mechanic is as annoying as before, though, and I wish there was a “Novice” option to give you at least one set of weapons that don’t break and that allocated hearts to one set of Shrines and stamina to the other. I didn’t really like the focus on building; it was finnicky to rotate and Fuse things together to solve puzzles and the vehicles weren’t very fun to control. The mechanic didn’t work for Banjo-Kazooie so I don’t see why Nintendo thought it’d work for Zelda, and it just got in the way most of the time. I liked seeing how Hyrule had changed, with familiar areas altered from the passage of time, and how much bigger the world was, but I hated the Gloom mechanic, the sky islands were dull, and battling Ganondorf was like chewing nails. The story was convoluted and somewhat lost amidst all the hundreds of other sub-plots and side quests, though I enjoyed seeing bigger, more ferocious optional bosses patrolling the overworld. Despite all the changes, though, The Legend of Zelda: Tears of the Kingdom still feels like a glorified expansion pack of its predecessor. I had the same issues as before, if not more thanks to the new inclusions, but remain impressed by the scope and sheer scale of the world, so I think it’s fair to give it the same rating as Breath of the Wild and stay in the minority of people who just don’t click with this approach to the Zelda franchise.
My Rating:
⭐⭐⭐
Rating: 3 out of 5.
Pretty Good
What did you think to The Legend of Zelda: Tears of the Kingdom? How do you think it holds up against its predecessor and were you excited to revisit this world? What did you think to Link’s new abilities, specifically the building and Fusing mechanics? Were you also frustrated by the Depths and the dangerous Gloom? Did you also find the main bosses easier than Breath of the Wild’s only to struggle against Ganondorf? Did you ever complete all the side quests and find all the Koroks? Which Zelda game is your favourite and how did you celebrate the franchise this month? Whatever your thoughts on Tears of the Kingdom, drop a comment down below and go check out my other Zelda reviews.


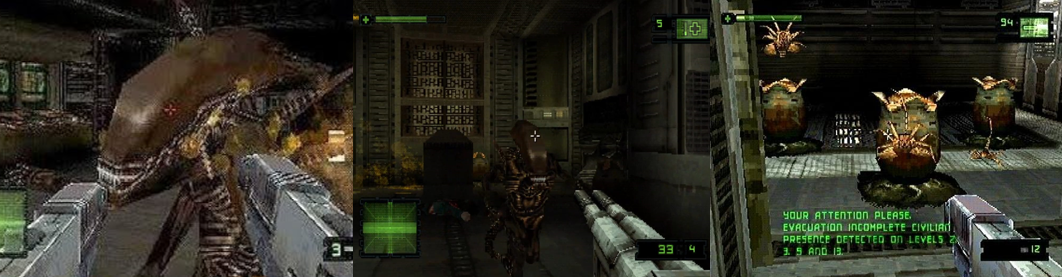
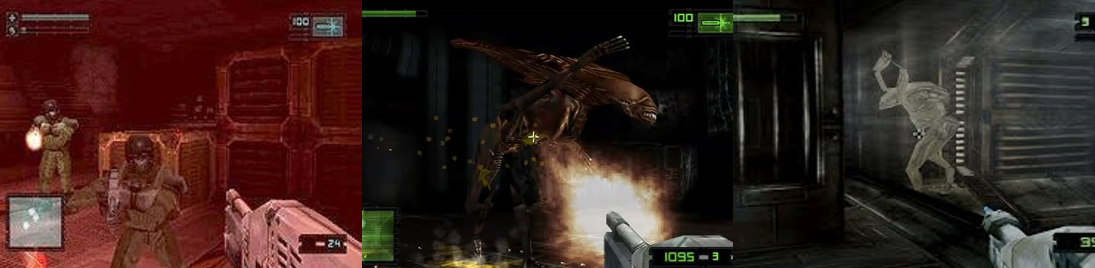
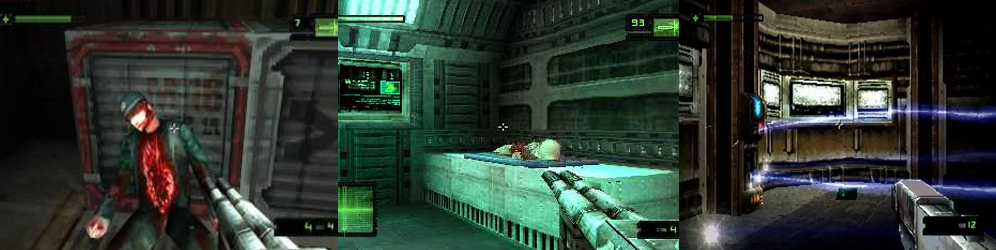


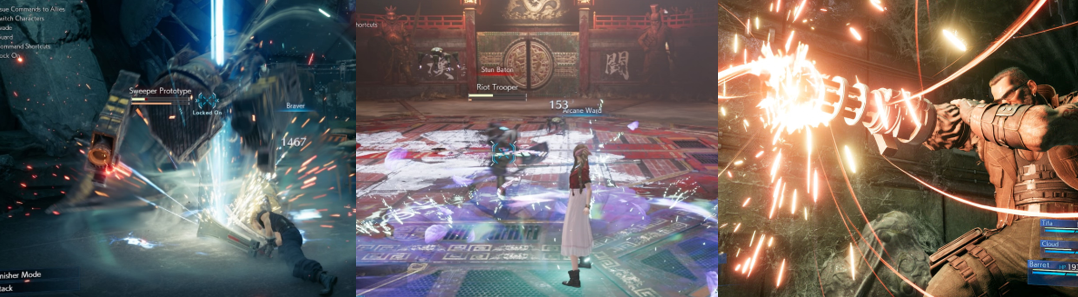
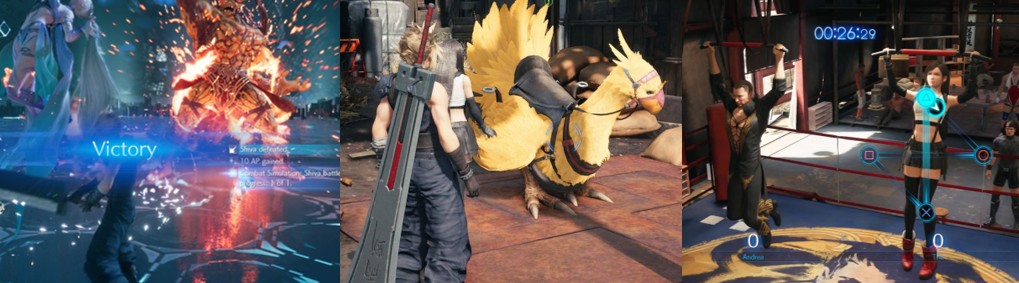
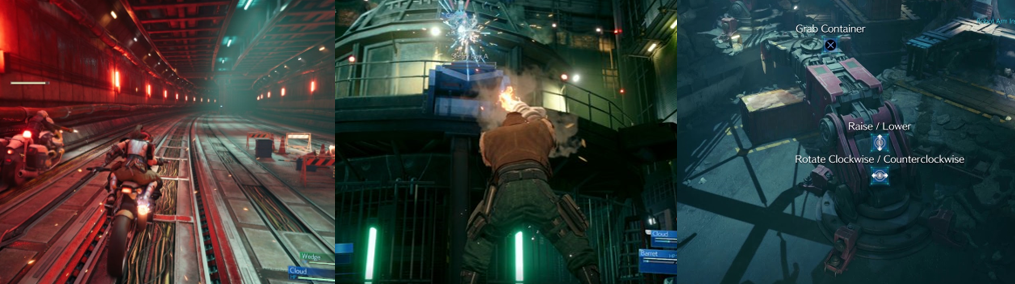
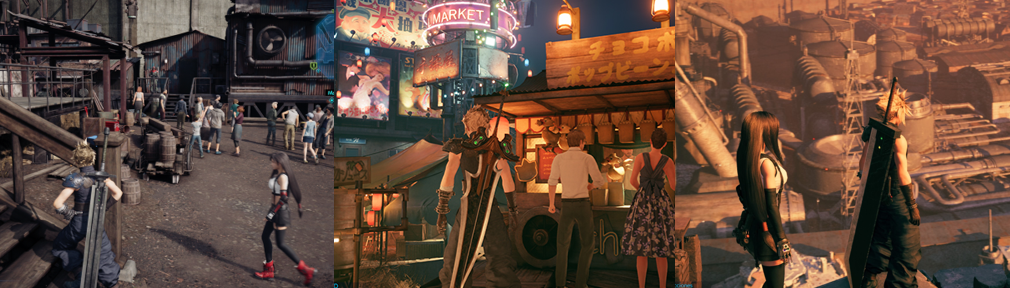

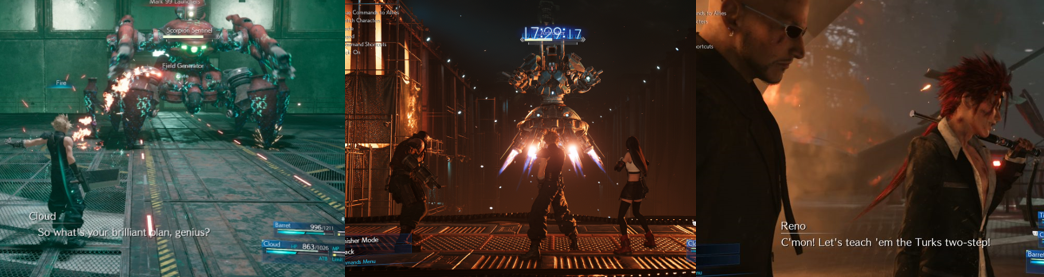
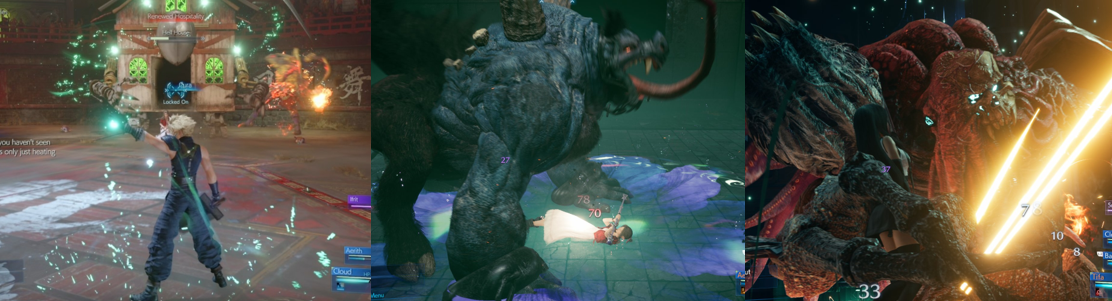


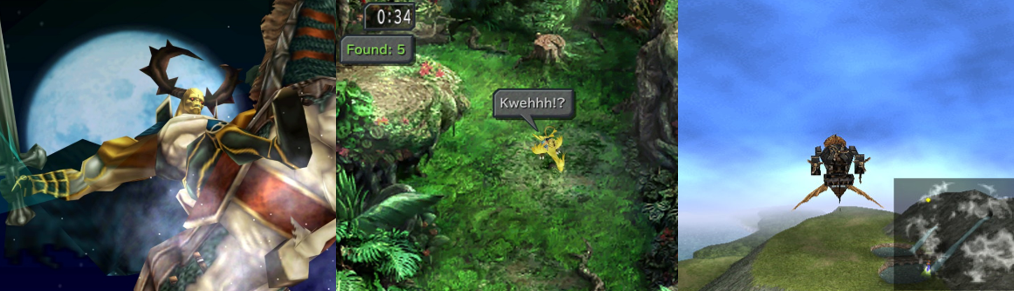
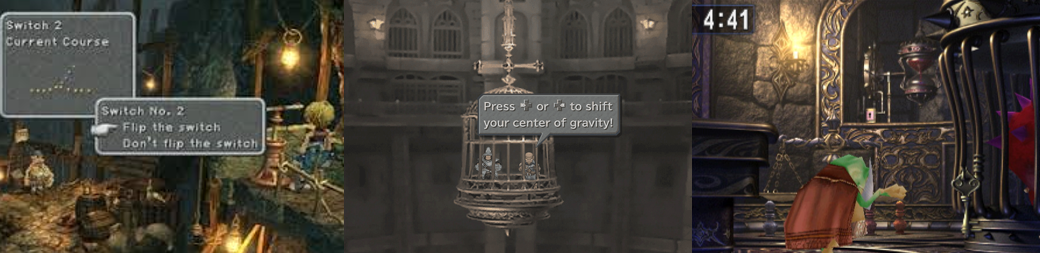

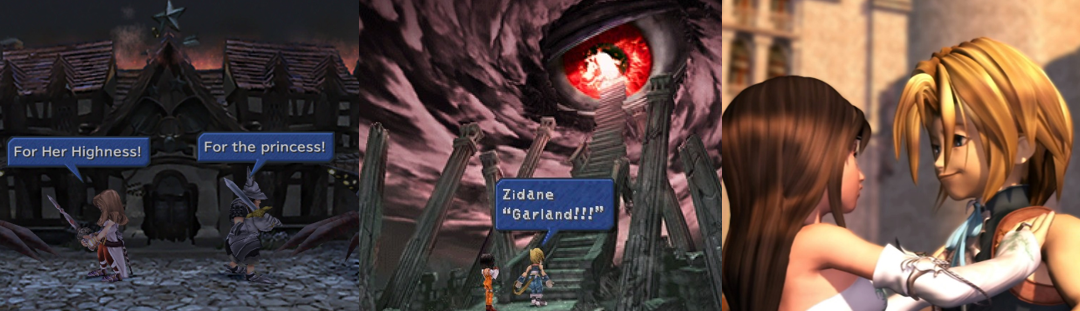
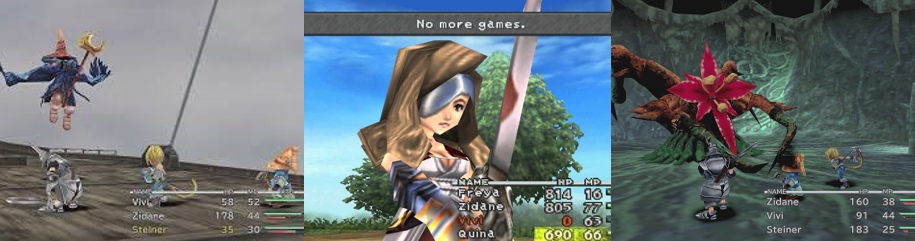


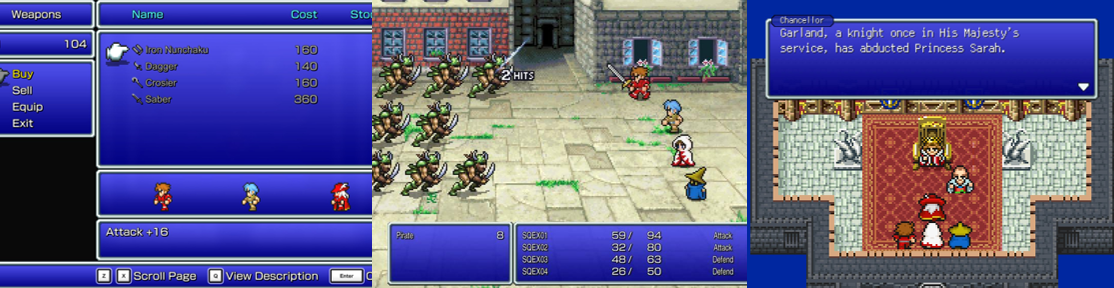


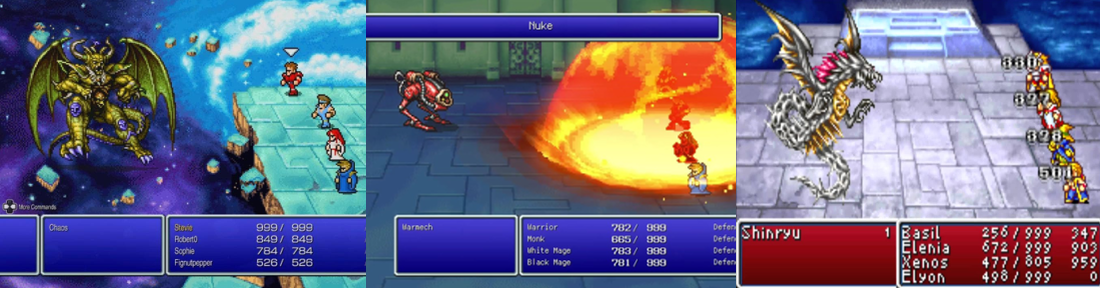

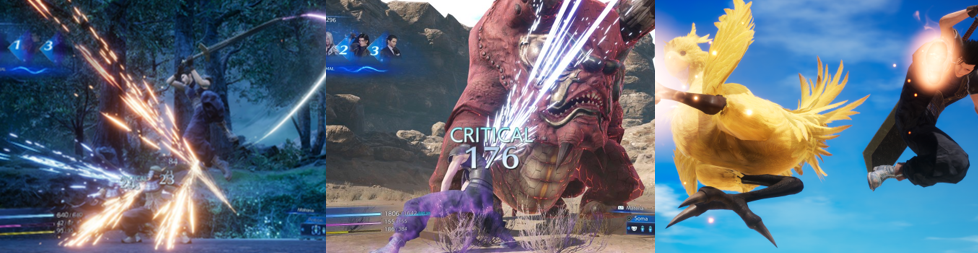
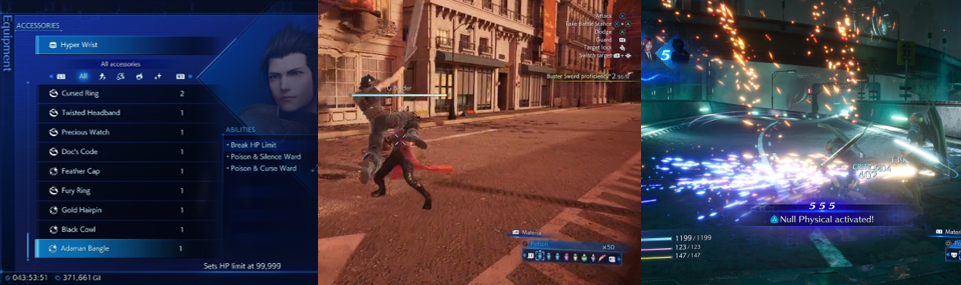
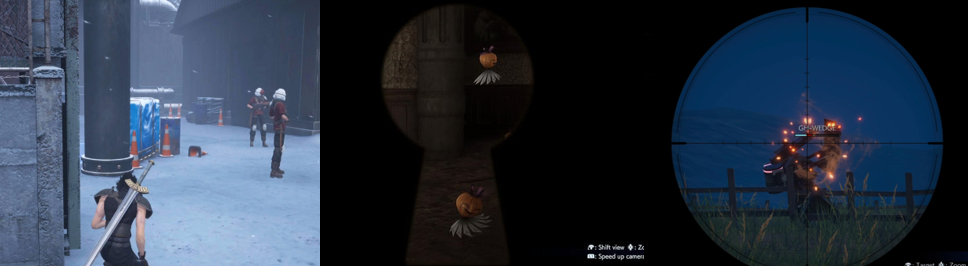
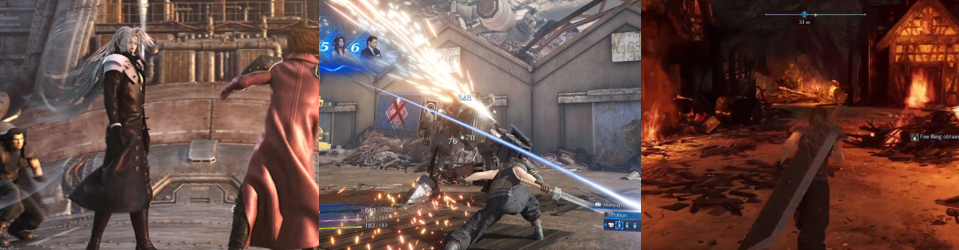
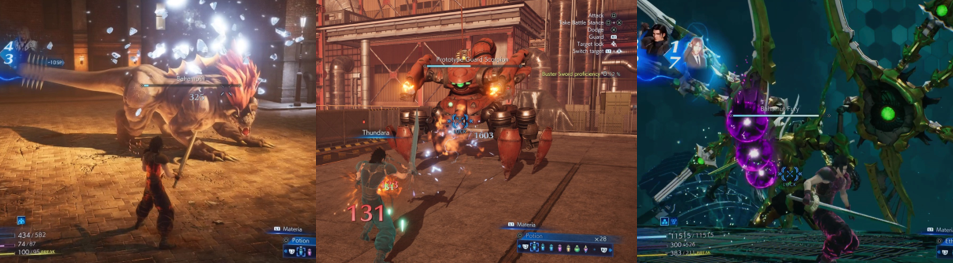
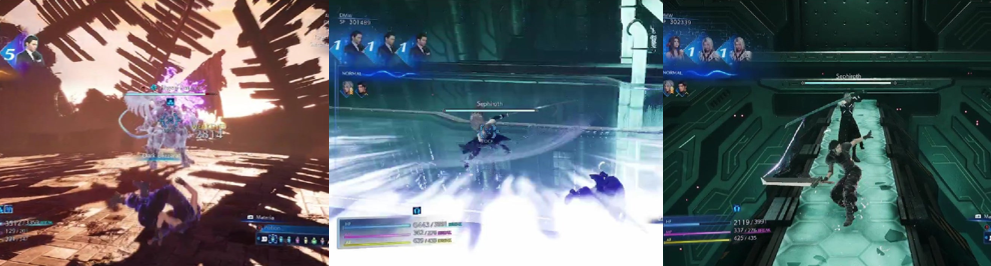
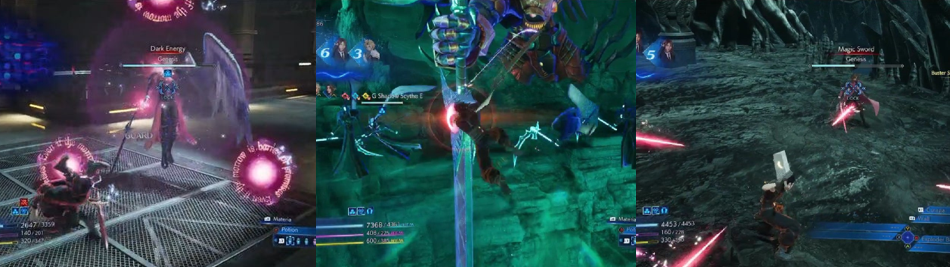


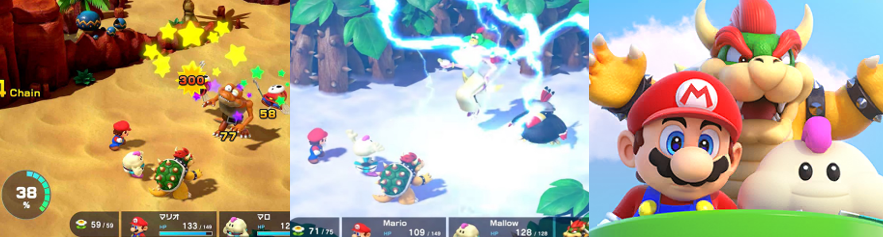
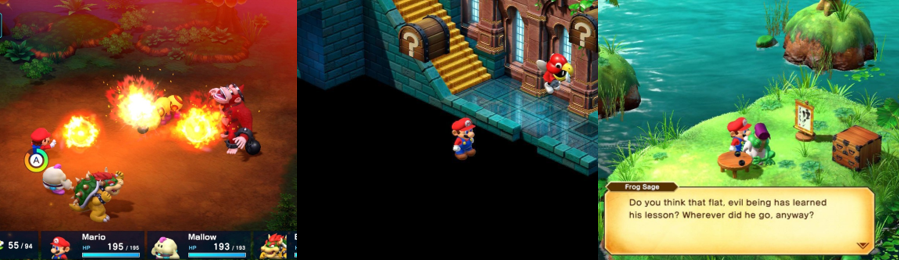
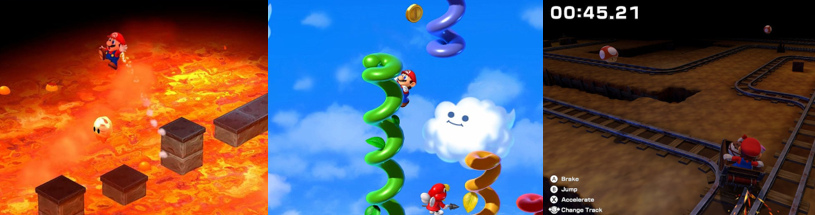

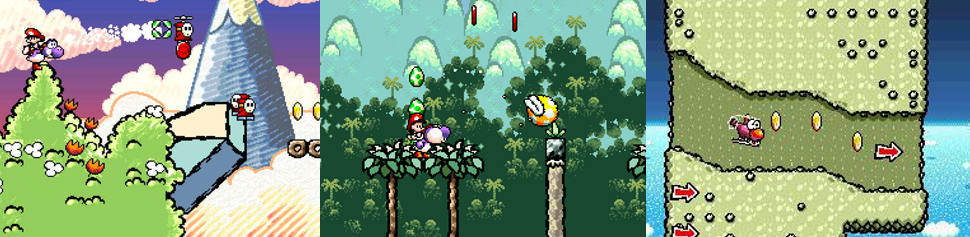
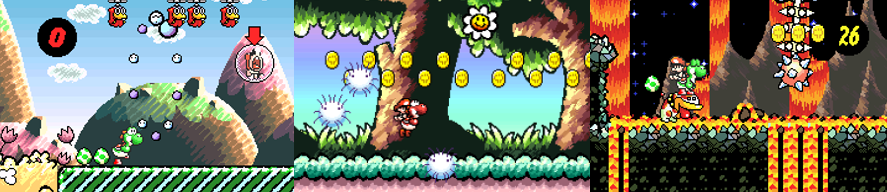

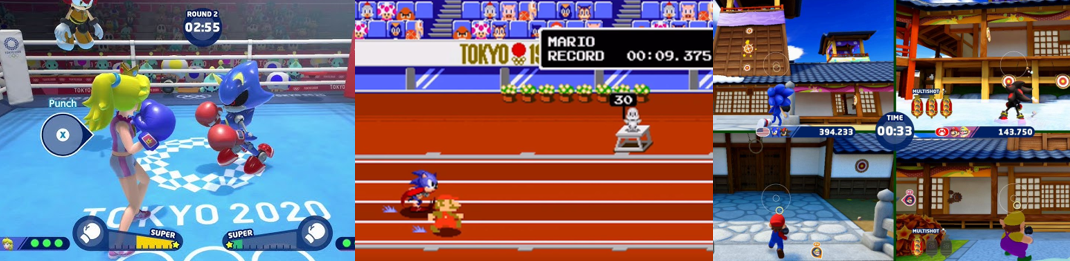
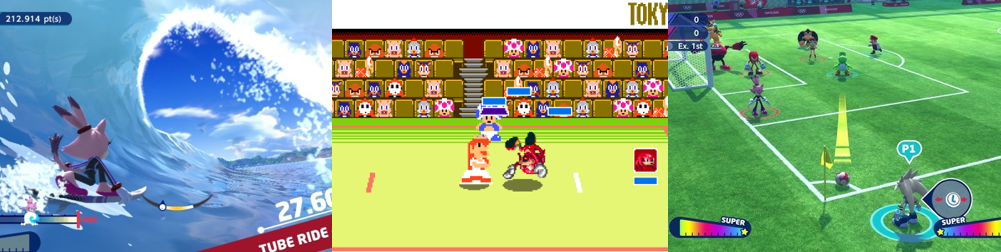


You must be logged in to post a comment.