With the release of Sonic the Hedgehog 3(SEGA Technical Institute, 1994) in February 1994, gamers were introduced to Knuckles the Echidna. This mischievous, dreadlocked antagonist was created by Takashi Yuda and is my favourite of Sonic’s supporting cast so I’ve been dedicating every Sunday to Rad Red!
Story Title: “Total Chaotix” (Part 1 to 6) Published: 27 May 1995 (cover-dated: 9 June 1995) to 5 August 1995 (cover-dated: 18 August 1995) Writer: Nigel Kitching Artist: Richard Elson
The Background: After finally knocking Nintendo from the top of the videogame industry, SEGA almost immediately transformed Sonic’s popularity into mainstream success with an influx of ancillary merchandise, mainly cartoons and comic books. Six months or so after Archie Comics published their first Sonic miniseries, United Kingdom publisher Fleetway Editions Limited published “Britain’s Official SEGA Comic”, Sonic the Comic (StC), a fortnightly comic book I collected diligently until its unfortunate end. Largely taking its lore from the now defunct Mobius/Doctor Ovi Kintobor storyline that originated outside of Japan, StC portrayed Sonic as a mean-spirited leader of the rebellious Freedom Fighters. Like the Archie comics, StC included someloose adaptations that recontextualised the videogames to fit its noticeably different lore. After his introduction in a multi-part story loosely based on Sonic 3, Knuckles immediately graduated to his own back-up stories that, after tying up loose ends from his debuted, eventually expanded on Knuckles’s vague backstory. His second solo feature, however, would be this loose adaptation of Knuckles’ Chaotix (SEGA, 1995), a bizarre and obscure title released solely for SEGA’s doomed 32X peripheral, which dramatically reinterpreted the titular Chaotix Crew for StC’s purposes.
The Review: “Total Chaotix” begins immediately after (or, at least, not long after) Sonic and Knuckles finally rid the Floating Island of Doctor Ivo Robotnik’s forces, bring down his Death Egg space station, and return the all-powerful Master Emerald to the island’s hot-headed guardian. Thus, Knuckles is in high spirits at the start of the story as, for the first time in centauries, the seven Chaos Emeralds and their gigantic master are fully powered, increasing them in size, keeping the Floating Island high in the sky, and protecting the island with an energy barrier to deter unwanted visitors. Speaking of which, Knuckles takes a Zoom Tube to check in on his new guests in the Mushroom Hill Zone. Realising that Dr. Robotnik would turn his wrath on the Emerald Hill Zone inhabitants, Sonic arranged a deal with Knuckles to shelter the Emerald Hill folk on the Floating Island in return for the Master Emerald. While Knuckles isn’t exactly happy with this arrangement since he prefers to live in solitude, he honours the agreement and hopes his new guests won’t bother him. While investigating the damage done to the Floating Island by the Death Egg’s powerful eye lasers, Knuckles is shocked to discover an old echidna relic: a stone ring whose ancient writing apparently reveals it to be a gateway to a “dream country”. Before Knuckles can properly examine the artefact, a portal suddenly opens and sucks him through, depositing the naïve guardian in the Special Zone. Bombarded by the bizarre dimension’s kaleidoscope of colours and surreal imagery, Knuckles realises he mistranslated the stone and prepares for a rough ride since the Special Zone is almost impossible to escape from. At that moment, Knuckles is confronted by the Omni-Viewer, a sentient television screen who watches over the Special Zone and allows for transport to and from the dimension. While the Omni-Viewer is an ally of Sonic’s and was once forced to do Dr. Robotnik’s bidding, his intelligence is massively out of date and he still believes Knuckles is the dictator’s partner. Thus, he ignores Knuckles’ pleas and teleports in the “Guardians of the Special Zone”, the Chaotix (Vector the Crocodile, Mighty the Armadillo, Espio the Chameleon, Charmy Bee (referred to as “Charmee”), and Nack the Weasel) to deal with the perceived threat.
Knuckles runs afoul of the Chaotix and discovers a Metallix plot in the Special Zone.
On Vector’s order, the group’s muscle, Mighty, leaps in to land the first blow, leaving him plummeting into the void when Knuckles glides to safety. Luckily, the peppy “Charmee” is on hand to rescue his cohort, who doesn’t care for the enthusiastic youngster’s commentary on his humiliation. While trying to escape the unreasonable group, Knuckles is blindsided by Espio’s camouflage ability. The chameleon then throttles Knuckles (!) and calls Nack for an assist, only for both to be shrugged off by the echidna’s superior strength. Vector then enters the fray and tries to snap his powerful jaws onto Knuckles’ head; however, Knuckles dodges and lands a solid uppercut to Vector’s chin, causing him to bite his tongue. The fracas is halted by the Omni-Viewer, who does a bit of research and finds that Knuckles is telling the truth. However, just as tensions are beginning to cool, “Charmee” notices some distortion appearing on the Omni-Viewer’s “face” and, to the horror of all, the warping solidifies to show not one, but two Metallixes forming within the Omni-Viewer! Despite recognising Sonic’s robotic doppelgänger from a precious encounter in Sky Sanctuary Zone, Knuckles is as powerless as Vector to keep the Omni-Viewer from being downloaded to a handheld device wielded by one of the Badniks. The Metallix then flee the scene, leaving the Omni-Viewer an empty void and giving the group no chance but to team up to rescue him, despite Nack’s suspicions that Knuckles is still working for Dr. Robotnik. When Vector mentions the ovoid dictator’s abandoned Egg Fortress base, the group makes haste on a rescue mission, unaware that the Metallixes are working under the command of a gigantic Emperor Metallix! Thanks to Mighty flying head-first at the Egg Fortress, the group’s infiltration doesn’t go as quietly as Knuckles wished, though it’s Rad Red who must keep Mighty and Espio from coming to blows when the short-tempered armadillo trips the base’s alarm. After “Charmee” warns of an incoming Metallix, the group squeeze into the base’s ventilation system. However, an errant kick from Nack compromises their position, forcing the wayward weasel to flee when they’re spotted by the Metallix.
Despite a double cross from Nack, Knuckles and the Chaotix defeat the Metallix…for now…
The Metallix attacks without mercy, blasting the group with its chest laser, easily sends them flying with a swing of its clawed arm, then buries them beneath debris by blasting the roof above. Although the Metallix believes it has killed its foes, Knuckles claws his way from the wreckage and flies into a rage. While the Metallix tanks his best shot and its speed throws Knuckles off-balance, Knuckles subdues the robot by hurling a girder through its chest. Though only a temporary reprieve, it’s enough for Nack to come out of hiding and for Mighty to muscle the debris off his team. With the damaged Metallix in hot pursuit and the Emperor Metallix’s plot to create a copy of the Omni-Viewer almost complete, Nack leads the team right into the “lion’s den” (as Vector puts it), betraying his team mates to the Emperor Metallix in return for “money, what else?” Although the Emperor Metallix thanks Nack for giving them the access codes to the Omni-Viewer, it immediately orders its Metallixes to attack him alongside his former allies, double-crossing the opportunistic weasel. Despite Nack busting out a hidden disruptor for just such a double-cross, he’s blasted by a Metallix. Still, Knuckles grabs the weapon and fires it, emitting what appears to be an electro-magnetic pulse that instantly disables the Emperor Metallix and its two minions. With the threat ended in surprisingly anti-climactic fashion, the Chaotix retrieve Nack and the Omni-Viewer and drop Knuckles back on the Floating Island. However, Knuckles can’t shake the feeling that there was something off about the Metallix and the Omni-Viewer finds he’s missing some memory banks from the ordeal. They’re right to be concerned by this for the story ends to show the Emperor Metallix and its brotherhood reactivating, having successfully feigned defeat, and that they now possess a corrupted version of the Omni-Viewer that will allow them to travel through time and space to realise their goal of world conquest!
The Summary: As is often the case, “Total Chaotix” is bolstered by Richard Elson’s stirring and visually engaging art. Having him work on Knuckles’ early solo strips gave them an air of legitimacy not afforded to other back-up stories in StC and showed that they were just as important to the ongoing storylines (especially StC’s multi-part adaptation of Sonic 3 & Knuckles). Elson draws a fantastic Knuckles, capturing his toothy smirk and temperamental demeanour, and a wonderful Metallix. Unlike the Mecha-Metallix last seen in StC, these Metallix are a return to form, featuring that sleek, sexy aesthetic that’s become so iconic. Knowing how troublesome just one of these Badniks was makes seeing two quite the moment and the Metallix retain their menace by how fast and lethal they’re portrayed. They make mincemeat of the Chaotix, who get no chance to fight back and are nearly killed by just one Metallix. Even Knuckles struggles to go toe-to-toe with the doppelgänger since it’s built to match Sonic’s speed and even a girder to the chest doesn’t put the Metallix down, so seeing a whole army of the robotic doubles ends the story on one hell of a cliff-hanger! “Total Chaotix” also introduces the Davros-like Emperor Metallix, a gigantic robot hedgehog permanently sat in a massive throne and who’s modelled after Metal Sonic Kai (fitting, considering this is a loose adaptation of Knuckles’ Chaotix). Knuckles suspects that the Metallix have split from Dr. Robotnik and that’s revealed to be true. The Emperor Metallix no longer serves its rotund master and has instead commands a “brotherhood” of robotic Sonics to make its own bid for world conquest. Its scheme to facilitate this is to download a copy of the all-powerful Omni-Viewer, a scheme that works despite Knuckles’ best efforts and which ends the story on a cliff-hanger that’s not only picked up in a later Sonic story, but which lays the foundation for future appearances of the Metallix.
It’s nothing like the game but “Total Chaotix” sets up some big storylines for Sonic the Comic.
Naturally, the titular Chaotix make quite an impact in the story thanks, again, to Richard Elson’s artwork, which closely emulates the artwork seen in their debut title. It’s interesting seeing them reinterpreted as the “Guardians of the Special Zone” considering they had no stronger ties to the Special Stages than Sonic and the other characters, but it makes sense in the context given (the Metallix are based in the Special Zone and this story is about introducing their “brotherhood”). Each character gets a little time to showcase their personality but, with so many of them, they’re largely one-dimensional. Vector is the leader (his headphones and love of music don’t come into play here, or ever, as I recall); Mighty is the hot-tempered muscle; and “Charmee” is the annoying little kid who gets on all their nerves. Surprisingly, considering he gets second billing in Knuckles’ Chaotix and is now known as a stoic ninja, Espio is probably the least developed of the group. He turns invisible, which is cool, but doesn’t seem that different a personality from Mighty, with the two almost coming to blows at one point. If course, the odd man weasel out is Nack, who’s less of a disreputable treasure hunter and more of a self-serving sell-out. It’s implied that this group has been together for a while, so it makes me wonder how deep Nack’s infiltration went or if he just decided to betray the team in this story. I guess anyone who had played Sonic the Hedgehog: Triple Trouble(Aspect, 1994) would’ve seen this betrayal coming, but then nothing’s for sure in StC, which plays it fast and loose with fidelity. The Chaotix are seen to be a relatively competent group when faced with a reasonable threat like Knuckles but are ridiculously outclassed against a single Metallix and don’t showcase much of their abilities beyond the basics, which is a shame. Still, the art and the significance of this story in both the wider StC canon and the context of its ongoing Sonic 3 & Knuckles adaptation make “Total Chaotix” a decent story. The new characters add a lot, visually, to Sonic’s extended cast and I enjoyed the ominous nature of the Brotherhood of Metallix, even if the story barely has anything to do with Knuckles’ Chaotix.
My Rating:
⭐⭐⭐⭐
Rating: 4 out of 5.
Great Stuff
Have you ever read “Total Chaotix”? What did you think to Fleetway’s version of the Chaotix and the reinterpretation of Nack as a traitor in their ranks? Were you happy to see the Metallix return? Would you have liked to see more elements from the videogame included in the story? Which of Fleetway’s Knuckles and/or Chaotix stories was your favourite and why? Are you celebrating Knuckles this month? Whatever you think about Sonic the Comic, and especially Knuckles and Chaotix, leave a comment down below and go show me some love on Ko-Fi.
On 21 February 1986, The Legend of Zelda(Nintendo EAD, 1986) was first released in Japan. The creation of legendary game designer Shigeru Miyamoto and Takashi Tezuka, The Legend of Zelda launched one of Nintendo’s most popular franchises. This year, I’ve been dedicating every Friday to Nintendo’s most famous silent protagonist, Link and his vast and enduring fantasy world of sword and sorcery.
Released: 13 February 2015 Originally Released: 27 April 2000 Developer: Grezzo Original Developer: Nintendo EAD Original Version Also Available For: GameCube, Nintendo 64, Nintendo Switch, Nintendo Wii, Nintendo Wii U
The Background: An instant classic upon release, The Legend of Zelda (mostly) went from strength to strength as the concept was refined and expanded throughout Nintendo’s handheldventures and 16-bitera. Following a long development period, the franchise made a phenomenally successfuljump to 3D with The Legend of Zelda: Ocarina of Time (Nintendo EAD, 1998). Following its success, Nintendo originally sought to create a remixed version for the ill-fated 64DD peripheral, which would eventually become the “Master Quest” version of the game. Designer Eiji Aonuma was unenthusiastic about this, so series creator Shigeru Miyamoto challenged the team to create an entirely new 3D Zelda adventure using Ocarina of Time’s assets in just one year. Aonuma recruited designer Yoshiaki Koizumi to adapt his concept of a time loop gameplay mechanic; Koizumi also (literally) dreamt up the idea of the impending threat of a falling Moon. Realising that Ocarina of Time’s players would be a little older, Aonuma purposely aimed for a bleaker, more melancholy tone for the game, which was bolstered by the Expansion Pak that allowed the game to run much smoother and boast more complex visuals compared to Ocarina of Time. The Legend of Zelda: Majora’s Mask was a critical and commercial success; reviews praised the new gameplay mechanics and it quickly gained a reputation as one of the darker, more sombre entries in the franchise. Following a handful of re-releases, and the success of Ocarina of Time’s 3D remake, Nintendo and Grezzo immediately began work on giving Majora’s Mask the same treatment. Alongside graphical improvements, the team purposely aimed to make Majora’s Mask3D more accessible and included numerous quality-of-life features that were criticised by some. Despite this, the game received positive reviews praising the updated visuals, mechanics, and new elements and the game retained its status as one of the franchise’s most under-rated entries.
The Plot: After saving Hyrule and being returned to his childhood, Link is jumped by a Skull Kid and has his horse, Epona, stolen. Pursuing the thief to the bizarre world of Termina, Link must manipulate a three-day cycle to stop the possessed sprite from destroying the land.
Gameplay and Power-Ups: The Legend of Zelda: Majora’s Mask is a 3D action/adventure game that’s built upon the same game engine as its predecessor, Ocarina of Time, and therefore shares many of the same controls, gameplay mechanics, and features. In a rarity for the franchise, players control the same Link is in the previous game, though returned to his child body (and you can change his name when starting a new file) and exploring a bizarre new land filled with many familiar, but noticeably different, characters. Link’s goal is simple: he has three days to stop the possessed Skull Kid from destroying Clock Town and all of Termina with a giant, nightmare-fuelled moon. To do this, players journey to four areas adjacent to Clock Town, tackle the dungeons (or “Temples”) found there, and defeat the bosses within to awaken the Four Giants, the only beings physically capable of pushing back the Moon. However, your mission is compounded by the ever-present time limit, the drama and side quests of the various non-playable characters (NPCS) Link meets, and the numerous magical masks he obtains along the way. Link’s abilities will be immediately familiar to any returning Ocarina of Time players: A sees you talk to NPCs, open chests, and interact with the environment while B lets you attack with your sword, swiping, stabbing, and even jumping when used in conjunction with A. The Left Trigger activates “L-Targeting”, allowing you to lock on to enemies, NPCs, and other targets and expands your attacking options by letting you raise your shield to deflect attacks and projectiles with the Right Trigger, side hop, backflip, and leap into action.
Though a child, Link is as competent as he was as an adult with his weapons and items.
You assign different weapons and items to the X and Y buttons, while other items are assigned to the I and II slot on the touchscreen for easy use. By default, your trusty ocarina and, later, the Pictograph Box are selectable from the top and bottom left of the touchscreen, which is also where you’ll find your map, health (represented as hearts), magic meter, and item and mask menu. Though a child, Link eventually acquires many weapons he utilised as an adult. These are found within the game’s Temples and are often necessary to defeat the mini boss and main boss within, as well as being used to solve various puzzles. You can acquire the Hero’s Bow and a variety of elemental arrows, allowing you to attack enemies from afar, hit switches, burn objects, and create ice platforms where indicated. Bombs and Bombchus are used to blow upon walls and discover secrets, Deku Sticks allow you to light torches, Deku Nuts briefly stun certain enemies, and you can snag on to certain targets and parts of the environment with the Hookshot to cross gaps or bring items to you. Magic Beans can be planted to create platforms to new areas, the Lens of Truth will reveal hidden paths and secrets while draining your magic, and you can capture life-restoring Fairies or store various potions in one of Link’s many bottles. Players can also strengthen their sword by following a specific side quest; though the Razor Sword is only temporary and will eventually dull, it can be further (and permanently) upgraded to the Gilded Sword. Similarly, you can earn yourself the massive Great Fairy’s Sword and obtain the light-reflecting Mirror Shield, and eventually purchase large Powder Kegs to destroy larger boulders. Link can also expand his inventory with bigger quivers, bomb bags, and wallets. Though you lose all your Rupees and ammo stock whenever you travels back in time, you can bank your Rupees in Clock Town and will find plenty of ammo by cutting up grass and defeating enemies.
Link’s masks afford him unique new abilities, though the controls can be finnicky and clunky.
The Ocarina of Time is again used to manipulate the flow of time. You’ll need to travel back in time multiple times as you’ll get a game over once you reach the end of the third day. Luckily, you can speed up and slow down the flow of time to give yourself more time to complete tasks or jump to specific time periods to complete side quests. Other ocarina songs warp you to the various Owl Statues across Termina, where you can also manually save your game, call Link’s trusty steed, Epona, once you rescue her, access certain Temples, and heal disturbed or unquiet spirits to obtain new masks. Majroa’s Mask big gimmick is the mask system; Link will assume three distinct forms (a Deku Scrub, a Goron, and a Zora) throughout the game, each with different playstyles and lacking his traditional weapons. Deku Link is small and spritely, spitting bubbles from his nose and using Deku Flowers to launch into the air and temporarily fly about like a helicopter. Goron Link is big, slow, and powerful, smashing foes with his fists, slamming the ground, and barrelling along in a spiked ball to cross gaps. Zora Link is sleek and agile, easily cutting through water, walking across the seabed, and tossing boomerang-like fins from his arms. Well, I say “easily” but Zora Link can be finicky to control, often ploughing into walls and being a pain. Each of these forms has their own musical instrument in place of the ocarina and is used not just in their main Temple, but to solve other puzzles and complete side quests, such as purchasing Deku deeds, competing in high-speed, aggravating Goron races, and racing against beavers. Link’s other masks all have special abilities, too, such as the Bunny Hood doubling his running speed, the Blast Mask exploding like a bomb, the Great Fairy’s Mask attracting Stray Fairies, and the Captain’s Hat allowing you to command Stalchildren. The Stone Mask renders you functionally invisible, the All-Night Mask keeps you awake, and the Giant’s Mask transforms Link into a hulking giant for a kaiju-esque boss battle. With the exception of the three main masks, all these masks are optional and obtained through side quests, but it pays to acquire them all to make your life (and the endgame) so much easier.
Termina is full of NPCs, mini games, and side quests that will reward you handsomely.
Termina is full of NPCs, all of whom have different thoughts on the current situation and different issues to deal with. Over the course of the three days, you’ll interact with them several times, with key events being recorded in your handy-dandy Bomber’s Notebook so you can keep track of what’s going on and when. This functionality is great for new players and for people like me, who like to efficiently complete the game’s side quests as quickly as possible. Because of the time travel and three-day loop, you’ll repeat certain events and trigger certain cutscenes multiple times, requiring you to rescue old ladies and injured witches, follow shady characters, and retrieve certain items to complete side quests. Many side quests are ongoing, requiring multiple steps (such as reuniting Anju and Kafei, which will take you right up to the last minute of game time and sees Link and Kafei working together to solve switch-based puzzles in Sakon’s hideout) or occur at specific times (such as the surreal defence of Romani Ranch against alien invaders!) Other quests are more low-key, such as using the Bremen Mask to engross little chicks, defending Cremia’s milk delivery from the Gorman Brothers, besting the various shooting galleries and fishing holes, and delivering fish to the Marine Research Lab. Other side quests can be quite involved, such as reuniting the frog choir, using all of Link’s transformations to form a band, digging up treasure with Dampé, and challenging the mini bosses to a rematch. You’ll also be using all your weapons and skills in Gold Skulltula Houses, taking pictures with your Pictograph Box, visiting Gossip Stones, and answering the Keaton’s quizzes. Your reward for these endeavours is either a new mask, a Piece of Heart to extend your maximum health, a bottle, or some Rupees, all key items to assist your adventure.
The four Temples are packed with new and familiar puzzles and fitting gimmicks.
Each Temple houses not just a new weapon and the usual map and compass, but fifteen Stray Fairies which must be freed and collected, usually by enticing them with the Great Fairy’s Mask. Find them all and you’ll earn Link’s patented Super Spin Attack (hold B to charge up a magic-draining spin attack), double your magic meter, increase your defence, and earn the aforementioned powerful (if unwieldy) Great Fairy’s Sword. It’s worth collecting these as you explore the Temples to avoid having to return later. Time is always against you in Majora’s Mask, so be sure to play the Inverted Song of Time to stave off Termina’s inevitable doom. Though the game only has four Temples, getting to them is a task in itself: Link must follow cheeky monkeys and sneak into the Deku Palace, feed and soothe the Goron Elder’s son and then use the Lens of Truth and Goron Lullaby to bypass the Biggorn protecting Snowhead Temple with a blizzard, mess about finding seven Zora Eggs to summon a giant turtle to reach the Great Bay Temple, and battle through the undead minions of Ikana Canyon and scale up a puzzle-landed rockface to reach the Stone Tower Temple. While each contains many recycled elements from Ocarina of Time (torches, switches (timed or otherwise), climbable and destructible walls, etc), each also boasts a maze-like structure and fitting gimmick. Woodfall Temple is full of poisonous water and large gaps you must fly over as Deku Link, Snowhead Temple features both lava and ice, ramps to careen over and weighted switches to pound as Goron Link, and a large central pillar that needs to be brought down to reach the boss. The Great Bay Temple is, obviously, water-based, featuring a maze of rushing currents, jet streams, and propellers. You must use the Ice Arrows to create platforms and solve puzzles and pay attention to the helpful colour-based indicators to know where new paths have opened up. The Stone Tower Temple is two dungeons in one, featuring a gimmick where you flip the area upside down to access new areas, light-based puzzles using the Mirror Shield, and plenty of opportunities to use the Elegy of Emptiness to create a soulless duplicate of Link to press down switches. As you’d expect, each Temple also contains a mini boss, a warp point, numerous small keys to open locked doors, and a big Boss Key to access the Temple guardian.
Presentation: Even in its original Nintendo 64 incarnation, Majora’s Mask had Ocarina of Time beat hands down when it comes to visuals. Although the game always had a bit of a blurry look thanks to it taxing the console (and the Expansion Pak) to its limits, the graphical upgrade was apparent right away in something as simple as Link actually having his sash and his jumping animations being more dynamic. In the 3DS version, the visuals are as improved as they were in Ocarina of Time 3D, reducing the blur in favour of clarity, adding more emotion to Link’s face, and allowing players to immerse themselves in the world (and induce a headache) with the 3D slider. At first glance, Majora’s Mask seems like a smaller sandbox to its predecessor; you spend a lot of time in one central location and there are only four Temples, after all. However, the opposite quickly proves to be true; not only are there more NPCs onscreen at any one time, their personalities, positions, and roles change across the three-day cycle, adding an unexpected level of depth and emotion to this bizarre adventure. In addition to a day and night cycle and each area of Termina sporting different weather effects and seasons, the world is far more diverse than before. Great Bay, for example, is a vast beach home to the Pirate’s Cove, Gerudo Lagoon, and Zora Cape, a coral-like town that puts Zora’s Domain to shame. Similarly, the Southern Swamp sees Koume and Kotake offer a boat ride through the sweltering foliage, a confusing monkey-filled maze, and the nigh-impenetrable Deku Palace, where the woodland folk don’t take kindly to strangers.
Termina is a diverse land with many areas to explore and environmental effects.
Easily the most impressive area, for me, was Snowhead Mountain. Like Zora’s Domain, Termina’s Goron population have been crippled by inclement weather; in this case, a raging blizzard. Snow and ice covers the environment and the weather has claimed many Goron lives and hides many secrets but, unlike in Ocarina of Time, the snow will melt when you best Snowhead Temple, just as the Southern Swamp with become more habitable. Sadly, travelling back in time undoes these actions and you’ll need to beat the Temple bosses again to re-restore the lands, but just the fact that you can undo the damage done to Termina and see NPCs celebrating in their newfound lives adds so much more gravitas to the game. It compels you to journey on and assist more NPCs, which rewards you with more lore and items, and makes Termina so much richer compared to the more stagnate Hyrule in Ocarina of Time. Ikana Canyon is a desolate, dangerous area filled with undead monsters, rolling rocks, an abandoned village, and the forgotten ruins of Ikana Castle, with its light-based puzzles and spooky inhabitants. The Stone Tower that leads you to the Stone Tower Temple is quite the feat, requiring you to scale it in various creative ways, all before you even flip the Temple on its head to tackle it upside down. Even exploring Termina Field is an adventure in itself; all sorts of respawning enemies lurk in the grasslands, and you can visit the observatory, Romani Ranch, and discover numerous hidden areas all by experimenting with your weapons, mask abilities, and exploring the rich and detailed world. Although the Song of Soaring, Bunny Hood, and Goron abilities make traversal simple, you can rescue Epona and race around on her as Young Link to tick off another desire from Ocarina of Time (though I admit that I rarely used her since she can’t access every area).
This is easily one of the darkest and most bizarre Zelda adventures.
Majora’s Mask is easily one of the most bizarre and bleak Zelda adventures. Right from the beginning, the story starts with a melancholy tone, with Link wandering the lands in search of Navi, only to have his horse and ocarina stolen by the Skull Kid and his mischievous fairy companions, lost in a strange land, and transformed into a Deku Scrub! Like in Ocarina of Time, Link is partnered with a fairy, but Tatl is no Navi; she’s rude, obnoxious, and rarely gives much help when searching for an enemy’s weak spot. Over the course of the game, the two find common ground as Tatl’s concern for her friend and her brother, Tael, grow, and Link’s courage is called upon again to aid the aggressive and slightly demonic Happy Mask Salesman in retrieving Majora’s Mask. Most interactions take place using the in-game engine and simple text boxes, but horrific (thankfully skippable) cutscenes play every time you put on a transformation mask, suitably dramatic cutscenes play when Temples rise up or NPCs are laid to rest to increase Link’s abilities, and you’ll get helpful reminders when day turns to night turns to day and the countdown to destruction looms closer. Speaking of which, the grim-faced Moon looms ominously overhead, growing closer and closer and causing small earthquakes. NPCs become more fearful or flee as the game progresses, and woe befall anyone who lets the timer runs out and must watch the Moon obliterate the land! While many of the assets, models, and elements are recycled from Ocarina of Time, they’re all much improved, with characters constantly on the move and doing their own thing, which you can track with the Bomber’s Notebook. Many musical cues and tracks return as well, though the Termina Field Overture is far more bombastic and engaging for me, and each area boasts a fittingly twisted soundtrack that’s both familiar and unique. The 3DS version changes up the presentation a bit, redesigning the countdown timer, area intros, and tidying up the graphics and assets to really make the colours pop, add helpful guidelines to certain areas, and even mixes up the puzzles and locations of certain items.
Enemies and Bosses: In keeping with the recycling of Ocarina of Time’s assets, Majora’s Mask returns many enemies from the previous game, such as the shield-sucking Like Likes, bat-like Keese (also in fire and ice variants), crab-like Tektites, Poes, Wolfos, crow-like Guays, Peahats, Octoroks (and their larger cousins), Deku Babs, Lizalfos and Dinolfos. Anyone who’s played Ocarina of Time will know how to tackle these enemies, which usually comes down to firing arrows or strategic use of L-Targeting, and the same is largely true of many of the new enemies featured here. You’ve got your normal, smaller foes like beetle-like Hiploops, electrical Dragonflies, Giant Bees, and skeletal fish, but you’ll also contend with strange foes like the Dexihand, Eyegore, and Goron-like Nejirons. Snappers are best taken out by lying in wait in a Deku Flower and exploding up beneath them; snowball-tossing Eenos are susceptible to Fire Arrows; the various ChuChus can be popped to quickly earn health and ammo; and you’re better off simply defending against or firing arrows at the “Real” Bombchus that scurry about. Some enemies will better test your swordsmanship, such as the Garos and returning Gerudos and Iron Knuckles (who attack faster and more aggressively as their armour is destroyed), while you can command the Stalchilds and even avoid or converse with Gibdos and ReDeads with certain masks. Similarly, you can bypass the Death Aros altogether with the Stone Mask, must switch to sub-weapons or play the Song of Storms when touched by a Blue Bubble, and keep an eye out for the vulture-like Takkuri flying around Termina Field to avoid having your items stolen.
Even familiar mini bosses require a bit more strategy to overcome.
Each Temple houses at least one mini boss who must be overcome, sometimes multiple times, usually to obtain the Boss Key or the dungeon’s weapon. Many of these will be familiar not just to players of Ocarina of Time, but also long-time Zelda fans: Dinolfos and Iron Knuckles appear more than once and fit into this category, for example, but Majora’s Mask sees the return of series staples such as Wart and Wizzrobe. Wizzrobe is fought multiple times in multiple Temples, teleporting about, creating illusionary doubles, and attacking with fire or ice magic. Wart appears in the Great Bay Temple and is, as usual, a giant eye surrounded by bubbles that Link must destroy to get a clear shot at its pupil, while being mindful of it firing them as projectiles and bouncing around in a frenzy. The Gekko appears twice in the game, first riding a Snapper and attacked via a Deku Flower and then encased within a giant, gelatinous substance that must be frozen with Ice Arrows and shattered to attack the slippery devil. In the Ikana Graveyard, Link chases the gigantic Captain Keeta, fending off his lackeys and hacking the giant’s legs to get his attention. You must avoid his swipes and flaming barriers and pelt him with arrows to stun him, but the main issue here is keeping up with him so he doesn’t flee (but that’s what Hylia created the Bunny Hood for!) Stone Tower Temple is home to two more tough mini bosses: first up is the Garoa Master, a teleporting assassin who drops from the ceiling and attacks with a charge. Stay away from his attacks to strike back when his guard is lowered, and be sure to keep your distance when he’s beaten as he’ll blow himself up with a bomb! Defeating him earns you the Light Arrows, which are key to dispelling the bats protecting Gomess. Gomess attacks with a scythe that can cut through your shield, so be sure to jump-slash his exposed heart when you see an opening.
Bosses have been redesigned to have new phases and weak spots, which can be aggravating.
Naturally, you’ll have to best each Temple’s boss to awaken one of the Four Giants and acquire their remains. If you played Majora’s Mask on the Nintendo 64, you’ll be in for a surprise here as each boss has been fundamentally changed, somewhat simplifying them and expanding their attack patterns to allow for new ways to beat them. First up is Odolwa, a manic swordman who dances about and strikes with a gigantic blade. Originally, you’d use arrows or bombs to stun him and strike with your sword, but now you must brave being roasted alive as Deku Link to attack from above, exposing a big slimy eye that is a recurring weak spot for the 3DS version’s bosses. I always found Goht one of the more annoying bosses; the fight takes place on a never-ending track filled with ramps and Magic Jars and sees Goht gallop along, tossing bombs, causing rocks to fall, or summoning a thunder bolt. You’re encouraged to race after him as Goron Link, picking up speed to ram him and topple him over to attack his exposed eye, but you can actually just stand by the entrance and pelt him with arrows or even toss a bomb at him to speed things up. Gyorg was initially a pretty simple affair, testing your patience by having you wait on the central platform to shoot him as he jumps over then ram into him as Zora Link. Now, there’s a second phase that’s completely underwater; you must desperately avoid the mines and detach them to stun Gyorg, blasting his giant eye where possible, something made quite troublesome with the clunky swimming mechanics. Similarly, Twinmold is completely different; originally, you’d be forced to don the Giant’s Mask and attack the worm’s heads or tails with your sword while keeping your magic topped up. Now, you only earn the Giant’s Mask after pelting the boss’s first phase with arrows and must stomp about as Giant Link engaging Twinmold in a fist fight, then grab its tail when it’s stunned. Again, this is a much more aggravating boss battle because of this; Giant Link is a slow, lumbering character compared to the slipper Twinmold and your magic drains very quickly, causing the fight to drag unnecessarily.
Majora’s many forms and difficulty are rendered mute with the overpowered Fierce Deity Mask.
Once they’re all beaten, you must return to Clock Town on the final day and play the Oath to Order. This summons the Four Giants and stop the Moon from falling, but causes the Skull Kid to freak out and the demonic Majora to assume full control. You’re then transported to the strangely idyllic Moon’s surface, where you must challenge four short, troublesome obstacle courses themed around each Temple. If you’ve collected every additional mask, you can trade them all in here and gain the Fierce Deity Mask, which can only be worn in boss rooms and transforms you into a hulking adult equipped with a massive sword that fires magic-draining energy beams when L-Targeting. This is the only way I’ve battled the game’s final boss, Majora itself, which has three distinct forms: Majora’s Mask, Majora’s Incarnation, and Majora’s Wrath. You can tackle each using arrows and bombs and traditional tactics, but I never have. I simply L-Target the weird, increasingly grotesque demon and fling sword beams at it until it’s defeated. Its attacks include charging at Link like a buzzsaw, shooting a reflectable beam of fire, circling at super-fast speeds, firing energy blasts, dodging your conventional attacks, and attacking with two disturbingly organic tentacle-like whips. Majora also attacks using the boss’s remains and by summoning spiky, spinning tops and can cut through your shield if you’re not careful, but none of this is a concern with the overpowered Fierce Deity Mask.
Additional Features: There are fifty-two Heart Pieces to find all around Termina; some are hidden in secret holes, some are up trees or require your weapons to access, some are gifted to you as rewards, and some require you to complete side quests. You’ll be dancing with the Rosa Sisters, giving a weird, disembodied hand some toilet paper, stopping a timer at exactly ten seconds, checking mailboxes, and besting the shooting galleries to acquire these helpful upgrades. Your main objective throughout the game is to acquire all the different masks, which requires interacting with all the NPCs and keeping an eye on their routines with the Bomber’s Notebook. While some masks are more useful than others, each has a specific function and will allow you to get other masks, Heart Pieces, or rewards depending on who you interact with when wearing them. Similarly, it’s worth seeking out the upgrades to Link’s sword, wallet, and items, if only to further explore the world, and making sure you bank your Rupees before resetting the three-day cycle. You’ll also find many Gossip Stones placed all over that will give you hints if you interact with them while wearing the Mask of Truth, and the Sheikah Stones return from Ocarina of Time 3D to provide you with more detailed directions if you get stuck. The manual save system has been revamped, with additional Owl Statues appearing in the game (though you can’t warp to all of them), and some of the rewards and side quests have been changed. Most notably, Link can now acquire seven empty bottles (which is, admittedly, a little excessive), with the last gifted after completing a new side quest involving the Gorman Troupe. Another new feature is the inclusion of two fishing holes, which you can either pay to use or acquire a pass to fish for various fish, though there are no rewards tied to this beyond trying to snag the legendary Lord Chapu-Chapu. Since the game resets when you go back in time, there’s no Boss Rush Mode this time around and, sadly, the developers didn’t see fit to include a mirrored Master Quest mode, though you now have three save slots instead of just two.
The Summary: The debate about which game is better, Ocarina of Time or Majora’s Mask, is seemingly never-ending and, honestly, it’s a tough choice. Majora’s Mask is definitely a more daunting challenge; I can play through Ocarina of Time with my eyes closed but I’ve never beaten Majora’s Mask without a guide, purely because I want to complete all the side quests before facing Majora at the end and have the overpowered Fierce Deity Mask on hand. Yet, Majora’s Mask is such a step up in terms of visuals, scope, and world-building. Termina feels alive in ways Hryule does not and the stakes feel so much higher since you can see how the impending doom affects the different NPCs. The three-day cycle is as daunting as it is annoying at times, resetting all your hard work but also pushing you to restore the next area and save this bizarre land. Majora’s Mask may seem smaller due to its more focused approach, but the game and its land is as big (if not bigger) than Ocarina of Time, expanding upon and improving every element of its predecessor and really making you feel the gravitas of its bleak narrative. Link may not acquire any new weapons here, but the mask-based gameplay mixes the formula up in surprising ways, changing Link’s form and altering the way you play (even if the controls can be a struggle at times). The 3DS version makes way more changes to the original game compared to Ocarina of Time 3D and, while some (like the simplified bosses and tweaked controls) can be frustrating, the benefits outweigh these issues. The expanded Bomber’s Notebook, being able to jump to specific time periods, and the changes to side quests help make the game accessible and fresh for old and new players, in my eyes. Ultimately, I think Majora’s Mask is a dark horse of the franchise; it’s an incredibly engaging experience, packed with side quests upon side quests, and more than stands alongside its predecessor as one of Link’s finest (if surreal) adventures.
My Rating:
⭐⭐⭐⭐⭐
Rating: 5 out of 5.
Fantastic
Have you ever played the Nintendo 3DS remaster of Majora’s Mask? If so, what did you think to the graphical overhaul and additional features included? Which of the masks and many side quests was your favourite? Would you like to see this version ported to the Nintendo Switch to make it more accessible? Did you own Majora’s Mask back in the day? If so, did you ever tackle the final boss without the Fierce Deity Mask? Were you a fan of the three-day cycle? I’d love to hear your memories of Majora’s Mask so leave a comment below and go check out my other Zelda content!
Upon the release of Pokémon: Blue Version and Pokémon: Red Version(Game Freak, 1996), a new craze swept through playgrounds. An entire generation grew up either playing Pokémon, watching the anime, playing the trading card game, and watching the feature-lengthmovies as clever marketing saw it become a massively lucrative and popular multimedia powerhouse. Accordingly, February 27th is now internationally recognised as “National Pokémon Day”, which I expanded to an entire month of Pokémon this February.
Released: 12 April 2023 Originally Released: 30 April 1999 Developer: Nintendo EAD Also Available For: Nintendo 64
A Brief Background: Pokémon was an instant cultural phenomenon when it first released. It wasn’t just because of the games, which cleverly encouraged players to “Catch ’Em All”; it was the slew of merchandise and ancillary media that made Pokémon a household name. Right from the beginning, Pokémon was followed by spin-off games; whether it was the incredibly popular trading card game or other videogame genres, like pinball, Pokémon dominated an entire generation, especially on the Game Boy. Two years after the original games released, Japanese Nintendo 64 players were treated to Pocket Monsters’ Stadium. Originally intended as a launch title for the ill-fated Nintendo 64DD, the game was limited to only forty playable Pokémon but set the template for 3D Pokémon battles. Pokémon Stadium was its successor, incorporating 3D models and animations for all 151 Pokémon and being chosen for international release over its predecessor, much like how the inferior Pocket Monsters: Green Version was superseded by its successors. It was HAL Laboratory president Satoru Iwata who studied the Game Boy source code and converted it to work on the Nintendo 64, though Pokémon Stadium’s other big selling point was its ability to communicate with the Game Boy using the unique (and sadly underutilised) “Transfer Pak” to import copies of Pokémon from the handheld titles. Pokémon Stadium was generally well received at the time; reviews largely focused on praising the 3D models and impressive adaptation of the turn-based battle system, though criticised the annoying announcer. Though a best-seller, and followed by a superiorsequel in 2000, Pokémon Stadium was stuck on the Nintendo 64 until it was finally made available to modern gamers, via the Nintendo Switch Online + Expansion Pak, in 2023.
The Review: Pokémon Stadium is a 3D Pokémon adventure in which players could upload copies of the Pokémon from the Game Boy games and battle it out in 3D against computer-controlled opponents or their friends. Since the Nintendo Switch Online version lacks connectivity with the Game Boy games (which aren’t even available on the Nintendo Switch Online as of this writing), you’re limited to using “rental” Pokémon, which can’t be renamed or customised in any way. When you first start the game, only 149 Pokémon are available to rent but you’ll gain access to Mewtwo and Mew by clearing all the game’s battle modes. Each rental Pokémon has four moves, with the third-stage evolutions (like Blastoise and Charizard) sporting better stats (higher attack and defence, for example) but wielding more unreliable moves (such as Fissure, a one-hit knockout move that can miss four times out of five) or moves with less Power Points (PP), such as Fire Blast and Mega Beam. Although I mentioned stats earlier, you can’t view the stats for any Pokémon in the game, rental or otherwise. You have no idea how strong your Pokémon is beyond the level they are and you have no options to improve their stats. The best you can do is use moves that buff them in battle, such as Swords Dance, to increase your chances of attacking before your opponent, or ones that de-buff your foe (such as Sand Attack to reduce their accuracy). As ever, Type advantages are a key factor in battle; Fire-Type moves are “super effective” against Grass-Type Pokémon, for example, which have the edge over Water-Type Pokémon. Many moves also have a chance of landing a “critical hit” for extra damage, missing, hitting you with recoil, or causing status effects. Pokémon can be burned, frozen, put to sleep, paralysed, and poisoned and you have no way to solve these ailments as there are no items here (though the game’s rigged to ensure no two Pokémon can be frozen or asleep in a battle).
All your favourite Pokémon are brought to life to battle in 3D.
The limitations don’t end there, either. Although you assemble a team of six Pokémon, you only ever battle with three. Similarly, while you can see your opponent’s available Pokémon, you have no way of knowing which ones they’ve picked so it’s best to assemble a diverse team. Luckily, every Pokémon has a diverse move pool consisting of elemental attacks, status-inflicting attacks, buffs, or alternative elemental attacks (Marowak, for example, not only has Ground-Type moves but also uses Fire Blast, a Fire-Type move) to provide additional coverage in battle. If you win without taking a single hit, you’ll earn an extra continue to battle on should you be defeated (though the Nintendo Switch’s save state feature can mitigate this). When taking on the titular Pokémon Stadium, you compete in one of four “cups”, each imposing level restrictions, to win one of four PokéBall-themed trophies by gaining six consecutive victories. The Gym Leader Castle has a similar setup, except you only have to win four battles (besting three underlings before challenging the Kanto Gym Leaders, Elite Four, and your Rival) and there are no level restrictions. Besting all these battles unlocks a final super boss battle against Mewtwo, in which you take six Pokémon in battle to beat him, unlocking the much tougher “Round 2” mode and changing both the title screen and the main menu accordingly. Battles are pretty basic; once you get over the fun, colourful, cartoonish animations of the Pokémon, you start to see how limited your options are. You can’t do anything but power through if your Pokémon is poisoned, its moves are disabled, or it gets confused and attacks itself. Type advantages can see you sweep entire teams, but the diverse move pools mean you can’t underestimate opponents, especially if you chose poorly when assembling your team. Finally, battling non-stop can get really tiresome; it’s definitely a game best played in little spurts rather than trying to beat everything in one sitting as the novelty quickly wears off.
While the visuals are decent, gameplay quickly becomes tiresome.
The grating announcer doesn’t help; this overly enthusiastic guy will spout the same exclamations over and over, chastising you if you take too long or pick the wrong Pokémon and screaming praise for every correct decision. Luckily, you can turn him off from the options. Unlike in the anime, Pokémon don’t scream their name when in battle (except for a Pikachu imported from Yellow Version), but this actually makes the game more appealing in my eyes. Pokémon are rendered in full 3D and exhibit a lot of personality; Mr. Mime actually mimes when idle, Onix’s body rotates and squirms, Muk is all sludgy and gooey, and Primeape dances about ready to fight. Rival Pokémon often sport rudimentary nicknames and alternative colour schemes and, while they only have a handful of animations, these work for the moves they perform, which are all brought to life in suitably dramatic fashion even if physical moves (like Mega Punch and Slash) don’t actually connect with the opponent as the Pokémon stay on each side of the arena. You never see the Pokémon Trainers except in profile pictures before and after battle and, while audiences react and make noise in arenas, you won’t see any spectators (at least, not clearly, anyway). Arenas are largely empty and underwhelming, to be honest; some are suspended over water or lava, some are inside, some outside, and you battle Mewtwo in a surreal sky landscape, but there’s nothing to really see as the focus is squarely on the 3D Pokémon models and their attack animations. This is fine and it all looks good and more accurate than the depictions in the anime, but again it’s all quite bland and tiresome after a while. The game is bolstered by renditions of the classic Pokémon theme, battle music, and other in-game tunes, which are always fun to listen to, but the introduction movie is incredibly basic and just showcases a few Pokémon models flying about.
While the mini games are fun, many of the game’s best features are now missing.
Of course, it’s not all battling in Pokémon Stadium, but that is half of the story in this version of the game. Normally, you could visit Professor Samuel Oak’s lab and organise or trade in Pokémon from the Game Boy games, but you can’t do that here. Most notably, you used to be able to access the GB Tower and play the original games on your TV screen, with options to speed up the gameplay at hand, but that’s also not available. Since you can’t import Pokémon, you can’t get the special Surfing Pikachu, though you’ll still be awarded with one of eight semi-rare Pokémon each time you clear the Gym Leader Castle. You can still visit the Hall of Fame and view the Pokémon character models up close, though you must best the Gym Leader Castle with all 151 Pokémon to do this (which also earns you a Psyduck that knows Amnesia). Luckily, you can still visit the Kids Club and play the many fun mini games on offer, either against the computer or alongside your friends. Here, you’ll copy Clefairy’s dance instructions, gobble up sushi with Lickitung, race against Rattata, cast Hypnosis against other Drowzee, see how any times you can get Magikarp to splash, charge up a dynamo with Pikachu or Voltorb, defend against incoming rocks with Kakuna and Metapod, toss Ekans like a ring, and dig into the ground with Sandshrew. These mini games are only short but they’re quite fun and addictive; the timing can be a little off at times and other times you must pay attention to not drain your health bar, but it’s enjoyable enough battling alone or against friends. I do wish the game did more with these, though, like maybe had a random mini game play during the cups to let you earn single-use items or some kind of buff. Other options include a gallery (another limited feature where you can photograph Pokémon to view its model, though you obviously can’t print these anymore), the ability to jump straight into a CPU battle, and unlockable stickers for the gallery when you beat “Round 2”. Beating the Kids Club’s “Who’s the Best?” mode on “Hard” unlocks the “Hyper” difficulty, but it can’t be denied that the game’s appeal and longevity suffer with this version since you can’t access the GB Tower.
The Summary: I remember when Pokémon Stadium was announced and first released. It was the first time I can remember pre-ordering a game, and all my friends and I delighted in seeing our portable Pokémon brought to life in 3D. It was a big deal then, but it can’t be denied that Pokémon Stadium hasn’t aged well, hence this shorter review. It’s certainly still a lot of fun and a nostalgic high to see those early 3D Pokémon models, which were reused for many years after and are actually more lively than in some of the modern games, and I loved that they made noises like the in the Game Boy titles rather than screaming their names like in the anime. There are a few options available here, but Pokémon Stadium is essentially a glorified party game. When you’re not battling for cups and trophies, you’re battling the Gym Leaders, a friend, or the computer. When you’re not doing that, you’re playing mini games which, while fun, aren’t enough to sustain your interest for longer than half an hour or so. Without the GB Tower functionality, Pokémon Stadium loses a lot of its replay value, and you’re forced to focus on the repetitive and tiresome battling. With limited options, no items, and no room for customisation since you can’t import your portable team, the battling just appears very shallow and basic. As a 3D representation of Trainer and Gym Leader battles, it’s serviceable but Pokémon Stadium only does a rudimentary job of representing that one aspect of the mainline games. It’s fun enough in short bursts, but even then it can be tedious hearing the same announcements over and over and essentially just hitting A again and again to spam super effective moves since it lacks the depth and complexity of its far superior portable counterparts.
My Rating:
⭐⭐
Rating: 2 out of 5.
Could Be Better
Did you enjoy Pokémon Stadium? Were you excited to see your team brought to life in 3D back in the day? Which of the mini games was your favourite? What did you think to the limited battle options and repetitive gameplay? Did you ever fill up the Hall of Fame and defeat Mewtwo? Are you disappointed that so much of the game is inaccessible in this version? Would you like to see another battle-centric 3D Pokémon game? How are you celebrating National Pokémon Day this year? Whatever your thoughts on PokémonStadium, feel free to leave them below and check out my other Pokémon content across the site.
Story Title: “Who is the Hulk?” Published: 4 January 2008 (cover-dated: March 2008)
Story Title: “The Smoking Gun” Published: 20 February 2008 (cover-dated: April 2008)
Story Title: “Creatures on the Loose” Published: 23 April 2008 (cover-dated: June 2008)
Story Title: “Red Light, Green Light” Published: 25 June 2008 (cover-dated: August 2008)
Story Title: “Rolling Thunder” Published: 6 August 2008 (cover-dated: October 2008)
Story Title: “Blood Red” Published: 24 September 2008 (cover-dated: November 2008)
The Background: Created by legendary Marvel duo Stan Lee and Jack Kirby, the depiction of Doctor Robert Bruce Banner transforming into the monstrous Incredible Hulk was inspired by a story of a hysterical mother summoning superhuman strength to rescue her child and classic screen monsters Frankenstein’s Monster and Doctor Jekyll and Mister Hyde. Initially appearing as a stone-grey creature, the Hulk has appeared in many forms and at different levels of strength and intelligence over the years. We’ve seen an old, dictator-like Hulk, an intelligent gangster Hulk, a “Smart Hulk”, and even a “Devil Hulk” so why not a Red Hulk? The idea of a Red Hulk can be traced back to Kenny Johnson, producer of the popular and iconicIncredible Hulk television series (1977 to 1982), who lobbied for the colour change since red is commonly associated with rage, the Hulk’s defining characteristic, only to have his logic dismissed. However, a mere thirty-odd years later, then-Marvel editor-in-chief Joe Quesada officially introduced a red variant of the Green Goliath, one whose identity was kept a closely-guarded secret for about three years. A dangerous, intelligent, and tactically-savvy villain who grew hotter the angrier he got, the Red Hulk was eventually revealed to be Banner and the Hulk’s long-time enemy, General Thaddeus “Thunderbolt” Ross, a cantankerous military man who hounded both characters for decades. Naturally, General Ross appeared prominently in the Hulk’s ancillary media, appearing in cartoons and live-actionmanytimes, but the Red Hulk (or “Rulk” as he’s colloquially known) has not only been a card-carrying member of the Avengers but has also appeared in Hulk-centric cartoons and even unexpectedly appeared in the Marvel Cinematic Universe, courtesy of Harrison Ford.
The Review: Our story begins in Russia, where Doctor Leonard Samson/Doc Samson and Jennifer Walters/She-Hulk investigate the sight of a fierce battle between the Hulk and his monstrous rival, Emil Blonsky/The Abomination. Begrudgingly, She-Hulk allows Samson to recreate the fight, deftly surmising and reenacting both character’s movements based on footprints and the surrounding devastation. It’s Doc Samson’s learned belief that the Hulk was unusually vicious, that he sought to beat the Abomination to death no matter what damage he caused in the process, and that, with his foe at his mercy, the Hulk drew a pistol and shot the creature at point-blank range. General Ross, Strategic Homeland Intervention, Enforcement, and Logistics Division (S.H.I.E.L.D.) commander Maria Hill, and S.H.I.E.L.D. director Anthony “Tony” Stark/Iron Man, who are also present, question the legitimacy of such an outrageous claim. However, when Hill reveals that S.H.I.E.L.D. does make a weapon big enough for the Hulk to fire and Doc Samson points out the residual Gamma radiation, the evidence, however unlikely, becomes difficult to ignore. She-Hulk and Samson also note that the Hulk is apparently emitting so much radiation that he’s scorching the earth with each footprint. The team’s squabbling and theorising is interrupted by Russia’s equivalent to the Avengers, the Winter Guard, led by Anton/The Red Guardian, who demand to take charge of the investigation. Despite being invited by the Russian government, the Red Guard have issue with their unauthorised personnel, like Samson, who reacts by starting a fight with the Red Guardian. Not to be outdone, Mikhail Ursus/Ursa Major, Boris Vadim/Crimson Dynamo, and Sasha Roerich/Darkstar join the fracas, with the bear-like Ursa clawing She-Hulk’s arm and Iron Man blasting the mech-armoured Crimson Dynamo right in the face. The battle is violent but short-lived as General Ross discovers a survivor, a traumatised boy who can only repeat the word “Красногоin” (or “red”) over and over.
A mysterious Red Hulk murders the Abomination and trashes the S.H.I.E.L.D. Helicarrier,
On the S.H.I.E.L.D. Helicarrier, Maria shows Stark a version of the gun used to kill Blonsky, a weapon he had no knowledge of. However, their discussion is interrupted when She-Hulk is suddenly attacked by a monstrous, Hulk-like figure. Though Stark barely glimpses the creature, he sees that it’s red, not green, and is stunned when the unconscious and badly beaten She-Hulk is dumped at his feet. Stark armours up and meets agent Clay Quartermain, who’s been injured by the monster but no less determined to bring him, and any and all Hulks, down. Iron Man’s orders are cut short when the Red Hulk suddenly tackles him through a wall. Noting the strange contradiction of a Hulk that growls like an animal but apparently wields a pistol and systematically targets a Helicarrier, Iron Man scrambles to fend off the brute’s vicious attack and deploy his spare armours to help stabilise the Helicarrier and catch the jets that tumble from it following the Red Hulk’s attack. Though his armour’s severely damaged, Iron Man is saved from a plummet by She-Hulk, who reveals that the Red Hulk wiped S.H.I.E.L.D.’s secure files with a sophisticated virus, and that the Red Hulk threatened her with an eloquence not shown to Stark. Despite Iron Man’s best efforts, the gold-plated Helicarrier crashes in a New Jersey field (with, surprisingly, no causalities). Iron Man’s attempts to formulate an effective counterattack are put on hold when Maria shows him video footage of General Ross and Doc Samson meeting with Bruce Banner, who’s held captive in the Gamma Base located in Death Valley, Nevada. The footage confirms that there is another Hulk out there, one very different from Banner’s mindless alter ego, and Banner suggests it’s someone who’s previously been exposed to high levels of Gamma radiation. However, Iron Man’s enraged when a crucial exchange between Banner and Ross is rendered unintelligible and orders Maria to clean up the recording. Later, Iron Man is brought to a meat packing plant where Agent Quartermain has been found dead alongside a severely torn, Gamma-irradiated coat belonging to Doc Samson, framing the superhuman psychiatrist as the Red Hulk.
The Red Hulk easily overpowers A-Bomb and even the rampaging Green Goliath!
Elsewhere, the Red Hulk blindsides perennial sidekick Rick Jones outside Gamma Base, transforming him into his own Gamma monstrosity, the A-Bomb. It’s in this fight that we learn just how intelligent the Red Hulk is. While A-Bomb can only bark childish threats, the Red Hulk is goading, intelligent, and aware of his surroundings. Although Gamma Base recognises the Red Hulk as an authorised entrant, its defences fire on A-Bomb and Red Hulk takes advantage, swiping a massive cannon and taking great pleasure in riddling the armoured monster with bullets. When A-Bomb spits claims of his invulnerability, the Red Hulk gleefully tests his theory by pummelling him into the ground. The sheer force of the assault sends seismic shocks through the entire base and triggers Banner’s transformation into the Hulk when his cage attempts to gas him. As the battle rages, the base unleashes its Adamantium-taloned harpy robots (modelled after Banner’s long-time love, Doctor Betty Ross) to carry the two away. Unfortunately, the machines are no match for either monster’s strength, though the distraction separates them long enough for the Hulk to confront his red-skinned doppelgänger. Before the two can lock horns, however, the Red Hulk casually punches out Uatu the Watcher, who randomly popped up due to the significance of these two immensely powerful beings coming to blows (and, I guess, to show how tough this new Hulk is). After humbling the cosmic overseer, the Red Hulk finds the Hulk enraged by his appearance. The Hulk sees his red double an imitation and challenger to his title of “The Strongest One There Is”, a title he vehemently seeks to defend as aggressively as ever. Red Hulk, however, dives into the fight with relish, determined to make the Hulk pay for years of death and destruction, and for waging war against the entire planet after his return from Sakaar. Though the Hulk’s no longer as intelligent as his “World Breaker” persona, his strength only increases with his anger. However, the Red Hulk weathers the beating and easily grabs the Hulk’s wrist, breaking his arm and causing him to pass out.
Though he humbles Thor, the Red Hulk is outsmarted by the Hulk, his true identity left a mystery…
The Hulk awakens atop the Golden Gate Bridge and avoids a public execution by biting the Red Hulk’s gun. For his insolence, the Red Hulk decides to let his foe live with the knowledge that he’s not the strongest and knocks him into the bay, trigging the San Andreas fault. Thor Odinson then confronts the monster, only for the God of Thunder to be stunned when the Red Hulk shrugs off a blow from the mighty Mjöllnir. Savouring the chance to beat a God to death, the Red Hulk backs his words with blows powerful enough to draw blood and knock Thor flying. Thor fights back, not realising his foe is a different Hulk to the one he knows and is therefore left speechless when the intelligent Red Hulk gets around Mjöllnir’s enchantment by launching them out of Earth’s atmosphere. In zero gravity, the Red Hulk humbles Thor by beating him with his own hammer and dumping him on the Moon. After the Fantastic Four seemingly confirm that the Red Hulk is Doc Samson and A-Bomb pulls the Hulk from San Francisco Bay, Iron Man, She-Hulk, Ben Grimm/The Thing, Johnny Storm/The Human Torch, Prince Namor McKenzie/The Sub-Mariner, and Ares, the God of War, arrive to help save the city. While the Hulk initially rejects their assistance, he begrudgingly agrees to let them get San Francisco under control so he can confront the Red Hulk in Monument Valley. The Hulk’s efforts are aided by the returning Thor and A-Bomb, with the latter revealing the Red Hulk’s weakness (that he gets hotter the madder he gets) and restraining Thor so the Hulk can settle the score alone. Smartly, the Hulk absorbs the Red Hulk’s horrendous assault, causing the monster to overheat and grow weaker. The Hulk then asserts his dominance and knocks the Red Hulk out with a single punch. He then parts ways with Thor as friends before wandering into the desert, exhausted and reverting to Banner. However, when A-Bomb turns back into Rick and tries to reveal the Red Hulk’s identity, he’s shot in the back by Doc Samson. Both Samson and General Ross express disappointment with the Red Hulk, who they leave lying in the dirt as his eyes snap open…
The Summary: First of all, I have to say that I love Ed McGuinness’s artwork. His work is always hyper-stylised and very bold and cartoonish, and he draws a wonderful Hulk and Hulk-like creatures, with them all being brutish monsters full of life and personality. You can tell so much about each of the Hulks in the way Ed McGuinness draws them: A-Bomb is constantly hunched over, as though weighed down by his armoured scales; the Hulk is always bulging and ready for a scrap; and the Red Hulk stands tall and confident, with a condescending smirk plastered to his face most of the time. The glue that holds this story together is the mystery of who the new Red Hulk is. At first, Doc Samson believes the Hulk is behind the Abomination’s murder. This is an odd hypothesis given he knows as well as General Ross that Bruce Banner is locked up in Gamma Base, but not one without merit; after all, Doc Samson himself once split Banner and the Hulk into separate beings. Naturally, given he was a bit of a dick around this time, Iron Man’s primary thought is to his culpability; he snaps and rages at Maria Hill about the Hulk-sized weapons S.H.I.E.L.D. developed and is desperate to ensure he can’t be held accountable for the murder. The evidence seems to ring true, but for the use of a gun and the scorched footprints, though She-Hulk remains unconvinced that her cousin was capable for such a cold-blooded act. Little moments throughout the story give some hints towards the Red Hulk’s identity, but there are numerous red herrings as well: Rick Jones, for example, seems tormented at the events, initially framing him as a suspect. We see that both Samson and Ross are authorised Gamma Base personnel, and that the base’s security recognises the Red Hulk’s iris. The garbled security footage seems to implicate Samson, as does his tattered coat, and the story even ends with the suggest that Doc Samson is the Red Hulk…until it’s revealed he’s not. But then again, General Ross is also seen standing over the Red Hulk’s unconscious body and he was right there when the Red Hulk attacked the Helicarrier, and he later turns out to be the Red Hulk! Indeed, the ending suggests more that Samson and Ross were in league with the Red Hulk, rather than being him, and I’d be interested to know or try and remember exactly how they explained how Ross and the Red Hulk could be in the same place at the same time (though it was probably a Life-Model Decoy).
The Red Hulk is an overpowered, egotistical, and incredibly dangerous Hulk.
As for the Red Hulk…well, this is a glorious showcase. Doc Samson’s intuitive nature reveals that the Red Hulk is a formidable foe, capable of beating even the super-tough Abomination into submission and fighting with a ferocity and power comparable to the Hulk. The Red Hulk is also seen to be tactically minded, launching an all-out assault against Iron Man’s fancy-pants gold Helicarrier and even wiping S.H.I.E.L.D.’s files. The Red Hulk’s intelligence is showcased in his eloquence; he delights in goading and taunting his foes as he fights them, displaying a familiarity with each and the defences of Gamma base. He repeatedly demonstrates a personal vendetta against the Hulk, first happy to frame him for murder and then delightedly besting him in a straight-up fight, even going so far as to break the Green Goliath’s arm and wish to publicly execute him. This, as he says, is payback for the Hulk’s years of death and destruction and more recent assault against the entire planet. The Red Hulk sees the Hulk as the true threat and is determined to stamp him out, but he’s also out to prove himself the superior being in mind and body. And what better way to do this than by not just beating the piss out of the Hulk and kicking him to the bottom of the San Francisco Bay, not just by punching out the Watcher, but by besting Thor in combat! Seriously, the Red Hulk is so massively overpowered it’s not even funny. Not only does he outmatch and humiliate Thor, even using insane logic to rob him of Mjöllnir, the Red Hulk completely disrespects and disregards the God of Thunder like he was nothing. A vindictive, calculating, ferocious opponent, the Red Hulk is so much than just another “Smart Hulk”. His blows have a purpose, striking at weak points and mixing pure power with tactical precision; he knows what he’s doing and enjoys doing it. His only weakness, one he doesn’t seem to realise, is that his body temperature rises exponentially when he gets mad, weakening him significantly. Well, it’s not his only weakness: he still needs to breathe, but that isn’t much of an issue considering he effortlessly trounced Thor while holding his breath.
The Hulk doesn’t care who his new foe is. He just wants to prove he’s the strongest!
The Red Hulk’s debut starts off as a showcase for the new Hulk on the block and a superpowered murder mystery. The investigation into the Abomination’s murder, the murder weapon, and the mystery of what’s happened to drive the Hulk to such an uncharacteristic action frames the first issue and a half. Once the Red Hulk makes his presence know, there’s some brief confusion as even Banner states that he’s been split in two and assumed different forms before, but then the crux of the story becomes trying to work out who this new Hulk is. Thus, everyone’s favourite Jade Giant doesn’t factor into the story for a few issues. Indeed, it’s up to the decidedly Hulk-like A-Bomb to carry the load when the Red Hulk targets him, but the action really ramps up when the two Hulks come to blows. I’m not sure what happened between Green Scar’s return to Earth and this story, but the Hulk has regressed to his mindless, child-like persona and is therefore at an initial disadvantage against his more tactile-minded doppelgänger. The Hulk’s driven to fight the Red Hulk out of a sense of pride (“Hulk is Hulk!”, after all) rather than to protect others, but his need to prove himself superior aligns with defending his few friends (such as A-Bomb) and allowing Iron Man and the others to save San Francisco. Thanks to Ed McGuiness, the Hulk-on-Hulk action is dynamic and interesting; it’s not just a senseless brawl as both Hulks weather their opponent’s onslaught to tire them out or strike when the opportunity presents itself. The Red Hulk, especially, stands out by using an enemy’s momentum against them and mixing brain with brawn, while the Hulk is naturally more savage and only tries a different tactic after seeing how dangerous his foe is. The art definitely makes his story a visually enjoyable experience and I did like the intrigue surrounding the Red Hulk. The red herrings and revelations are kind of odd knowing what I know now about the character, but it’s always nice seeing 2008-era Iron Man get his smug face smashed in and I loved that an intelligent Hulk proved to be such a threat. There’s definitely enough here to make me want to read up on what happened next with the Red Hulk and the lingering plot threat regarding Doc Samson, and the mixture of action and mystery were highly entertaining all-in-all.
My Rating:
⭐⭐⭐⭐
Rating: 4 out of 5.
Great Stuff
Did you enjoy the Red Hulk’s explosive first appearance? Do you think the writers went a bit over the top in showcasing his threat, power, and intelligence? What did you think to the murder mystery sub-plot and who did you think the Red Hulk was? Were you impressed by the way the Hulk defeated his doppelgänger at the end? Which alternative version of the Hulk is your favourite? What are some of your favourite Red Hulk moments? Tell me your opinions on the Red Hulk in the comments and be sure to check out my other Marvel and Hulk content.
With the release of Sonic the Hedgehog 3(SEGA Technical Institute, 1994) in February 1994, gamers were introduced to Knuckles the Echidna. This mischievous, dreadlocked antagonist was created by Takashi Yuda and is my favourite of Sonic’s supporting cast so I’m dedicating every Sunday to Rad Red!
Story Titles: “Mystery of the Sandopolis Zone” (Part 1 and 2), “Count Down to Disaster” (Part 1 and 2), and “Disaster!” (Part 1 to 3) Published: 17 March 1995 to 9 June 1995 Writer: Nigel Kitching Artist: Richard Elson
The Background: After SEGA finally knocked Nintendo from the top of the videogame industry, the company almost immediately set about transforming Sonic’s popularity into mainstream success with a slew of ancillary merchandise, principally cartoons and comic books. Around six months after Archie Comics published their first Sonic stories, United Kingdom publisher Fleetway Editions Limited began their own series with “Britain’s Official SEGA Comic”, Sonic the Comic (StC), a fortnightly publication I collected diligently until its unfortunate end. Heavily influenced by the now defunct Mobius and Doctor Ovi Kintobor storyline that was popular outside of Japan, StC soon deviated from the source material, portraying Sonic the a mean-spirited leader of the rebellious Freedom Fighters, a group made up of both familiar characters and anthropomorphic characters adapted from the videogames. Like Archie Comics, StC featured some very loose adaptations of the videogames; these were often truncated or heavily altered to align with the comic’s noticeably different lore. Their introduction of Knuckles and their subsequent adaptation Sonic 3 was no different, though that multi-part arc did lead to the first of many solo ventures for the stubborn echidna. Many months later, StC’s creatives brought Sonic and Knuckles together as an unlikely and abrasive team in this loose adaptation of Sonic & Knuckles (SEGA Technical Institute, 1994).
The Review: StC’s continuation of their Sonic 3 & Knuckles arc begins with Sonic and his sidekick, the perennial put down upon Miles “Tails” Prower, flying through the skies of Mobius to the Floating Island (as it was then known) in their biplane (which we now call the Tornado). Despite Tails’ worries, Sonic leaps off solo and lands in the arid desert of the Sandopolis Zone. He’s there to scope out some intel from his friend, fellow Freedom Fighter Porker Lewis, that maniacal despite Doctor Ivo Robotnik (who, at this point, currently dominates the entire planet) has secretly been repairing his ultimate weapon, the spherical Death Egg battle station, on the far side of the Floating Island. From the ancient ruins of Sandopolis Zone, Sonic spots the space station at the nearby Launch Base Zone but, before he can race to keep Dr. Robotnik from completing his repairs, he’s attacked by a particularly aggressive Sandworm Badnik. Caught off-guard, Sonic’s counterattack is interrupted by Knuckles, the pig-headed, super strong guardian of the Floating Island. The two immediately resume their rivalry, trading barbs with each other, and Knuckles clearly enjoys watching Sonic stubbornly refuse help. Of course, bashing Badniks is Sonic’s thing so he quickly trashes the Sandworm and the two realise that they’re there for the same reason since Knuckles is still cleaning up loose ends after he was tricked into helping Dr. Robotnik. Before they can reluctantly join forces to fight their common enemy, Captain Plunder and his Sky Pirates appear, angering Knuckles since he’s sick and tired of everyone and their mother showing up unannounced on his secluded island.
Sonic and Knuckles begrudgingly team up to intercept the Death Egg’s launch.
No strangers to each other, Sonic demands to know what the grim-faced walrus is doing there, and Captain Plunder eagerly reveals that he’s following an ancient treasure map, one he now realises led to the Floating Island since the mythical location has become common knowledge. With the aid of his newest crewman, known only as the Professor, Captain Plunder activates an ages-old control console and successfully raises the legendary Lost Pyramid of Sandopolis. The rag-tag group are immediately confronted by the pyramid’s guardian, a towering stone sentinel who easily reconstructs himself after being blasted with Sonic’s patented Spin Attack. Using his unparalleled knowledge of the island, Knuckles uses his head rather than his muscles and lures the guardian to some quicksand, subduing the titan just as the player would in the game. In the confusion, Captain Plunder and his cronies sneak into the cursed pyramid and discover a tomb full of riches, which they immediately pilfer. Naturally, Knuckles isn’t best pleased by this but, before he can stop the pirates, the tomb is plunged into darkness as the pyramid’s curse takes effect. Demonic ghosts chase them from the tomb, leaving them humiliated and penniless (though Captain Plunder spins a yarn of great danger and heroism to his crew). As for Sonic and Knuckles, they escape when Knuckles smashes a jar, flooding the room with sand and boosting them to a secret exit through a series of underground tunnels towards the live volcano that houses the looming Death Egg. When they reach the Lava Reef Zone, the duo is set upon by Dr. Robotnik’s rotund Eggrobos, which don’t just sport their master’s visage; Dr. Robotnik can see and hear everything through them. Sonic immediately attacks and is sceptical when Knuckles states he has a faster way to deal with them, though Rad Red comes through by smashing a nearby boulder and melting the hoard with a torrent of lava.
Though Super Sonic defeats Metallix, the Death Egg launches and prepares to fire.
Naturally (and correctly) surmising that Dr. Robotnik’s goal is the all-powerful Master Emerald, the gigantic jewel that keeps the Floating Island aloft, Knuckles leads Sonic to the Hidden Palace, where the Chaos Emeralds reside. Unfortunately, the Master Emerald is gone, dooming the island to drop into the ocean in mere hours. As for Dr. Robotnik, he’s already gloating about his supreme victory, not just because he’s close to the gem that will finally allow him to avenge himself upon the Emerald Hill Zone folk who so openly defy him, but also because an armour-clad, upgraded version of his ultimate creation, Metallix, is already drawing power from the Master Emerald. Sonic’s naturally shocked since the last time he tangled with Metallix, Sonic did a bit of time travel shenanigans to erase his metallic doppelgänger from history. The only explanation we get about how Metallix can still be around is a brief mention of a “brotherhood” of Badniks since exposition gives way to an all-out battle. Teleporting to the Sky Sanctuary Zone, the new Metallix proves its superiority by absorbing power from the Master Emerald and knocking Knuckles out. Despite Sonic trying to whip up a vortex to tear Metallix apart, he’s whacked by the Badnik’s extendable arm and socked into the air with a rushing uppercut. Unfortunately for Metallix, the shot sends Sonic flying towards the Master Emerald and, upon contact, the surge of Chaos energy transforms Sonic into his raging, demonic, invincible alter ego, Super Sonic. Super Sonic decapitates Metallix’s head with one blow and rips its remains apart in a mindless rage. Super Sonic then turns his wrath against Knuckles before the transformation wears off and Sonic regains his senses. Knuckles’ bruises are nothing compared to the sudden, dreadful realisation that the Master Emerald has been teleported away in the fracas. The two watch with horror as the mighty Death Egg finally launches, shaking what’s left of the Sky Sanctuary Zone apart with its vibrations.
An interior and external assault sees the Death Egg blasted from orbit once more.
Ecstatic at finally piloting his spherical space station once more, Dr. Robotnik sends a wave of Eggrobos after his foes. However, Knuckles begrudgingly carries them to safety by gliding on the turbulent winds. Sonic then pinballs off the Badniks to infiltrate the space station while Knuckles heads to a hidden chamber. Looking over some wizened scrolls, he activates an antiquated control console and literally pilots the Floating Island towards the Death Egg. Unlike the last time we saw Sonic explore the Death Egg, this rendition is gigantic, ominous, and filled with traps and Badniks. Sonic obliterates the Spikebonkers and then feigns surrender to enter Dr. Robotnik’s main control room. There, he spots the Master Emerald and makes a beeline for it, desperate to remove the space station’s main power source before Dr. Robotnik can disintegrate the Emerald Hill Zone folk. Luckily, the Floating Island opens fire on the Death Egg using energy drawn from the very island. Enraged, Dr. Robotnik demands that his assistant, the long-suffering Grimer, turn the Death Egg’s main cannon on the Floating Island. However, the rotund dictator’s so caught up in his boastful gloating that Sonic knocks the Master Emerald free, disabling the Death Egg and leaving it wide open to Knuckles’ unrelenting barrage.
With Dr. Robotnik’s threat ended, Knuckles agrees to shelter Sonic’s friends on his secluded island.
Tumbling from the disintegrating space station, Sonic spots an Eggrobo snatching the Master Emerald. Thinking fast, Sonic swipes a laser blaster and destroys the Eggrobo, causing the Master Emerald to safely fall to the Floating Island. Sonic then saves himself by relieving another Eggrobo of its jetpack and riding it to safety, gloating as the exploding Death Egg falls from the sky. Upon spotting the Master Emerald, Sonic hefts it up (with no sign of Super Sonic this time around), determined to return it to the Emerald Chamber before the Floating Island crashes to the surface. Unfortunately, he’s taken by surprise when Dr. Robotnik fires upon a concussive laser blast from a gigantic suit of armour somewhat similar to the Giant Eggman Robo from the source material. Unlike that gruelling fight, where the mech boasted gigantic crushing fingers, fireball-sprouting nostrils, and a gigantic, Master Emerald-powered laser cannon, this suit’s primary attack is to try and crush Sonic with its fists. The desperation and high stakes see Sonic unleash aggressive Spin Attacks so savage that even Dr. Robotnik comments upon Sonic’s grim attitude. Still, Sonic is horrified when his final blow causes Dr. Robotnik to topple over the island’s edge. However, the maniacal dictator’s luck holds out as his damaged jet propulsion system means the fall isn’t fatal. Sonic’s equally as unimpressed to see Knuckles rushing up to him, too late to help with the battle and demanding the safe return of the Master Emerald. However, Sonic doesn’t hand over the gem that easily. Realising that Dr. Robotnik will never rest until he’s destroyed the Emerald Hill folk, Sonic agrees to return the Master Emerald in return for safe shelter for his friends. Thus, amidst the last vestiges of a downpour, the displaced Emerald Hill folk are safely hidden from Dr. Robotnik’s repercussions in the island’s Mushroom Hill Zone, high up in the sky. And good thing, too, since the injured Dr. Robotnik swears revenge against both Sonic and Knuckles.
The Summary: StC was really at its peak around this time. This second round of Sonic 3 & Knuckles stories really ups the ante from Knuckles’ first introduction, which barely touched upon the gameplay mechanics, locations, and intricacies of the source material. To be fair, this was common in StC’s adaptations and subsequent stories did explore other aspects from the game, so basically Angel Island’s areas were incorporated into StC canon and formed the basis of plenty of other stories, short and long. But, at its core, the first arc was more concerned with the rivalry between Sonic and Knuckles, the fusion of the twelve Chaos Emeralds, and Dr. Robotnik’s attempt to attain Godhood. This second arc visits far more locations from the game and even incorporates mechanics seen in those areas, such as the pyramid from Sandopolis, the light gimmick and scary ghosts, and the crumbling Sky Sanctuary Zone. Every location and character is brought to life by the peerless Richard Elson, who brings a kinetic, visual power to every action. This is best evidenced in Sonic and Knuckles’ battle against Metallix, which conveys the speed and raw power of the Badnik like never before, instantly differentiating it from its predecessor and emphasising its threat. Things only escalate when Knuckles pilots the Floating Island and fires on the Death Egg, a unique plot thread obviously missing from the videogames but which adds further lore to the mysterious nature of the island, which holds secrets even Knuckles is just now discovering. While Super Sonic wasn’t much of a factor, his appearance was a welcome one and helped sell the threat of the Metallix, itself a lingering plot threat explored in later issues. I really liked that Sonic and Knuckles were teamed up this time around; Tails and the other Freedom Fighters were basically absent but it was a nice bookend to their previous meeting, where they fought against each other and begrudgingly teamed up in the finale.
Rivals Sonic and Knuckles team up against a common foe.
The two work surprisingly well together here. Perhaps because of their common enemy and the very real threat the Death Egg poses, there’s little bickering between the two. They’re largely on the same page, save for a few barbs here and there, and Sonic defers to Knuckles’ expertise regarding the island numerous times. Naturally, a spirited rivalry remains, with Sonic being the flashy showman who never admits when he’s wrong and Knuckles taking a more measured approach, utilising the environment or his know-how to quickly dispatch enemies and focus on the big picture. His primary concern is the safety of the Floating Island, which he feels has been defiled ever since Dr. Robotnik and Sonic arrived there. He just wants to clear out Dr. Robotnik’s influence and get things back to normal and is extremely intolerant of any intruders, even allies like Sonic. Unfortunately for Knuckles, he’s become part of a larger world, something even he acknowledges since he attacks the Death Egg not just for the Floating Island, but to safeguard the entire planet. Having previously experienced the Death Egg’s power before, Sonic knows all-too-well with the space station is capable of. Readers got a taste of this a few issues back when Dr. Robotnik ran a simulation that resulted in Sonic and Tails being vaporised, and the ever-present threat posed by the Death Egg clearly weighs heavily on Sonic’s mind. Sonic gives Badniks and Dr. Robotnik alike a taste of his smart mouth, but he knows what’s at stake and even welcomes transforming into Super Sonic if it means dispatching his metallic doppelgänger and safeguarding the Master Emerald. Consequently, Sonic defiantly battles a roomful of Spikebonkers, desperate to knock out the Master Emerald, only to despair when, for the first time in his life, he’s too slow to save his friends. It’s only because of Knuckles’ attack that Sonic dislodges the power source, and even Sonic must commend the echidna’s thinking (though, tellingly he, never expresses gratitude to his rival at any point in this arc).
Dr. Robotnik’ mad ambitions almost succeed but for the intervention of his worst enemies.
This focus on Sonic and Knuckles means there’s not much panel time for Dr. Robotnik. When we do see him, he’s raving about his need to acquire the Master Emerald, boasting about having acquired it, or anguished at having lost it. He constantly brags to Grimer about his superiority and the power of the Death Egg and relishes having a front row seat to witness the demise of his foes. Once the Death Egg launches, Dr. Robotnik is practically giddy with glee and immediately aims his ultimate weapon at the Emerald Hill Zone, ready to wipe the whole town and its inhabitants out. He’s aghast when Sonic and Knuckles destroy his beloved space station and finally takes matters into his own hands, piloting a mech suit far larger than the one seen in the last arc and taking the fight directly to Sonic. However, even Dr. Robotnik underestimates Sonic’s anger and determination; in the face of Sonic’s raw speed and power, the malevolent dictator is helpless, mech suit or not, and sent plummeting to a nasty landing, his dreams of all-out destruction quashed for now. By spreading the Sonic 3 & Knuckles story across intervening stories and giving the source material time to breath in this main arc, these issues tell one of the first great epics in StC’s run. The stakes were high and tangible: Dr. Robotnik wasn’t using magic gems to become a God or anything like that. He built the Death Egg just as he built Metallix and his Badniks, and it stands as the ultimate weapon of his vengeance upon those who defy him. Seeing Sonic and Knuckles properly team up, utilising their individual strengths in creative ways, was a blast and a taste of an ongoing begrudging alliance that would last until the comics were cancelled. Newcomers may be confused about Captain Plunder, Metallix, Super Sonic’s portrayal, and Dr. Robotnik’s vendetta against the Emerald Hill folk, but I’d still rate this as one of the best adaptations of Sonic 3 & Knuckles just because it takes the time to explore different locations from the games and provide a unique spin (pun intended) on some recognisable elements rather than simply taking the basics and weaving it into an all-new canon, as is usually the case.
My Rating:
⭐⭐⭐⭐
Rating: 4 out of 5.
Great Stuff
Have you ever read Sonic the Comic’s second Sonic 3 & Knuckles arc? Did you enjoy seeing Sonic and Knuckles team up this time? What did you think to the use of locations and mechanics from the games? Were you surprised that Knuckles turned the Floating Island into a weapon? Which of StC’s videogame adaptations was your favourite? How are you celebrating the debut of Knuckles today? Please feel free to share your memories of StC and Sonic 3 & Knuckles below and go check out my other Sonic and Knuckles content.
On 21 February 1986, The Legend of Zelda(Nintendo EAD, 1986) was first released in Japan. The creation of legendary game designer Shigeru Miyamoto and Takashi Tezuka, The Legend of Zelda launched one of Nintendo’s most popular franchises. This year, I’m dedicating every Friday to Nintendo’s most famous silent protagonist, Link and his vast and enduring fantasy world of sword and sorcery.
Released: 9 February 2023 Originally Released: 4 November 2004 Developer: Capcom / Flagship Also Available For: Game Boy Advance and Nintendo Wii U
The Plot: Apprentice blacksmith Link accompanies his childhood friend, Princess Zelda, to the Picori Festival, where monsters are unleashed by the evil wizard Vaati. With Zelda petrified, Link teams with wise-cracking magical hat Ezlo and assists the pixie-like Minish people in restoring the legendary Picori Blade to confront the threat.
Gameplay and Power-Ups: The Legend of Zelda: The Minish Cap is a traditional, 2D, top-down action/adventure game in which players take control of Link (or whatever they choose to name him), in the “toon” style of his Wind Waker counterpart, and embark on a quest to save Hyrule, and the Princess Zelda, from new sorcerer on the block, Vaati. As a Game Boy Advance title, the controls are as basic as it gets and akin to the previous handheld Zelda titles. You equip any of Link’s weapons and items to either A or B and then use that button to attack, defend, hit switches, solve puzzles, and whatever else your items are capable of. The Right Trigger performs a roll, speeding up your travel time, and also performs similar actions to A (like speaking to non-playable characters (NPCs) and opening chests). R is also the only way to open locked doors, which can be clunky as it would’ve been easier for Link to simply manually use any keys he possesses. The Left Trigger also performs a dedicated function, fusing “Kinstones” with NPCs, which I’ll detail in a bit. The + button pauses the game and brings up your inventory screen, the pretty basic map (which uncovers the more you explore and highlights notable areas), a subscreen showing how close you are to extending your health bar, total Mysterious Seashells and Tiger Scrolls, and allows you to save the game or enter “sleep” mode. As I’ll also get into in a bit, Link is joined by a hat-shaped companion, the insolent Ezlo, who constantly interrupts your gameplay to offer blindingly obvious advice that would make Navi blush. Also like Navi, you can choose to ask him for a tip by pressing -, though I’d just as soon never speak to him again. As you’d expect, Link acquires his standard sword and shield but the enigmatic Grimblade Brothers will teach additional sword techniques, such as a rolling attack, the aerial downthrust, and patented moves like the Sword Beam and Spin Attack. Some of these are more like padding, though, such as Link having to learn to attack with his sword when running with the Pegasus Boots.
Link’s traditional and new weapons are brought to colourful, cartoony life.
Many of Link’s recognisable weapons return here and function exactly as you’d expect. The bow and arrow lets you to hit eye switches and take out Eyegore statues, bombs blow up walls and discover new areas, and you can purchase a boomerang to stun targets or hit switches. This can be further upgraded into the Magical Boomerang, allowing you to manually direct it. Eventually, you can swap out the regular bombs for remotely detonated ones (though there are few benefits to this) and obtain the optional (and missable) Light Arrows for extra arrow damage. The Flame Lantern lights up dark areas, ignites torches, and burns certain enemies and spider webs. The Roc’s Cape lets you jump and glide short distances, the aforementioned Pegasus Boots let you run really fast, and the Ocarina of Wind warps you to any Wind Crests you’ve uncovered. The Minish Cap debuts three new items: the Cane of Pacci (which flips certain enemies and objects and creates temporary boosters in holes to launch you higher), the Gust Jar (which sucks up enemies, propels you across gaps when used on spring mushrooms, and turns lily pads into rafts), and the Mole Mitts (which dig through dirt). The Flippers, Grip Ring, and Power Bracelet are all passive items that don’t need to be equipped to use and let you swim and dive, climb certain walls, and pick up and toss jars and such, respectively. Link can capture life-restoring Fairies or store potions in bottles, increase his total bomb and arrow inventory with bigger bags and quivers, and also carry more Rupees by finding bigger wallets. Link’s sword is progressively empowered as you acquire the four Elements, duplicating Link into as many as four copies to push bigger blocks, step on or slash switches, and attack enemies, as well as fire a special beam that restores petrified NPCS. Finally, you can upgrade the shield into the reflective Mirror Shield, though this requires awakening a sleeping Biggoron and waiting for him to finish chewing on it.
Link’s shrinking ability doesn’t live up to its potential, and Kinstones are overused.
Link’s newest gimmick in The Minish Cap is the ability to shrink to microscopic size, courtesy of Ezlo’s magic. This is performed primarily at magical tree stumps and allows you to enter small holes, climb small steps and vines, and access out of the way places. When shrunk, you’ll interact with the pixie-like Picori tribe (or “Minish”) scattered throughout Hyrule (once you’ve consumed a Jammer Nut, that is) and be given additional side quests and assistance from them. In this form, Link takes more damage and his weapon usage is limited, but he can talk to animals and cross small lily pads. Occasionally, Minish Link enters Armos statues to activate or deactivate them and the action frequently zooms in to follow him up rafters, into the Minish towns, and through enlarged (from your perspective) areas, like in Honey, I Shrunk the Kids (Johnston, 1989). Apart from this, Ezlo is more a hinderance than anything; he’s obnoxious and rude and demanding and pops up to point out the obvious, severely dumbing down puzzles and interrupting the gameplay. The other big mechanic here is Kinstones; as you slash bushes, defeat enemies, and open chests, you’ll find several coloured Kinstone pieces. These are fused with certain NPCs to alter the overworld in different ways. This may involve spawning a treasure chest containing another Kinstone, or Magical Seashells, or a Big Rupee, or even a much tougher gold enemy for an additional challenge. Fusing removes vines to open new areas, parts waterfalls, drains ponds, and even spawns in NPCs for you to trade and train with. You can buy Kinstones, but they cost a lot and it’s not really worth it as you’ll inevitably find them on your travels, and none of the main variants are necessary to complete the story, though the benefits (extra hearts, Rupees, and training with the uncovered Grimblades) can be worthwhile. Specifically, fusing with Din, Farore, and Nayru spawns Lucky Butterflies which, when touched, increase your digging, shooting, and swimming speed. The only time you’re required to fuse Kinstones is when you find golden ones, such as in Cloud Tops, where you navigate a maze of clouds, floating about to find different halves of golden Kinstones to activate five propellers and be blasted up to the Palace of Winds.
I would’ve liked to see more creative use of the duplication feature in puzzle solving.
Link’s shrinking ability isn’t just used on the overworld; you’ll frequently shrink in Dungeons to reach new areas and progress. As ever, Dungeons contain a map, compass, and new weapon to aid your journey, as well as secret areas, switches, and stairways to other floors. Sometimes, you’ll drop or push blocks to lower levels; others, you’ll push levers to let in sunlight to melt blocks. Frequently, you must eliminate all enemies to open doors, or push jars or statues onto switches for the same effect, though it’s much more likely you’ll be duplicating Link to solve these puzzles. Tornados carry you across bottomless pits, moving platforms carry you across gaps, and floors are often covered in collapsing tiles, spikes, or rolling spiked logs that must be avoided. You’ll jump up to mesh bridges (and down through certain holes), hop up and across cloud platforms, push ice blocks into place, cross gaps using powerful wind blasts from propellers (in conjunction with the Roc’s Cape), and spring across chasms with the Gust Jar. There’s a giant rotating barrel in the Deepwood Shrine which must be rotated to progress, high-speed mine carts in the Cave of Flames that you redirect with switches, the Fortress of Winds is a veritable labyrinth of floors and dirt, the Temple of Droplets is a largely pitch-black mixture of ice and water, and the Palace of Winds offers the constant threat of falling to your doom. For the game’s final Dungeon, Vaati corrupts Hyrule Castle, transforming it into a monster-infested Hell filled with recycled enemies and hazards from previous Dungeons. While largely inspired by A Link to the Past and Link’s previous handheld entries, it’s in Dark Hyrule Castle where I saw some of the strongest parallels as exploring the Dungeons, battling Darknuts, and restoring the petrified NPCs was very similar to Link’s celebrated 16-bit adventure. Sadly, only two of the Dungeons are Minish-sized (the Deepwood Shrine and Palace of Droplets). Though you don’t really notice as you’re exploring these Dungeons, the developers did include larger variants of common enemies as boss battles. Still, I feel they didn’t take full advantage of Link’s new miniature perspective in these (or other) areas as the shrinking mechanic was more of a gimmick or hinderance a lot of the time.
Presentation: I’ll be the first to admit that I never really cared for TheWind Waker’s cartoony aesthetic. It’s grown on me over time, but I much prefer the more realistic, fantasy-orientated style of Link’s other 3D adventures. However, it works really well here; probably better than in 3D. Link is super expressive; from his grunts and yells (carried over from this 3D titles) to his messy bed hair, his look of sheer panic on a runaway minecart, and the way he races around when on fire. He’s a jaunty little cartoon sprite, bobbing along and reacting to everything around him. Ezlo is very animated as well, popping up on Link’s head to react to and comment on their surroundings or the plot, and all the NPCs are similarly cartoony and fun to behold. Many will be familiar to long-time Zelda players, such as Malon (with her milk cart and nearby farm), Dampé the grave keeper, Ingo (now a real estate developer), and Gorons intent on ploughing through a rocky underpass. Many characters fuse Kinstones with you to solve a personal crisis, such as the overworked mailman, the librarian searching for lost books, and a poor man haunted by a restless spirit. The Minish Cap is a little light on new races but there are anthropomorphic characters to find, animals to chat to (as a Minish), and, of course, the gnome-like Picori tribe. These peaceful little sprites have a main village and live in little mushroom houses or up in the rafters, their homes made out of barrels, walls made of books, and heating provided by flickering candles. When Link is turned microscopic on the overworld, a helpful bubble indicates where he is. Though his actions are limited, he has full access to his arsenal when the game zooms in, casting dirt paths with the shadows of grass and blocking his path with chestnuts and such. Minish-Link must avoid cats looking to swipe him and relies on lily pads to cross water until he gets the Flippers, and you must be on the lookout for small holes, paths of flowers, and flappable objects to progress and shrink or return to full size.
The “Toon” style really suits the traditional Zelda aesthetic and brings Hyrule to life.
The Minish Cap’s overworld and Dungeons are heavily reminiscent of A Link to the Past, mixing locations such as ruins, a swamp, and Hyrule Castle itself with areas I’m more familiar with from the 3D games, like Lake Hylia and Lon Lon Ranch. Mt. Crenel acts as a Death Mountain substitute, featuring falling boulders, climbable walls, tornados to fly you about, and a Minish mine where Melari repairs the broken Picori Sword. Like the Swamp of Evil, Castor Wilds is a murky swamp full of thorns; you’ll need the Pegasus Boots to navigate this area, and shrink to clamber inside Armos Statues within the maze-like ruins. Finally, the Flame Lantern lights your way in the desolate Royal Valley, which contains a looping maze in its haunted forest. Aside from the Minish Village, Cloud Tops and the Palace of Winds and the Temple of Droplets impressed me the most, visually. The other Dungeons are very formulaic, despite some fun perspective and depth effects, but these three have you up in the clouds or high in the sky or navigating a frozen labyrinth, respectively, which really mixes up the formula. Dark Hyrule Castle is similar, putting an ominous spin on the palace’s ornate rooms and recycling all previous hazards, but I was disappointed that the Dungeons didn’t utilise Link’s new miniature perspective to make their visuals and layouts standout more from the likes of A Link to the Past. Instead, The Minish Cap often resembles a toon-ified version of that game, doing little to stray from the usual stone trappings of those Dungeons and being a little too familiar at times. Still, there are fun touches, like the Biggoron atop Veil Falls, the big bell in the bustling Hyrule Town, guards to sneak past, and occasional weather effects. The game’s story is all relayed though text boxes, as usual, but key events are told using stained glass murals, Wind Waker-style art is showcased in the end credits, and the sprite-based cutscenes are full of cartoony life. The music is as infectious as ever, with familiar and slightly tweaked classic Zelda tracks at the forefront (many I mostly recognised from A Link to the Past and Ocarina of Time), though new areas and Minish locations have a spirited flavour that adds to the game’s whimsical, fairytale-like charm.
Enemies and Bosses: All of Zelda’s most recognisable enemies make a return in The Minish Cap, though redesigned to evoke the toon style of The Wind Waker. This is most evident in the Moblins, who charge with spears or fire arrows and have much more life and detail compared to past 2D Zelda titles In some cases. This ups the challenge represented by some enemies, such as the various Dark Knights you’ll encounter. These are essentially mini bosses and swarm Dark Hyrule Castle, defending against your attacks and landing powerful sword swipes and even boasting a charged thrust. Your best bet against these enemies is to hop over them with the Pegasus Boots and attack from behind, a tactic mirrored when facing the Ball and Chain Soldiers. Other enemies require strategic use of your other items, such as using the Gust Jar to suck up and fire out the annoying Peahats or pull the masks off Helmasaurs, tossing your boomerang at Sparks, or using the Cane of Pacci to flip Spiked Beetles and attack their vulnerable underbelly. Like Likes masquerade as Rupees and steal your items, Keatons and Takkuris make you drop Rupees on contact, Madderpillars (also a kind of mini boss) fly into a rage with you bop their noses and attack their tails, and you’ll even encounter Bob-ombs and Lakitus. ChuChus fry you, Floor and Wall Masters return you to the Dungeon entrance, and Octorocks and Deku Scrubs are subdued by deflecting their projectiles. Cloud Piranhas snap at you from the clouds, fake doors crush you, and Acro-Bandits leap from the ground in a swaying tower. You’ll also battle elemental Wizzrobes, who teleport about shooting ice, fire, or lightning; Stalfos leap and toss their bones at you; and Slugglas drop from above. By the time you reach Dark Hyrule Castle, rooms are filled with an assortment of these enemies. Though you can often simply bypass them, you’ll need to defeat a gauntlet of them before Vaati completes his macabre ritual to reach the petrified Princess Zelda in the finale.
Too few bosses require the shrinking mechanic, but they’re mostly big, fun challenges.
The Minish Cap is surprisingly light on bosses; four of its five main bosses guard an Element, which empowers your sword and duplicates Link, relinquishing a Heart Piece to extend your life bar. The first boss you battle is a gigantic green ChuChu; well, it’s actually a regularly sized one but you’re in Minish form, so it appears huge. A blue variant appears later in the game too, now sporting electrified skin, but the tactic of sucking at its “feet” with the Gust Jar and whacking it with your sword when it’s stunned remains the same. Next, you face the turtle-like lava dinosaur Gleek, which sits in a pool of lava and spits fireballs in a circular motion. You must run behind it and flip its shell with the Cane of Pacci to race up its neck and attack the crystal on its back. In retaliation, it rains rocks and breathes fire, making the fight more difficult as it progresses. Mazaal is the only one of the main bosses to incorporate the shrinking mechanic in. A strange, disembodied Aztec head and fists, he is stunned by shooting and slashing the jewels on his hands (which try to crush and hit you). You then shrink, enter his head, and attack the glowing pillar to deal damage. As the fight progresses, you use the Mole Mitts in his head and dodge a Shrink Ray attack from his eyes. The Big Octorok is fought in a shallow pool that it freezes, reducing your traction and making avoiding its pellets much harder. Well, I say “avoid” but you actually smack these back with your sword to stun it, allowing you to set fire to the petal on its back. This causes rocks to rain down and the Big Octorok to freak out; it also charges, spins around, and creates a smokescreen to limit visibility. Finally, the Gyorg Pair are easily the most unique boss in the game. This fight takes place in the skies of Hyrule on the back of two manta ray-like creatures. When riding the red one, you must dodge the smaller blue one and its fireballs and duplicate Link to attack the red one’s eyeballs. You then hop to the blue one, slashing its eyeballs, and repeat, watching for smaller green variants that fly past.
Vaati assumes some familiar forms in his attempt to spread darkness throughout Hyrule.
After battling past the many Darknuts that haunt Dark Hyrule Castle, you’ll finally confront the master swordsman and corrupted sorcerer, Vaati. Vaati takes many forms, one similar to Agahnim, one like Arrghus or Vitreous, and one like Nightmare’s final form, Dethl. The first form, “Vaati Reborn”, morphs him into a dangerous sorcerer protected by many small, spinning eyes. These encircle him, distracting you as he shoots fireballs, and must be destroyed to expose his big, eyeball-like weak spot. After enough hits, he encases the eyes in protective shields that must be sucked off with the Gust Jar. The eyes also fire vertical laser beams (just stand between them) and Vaati erratically teleports, making him a harder target to hit. For his second form, “Vaati Transfigured”, fought immediately after in a psychedelic landscape, Vaati takes his obsession with eyes to the next level. In this fight, you shoot arrows at the small sphere surrounding the central body to uncover four red eyeballs. You must then duplicate Link into the same formation and attack, continuing your assault when he’s stunned. However, Vaati spews destructible spiked balls and a spread of electrifying balls, which can be tricky to dodge especially considering his large hit box. After he’s defeated and Princess Zelda is revived, Dark Hyrule Castle collapses and Vaati’s true, final form, “Vaati’s Wrath” emerges. In this form, he pursues you, again firing balls of electricity, and sends his extendable claw arms under the ground to attack. When one pops up, stun it with the Cane of Pacci, shrink down, and venture inside to destroy the one real bladed eyeball amongst the fakes to literally disarm him. Repeat for the other arm and Vaati sends four electrical orbs your way from the small eyes in front of him, as well as a spread of larger orbs. To win, simply avoid the spread and duplicate Link in a line to deflect his smaller shots with your sword (the timing can be tricky), which will stun him and soon end his dreams of conquest.
Additional Features: As you’d expect, there are forty-four Pieces of Heart to find all around Hyrule. Collecting four will extend your life bar, so they’re worth seeking out. While some are just lying in the open, others require your items to reach or are gifted by fusing Kinstones. Opening chests, defeating enemies, and cutting grass also sees you collect Magical Seashells. Unlike the similar items from Link’s Awakening, these are essentially infinite in number (though your inventory maxes out at 999) and are traded for figurines in Hyrule Town, similar to the Pictobox side quest in The Wind Waker. This is quite a time-consuming task, however, as you must speak to the proprietor, set how many Magical Seashells you wish to trade (with the percentage of a new figurine increasing the more you wager), and then pull a lever to get an egg-like capsule containing the figure. The more places you explore and the more NPCs you meet, the more figurines you can get, with your Magical Seashells being replaced by the Carlov Medal once you obtain all 136 figurines. This, in turn, opens Baris’s house, gitfting you another Piece of Heart and the Phonograph, which acts as a sound test for the game. Similar to the Magical Seashells, there are a near-infinite number of coloured Kinstones to find. Fusing with NPCs unlocks new areas and gifts rewards that aid your quest, and completing all fusions awards you with a Tingle Trophy. Clearing the game earns you a Triforce stamp on your save game file; you can have up to three of these and also change the language to suit you. Finally, the Nintendo Switch version lets you play the European and North American releases (with subtle differences between them), rewind should you make a mistake, and create save states at will, dramatically reducing the game’s already low difficulty.
The Summary: I’ve wanted to play The Legend of Zelda: The Minish Cap for the longest time. Finding a physical copy was expensive, even unboxed, so I consoled myself with the knowledge that it would be another Zelda game that passed me by…until I upgraded my Nintendo Switch subscription and finally dug into it. Visually, the game is very impressive; colourful and lively, The Minish Cap is like playing a cartoon and I really enjoyed how it translated a Wind Waker aesthetic onto a traditional Link to the Past formula. The core gameplay is as reliable as ever; Link has some fun new toys to play with that mix things up, like the Gust Jar and Mole Mitts, though I do feel these could’ve been emphasised more. Similarly, the shrinking mechanic became tedious after a while. Generally, it’s simply anther way to get from one place to another and fuse with different NPCs rather than changing the puzzles in a meaningful way. Likewise, while the graphics represented these sections well, I think the developers could’ve done more with it, such as more bigger enemies and obstacles that meant using the duplication feature in interesting ways, rather than just hitting switches. Ezlo was also a pain in the ass, thankfully rectified in the post-game, and the Kinstone fusing got old quickly, too. This mechanic replaces traditional fetch and trading quests and is used as a shorthand for everything, limiting your exploration options and adding an element of grinding. The bosses were fun, if too few in number, but Vaati wasn’t the most enigmatic or threatening villain and the story felt uncharacteristically low stakes for a Zelda game. As a spiritual successor to A Link to the Past and the handheld games, The Minish Cap does well and the core Zelda gameplay is always enjoyable, but I don’t think this one lived up to its full potential and it ended up being more of a chore at times.
My Rating:
⭐⭐⭐⭐
Rating: 4 out of 5.
Great Stuff
Was The Legend of Zelda: The Minish Cap a staple of your Game Boy Advance library back in the day? Were you a fan of the Wind Waker art style and, if so, what did you think to the way it was implemented here? Did you enjoy the shrinking mechanic and the Kinstone fusions or did they become tedious for you, too? Did you ever fuse every Kinstone and collected every figurine? What did you think to Vaati as a villain? Would you like to see the Minish return? Which Zelda game is your favourite and how are you celebrating the franchise this month? Whatever your thoughts, share them below and be sure to check out my other Zelda content on the site.
Upon the release of Pokémon: Blue Version and Pokémon: Red Version(Game Freak, 1996), a new craze swept through playgrounds. An entire generation grew up with Pokémon, as clever marketing saw it become a massively lucrative and popular multimedia powerhouse. Accordingly, February 27th is recognised as “National Pokémon Day”, which I expanded to an entire month of Pokémon this February, which is even more fitting given that February 6th is the day that Mew gave birth to my favourite Pokémon, Mewtwo!
Released: 10 May 2019 Director: Rob Letterman Distributor: Warner Bros. Pictures Budget: $150 million Stars: Justice Smith, Ryan Reynolds, Kathryn Newton, Bill Nighy, Suki Waterhouse, Ken Watanabe, and Rina Hoshino/Kotaro Watanabe
The Plot: When his ace detective father goes missing, Tim Goodman (Smith) reluctantly teams up with his Pikachu partner (Reynolds) and aspiring report Lucy Stevens (Newton) to unravel the mystery.
The Review: Pokémon: DetectivePikachu takes place in Ryme City, a bustling, neon-drenched metropolis billed as a utopia for humans and Pokémon alike to live and work together in harmony. The city was built by billionaire tycoon and Pokémon advocate Howard Clifford (Nighy), a disabled visionary who poured his heart and soul into protecting Pokémon and fostering positive relations between them and humans. Much of this is related to the audience during Tim’s train ride to the city and in a format not unlike the “Welcome to the World of Pokémon” introductions included in many of the animated features, and is a fun way to show how Ryme City sets itself apart from other regions and locations. There, Pokémon battling is banned and people are discouraged from having PokéBalls. The relationship between humans and Pokémon is supposed to be more symbiotic and mutually beneficial, though that doesn’t stop everyone Tim meets asking where his “partner Pokémon” is. We’ve seen similar cities to this in the videogames and anime; indeed, the idea of humans working alongside Pokémon has been present since the first games. However, it’s presentation in this decidedly Blade Runner (Scott, 1982) inspired environment is not just to stuff in a load of Pokémon cameos but also to acclimatise viewers to the idea that, in this world, Pokémon are real and integrated into society. Still, the world of Pokémon: DetectivePikachu should be instantly recognisable to series fans and the film thankfully doesn’t bog down its run time with heavy handed exposition into its mechanics. This may be somewhat alienating to newcomers but it’s pretty clear from the title and the presentation who this film is aimed at, and I appreciate that it embraces the concept and plays it straight. It also has some tenuous ties to both the anime and the videogames: Mewtwo is said to have “escaped form the Kanto region” twenty years ago and Pikachu tearfully sings the anime’s original infectious theme song at one point, meaning the film can easily be seen as an extension of one or the other (or both, if you like). Layman viewers are tossed a bone in the main character, Tim, who is noticeably distinct from every other character he meets in that he doesn’t have a Pokémon partner and seemingly has no interest in the creatures.
Distraught Tim reluctantly partners with Pikachu to investigate his father’s death.
Again, this isn’t something new; the animated features often include characters either wary of or disinterested in Pokémon. Tim was an avid Pokémon fan as a kid; young Tim (Max Fincham) followed and participated in battles, collected the cards, and lived the Pokémon life. However, that all changed when his mother died; this drove a wedge between him and his father, who threw himself into work with the Ryme City Police Department, leaving Tim to be raised by his grandmother (Josette Simon) and grow up resenting both his father and the Pokémon he preferred to spend time with. Rather than growing up to be a Pokémon Trainer, Tim takes up a tedious job in insurance and has no interest in partnering with a Pokémon but ends up lumbered with his father’s cheeky Pikachu partner when he travels to Ryme City following his dad’s sudden death. Tim’s clearly shaken by his father’s demise and wrestling with conflicting emotions. He struggles to express himself when meeting with Harry’s friend, Lieutenant Hideo Yoshida (Watanabe), who relates that Harry always loved his son. This is little comfort to Tim, who’s clearly rattled at being denied the chance to get some closure and just wants to get home as quickly as possible. The deerstalker-garbed Pikachu completely upends that, however, since Tim can strangely understand the pint-sized detective. Tim initially reacts to this with shock and horror, believing he’s either going mad or has been adversely affected by a mysterious purple gas he discovers in Harry’s apartment. Even when he accepts that no one can understand Pikachu but him, Tim is reluctant to assist the Pokémon in figuring out what happened to his partner. Believing he lacks the same detective skills and expertise as his father, Tim repeatedly shuns Pikachu, who latches onto him out of desperation since he’s suffering from amnesia but feels it “in his jellies” that there’s more to Harry’s death than the media and the police want to admit. Pikachu’s insistence is infectious, and Tim reluctantly agrees to help with his investigation, aiding Pikachu by talking to humans for information while Pikachu interrogations Ryme City’s Pokémon. Though he’s uncomfortable carrying Pikachu on his shoulder and indulging his hairbrained theories, Tim proves a great asset when they question Harry’s informant, a Mr. Mime, leading to a hilarious moment where Tim threatens (through pantomime) to light the Pokémon on fire!
Aspiring journalist Lucy helps Tim and their investigation leads them to Clifford Howard.
Tim also provides Pikachu with the strongest lead in their muddled case when he’s accosted by aspiring reporter Lucy Stevens and her Psyduck (Michael Haigney). Struggling as an unpaid intern repeatedly ignored and chastised by her peers, Lucy is desperate to break a big story and senses that something’s amiss about Harry’s death. This is primarily because she has acquired several vials of the purple gas Harry was investigating, a strange substance known as “R” that temporarily drives any Pokémon that inhale it into a blind rage. Though he claims otherwise, Tim is clearly smitten by Lucy (and, honestly, I don’t blame him) and, while he doesn’t tell her the truth about Pikachu, he does review her notes and work with her to figure out what’s going on. Pikachu tries to help Tim flirt with and grow closer to Lucy, but despairs when Tim proves to be awkward around her and lack game. However, Lucy doesn’t seem to mind and finds the troubled young man charming, even when he’s stumbling over his words or making a fool of himself. While Yoshida believes Harry perished in a car crash, Clifford’s advanced holographic technology shows the detective survived and that both Mewtwo and Pikachu were at the scene, compounding the mystery further by naming his resentful son, Roger (Chris Geere), as the one behind the R. Thanks to Lucy’s digging, Tim learns of an abandoned research facility where Mewtwo was held against its will and harvested to synthesise R, and all signs point to the genetically engineered Pokémon turning its wrath on its captors and, by extension, Harry, who was contracted to capture it. Though this is clearly the big break Lucy has been looking for, she never abandons Tim in favour of getting her scoop like some fictional journalists. Indeed, they remain united throughout the film, working together to help each other, though Lucy continues to run into obstacles when she desperately tries to warn Ryme City’s inhabitants about the R gas in the final act.
Though suffering from amnesia, Pikachu is determined to solve the mystery of Harry’s disappearance.
Since he isn’t a detective, Tim’s at a loss about how to investigate his father’s death and even more helpless at uncovering proof that Harry survived. Thankfully, Pikachu is more than capable of carrying the bulk of the detective work. Though he’s suffering from amnesia, he’s no less determined to root through newspaper clippings, articles, photographs, and unturn any stone to find some kind of connection. Fuelled by caffeine and an insatiable lust for solving a good mystery, Pikachu tackles the investigation with gusto, chattering a mile a minute and standing up to any challenge. This bites him in the ass when he and Tim infiltrate an illegal underground Pokémon battle run by Sebastian (Omar Chaparro) and Pikachu’s forced to battle a voracious Charizard to get information from Sebastian, a sequence that showcases Tim has retained knowledge of Pokémon battles, but the amnesia has caused Pikachu to forget how to fight! Pikachu’s stunned to see he was at the scene of the crash and heartbroken when the Pokémon Comprehensive Laboratory (RCL) footage suggests that he betrayed Harry and led to his death/disappearance by freeing Mewtwo. Tim, Pikachu, Lucy, and Psyduck’s desperate escape from RCL sees them eluding not just a contingent of Greninja but also nearly crushed to death by giant Torterra masquerading as a forest, further results of the RCL’s horrific Pokémon experiments. Pikachu is gravely injured during the escape, which deeply upsets Tim. Despite him shunning Pikachu, and all Pokémon, he comes to connect with the adorable pint-sized detective and is devastated at losing him, both because he considers him a friend and partner and also because he’s the last link to a father he never knew. Luckily for them, some local Bulbasaur guide them to Mewtwo, who heals Pikachu and adds a touch more exposition to what really happened before being ensnared by Roger’s drones. However, this brief glimpse leaves Pikachu despondent and he wanders off, believing he’s a danger to everyone, only to stumble upon the crash site and realise it was the Greninja who attacked Harry’s car, not Mewtwo, and rush to help Tim confront the true mastermind behind the film’s events.
The Nitty-Gritty: Given the movie’s title, it should be no surprise that Pokémon: DetectivePikachu is primarily a mystery story. There’s the obvious mystery surrounding Harry’s unexpected death, which evolves into a mystery about whether he survived or not, what happened to him after the fact, and what role Mewtwo and the Cliffords played in it all. Pikachu, Tim, and Lucy are united in investigating this conundrum, which intersects with all their lives: Lucy’s been investigating the R gas, which was found in Harry’s apartment and produced at RCL, with each step piecing more of the puzzle together for them. Along the way, they’re hounded by numerous obstacles: first, the R gas turns some Aipom rabid, showcasing how dangerous the gas can be, then Tim and Pikachu have to survive a battle with a similarly enraged Charizard, and finally they face persecution from Roger and his minions as they seek to recover Mewtwo and cover up their tracks. All the while, they’re shadowed by Clifford’s mysterious and unnerving bodyguard Ms. Norman (Suki Waterhouse), who turns out to be a Ditto in disguise, and forced to flee from every confrontation since Pikachu cannot remember how to fight and Psyduck’s powers are too unpredictable to be reliable. This means Pokémon: DetectivePikachu doesn’t have many traditional Pokémon battles or mechanics, a fact only exacerbated by Ryme City outlawing battles. Indeed, Sebastian’s arena is the closest thing we get to seeing Pokémon battles; the rest of the time, the characters are fending off or running from Pokémon driven into a frenzy by R. It’s an unusual approach but it seems to serve the narrative well. This isn’t the traditional story of an aspiring Pokémon Trainer earning badges and overcoming a nefarious team of criminals. It’s a young man desperately trying to figure out what happened to his estranged father in a colourful and chaotic world where Pokémon of all shapes and sizes exist.
Many Pokémon are brought to life but the effects often suffer as a result.
The idea of doing a live-action Pokémon movie had been doing the rounds for some time and many aspiring digital artists had tried to show how the concept would work on the likes of Deviantart, with these efforts being pretty close to the final result. Pokémon: DetectivePikachu is stuffed with all kinds of Pokémon, from Machamp and Snubble working with the police department, to firefighting Squirtles and various Flying-Type Pokémon soaring through the skies of Ryme City. Charmanders walk the streets, Jiggypuff (Rachael Lillis) sings karaoke, Greninja hunt our protagonists, and gigantic Torterra shift the very landscape and it’s all taken entirely in stride. There’s literally nothing unusual about these creatures wandering around as they like and the integration of Pokémon into human society is fun to see, though the CGI can be questionable at times. It’s obvious that most of the work went into bringing Pikachu to life; he’s the most detailed, expressive, and nuanced of all the film’s Pokémon. Everything from his little red cheeks, his glassy and vivid eyes, and the tufts of fur on his body are beautifully brought to life, and he interacts seamlessly with Tim at all times. The same isn’t true of most other Pokémon, unfortunately. While Gengar looks great rendered as a gaseous, leering spirit, Charizard, Machamp, and even Psyduck appear a bit too cartoony. This is largely because the filmmakers stick very closely to the Pokémon’s original designs, which is commendable and definitely brings them to life, but results in them sticking out against the more realistic backgrounds. It’s a bit like Who Framed Roger Rabbit (Zemeckis, 1988) but, whereas it made sense for the Toons to appear as living cartoons, it doesn’t quite work for these supposedly real creatures to appear so fake. I definitely think it works for the most part and I’m impressed that Pokémon: DetectivePikachu includes so many Pokémon and integrates them so well, but I do wonder if the effects might’ve been better served by focusing on a handful of Pokémon. Like, maybe if Ryme City were a little different and Pokémon are largely banned and Clifford was trying to change that, so you’d only see a few different types of Pokémon, freeing the animators to make them look as good as possible. It’s a minor thing, but a noticeable one, for sure.
Tim stops Clifford’s mad plot and Mewtwo finally reunites him with his father.
Sadly for me, the Pokémon who suffers the most from this is Mewtwo. Appearing sleek and eel-like, it lacks the armoured, menacing appearance it usually exudes, though it’s no less threatening in its actions. Once again captured and experimented on, Mewtwo flies into a rage and destroys its facility, but is unable to save Harry from the Greninja attack. However, his loyal Pikachu offered to house Harry’s consciousness until Tim could be brought to Mewtwo to reunite Harry with his recuperated body. These revelations all come after it’s revealed that Clifford’s Ditto has been posing as Roger all along (or, at least, for much of the film) and that Clifford was behind everything. Interestingly, Clifford’s goal isn’t world domination or power; it’s to transfer his consciousness out of his crippled body and into the most powerful Pokémon of all. Successfully possessing Mewtwo’s body, Clifford unleashes the R gas throughout Ryme City using a balloon parade, turning all Pokémon feral and leaving them susceptible to his Psychic powers. Again, this isn’t to control them, but rather to use Mewtwo’s hitherto-unknown ability to merge a human’s consciousness with a Pokémon to literally unite the two species in a forced harmony and allow humanity to “evolve” into a better form. While the mismatched Pikachu battles Mewtwo atop the balloons, having rediscovered his Electric-based attacks, Tim fends off Ms. Susan, who assumes various forms (including an unsettling masquerade of Lucy) and removes Clifford’s control device from his prone body, breaking his connection to Mewtwo. Sadly, Lucy isn’t much help during all this as she’s infused with her Psyduck while trying to get the panicked civilians to safety, but she’s charged by the real Roger to break the story after Mewtwo restores everyone to normal. This includes Pikachu and Harry, who returns to full health as Ryan Reynolds and is delighted when Tim decides to stick around and build bridges with his estranged father.
The Summary: Pokémon: DetectivePikachu has a lot going for it. I really liked the design of Ryme City, how it mixed old and new technologies and East and West in its makeup and echoed the tech-noir design of Blade Runner to be both sleek and futuristic but also grimy and dangerous at the same time. I quite liked Tim’s character and his arc; it’s nothing especially ground-breaking but I think Justice Smith did a great job with the character’s emotions and charming awkwardness. I loved Kathryn Newton; she’s super cute and I liked that they didn’t have her simply be obsessed with her career and screw Tim over for her big break, though she does get a bit shafted in the finale. Ryan Reynolds was also great as the wise-cracking, coffee-obsessed Pikachu. Pikachu is as adorable as ever but given a fun edge through his snarky demeanour and obsession with cracking the case and figuring out what happened to his memories and his partner. It was a bit of a shame to not follow a more traditional Pokémon story and characters, but I think it works well for Pokémon’s first live-action outing. I feel the movie appealed to both long-term fans and newcomers by choosing this format and it help make the presence of these cartoonish creatures more acceptable by focusing on them as just an everyday part of life. Sadly, the effects can be a bit hit and miss; like I said, I think the filmmakers overreached a little by featuring a few too many Pokémon and the CGI does suffer at times as a result. Pokémon: DetectivePikachu also struggles a bit with its pacing; it seems to drag a little in the middle, making exciting sequences seem lifeless in the process, and I wonder if this could’ve been prevented by having Lucy be a Pokémon Trainer and thus injecting some traditional battles to keep the pace up. Still, it’s a fun and heart-warming film that appeals to kids and has some fun content for adults (mostly in Ryan Reynolds’ depiction of Pikachu), and it’s worth it just to see Bill Nighy go on a maniacal rant while possessing Mewtwo’s body!
My Rating:
⭐⭐⭐⭐
Rating: 4 out of 5.
Great Stuff
Did you enjoy Pokémon: DetectivePikachu? What did you think to the depiction of Pokémon in a live-action aesthetic? Did you like the mystery surrounding Harry and Tim’s depiction as reluctant partner to Pikachu? What did you think to Ryan Reynolds’ portrayal of Pikachu? Were you disappointed that there weren’t more traditional Pokémon battles? What did you think to the CGI and was your favourite Pokémon included here? How are you celebrating National Pokémon Day this year? Whatever your thoughts, drop them in the comments below and be sure to check out my other Pokémon content.
Story Title: “The Coming of…The Falcon!” Published: 3 June 1969 (cover-dated: September 1969)
Story Title: “The Falcon Fights On!” Published: 1 July 1969 (cover-dated: October 1969)
Story Title: “Now Falls the Skull!” Published: 30 July 1969 (cover-dated: November 1969)
The Background: World War Two was in full swing by 1941. Nazi Germany had barrelled through Denmark and Norway in April 1940 and, after initially resisting joining the war, the United States entered the fray and provided much needed support against the “Axis powers” of Germany, Japan, and Italy. Patriotism and national pride was high at the time, especially in America, and it was during these dark days that Joe Simon and the legendary Jack Kirby introduced readers Captain Steve Rogers/Captain America and his kid sidekick, James Buchanan Barnes/Bucky, to encourage support of the war effort. However, after the end of the War superheroes declined in popularity and Captain America’s solo comic was cancelled in 1954. Luckily, Cap got a second chance as a “man out of time” when he joined the Avengers, reigniting his superhero career and butting heads with such iconic villains as Johann Shmidt/The Red Skull and even eventually battling his fellow superheroes. In the aftermath of this civil war, Cap was left seemingly dead and his mantle passed to his troubled sidekick, now also a superhuman figure, who operated in the role until Steve’s inevitable resurrection and, in 2014, Sam Wilson took on the mantle, to much undue controversy. Created by Stan Lee and Gene Colon, the man better known as the Falcon was the first Black American superhero in mainstream comic books. Specifically created to be a trendsetter during turbulent times, the Falcon went on to have a lengthy career in Marvel Comics, though mostly as a bit-player until his promotion into the shield-slinging role of Captain America, and has achieved mainstream recognition thanks to Anthony Mackie’s celebrated portrayal of the character in the Marvel Cinematic Universe.
The Review: Sam Wilson’s debut in Captain America’s solo title came in the middle of a particularly trying time for the Star-Spangled Avenger. After almost having his identity made public, Cap was ambushed by his old foe, the gruesome Red Skull, who used the power of the Cosmic Cube to switch bodies with his hated enemy! As if being tapped in the body of a skull-faced Nazi wasn’t bad enough, the Cosmic Cube’s near-limitless power dumped Cap on a remote island home to the Exiles, a misfit group of would-be conquerors who hate the Red Skull with a passion. Observing through the Cosmic Cube’s omnipotent power, the Red Skull watches as the wheelchair-bound Franz Cadavus leads his venge-filled fellows in search of the one who robbed them of the Cosmic Cube’s power. When Cap crashes before them after falling from his hiding spot in a tree, he doesn’t even bother trying to explain the situation. Instead, he defends himself against Angelo Baldini and his deadly scarf, easily using his knowledge of his foe’s abilities to his advantage. Cap then uses his incredible agility to dodge Cadavus’s “murder chair” cannons, tossing sand in his eyes, and disarms Jun Ching. However, the numbers soon overwhelm the celebrated Avenger when Eric Gruning restrains him with his whip and “Iron-Hand” Jurgen Hauptmann closes in for the kill. For the observing Red Skull, the irony and glory of it all are too much to witness. Confident that his plot has succeeded, he decides not to witness his hated enemy’s final moments and turns his attention towards his greater goals.
Trapped in the Red Skull’s body, Cap nevertheless inspires young Sam to become a hero.
Consequently, the Red Skull doesn’t see the timely intervention of a falcon, later identified as “Redwing”, who distracts Iron-Hand long enough for Cap to fight him off with a swift uppercut. Redwing also helps Cap escape the iron grip of the brutish Ivan Krushki and, as Cap flees to the bushes, he notes that the bird seems to be trained, as if following orders. Cap surmises that the Exiles probably haven’t seen the Red Skull’s true face, so he removes the gruesome mask and manipulates his features with clay to move more freely around the island. In contrast, the Red Skull walks in the guise of Captain America, disgusted by the adulation and awe his appearance inspires and secretly conspiring to enslave everyone. The Red Skull revels in deceiving the masses, taking advantage of their goodwill, before deciding to further his victory against Captain America by destroying his enemy’s distinguished reputation. He is completely unaware that the Mental Organism Designed Only for Killing/MODOK and his beekeeper-suit flunkies at Advanced Idea Mechanics (A.I.M.) are working to render the Cosmic Cube they created powerless to avoid it being used against them. Back on the island, Redwing returns to his master, the jovial Sam Wilson, a lone vigilante against the Exiles. When Cap spots him, he thanks Sam for his assistance and learns that he’s a simple Harlem man who came to the long-peaceful island to organize a resistance against the Exiles. Sam relates that he had an affinity for birds since boyhood, communicating with them in a way beyond a simple animal trainer. When he unwittingly answered the Exiles’ call for a hunting falcon, Sam turned on them, unwilling to help them enslave others. While he initially laughs at Cap’s suggestion that he turn his love for falcons into a symbol, a costumed identity for the natives to rally behind, Cap soon organizes the creation of a garish outfit that will better suit his radical goals and dubs him “The Falcon”.
Despite this God-like power, the Red Skull doesn’t foresee Cap training a new ally.
Back in New York City, the Red Skull finally realises, with anger, that his protégés have failed to find or kill their quarry. Realising that Cap must’ve taken off his skull-like visage, he resigns himself to the inevitability that his enemy can’t hide forever. Yet, the Red Skull decides he’s not willing to aid the Exiles or simply blink Cap out of existence with his God-like power and thus doesn’t bother to look in on Cap or witness him bonding with his new friend, whose connection with Redwing constantly impresses the disguised Avenger. Cap teaches the Falcon the basics of superheroing…And by that I mean they spar on the beach, Cap instructing Sam how to fight properly and use an enemy’s momentum and strength against them. Sam’s experience fighting for survival on the mean streets of Harlem see him take to the training like a natural, quickly becoming stronger and more sure of himself, and Cap impresses upon him that he must embody his new identity whenever he’s wearing his awful costume. When the Red Skull is awoken by concerns of an overexcited rabble of Cap fans in the lobby of his hotel, he sees it as the perfect opportunity to discredit Cap’s name. He shouts at the hotel manager and berates the fans, spitting spiteful insults every chance he can get, and even ostracises perennial hanger-on Rick Jones, who had aspirations of becoming Cap’s new sidekick. While A.I.M. continue their experiments, Cap and the Falcon blindside the Exiles, easily besting them even though Cap’s speed and strength are lessened in the Red Skull’s body. The Falcon proves very adept, dodging Gruning’s whip and inspiring the natives to rise up and drive the Exiles into fleeing for their lives.
Ultimately, it’s A.I.M. who quash the red Skull’s dreams of ultimate victory,
Unfortunately for them, the Red Skull happened to be looking in. Angered and determined to finish his enemy and his new ally off, the Red Skull assumes his more familiar appearance and effortlessly teleports himself to Berchtesgaden Castle, where he once conspired with Adolf Hitler to conquer the world, ravenous to stage his final victory in the castle’s opulent halls. Cap and the Falcon are then violently transported halfway across the world to Berchtesgaden Castle. Though Cap bemoans getting the Falcon caught up in his ages-old rivalry with the skull-faced dictator, Sam vows to face the threat no matter the outcome, but is enraged when the Red Skull’s first act is to cage Redwing. The Red Skull feeds the Falcon’s anger and spirit, goading him into attacking so that he can repel the fledgling hero with a forcefield. Sam is then stunned when the Red Skull uses the Cosmic Cube to undo the mind and body transfer, reverting Cap to his colourful costume and rearming him once more. Galvanised by this revelation, the Falcon willing follows Cap into battle, despite the Red Skull encasing himself in a protective rocky shell and spontaneously conjuring a tidal wave that threatens to drown the two heroes. While the Falcon’s caught off-guard by such tricks, Cap warns of the Red Skull’s power and insanity, which see the villain whisk them to an arid desert. With Sam exhausted, Cap hurls his shield and, incredibly, causes the Red Skull to drop the Cosmic Cube! The two fight valiantly over the prize but, just as the Red Skull reclaims the Cosmic Cube, he watches in horror as it melts between his fingers thanks to MODOK and A.I.M. activating their “Catholite Block” and rendering the weapon inert. Despite this, the Red Skull uses the melting cube’s fading power to teleport away, leaving MODOK victorious and Cap and the Falcon to head into the sunset as triumphant new allies.
The Summary: I’m honestly not very familiar with the Falcon. This may very well be the first story I’ve ever read where he’s a part of the plot. I’m much more aware of his film counterpart and, honestly, never thought too much of him since his gimmick is very similar to Adrian Toomes/The Vulture, another character I traditionally find lacklustre compared to other, more colourful and appealing characters. However, his appearance here was enjoyable for what it was. There are some holes in his backstory, though, that the story didn’t satisfactorily explain for me. So, he’s a bird-lover, that’s great; he can communicate with Redwing on a near-telepathic level, sure, I’m all for that. But…why did he answer the ad for a hunting falcon? I mean, I guess he just wanted to leave Harlem and I can understand that, but it’s a bit random to jet off to a secluded island on a whim. Also, why did the Exiles need a hunting falcon anyway? Sure, they’re repeatedly shown to be useless at tracking their enemies but still…a falcon? And how did they place an ad for that when they’re exiled to the island? Still, Sam’s heart is in the right place; he won’t stand for injustice, especially slavery, and is determined to encourage the remaining natives to reclaim their land. It’s obviously a very racially and politically charged motivation and character, but I think it’s a universal truth we can all agree to: slavery and mistreatment of others is bad and should be opposed. Sam embodies this ideal before Cap shows up but lacks the proper means to enforce it. He seems to operate mainly from the shadows, but Cap encourages him to stand in the spotlight as a symbol for people to believe in, not unlike he is when in full costume.
It’s a good job Sam’s such a likeable guy because his superhero costume is unsightly!
Unfortunately for Sam, Cap and the natives whisk up one of the worst costumes I’ve ever seen. God, it’s so awful, with its lime-green and brown-gold edging, it’s weird-ass cowl and strangely angled boots. Considering Cap encourages him to take inspiration from his love and use the moniker “The Falcon”, nothing about Sam’s outfit screams “Falcon” to me. He doesn’t have a bird-like cowl like, say, Katar Hall/Hawkman, doesn’t match Redwing’s gold and red/brown feathers, and doesn’t even have his now-iconic wings. Just about the only thing this outfit has going for it is its sense of native tribalism, but otherwise it’s truly a ghastly sight. Luckily, Sam’s personality makes up for it. He’s not some jive-talking street tough or a shallow Blaxploitation cliché; he’s just a regular guy from Harlem with a friendly disposition who wants to do what’s right. His time on the mean streets toughened him, sure, but there’s no sense of malice or ego. The only time he shows any anger is when Redwing is threatened and when confronted by the embodiment of xenophobic oppression. Otherwise, he’s a level-headed, affable young man who luckily turns out to be a natural when it comes to learning how to fight. In a short time, Cap teaches Sam how to defend himself, how to fight smartly, and leads him into battle against the Exiles, a fight that puts them at a disadvantage due to the group’s numbers and weapons but which the heroes ultimately triumph thanks to putting their skills to good use. This also sees the Falcon inspire the natives to rise up, though this was very rushed for me. There was never any indication that the people even know the Falcon was heading into battle that day. All they knew was that Sam was wearing a costume now, not that he’d done anything worth riling them up. Of course, Sam’s natural abilities are only half the story; Redwing gives him a memorable gimmick that helps him stand out against his peers. The bird is exceptionally well trained and intelligent, turning the tide in every battle the Falcon is involved in and proving invaluable to their cause.
The story completely wastes the potential of the Red Skull’s unlimited power.
Beyond this, the story is a bit of a mess. I love the idea of the Red Skull attaining God-like power, and the Cosmic Cube effectively allows him to do anything. He can see anything he likes at will, switch bodies with people, teleport, conjure forcefields and the elements, and is functionally untouchable as long as the cube is in his hands. Unfortunately, the Red Skull is a cackling buffoon. Rather than simply will Captain America out of existence, he swaps bodies with him and dumps him on an island, where inept forces fail time and again to do his dirty work. Rather than reshaping reality in his image, brainwashing the masses and conquering the world a piece at a time, the Red Skull parades around in Cap’s body to take advantage of their goodwill, all while ruminating about how much he hates Americans and the many ways he’ll subjugate and destroy those around him. Rather than doing this, the Red Skull plots to destroy Cap’s reputation by…being rude to people! It’s ridiculous! He doesn’t even watch what’s happening on the island until it’s too late and gets so distracted bringing himself, Cap, and the Falcon to Berchtesgaden Castle that he doesn’t think to set aside his pride and just snuff their lives out with a thought. It’s typical, cliché supervillain behaviour to assume victory, bask in your superiority, and to toy with your enemies but I expected more from someone like the Red Skull! Despite demonstrating that he can protect himself from any attack with a thought, Shmidt is disarmed by a simple throw of Cap’s shield and then he completely fails to consider that A.I.M. might be angry at him swiping their most powerful weapon, leaving him undone not by his enemy, but by his own lack of foresight. Overall, this was a decent enough introduction for Sam Wilson; his costume was awful, but I liked his attitude and his gimmick. What lets it down, though, is the nonsensical main plot regarding Cap and the red Skull switching bodies. It’s a great concept but the story completely wastes it, having Shmidt lounge around thinking nasty thoughts but squandering his great power, leaving him undone in the lamest way possible.
My Rating:
⭐⭐⭐
Rating: 3 out of 5.
Pretty Good
What did you think to the Falcon’s debut story? Were you as repulsed by his costume as I was? What did you think to his moxie and his gimmick with Redwing? Were you also disappointed that the red Skull squandered his potential here? What are some of your favourite moments in the Falcon’s long history? There’s a comment section down below; use it to share your thoughts and then go check out my other Marvel content.
With the release of Sonic the Hedgehog 3(SEGA Technical Institute, 1994) on this day in 1994, gamers were introduced to Knuckles the Echidna. This mischievous, dreadlocked antagonist was created by Takashi Yuda and is my favourite of Sonic’s supporting cast so excuse me while I celebrate his debut today (every Sunday in February!)
Story Title: “This Island Hedgehog” (Part 1 and 2) Published: 16 May 1994 (cover-dated: August 1994) Writers: Mike Kanterovich and Ken Penders Artist: Dave Manak
The Background: When Sonic the Hedgehog made his dramatic videogame debut in 1991, he was an immediate hit thanks to SEGA’s aggressive marketing campaign seeing his debut title being bundled with the Mega Drive. Sonic the Hedgehog 2(SEGA Technical Institute, 1992) expanded his popularity and, suddenly, Sonic merchandise was suddenly everywhere! He was included not only in the Macy’s Day Parade, but in cartoons and numerous comic books. Following the initial four-part miniseries, which combined narrative elements of Sonic’s cartoon adventures, Archie Comics published what would become the longest-running videogame comic book of all time. In time, to better capitalise on Sonic’s continued popularity, Archie also produced various Sonic spin-off comics, with the Knuckles the Echidna sister series being the most prominent. Long before writers like Ken Penders lumbered Knuckles with a convoluted lore and launched a bitter lawsuit that forever changed Archie’s Sonic comics, Knuckles debuted in this issue as one of Archie’s many loose videogame adaptations.
The Review: Sonic and his perennial kid sidekick, Miles “Tails” Prower, first encounter Knuckles, the last of the echidna race and guardian of what was then known as the Floating Island, completely by chance. While flying through the skies of Mobius in search of Doctor Ivo Robotnik’s “hovercraft”, the two stumble upon a mysterious island in the sky. Interestingly, unlike in Fleetway’s comics, the two have no knowledge of the Floating Island and can thus only speculate how it stays afloat, with Sonic guessing (correctly, it turns out) that it’s held aloft by one of the (many) Chaos Emeralds. As the two come in to land to investigate further, unaware that they’re being watched by a mysterious, spike-fisted individual, their biplane is knocked from the sky by a literal “unwelcome mat” and Tails is forced to air-lift the duo to the ground. With no choice but to investigate further to find some way back to Knothole Forest, Sonic and Tails venture into a close approximation of Angel Island Zone and are attacked by an “Assaulting Batter Blimp” (essentially the “Fire Breath” mech from Sonic the Hedgehog 3, but with a far less intimidating white paint job). Assaulted by the blimp’s flame bursts, Sonic is randomly shielded by “some sort of energy shield” (visually similar to his Insta-Shield ability, though Sonic seems unaware of how this happened) and forced to dive into the nearby water. Caught in an inescapable current and blasted past spikes and through crumbling walls in what I guess is supposed to be Hydrocity Zone (but which looks more like Labyrinth Zone), the duo find themselves blacking out from the strain and the force of the suction. They awaken in a dark room with their arms and legs bound and are stunned when they’re greeted by Knuckles, who steps from the shadows and introduces himself as the island’s guardian.
After Sonic and Tails prove their innocence, Knuckles joins them in fighting Dr. Robotnik.
Knuckles also reveals that he’s formed a friendship with Dr. Robotnik, who’s fed him lies about the two’s intentions to steal the island’s Chaos Emerald! Dr. Robotnik observes the events with glee alongside his long-suffering right-hand and nephew, Snively, and reveals that he’s misled the naïve echidna in order to steal the Chaos Emerald for himself to recharge his hovercraft. Having successfully duped Knuckles, Dr. Robotnik sits back and watches as the echidna’s riled up by Sonic and Tails’s defiant attitude. Still, Knuckles offers to give them ten minutes to get off the Floating Island before he hunts them down like wild dogs. While Sonic and Tails instead resolve to use the time limit to prove their innocence, Dr. Robotnik berates Knuckles for not finishing off the “jewel thieves” when he had the chance. Thus, Dr. Robotnik moves up his schedule and, after snatching the Chaos Emerald from his minion, Crabmeat, prepares to enact his dastardly plot. Angered that Sonic and Tails are still hanging around, Knuckles takes a short-cut to the Chaos Emerald and is horrified to find it’s been swiped from its simple stone pedestal. When Sonic and Tails arrive immediately after, Knuckles realise that he’s been duped and demands to be taken to Dr. Robotnik. The three arrive just as the semi-cybernetic dictator is preparing to take off and, after swiping the gem, reduce his SWATbot guards to scrap metal. However, Dr. Robotnik manages to elude them by powering up his hovercraft (how he does this without the Chaos Emerald is beyond me) and awkwardly escaping across the sea. To thank his newfound allies, Knuckles gathers the pieces of Sonic’s trashed plane so Sonic can reassemble it at super speed and then sees the two off, sure that it won’t be the last time their paths cross.
The Summary: My first observation about this story is that the art is pretty atrocious. A lot of it was back then in the Archie comics as their artists opted for a more cartoony approach to these characters, one that emulated the cartoons that inspired them, yes, but which was also somewhat dumbed down and a far cry from SEGA’s official artwork. Most of this criticism is aimed towards Knuckles, who looks decidedly off-model here. Judging by the poses he strikes and the limited exploration of Sonic 3’s environments, I wouldn’t be surprised if the writers and artists only had access to limited materials to produce their story. It seems like they had footage or screenshots of Angel Island Zone (at least Act 1) and Hydrocity Zone and images of Knuckles, and that was it as this story explores even less of the Floating Island than in the Fleetway adaptation! As was the style at the time, “This Island Hedgehog” is seemingly more concerned with awful puns and pop culture references than emulating the source material. While the “unwelcome mat” was kind of funny, ““plane” crazy” was very cringe, Tails’s reaction when Sonic says they should “hit the drink” probably went over most kids’ heads, and “cute” references to Super Mario and the 1960s Batman television show just come across as corny. Sonic’s “energy shield” really bugged me since it appears out of sheer convenience to save him from being roasted, is never seen again, and never gets explained. Again, it’s like the writers just watched some footage of Sonic 3 and had no idea how the Insta-Shield works, making its inclusion even more egregious than how Fleetway handled it. Couple that with the Master Emerald and Hidden Palace Zone shrine being reduced to a simple, run-of-the-mill Chaos Emerald and a pile of rocks, and that Dr. Robotnik’s plot is to power up his hovercraft rather than the Death Egg, and you have a very poor representation of the source material, even by Archie’s standards!
More focused on bad art and worst puns, this story is a poor showing for Knuckles and Sonic 3.
I wish I could say that Knuckles, at least, comes off well, but it’s a bit of a mixed bag, to be honest. I liked that he was kept hidden, seen as merely a fist and speech bubbles for most of Part 1, and that he was shown to be responsible for the traps and pitfalls that deter Sonic and Tails. His reveal was somewhat dramatic, but a far cry from how he made an immediate impact in Sonic 3 and his impactful introduction to Sonic in Sonic the Comic. I will say, though, that I liked Knuckles’ more relaxed way of speaking (he often drops g’s from his words) and that he gave Sonic and Tails a fighting chance to leave the island, showing he has some pride and honour despite being duty-bound to protect his home. He’s still easily fooled by Dr. Robotnik (though we’re not seen how) and quick to assume Sonic and Tails are jewel thieves based on paltry evidence, but he’s also seen to be quite eloquent and intelligent rather than a meathead. However, in saying that, we don’t get to see any of Knuckles’ abilities here: he’s not seen gliding, digging, or climbing and never throws a punch. Sure, he and Sonic trash some SWATbots but the action is obscured by sound effects and dust, so there’s no indication of his physical strength…again, almost as though the writers only had promotional art to work from. Knuckles does part on far friendlier terms with Sonic and Tails than in most adaptations, however, but is a far cry from the character he should be. The story is also an extremely weak adaptation of Sonic 3, serving only to touch upon the most basic of elements and leave the door open for further adventures. Perhaps if Archie has spread the story out across a few issues, or dedicated this entire issue to Sonic dealing with Knuckles rather than wasting pages with a back-up story, things might’ve been different but, as is, this is probably the worst comic book adaptation of Sonic 3 I’ve ever read!
My Rating:
⭐
Rating: 1 out of 5.
Terrible
What did you think to Knuckles’ first appearance inArchie’s Sonic comics? Were you also disappointed by how poorly he and Sonic 3 were represented here? What did you think to Dr. Robotnik’s drastically reduced plot for the Chaos Emerald? Which of Archie’s Knuckles stories and/or characters was your favourite and why? Are you celebrating Knuckles’ debut this month? Whatever you think about Archie’s Sonic comics, and especially Knuckles, leave a comment down below and let me know, support me on Ko-Fi, and check out my other Knuckles content!
January sees the celebration of two notable dates in science-fiction history, with January 2 christened “National Science Fiction Day” to coincide with the birth date of the world renowned sci-fi writer Isaac Asimov, and HAL 9000, the sophisticated artificial intelligence of Arthur C. Clarke’s seminal 2001: A Space Odyssey (1968), being created on 12 January. Accordingly, I dedicated all of January to celebrating sci-fi in all its forms.
Released: 30 September 1998 Developer: DMA Design
A Brief Background: Developed by DMA Design, the team behind classics such as Lemmings (1991) and the original Grand Theft Auto (1997) and who would go on to be rebranded to Rockstar North to spearhead the subsequentGrand Theft Auto franchise, Body Harvest had a tumultuous development history. An early example of open-world gameplay, Body Harvest was initially planned as a launch title for the Nintendo 64. Unfortunately, the complex nature of the ambitious gameplay mechanics prevented that. Language barriers also caused issues for the Dundee-based team, who drew inspiration from B-movies and sci-fi classics when conceiving the time travel plot. Nintendo of Japan had many notes regarding this, wishing the narrative to be simplified, and the initial idea to incorporate role-playing mechanics was ditched in favour of a more mission-based structure. While Body Harvest received only average reviews, it’s been praised as a hidden gem for the console thanks to its many gameplay mechanics and replay value.
First Impressions: Body Harvest is one of the Nintendo 64’s more obscure and ambitious titles, primarily because it takes place in a very large (if, often, very empty) open world and affords you a great deal of freedom regarding exploration. As related through the open text and cutscene, you take control of genetically engineered soldier Adam Drake, who battles bug-like aliens who routinely return to Earth to harvest humans. With the aid of a time machine, Adam (and therefore the player) visits various historical locations over a 100-year period before confronting the enemy head-on on their artificially created comet. Body Harvest is a 3D, third-person shooter with puzzle solving elements and vehicular sections, and a lot of back and forth between locations sprinkled in as aliens teleport in and attack the area. Players can interact with their environment (open doors, pull levers, talk to non-playable characters (NPCs), check drawers and chests for goodies, light candles, etc) with A, fire their current weapon with Z, and hold the Right trigger to enter a targeting mode to better blasts alien bugs. While shooting in this mode, you can press C-Left or C-Right to dodge roll out of harm’s way or press C-Down for a complete turnaround. You can switch weapons by pressing up and down on the directional pad, take calls from Daisy (who alerts you to alien attacks and objectives), and view a larger (though surprisingly unhelpful) map from the pause menu. A mini map is also present but, while it shows you vehicles and enemies, it’s not the best at pointing you in the right direction so you’ll be doing a lot of jumping between active gameplay and the pause map to make sure you’re going in the right direction. Adam can swim, but not for long, and can replenish his health, ammo, and fuel by grabbing pick-ups dropped by enemies or found in people’s houses
Blast alien scum in this fun, but clunky and incredibly challenging, obscure N64 title.
Adam starts the game with his default pistol (which has infinite ammo), but you can also grab a machine gun, shotgun, rocket launcher, and TNT for blowing up boulders blocking your way. Each level hides three Weapons Crystals and three Alien Artifacts; finding the crystals grants you a unique, powerful alien weapon and finding the artifacts allows you to replay the boss battle. You’ll also make use of the Sun Shield, another infinite ammo weapon that burns up bugs and lights torches, and hop in various vehicles with C-Down. Each vehicle handles differently, with trucks chugging along, motorcycles blasting away at breakneck speed, and tanks crashing through gates and trees. Most vehicles see you switching to the machine gun by default but tanks fire an infinite gatling gun or mortar cannon, though you must keep an eye on your fuel and vehicle health. You can also jump in fire engines to extinguish fires and, eventually, pilot various planes and even the all-powerful Alpha Tank. A degree of auto aim helps with the shooting sections, which are where Body Harvest shines. It can be hectic attacking bugs as they’ll attack buildings and eat or capture NPCs, forcing you to quickly take them out to add to your high score and keep from failing because the environment has been too badly damaged. Each stage is broken up into at least three sections, separated by a boss battle (against an alien “Processor”) and a shield wall. The only way you can save the game is by defeating these bosses, meaning you can lose a lot of progression very quickly if you don’t stay healthy. Adam (and the game’s vehicles) can be a bit clunky to control, moving very slowly and utilising “tank” controls. He’s also quite fragile, falling down dead from sustained attacks and even drowning if you stay in water for too long, with no lives, checkpoints, or respawn points to help you if you make a mistake.
Solve puzzles, save NPCs, and blow up large alien Processors to progress.
I played Body Harvest as a kid and loved it. Something about the graphics, as blocky and simple as they are, and the bug-blasting action really stuck with me, even though the game was always difficult. You get two difficulty settings (“Hero” and “Zero”), though the game cannot be completed on “Zero” and is pretty unforgiving at times no matter which one you pick. Adam is a big, lumbering target, vehicles struggle to turn and get up hills, and ammo isn’t exactly plentiful. There are some puzzles to deal with, too, like searching for keys or pulling levers to lower bridges. As long as you enter every building and chat with NPCs, you should figure these out but Daisy’s not much help at delivering specifics so an online guide is recommended. There are also some handy-dandy cheats to help you out; by naming one of your three save files ICHEAT, you can activate these with in-game button presses. These grant you all weapons, stronger firepower, weaken bosses, turn Adam into his dark doppelgänger, and even make him dance. Sadly, while you can fully replenish Adam’s health, there’s no invincibility, which really handicaps my ability to overcome Body Harvest’s immense difficulty curve. It’s not even really the difficulty; it’s the lack of check- and save points that really cuts the legs out from the game. Thus, unfortunately, I couldn’t even clear the first stage, which takes place in Greece in the 1900s. It didn’t help that the game’s thick with fog and slowdown, but I gave up shortly after beating the first Processor. Just getting to this had me wandering around the ruin-strewn valleys looking for a key to the military hanger, putting out fires, and being crushed by alien mechs. These all explode in a spectacular splatter of alien gore, which is very satisfying, but it’s not very fun when you’re at full health and then get clobbered down to nothing. I blew open the boulder, jumped in the Panzer tank, and defended the monastery and village from attacks, but got screwed by the mortar-firing Humber and died shortly after exploring an underground passage.
My Progression: I was determined to beat Body Harvest on at least the “Zero” setting but failed miserably. It’s just a very tough, obtuse, and clunky game. The map seems very big from the map screen, but the environments are quite small, which is actually helpful as you’ll be doing a lot of backtracking and exploring. Looking ahead on the Greece stage, it seems you eventually get a crash course in aviation, have your first run-in with Adam’s alien twin, and take control of a boat to reach new areas. I was screwing about trying to find a boat when I died on my last attempt, so I don’t think I was too far from the second Processor but my motivation for trying dwindled after this death. If the game employed a lives system, these issues would be immediately circumvented. Indeed, it’s very unusual to play a Nintendo 64 game that doesn’t have a lives system and it unfortunately makes Body Harvest unnecessarily difficult and inaccessible. You can use the ICHEAT and refill health code to help, but it’s not going to do you much good if the “human” damage bar fills up or you get caught in a crossfire, ending your run and forcing you to restart from the last save point (or, worse yet, the level’s start!)
Unfortunately, the game’s too difficult for me to experience the later stages and bosses.
It’s a shame as there are some unique and fun looking stages later in the game. Players travel to the swamp-like Java, an American city, hop in a Scud missile launcher in frigid Siberia, and blast around the alien’s home comet in the all-powerful Alpha Tank. There, if you survive the onslaught of aliens and their projectiles, you’ll confront their mastermind, a brain in a jar, and Adam’s doppelgänger, who apparently transforms into a monstrous form. You’ll pilot a gun boat, test drive an experimental submarine, and commandeer a UFO to track down and destroy Black Adam’s (not that one) doomsday devices. It all sounds, and looks, very thrilling and I wish I could’ve experienced it with some kind of level skip or invincibility cheat, or if the game were a little more forgiving or had a lives system. Honestly, your best bet is to get a Gameshark or similar cheat device as Body Harvest is one of the toughest games ever, never mind on the Nintendo 64. It’s insane to me, honestly, that the game is so punishing. By the time Body Harvest came out, regular save points were well established on the system, either using the cartridge or a Memory Pak. There’s no excuse for not allowing manual saves or dropping in more save points to help players out but, again, simply having a lives system would’ve been enough. Start Adam with three lives and have him pick himself up or respawn after a life’s lost, then hide lives in buildings or behind score points. Instead, I’d wager very few players managed to get past Greece and, even then, were probably stunned to find the game ended prematurely on the “Zero” difficulty.
Body Harvest is at its best when you’re blasting aliens or driving around and blasting aliens. The on-foot sections and puzzles are clunky and boring, the environments don’t lend themselves to exploration, and the visuals are subpar considering some of the titles that were available at the same time. I’d love to see more of it but it’s too frustrating to keep me motivated to try so, sadly, it goes back on the shelf as a piece of nostalgia that I cannot crack. The alien bugs look great, as do the vehicles, but buildings and character models are very basic, blocky, and forgettable. Even Adam doesn’t impress with his plodding orange armour and inability to jump or control well. The sheer amount of wandering about, pulling levers and exploring, probably explains why the alien processor isn’t much of a fight, especially in the thick-hide of the Panzer tank. It just sits there, firing energy bolts, and blows apart after a few hits. If you collect the level’s unique alien weapon, these battles are apparently even easier, though I don’t think you can access the weapon in the first area alone. But perhaps you had better luck. Maybe you easily blasted through the levels despite the lack of save points. Perhaps you easily assembled the Weapons Crystals and took out Black Adam. If so, I’d love for you to tell me how in the comments.

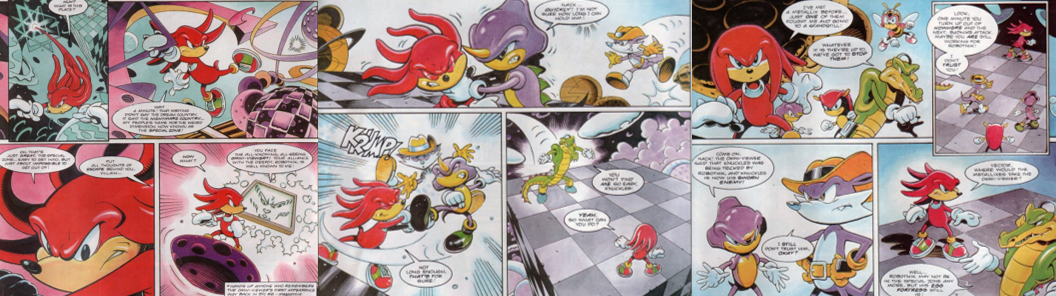
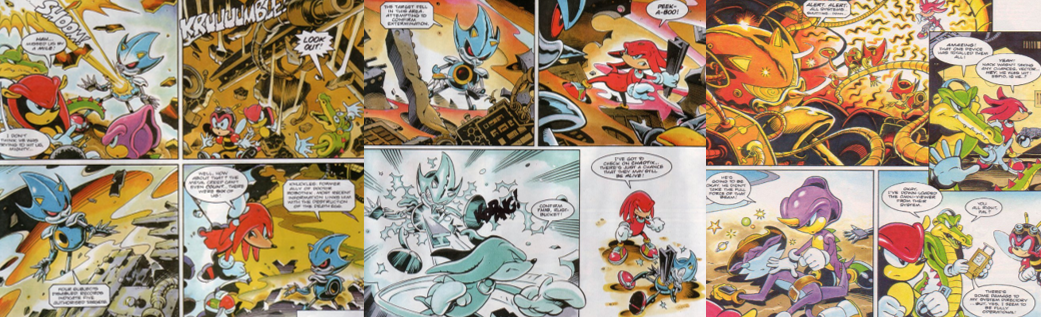
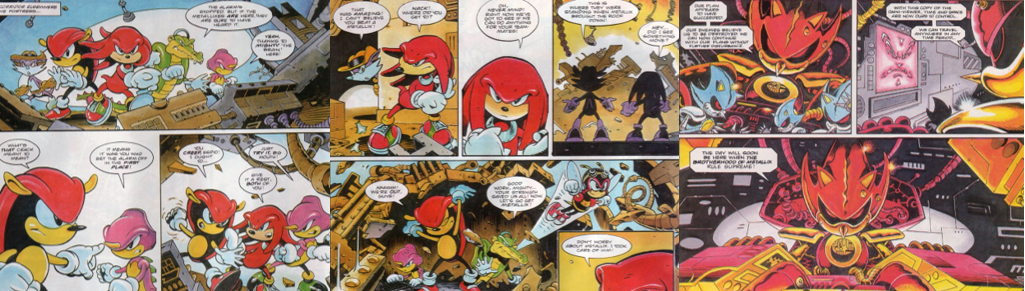


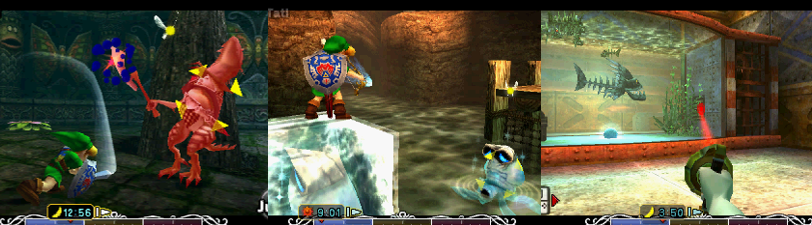
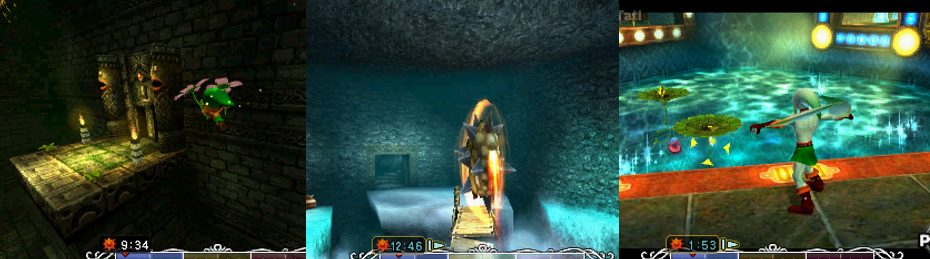
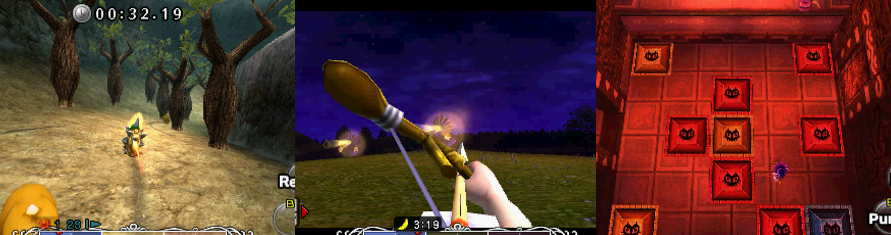
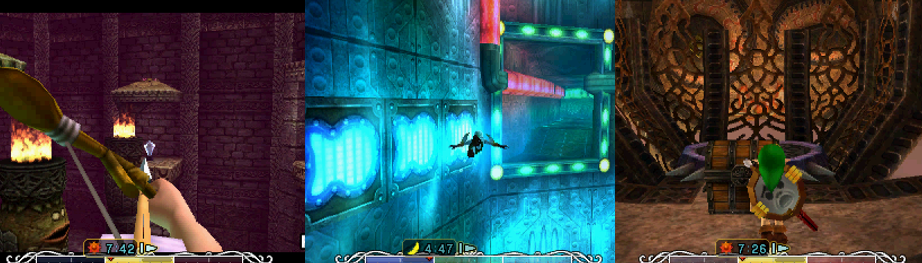
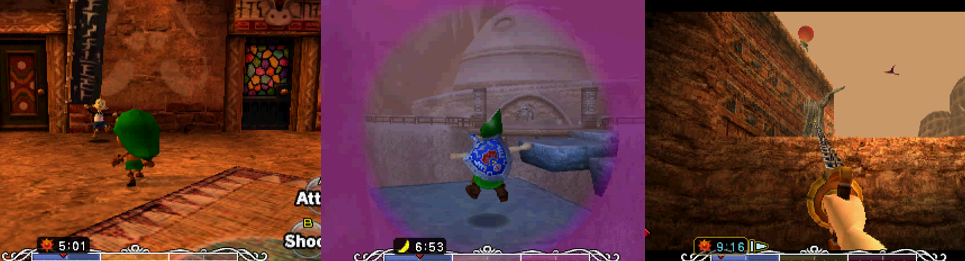
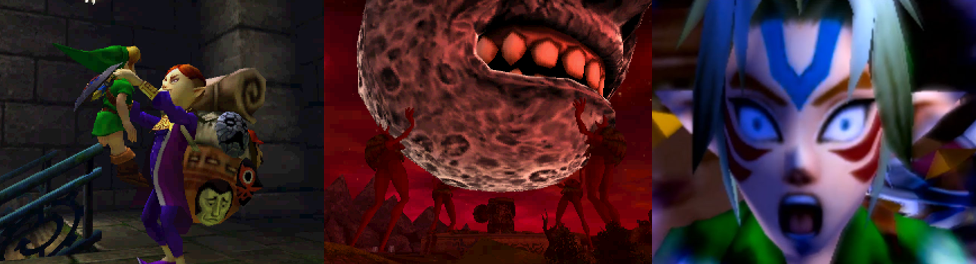

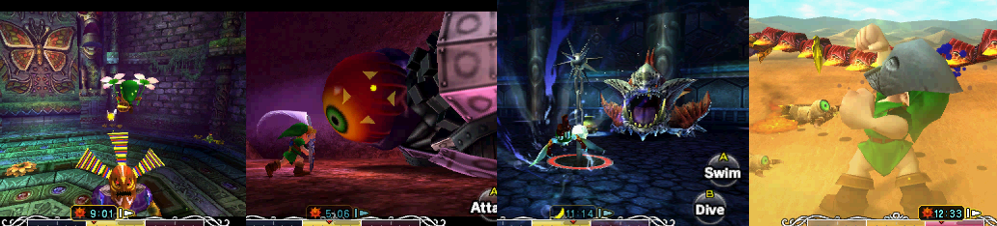


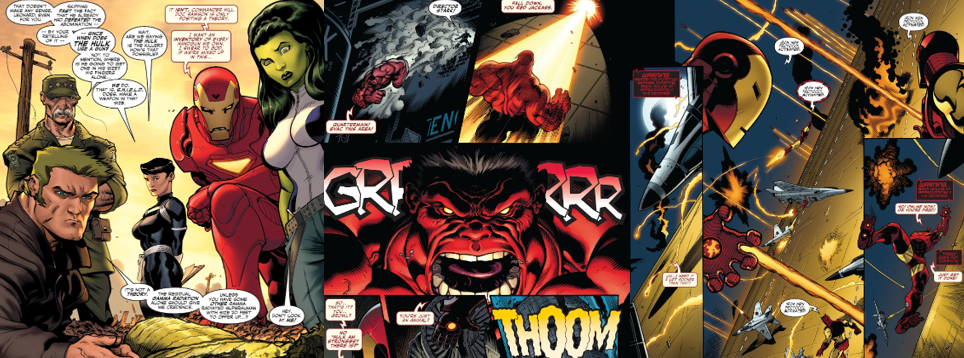
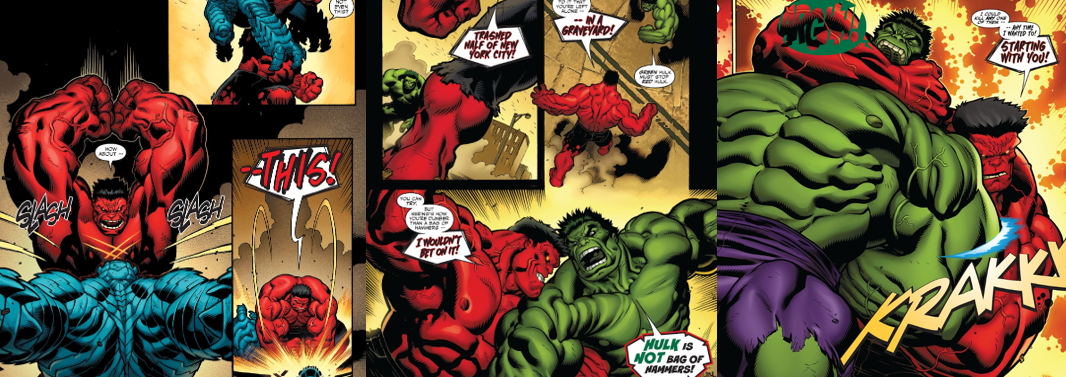
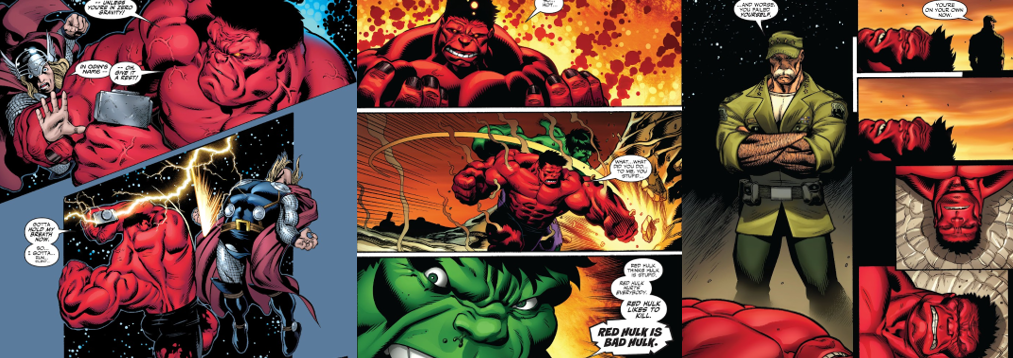
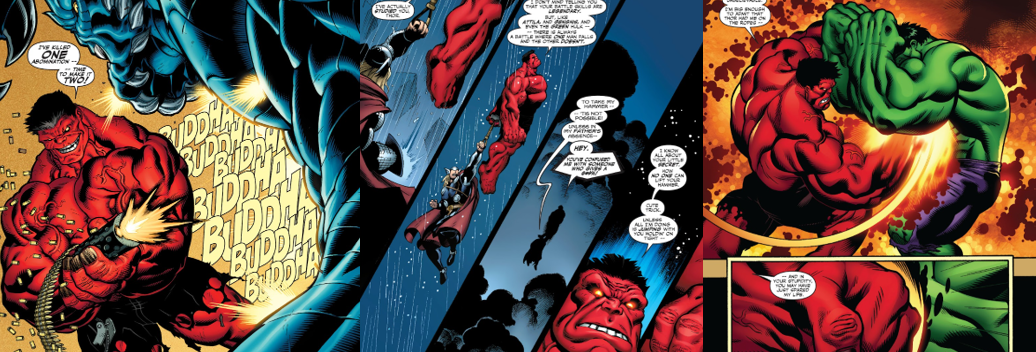
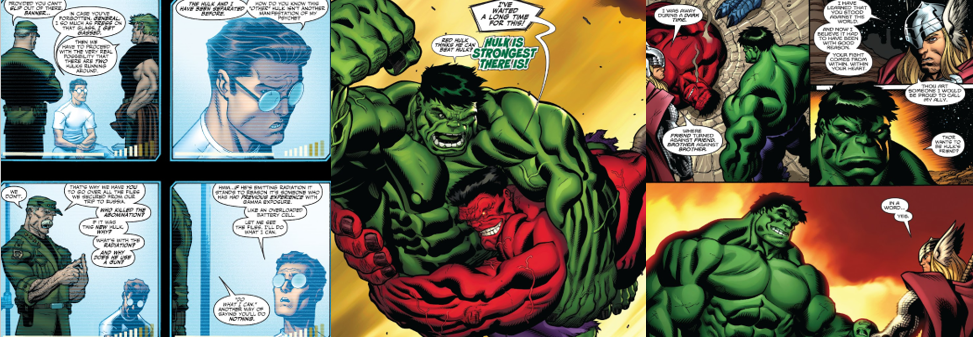


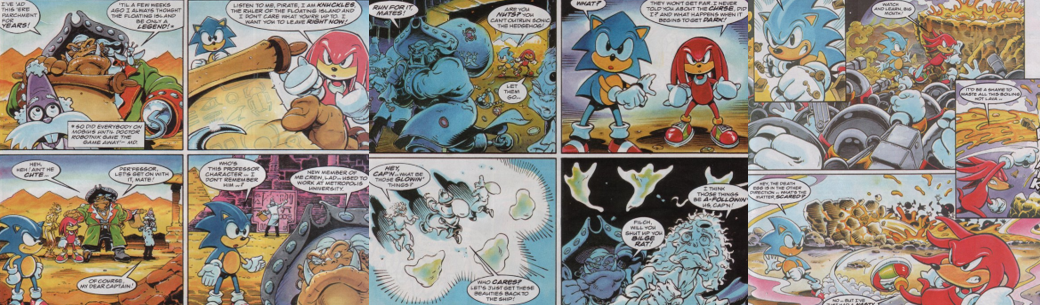


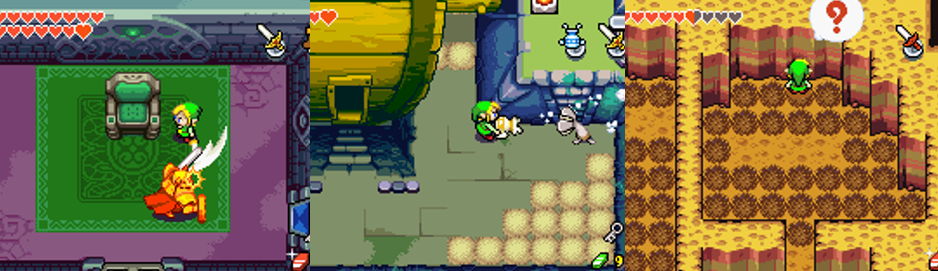
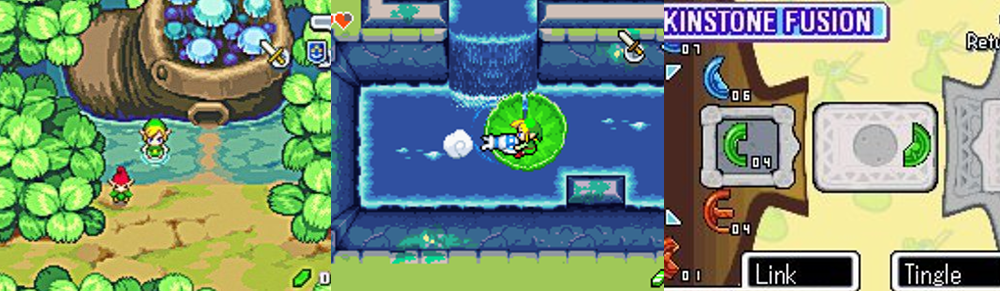
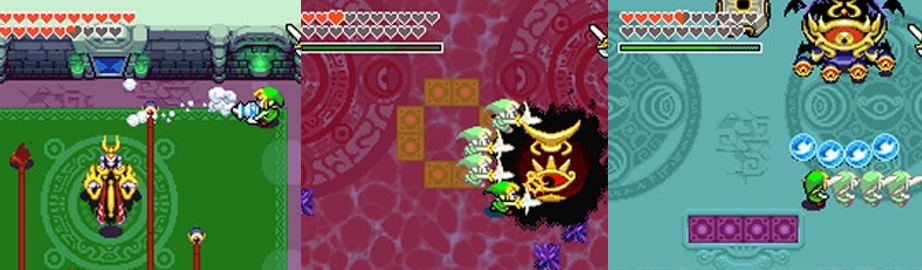


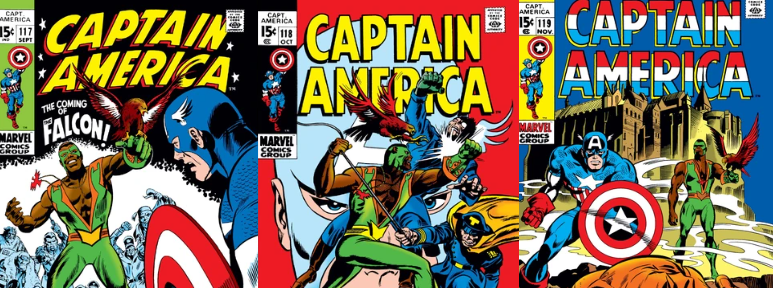
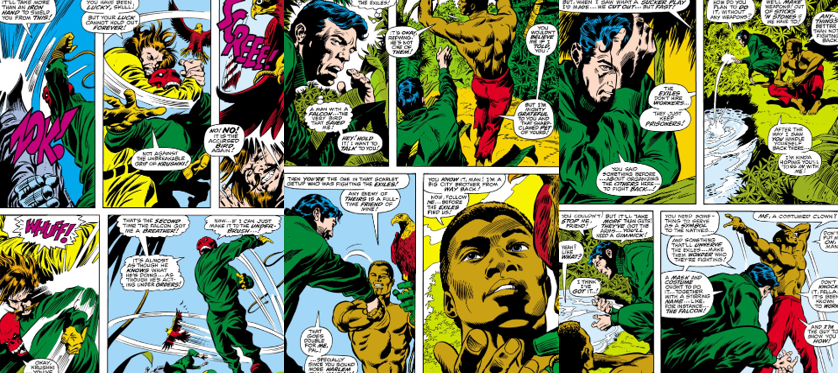

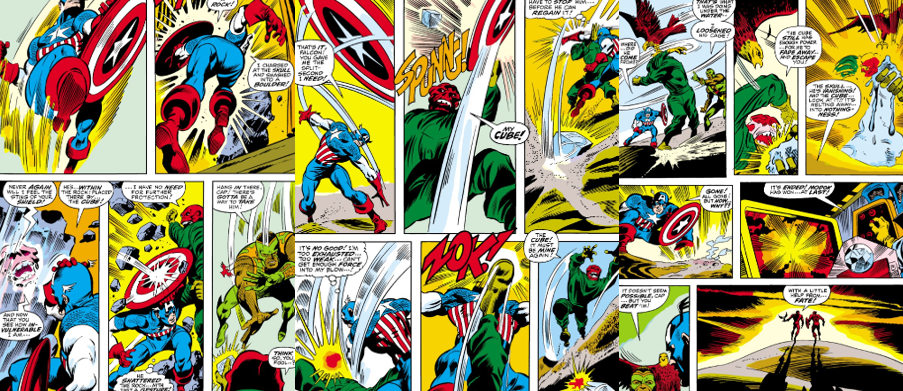
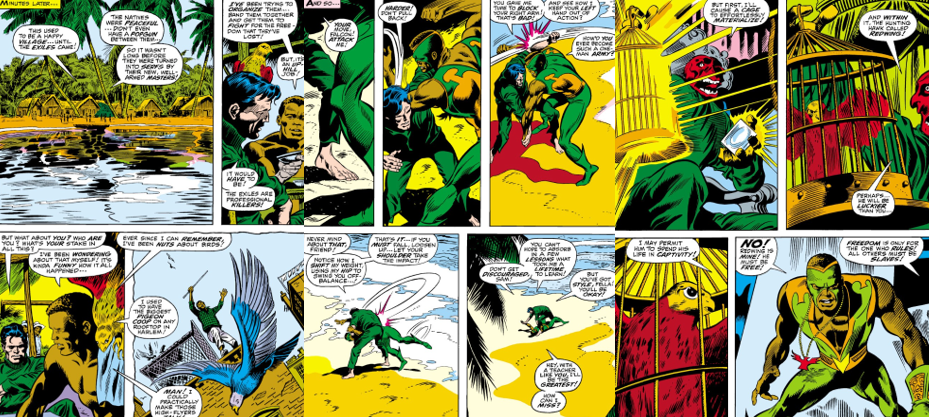
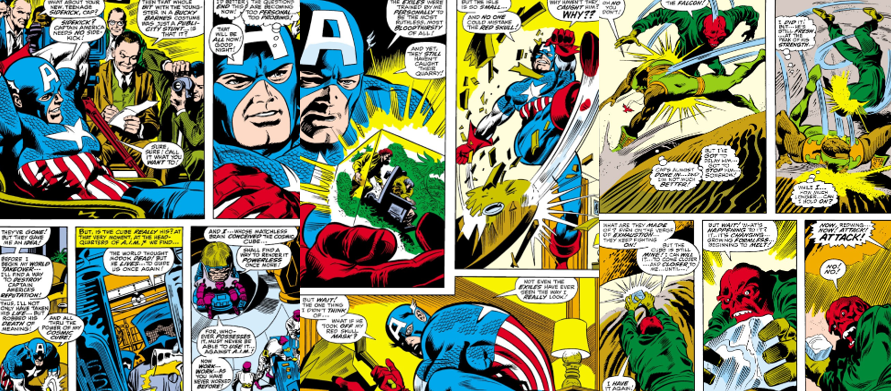


You must be logged in to post a comment.