The Date: 16 May 1999 The Venue: Mid-Hudson Civic Centre; Poughkeepsie, New York The Commentary: Joey Styles The Referee: John Finegan The Stakes: Singles match for the ECW World Television Championship
The Build-Up: In the nineties, while the World Wrestling Federation (WWF) and World Championship Wrestling (WCW) dominated the professional wrestling scene in an all-out war for television ratings, Extreme Championship Wrestling (ECW) offered an alterative product to its mainstream counterparts. Originally known as Eastern Championship Wrestling, ECW was re-branded in 1993 by pro wrestling genius Paul Heyman and quickly grew a cult following with the rabid Philadelphia crowd at the ECW Arena. While making waves with its violent and controversial matches and content, ECW also offered no-nonsense wrestling, greatly inspired the WWF’s “Attitude Era”, and gave future wrestling stars a chance to hone their craft. Up until 1997, ECW primarily presented non-televised supercard events from the ECW Arena, but Heyman got his big break with his first pay-per-view, Barely Legal, on this day in 1997. Unquestionably, one of ECW’s biggest stars was “Mr. Monday Night” Rob Van Dam, a trainee of the legendary Sheik who started out as enhancement talent for various independent promotions and WCW before honing his craft in All Japan Pro Wrestling (AJPW) and being signed by Heyman in 1996. Depicted as a stoner, RVD made a name for himself with his rivalry with Sabu, which saw him transform into an arrogant heel, and his career-defining run with the ECW World Television Championship, which lasted 700 days! Widely considered one of RVD’s greatest rivals, Jerry Lynn had numerous clashes with RVD before and after his TV Championship reign, most notably earning this shot at the belt after declaring himself “The New Fuckin’ Show” and vowing to relieve RVD of the championship.
The Match: This classic bout for the ECW Television Championship, a belt made famous my ECW’s most charismatic star, RVD, started with a lot of postering by “The Whole Fuckin’ Show” and his ever-annoying manager, Bill Alfonso, as they milked the crowd’s anticipation, laid down the law with the referee, and played into RVD’s arrogant character. Once the bell rang, however, Jerry Lynn wasted no time in going for the attack, fitting considering how badly he “coveted” the belt. Lynn’s opening wristlock kicked off an extended showcase of both men’s athleticism and wrestling fundamentals as RVD flipped his way into an advantageous position, took Lynn to the mat with a headlock, and the two effortlessly exchanged wristlocks, hammerlocks, and takedowns, proving themselves evenly matched and earning the respect and appreciation of the raucous ECW crowd. The next exchange emphasised their speed as both men shot off the ropes, ducked and dodged running attacks, and ended up in that classic wrestling standoff, with even the cocksure RVD giving his opponent his props for his quickness. Despite Alfonso’s irritating whistling, the crowd chanting the cocky champion’s name, and RVD’s showboating, Lynn remained laser focused and went right back working over the champion in the corner. Again, though, RVD proved too quick and constantly slipped out of every attack and Lynn answered right back, awkwardly flipping out of RVD’s patented corner monkey flip and leading to another stalemate. An errant elbow from the challenger caught RVD above the eyebrow, causing a minor wound that Alfonso tried to use as an excuse to call the match off, but RVD simply shrugged it off and went back to work with some martial arts kicks. The two then fought on the ring apron, with RVD missing a top rope backflip and being dumped out of the ring from Lynn’s springboard dropkick. However, RVD clumsily caught and countered Lynn’s top-rope dive and both men crashed to the concrete.
When the duo proved evenly matched, RVD upped his attack on the outside to gain the advantage.
RVD returned to the ring the hard way when Lynn stunned him with a dropkick and then hit a guillotine leg drop from the top rope that saw RVD folded up like an accordion on the ring apron! This scored Lynn the first near fall of the match and saw him work RVD over in the corner with some chops and a ludicrous avalanche bulldog…for a two count! When Lynn went back up to continue his assault, Alfonso tripped him and sent him crotch-first into the ropes, though Lynn fought the little weasel off and acquired a steel chair in the process, leading to a sickening shot to RVD’s head. The champion basically no-sold this, however, as he immediately crotched Lynn and sent him tumbling to the outside with a springboard kick. RVD took his time stalking Lynn and hauling the dead weight of his challenger back to his feet, then spitefully launched Lynn into and over the security guardrail. RVD followed up with an impressive flying clothesline, leading the dazed and bleeding Lynn to answer with a dropkick that sent RVD scurrying back into the ring. Lynn (who was either legitimately hurt or really good at selling), stumbled after him and even tangled RVD up with a rollup after dodging a corner attack. Although Lynn couldn’t hit a piledriver or avoid a rolling leg drop, he did roll out of the way of RVD’s Rolling Thunder. However, when Lynn went for a Tornado DDT out of the corner, RVD impressively countered into a Northern Lights Suplex pin for a near fall. With both men back in the corner again and battling on the top rope, Lynn took RVD to the mat with an avalanche sunset flip for another near fall then just decked him with a short-arm clothesline. With RVD down, Lynn set up a table at ringside but was again tossed into the front row when RVD intercepted him and ate a steel chair to the face thanks to an assist from Alfonso and a Van Daminator from the guardrail. However, Lynn quickly answered back by ramming RVD’s head off the ring post and teasing a top-rope hurricanrana through the table, only to be clunkily back body dropped through the wood!
The back and forth action culminated in RVD’s victory and a show of mutual respect.
RVD soon doubled down with a corkscrew guillotine leg drop off the top rope and across the prone Lynn’s back as he dangled over the railing. When Lynn still kicked out from the follow-up pin, RVD targeted his left knee and flip-dropkicked the steel chair into his face. RVD then countered a Tornado DDT onto the apron with a clothesline and a flying leg drop for another two count. Frustrated and impressed by his opponent’s resolve, RVD was sent through the ringside table when Lynn hit a sunset flip over the top rope and through the wood! RVD still kicked out of a pin fall and dodged a chair shot, but Lynn threw the chair in Alfonso’s face and nailed a nice bridging German Suplex for a near fall, though both men tumbled to the mat while fighting on the top rope in what could’ve easily been a very dangerous botch. A hush fell over the crowd as Lynn kicked out of the pin fall, but they soon got back into the action when Lynn dropkicked the steel chair into RVD’s face for a near fall. A clumsy pinning and reversal sequence saw Lynn switch his Cradle Piledriver attempt into a roll up and RVD hit the Split-Legged Moonsault for a two count. After slipping out of Lynn’s Inverted DDT attempt, RVD nailed a beautiful Five-Star Frog Splash, only for Lynn to roll into a pinning attempt. In the end, it was Alfonso who was the difference maker as he tossed the steel chair back into the ring, leading to a second Van Daminator and another Five-Star Frog Splash for RVD to retain his championship, though both RVD and Alfonso gave Lynn his props during their celebration. This was a very athletic and impressive showing from both men, though I would’ve preferred to see the stalling replaced with the guys selling the punishment they were dishing out as it seemed they were back on their feet far too quickly off the bigger moves. I liked how they made good use of all the space and were constantly portrayed as evenly matched, with both men easily dodging, countering, and exchanging strikes, holds, and crazy moves with tables and chairs. It felt as though the match could end at any moment and either man could be the victor, and they definitely built up a lot of anticipation and paced things out well, and the sloppier aspects actually fed into this narrative really well.
The Aftermath: Rob Van Dam and Jerry Lynn’s iconic clash for the ECW World Television Championship was so well received that Paul Heyman opted to air the match in its entirety when ECW debuted on TNN. Given that a mutual respect had been earned between the two competitors, RVD and Lynn teamed up at ECW’s next pay-per-view, Heat Wave, to take on the Impact Players. While the duo won the match, RVD did accidentally hit Lynn with the Five-Star Frog Plash while aiming for Lance Storm. Despite this, Lynn branched off to feud with Storm and, later, Yoshihiro Tajiri and Super Crazy while RVD continued to defend his championship in a career-defining reign. Unfortunately, a broken ankle meant RVD was forced to vacate the belt and, when he returned at the 2000 Hardcore Heaven event, it was to face Lynn once again. This time, Lynn was victorious thanks to interference by Scott Anton, though RVD got another win over his rival at the start of 2001 in what turned out to be RVD’s final ECW match. Despite both men competing for World Wrestling Entertainment (WWE) during and after the ill-fated “Invasion” angle, their paths wouldn’t cross until they were in Total Nonstop Action (TNA), where RVD defeated Lynn on five separate occasions.
My Rating:
⭐⭐⭐⭐
Rating: 4 out of 5.
Great Stuff
What did you think to this classic match between Rob Van Dam and Jerry Lynn? Who were you rooting for at the time? Were you a fan of Rob Van Dam’s time in ECW? What did you think to the two being portrayed as evenly matched? Do you agree that there could’ve been a bit more selling of the bigger moves? Did you watch ECW back in the day and, if so, who were some of your favourite wrestlers and what were some of your favourite matches and moments? Whatever your thoughts, feel free to leave them below, support me on Ko-Fi, and be sure to check out my other ECW content across the site!
Released: 20 June 2023 Developer: Tindalos Interactive Also Available For: PC, PlayStation 4, PlayStation 5, Xbox One, Xbox Series S
A Brief Background: The Alien franchise (Various, 1979 to present) has had a long and complex history with videogame adaptations over the years. The films have been adapted into everything from primitive pixelated messes to crossover titles, survival/horror experiences, and first-person shooters. We even got a real-time strategy title back in 2003, one that garnered a lukewarm reaction from critics. While it may be surprising that Tindalos Interactive chose this genre for their adaptation of Aliens(Cameron, 1986), there was precedent for this given their success in the genre with Battlefleet Gothic: Armada (2016). While there isn’t much information about the game’s development available online, I can tell you that Aliens: Dark Descent was received rather favourably and that critics praised the foreboding atmosphere and immersive gameplay while criticising its performance and the unwieldy nature of certain control options.
My Progression: Aliens: Dark Descent is a real-time tactics games that borrows many visual cues, dialogue, and audio from Aliens. Played from a top-down, isometric perspective, the game has players control a squad of four Colonial Marines and take on various missions on Lethe, a planet they’re stuck on following a Xenomorph outbreak on an orbiting Weyland-Yutani space station. Initially, you learn some of the basics by controlling a single character, Deputy Administrator Maeko Hayes, who’s responsible for them being stranded on Lethe. While nowhere near as capable as the Marines, controlling Hayes teaches you the basics of character and camera movement, the interactions you’ll need to progress, and the importance of stealth in later missions. She also tours the downed USS Otago between missions, promoting Marines, assigning Physicians to heal injured troops, and deploying missions across Lethe. When on a mission, you press X to have your Marines move to a point on the environment. You can also double tap X to have them run, though they’re inexplicably unable to shoot and run at the same time. Y allows them to interact with the environment, activating consoles, calling lifts, extracting samples from downed Xenomorphs, and repairing sentry guns or healing teammates. You can also hold Y or press in the right stick to activate a flashlight, which is super useful for exploring the game’s dark, ominous areas. A confirms your menu selections, B cancels them, and the Xbox’s ‘View’ button opens a full-sized map (though I found the smaller mini map, with built-in motion tracker, more useful). From the map screen, you can select any security cameras you’ve activated, see primary and secondary objectives, and call the M540 Armoured Reconnaissance Carrier (ARC) for some heavy ordnance support or to extract your team. The Left Trigger allows a grapnel function, though I never utilised this so I can’t comment on it, and you can focus on your team leader or reload your weapons by using the directional pad.
Assemble a team of Marines to investigate and exterminate the Alien infestation.
Your squad will automatically open fire on any nearby targets or if manually directed by your inputs. They don’t have infinite ammo, however, so you must loot corpses and crates to boost your stock, though your inventory is limited. You can select a Marine with Y to apply first aid or give them a booster to calm their nerves as your troops will grew more and more anxious as you engage in combat. The Right Trigger opens the “Skill Menu”, allowing you to utilise additional weapons (such as a shotgun spread, suppressive fire, a flamethrower, and a grenade launcher) at the cost of “Command Points”. Command Points regenerate over time, but you can fully restock them, calm down your squad, and manually save the game by welding shut doors in enclosed spaces to create a “Shelter”. This can only be done as long as you have “Tools” points and will not refill their health, unfortunately, but it gives you a chance to catch your breath. Each Marine has a personality trait that affects their gameplay; they may be cowardly, or quick to panic, or clumsy. These negatively impact their performance, reducing accuracy, increasing the chances of exhaustion, and lessening their attack power. Even if your Marines survive their mission, they are left traumatised by several afflictions. While some are cured by a Physician, others escalate, especially as you pass days to give them time to recuperate. You can level-up and Promote your Marines, however, adding additional buffs such as increasing their armour or their build/health speed. You also spend points in the workshop purchasing new weapons, such as the Smart Gun and mines, and accessories like the sentry guns and tactical analysis, which can be lifesavers out in the field. While you can heal, save, and often carry downed Marines to safety, any you lose are gone forever and memorialised on the USS Otago, forcing you to strategize and make smart use of your resources and surroundings to keep them healthy and alive.
Alien hoards will wipe out or traumatise your squad if you’re not careful.
This adds a level of tension and dread to Aliens: Dark Descent that’s exacerbated not just by the foreboding visuals and obscured map but also the game out-right warning you of its difficulty. You can adjust the game’s difficulty settings and the enemy intelligence before starting a campaign, though the standard settings were challenging enough for me. Lethe is crawling with Xenomorphs who scurry about on walls and ceilings and burst from pipes and the shadows. Aliens swipe with their claws and tails, attack with their little mouths, spit and bleed acid, and abduct your Marines and non-playable characters (NPCs) to be cocooned elsewhere. You’ll occasionally free these victims, though most die from a Chestburster, and encounter numerous Alien eggs and Facehuggers, which must be dispatched before they impregnate your troops. Even bog standard Xenomorph drones can take a lot of firepower to put down, especially if your squad is weak, injured, or panicked. Your best bet is to either use cover or stay back, laying down suppressive fire or deploying sentry guns in a kill box to thin out the Aliens. While they usually attack in small groups, their aggressiveness will increase, they will actively hunt you, large swarms spawn in for a short time, and their numbers and aggression only increase the more days you waste recuperating. Eventually, you’ll encounter a larger Alien variant, a “Charger”, that…well, charges at you like a rhino. Though big and cumbersome, the first encounter in the slaughterhouse isn’t too bad as long as you stay back and rest your troops, but they spelled disaster for my repeated excursions into the mine. An Alien nest is found here, with cocooned scientists and eggs everywhere, and sheltering a gigantic Xenomorph Queen. Ironically, this battle was easier than exploring the mines! I laid down suppressive fire, unloaded with the grenade launcher and flamethrower, and placed a sentry gun or two and she went down on my second try, though I think the strength of my squad had a lot to do with that as I had to extract and heal up to even reach her lair. It seems like you’ll also battle malfunctioning synthetics as well; this happened once during my playthrough so I imagine they, and other Aliens, crop up later in the game.
A tactical retreat to heal and regroup is often necessary to win the day.
Aliens: Dark Descent certainly looks the part. The perspective obviously makes the game far less detailed than FPS or third-person Alien titles, but the environments are all ripped right out of Aliens and I loved how all the tech and readouts aligned with what we saw in the first two films. Character models are very basic, however, often disappearing into the dark environments and not featuring much variety unless your troops are limping from wounds. They express themselves more through dialogue, shamelessly stealing the best lines from Aliens and commenting on every situation, and through the many pre-rendered cutscenes. Hayes’ time on the USS Otago recalls similar third-person sections from Aliens: Fireteam Elite(Cold Iron Studios, 2021) and sees her meeting new recruits, prioritising her troops, and being assigned side missions by other NPCs. If you choose not to deploy your squad, the infestation increases and your troops suffer; oddly, demanding they rest causes them to become exhausted, which was very strange. Passing the time often gives you the option to undertake offscreen missions for additional resources, though at the cost of a deployment, meaning you have to weigh the pros and cons of obtaining additional bonuses versus increasing the Alien resistance. Eventually, I got into a routine of deploying, accomplishing a mission or two, and fleeing Lethe with more of my squad, meaning the bulk of my gameplay was focused on repetition, trial and error, and revisiting the same locations with a bit more experience. It took everything I had just to clear the first mission, which took a good few hours, which tells me that Aliens: Dark Descent has a lot of play time in it, likely focused on grinding and exploration to nab all those hidden Achievements, though it’s possible those better versed in this genre of game may have better luck than I did during my frustrating play time.
When I first started Aliens: Dark Descent, I was expecting a game akin to the Command & Conquer games (Various, 1995 to present) I dabbled in as a kid. This turned out to not be entirely true as it’s much more focused on stealth and action rather than building bases and such, though the Shelter mechanic masquerades as a base, I suppose. This genre of game isn’t really one I’ve had that much experience with; it seems more geared to mobile players or fans of “roguelike” titles, and therefore was quite a chore and a challenge to play. I was hoping for a mission-based title where you strategically place troops and build forces to hold off the Xenomorphs, and instead was beaten over the head with a moody, difficult, and often tedious gameplay experience. The visual fidelity to the first two movies is amazing; the atmosphere is perfectly foreboding and the dread of every encounter, however minor, definitely echoes the dire straits faced by the Marines in Cameron’s sci-fi classic. Aliens: Dark Descent can be very unforgiving, though; even if you take the time to heal and prepare, the odds are always against you. Just one Xenomorph can wipe out your squad, especially if they are injured or fresh-faced recruits, and it’s very easy for the tide to turn against you, even if you set up a well-armed kill box and farm nearby resources. I can see that Aliens: Dark Descent is going to demand a lot of my time as the first mission took me most of an afternoon to get through, meaning it’s a game I will likely revisit in the same manner I played: “short, sharp bursts” to whittle away at each objective, no doubt to be wiped out by some unforeseen new Alien variant. But maybe I just suck. Maybe you had a better strategy. Maybe you found all the data pads and creamed this game. If so, tell me about it in the comments, tell me your favourite Alien game, and check out my other Alien content.
Released: 13 February 2019 Originally Released: 7 July 2000 Developer: Square Original Developer: Squaresoft Also Available For: Android, Nintendo Switch, PC, PlayStation, PlayStation 3, PlayStation 4, Xbox One, Xbox Series S
The Background: Final Fantasy VII (Square, 1997) is unquestionably one of the definitive role-playing games (RPGs) and probably the most popular Final Fantasy title, selling over twelve million copies worldwide and making its way onto many “top ten” lists. In comparison, Final Fantasy VIII (ibid, 1999), despite being a best-seller, is often the subjectofcriticism. For the ninth game, Square decided to veer away from the pseudo-futuristic settings of its predecessors and move back towards a medieval fantasy aesthetic like the original games. This fantastical setting would be home to the various anthropomorphic characters who made up the game’s cast, all of whom were designed by Shūkō Murase, Toshiyuki Itahana, and Yoshitaka Amano. Main character Zidane Tribal was purposely designed to be the inverse of his predecessors: young, agile, brash, and outspoken with an eye for the ladies, a philosophy that extended to his supporting cast and the lighter tone of the narrative. Determined to return to the roots of the franchise by reviving narrative concepts such as the Crystals, Fiends, and fantasy elements, the developers tweaked the battle system to be both familiar and slightly different, returning character classes (or “Jobs”) to the franchise to make each character unique both visually and in terms of their abilities. Final Fantasy IX became the second-highest selling game in Japan upon release and was met with critical acclaim. Reviews praised the back-to-basics approach, amusing characters, and detailed environments and character models, though main villain Kuja was seen as inferior to his predecessors In later years, Final Fantasy IX has been recognised as an under-rated entry in the franchise, which perhaps prompted Square to release this enhanced version of the game in 2019. Featuring graphical updates and helpful boosters to speed up the gameplay, Final Fantasy IX found new life and new success on modern consoles and became much more accessible as a result.
The Plot: In the medieval fantasy world of Gaia, thief Zidane Tribal kidnaps princess Garnet Til Alexandros XVII as part of a ploy by the neighbouring nation of Lindblum. However, he ends up joining forces with Garnet and a diverse cast of characters to take down her mother, Queen Brahne of Alexandria, who has sparked an all-out war between Gaia’s nations.
Gameplay and Power-Ups: Final Fantasy XI is a traditional turn-based RPG set in a fictional and very fantasy-orientated medieval land. Unlike the previous two Final Fantasy titles, players now form a team (or “party”) of up to four characters, each with their own set of skills, magic, and abilities that are analogous to the classic Final Fantasy Job system. Primarily, players control Zidane, a peppy monkey-boy thief, though you’ll control his teammates at various points and will be encouraged to view their character-building moments and forced to split the playable roster into separate teams. In terms of controls, Final Fantasy XI is nice and simple: use the control stick or directional pad to move your character around the various towns, overworlds, and locations and to select commands in battle, execute those commands. Talk to teammates and non-playable characters (NPCs), activate objects and open chests with A, and back out of menus with B. Open up the main menu with Y, challenge characters to a game of Tetra Master with X, and use Right and the Left Triggers to move the camera on the overworld. RT also enables an “auto battle” function, effectively removing control from the player in battles. In battle, you can press Y to switch characters, hold the Left and Right Bumpers to escape (if possible), and select battle commands (attack, defend, casting spells, using items, and such) from several in-game menus. Pressing the View button opens the map on the overworld (which is eventually enhanced to show location names and allow fast travel) and helpful notes when on menus (a Moogle says what each item or spell does, for example), while pressing Menu pauses the game. From the pause screen, the shoulder triggers and bumpers activate some helpful boosters, such as turning off random battles and setting your maximum attack power to 9999 and speeding up the gameplay, all while still allowing you to obtain Achievements.
Engage in fantasy battles, powering up with Trance and more powerful weapons and gear.
There are some other helpful settings in the main menu, too. You can change the borders and text speed, set your default movement speed to run or walk, turn a helpful cursor on or off so you can always locate your character, and set the battle system to turn-based or “wait”. If you set it to wait, enemies won’t attack while you’re selecting moves, easing the pressure on you. You can also turn certain camera movements on or off to further speed up the gameplay, and certain items also affect this as they increase your chances of attacking first, avoiding damage, and the speed your Active Time Battle (ATB) gauge fills up. When exploring the overworld and the various swamps, forests, caves, and castles, you’re randomly attacked by monsters. Defeating them earns you experience points (EXP), ability points (AP) for your character’s different abilities (as dictated by the gear they have equipped), Gil (Gaia’s currency), and random items (potions, elixirs, and the like). Battling also fills the ATB gauge; once full, you automatically enter a “Trance” state that increases your attack power and speed and allows access to more powerful attacks. Each character carries a weapon to inflict damage on enemies; these are applied manually or you can select “Optimise” to equip the best options. Weapons and gear can be swapped for more powerful options you either steal, find, buy, or “synthesise” in specialist shops to increase their attack power and add various buffs or status effects to your attacks. Different equipment (armour, rings, headbands, and such) do the same, allowing characters to learn abilities that can then be equipped providing you have enough AP. These increase your maximum health and/or magic points (HP/MP, respectively), have you automatically counterattack or take damage for party members, increase you chances of stealing, escaping, or attacking first, negate back attacks, and make you resistant to status effects like poison, petrify, stop, and mini. Each character has different special attacks, too: Zidane steals from enemies, Vivi Ornitier and Eiko Carol cast magic twice in a row, Quina Quen eat enemies to learn their attacks, and Freya Crescent leaps to attack from the air, for example. These abilities are then enhanced through Trance, adding more powerful attacks to your arsenal that will attack or affect multiple enemies, deal greater damage and inflict status effects upon them, or heal or revive your party, though at the cost of MP.
Summon Eidolons, ride Chocobos, and traverse Gaia in various airships.
Characters like Eiko and Garnet (who later takes the name “Dagger”) can also summon “Eidolons”, powerful creatures that deal huge damage. Other beneficial magic includes healing spells, spells that cure status effects, and spells that revive downed players, abilities also accomplished by various items, using a tent at save points, or resting at inns (though this will cost you). Google save points are all around Gaia and you can eventually summon a Moogle on the overworld with X. Moogles also teach you the game’s mechanics, sell items, weapons, and accessories, and have you ferry letters around. Some key items must also be selected from your inventory to be used, such as the Gysahl Greens that summon a rideable Chocobo at specific parts of the map, and orbs or keys to open pathways. Initially, your Chocobo simply travels across the open fields but, as you play the aggravating Hot and Cold mini game to find treasures, it’s enhanced to traverse mountains, water, and even fly. However, you’ll also get access to different ships, ones that traverse water and, eventually, the skies, allowing you to quickly fast travel. When in the castle town of Lindblum, Air Cabs take you to the different districts; Memoria features teleport pads, but mostly you use ropes or ladders to explore. When you’re not battling, you can play Tetra Master, a card game almost every NPC plays. As you explore and battle, you’ll acquire cards; these have different strength ratings that, when placed on a grid, allow you to steal your opponent’s cards. Use the arrows on each card and their strength rating to judge where best to place them and fill the board with your colour to win, though I’d recommend making liberal use of nearby save points as NPCs are unfairly skilled. While it’s largely an optional distraction, you must win a small tournament in Treno to progress the story. Speaking of which, you’re regularly prompted to watch an Active Time Event (ATE). A prompt appears onscreen and, when selected, the game shifts to an NPC or teammate as they contemplate their situation or get into mischief. These are optional, and can arguably distract from the main game, but I liken them to regular cutscenes but with a little more character.
Various mini games and additional mechanics add some (often aggravating) variety.
As is common Final Fantasy games, the difficulty scales in Final Fantasy XI; the further you progress, the more powerful enemies become, even in areas you’ve previously explored. Puzzles are generally quite simple: you’ll be activating switches and consoles, collecting items, pulling levers, and traversing mazes in different areas without too much difficulty. There is a lot of back and forth and repetition involved, though, such as when you explore Fossil Roo and change the track the spider-like gargant takes to reach the exit, or when you wander Pinnacle Rocks looking for Ramuh to piece together his fable and earn him as a summon, or taking the correct path in a looping forest to reach the Black Mage village. You’ll light candles to uncover hidden stairways, explore rooms to find hidden passages, search for your teammates when they’re captured or inevitably wander off or have an identity crisis, mashing A to escape quicksand, and cooking dinner for your party. This, like some other parts of the game, requires you to select the right order from a list to get the best results, with some decisions leading to you battling a swarm of enemies. Final Fantasy XI is full of little mini games, with many being mandatory: you jump rope in Alexandria, take part in a play and sword fight with Zidane’s friend, Blank, and question your life decisions as you swing a cage back and forth to rescue Adelbert Steiner and occasional party member Marcus. Marcus and Beatrix, General of Alexandria’s armies, temporarily join the party at various points, with the latter often teaming with Steiner in side battles. Similarly, there’s a part where you play as Regent Cid Fabool IX (who’s been transformed into frog) and must carefully sneak past a Hedgehog Pie and then balance a set of scales to rescue Zidane’s friends. When exploring Ipsen’s Castle, you can open a secret passageway by picking the correct sequence and then mix ingredients for the Ancient Aroma. In Pandemonium, you get thirty seconds to slip past light plumes and the random battles they contain to cross a temporary bridge, as well as altering some headings to activate platforms. You’ll also power up and activate orbs in Oeilvert to learn valuable lore about Terra and Garland’s plan to fuse it with Gaia.
Presentation: I loved the chibi character models of Final Fantasy VII and its industrial, futuristic steampunk prerendered backgrounds. Final Fantasy VIII was a huge visual improvement, both in terms of the more detailed character models and environments. Returning to a medieval setting for Final Fantasy IX is a shame for me as I prefer the more futuristic settings, but my God is this game full of charm! Zidane is the polar opposite of the brooding Cloud Strife and the melancholy Squall Leonhart, being peppy, agile, mischievous, and eternally optimistic. Zidane fancies himself a romantic, pirate-like figure; his charms are mostly wasted on Dagger but she warms to his enthusiasm and heart. When he learns his origins from Garland, Zidane becomes morose and lashes out at his friends, who endure tough battles to snap him out of his uncharacteristic mood. While he’s the focus of the story and gets the most character development, Zidane has competition in Vivi, a clumsy, insecure Black Mage who’s constantly feared and hated due to his destructive brethren who embarks on a journey of self-discovery. Zidane clashes with Steiner, the oafish captain of Alexandria’s guards, and Amarant Coral, a brutish thug and loner with a grudge against Zidane. Freya is an old ally of his searching for her lost love, while Eiko is a young girl with a crush on him who’s both envious of Dagger and also tries to get them to admit their feelings. Then there’s the supporting cast, such as Zidane’s roguish crew, the Tantalus Theater Troupe, who initially seek riches but are roped into saving the world, the jester-like Zorn and Thorn who constantly hound and mock the player, and the enigmatic Kuja, a flamboyant villain who lacks the menace of his predecessors but makes up for it in theatricality. It’s a very light-hearted, whimsical adventure for the most part; slapstick comedy and goofy moments pepper the narrative (especially whenever the androgynous and perpetually hungry Quina is around). However, there’s a lot of heart and emotion and high stakes as the story progresses, with characters questioning themselves and being forced to find the courage to fight for something worthwhile.
Medieval fantasy lands soon give way to surreal, alien landscapes.
While the overworld is largely similar to those of the last two games, comprising various land masses (fields, deserts, a snow region), lakes, and a vast ocean, the towns are closer to those seen in pre-Final Fantasy VII, now brought to life in more detail than ever before. The medieval and fantasy theme delivers bustling castle towns, lavishstone palaces, and quaint little villages. Technology is of a similar steampunk style, but far less advanced (airships and complex machinery aside), with towns relying on wind and water power for the most part. While it’s all very beautiful, it’s an aesthetic I find quite samey; Alexandria and Lindblum are quite similar in many ways, for example, though they get more personality after they’re attacked and left in disarray. One aspect I was keenly aware of was that each area is home to a different species, often anthropomorphic ones, and these different species intermingle throughout the game, adding to its distinct visual style and giving it a diverse world. Caverns, ice caves, great trees, murky swamps, and arid deserts filled with abandoned temples and structures are everywhere. Qu Marshes are full of tall crass and frog ponds, the Iifa Tree looms ominously and sports gigantic, twisted branches, and you’ll find isolated settlements in forests and atop mountains. Ruins, great gates, and abandoned towns add a sense of desolation but things really become surreal and visually interesting when you’re transported to Terra, a bizarre alien landscape whose architecture emphasises glaring eyes, spheres, and a quasi-magical awe. Like the chilling Black Mage production line in Dali, the warped, crystalline Terra and its main town, Bran Bal, is where the genomes (Zidane and Kuja’s people) are created as puppets for Garland’s plot. Though you only visit Terra once, its spirit lives on in the desolate landscape of Pandemonium, a ruined dimension of chaos and memory that threatens to eradicate all life.
The game has a strong visual appeal, with fun characters and rising stakes.
Unlike in previous Final Fantasy games, dialogue is delivered through speech bubbles, allowing multiple characters to talk at once and adding a level of personality not seen before. There’s no voice acting beyond a few roars and squeals and such, but each character exudes personality in their body language; Steiner even lives up to his nickname, “Rusty”, since his armour clanks as he walks. Legendary composer Nobuo Uematsu remixes classic Final Fantasy themes for this throwback, infusing every grand town and castle with a regality or sense of adventure, and every warped nightmare realm with a sense of foreboding as this whimsical adventure takes a dark turn. While no tunes were as memorable as “Dancing Mad”, “One Wing Angel”, or “Maybe I’m a Lion”, I enjoyed the fantasy score. Pre-rendered cutscenes and FMV sequences show our heroes comically swinging through the skies, emotionally reunite, and the all-out destruction of castle towns by powerful summons. Many cutscenes are standout moments, such as the characters flying the Invincible through a swarm of Silver Dragons, Dagger and Eiko summoning Alexander to repel Bahamut, and Zidane braving the Iifa Tree to rescue Kuja. Cutscenes are also told using the in-game models, of course, and these are often animated over FMV sequences. The transition is much less jarring than in previous games and, similarly, the distinction between the overworld models and the battle models is basically none this time around. Battles still load up an enclosed arena, characters still pose triumphantly as the victory fanfare plays, and their weapons change appearance as you equip new ones. Unfortunately, I did notice a considerable lag when the game loads battles that I don’t remember from the last two games. Since random encounters happen very frequently, it can get frustrating staring at a black screen and thinking the game’s crashed every other battle.
Enemies and Bosses: Final Fantasy is known for having some bizarre enemies, but Final Fantasy IX may be some of the weirdest I’ve seen from the series. Sure, you’ve got some returning faces (Bombs, the ever-annoying Cactuars and Tonberries, Goblins, Hedgehog Pies, Malboros, and such) but these are joined by literal zombies, yetis, warrior skeletons, sand golems, lizard men carrying tridents or hatchets, amorphous red blobs with too many eyes for comfort, and a strange living house on spider legs! Giant armoured tortoises, vulture-like birds, oversized beetles, large worms and crabs, ravenous wolves, and sicken toads are commonplace, existing alongside powerful dragons, chimeras, giant trolls, terrifying robe-wearing ogres, and seemingly innocuous treasure chests that turn out to be Mimics. Epitaphs are living stone statues that conjure replicas of your party, Gimme Cats yield barely any rewards upon defeat and simply demand your items, Grand Dragons and Behemoths can KO with one hit even with the boosters activated, Jabberwocks and monstrous Mistodons are the stuff of nightmares, and you’ll be caught completely off-guard by the small, sheep-like Yans and being decimated by their powerful magic. Enemies inflict harmful or aggravating status effects, confusing you, poisoning you, or keeping you from using certain attacks. They heal themselves and their allies, cast elemental magic, and even blow party members away, though many can be stolen from to acquire powerful or rare items. When visiting Treno, you can challenge a powerful monster in the weapon shop if you’re feeling brave, though sadly this is the only opportunity to do this and it’s limited to certain monsters.
Aggressive Black Mages, powerful soldiers, and monstrous plants all stand in your way.
There are many boss battles in Final Fantasy XI, and some enemies must be fought multiple times. Steiner, for example, initially tries to stop you in Alexandria; you’ll battle him three times during your escape, though he’ll either flee or be felled by a Bomb, and he’ll refuse to attack Garnet so you can use this to your advantage. You also have three unwinnable fights with Beatrix where, after you deal enough damage, she uses Stock Break or Climhazzard and flees. You’ll battle Zidane’s boss and father figure, Baku, twice, with the first essentially acting as a battle tutorial, though he’s quite clumsy and often trips. Amarant is also fought before he joins your team; his battle is interesting as he hops all around the arena, making it difficult to target him, though he also casts Death, which can be a problem as you fight him as Zidane alone. Many Black Waltz’s, bloodthirsty Black Mages, attack Gaia’s towns and are thus greatly feared. They use elemental attacks, can freeze your party members, and even utilise dual magic attacks, though the third one you encounter also refuses to attack Dagger. Red Dragons pounce in Mount Gulug (though they’re naturally weak to Blizzard) and two serpentine beasts – Ralvurahva and Ralvuimago – must be fought to pass Gargan Roo. In the early game, Dagger and Vivi are both captured by the appropriately named Prison Cage, a strange plant-like creature from the Evil Forest that sucks HP from its captives. You must be mindful of this and hurting your allies, as it’s game over if their HP drops to zero. The Evil Forest is also home to the Plant Brain, a hideous malicious bud that attacks with lashing tentacles and by casting Thunder or afflicting Darkness through Pollen, though Fire attacks and Blank’s support will win the day (at the cost of the forest).
Bosses become more monstruous and fearsome as you progress.
Your reward for rescuing Lindblum during the Festival of the Hunt is a battle against the boar-like Zaghnol, which enhances its Thunder spells and rams you with Heave. While exploring Gizamaluke’s Grotto, Zorn and Thorn manipulate the cobra-like Gizamaluke into attacking you, though the Bird Killer ability counterbalances its powerful Water spell. While exploring Cleyra and the desert of the Outer Continent, you’ll fight the ravenous Antlion, which reduces your HP to single digits with Sandstorm, counterattacks when attacked physically, and inflicts Trouble (which can only be cured with Annoytment). You’ll finally confront Zorn and Thorn, who fuse into the Lovecraftian entity Meltigemini, which poisons you and stops you earning AP with Virus, though it is weak to Fire magic. Deep in the Iifa Tree, you confront the tree-like demon Soulcage to dispel the Mist spewing from the tree. It can cast LV5 Death and infuriate party members with Mustard Bomb and its attack power is raised if you use Fire spells, but it’s undead so you can use a Phoenix Down to reduce its HP to 1 or use Life or Elixir to instantly kill it. In Fossil Roo, you spring past hazards as the Armodullahan chases them. If hit, you battle it, desperately avoiding its Death spells, until it falls down a hole but you can outrun it if you’re quick. When forced into journeying to Oeilvert to obtain the Gulag Stone, players battle the Ark, and airship-like being that can confuse your team or reduce them to 1 HP but will become a summon upon defeat. Also, when in Ipsen’s Castle, the insectile Taharka attacks when you steal the four elemental mirrors, increasing its defence when it curls into a ball but being notable susceptible to Heat, Silence, and Sleep spells.
Kuja’s threat is usurped by Garland, who’s usurped by Necron!
When the party learns of the four elemental temples, they split up to explore them and are attacked be the four Guardians of Terra, though the player only battles the Earth Guardian, a regal skeleton that attacks with Earth Shake. As you enter Memoria, you’ll battle the Nova Dragon, which tosses you with Psychokinesis, inflicts heavy damage with Twister and Tidal Wave, and counterattacks when physically hit. The four guardians are recreated by Kuja in Memoria and randomly attack as you explore: the four-armed Maliris favours Fire magic, Tiama is a three-headed dragon (almost a Cthulu-type being) that uses Wind magic and can blow you off the battlefield, Kraken is a disgusting octopus-like creature that fires Water or Ink from its tentacles or inflicts Freeze, and Lich is the Earth Guardian reborn, now more likely to cast Death. In Pandemonium, you endure a three-stage gauntlet against the Silver Dragon, Garland, and Kuja with no respite between. While the Silver Dragon favours Wind spells like the Nova Dragon, Garland likes to freeze the party with Stop (causing a game over if all four are afflicted) and obliterate their HP with Flare. In comparison, Kuja casts Demi, Ultima, and Flare Star, the latter of which cannot be protected against with Shell or Reflect. This is an unwinnable battle, as Kuja enters Trance to end the battle, and battle him (as “Trance Kuja”) again after besting the four guardians and Deathguise, another cobra-like dragon capable of annihilating ill-prepared parties with Meteor. Trance Kuja heals with Curaga, casts Flare, Holy, and Flare Star, though these same spells (or similar) can be turned against him. Once again, this is an unwinnable fight but, this time, you’re transported to the Hill of Despair and challenged to assemble a refreshed party to battle Necron, a being from beyond time and space who appears out of nowhere, drawn to Kuja’s despair. This surreal, angelic being is fought in a void and boasts powerful magic spells, including Blue Shockwave (which reduces one character to 1 HP), Grand Cross (which randomly inflicts different status ailments), and Neutron Ring to deal heavy damage. Necron can also attack four times in a row, easily pummelling the unprepared, so it’s best to have abilities like Regen, Auto-Life, and Mighty Guard enabled.
Additional Features: There are fifty-one Achievements in Final Fantasy XI, with very few obtained through simple gameplay. You’ll get one for finishing the game, sure, and for winning one, ten, and 100 Tetra Master matches, but you’ll be hard-pressed to defeat 10,000 enemies or reach level 99 without grinding endlessly. Similarly, while it is possible to view 79 ATEs in a single playthrough, if you miss even one you can’t go back and view it or tick it off on a second playthrough, same goes for buying every item from Stiltzkin the Moogle (I missed that he was in Bran Bal). While guiding the residents of Cleyra to safety, entering Trance fifty times, causing Moguo to have a tantrum, and having Vivi win the Festival of the Hunt are pretty easy, getting an encore from the nobles, catching ninety-nine frogs, and jumping rope 100 and 1000 times are more than a chore! Similarly, you’ll be playing Hot and Cold a lot to upgrade your Chocobo’s beak and uncover all the hidden treasures across Gaia, though you can obtain most of the Ultimate Weapons if you search around Memoria. Other Achievements are gained from delivering Moogle mail and repairing their Mognet, uncovering the secret of the Eidolon Wall by interacting with the images etched there, obtaining four Moonstones, capturing a golden frog, and trading thirteen rare cards to Queen Stella. If you defeat the Behemoth in the Treno weapon shop with Dagger, you’ll get an Achievement (something easier said than done even with the boosters on!), and you’ll get another for getting a Very Good Omen from the fortune feature in Dali, where you also earn a nifty model airship if you bring an NPC three coffees hidden throughout Gaia.
You’ll have to endure tedious side quests to reap the best rewards and challenge the bizarre Ozma.
Other Achievements are much more time consuming. You can’t acquire Zidane’s Ultimate Weapon unless you upgrade your Chocobo, which must also be done to find hidden treasure chests and reach Chocobo’s Air Garden. This is a hell of an ask and an aggravating task, but your reward is battling the spherical superboss Ozma, an existential cosmic being capable of fully regenerating itself and attacking before you do, decimating the party with powerful spells like LV5 Death, LV4 Holy, Doomsday, and Meteor. Ozma is also practically unreachable unless you befriend all the friendly monsters across Gaia (which also awards another Achievement). These randomly appear (accompanied by a whimsical jingle) asking for ore or diamonds or other items and allow you to attack Ozma unrestricted once appeased. The Ragtime Mouse also randomly appears throughout the overworld, challenging you answer his quiz to earn rewards and another Achievement. All the boosters in the world won’t help too much with these tedious tasks, and be careful what you activate as there are cheat boosters in the main menu that disable Achievements. If you fancy synthesising the best weapons and gear, search around in Memoria to find Hades, an optional superboss that likes to inflict numerous status ailments and reduce you to 1 HP with Judgment Sword but will synthesise the best gear upon defeat. Additionally, you can take on the Tetra Master tournament as often as you like (and challenge numerous NPCs) and pop along to the Trena auction house to win rare items, some of which are needed for Achievements. If you reach Memoria in under twelve hours, you’ll also acquire Steiner’s Ultimate Weapon, Excalibur II, and you’ll even be ranked on your treasure hunting abilities by a mysterious four-armed man. Finally, completing the game unlocks a movie gallery and an additional card game from the main menu, if you fancy checking those out.
The Summary: I first played Final Fantasy XI on the PlayStation 3 back in the day after years of being a SEGA and Nintendo kid. The darker, more melancholy and futuristic nature of its two predecessors appealed to me a lot more so it was always jarring entering a medieval fantasy world, a trope that had been done to death even back then, but the sheer visual appeal and wacky nature of the game’s characters quickly won me over. I was excited to return to Gaia, especially with the helpful boosters this version offers, and the story and characters are just as appealing as ever. Everyone has such life and personality to them and, while the game is very goofy, there’s an emotional undercurrent through it and it gets pretty dark at times when castles are being destroyed and characters are questioning their origins and morality. While I wasn’t massively blown away by the game’s locations or music, few of which really stood out for me, the diverse cast and bizarre enemies made up for it, as did the bonkers existential narrative that the otherwise simple plot descends into by the end. Gameplay is solid throughout; battles are as easy to navigate as ever, with a few tweaks to the formula to harken back to the old Job system and make characters unique through their abilities. I was a bit disappointed by the Trance state as I missed the big Limit Break attacks of the past games, but they open up new attack options and the summons are as impressive as ever. While it can lag at times and the mini games can be frustrating and the ATEs a little distracting, I think the whole package comes together nicely to pay homage to the franchise’s rich history and deliver a suitable love letter to the games that made Final Fantasy a household name. It may not be as mainstream as Final Fantasy VII or as controversial as Final Fantasy VIII, and I’d agree that it’s unfairly forgotten or overshadowed by its more successful and appealing predecessors and successors, but Final Fantasy XI is everything you could want from an RPG. Strong story, fun and engaging characters, intricate battle system, and a fair amount of replay value if you’re willing to put the time into doing tedious tasks for high rewards.
My Rating:
⭐⭐⭐⭐
Rating: 4 out of 5.
Great Stuff
Are you a fan of Final Fantasy IX? Were you pleased to see it return to the medieval roots of the series? Who was in your party in Final Fantasy IX and which character was your favourite? Were you surprised when Necron randomly appeared at the end? Did you ever find all the treasures and defeat Ozma? Whatever your thoughts on Final Fantasy IX, and the Final Fantasy series, drop a comment below and go check out my other Final Fantasy content.
Released: 14 September 2005 Director: Morio Asaka Distributor: Sony Pictures Home Entertainment Budget: Unknown Stars: Christian Sekhanan, Jonathan Waters, Kennedy Spatz, and David J.G. Doyle
The Plot: Tseng (Waters) of the Turks recaps the catastrophic events of Nibelheim, where super soldier Sephiroth (Sekhanan) learned of his origins and went mad, leading to a violent confrontation with his fellow SOLDIER 1st Class Zack Fair (Sekhanan) and rookie Cloud Strife (ibid).
The Background: Final Fantasy VII(Square, 1997) needs no introduction. The genre-changing, award-winning game was a best seller on the PlayStation and so popular that Square Enix expanded upon the story with the Compilation of Final Fantasy VII multimedia venture. Produced alongside the computer-generated movie Final Fantasy VII: Advent Children(Nomura, 2005), Last Order: Final Fantasy VII wasn’t the first anime venture for the franchise (Final Fantasy: Unlimited (2001 to 2002) finished only two years previously) or the first to be directly tied to an existing game in the franchise, a task animation studio Madhouse didn’t take lightly. Final Fantasy VII director Tetsuya Nomura was apparently heavily involved in the original video animation (OVA), to the point where development was troubled as a result. Nevertheless, producer Akio Ofuji was allegedly determined to produce a high-quality product that expanded upon Zack’s character and legacy. Although included with some releases of Advent Children outside of Japan, the OVA never received an English dub, though this didn’t stop the anime from being widelypraised. Unfortunately, Square were said to be discouraged by negative feedback and subsequently erased Last Order from continuity withCrisis Core: Final Fantasy VII (Square Enix, 2007).
The Review: Last Order begins right after the sacking of Nibelheim and finds Zack Fair helping his wounded friend, SOLDIER grunt Cloud Strife, to safety in the nearby woods. Unfortunately, the Shinra Electric Power Company sends their troops into the woods to weed the duo out, under the direction of Tseng, leader of Shinra’s clandestine force, the Turks. As he’s essentially a super soldier, Zack easily makes short work of the grunts, though he is massively outmanned and outgunned and burdened by Cloud’s dead weight. The two are branded as “samples” that escaped from Professor Hojo’s (Sekhanan) laboratory in Nibelheim, with both infused with “Mako” energy (the veritable life force of the planet), plus cells from the malevolent alien entity known as Jenovah, and thus branded a threat, especially considering Zack’s vaulted status in SOLDIER. Though Tseng issues the order to recapture the two, he morosely reflects on the events that led to this point, thumbing through his records (and memories) of SOLDIER’s greatest warrior, the super soldier Sephiroth, who turned his wrath on Nibelheim after learning of his true origins as a genetic experiment. Seeing Jenovah as his “mother”, Sephiroth slaughtered most of Nibelheim’s inhabitants and set the town ablaze, leaving young Tifa Lockhart (Spatz) stunned by the legendary hero’s murderous actions. When she learns that her father, Brian (Justin Cabanting), went to the local Mako Reactor to confront Sephiroth, she rushes to help despite the protestations of her martial art instructor, Zangan (Doyle). When she gets there, her father dies in her arms, leaving her further distraught and even more enraged. Determined to get revenge, she enters the Mako Reactor to make Sephiroth (and everything associated with Shinra) pay. Despite her moxie, Tifa is naturally no match for Sephiroth and is left an unconscious, heartbroken heap in the Mako Reactor. Zack was equally horrified by Sephiroth’s sudden turn but was cocksure of his ability to confront the fallen hero, shocked that he could harm innocents, much less their mutual friend, Tifa, who’s left vilifying SOLDIER and all they stand for.
Sephiroth’s psychotic break enrages Zack and compels him to avenge those lost.
Regardless, Zack ploughs into the Mako Reactor to bring the fight to Sephiroth, only to be hopelessly outclassed and left gravely injured. Yet, even in his weakened state, Zack finds the strength to cheer Cloud on when the enraged foot soldier takes Sephiroth by surprise, summoning the will to send the once-lauded hero plummeting to his apparent death, though this also leaves Cloud grievously injured. In their weakened state, the two are easily apprehended by sadistic Shinra scientist Professor Hojo, the man who created Sephiroth, and imprisoned in his laboratory beneath the Shinra Mansion. Even after escaping from Professor Hojo, Zack doesn’t lose his snarky, carefree attitude, despite the odds against him. Cloud might be out cold, but that doesn’t stop Zack reassuring him and making light of the situation, regardless of how grim it appears, and promising him they’ll start a new life once they reach a safe haven. Zack is so athletic that he easily dances rings around the military, dodging their gunfire and decimating them in melee combat and with his gigantic Buster Sword. Although Zack and Cloud represent a real threat, and are valuable assets to Shinra, Tseng orders Rude (Sekhanan) to bring them in alive. As much as others revere Sephiroth, his abilities and his reputation, many also respect Zack’s skill. And with good reason: he’s a one-man army, with determination and charisma that inspires admiration, even from his enemies. This is true of all the Turks (who paradoxically sympathise with Zack and Cloud’s plight while remaining determined to bring them in) and especially their leader. Tseng was already questioning Shinra’s unethical practices; he was outspoken about Professor Hojo’s experiments and the treatment of Nibelheim. However, resentful of the Turks, the military defy their authority (and their direct orders) and use lethal force against Zack and Cloud. When they locate the two hitching a ride on a truck, they’re more than happy to take sniper shots at them and unleash their full might against them.
Tseng reflects on Sephiroth’s downfall and Zack’s persecution.
Unfortunately, we’re denied seeing this as the short cuts to the credits right as Zack’s last stand starts. While this is very dramatic, it denies us the full tragedy of Zack’s last moments; we see him fight for his friends and get a taste of his physical ability, but the feature doesn’t go into much depth with this. It’s a shame as the action sequences bring Zack, Sephiroth, and the game’s turn-based battles to life in a visually striking way thanks to the anime’s slick presentation. The battle between Zack and Sephiroth is as beautiful as it is deadly, with the two trading strikes within the hyper-industrialised Mako Reactor and the fight nicely personifies their different personas. Zack is emotional and hot-headed, full of passion and justified anger, while Sephiroth is a cold, soft-spoken, ominous individual, just as he was in the cutscenes and gameplay moments that this feature recreates. We don’t get a sense of his personality before his psychotic break, but Zack and others express shock at his sickening actions and awe at his abilities. Having learned that he was a genetic monstrosity infused with alien DNA, Sephiroth becomes obsessed with freeing his “mother”, Jenovah, and bringing ruin upon the world, starting with Nibelheim. Even with his new skewed outlook and apparent disregard for his SOLDIER honour and the lives of others, Sephiroth still sees Zack as a “traitor” for opposing him. Unmatched in combat and attacking with a blade that’s twice his size (one-handed, no less!), Sephiroth is a formidable foe; his madness has extended to a full-blown God complex and he easily bests Zack. However, Sephiroth’s obsessions also empower him with a faulty overconfidence; thus, he ignores a cardinal rule of battle and turns his back on his foe and is impaled by Cloud. Despite this fatal injury, Sephiroth’s rage and power are enough for him to return the favour, but he underestimates Cloud’s resolve and ends up careening down the reactor shaft, still clutching at his mother’s severed head!
The Summary: I fully admit that I came into Final Fantasy VII a bit ass-backwards. Although aware of the game as a kid, I was a SEGA and Nintendo 64 gamer back in the day; I don’t recall any of my PlayStation-owning friends having the game at the time. So, it wasn’t until I was a lot older and got a PlayStation 3 that I really got into it, and the entire Final Fantasy franchise. This means that my first real exposure to the game was Final Fantasy VII: Advent Children and the handy feature-length recap included. I then played the game, then its spin-off sequel and prequel, and here we are with this anime feature, which I believe I first watched between Advent Children and completing Final Fantasy VII, or somewhere around there. However, I didn’t remember it ending so abruptly, or being so shallow. Despite incorporating musical remixes (including a new version of “One-Wing Angel” during Zack’s duel with Sephiroth) and a handful of Limit Breaks, action sequences are incredibly brief and the short focuses more on being a sombre and brief recap of the Nibelheim incident, something the game’s cutscenes convey in far more detail. Sure, Zack showcases more personality, but the feature is so short that even he is painfully one-dimensional (he’s fierce and loyal and carefree, and that’s about it). The same is true of Sephiroth, Cloud, and Tifa, with only Tifa really standing out because you see a lot of emotion in a very short time from her. If it was supposed to be more of a deep dive into Tseng, Last Order also fumbles the ball as he just seems reflective and conflicted over it all and not much else. It’s a shame as the animation is gorgeous, but Last Order is too short to live up to its potential and left me disappointed that we didn’t get to see more of the game’s moments and features recreated with the same level of detail on show here.
My Rating:
⭐⭐
Rating: 2 out of 5.
Could Be Better
Did you enjoy Last Order: Final Fantasy VII? Do you agree that it was too short to really impress or were you satisfied with the retelling of the Nibelheim incident? Did you enjoy seeing a little more of Zack’s personality and what did you think to the abrupt ending? Would you like to see more anime adaptations of Final Fantasy? Which adaptation of the franchise is your favourite? Whatever you think about Final Fantasy, drop a comment below and be sure to check out my other Final Fantasy VII content.
Cover-dated April 1985, the first issue of this ground-breaking event precipitated the destruction of the “Multiverse” in favour of a unified DC canon. Though DC returned to this concept again and again, that doesn’t change how influential this massive crossover was and what better way to celebrate than with a “Crossover Crisis” of my own?
Published: 3 January 1985 (cover-dated: April 1985) to March 1986 (cover date) Writer: Marv Wolfman Artist: George Pérez
The Background: In Showcase #4 (1956), writer Robert Kanigher and artist Carmine Infantino debuted Barry Allen/The Flash, the successor to Jay Garrick, who was established as an alternative version of the Fastest Man Alive. This concept was taken to the next level when Barry and Jay met face-to-face, revealing an infinite number of parallel worlds. Regular crossovers between the likes the Justice Society of America and the Justice League of America soon followed, allowing alternative heroes and various stories to exist simultaneously. Over time, writers like Mark Wolfman became frustrated with this concept, which made keeping track of continuity difficult and it was hard for both writers and readers to connect with the stories. Wolfman initially pitched a reader guide to simplify the DC universe, which then evolved into a sprawling tale of multiversal destruction seen as a risky proposition as it meant erasing all continuity and starting from scratch to attract new readers. Such an event was unprecedented and DC spent two years laying the foundation for this Crisis, hiring researchers to document every character and event in their library and bringing in George Pérez to illustrate, with the artist excited at the idea of illustrating every DC character. Crisis on Infinite Earths became a bestseller for DC Comics and was heralded as a turning point for both the publisher and the industry. The fallout saw every DC character rebooted, with Clark Kent/Superman notably being reimagined as a more grounded character and Wally West taking over as the Flash, though Carter Hall/Hawkman was irrevocably damaged for years as DC struggled to reconcile certain elements of his character. Praised as the greatest comic book crossover in history, the event popularised massive, cosmic crossovers and DC revisited this concept numerous times in subsequent years. The event was even adapted into an ambitious and well receivedtelevision event and an impressive three-part animated feature.
The Review: Confused by the concept of the multiverse? Well, Crisis on Infinite Earths has you covered, to a degree, as it opens with (and features throughout) narration and exposition from the tragic Kell Mossa/Pariah. In the beginning, before there was light and life, there was only darkness. Then, from nowhere, came a single light that grew and expanded and finally exploded in “pain [and] relief” as the multiverse was born. The idea is infinite parallel realities all co-exist at once, separated by vibrational planes, though this is noted to not have been the intention when the light burst into being. The story the shifts to one such Earth where the hooded, weeping Pariah witnesses the destruction of not only that world, but the entire reality, at the hands of an all-encompassing white light. As entropy erases everything it touches, Pariah begs to be taken with it, sparing him his grim fate, only to be teleported away as the universe meets its destructive end. We then jump to Earth-3, home of the Crime Syndicate, an evil alternative version of the Justice League. There, Harold Jordan/Power Ring and Clark Kent/Ultraman desperately try to stop the cataclysmic natural disasters springing up across their world as the anti-matter wave approaches. While Thomas Wayne Jr./Owlman and Jonathan Allen/Johnny Quick lament their helplessness against such awesome power, the world’s only superhero, Alexander Luthor, watches helplessly as lifelong enemies like Diana/Superwoman are devoured by the anti-matter wave. With no way to save his world, Alexander rushes to be with his wife, Lois, and baby son, Alexander Luthor, Jr. In a parallel to Superman’s iconic origin, the baby is loaded into a specially prepared rocket and spirited away to Earth-1 as his world dies.
With all universes at risk of annihilation, the Monitor assembles a team of heroes and villains.
The mysterious Mar Novu/The Monitor observes this from his orbiting, spherical space station alongside Lyla Michaels/Harbinger, whom he sends to recruit Earth’s greatest heroes and villains to stop the pending Crisis. Harbinger recruits King Solovar from Gorilla City, Dawnstar from the 30th century Legion of Super-Heroes, Danette Reilly/Firebrand from Earth-2 1942, Ted Kord/The Blue Beetle from Earth-4, and Roger Hayden/Psycho-Pirate from present-day Earth-2. She returns Psycho-Pirate’s emotion manipulating Medusa Mask and coerces him into quelling Louise Lincoln/Killer Frost’s bloodlust and bringing both her and Ronnie Raymond and Professor Martin Stein/Firestorm to the cause. Though Harbinger is possessed by a Shadow Demon when recruiting Ahri’ahn/Arion the Sorcerer, he joins the other recruits, including Kal-L/Superman, John Stewart/Green Lantern, Neal Emerson/Doctor Polaris, Victor Stone/Cyborg, Simon Jones/Psimon, and Todd Rice/Obsidian. With tensions running high, the group are attacked by Shadow Demons, which seem impervious to physical, mental, and energy-based attacks. While the likes of the Blue Beetle can only run and Firestorm struggles with Killer Frost’s newfound affections, Obsidian and the arrogant Dr. Polaris put their shadow- and magnetism-based powers to good use. The Monitor halts the attack and introduces both himself and the threat to their universes. Weakened by the spread of anti-matter and facing suspicion from his assembled forces, the Monitor reveals that he’s judged them as the best hope of protecting five devices spread across the different eras that he hopes will halt the anti-matter wave. Meanwhile, reality is warped across the multiverse: in prehistoric times, Anthro the Cave-Boy is as astonished to spot a futuristic city amongst the wilds as Querl Dox/Brainiac-5 is to see mammoths stampeding through the 30th century. Half a galaxy away on Oa, the Guardians of the Universe prepare to summon their entire Green Lantern Corps to meet the threat, only for a mysterious voice to corrupt the Central Battery and trap them in a stasis beam. On Earth-1, Bruce Wayne/Batman is busy confronting the Joker during his latest crime spree and is astonished when an emaciated, confused Flash suddenly appears babbling about the end of the world and begging for help before disintegrating before the Dark Knight’s eyes!
As the Crisis worsens, the Monitors prepares Alexander and a new Dr. Light to face the threat.
On the post-apocalyptic Earth-AD, Kal-L, King Solovar, and Dawnstar meet Kamandi, the last boy on Earth, and discover the Monitor’s device, a towering, golden Cosmic Tuning Fork that’s immediately (though only briefly) attacked by Shadow Demons. Arion, Obsidian and the Psycho-Pirate watch over another tower in Atlantis, only for the Psycho-Pirate to be transported to a dark realm and coerced into turning against the Monitor just as Harbinger secretly conspires with that same dark force. Oblivious, the Monitor experiments on the rapidly aging Alexander Luthor, Jr., an impossible merger of matter and anti-matter who potentially holds the key to defeating the anti-matter spread, whom Harbinger’s dark master wants destroyed before he can threaten his schemes. Meanwhile, in the far future of Earth-1, the Flash races to keep his world from being torn apart from natural disasters but is forced to vibrate at super-speed to escape death. This same anti-matter energy arrives on present-day Earth-1, much to the horror of the Teen Titans, who desperately try to both halt the destructive wave and save lives alongside Batman and Superman. As Linda Lee/Kara Zor-El/Supergirl does the same, Barbara Gordon/Batgirl gives in to self-doubt, and John Constantine arrogantly believes it’ll all work out, Vril Dox/Brainiac coldly observes the events concludes that, if he’s to survive, he must team up with Lex Luthor. While defending a Cosmic Tuning Fork from both Nazi forces and Shadow Demons in 1942 Markovia, the Blue Beetle discovers the mysterious Scarab fused to his suit is lethal to the shadowy entities but is wounded before he can put this to good use and returned to his world by the Monitor to spare him. Back on Earth-AD, the skies turn red and King Solovar succumbs to his wounds while Cyborg, Firebrand, John Stewart, and Psimon team up with some local heroes (including Jonah Hex) in 1879 to defend another tower, only to be as overwhelmed by anti-matter as the far-flung future of the Legion of Super-Heroes. Elsewhere, the terrified heroes of Earth-6 blame Pariah for the looming threat, to no avail (though Pariah does save Tashana/Lady Quark to ease his suffering). While the unseen villain forcibly recruits the Red Tornado, the Monitor activates an “ion-based energy ray” to empower Doctor Kimiyo Hoshi, transforming her into the new Doctor Light and sending her to defend his tower on Earth-1.
Following the Monitor’s death, his champions are convinced to unite and save the remaining Earths.
When the heroes attack her, believing she and the tower caused the entropy, Superman quells the fighting, though things take a turn when the Shadow Demons combine into one gigantic, terrifying entity in each era. Even Princess Diana Prince/Wonder Woman’s hopes of recruiting her Amazonian sisters fail. When Pariah berates the Monitor for not doing more to intervene, he reveals just how weak he’s become and then nobly faces his end at Harbinger’s hands. Distraught, Pariah weeps as Earth-1 and Earth-2 are finally consumed; confused to find his strength hasn’t increased as a result, the dark villain delights in having the Psycho-Pirate torture the Flash. Depowered, Lyla is distressed by her actions but a pre-recorded message from the Monitor reveals that his death allowed his essence to empower his Cosmic Tuning Forks and create a “netherverse”, a pocket dimension to keep Earth-1 and Earth-2 safe. After giving the Monitor an appropriate burial, Lyla, Pariah, and the now teenage Alexander Luthor, Jr. gather both world’s champions on the Monitor’s satellite to merge all existing realities into one lest all worlds and realities be lost. Since there are some doubters, Alexander has them witness the Red Tornado be forcibly transformed into a being of pure, primal force, one easily subdued by sorcerers like Kent Nelson/Doctor Fate and Zatanna Zatara (though Ted Grant/Wildcat’s legs are shattered during the fracas). Thus, even the most sceptical agree to defend their worlds, only for the satellite to disintegrate courtesy of the event’s big bad, the Anti-Monitor! Fleeing to the emptiness of limbo, Alexander moves to save Earth-4, -S, and -X, only for Harbinger to subdue him and take his place. While Yolanda Montez continues Wildcat’s legacy on Earth-2, the Freedom Fighters and the Monitor’s agents come to blows on Earth-X when the Psycho-Pirate, his powers augmented by the demonic Anti-Monitor, stirs fear and hatred amongst them. Similarly, on Earth-1, Billy Batson/Captain Marvel and his siblings mindlessly attack Supergirl and Wonder Woman, though the fighting ends when Harbinger forces Earth-4, -S, and -X into the netherverse alongside Earth-1 and Earth-2, exhausting her incredible powers but dooming them to be slowly merged together.
After Lyla relates the Anti-Monitor’s origin, Supergirl sacrifices herself to try and destroy him.
Thus, Lyla, Pariah, and Alexander assemble Earth-1’s Superman, Earth-2’s (Kal-L), Captain Marvel, the Blue Beetle, Lady Quark, and Uncle Sam and reveal that, ten billion years ago, the Oan scientist Krona dared to seek the beginning of the universe, witnessing a giant hand clutching a star cluster. This caused a cosmic fracture, creating not just the multiverse, but an anti-matter universe and a counterpart to Oa, Qward. After banishing Kronoa, the Oans created peacekeeping forces like the defective Manhunters and the Green Lantern Corps but were fractured by a civil war, birthing the Controllers. Amidst the fighting, the Monitor and his evil, anti-matter counterpart came into being. The Anti-Matter conquered Qward and created the Shadow Demons to spread his influence throughout the anti-matter universe before waging war against the Monitor upon sensing his presence. Evenly matched, they were rendered unconscious for nine billion years before being awoken by the misguided Pariah, once a celebrated healer and scientist who also investigated the origin of the universe. Pariah’s world paid the price, and he was damned to live forever and watch all worlds die, though the Monitor also saw him as instrumental in saving all reality. Alexander uses his unique matter/anti-matter powers to create a dimensional tear to the anti-matter universe, which Pariah leads the heroes to the Anti-Monitor’s vast stone fortress. Enraged that the Psycho-Pirate is too drained to corrupt them, the Anti-Monitor has his stronghold attack, injuring the usually invulnerable Kal-L. Dr. Light and Superman discover the Anti-Monitor’s solar collector but are attacked before they can destroy it and halt the merger of the Earths. Hearing her cousin’s agony, Supergirl flies to Superman’s aid, brutally beating the villain in a rage and chastising his disdain for life, tearing through his protective armour. Furious, the Anti-Monitor prepares to explode with all his energy and, in a last-ditch effort to destroy him, his machine, and save everyone, Supergirl tackles him, destroying his machine but being fatally blasted. As the Anti-Monitor’s deteriorating, incorporeal form slinks away, Superman mourns his cousin’s death and vows to kill the Anti-Monitor. Kal-L calms his counterpart and they escape, and a memorial service is held on Earth-2, where Superman pays homage to Supergirl, vowing to remember her and fight in her name. Despite the loss, the five worlds are saved; similarly, the Green Lantern Corps free their masters and almighty Darkseid wisely cloaks Apokalips from the Anti-Monitor’s gaze. However, the Anti-Monitor reconstitutes himself on his ship, where the Flash is imprisoned, and prepares a counterattack from Qward.
Despite the Flash’s noble sacrifice, the Anti-Monitor gains God-like power from his anti-matter universe.
Though saved, the five worlds are still overlapping, causing anomalies and damage to each while the Anti-Monitor oversees the creation of the anti-matter cannon, which he plans to use to obliterate the worlds. Just as the Psycho-Pirate feels his powers return, the Flash escapes and angrily attacks the sadistic villain, forcing him to turn the Anti-Monitor’s slaves against their master as a distraction. Though stunned to find the anti-matter cannon is powered by concentrated anti-matter and realising that destroying it would kill him, the Flash bravely circles the weapon’s core to turn its destructive energy back on it. Staving off the agony with memories of his loved ones, the Flash runs fast enough to move back in time (explaining his earlier, sudden appearances). Though Barry successfully destroys the weapon, it costs him his life. Enraged, the Anti-Matter absorbs the anti-matter universe, literally sucking the life out of over a million worlds to feed his lust for power and vengeance, an act so awesome that it’s detected by both the Challengers of the Unknown and the embodiment of the Lord’s wrath, Jim Corrigan/The Spectre. In the face of multiversal destruction, the Guardians of the Universe offer Guy Gardner the chance to become a Green Lantern once again and, when all but one of them are all slaughtered by a sudden explosion, Guy vows to avenge them as their champion. The Brainiac/Luthor team then recruit dozens of villains to strike while the remaining Earths are weak and in disarray. As time runs amok on Earth-1 and Alexander, Lyla, and Pariah address the United Nations, the villains make their move, having conquered Earth-4, -S, and -X, encasing them within impenetrable barriers, and threatening to destroy the remaining worlds. Lyla and Jay recruit a reluctant Wally West/Kid Flash to breach the barrier with the cosmic treadmill, though neither Luthor or Brainiac care much about their losses since they still possess the power to destroy everything. However, the Spectre ends the hostilities by revealing that the Anti-Monitor still lives and plans to corrupt the flow of time and formation of life by travelling to the dawn of time.
The Spectre demands co-operation, resulting in a singular world being created.
With the villains back on side, Kal-L bids an emotional farewell to his wife, Lois Lane, to join the counterattack, alongside a surprising newcomer: the Superboy from Earth-Prime (a fictional approximation of the real world where he’s the only superhero). After a rousing speech from Uncle Sam, heroes and villains alike pool their technology and powers to travel to the dawn of time and confront the anxious Anti-Monitor. The Anti-Monitor reveals that he, not Pariah, was responsible for the destruction of Pariah’s world after he took advantage of Pariah’s experiments to rebuild his power, absolving the tragic figure of his sins. Now grown to immense proportions, the Anti-Monitor withstands the assault of those assembled (with guys like Batman offering only support), absorbing their life energy to add to his power and allowing his hand to be the one that shapes all reality, as witnessed by Kronoa. His grasp is intercepted by the Spectre and the combined magic of the unified sorcerers, reducing the battle to a literal arm wrestle between the Anti-Monitor and the Spectre. Thanks to their bickering, Luthor’s underlings fail to kill Kronoa before he can cause the creation of the multiverse and the Anti-Monitor, and all seems lost. However, following a blinding light and the literal shattering of all time and space, Kal-L awakens on present-day Earth to find he’s on the same world as his Earth-1 counterpart. Sharing the same fragmented memories, Superman explains that time seems to be healing (albeit wonkily) and that elements of multiple Earths have been merged into one. For example, everyone knows Supergirl died but not how, the Flash is presumed vanished, and Earth-2’s Keystone City and Jay Garrick now live on this Earth. Jay, Wally, and the Supermen use the cosmic treadmill to discover Earth-2 is missing. Realising that the multiverse no longer exists, Superman has to force his older counterpart to return rather than throw himself into the endless void in despair. With the cosmic treadmill irreparably damaged, Wally assembles everyone at Titans Tower, discovering guys like Captain Marvel, Superbody-Prime, Uncle Sam, and the Earth-2 Dick Grayson/Robin also exist on this world, where they’re all shocked to see Harbinger alive and powered back up. The refugees are despondent and horrified to learn their worlds, pasts, and many loved ones are gone thanks to “cosmic irony” as Harbinger explains that there is now one Earth with one coherent timeline that folds their disparate lives into its flow, sending Kal-L into a crazed distress at having lost his wife and home.
A final, all-out assault ends the Anti-Monitor and starts the universe anew, with some casualties.
After questioning the imprisoned Lex Luthor, Batman, Jason Todd/Robin, and Alexander confirm that, while some duplicates remain and some lives were restored, others weren’t and only those who present at the dawn of time remember the multiverse. Just as they’re processing this, the skies turn red and the world suddenly shifts to the anti-matter universe, where the titanic, disembodied Anti-Monitor still lives! Though incensed by their efforts, the Anti-Monitor congratulates them for handing him his first defeat in ten billion years and then decrees that they must all die. Wally’s shock at his mentor’s death is mirrored by the abject panic that sweeps the civilians following the Anti-Monitor’s threat, which doubles when the Shadow Demons kill Don Hall/Dove, Helena Wayne/Huntress, and Tula Marius/Aquagirl. While the sorcerers remove the Shadow Demons, Harbinger assembles one last effort to stop the Anti-Monitor on Qward. Though the Anti-Monitor is too large and powerful to be damaged, Harbinger has Dr. Light absorb the star feeding him power, weakening him enough for Alexander to breach the villain’s armour. With the threat seemingly ended by a combined energy blast, Alexander struggles to return Earth home and the Anti-Monitor absorbs his exiled Shadow Demons to rise again and vaporise Wonder Woman. Rather than see anyone else die, Kal-L tackles the Anti-Monitor, believing he’s got nothing to lose, and Alexander and Superboy-Prime are trapped with him. Though Darkseid, watching from Apokalips, strikes a fatal blow through Alexander’s eyes, the Anti-Monitor refuses to die, so Kal-L delivers a final strike that obliterates the tyrant. Faced with the pending destruction of the anti-matter universe, Kal-L and Superboy-Prime prepare to meet their end only for Alexander to teleport them, alongside Kal-L’s Lois, to a pocket dimension. In the aftermath, Wonder Woman returns to the clay that forms Themyscira, her Earth-2 counterpart is welcomed among the Gods, the dead heroes are memorialised, and Wally assumes the Flash mangle. Confined to Arkham Asylum, the Psycho-Pirate is dubbed a raving lunatic since he’s the only one who remembers the multiverse and the catastrophic events of the Crisis.
The Summary: Whew, there’s a lot happening in Crisis on Infinite Earths. There’s a reason I’ve put off reviewing it for so long, and why I rarely revisit it. It’s a very dense and complex story, full of exposition and cameos and faces both obscure and iconic. As a celebration of DC’s rich history and characters, it’s hard to find much better than Crisis on Infinite Earths, which stuffs just about every costumed character, hero or villain, into its dense twelve issues! My hat’s off to George Pérez; it must’ve been painstaking to sketch all these group shots, action sequences, montages, and dramatic events. Equal praise to Marv Wolfman as I can’t imagine how difficult it was to make sense of all these different worlds and come up with a cohesive way to explain, link, and destroy them all. In the end, the solution was simple: pure, destructive, unstoppable entropy. It’s fitting that the anti-matter wave is depicted as a blinding white light that erases everything it touches, for it symbolically represents a blank page or an artist’s eraser, indicating that these colourful and convoluted worlds are being literally wiped clean for a new status quo. Our guide through most of this is Pariah, a tragic figure doomed to watch each world die as penance for kick-starting the events that follow. Immortal but seemingly powerless to intervene, all he can do is shout desperate warnings and is powerless to rescue anyone and constantly met with aggression, suspicion, and accusations. He’s merely a pawn in a much larger game, however, much like Harbinger, who acts as an all-powerful emissary of the Monitor and deliver exposition in his stead. A conflicted individual burdened with the knowledge that she will betray and murder the man to whom she owes her life, Harbinger, nevertheless works to uphold the Monitor’s legacy and bring together heroes and villains alike to stand against his dark counterpart.
The Anti-Monitor’s power sends shockwaves through the multiverse and those who’ve witnessed it.
The dreaded inevitability of death is a focal point in Crisis on Infinite Earths. When the anti-matter wave hits, heroes and villains set aside their differences and use all their powers and resources to either stop it or save people from its destructive touch. Even the abhorrent Crime Syndicate find themselves fighting to save their world and Ultraman willingly enters the wave to die on his terms. Even before the wave arrives, the worlds are shaken to their core by natural disasters; volcanoes, tsunamis, and ominous, crackling red skies precipitate the disaster as much as Pariah. Perhaps no character is more synonymous with the coming destruction than the Flash; thanks to his super-speed, he ends up travelling through time, arriving before the likes of Batman and Wally as an omen of what’s to come and taking on an appearance that resembles Death itself. The Anti-Monitor echoes this in his design; though shrouded by his all-powerful armour, he sports a skull-like visage and dark, piercing eyes. Commanding demonic shadows, he’s very much the embodiment of Death and his lust for utter annihilation drives him to snuff out all life and light. Sadistic to the core, he employs the Psycho-Pirate to foster fear and hate, turning his would-be opponents against each other and causing countless more deaths. His ruthlessness seemingly knows no boundaries as he gleefully corrupts Harbinger, relishes the death of his counterpart, and nonchalantly obliterates his rebellious slaves without a second thought. His power and cruelty are so great that even the mighty Darkseid is driven to hide rather than confront him, striking when the villain is at his most vulnerable and largely avoiding the greater conflict. For all his God-like power, the Anti-Monitor still relies on technology; his merger and destruction of worlds can be halted or stopped by Cosmic Tuning Forks or destroying his solar collector. Indeed, it’s only after his massive, world-ending cannon is destroyed that the Anti-Monitor eschews all other methods and absorbs the entire lifeforce of the anti-matter universe into himself to literally take matters into his own hands.
The Supermen anchor the story, leading the assembled champions in battle and saving all reality.
There is no one central character in Crisis on Infinite Earths. Instead, it’s a team-up story through and through, meaning some of your favourites may be sidelined. In some respects, I don’t mind this; Batman outright admits how useless he is against the Anti-Monitor and it’s clear only beings of incredible power can stand against him. Yet, the Blue Beetle is said to be pivotal in opposing the villain, the Red Tornado is briefly said to be incredibly important, and Lex Luthor comes close to co-ruling five entire worlds and even leads the charge to assassinate Kronoa. The Earth-2 Superman, Kal-L, is often at the heart of the conflict, leading the others and inspiring confidence, as is his Earth-1 counterpart. It’s therefore more tragic seeing Superman’s grief-stricken reaction to his cousin’s death; holding Supergirl in his arms, the Man of Steel briefly forgets his morals and vows to kill the Anti-Monitor as recompense. This is but one of the unforgettable deaths featured in Crisis on Infinite Earths as the Flash sacrifices himself to deal a critical blow to the Anti-Monitor, making a martyr of himself for decades before DC made the bone-headed decision to revive him. There’s an odd dichotomy in Crisis on Infinite Earths; these alternative worlds and characters co-exist and are even folded into one by the end. Rather than wiping everything away and starting afresh by the conclusion, the story clunkily has the survivors forget key events and weaves characters like Captain Marvel and the Justice Society into a unified timeline. This works for me as I prefer a coherent narrative, but it essentially means Crisis on Infinite Earth takes place mid-way through the early years of the post-Crisis reboot and reimaginings like John Byrne’s Superman stories happen before and during this event, rather than after it.
Worlds lived, worlds died, and the DC Universe was never the same…for about twenty years…
These days, Crisis on Infinite Earths may be a lot for modern readers to take in. Many of its characters and concepts are either forgotten, wildly different, or have been done to death thanks to the multiple reality-altering events that followed (many specifically to address loose ends from this story). At the time, though, I’d wager many long-term DC readers appreciated the cameos and call-backs weaved into the story. I’m glad DC devoted twelve issues to the story and didn’t rush it, but it does get repetitive and convoluted as it drags on. The secondary threat of Brainiac and Luthor directing a team of villains to conquer the five worlds, for example, could probably be skipped or relegated to a tie-in comic. Similarly, the defending of the Cosmic Tuning Forks isn’t very interesting and doesn’t really add to the story since we barely see any action around this, the Shadow Demons are too powerful to be interesting, and it’s all negated by the Monitor’s death. In this respect, I think the event could’ve been cut down to eight or ten issues and still been just as effective, especially as many Earths and characters feature as quick cameos to be obliterated. The remaining five Earths are said to be the most important, which is a little disrespectful to those that perished by the Anti-Monitor’s hand and a bit of an insult to any fans of those worlds. I liked seeing new heroes rise during the chaos, like a new Dr. Light (who was an aggressive bitch throughout), Wildcat, and Guy being Green Lantern again, though it falls a little flat when you know the canon is going to be altered after this to return the status quo. I liked the Anti-Monitor’s design and his characterisation as a reprehensible being who craved only power and destruction, but it was hard to get a sense of his power and limitations. One minute he’s weakened by giant towers, then his armour is containing his energy, and then he’s being powered by a black sun despite having absorbed the lifeforce of his anti-matter universe. Still, the unification of heroes and villains to oppose him was fun to see, the sacrifices and determination were poignant, and the weaving together of a singular continuity, while flawed, was ambitious and visually engaging to behold.
My Rating:
⭐⭐⭐⭐
Rating: 4 out of 5.
Great Stuff
Have you ever read Crisis on Infinite Earths? What did you think of this unprecedented mash-up of DC’s various worlds and characters? Which parallel world was your favourite and were you upset to see destroyed? What did you think to the Anti-Monitor, his vast power and his stubborn refusal to die? Were you shocked to see Supergirl and the Flash die so dramatically? Do you agree that the story dragged on a bit by the end? Which of the subsequent Crisisevents was your favourite and what are some of your favourite cosmic events? Drop a comment below to share your thoughts about Crisis on Infinite Earths and feel free to check out my reviews of other notable crossovers.
Writers: Frank Miller and Roger McKenzie –Artist: Frank Miller
Story Title: “She’s Alive” Published: 26 January 1982 (cover-dated: May 1982)
Story Title: “Child’s Play” Published: 23 February 1982 (cover-dated: June 1982)
Story Title: “Good Guys Wear Red!” Published: 23 March 1982 (cover-dated: July 1982)
The Background: The 1960s were a golden age for Marvel Comics, when Stan Lee teamed with the likes of Steve Ditko and Jack Kirby to create some of their most recognisable superheroes. On 1 April 1964, Stan Lee and artist Bill Everett introduced their most challenging hero yet, Matt Murdock/Daredevil, who became a popular and enduring character thank to the efforts of writer/artist Frank Miller, who spearheaded some of Daredevil’s most memorable stories. It was during Miller’s run that Daredevil first crossed paths with Frank Castle/The Punisher, a Vietnam veteran-turned-mercenary vigilante who first appeared in Amazing Fantasy #15. Inspired byThe Executioner (Pendleton, et al, 1969 to present), designed by Gerry Conway, and named by Stan Lee, the Punisher was a natural foil for the more righteous and law abiding Daredevil. The two have clashed, begrudgingly teamed up, and debated their different philosophies numerous times in the years since they first met. Their memorable rivalry even made it to the silver screen when the two clashed on the streets and in the courtroom during Daredevil’s second season (Various, 2016).
The Review: Our story begins with Matt Murdock still reeling from the recent murder of his lover, Elektra Natchios, at the hands of the sadistic mercenary, Lester/Bullseye. Despite having cradled Elektra in his arms, felt her last heartbeat, heard her death rattle, and attended her funeral, Matt awakens from a nightmare convinced that she’s somehow still alive. Overwhelmed by guilt at having not done more to steer Elektra away from the ninja organisation, the Hand, and the dark path that led to her becoming an assassin, and sure that those same ninjas taught her a way to fake her death, Matt pulls on his costume and heads out into the snow swept night to get some answers. This takes him to a “grimy underworld saloon”, where Daredevil kicks the shit out of the patrons, easily dodging their blows and bullets, and accosts one of them into revealing that Wilson Fisk/The Kingpin is holding a summit of the city’s top mobsters at midnight. Sure that the Kingpin must be trying to sell Elektra’s services, Daredevil returns to his civilian identity and has his secretary, Rebecca “Becky” Blake, go through the coroner’s report on Elektra’s body. Despite the evidence stating quite clearly that Elektra suffered mortal wounds, Matt’s convinced that the body could’ve been swapped and is so blinded by his obsession with proving that his former lover is still alive that he gives his current love interest, Heather Glenn, the cold shoulder. Indeed, it’s only when his best friend and law partner, Franklin “Foggy” Nelson, chews him out that Matt begins to question his state of mind. Across the city, in Ryker’s Island penitentiary, Frank Castle is locked up alongside the city’s scumbags. When the Punisher puts Joe Carson/Injun Joe in the infirmary, a few of his boys accost him in the showers and, despite being outnumbered by the armed assailants, the Punisher easily overpowers and kills the three. Though indifferent to his actions, the Punisher is intrigued when an emissary of the “agency” offers to get him out of prison so he can covertly intercept a shipment of narcotics, and promptly escapes via helicopter.
Matt’s obsession over Elektra’s death is compounded when the Punisher goes on a killing spree.
Thus, the Punisher heads to Long Island and lays in wait for the shipment. Thanks to his trip wires, tear gas, and skill with a shotgun and assault rifle, the Punisher wipes out the goons, even gunning one down after he surrenders since “war [doesn’t] take prisoners”. However, the Punisher is distraught to learn his victim was merely a child; laying out the G-man, the Punisher vows to continue his war on crime, especially if evil is corrupting children. Daredevil easily dispatches the Kingpin’s goons and confronts the rotund crime boss regarding Elektra, confusing Fisk with his accusations and eventually leaving after the Kingpin calls his bluff, confirming that Matt hasn’t completely gone off the deep end just yet. Foggy’s concerns are only exacerbated when he’s awoken in the middle of the night to learn that Matt coerced a city judge into signing an exhumation order for Elektra’s body! By the time Foggy gets to the cemetery, Matt has already frantically, feverishly dug up Elektra’s grave, only to confirm with his very hands that his lover is, in fact, dead and causing him to break down in tears in his friend’s arms. Still reeling from this moment, Matt is horrified when a young schoolgirl suddenly freaks out in the middle of a Civics class he’s attending and, convinced that snakes are crawling over her skin, throws herself out the window! Switching to Daredevil, Matt races the girl’s broken body to the hospital, only for her to succumb to her injuries thanks to the “Angel Dust” in her system. Daredevil learns from the doctor that the girl is the latest in a long line of child victims of drugs, with phencyclidine being the most common and most dangerous as it causes many horrible side effects, including psychosis, and lingers in the system for years. Donning a simple disguise (over his costume, no less), Daredevil hits the streets to try and get a lead on Peter Grunter/Hogman, one of the lead pushers of the drug, only to be attacked by drugged-up kids. Although Daredevil pulls his punches, sympathetic to their plight, he’s stunned when the Punisher appears, murders one of them with a knife, and prepares to execute the others in cold blood.
While working to prove a boy’s innocence, Daredevil clashes with the hard-nosed Punisher.
Although Daredevil keeps the Punisher from carrying out the kill, and the Punisher expresses respect for ol’ hornhead, the two are stunned when another shooter guns down one of Daredevil’s attackers. While the Punisher is indifferent, Daredevil is aghast to discover the shooter is William “Billy” O’Koren, the brother of the girl who was driven to suicide. Matt pledges to represent Billy in court, sure that he’s innocent, a hunch he all-but confirms when he returns to the crime scene. The Punisher also suspects that a more competent sniper made the shot, despite a lack of tangible evidence. Daredevil gets some intel on the Punisher from Ben Urich (who’s aware of Matt’s dual identity), who warns him against going toe-to-toe with the Punisher since he’s a well-trained, cold-blooded killer. As luck (or fate) would have it, the Punisher just so happens to be beating up a junkie on a nearby rooftop, so Daredevil intervenes, disgusted by Castle’s brutal methods, which the Punisher defends as the only way to permanently deal with criminals. While Daredevil’s quick to fight, the Punisher suggests they team up to eliminate their common enemy and, when Daredevil adamantly refuses, he spares his foe a quick death by shooting Daredevil with a tranquilizer dart. Severely weakened from the shot, Daredevil’s powerless to stop the Punisher beating his victim so badly that he suffers a heart attack. Luckily, Daredevil’s quick bout of CPR sees the junkie cling to life and point him towards a restaurant, where Daredevil finds the elusive Hogman. When Hogman’s cohorts refuse to back him up, the drug peddler is apprehended by Daredevil and the Punisher’s victim recovers to testify in court, absolving Billy of any wrongdoing, though Matt’s stunned when his super senses reveal that Hogman is also innocent of murdering his partner.
A mistake by Daredevil sees him and the Punisher battling for a boy’s soul.
After winning Heather back with a marriage proposal, Matt volunteers to represent Hogman and prove his innocence. Sure that Matt can absolve him of the crime, the arrogant Hogman stuffs his face with pasta, unaware that the stoic Punisher has taken up a sniping position on a rooftop across the street. Luckily, Daredevil is on hand to keep his client safe but, when the Punisher’s shot buries him under a pile of bricks, Daredevil again fails to apprehend the murderous vigilante. Although Matt claims to have evidence to prove that Hogman is being used as a convenient patsy by the true culprit, Billy’s coach, Patrick Donahue, he doesn’t get solid confirmation until Donahue calls him to discuss the whole operation in private. The call costs Matt dearly as he ends up giving Heather the brush off and it leads to Matt being attacked by the rabid Donahue, who’s been driven to a crazed frenzy by his own drugs! Despite the coach’s augmented strength, Matt uses his agility to put him in a choke hold and subdue him, theorising that a third party juiced Donahue up. In court, Matt successfully absolves Hogman of his crime, only to learn afterwards that the scumbag is not only guilty, but gleefully causes his returning customers to overdose to amuse himself. When Daredevil confronts Hogman, threatening to beat him to a pulp, Matt realises he’s been played for a fool as Hogman’s pacemaker screwed up his radar sense. When Billy decides to take the law into his own hands, Daredevil races to intervene, only for the Punisher to show up and subdue Hogman with some well-placed shots. Daredevil stops him from delivering the killing shot and calls the Punisher’s bluff, fully aware that he’s purposely missing and would never knowing kill an innocent person. Although the Punisher again offers a truce, he’s stunned when Daredevil subdues him with a gunshot, leaving Matt free to appeal to Billy’s better nature. His pleas get through and Billy testifies against Hogman, leaving the drug baron facing serious jail time and Matt emphasising the importance of following the law to the impressionable pre-teen.
The Summary: I’ve talked about this before, but I’m really not a big fan of Frank Miller’s art. He’s nowhere near as bad here as he is in his efforts for DC Comics and his independent publications, but he really does draw some of the ugliest faces I’ve ever seen. His use of shadows and lighting are extraordinary, however, and he draws a very dynamic and intimidating Daredevil, something bolstered by the start darkness of night. In Miller’s hands, New York City and Hell’s Kitchen are a dark, ominous place that feels very dangerous. Violence stalks the streets, but this is taken to the next level here as Hogman sells drugs to kids, using Coach Donahue as a gofer and selling to kids at a Catholic school. Happy to cause overdoses and kill anyone who tries to speak out against him, even if they’re his partners, Hogman thinks nothing of abusing the law system and little children to come out on top. He’s practically giddy when Matt clears him of murder, only to immediately reveal that he’s “guilty as sin”, and Matt’s left humiliated since he was convinced of the villain’s innocence thanks to Hogman’s pacemaker. Matt’s a bit all over the place in these issues, reeling from Elektra’s murder and as desperate to prove that she’s alive as he is to defend Billy and keep the neighbourhood kids free from drugs. Grief hits Matt like a brick wall, causing him to descend into denial and desperation, only to be mocked by the likes of the Kingpin, push away those closest to him, and ultimately go to extreme lengths to prove his theory…only to find that Elektra is well and truly dead. This revelation seemingly snaps Matt from his malady as he’s back to normal in the very next issue and doesn’t mention Elektra again, instead turning his focus towards Hogman, the kids he abuses, and the Punisher.
Sadly, Daredevil and the Punisher don’t clash enough, physically or ideologically, for my tastes.
The Punisher pretty much steals the show here. Still portrayed as a ruthless vigilante killer, he’s largely indifferent to the world around him, as though sleepwalking through life and unconcerned about the machinations of those who would seek to release him onto the streets. Castle couldn’t care less about the scumbags he kills and only shows a shred of remorse when he’s forced to gun down a kid. Even then, rather than dwell on how his actions have cost a misguided youth their life, the Punisher refocuses his energy on taking out those responsible for putting the boy in that position in the first place. Interestingly, the Punisher has no desire to fight Daredevil; indeed, he not only purposely misses his shots but shows a great deal of respect for ol’ hornhead. The Punisher repeatedly offers to form a partnership with Daredevil, believing they’re kindred spirits who fight for the same thing against a common enemy, only to be rebuffed each time. While the Punisher is respectful towards Daredevil, Matt attacks Castle without hesitation, disgusted by his disregard for the law and the lives of his victims. It’s an interesting dichotomy since Matt, as a vigilante, is breaking the laws he so diligently serves in his civilian guise so it’s a touch hypocritical for him to lecture the Punisher on his vigilante ways. Of course, the real difference between the two is that the Punisher kills his victims whereas daredevil just beats them up and has them arrested so they can stand trial, a system the Punisher openly mocks for being flawed and broken. While Daredevil valiantly fights to defend all lives and everyone’s rights, even those of scumbags like Hogman, the Punisher takes a more direct approach, putting the two at natural odds. Unfortunately, this isn’t explored that well here; their fights are very brief, their different ideologies barely touched upon, and much of the potential of their first meeting is secondary to the main plot concerning Hogman. Therefore, these issues are important for being the first meeting between these two characters but there are far better clashes between the two out there, such as Garth Ennis’s iconic story from the early 2000s.
My Rating:
⭐⭐⭐⭐
Rating: 4 out of 5.
Great Stuff
What did you think to the first meeting of Daredevil and the Punisher? Do you agree that the story didn’t quite live up to its potential? What did you think to the differences between Daredevil and the Punisher, particularly in their methods? How impactful did you find the main plot concerning kids and drugs? What are some of your favourite Daredevil and Punisher moments and how are you celebrating the Man Without Fear this month? I’d love to know your thoughts so feel free to share them in the comments below, support me on Ko-Fi, and be sure to check out my other Daredevil and Punisher content.
Released: 26 September 2024 Originally Released: 18 December 1987 Developer: Square Enix / TOSE Original Developer: Square Also Available For: Android, Mobile, Nintendo Switch, PC, PlayStation 4, PlayStation 5, Xbox One, Xbox Series S (Pixel Remaster); EZweb, Game Boy Advance, i-mode, J2ME, MSX2, Nintendo 3DS, Nintendo Entertainment System (NES), PlayStation, PlayStation Portable (PSP), WonderSwan Color (Original / Ports)
The Background: Midway through the 1980s, videogame developer Square first branched into the Japanese videogame industry with simplistic role-playing games (RPGs), racing titles, and platformers for the Nintendo Famicom. Cautious to risk their sales, they initially refused to allow Hironobu Sakaguchi to develop a more complex RPG, however the success of Dragon Warrior (Chunsoft, 1986) saw Square reconsider this decision. Accordingly, Sakaguchi put together a small team to develop what he saw as his last chance to achieve success in the industry. Though Sakaguchi was known as a hard taskmaster, his team worked hard to conceive of the game’s turn-based battle system and lore, inspired by Dungeons & Dragons, and advocating for as much player choice as possible. Yoshitaka Amano joined the project as the character designer while Nobuo Uematsu came on board as the composer, while Nasir Gebelli was brought in to code the game and design an additional sliding puzzle minigame. Against the odds, Final Fantasy proved a critical and commercial success and a game-changing entry in the RPG genre, despite its difficulty and laborious mechanics. This success launched a slew of sequels, spin-off titles, and multimedia ventures, turning Sakaguchi’s last-gasp at success into perhaps the most prolific RPG franchise in all of gaming. Over the years, Final Fantasy has been ported to multiple consoles, adding visual and gameplay upgrades to each new version, such as the quality of life tweaks, a “Bestiary”, and additional dungeons seen in the warmlyreceived Game Boy Advance version that I first played. This rebuilt version of the game was originally exclusive to mobile platforms and Steam, before jumping to home consoles and, eventually, the Xbox series in late-2024. Although this Pixel Remaster removed some features from previous ports, it boasted a much-needed visual upgrade to the classic game and included some modern features to make the experience more accessible, resulting in a largelypraised collection of RPG classics.
The Plot: Upon arriving in the medieval fantasy land of Cornelia, four Warriors of Light are charged with rescuing Princess Sarah from the rogue Cornelian knight, Garland. However, their journey sees them embroiled in a paradoxical plot to upset the four elemental Crystals and spread chaos across the land using four mythical Fiends.
Gameplay and Power-Ups: Final Fantasy: Pixel Remaster is a spruced-up overhaul of previous 16-bit remakes of the original Final Fantasy. Accordingly, the game is a traditional turn-based RPG title in which players explore a vast overworld and various dungeons from a top-down perspective and engage in regular, random battles while exploring outside towns. As soon as you start the game, you must form a team (or “party”) of four characters, picking from six different character classes (also commonly referred to as “Jobs”). Each has different strengths and weaknesses and can be equipped with different gear, and each class is later upgraded after you acquire a specific key item and talk to the legendary king of dragons, Bahamut, which allows even a Warrior to cast magic. Due to sticking closely to the original NES version, Final Fantasy: Pixel Remaster’s actions are relatively simple, with you using A to talk to non-playable characters (NPCs), open treasure chests, enter your Airship, and to select commands from the various menus. B backs out of these menus and cancels your last order, while “Start” pauses the game. Y brings up a full screen map, which clearly shows towns and things of interest and is a godsend since this was missing in previous versions. A mini map also appears onscreen, which you can toggle with the Right Trigger. X opens the main menu, where you can tinker with either the party or the in-game settings. You can rearrange the order of your party (which changes the overworld sprite), though you won’t be placing characters in front or behind to increase or reduce damage. You can also use various items both in and out of battle, equip various gear (weapons, shields, and clothing, for example), and review or use any spells you’ve acquired from the various magic shops found in each town. When in battle, you can choose to attack, cast magic (which can only be done so many times), use items, or flee. You can still be attacked when fleeing, and you’ll forfeit any experience points (EXP) and Gil (the currency of Final Fantasy) you would’ve earned from a victory. Finally, you can enable the “Auto-Battle” option to have the CPU repeat your last inputs and speed up encounters.
Gear up your party of chosen warriors and prepare for an arduous, fantastical quest.
Battles were frequent in the original Final Fantasy, with anywhere from one to nine enemies randomly attacking after one step or more. These are a bit less annoying in the Pixel Remaster, however, and you can even toggle them off from the “Boost” menu. I’d recommend battling every enemy you encounter, not just to stock up on Gil and randomly dropped items, but also to gain EXP and level-up your party up to stand a better chance against later battles and bosses. The “Boost” menu also allows you to increase the Gil and EXP you receive, meaning you can level-up your characters and increase their stats even faster. This ups their attack power, evasion, and maximum health points (HP), enabling them to take more hits before being knocked out or more easily flee. Each class utilises different weapons and gear and has pros and cons. The Warrior, for example, can wield powerful swords and block damage with shields, but their magic is limited. The Thief attacks with high accuracy, but their gear selection is poor; the Monk can easily flee but cannot use shields and fights best bare-handed. The White and Black Mages specialise in healing and offensive magic, respectively, with the Red Mage being the jack of all trades and probably your best bet for overall coverage. Although you cannot summon powerful monsters to aid you in battle or utilise class-specific moves like stealing items or learning enemy attacks, you can use certain gear in battle to cast magic without cost. You can cast elemental magic against enemies, such as Fire, Blizzard, and Thunder, or restorative spells on your party to cure status effects like Poison or Stone and even return them to life. Magic is a bit weird in this game, with you having to buy it for extortionate prices and characters only able to learn select spells according to different “magic levels”. Better, more useful spells like Flare, Holy, and Warp can all be learned as you progress, allowing you to deal or heal additional damage, escape from dungeons, and up your attack or evasiveness, among other buffs. While some status ailments (like Darkness and Paralysis) disappear after battle, others (Poison and Stone, for example) can only by cured using magic or items; even resting at an inn won’t remove these effects, which can be aggravating.
Some dungeons have hazards to watch out for and you’ll soar through the sky in an Airship.
On the plus side, the Pixel Remaster utilises both autosaves, quick saves, and a manual save anywhere outside of a battle screen, you can find loads of treasure in each area, and you can always backtrack to cheaper inns if you’re low on Gil. Still, Final Fantasy: Pixel Remaster certainly doesn’t hold your hand. While things are pretty linear at the start, you’ll soon be left wandering the overworld with little direction on where to go and what to do. NPCs offer hints and inform you of their current troubles, but it’s mostly up to you to figure out where to go next. It’s not uncommon to stumble upon caves and blocked paths, or NPCs who require items but won’t tell you where to find them. It’s equally easy to miss crucial pick-ups or interactable elements in some dungeons, such as the Cavern of Earth, where you must return with the Earth Staff to proceed further. Most dungeons are simply mazes of tight corridors and stairs, though teleports pop up in the Flying Fortress. Some dungeons contain cracked floor tiles that drop you to lower areas, lava or spiked floors that sap your health, a maze of doors that turn you around, and even areas where random encounters are increased! Unless you battle one of the main bosses, you can’t exit a dungeon until you purchase the Warp spell, so it pays to have a good stock of healing items and to watch your resources so you can stay alive long enough to leave the more labyrinthine areas. You’ll need key items like the nitro powder, oxyale, and the magic key to unlock new areas or progress further and it’s recommended that you spend time grinding as the difficulty can spike at times, especially in the endgame. While you wander about on foot most of the time (and should therefore enable the “run” option in the settings), you soon acquire a pirate ship to cross the sea, a rowboat to travel through shallow streams, and eventually an Airship to fly over the map with no fear of random encounters (though limited places to land).
Presentation: Final Fantasy has been completely overhauled here, ditching the indistinct and outdated 8-bit graphics and adding an additional graphical flair to the 16-bit paint job seen in the Dawn of Souls (Square Enix/TOSE, 2004) version I first played. This not only brings Final Fantasy more in line with the standard set by Final Fantasy VI (Square, 1994) but also adds some visual effects to compliment the sprite work, such as fog, rushing water, twinkling snow, and more theatrical spells in battle. This also means that sprites are far more detailed and lively, towns and dungeons pop with colour and little details, and a touch of Mode 7 brings an additional gravitas to your flights around the overworld. The graphical overhaul extends to the game’s cutscenes, which introduce the basic story and show new areas unlocking or being altered by your actions. This is all bolstered by a remix of Nobuo Uematsu’s timeless score, which gives each area a distinct identity and makes boss battles more dramatic. However, as slick and detailed as the game looks, there are still some holdovers from the 8-bit days. Sprites constantly run in place, for example, and, though each character in your party can be named, they’ll never speak during the game. Still, your party exudes a decent amount of character at times, splitting out from your lead character during key events, celebrating victories, slumping in defeat, and even keeling over when afflicting with status ailments. Character sprites change when you upgrade their classes (or press the shoulder triggers) to keep things visually interesting and they’ll even whip out different gear when you equip new weapons, which was a nice touch. Battle animations are limited, with basic attacks never connecting with either party, but magic effects are very impressive, with flames bursting from the ground, tidal waves sweeping your party away, and bolts of lightning raining down. There are some nice visual effects are times, too, such as clouds passing by beneath the Flying Fortress, bosses disintegrating upon defeat, harmless bats flittering about in caves, and the Airship and Mirage Tower making their grand entrances.
The graphical overhaul brings a whole new lease of life to this classic RPG title.
Final Fantasy: Pixel Remaster has both feet firmly planted in a medieval fantasy setting. Accordingly, you’ll visit numerous towns in the shadow of large, stone castles and populated by colourful NPCs, from dwarves, to dragons, to mermaids. Some even speak with regional accents not unlike Scottish or Irish, which was a welcome detail, and others change their dialogue after you’ve liberated their towns or defeated whatever evil threatens them. Each town is very distinct, though they share common elements such as stone paths, rural brick buildings, wells, churches, and churchyards. Castle Corneria is an ornate abode of marble statues and beautiful carpets, Pravotia is a town criss-crossed by moats and under siege by Bikke’s pirates, Mount Duergar is a dwarf mine where blacksmiths toil, and Melmond is a town in ruins thanks to a local vampire. While caves and dungeons are primarily differentiated by colour palettes and different layouts, some stood out, such as the volcanic Mount Gulg, the trepidatious Cavern of Ice, and the pyramid-like Mirage Tower. Depending on where you are, the battle backgrounds also change, ranging from a swamp-like marsh to a dark cavern to a cosmic barrage of colours by the end. In-game cutscenes shine with their use of sprite-based assets, such as the king’s men hastily constructing a bridge to speed you on your quest and Bahamut majestically spreading his wings before upgrading your classes, with the game’s ending providing a sneak peek at the peace your actions have brought each location. The game performs exceptionally well, with battles loading and progressing with a slickness the NES could only dream of, though the game can still be tedious due to the constant grinding to survive its progressively more powerful enemies. The methodical nature of its genre means you may get frustrated by the barrage of battles, even with the boosts and Auto-Battle enabled, though things are far less aggravating than in previous versions thanks to the autosaving allowing for quick reloads.
Enemies and Bosses: There are loads of fantastical, monstrous, and aggravating enemies to contend with in Final Fantasy, with many being recycled as palette swaps but augmented by greater attack power, magic, or coming in larger groups. Various goblins, snakes, tarantulas, and sharks are commonplace enemies, for example, alongside more recognisable enemies such as the Sahagin lizardmen, who naturally make their debut here. Golems, crocodiles, hydras, various dragons, and undead enemies like mummies, vampires, and ghouls all crop up alongside giant worms, bizarre cycloptic creatures, wolves, tigers, and ogres. For the most part, these enemies are relatively unspectacular, lashing out with simple melee attacks and going down in just a few hits. Others, like zombies, Chimera, and the techno-organic Soldiers, both resist and are immune to certain elemental magic. Undead enemies, for example, are particularly weak to Dia spells, the different Elemental enemies will be weak to their corresponding element, and many drop items or gear upon defeat. While enemies can flee from battle, which is to your benefit, some will automatically regenerate health as the battle goes on and many eventually cast magic of their own. While this means they can blast you with Fire or strike you with Icestorm, it’s the status ailments that’ll give you the most trouble. Enemies can “slow” you, paralyse you to keep you from attacking, whittle away your health in and out of battle with poison, and halve your accuracy by inflicting Darkness. Your party can also be subdued by being put to sleep or turned to stone, or even knocked out with one hit if Death is evoked. Luckily, you can equip gear that’ll nullify many of these status effects, and use items and magic to cure them, but they can significantly impact battles even when you’re at a high level, especially when confronted by a swarm of enemies.
While things start simple with an errant knight, you’re soon battling mythological beasts!
While many treasure chests are guarded by specific encounters with the likes of Evil Eyes, Dragon Zombies, and Piscodemons, these are merely tougher enemy variants and don’t really classify as bosses. Your first test comes at the Chaos Shrine when you confront Garland, an armour-clad knight who certainly looks and talks tough and has no elemental weaknesses but is easily put down if you grind to about level twenty since he relies solely on melee attacks. After wiping the floor with Bikke’s pirates and securing a boat, you’ll cross the sea to Elfheim and investigate the Western Keep, tangling with Piscodemons and rescuing the elf-king…who turns out to be the Dark Elf monarch Astos. Like Garland, Astos has no elemental weaknesses but boasts a greater health pool and debilitating spells like Slowra, Dark, and the ever-aggravating Death. You’ll fight many variants of the Vampire boss as regular enemies after encountering him in the Cavern of Earth. Luckily, he’s weak to Fire magic and, naturally, Dia, which can make short work of him and nullify his paralysing Gaze attack. Your primary goal in Final Fantasy is slaying the Four Fiends and restoring the four elemental Crystals, and these mythical creatures represent some of the game’s most impressive and detailed sprites (even if they are mostly static). The Grim Reaper-like Lich is up first, attacking with Fira, Blizzara, and Thundara as well as paralysing you with Hold and putting your entire party to sleep. Weak to Fire, Ice, and Dia magic, Lich is the toughest enemy of the early game but is easily overcome within a few turns if you’ve optimised your equipment, levelled-up, and have the appropriate magic. Marilith is tougher still, resisting or having no discernible elemental weaknesses, roasting you with Fira and handicapping you with Darkness. This was the first real challenge I faced, but a fun one as I was at a high level and could withstand Marilith’s high attack power.
As tough as Chaos is, the game’s optional superbosses will absolutely decimate the unprepared!
Minotaurs, armoured turtles, and oriental-style monsters pepper the convoluted path to Kraken, a Cthulu-like monarch who inflicts Darkness with Ink and decimates your party with Thundara, though it’s naturally weak to Thunder attacks. The final Fiend, Tiamat, is the most horrific; a multi-headed dragon who can poison and chill the entire party with Poison Gas and Blizzard. With a high health pool and no elemental weaknesses, Tiamat can be quite the hurdle for an unprepared or under levelled party. The Four Fiends are fought again, attacking in specific spots as you explore the Chaos Shrine 2,000 years in the past. The battles are mostly the same, bar some new moves to their arsenals, though you should be a lot tougher by this point. They serve as the perfect appetiser to the game’s final boss, who turns out to be Garland, having ensured his survival with a time loop and transformed himself into the demonic Chaos! Chaos is, without a doubt, the toughest of the regular bosses, boasting a whopping 20,000 HP and no discernible weaknesses. Chaos sports some devastating attacks that can wipe out your party with ease, such as a unique version of Flare, a powerful tsunami and cyclone, and the one-hit KO Earthquake, alongside incredibly powerful elemental magic. Your best bet is to get your levels high, equip Ribbons (since Protect Rings won’t help against Earthquake), and cast Haste, Invisira, and Curaga as soon as possible. Holy and Flare are your best bet here, but it’s a gruelling battle, one only surpassed by the death machine, Warmech, a superboss that may surprise you when you approach Tiamat. Unfortunately, this version of the game removes the additional dungeons and optional superbosses from the Dawn of Souls version, meaning you’ll need to shell out a fair bit of money if you want to tackle returning faces like Gilgamesh, Deathgaze, and Shinryu, as well as an even tougher variant of Warmech, Omega, and even the ever-ridiculous Phantom Train!
Additional Features: There are twenty-three Achievements to earn in this version of Final Fantasy, with six earned from completing story-based objectives like rescuing Princess Sarah and restoring the Crystals, and three more for defeating 100, 300, and 500 enemies. You’ll get additional Achievements for getting your whole party to level 50, obtaining up to 100,000 Gil, playing the hidden slide puzzle game, and finding some and then all of the game’s treasure. There’s loads of treasure to be found in Final Fantasy: Pixel Remaster (more than you can ever carry!), and most of it is guarded by tougher enemies or hidden away in optional rooms and alternative routes in dungeons. If you’re frugal or activate the Gil multiplier boost, like me, you can easily amass enough Gil to buy new gear and spells, but you’ll eventually amass more Gil than you can carry and won’t have to worry about keeping your items fully stocked. You must search around, pay attention, or use a guide to get the best rewards, such as Excalibur and Masamune, the two most powerful swords, though getting the best spells is simply a question of cash and properly thinking about what your characters are capable of learning. Like previous re-releases of Final Fantasy, the Pixel Remaster includes a “Bestiary”, which fills as you encounter new enemies and bosses, cluing you in on their strengths, weaknesses, and the rewards they drop. Unfortunately, defeating the Four Fiends no longer unlocks the four additional areas from the Dawn of Souls remake, so you won’t get to test your mettle against those optional superbosses, though you can still go seek out the elusive Warmech if you want an extra challenge.
The Summary: I’ve only played a few Final Fantasy titles, so I’ll be the first to admit that I was wary about tackling Final Fantasy: Pixel Remaster, primarily because of the time and energy required to play it. However, I enjoyed my time with the Dawn of Souls version and this version of the game has some benefits over even that version, such the boost features that increase the Gil and EXP you earn and the Auto-Battle mode, which really benefitted my playthrough. It also helped to be able to save at any time and to be frugal with my Gil and spending, and to spend some time between dungeons levelling-up so I was prepared for future challenges. It helps that the game looks awesome; the constantly walking sprites were distracting but, otherwise, Final Fantasy greatly benefits from the graphical tweaks and improvements. This includes adding a visual flair to enhance the redrawn sprites and making battles even more spectacular with some truly impressive sprite art. The story is paper thin for the most part and the main characters largely lifeless, but the world is brought to life through the varied locations and lively NPCs, who are all different races and offer something different to the player. I enjoyed the twist at the end that Garland was creating a self-sustaining paradox and the challenge offered by the Four Fiends, though the difficulty curve was very much like a rollercoaster at times, with some debilitating attacks making even regular enemies an uphill battle if you get unlucky. It would’ve been nice to see a bit more direction about where I needed to go and what I needed to do at times, perhaps by having the priest at the various churches pointing you in the right direction, but it was fun exploring and figuring things out (and online guides are always available). In the end, while it’s obviously dated and lacks many of the more enjoyable features of its previous ports, this much-needed overhaul of Final Fantasy was a lot of fun to play through and I was glad to revisit the game it and see how many of the franchise’s recurring elements got their start, even if it’s obviously been far surpassed.
My Rating:
⭐⭐⭐
Rating: 3 out of 5.
Pretty Good
Have you ever played the Pixel Remaster of Final Fantasy? What did you think to the new additions and were you able to figure out the Magic Level system? Which character classes made up your party? What did you think to the difficulty curve and the final battle against Chaos? Did you ever defeat Warmech and complete the Bestiary? Which Final Fantasy game is your favourite? Whatever your thoughts and memories of Final Fantasy, drop a comment below, support me on Ko-Fi, and check out my other Final Fantasy content.
Released: 13 December 2022 Originally Released: 13 September 2007 Developer: Tose Original Developer: Square Enix Also Available For: Nintendo Switch, PC, PlayStation 4, PlayStation 5, Xbox One, Xbox Series S (Reunion); PlayStation Portable (Original)
The Background: You’ve heard of Final Fantasy VII(Square, 1997), right? Of course you have! The game won numerous awards and sold over ten million copies on the PlayStation alone! But the story of Final Fantasy VII doesn’t end there. Seeking to expand their scope beyond just the gaming world, Square Enix announced Compilation of Final Fantasy VII in 2003, a multimedia venture that included the fantastic computer-generated movie Final Fantasy VII: Advent Children(Nomura, 2005) and numerous spin-off titles that expanded the lore and world of Final Fantasy VII. Crisis Core, a prequel story initially exclusive to the divisive PlayStation Portable, was one such title. Director Hajime Tabata wished to exceed fan expectations with the game, which focused on the younger days of popular characters Zack Fair and Sephiroth and built upon story elements that had been laid out for both by Tetsuya Nomura. Envisioned as an action game first and foremost, the team incorporated role-playing elements to craft something of a hybrid and emphasised an element of luck to the combat through the Digital Mind Wave (DMW) system. Upon release, Crisis Core was met with generally positive reviews; while the combat was praised, critics were dividedon the DMW system but praised the game’s narrative and graphics. About fifteen years later, to commemorate Final Fantasy VII’s 25th anniversary, Square Enix developed a remake for then-modern consoles alongside Tose, one that completely overhauled the graphics, soundtrack, and voice acting. Although the story remained the same, the game was tweaked to closely align with the much-anticipatedFinal Fantasy VII remake project. Producer Mariko Sato advocated for numerous improvements to the original game, such as reducing combat interruptions, adjusting the magic speed, and including a“Hard” mode for returning players. Like the original game, Crisis Core Reunion was largely praised; while critics weredivided regarding the characterisations and the DMW system, the improved gameplay was praised and it was one of eleven recipients of an “Award for Excellence” at the 2023 Japan Game Awards.
The Plot: Before Final Fantasy VII, Zack Fair of the paramilitary organisation SOLDIER is assigned to find his mentor, Angeal Hewley, and fellow SOLDIER Genesis Rhapsodos and discovers a revelation that sets him against the malevolent schemes of his former masters.
Gameplay and Power-Ups: Crisis Core: Final Fantasy VII Reunion is a HD reimagining of the original action/role-playing PSP title. Unlike the original Final Fantasy VII (and most of the Final Fantasy games I’ve played to this point), it’s less of a turn-based RPG and more of a mission-based, action-orientated title in which players control one character (Zack) rather than a party of diverse fighters. Zack is free to roam around various 3D locations (with many being recreations of environments seen in Final Fantasy VII) and automatically engages in random battles when exploring. When in a conflict situation, Zack can attack with X; successive presses of X unleash combination attacks (with some dealing additional damage from “critical hits”), and you can target enemies by pressing in the right stick and switch to different targets by pressing the Left Bumper and the right stick. A lets you dodge incoming attacks, the Right Bumper puts up a guard to reduce damage, and you can flee from most battles by running against the edge of the barrier that pops up in each combat scenario. You use the Left and Right Triggers to cycle through your available items and use them with B, restoring health points (HP), magic points (MP), and providing certain buffs to Zack or debuffs to enemies. The Left Bumper brings up the Materia command window; eventually, you equip different Materia to the four face buttons and RB and RT, allowing you to perform elemental magic attacks, healing spells, reduce damage, apply buffs, eliminate status effects, and more if you have enough MP. Outside of battle, you can dash with RT and hold it to run (a toggle option would’ve been nice), talk to non-playable characters (NPCs), and bring up the map with X. While there’s no mini map (which also would’ve helped), you can toggle on destination markers to help guide you to your objectives from the settings menu, and set the in-game language and toggle the camera tracking.
Equip Materia to boost your attacks and use the DMW to unleash Limit Breaks and Summons.
The game’s big unique feature is the DMW system, a slot-based game of chance that automatically plays in every battle and seems to spin faster and build up the more you attack. Each spin consumes Soldier Points (SP), which are gained from winning battles and fusing Materia, and the strength of each DMW image increases as the game progresses. The game says they’re made stronger by Zack’s emotional tie to the characters represented, but your DMW avatars actually level-up in battle just like him. When three of the same images appear in the slots, press Y to perform a Limit Break or press in both analogue sticks to unleash a powerful Summon. These super powerful attacks, often accompanied by an annoying cutscene that’s thankfully skippable, can lay waste to entire foes, completely heal you and bestow buffs, level-up your Materia, and more. Additionally, during combat, you are often granted limited buffs, such as temporary invincibility or infinite MP or Ability Points (AP, consumed when you dodge, block or use Command Materia like Assault Twister or the elemental blade attacks), which is super useful in a tight pinch. Like other Final Fantasy games, you must be mindful of status effects and elemental attacks; enemies can cast Silence to negate your MP or stun you, and some are weak to certain elemental attacks and resist to others so it’s worth exploiting these weaknesses. Although the game autosaves at various points and gives you the option of retrying a battle upon defeat, there are numerous manual save points in each location. These refill your HP, MP, and AP and offer a selection of Missions to play through alongside the main story. Indeed, while you can level-up and get stronger playing the story, the best way to grind, gain new items and Materia, and improve your combat prowess is through these missions. They all have a level grade so you can judge how difficult they are and are usually quite short, consisting of a handful of battles, though others throw you against seemingly endless waves of enemies, or have you rematching bosses or defeating Summons to add them to the DMW.
Different equipment, Materia, and battling will bestow buffs and additional items.
Although you don’t acquire new weapons or equip armour, Zack does eventually inherit the iconic Buster Sword. Once you have this, you can hit X and A to enter a “Battle Stance”, increasing your attack power and chances for critical hits, and your proficiency increases as you defeat enemies in this stance. Additionally, after Zack is promoted to SOLDIER 1st Class, you gain extra items and buffs (including refilling your gauges) if you win battles in certain ways (with magic attacks, Summons, or without taking damage, for example). You can customise Zack from the main menu, setting up five equipment presets for your convenience, fusing and selling Materia, and eventually purchasing items from various shops. You’ll do this with the Gil you obtain from battle, though I honestly never bought anything as the game is extremely generous with items (which I also rarely used) and restoring your gauges. Materia is fused together to become stronger, and is also be “mastered” over time, increasing its MP cost and its power. This menu also allows you to review the mail and tutorials characters send you, review your DMW progress, and equip various accessories to Zack. These provide passive buffs, such as increasing his stats, providing resistance to elemental attacks and status effects, and more. Items and Materia are also acquired from various treasure chests lying around, completing missions for NPCs, and as required by the story. There’s a part, for example, where Zack searches for various junk to build a flower cart (and impress) Aerith Gainsborough. Other times, you’re climbing ladders, searching for keys to open doors, defeating enemies for different keys, searching for clues to find a pickpocket, activating consoles and turning wheels to open pathways, and searching for additional lore or helpful pickups.
Aggravating mini games and gimmicks compound the strange difficulty curve.
There are numerous mini games and gameplay gimmicks to break up the action, though they’re a bit hit and miss in their execution (despite awarding additional Achievements). Hidden pathways in Wutai lead to enemy troops that must be defeated to impress SOLDIER Director Lazard Deusericus and you can also choose to charge at enemies or take a stealthier approach in this section. Professor Hojo tests your skills in battle and a frustrating squatting challenge, Banora village hides numerous glowing spots that must be interacted with under a time limit, and then the village must be defended from a missile attack using carefully timed strikes. NPCs need rescuing from Shinra headquarters, spies are in Midgar, a Slums vendor challenges you to quickly grab his Materia, perfume can be blended to impress Aerith, and Junon’s perimeter must be defended from incoming enemies. Many side missions are contested under a time limit, which can be a bit stressful, but easily the most aggravating mission with Zack’s infiltration of the Modeoheim Mako Reactor. While you can simply storm in, you get an Achievement for staying out of sight, which is tricky as the guards spot you the moment you pop out from cover and you must rapidly tap Y to keep your body temperature up. There are seven wonders to find in Nibelheim, a mother trapped in a burning building, and keyholes to look through in the Shinra Manor to discover a random safe code. There’s number guessing game to play, fan clubs to join, and an annoying sniper mission where you pick off Shinra forces with an upgradable rifle. While it’s easy to retry the Modeoheim mission thanks to a nearby save point, this sniper mission doesn’t have that so you need to be fast and accurate to get that Achievement. Finally, in the end game, you’ll be battling monstrous monsters from the Lifestream to collect the Goddess Materia and running around a prison, unlocking cages and taking secret tunnels. The game has two difficulty settings, “Normal” and “Hard”. I played on “Normal” and found the difficulty oddly unbalanced. Some bosses were a complete joke, and then other times I’d be one-shotted by a damn Pachyornis! Most enemies are cut down in no time at all, making combat even more tedious and creating a bit of an uphill battle when you randomly face troublesome enemies who’ll decimate you if you don’t break their Boss Ability Gauge.
Presentation: I briefly played Crisis Core on the PSP many years ago and was mildly impressed with its PlayStation 2-quality graphics on the handheld. Things were a bit clunky and restrictive, particularly Zack’s movement and the mission-based structure of the game, but it seemed decent enough, especially the high quality FMVs. All these visuals have been upgraded here to match the presentation of Final Fantasy VII Remake (Square Enix Business Division 1, 2020). This includes an all-new soundtrack, which features remixes of classic Final Fantasy VII themes to match each location and an awesome new rendition of “One-Winged Angel”, “Vengeance on the World”, and similar rocking riffs like “Black Wing Unfurled”. Zack is given so much more personality here than in his brief, skewed appearances in Final Fantasy VII; we track his entire journey from an enthusiastic protégé to a hero in his own right and watch as he forms relationships with Aerith, Tseng, Cissnei, and his perceptions of Angeal and Sephiroth change as the narrative progresses. There’s little distinction between the FMVs and in-game graphics, though there are few opportunities for Zack’s personality to stand out in battle beyond his quips and voice clips since battles don’t end with a victory pose. Still, battle animations and explosive and varied; the Limit Breaks and Summons, especially, impress, though it can be annoying when the DMW memories interrupt the combat flow. Zack’s character model also changes as the game progresses; he gets a new uniform, takes up Angeal’s Buster Sword, and gains his trademark scar throughout the story, though it’s a shame you can’t alter his appearance further with armour or accessories. The game also includes fun cameos from familiar faces like Yuffie Kisaragi, Vincent Valentine, Cait Sith, Reno, and Rude alongside allusions to Cid Highwind and Red XIII/Nanaki and fully exploring Zack’s friendship with Cloud Strife.
Key Final Fantasy VII locations, characters, and moments are lovingly recreated in impressive detail.
The game’s locations will be immediately familiar to anyone who’s played Final Fantasy VII. Memorable towns like Midgar, Sector 7, and Junon all appear in their steampunk glory, with Zack even naming Seventh Heaven, battling on the highway outside Midgar, and taking the fight to the Wutai. You’ll spend a lot of time exploring Shinra headquarters (home to Hojo’s laboratory, a Materia processing room, and a museum to the company’s achievements) and the bustling town of Midgar, with its iconic train station and desolate Slums, complete with market, playground, and Aerith’s church. You’ll travel to Nibelheim and explore the small town and its peaceful inhabitants, the spooky Shinra Manor and the hideous secrets hidden within, and the looming Mako Reactor that houses Jenova, and then bask in the horror when Sephiroth discovers his true origins and burns the town to the ground! In the endgame, you’ll return to Banora, once Angeal’s peaceful hometown now corrupted by the emerging Lifestream, and descend into the ethereal caverns beneath it where slumbering giants and monstrous enemies await. When tackling missions, you’ll battle in the desert, at the Chocobo Farm, and in steampunk locales that bring the ambitious pre-rendered backgrounds of Final Fantasy VII to life. Things are, however, a bit restricted; you’ll revisit the same caves and enclosed areas again and again, there are few houses to enter, and locations can be surprisingly barren. Handfuls of enemies are encountered at once, with battles against bigger waves restricted to loading each group, and the mission-based structure of the combat betrays the game’s handheld routes. Having said that, though, there’s an emotionally poignant finale where players can control Zack’s last stand against Shinra’s inexhaustible forces, even battling while severely injured and near death.
Enemies and Bosses: Numerous enemies will dog your progress in Crisis Core Reunion, many of which are returning monsters from Final Fantasy VII. Zack battles various human soldiers, such as Wutai’s forces and even Shinra solders by the end game, each armed with lances, assault rifles, and grenades. More formidable variants also exist, wielding dual blades, casting elemental or restorative spells, and carrying larger weapons, like Wutai’s Crescent Unit. Perhaps the most notable humanoid enemies are the various “G” foes, imperfect and often monstrous copies of main antagonist Genesis who sport their own wings, more powerful magic, and even wield scythes or gunblades. Most of these can be put down without much issue, or by exploiting elemental weaknesses, but the numbers can be overwhelming if you don’t have the right Materia setup or are under-leveled. Naturally, various wild animals and creatures also roam the streets and wilderness of this world. Many have different names and appearances and abilities depending on the region and how far into the game you are. Bat-like Evil Eyes, demonic winged Evilgoyle, and ludicrous Hedgehog Pie are commonplace, as are elemental Bombs, spooky Jack o’ Lanterns, and insectile enemies like the annoying Killer Bees, various worms and beetles, and the lizard-like Sahagin. More bizarre foes like the egg-like Grangalan and spear-beaked Raijincho co-exist with more grotesque creatures, like the demonic Foulanders, strangely deformed Killer Stingers, and hefty Iron Claws. These are joined by mechs and robotic enemies, from disposable pawns like the Bee Saucers and Metal Saucers to more formidable, heavily armed constructs like the various Machines (which come in flying, drill, “death”, and missile variants, among others). While most enemies have an elemental weakness and some cast offensive and healing spells, many are simply there to be cut down by your attacks, meaning it’s easy to underestimate the Machines and G-variant enemies, which can almost act as mini bosses at times and, in some cases, can even be tougher than the likes of Sephiroth!
There’s a strange imbalance in the difficulty of some bosses.
Each of the game’s ten chapters but one (Chapter 7) culminates in a boss fight against at least one enemy, though some are variations of others or have multiple phases. Zack’s first test is against the monstrous Behemoth, a dog-like demon that attacks with a tail and claw swipes and serves as a tutorial for the game’s DMW system. Other variations of this creature appear later in the game, with the Behemoth King proving a steep penultimate challenge that I found more troublesome than the final boss thanks to it casting Regen on itself, having no specific weaknesses, and tanking my hits. Your mission in Wutai culminates in a battle against the duo of Vajradhara Wu and Vajradhara Tai, variants of which also crop up in subsequent missions and who are more deadly when teamed up thanks to their Limit Break, large health pool, and devastating physical attacks. After besting them, you’ll test your skills against the fire demon Ifrit, the first of many Summons who must be defeated to add them to your DMW. Ifrit sports formidable fire-based magic and attacks and you’ll need projectile magic to attack him from afar, but he’s weak to ice attacks like Blizzard. Chapter 2 sees you battling the mechanical Guard Spider, while Chapter 6 sees this improved to the more familiar Guard Scorpion. Both attack with cannons, stomps, and a hail of bullets but the latter mech also sports an EM Field attack that must be avoided. Chapter 2 ends with a battle against the dragon king, Bahamut, who can be annoying with his slam attack and Thunder Strike. In Chapter 4, you’ll battle the larger and more impressive Bahamut Fury, though I found this fight far easier as Bahamut Fury spent a lot of time just standing (or floating) around doing nothing and I easily kept it from attacking with Exaflare despite it having no elemental weaknesses.
Despite their emotional and historical significance, Angeal and Sephiroth are a bit of a let down.
Things continued to be largely manageable in Chapter 3. Here, you fight the G Eraser copy of Genesis, which is noticeably nimbler and more versatile than the three Machines that guard the chapter’s end, which are bested by bringing along thunder, fire, and ice-based Materia. The same is true for the Support Machines and the General’s Tank in Chapter 6. The drama ramps up when Angeal undergoes a horrific transformation, merging with his monstrous copies to form a centaur-like abomination not unlike Ultima Weapon. Angeal Penance is best attacked from behind since its lance has good reach. It can also magically boost its defence, charge, and unleash a bunch of physical and elemental attacks. However, despite its imposing size, this fight was pretty easy; Zack’s very emotional during it so the DMW is often in your favour, meaning this boss is all bark and no bite. Shinra scientist Hollander undergoes a similar transformation after being corrupted by Genesis’s cells. Constantly healing himself, Hollander distracts you with Land Worms and takes away chunks of HP with his Dimension Missile attack or poisons you with his breath. Being a Final Fantasy VII game, you naturally battle Sephiroth as well, most notably after he goes insane in Nibelheim. This is a two-phase battle, with the first seeing Sephiroth attacking with his impossible long sword, teleporting, and unlashing Heartless Angel and his trademark Octaslash. Sephiroth almost always has his guard up, negating many of your attacks, so just dodge, heal, and wait for an opening. Sephiroth spawns four elemental crystals that restore his health and bolster his attacks with fire, thunder, and blizzard spells. These must be destroyed using the opposing element (Fire against Blizzard, for example), and you might want to cast Dispel to remove his buffs. Though challenging, he’s actually easier than some other, less notable bosses and enemies. Once you’ve depleted his health, you then attack him on a narrow walkway. It’s game over if he pushes you back, so focus on staying alive and pummelling him with everything you have until he takes his dramatic drop into the Lifestream.
Although a formidable combatant, Genesis is sadly lacking compared to other, lesser bosses.
Edgelord antagonist Genesis, a fan of poetry and the flamboyant, is encountered and fought multiple times throughout the story. You first battle him in Chapter 5, prior to the fight with Angeal Penance, and many of the G-variant battles are tests for your one-on-one encounters with Genesis. In the first encounter, Genesis casts Regen on himself and magically increases his defence; he’s fast and tricky, attacking and Cursing you with Black Flurry and draining your MP with Osmose. Yet, I found this battle surprisingly easy; you can negate Genesis’ status effects with magics and items and simply batter him until he flees. In the finale, Genesis summons a gigantic, grotesque creature to fight on his behalf; Genesis Avatar cannot be harmed by physical attacks as it’s out of reach, so you’ll need projectile Materia like Thundaga or Ultima to chip away at it. You also need to keep your distance from his giant sword; it’ll create a shockwave when it hits and spawn G Shadow variants to distract you from attacking the Materia in the hilt. Similar to Bahamut Fury, though, this battle was a joke, especially compared to the Behemoth King and even the G Regicide that preceded it. Simply cast Wall, keep your distance when it unleashes Purgatorial Wave, keep your HP up, and attack the Materia until its defeated. After that, you’ll go toe-to-toe with Genesis once more. Again, he’s fast and can land combos on you. He can cast Apocalypse for big damage and stun-lock you with the Black Feather barrage, but he’s a ridiculously anti-climatic final boss and easily put down despite his agility, making for a dissatisfying final bout.
Additional Features: Crisis Core Reunion boasts fifty-one Achievements to earn, with one popping after completing every chapter. You’ll also get Achievements for completing some, and all, of the Missions, winning your first battle, dealing 99,999 damage, obtaining and levelling-up all DMW images, unlocking every shop, and receiving mail from everyone possible. As mentioned, every chapter features a mini game or gameplay gimmick that is tied to the Achievements; it’s worthwhile creating a backup save file as you won’t be able to retry if you miss them, fail them, or progress past that chapter. Other Achievements come from collecting equipment, fusing Materia, clearing the “Hard” difficulty, and defeating the powerful superboss Minerva, something you can only do after unlocking and clearing every previous Mission. Missions are unlocked through story progression and talking with NPCs, so be sure to talk to everyone you see. Their difficulty ranges and some are extremely tedious, forcing you to defeat up to 1000 enemies in a row or battle previous bosses and Summons, but you’re rewarded with better Materia and items and such. After you beat the game, you’ll create a clear save file and can start “New Game+”. This carries over your current level, SP, Gil, play time, items, Materia, equipment, DMW progress, Buster Sword proficiency, and mail but not the Missions you’ve completed. You also still need to unlock a lot of this stuff again, such as the additional Materia slots, shops, and Buster Sword, but I imagine it makes a second playthrough – even on “Hard” mode – much easier. Other than that, there’s not much else here; no new costumes or skins, no chapter select, and no gallery or movie theatre, which is a bit of a shame.
The Summary: As I mentioned, I played Crisis Core: Final Fantasy VII years ago when I first got a PSP. I didn’t get very far, though, mainly because I had a bunch of PSP games to play at the time and was a little put off by the strict mission-based structure of the game. Having finally played through this Reunion version, I can say that this structure is somewhat hampered at times and a little too quaint for a main console release, but it’s not as bad as I first thought. It is tedious having to go into the Mission menu and tackle each one in turn, but it was a fun way to level-up between the main story and combat was usually simple enough that they only took a few minutes to beat. The DMW system was certainly unique; the randomness wasn’t to my liking, but I enjoyed the variety in the attacks and benefits it gave you. This, along with battles constantly rewarding you, means the game can be pretty easy most of the time. Combat thus becomes quite dull very quickly as you just mash away and win, heal at a save point, and repeat until the chapter ends. There is a strange difficulty curve in Crisis Core Reunion, though; it’s really weird that Sephiroth and Genesis were so simple to defeat compared to the Behemoth King, and that enemies like the Pachyornis line could one-shot me yet I could survive Bahamut Fury with barely a scratch. This made combat a little unpredictable and annoying at times, almost as much as some of the mini games and the requirements to earn the Achievements associated with them. I enjoyed the dramatic dive into Zack’s backstory, his relationships with his mentor and peers, and his interactions with Final Fantasy VII icons like Cloud and Aerith. It was very impactful seeing Sephiroth’s downfall first-hand and playing an active role in the sacking of Nibelheim and Zack’s final stand, and the score and 3D recreations of Final Fantasy VII locations were a joy. In the end, it was an enjoyable enough action-orientated RPG but it a little clunky in its execution, with odd difficulty spikes and strange mechanics that make it fall short of its true potential.
My Rating:
⭐⭐⭐
Rating: 3 out of 5.
Pretty Good
Have you played Crisis Core: Final Fantasy VII Reunion? If so, did you enjoy it? How do you think it compares to the original PSP release and did you like the new additions made to the game? What did you think to the DMW system and the mission-based structure? Did you enjoy Zack’s narrative and witnessing Sephiroth’s downfall? Did you ever complete all the side missions and defeat Minerva? Which other Final Fantasy VII side character would you like to see take the spotlight and which game in the Compilation of Final Fantasy VII was your favourite? Whatever your thoughts on Crisis Core, or Final Fantasy VII in general, leave a comment below and be sure to check out my other Final Fantasy content across the site.
In February 1991, readers of The New Mutants were introduced to Wade W. Wilson, the wise-cracking, fourth-wall-breaking Merc With a Mouth, Deadpool. Rob Liefeld and Fabian Nicieza’s sword-swinging immortal went on to become one of Marvel’s most popular anti-heroes thanks to his metatextual humour, violent nature, and massively successfullive-actionfilms. It’s perhaps no surprise that Sideshow rechristened April 1st as “Deadpool Day” to give fans of the chimichanga-chomping mercenary an excuse to celebrate all things Deadpool.
Writer: Mark Waid – Artists: Ian Churchill and Ken Lashley
Story Title: “If Looks Could Kill” Published: 14 June 1994 (cover-dated: August 1994)
Story Title: “Luck of the Irish” Published: 12 July 1994 (cover-dated: September 1994)
Story Title: “Deadpool Sandwich” Published: 9 August 1994 (cover-dated: October 1994)
Story Title: “Mano @ Mano” Published: 6 September 1994 (cover-dated: November 1994)
The Background: By the 1980s, the X-Men had been established as one of Marvel Comics’ most successful publications and then-chief editor Jim Shooter was encouraged enough by their success to commission a few spin-off titles, birthing Chris Claremont and Bob McLeod’s New Mutants. These Mutant youngsters soon fell under the tutelage of the time travelling Mutant Nathan Summers/Cable, formed X-Force, and famously clashed with Fabian Nicieza and Rob Liefeld’s Deadpool in The New Mutants #98 (ibid, 1991). Heavily inspired by James Howlett/Logan/Wolverine, Peter Parker/Spider-Man, and (most infamously) to DC Comics’ Slade Wilson/Deathstroke the Terminator, the self-styled “Merc With a Mouth” proved popular enough to receive this own four-issue miniseries in 1993. The series was a relative success, prompting Marvel to sign off on a second miniseries the following year, though writer Mark Waid later distanced himself from the character’s more violent nature. This was all a prelude to Deadpool graduating to an ongoing solo title and his greater popularity as a self-aware anti-hero, and his eventual appearances in Marvel/X-Men-related videogames, a cameo appearance in the beloved X-Men animated series (1992 to 1997), and the incredible success of his live-actionfeaturefilms decades later.
The Review: Deadpool’s second miniseries begins in a secret, heavily guarded facility where two thousand imprisoned inmates are forced to endure the agonised screaming of Thomas Cassidy/Black Tom as he sustains horrendous torture at the hands of Doctor Emrys Killebrew. Dr. Killebrew’s there to cure Black Tom of the “viral wooden growth” currently infecting his cellular structure, a procedure quickly interrupted by the explosive arrival of Cain Marko/The Juggernaut, Black Tom’s loyal (if thick-headed), brutish best friend. Though weak and in pain, Black Tom ensures the Juggernaut also grabs Dr. Killebrew and his files on cellular regeneration cases, namely one belonging to Wade Wilson. Weeks later, everyone’s favourite Merc with a Mouth is regaling patrons in a bar with stories of his recent tangle with Wolverine, removing his bandages and scarring off a girl with his tumour-riddled, scarified visage. As he downs beers, Wade shares a truncated version of his origin with the bartender, too busy dwelling on his situation and running his mouth to notice when a group of heavily armoured and well-armed mercenaries enter the bar. Though blasted by a bazooka, Wade easily recovers thanks to his advanced healing factor and opens fire, antagonising the mercs with his inane banter, though briefly slowed by a particularly gruesome close range shot to the gut. Too stubborn to go down, Deadpool continues to fight back; even being literally frozen doesn’t keep him down thanks to the unexpected arrival of Sean Cassidy/Banshee and his daughter, Theresa/Siryn, who catches Deadpool’s eye as much as their mention of Black Tom catches his attention. Since Black Tom is Banshee’s cousin, he has a vested interest in tracking him down and has been on his trail since his escape, though neither of the Irish Mutants know why their cousin targeted Deadpool. For Wade, it’s as simple as revenge since he’s tangled with Black Tom before, though all three are confused as to why Black Tom would order for Deadpool to be captured alive rather than simply ordering his assassination. On Siryn’s suggestion, Banshee reluctantly leaves to get some answers from Interpol and she chooses to stick close to Deadpool, sure that Black Tom’s goons will strike again, and immediately shuts down his lewd attempts to woo her.
Deadpool’s busted powers don’t stop him from making uncomfortable advances towards Siryn.
Still, as capable as Siryn is, it’s only thanks to Deadpool’s timely intervention and quick reflexes that she’s spared a sword in the back. Although Deadpool proves a master swordsman and eventually runs Black Tom’s merc through with his katana, it costs him a hand and he’s surprised to find the limb failing to instantly regenerate and himself blacking out from the pain. Siryn drags his unconscious ass to a safe spot and, when he comes to, Deadpool finally regenerates the hand but only after concentrating with all his might and enduring incredible pain. Deadpool’s concern about his slow healing factor is swept aside for further uncomfortable advances towards Siryn, who bluntly tells him that they’re partnership is simply one of convenience, and temporary. While waiting to meet with his old partner, Daniel “Danny” Peyer, Banshee recalls his time working for Interpol when Deadpool saved his ass at the cost of his career. Banshee asks Danny to help track down Black Tom and unwittingly gives Peyer the information he needs to settle his own score with Deadpool. Meanwhile, the severely suffering Black Tom is angered to see Theresa wrapped up in his business and orders his men not to engage without safely removing her from the line of fire first, causing himself incredible pain from getting so worked up. Black Tom’s affliction spreads further the more his adrenaline spikes, but Dr. Killebrew is sure that he can cure him if they capture Deadpool, a task the Juggernaut gladly takes up even though he hates to leave his sick friend undefended. Though Deadpool and Siryn take out another group of Black Tom’s men, Wade ends up being riddled with bullets when shielding Siryn and taking a nasty fall from a window. When the Juggernaut shows up, Siryn insists they make a stand in a knife factory and, though hesitant to tangle with Cain even if his healing factor was working, Deadpool showers the Juggernaut with blades in an unsuccessful attempt to stop him.
Complex relations see Deadpool reluctantly rally against Black Tom, who increases his powers!
Naturally, these simply bounce off the Juggernaut’s impenetrable hide and Deadpool ends up skewered by several blades before being saved by Siryn’s high-pitched sonic blast. Unfortunately, even molten metal doesn’t slow the Juggernaut and Deadpool’s issues are only compounded when he runs into Peyer and his men. Thinking fast, Deadpool lures the flaming-hot Juggernaut to the Interpol agents and causes them to flee, solving one problem but leaving Wade powerless to stop Cain. Though Deadpool shows no fear and keeps fighting and throwing barbs at his foe, he’s helpless against the Juggernaut’s strength. Thankfully, after a brief hesitation, Siryn saves Deadpool by bombarding the Juggernaut with her scream. Although they flee to safety, Deadpool chastises Siryn for hesitating and she reluctantly reveals that part of her still cares for Black Tom despite all the bad he’s done and that she considered letting the Juggernaut take Wade so Black Tom could be cured. This leads to a tender moment between the two where Siryn asks his real name and tries to see under his mask, only for Deadpool to scold her and Peyer to interrupt with a hail of gunfire. Although Wade gets Peyer bang to rights, he’s stopped from killing him by a convenient lack of ammo, getting himself shot a bunch of times as Peyer extracts a measure of revenge. Too stubborn to go down, Deadpool simply tanks each shot and sends Peyer plummeting off a rooftop with a punch, only for Banshee to swoop in and make the save. After chastising his former partner for acting so recklessly, Banshee offers Deadpool the chance to join him and Siryn in heading to Black Tom’s location (which he learned from Peyer’s files). Although Wade initially refuses to join them, he begrudgingly changes his mind seemingly to impress Siryn. Though enraged at the slow progress of his men, Black Tom is ecstatic when one of them returns with Deadpool’s severed hand, which Black Toom maniacally attaches to his own wrist after lopping off his hand!
Deadpool shows a surprising vulnerability and ultimately spares Black Tom for Siryn’s sake.
Deadpool, Banshee, and Siryn head to Bannerman Castle on the Hudson River and blast their way inside. Against Siryn’s advice, the three split up. While Banshee advises her to not get too attached to a ruthless mercenary like Deadpool, Wade stumbles upon Dr. Killebrew, the same man who turned Deadpool into an unkillable monster. Realising that Dr. Killebrew can fix his dodgy healing powers, Deadpool ignores the sounds of his friends battling Black Tom and the doctor’s snivelling begging and threatens Dr. Killebrew, only to be drawn back into the fight when Siryn crashes through the wall. Deadpool leaps into action and finds Banshee unconscious and Black Tom’s powers raging out of control. Incensed to see his hand grafted to the villain’s wrist, Deadpool desperately dodges Black Tom’s flaming energy blasts and the villain is driven mad from the pain caused from Deadpool’s cells regenerating his own. While taking cover, Deadpool is again accosted by Peyer but fools the vindictive agent into taking a blast to the face by tricking him into earning a promotion by apprehending Black Tom. Deadpool’s elation is cut short when he’s blindsided by the Juggernaut, whose massive fists accidentally tear off Wade’s mask, driving Deadpool into an insane frenzy as he desperately tries to recover his “face”. Siryn blasts the Juggernaut from the castle and retrieves the mask, finally getting a good look at Wade’s gruesome visage, though he’s stunned when she shows him kindness rather than fear. With Black Tom’s life equally threatened by the hand’s infestation, Deadpool renews his attack, breaking Tom’s arm and ready to end his foe… only to relent at the last minute and spare Black Tom for Siryn’s benefit. Deadpool then finally subdues the Juggernaut by holding Dr. Killebrew hostage and the doctor stabilises Black Tom’s condition, though Cain vows to break his friend out of whatever cell he ends up in. Wade parts ways with Siryn, with her inviting him to team up again some time, and then flees into the night with the terrified Dr. Killebrew, unaware that Peyer is still lurking in the background with a thirst for vengeance.
The Summary: Eh… this was a bit of a slog. Let’s talk positives first, though. I enjoyed the artwork. Ian Churchill and Ken Lashley seem to be of the same school as the likes of Mark Bagley, Rob Liefeld, Todd McFarlane, emphasizing big, bold, ridiculously proportioned characters who are twisted into various physics-defying poses. It’s all very dramatic and bombastic, making for some very kinetic action sequences and memorable “hero shots” of Deadpool leaping, slashing his swords, or whipping out his pistols. Siryn is, of course, heavily sexualized; her costume is suggestively torn by the end to expose her bra and breasts and she’s no doubt suffering a great deal of back ache from her unnatural poses. Luckily, she’s written really well and isn’t some airhead or an emotional wreck. I never knew Banshee even had a daughter until reading this, though, and the two are depicted very strangely. They come across more like siblings or even lovers than father and daughter, something not helped by the fact that they look around the same age. They could’ve avoided this by making Banshee appear older, with more lines on his face or greys in his hair, or depicted Siryn as more of a teenager, smaller and slender rather than fully developed woman. This would’ve had the knock-on effect of sparing her (and the reader) from Deadpool’s lewd advances. He’s not too full on, to be fair, but it’s enough to make her uncomfortable and shut his shit down. Though she’s supposedly a fairly stoic character, Siryn does grow to respect Wade. He risks his life (literally, considering his janky healing factor) to protect her and she admires both his fighting spirit and is sympathetic towards his gruesome appearance. By the end, she’s more than happy to team up with him again and a potential romance is even hinted at, showing that Deadpool should rely more on his actions than his words to impress those around him.
Deadpool’s weaker than usual, but no less tenacious, lewd, and dangerous.
This ties into a recurring theme in this miniseries concerning Deadpool’s self confidence and his monstrous lifestyle. When we first see him, he scares off patrons with his scarified visage and he reacts with hostility whenever Siryn tries to remove his mask, before descending into Walter Kovacs/Rorschach levels of madness when it’s finally removed. He expects Siryn to react with fear and disgust, but is amazed when she shows him pity. In recounting his origin, Deadpool talks bitterly about how his terminal cancer was cured at the cost of his humanity, and he turns that bitterness and anger towards the world (or, at least, his enemies), masking his pain with a mile-a-minute banter that regularly antagonizes friend and foe alike. I’m not sure why, but Deadpool’s healing factor is on the fritz in this miniseries. It leads to some dramatic tension as Deadpool’s strategy is to throw himself head-first into a fight, shrugging off mortal wounds and coming out on top, something that costs him his hand and leaves him struggling to heal from wounds. As far as I can tell, it’s not said why this is happening to him and it is a bit inconsistent: Deadpool’s momentarily stunned from a gunshot wound but shrugs off a plummet from a window. His reflexes and skills are also unaffected by this handicap, though it does place him in a more vulnerable position and allow him to open up to Siryn and, perhaps, rediscover aspects of his humanity. Deadpool’s reputation precedes him, to the point where Banshee is reluctant to team up with him and warns Siryn against getting too attached to him since Wade is known as a cold-blooded mercenary who’s just as likely to stab them in the back as help them. However, Deadpool is clearly taken by Siryn, either legitimately or from simple lust, and not only accompanies them to Bannerman Castle despite being wounded but even temporarily forgets his own selfish desire to be cured to help Siryn when she’s manhandled by Black Tom. Deadpool’s really off his rocker here, ranting about nonsense during pitched battles and mocking his foes to throw them off-balance, overwhelming even groups of armed soldiers with his katana and guns. Though he’s no match for the Juggernaut, that doesn’t stop him trying and standing up to the brute, though this miniseries emphasises quite explicitly that much of his inane banter is to mask the pain and anger he feels at being turned into a ghastly, inhuman freak.
Juggernaut may be powerful but the story’s main antagonists aren’t believable threats.
I think what lets this miniseries down is the main villain. I’m vaguely aware of Black Tom but he’s a bit of a nobody, with weak-ass powers that can’t compare to Deadpool’s skills. Luckily for him, he’s got the Juggernaut in his pocket but, even then, Cain is just a rampaging brute and fights against him aren’t that interesting. Nothing Deadpool and Siryn throw at the Juggernaut can stop him and they’d been ridiculously outmatched even if Deadpool’s healing factor was working. Without it, we’re denied even the simple pleasure of seeing the Juggernaut tear Deadpool limb from limb and instead rely on a cat-and-mouse game. This is fun enough and shows Wade’s adaptability and certainly paints Siryn as formidable since she holds her own against the Juggernaut, but I feel more could’ve been done with these bouts. Instead, the story spends more time focusing on Danny Peyer and his childish vendetta against Deadpool for costing him his career some years ago. Peyer is just a regular guy with a gun and some soldiers; he’s way out of his league and just grinds the story to a halt. I would’ve rather seen Banshee simply pulling Interpol’s file on Black Tom and then devoted the panels wasted on Peyer to showcasing more of the Deadpool/Juggernaut fight and exploring Wade’s condition, especially as a mirror of Black Tom’s. Like Deadpool, Black Tom suffers from an affliction that’s slowly and painfully killing him (or transforming him into a tree-man? I’m not sure). His agony and desperation see him lash out and devolve into near madness after grafting Wade’s severed hand to his own, increasing his powers and finally making him a true threat but, in the end, he’s subdued with ridiculous ease because, as I said, Black Tom is a nobody. In the end, this was an okay miniseries for the Merc with a Mouth; it showcased a few more layers to his character and developed him further into the near parody of a character we know today, but it’s really just nonsensical fights. Every conversation is interrupted by some goon or another, it’s not always clear what’s happening or why, and the threat is just so low level that it feels like Deadpool could’ve ended things in one or two issues if his healing factor wasn’t mysteriously broken.
My Rating:
⭐⭐⭐
Rating: 3 out of 5.
Pretty Good
Have you ever read Deadpool’s second solo foray? Did you enjoy the exaggerated artwork and the violent action? What did you think to Deadpool’s characterisation, the vulnerability he displayed and his busted healing factor? Were you a fan of Black Tom or do you agree that he’s a weak villain? What are some of your favourite Deadpool stories and moments and how are you celebrating Deadpool Day today? Whatever your thoughts on Deadpool, feel free to share them below and go check out my other Deadpool content.
So, for no better reason than “Mar.10” resembling Mario’s name, March 10th is widely regarded as being “Mario Day”, a day to celebrate Nintendo’s portly plumber, an overalls-wearing mascot who literally changed the videogame industry forever and shaped the home console market of the nineties.
Released: 20 October 2023 Developer: Nintendo EPD
The Background: Following the collapse of the videogame industry from a slew of overpriced consoles and mediocre titles, Nintendo revitalised the landscape withSuper Mario Bros. (Nintendo EAD, 1985). Once the “Console Wars” of the mid-nineties ended, Nintendo and their famous mascot became an innovative and reliable staple of the videogame industry. After successfully transitioning into 3D gaming, Nintendo continued to pay homage to Mario’s 2D roots with hit2.5D titles. Shiro Mouri, director of New Super Mario Bros. U Deluxe (Nintendo EAD, 2012), returned to develop Super Mario Bros. Wonder and he and his team worked without a deadline, allowing them far more freedom to develop new ideas. Producer Takashi Tezuka suggested implementing a gimmick that would alter the game’s locations in fun and wacky ways, birthing the “Wonder Flower” mechanic, and features and accessibility options were implemented to make the game appealing to players of all ages. A live commentary feature was scrapped early on, long-time Mario voice actor Charles Martinet was replaced for the first time following his retirement, and Mouri also personally lobbied for Princess Daisy to be included so girls (specifically his daughters) would have more playable options. Super Mario Bros. Wonder was met with widespread acclaim; critics adored the gameplay innovations and responsive controls, and it sold 4.3 million units in its first two weeks alone.
The Plot: While visiting the Flower Kingdom, Mario and his friends are stunned when Bowser, King of the Koopas, steals the Wonder Flower, turns himself into a giant flying fortress, and wreaks havoc throughout the kingdom. Our heroes thus travel across this new land to gather the Royal Seeds and stop their nemesis.
Gameplay and Power-Ups: Like its 2- and 2.5D predecessors, Super Mario Bros. Wonder is a 2.5D action platformer, albeit one that gives players twelve characters to pick from and offers four player co-op, both on- and offline. Players journey across the Flower Kingdom collecting golden Coins (100 of which will grant a 1-Up), stomping on Goombas, and leaping to flagpoles to clear the six main stages (known as “Worlds”) alongside Prince Florian, a caterpillar-like character who pops out when you’re idle and chimes in during cutscenes. Regardless of which character you select, they all control the same with the exception of Yoshi, who can flutter jump by holding A (giving you a bit more airtime to clear gaps) and eats enemies and spits them back out with B. Otherwise, you can pick from two control schemes and choose to play with or without motion controls. The setup I chose saw me jumping or swimming with A (holding it to jump higher), running and picking up certain objects (like Koopa shells) by holding B (releasing it to launch my item upwards or straight ahead), and ground pounding by pressing ZL in mid-air to squash enemies and break blocks. Y brought up an emoji wheel to communicate to other players and X either placed a standee (used to revive players in co-op) or spawned an item balloon when I had one saved up. Pressing R performed a spin jump and jumping against walls and vertical surfaces performed a wall jump. You can also hold down when on slopes to slide into enemies, and pressing the L and R triggers together in co-op sees you become a ghost to float around stages. Also, you can jump atop and ride Yoshi players in multiplayer and press B to perform your special attacks when you have a power-up item.
Mario and friends utilise new power-ups and the Wonder Flowers to explore this new kingdom.
As you might expect, grabbing a Super Mushroom allows your character to grow and take an extra hit and break certain blocks. Get hit when in your small form and you’ll lose a life, respawning either at the beginning of the stage or from the last checkpoint you touched. Touching a checkpoint automatically causes you to grow if you’re small, rare green mushrooms grant extra lives and Fire Flowers let you toss fireballs to defeat enemies and melt ice blocks. Blue Coins appear when you hit P Switches, POW blocks defeat all onscreen enemies and break all visible blocks, and Super Stars make you invincible for a short time and add a somersault to your jump. This is all very familiar but Super Mario Bros. Wonder does add in three new power-ups. The Bubble Flower sees you throw bubbles to trap and defeat enemies and make temporary platforms, the Drill Mushroom lets you dig into floors and ceilings to reach new areas, and the Elephant Fruit transforms you into a rotund elephant that smacks enemies with its trunk and sprays water to cause various effects whenever you enter a fountain. If you have one power-up active, you’ll store the next one as a bubble, which is very useful as an extra chance to bypass tricky areas, and you can even commandeer Lakitu’s cloud or ride Missile Megs and Ancient Dragons to clear gaps. Wonder Flowers are the game’s biggest new feature and temporarily alter the game’s environments or your character’s appearance to mix things up. You’ll see Warp Pipes come to life, adopt a top-down perspective, float around in zero gravity, race to collect Wonder Tokens, ride along stampeding enemies, get chased by King Boo, and even explore in near darkness when the Wonder Flower is collected. These also transform you into new forms, such as a Goomba (stunting your jump but allowing you to safely cross spikes), a Biyon (stretching your character considerably), a Hoppycat (increasing your jump height), a floating balloon, granting you the Metal Cap power-up, and allowing you to stick to walls and ceilings as a Wubba, amongst other effects. These effects are sometimes timed but will last until you find a Wonder Seed or clear the stage and really add to the visual variety and mix up the gameplay as you never know what effect the Wonder Flower will have.
You’ll need all your skills and the game’s Badges to find all the collectibles and stop Bowser.
Sadly, this variety doesn’t extend to the playable characters as much as I’d like. Luigi jumps higher and has less traction than the others, Toad seems to have floatier jumps, and the Yoshis and Nabbit are invulnerable to damage (but can still lose lives), but Princess “Peach” Toadstool doesn’t have her glide ability and I question the logic behind having three Toads and four Yoshis rather than putting in Wario and Waluigi. Still, the game does allow for some character customisation in the form of “Badges”, which are either bought using the new purple Flower Coins (with three 10-Flower Coins hidden in most stages) and by conquering bite-sized Badge Challenge levels. You can equip one Badge at a time and each one grants different buffs or abilities, such as allowing you to glide by holding R, adding to your wall jump, increasing your running or swimming speed, and allowing you to snag platforms with a vine. Other abilities are more passive, such as allowing you to sense nearby collectibles, giving you a one-time save from instant-death traps like pits and lava, or turning every power-up into a specific item. You can also earn “Expert” Badges that further increase your running speed and add a limited double jump, turn you invisible (actually more trouble than it’s worth), add a spring to your step for added jump height, or allow you to hear strange voices. While it’s fun challenging for and collecting the Badges, I stuck with the Parachute Cap for my entire playthrough bar one or two exceptions as it was far more useful to add a short glide to my arsenal than anything else. You can also spend your Flower Coins on new standees (which are randomised), 1-Ups, Wonder Seeds, and paying off the local Poplins to repair bridges or smash rocks to create shortcuts and open new areas on the overworld. Furthermore, if you search hard enough, you’ll not only uncover new stages to challenge but also meet Captain Toad, who’ll gift you some Flower Coins, alongside visiting the locals to get Wonder Seeds or be told of regional issues caused by Bowser’s influence.
There’s a lot of challenge and variety on offer thanks to the Wonder Flowers.
While Super Mario Bros. Wonder contains many of the same gimmicks and mechanics you’d expect from a Super Mario title (platforming, taking Warp Pipes, smashing blocks, climbing vines, sliding on ice, and dodging fireballs are all common tropes recreated here), the game is structured more like an obstacle course than ever before. You’ll be taking Warp Pipes to the foreground and background, pushing pipes and blocks to clear paths, entering doors and taking leaps of faith, hopping to moving, spinning, and temporary platforms, and dashing across zip lines to reach new areas. Like many Super Mario games, there are often hidden exits to find (generally by collecting or avoiding Wonder Flowers), you’ll need to face Boos to stop them in their tracks or lure them into the light to destroy them, and bottomless pits, boiling lava, and toxic gunk will instantly end your run if you’re not careful. You must also avoid giant spiked balls, lure Bulrushes and Konks into smashing through blocks, outrun shadowy enemies who relentlessly chase you, time your jumps to avoid being hit by Hoppycats, stay out of reach of Maw-Maws so they eat enemies instead of you, and hold B to unzip the background, unwrap Mumsys, and send Revvers dashing. Sometimes, you’ll grab keys to open doors; others, you’ll be climbing or shimmying across striped poles. Often, you’ll touch Wow Buds to spawn Coins or cause platforms to appear, move, or sway. Balloons must be popped, balloon-like enemies need to be carefully bounced across to clear gaps, and rhythm platforms and mushroom trampolines will have you timing your jumps to progress higher. You’ll also cross hazards in rolling wheels or on rafts made from dinosaur fossils, and transport to the clouds using Propeller Flowers. Timer Switches activate block platforms for a short time, Bowser’s ship fires from the background, you’ll ride an out-of-control avalanche, race against Wiggler, and battle through autoscrolling sections on Bower’s battleships, dodging Bullet Bills and flame bursts that’ll test your reaction times. The difficulty spike is pretty fair, and each stage has a star difficulty to alert you to the challenge on offer. Things never get too tricky and you can always purchase additional lives from the shop, though the game does ramp up as you progress and offer incredibly tough missions up in the Special World.
Presentation: Super Mario Bros. Wonder is, in a word, gorgeous. 2.5D Mario has never looked or played better than here, with the game performing incredibly well throughout and the action never slowing down. It helps that most stages are bite-sized obstacle courses and that there’s a lot happening in every stage. Talking Flowers are everywhere, offering encouragement, calling for help, or commenting on the effects of Wonder Flowers. These, as mentioned, alter the stages so drastically that it’s almost like having two versions of most stages at times. They’ll be plunged into darkness, surreal colours bombard the player, and a kaleidoscope of bizarre and amusing effects spawn once you touch them, making for an enjoyable twist on the tried-and-tested formula. Mario and his friends might not play as differently as I’d like but they’re full of life and personality. Chattering through gibberish and pantomime movements, they hop and explore like never before, with caps flying off as you jump or fall or being swiped when you enter pipes. Your Elephant form squeezes through narrow passageways and Prince Florian pops out whenever you’re left idle or finish a stage. The game takes into account which character you’re playing as, too, with character-specific hidden blocks appearing in stages, personalised flags appearing at checkpoints and end goals, and the in-game text referring to whomever you’re controlling at that time. The music is as catchy and whimsical as ever; classic Super Mario tunes return, as you’d expect, as end of stage and power-up jingles but also for bonus stages and boss battles. The story is light-hearted and secondary to the action, for the most part, but just different enough to be unique. Peach isn’t a damsel in distress, for example, Bowser’s ominous ship form looms in the centre of the overworld, and you’re even actively searching for lost Poppins when you explore the Fungi Mines.
Mario has never looked better in this colourful, quirky adventure.
While Super Mario Bros. Wonder doesn’t break the mould that much when it comes to its stage designs, everything looks great and there are a lot of stages on offer in each World, with each sporting a unique and interconnected overworld. Things start relatively familiar in Pipe-Rock Plateau, where Warp Pipes are prevalent and you’ll be bouncing from Hoppos, before taking a turn for the surreal in Fluff-Puff Peaks. With the action mostly up in the clouds, you’ll be adding to your temporary platform in “Cruising with Linking Lifts” and slipping on icy platforms as you make way for Pokipedes on their set paths. Shining Falls adds an isometric aesthetic to its overworld and offers unique platforming challenges as the Hoppycats copy your jumps, the Anglefish fly from different directions, and you race along at high speeds on Zip Tracks. The Sunbaked Desert sees new stages appear from the arid sands as you explore or open by performing tasks on the overworld, and its stages have a tangible Arabian theme. You’ll be exploring a door maze in the Shova Mansion, gatecrashing the Ninji’s jump party, and exploring pyramid-like tombs for goodies. Things take an ominous turn in the Fungi Mines, where toxic clouds and goop lurk amongst haunted mansions and destructive rifts in the fabric of reality. The Deep Magma Bog overworld is not only the most menacing yet but also a maze of tunnels and paths. Its stages are volcano themed and feature dinosaur bones, fireballs, and flaming enemies who rush from the walls. As you explore the overworld, Kamek occasionally spawns huge Bowser-themed battleships not unlike those seen in Super Mario Bros. 3(Nintendo EAD, 1988). Here, the game becomes an autoscrollers and you’re forced to avoid numerous hazards and destroy the central core, which doubles as a baddy maker. Finally, simple cutscenes and interactions with the locals pepper the action, with the game concluding with an all-out frenzy to get the highest score during the credits as recycled (now non-lethal) hazards fly past.
Enemies and Bosses: Many of Mario’s most recognisable enemies make a return in Super Mario Bros. Wonder. Goombas will snooze in stages and wander or float about, Piranha Plants of various sizes pop up from pipes to bite you or spit fireballs, green and red Koopas trot about or flutter in the air, Bullet Bills blast across the screen, Boos shy away from your gaze, and Hammer Bros toss hammers in an annoying arc, as ever. Mechakoopas patrol Bowser’s battleships and castles, Pokeys wander the desert, Lakitus drop Spinys, Thwomps try to crush you, and Cheep Cheeps swim about underwater to get in your way. These are joined by some new enemies, with some offering different mechanics. The Babooms, for example, shoot fireworks that can be used to defeat enemies above you. Blewbirds fire their beaks, which then become platforms, Bloomps can be bounced on to clear gaps, Bulrushes can be ridden, and Wonder Hoppins can be tricked into smashing through the stage to make new paths. Mumsys must be unwrapped by grabbing their handle, Noknoks masquerade as doors, Renketsu Search Killers offer themselves as temporary, explosive platforms, and Skedaddlers spit seeds and run off with collectibles. Shovas push pipes and blocks about, Smogrins lurk near tricky jumps, you can swing across gaps by grabbing Tailys, and Wubbas will cut through sticky goo that slows you down. Spikes, flame bursts, electrical sparks, giant balls, toxic gunk, and crushing pistons are persistent hazards, with you often bouncing from enemies to avoid them or luring nearby foes into unwittingly aiding you.
The game’s disappointingly light on bosses but goes all-out for the finale.
Sadly, Super Mario. Bros Wonder is disappointingly light on unique boss battles, a trend I’ve noticed in a lot of 2- and 2.5D Mario adventures. While larger variants of certain enemies do exist (King Boo being the most memorable), they’re more like chase sections rather than boss battles. The Mecha Makers are close to a boss in that you have to avoid hazards on the conveyer belt and smash the big red button to down Bowser’s battleships, but that’s being generous. Since Bowser’s busy being a giant, living ship, you’ll instead battle Bowser Jr. to clear four of the six main Worlds and retrieve the Royal Seeds and remove Bowser’s defences. Each battle against Bowser Jr. is a two-stage affair, with the first simply having you avoid his shell spin, jumps, and occasional fireball. After one hit, he transforms into Wonder Bowser Jr. and alters the terrain and your abilities somewhat. In the first fight, either you or he will change size; in the second, the rising and falling platforms alternate between being ice or jelly; in the third, water floods the arena (either above or below); and, in the fourth, Wonder Bowser Jr. distracts you with clones and by having you fight in the dark. While these fights can be tricky without any power-ups on hand, it only takes a couple of hits to defeat Bowser’s kid and his attack pattern doesn’t change much. You never battle Kamek, which is a shame, and Bowser Jr. is ultimately done in for good in a cutscene, which is also disappointing. After braving Bowser’s Rage Stage, you’ll face off against Castle Bowser in a somewhat harrowing, multi-stage final fight. In each phase, Castle Bowser spawns more hands to rain flaming Piranha Plants or to try and slam you. You must time your jumps to gain a boost from the rhythm blocks to either dispose of the hands or smack the weak spot under his chin, which he shields with his extra hands. As the battle progresses, Castle Bowser retreats to the background and fires larger Piranha Plants that can be tricky to dodge, alternates the floor to screw up your jumps, and tosses big, spiked balls that bounce around the arena. Power-ups are occasionally deposited as well and, after enough hits, a big button appears on Castle Bowser’s head that you must propel up to to end to his latest mad scheme.
Additional Features: As mentioned, there are three 10-Flower Coins to find the game’s main stages and you’re encouraged to snag the top of every flagpole. Like the collection of Wonder Seeds, these statistics are recorded on your save file, though they appear to have no other function other than bragging rights (and, in the case of Flower Coins, allowing you to buy items). You must search high and low for every Badge Challenge and hidden sage if you want to earn every Badge in the game and enough Wonder Seeds to progress through the story. You can easily review each stage from the main map and jump to any stage where it shows you’ve missed anything, though you’ll need a guide or to pay attention to the overworld to spot when stages have secret exits. Bonus levels appear that bombard you with Coins, you can take a break by searching for Flower Tokens or taking out enemies across various arenas, and you can hunt across each map in search of Captain Toad. Eventually, you’ll unlock the Special World, where ten additional, super tough stages await, each one themed after the main Worlds and remixing hazards and enemies in new, challenging ways. Clear them all and you’ll gain access to a new Poplin House and earn yourself a congratulatory message and the Sound Off? Badge, though personally I couldn’t even clear one of the Special World’s stage…so good luck to you! Finally, of course, you can tackle any of the game’s stages in multiplayer, vying for Coins, power-ups, and a high score at the end, though I wasn’t able to play this so I can’t say how good or bad it is.
The Summary: While I usually prefer Mario’s 3D adventures due to his 2D outings being slippery and unfamiliar to my SEGA-hardened gaming skills, I’ve really enjoyed his 2.5D titles and was blown away by Super Mario Bros. Wonder. Visually, the game is such a treat to behold; I loved all the little, goofy details and the whimsical (yet familiar) nature of the Flower Kingdom. I loved the callbacks to Mario’s previous adventures, with some returning gimmicks and mechanics, and the new abilities were a real treat. While the Bubble and Elephant forms weren’t that special, the Wonder Flower mechanics really helped to inject new life into the tried-and-tested Mario formula. I loved how unpredictable it was, how it reimagined stages and decades old fixtures like Goombas and Warp Pipes in fun new ways, and how it bombarded you with such an array of visually interesting mechanics. The new Worlds were also very enjoyable; I liked how the stages were short obstacle courses that never outstayed their welcome. The level of challenge was just right, with the game being upfront about when things get trickier and the onus being on the player to have the right skills accumulated or Badges equipped. The Badge mechanic was a little wasted on me but may have more appeal in multiplayer, and I was disappointed by the poor variety of the boss battles. There really was no excuse not to have Kamek be a boss fight at least once and I do think the developers sell the franchise short by not doing more with the likes of King Boo. Similarly, the character selection could’ve been better; I don’t get why Wario and Waluigi are always shafted or why Peach and Princess Daisy don’t have unique attributes. These negatives are mere nit-picks, however, to the overall enjoyment and fun on offer in Super Mario Bros. Wonder. It really does feel like a brand-new addition to the classic games and I liked how it provided just enough of a spin on the usual formula to be a wholly unique and accessible experience.
My Rating:
⭐⭐⭐⭐⭐
Rating: 5 out of 5.
Fantastic
Did you enjoy Super Mario Bros. Wonder? How do you feel it compares to other Mario titles, specifically the previous 2.5D Super Mario games? Which of the playable characters was your go-to and were you disappointed that they didn’t have more unique playstyles? What did you think to the new power-ups and the Wonder Flower mechanic? Were you disappointed by the lack of variety in the boss battles? Did you ever conquer the Special World? How did you celebrate Mario’s birthday this year? Whatever your thoughts on Super Mario Bros. Wonder, feel free to share them below and be sure to check out my other Mario content!

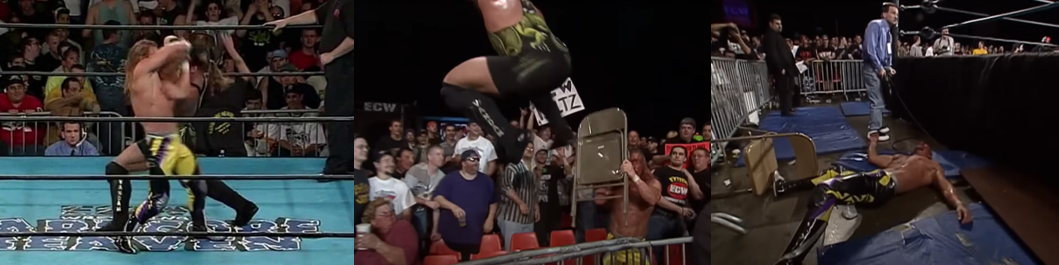
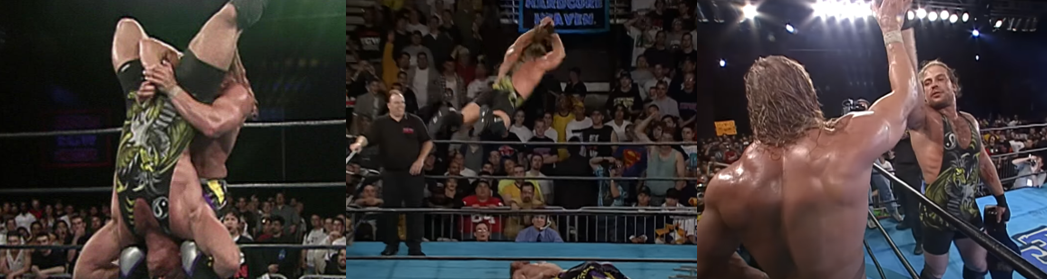


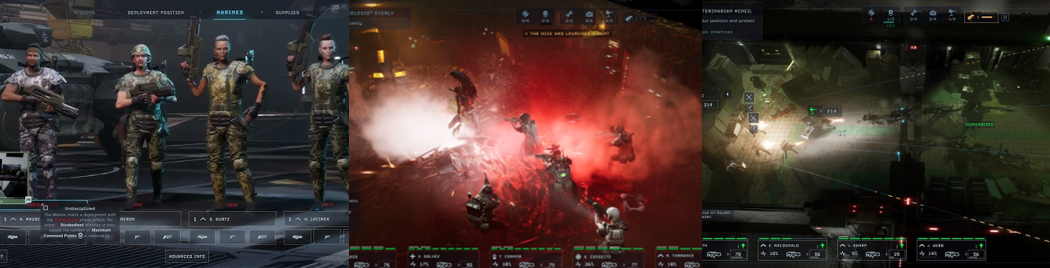
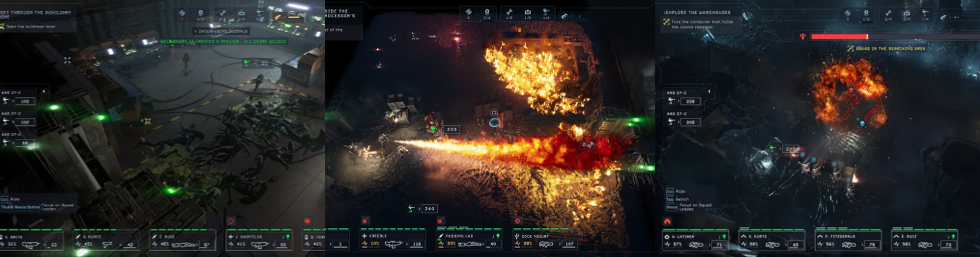
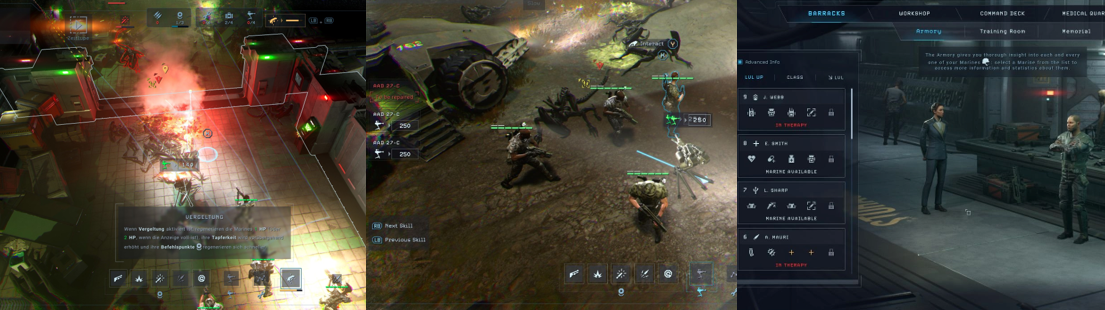


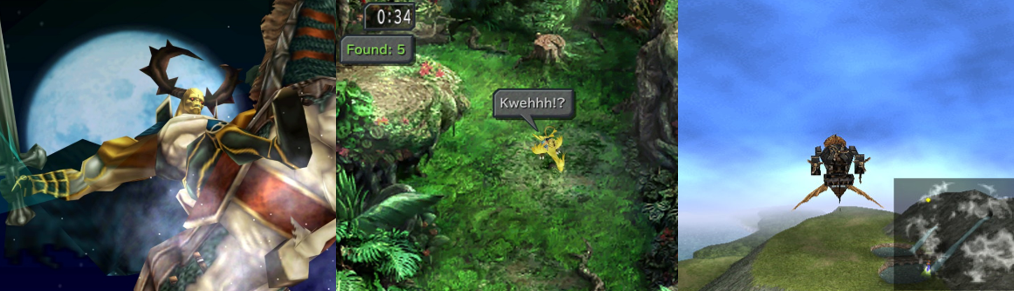
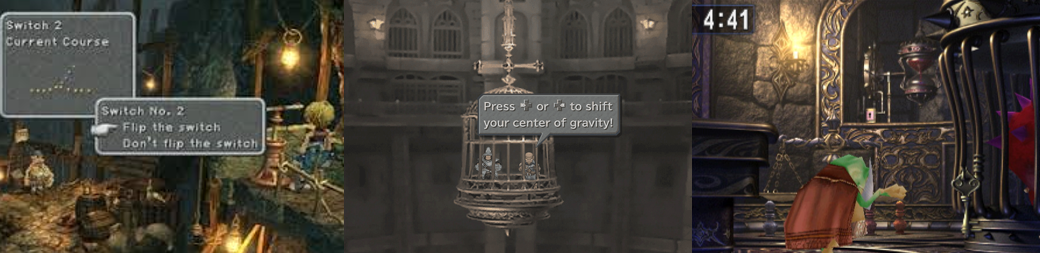

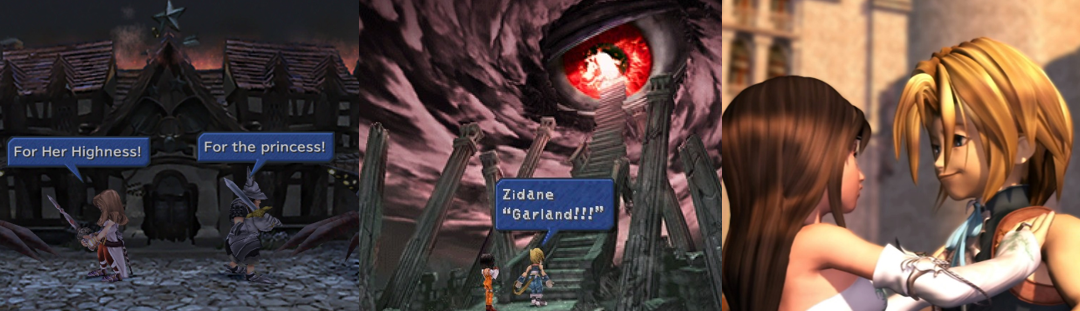
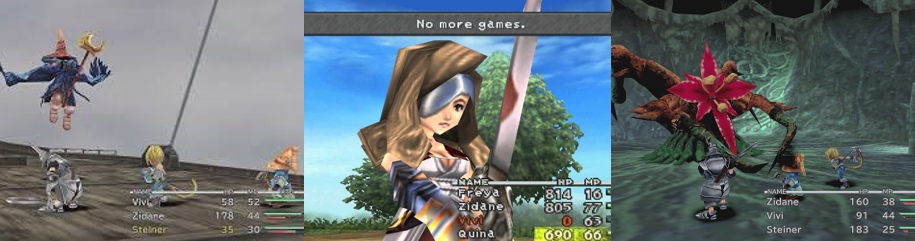


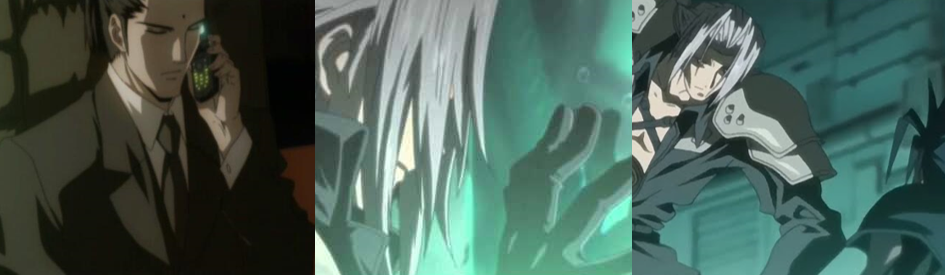


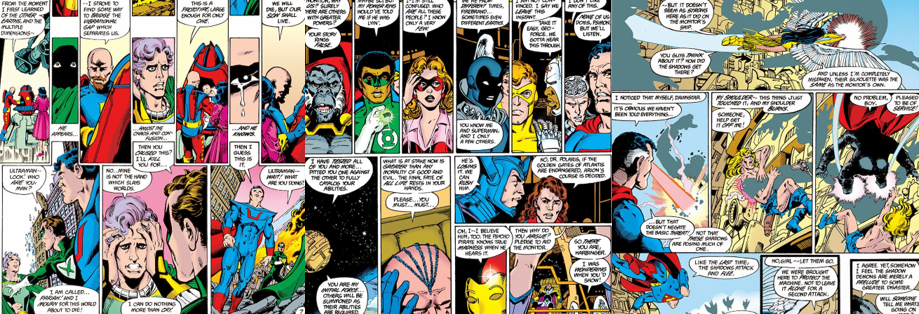
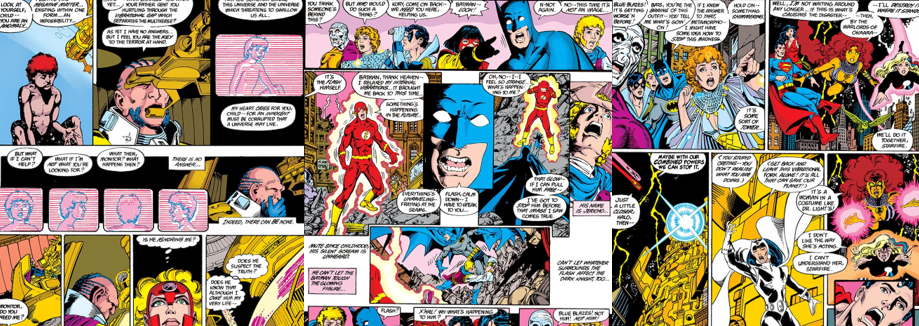
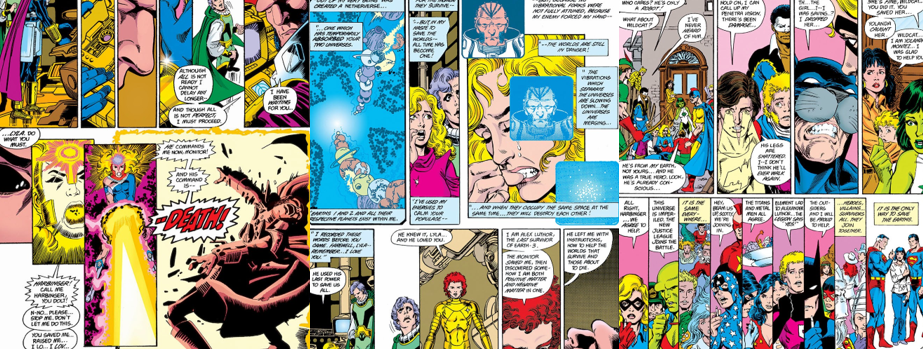
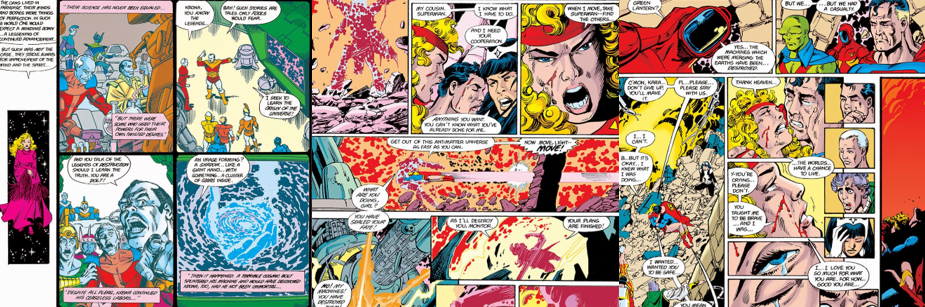
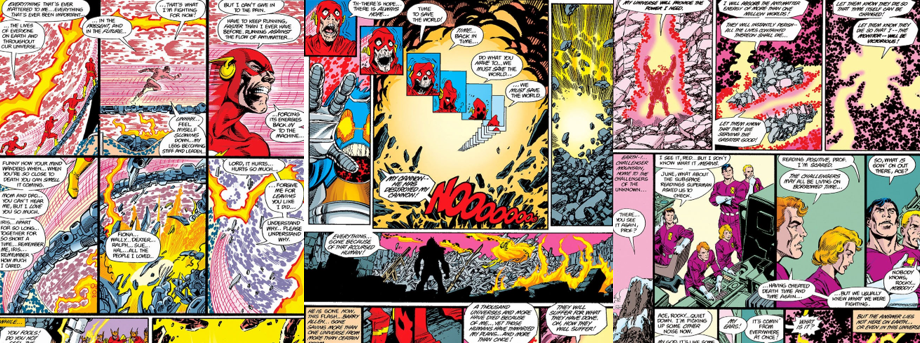
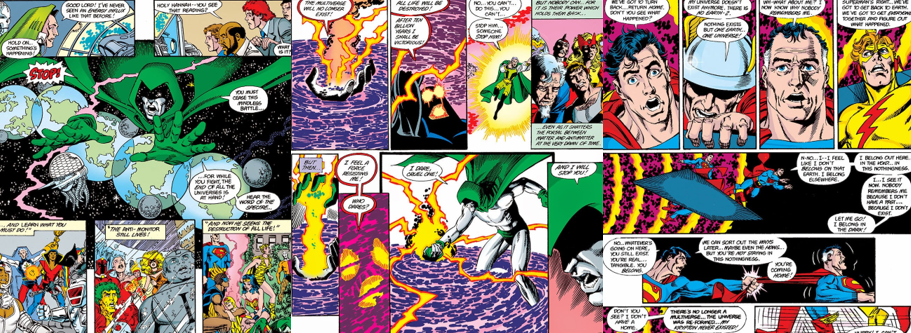
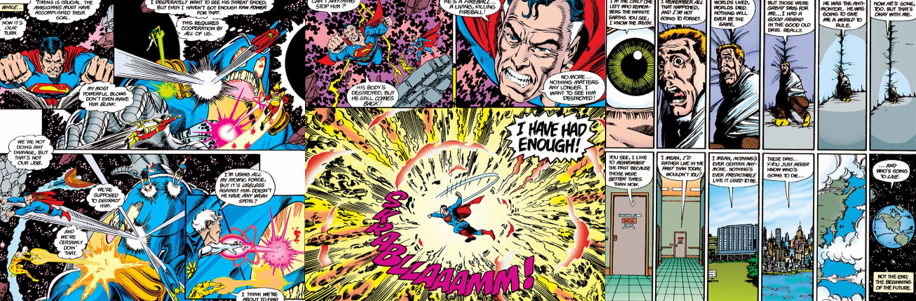
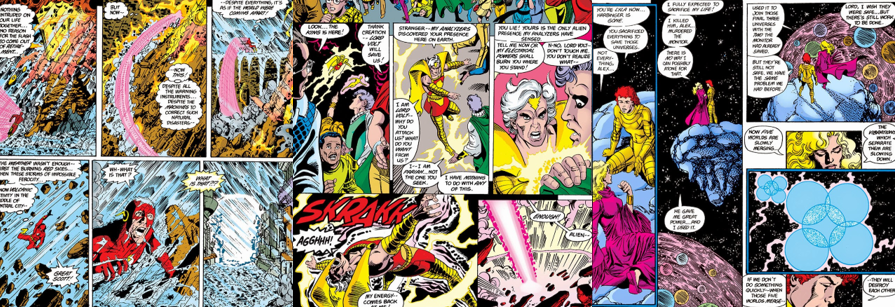
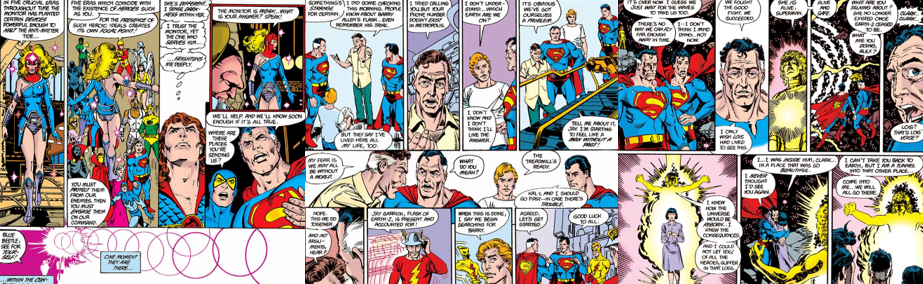
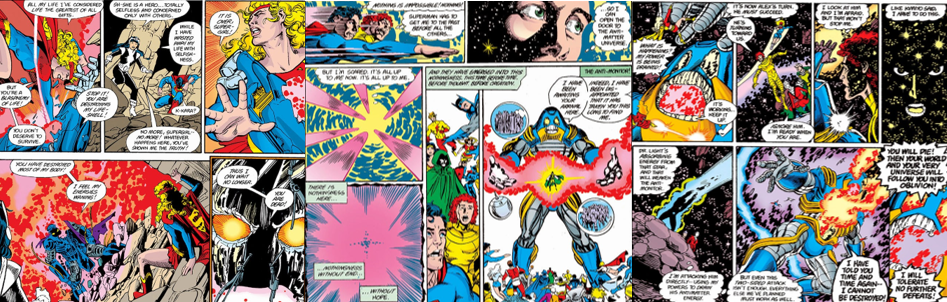

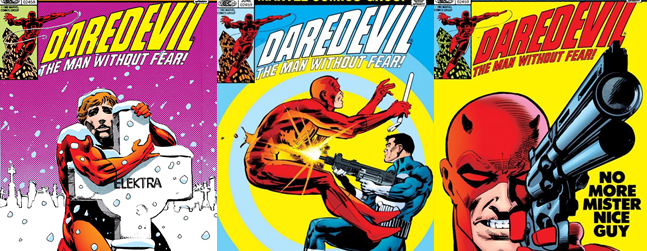
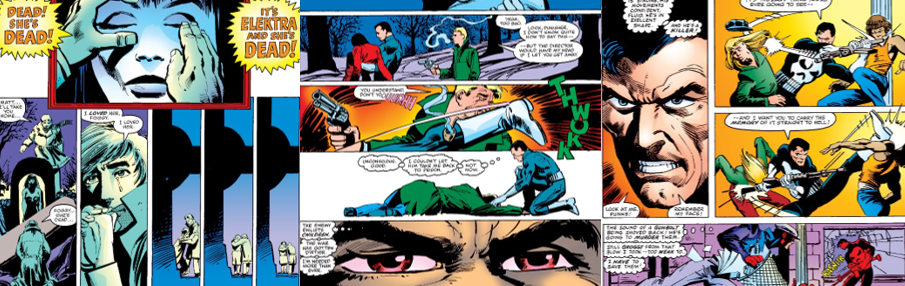
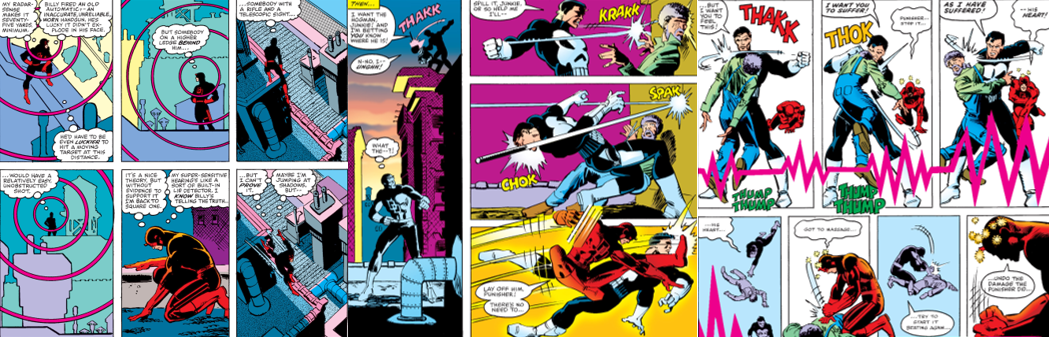
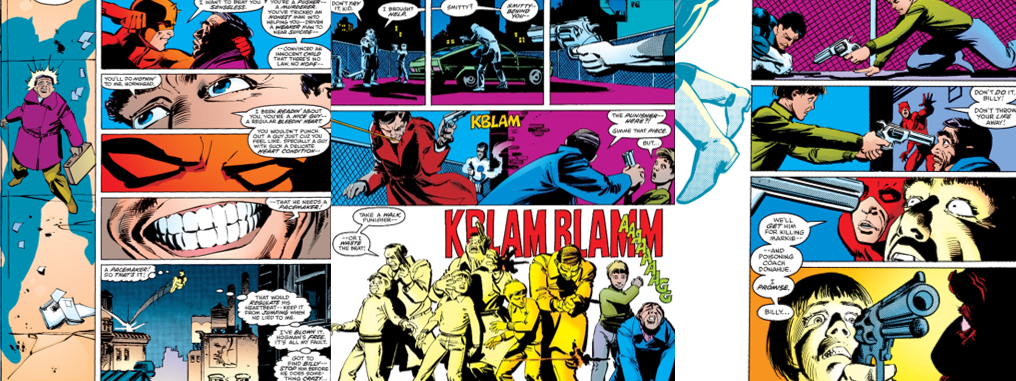
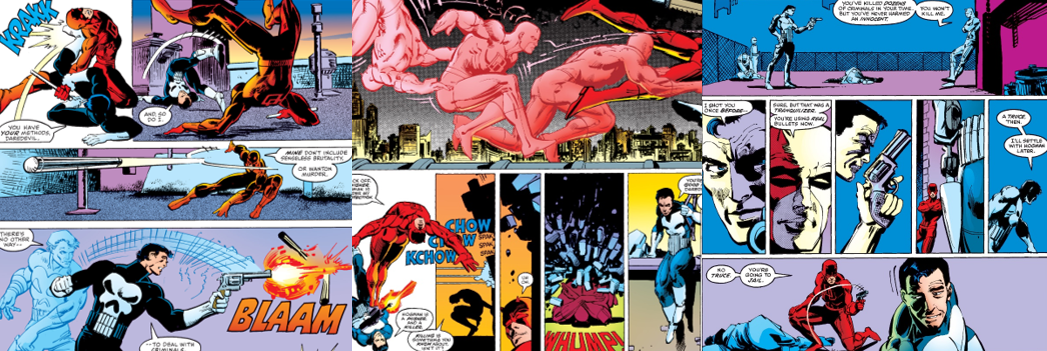


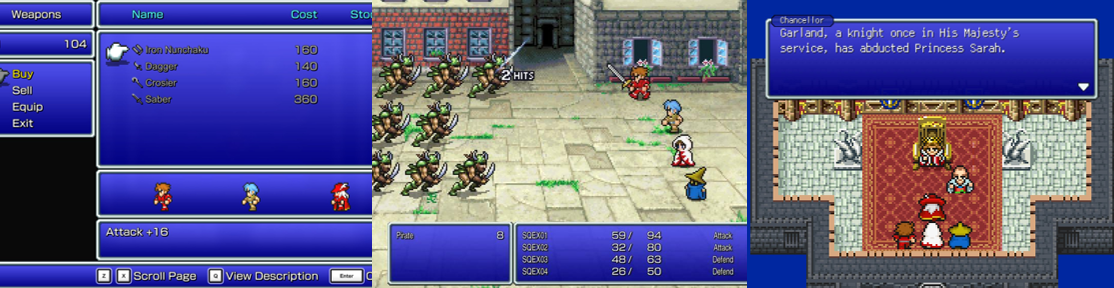


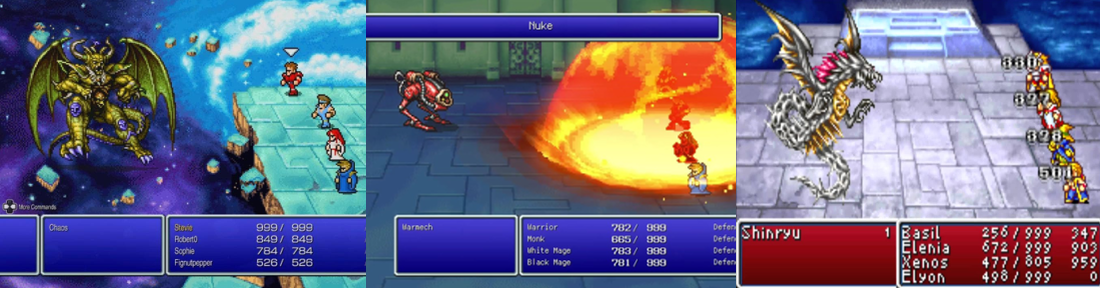

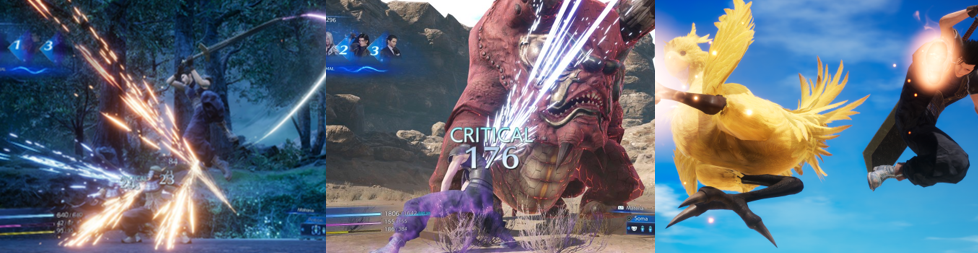
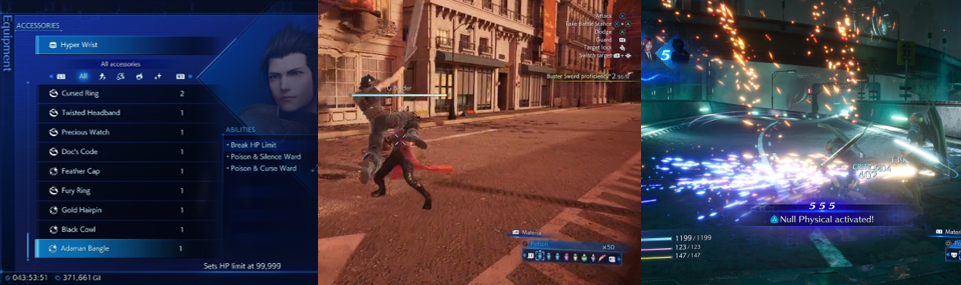
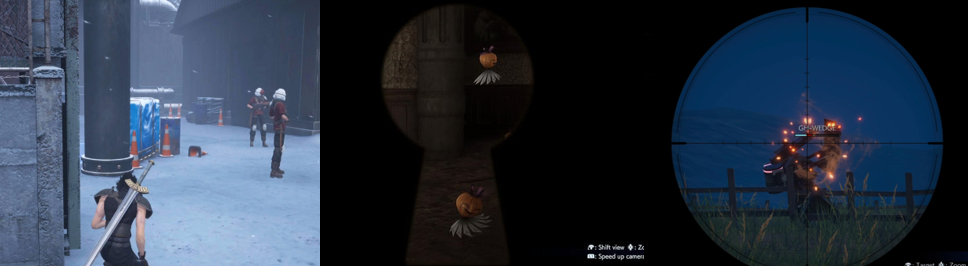
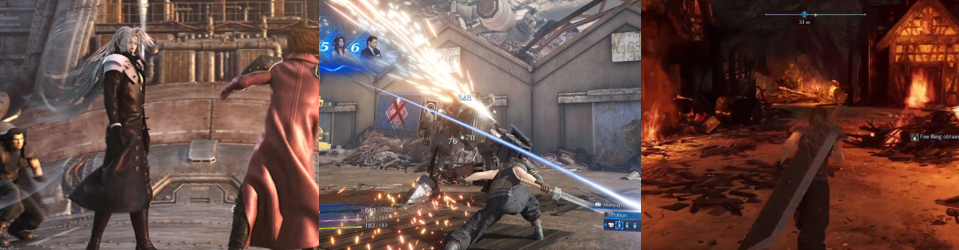
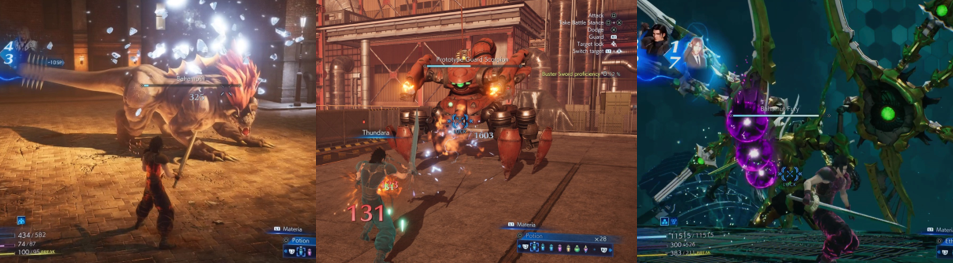
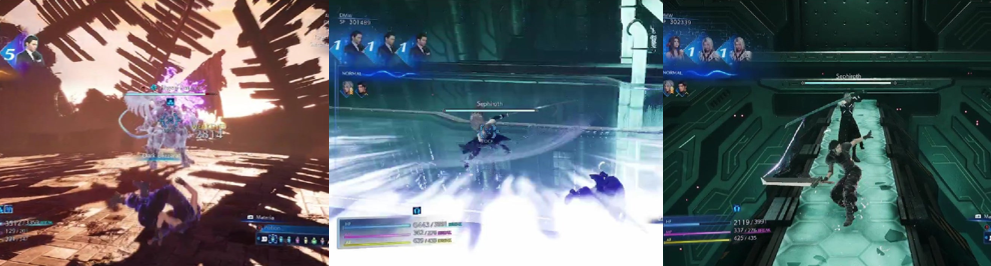
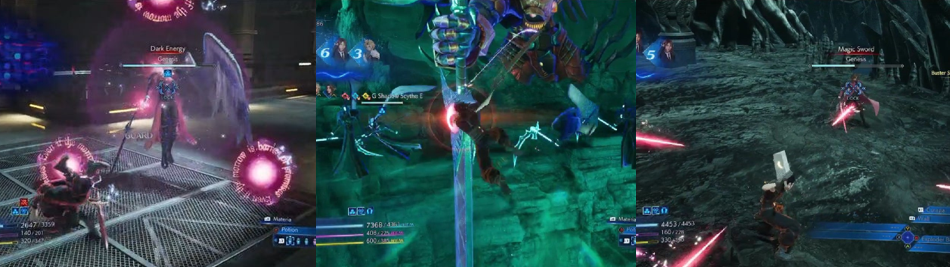


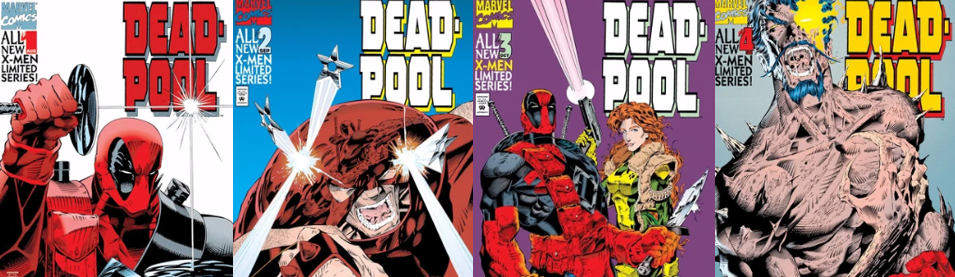
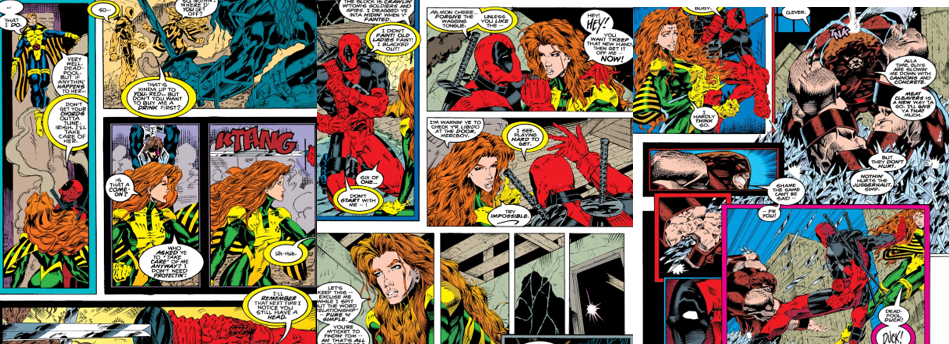
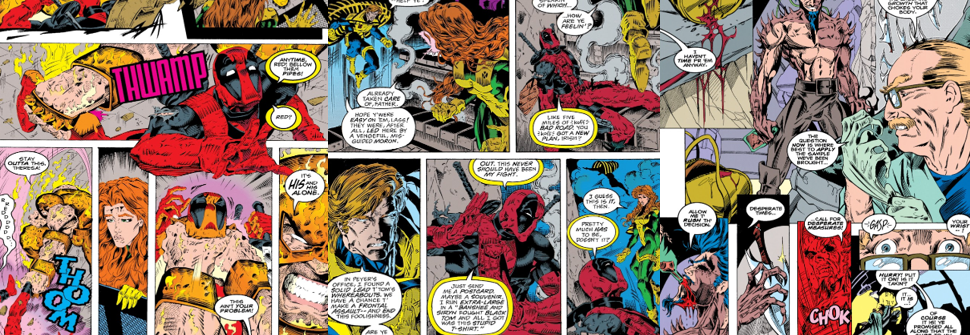
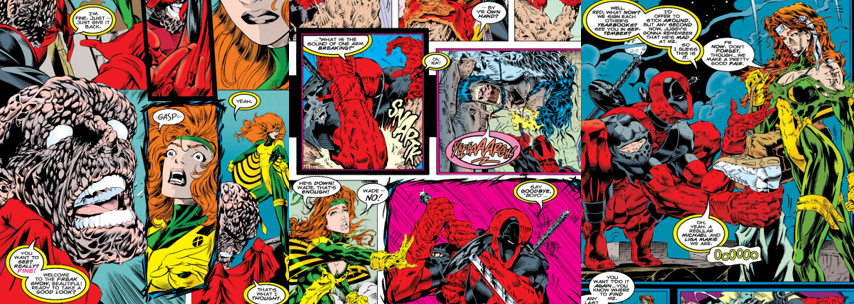
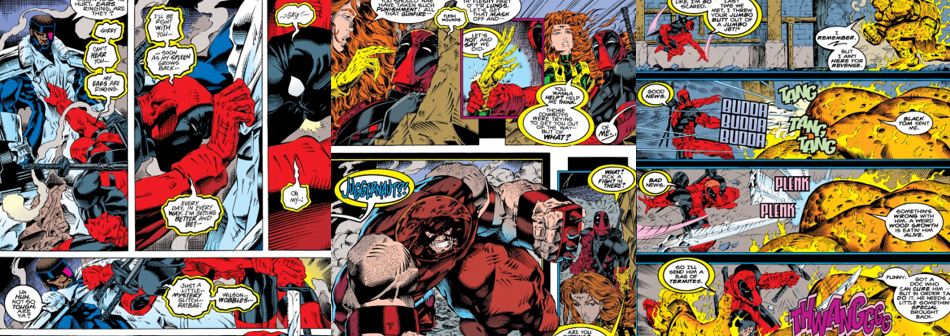
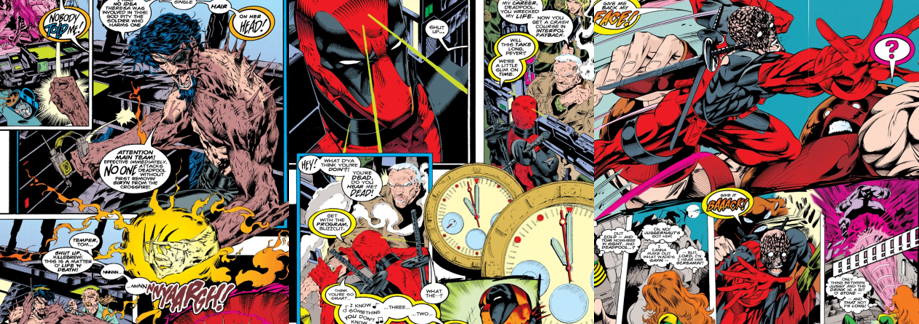


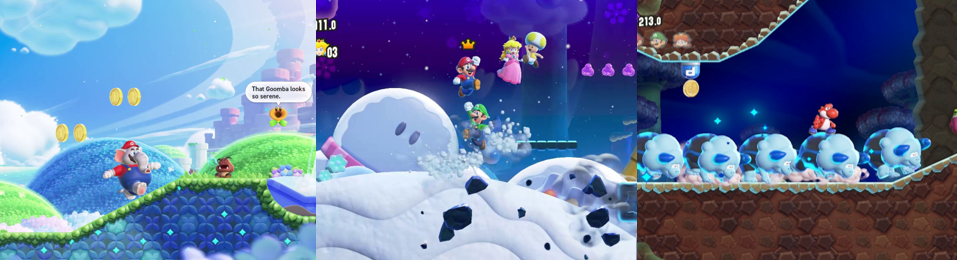
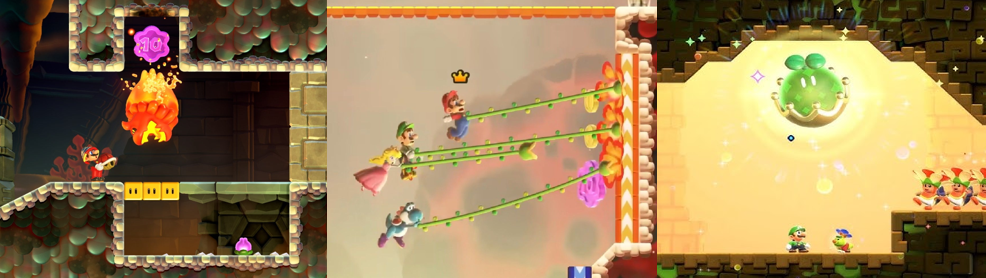
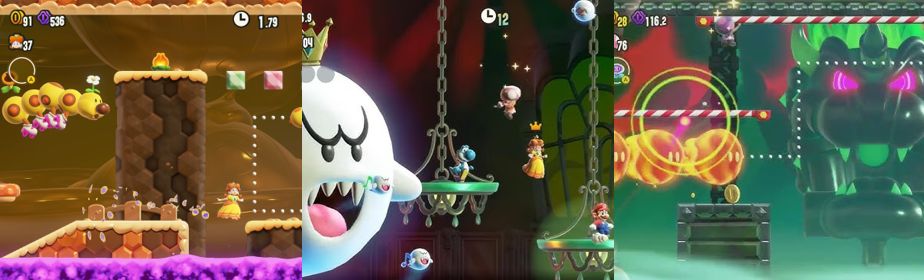

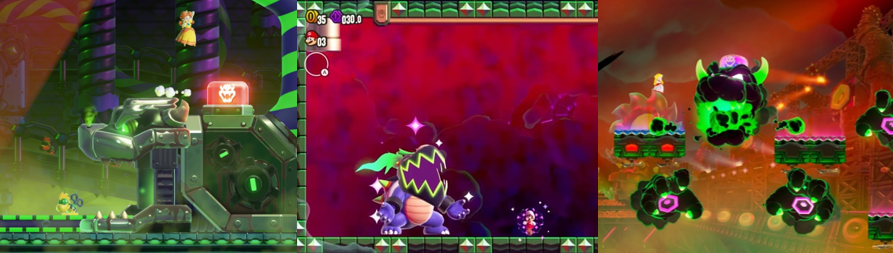


You must be logged in to post a comment.