Movie Night [Sci-Fanuary]: Edge of Tomorrow


January celebrates two notable dates in science-fiction history, “National Science Fiction Day” on January 2 and Arthur C. Clarke’s HAL 9000’s birthday on January 12. Accordingly, I’m dedicating January to celebrating sci-fi with an event I call “Sci-Fanuary”.


Released: 6 June 2014
Director: Doug Liman
Distributor: Warner Bros. Pictures
Budget: $178 million
Stars: Tom Cruise, Emily Blunt, Bill Paxton, Noah Taylor, and Brendan Gleeson

The Plot:
When public affairs officer Major William Cage (Cruise) unexpectedly gains the ability to reset time after his death in battle against the aggressive alien “Mimics”, he teams up with the heroic Sergeant Rita Vrataski (Blunt) to defeat the invaders.

The Background:
In 2004, Hiroshi Sakurazaka and Yoshitoshi Abe collaborated on the spectacularly named “light novelAll You Need Is Kill, the story of soldier Keiji Kiriya, who’s caught in a time loop that allows him to improve his fighting skills against invading aliens. Nominated for the 2005 Seiun Awards, All You Need Is Kill caught the attention of producer Erwin Stoff, who optioned the rights to create a live-action adaptation. Despite being intimidated by the source material, writer Dante Harper produced a screenplay that was listed as one of the best unproduced works doing the rounds. After Brad Pitt declined the lead role, Tom Cruise joined the project, and the script underwent additional rewrites after he and Emily Blunt were cast, with writer Christopher McQuarrie and director Doug Liman struggling to produce a satisfactory ending. The cast and crew spent an unexpected three months filming the complex, action-heavy beach assault on a large soundstage surrounded by green screens. The UDF exosuits were designed by Oliver Scholl, Pierre Bohanna, and Kate Hawley and modelled after real-world exoskeletons and built as largely practical suits that bruised and battered the stars. In contrast, the Mimics were digital creatures courtesy of Sony Pictures Imageworks; the designers worked hard to make them an otherworldly mess of dangerous tentacles that had a tangible reality to their otherwise fantastical appearance. Despite a worldwide box office of just over $370 million and largely positive reviews that praised the direction and execution, and the time loop twist, Liman and Warner Bros. were left so disappointed by the film’s reception that they pushed to re-brand the film to the clever tag line, “Live. Die. Repeat”. Indeed, while some found the film tedious and strangely limited in its scope, Edge of Tomorrow is widely branded as an under-rated sci-fi romp. Though talks of a sequel have done the rounds since its release, it seems we’re more likely to get a TV spin-off than a direct follow-up any time soon.

The Review:
So, two caveats before we get into this film: one, I’ve never read All You Need Is Kill (though my fondness for this movie makes me want to sit down with it some day) and two…I absolutely cannot stand Tom Cruise. I don’t care how many of his own stunts he does or about his weird personal life; I’ve just never bought into him as an actor and find his characters very bland and unlikeable. Thankfully, Cage is written to be pretty unlikeable. A smarmy, confident, well-dressed spokesperson, he’s effectively become the face of the UDF’s counterattack against the Mimics, frequently appearing on television and in interviews to encourage viewers to join the military, hyping up the combat prowess of the armoured exosuits worn by their soldiers, and painting Vrataski (the so-called “Angel of Verdun”) as a heroic symbol. In Edge of Tomorrow, humanity was completely caught off-guard when a seemingly innocent meteor landed in Germany, only to spew out a legion of weird, tentacle-like aliens that swiftly overtook most of continental Europe. Because of their uncanny ability to seemingly anticipate their enemy’s actions, the aliens are dubbed “Mimics” (an odd name considering they don’t physically or strategically mimic anything about us) and, in the space of just five years, were seemingly set to destroy all human life. That was, until, the Battle of Verdun, where Vrataski scored a major victory, one which galvanised humanity to push towards total victory. Unfortunately for many of their troops, the UDF still employ trench warfare, literally dropping their soldiers into enemy territory and leading to mass slaughter in most cases, keeping humanity on the razor’s edge of extinction.

The time loop and brutal training transform the once-cowardly Cage into a battle-hardened soldier.

This, as much as anything else, is why Cage would rather be anywhere else but on the front line. A former advertising guru, he adapted his skills to promoting the war effort, receiving a complimentary military rank, and has successfully hidden his abject cowardice and combat inexperience behind his silver tongue. However, when he’s called to meet with grizzled veteran General Brigham (Gleeson), Cage is aghast to learn he’s been ordered to join the next push into Europe as a war correspondent. Desperate to avoid the danger, death, and bloodshed, he begs, bargains, and eventually tries to blackmail his way out of the assignment, only to be arrested, stripped of his rank, and branded a deserter (“Rail-roaded”, as he calls it) and dumped into the judgemental and unsympathetic care of Master Sergeant Farell’s (Paxton) J-Squad. Despite desperately trying to explain his situation, Cage is met by nothing but sarcasm, mockery, and aggression from his newfound peers and, before long, is strapped into an exosuit and violently dropped into battle with little to no combat training. The beachfront assault is not a battle, it’s a massacre. Cage’s entire battalion is killed and he comes face-to-face with a large, voracious Mimic, barely able to defend himself. Out of desperation, he blows the “Alpha” to pieces with a Claymore mine and is drenched in its caustic blood. He then suddenly finds himself waking up 24-hours earlier, being given the same impassioned speech by Farell, suffering the same abuse from J-Squad, and dying in battle once again, only to begin the day anew each time.
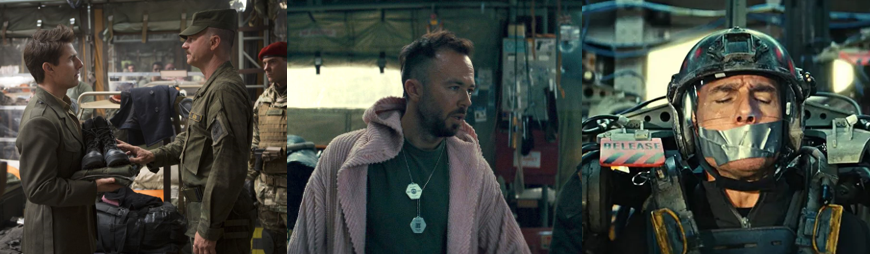
J-Squad are unimpressed by Cage’s attitude, inexperience, and increasing mania.

Confused and disorientated, Cage initially believes he’s suffering some kind of déjà vu or nightmare, or that he’s losing his mind. This latter explanation is what the other characters default to whenever he tries to warn them of the mission’s impending failure. No matter now many times he repeats Farell’s words or rattles off his knowledge of J-Squad – Griff (Kick Gurry), Kuntz (Dragomir Mrsic), Nance (Charlotte Riley), Skinner (Jonas Armstrong), Ford (Franz Drameh), Takeda (Masayoshi Haneda), and Kimmel (Tony Way) – they simply think he’s losing his mind. Eventually, during his many repeats of the same day, Cage’s knowledge of each increases; though this happens offscreen, we learn a bit more about each of them from his exposition as he tries to earn their trust. Ford, for example, is using his dead best friend’s name and sending his payment to his family. Mostly, Cage simply earns their ire; they’re annoyed at being saddled by him, his incompetence, and personally insulted by him being a deserter and they even attack him when his subsequent absences see them being punished by Farrel. Played by the late, great Bill Paxton with a delicious, scenery-chewing charisma, Farrel appears to be a man completely consumed by the fire and glory of war. However, unlike Brigham, Farrel isn’t all talk and bluster and eagerly joins his men in battle, relishing the taste of combat. Cage’s eventual combat prowess is more to do with memory, tough training, and a constant cycle of failure than him being mentored by J-Squad. They essentially leave him to fend for himself at the beginning, and are therefore stunned when he suddenly exhibits near-superhuman deftness and ability on the battlefield. Later, when he convinces them to heed his warnings, they’re shocked to learn how insurmountable the Mimic’s power is but readily follow him into a final assault on the Louvre Pyramid, giving their lives to his cause and even sacrificing themselves to cover his infiltration. However, as persuasive as Cage’s parlour tricks and knowledge are, they’re primarily convinced by him having the seal of approval of the near-mythical Vrataski, who backs Cage’s claims and emboldens their fighting spirit.

Constantly frustrated by Cage’s inexperience, Vrataski works hard to train him for combat.

Vrataski is a tough, no-nonsense soldier equally dubbed the “Full Metal Bitch”. Extremely adept with her exosuit, Vrataski also employs a massive, anime-styled sword (fashioned from a helicopter blade) and inspires awe in her fellow soldiers. However, Vrataski is also cold and stoic, rarely showing her emotions or letting them rule her actions, to the point where she’s largely impassive when her fellow soldiers die in battle. Behind this façade, she hides a deep pain at having watched so many of her loved ones die and failed to end the Mimic threat when she had the chance. When Cage unexpectedly saves her in battle thanks to his foresight, she orders him to find her when he wakes up and reveals that her victory at Verdun (and her entire reputation) is thanks to her also having previously acquired the Alpha’s time-manipulating blood. Working with Doctor Noah Carter (Taylor), Vrataski learned that the Alpha’s death triggers the gigantic “brain” of the Mimic hoard, the “Omega”, to reset the day, allowing the Mimics to counteract accordingly. The longer one has the power, the more the Mimics become aware of them and the closer the protagonists get to learning the Omega’s location. Vrataski therefore forces Cage to train again and again, executing him to restart the day whenever he’s incapacitated or killed, to turn him into her proxy. Vrataski is constantly exasperated by Cage’s inexperience, questions, and cowardice and delights in abusing him, barking orders and forcing him to step up and find a viable route off the beach to find the Omega. Similar to J-Squad, Cage eventually learns a bit about Vrataski and bonds with her, to the point where he becomes despondent at having watched her repeatedly die and their continued failures to make real headway.
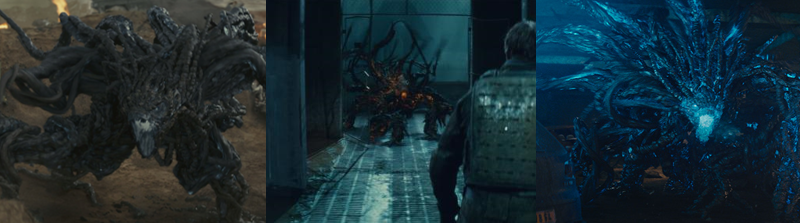
The Mimics are an ugly, aggressive alien race that can somehow create time loops.

A bunch of veterans and barflies speculate on the reason the Mimics have come to Earth, but Edge of Tomorrow largely leaves the explanation vague. They’re described as a “perfect”, planet-conquering hive mind, a near-exhaustible army even without accounting for their time-bending powers. The actual creatures are somewhat generic; they’re perfectly monstrous and disturbingly Lovecraftian, but we never really get a decent look at them and they often resemble a blurry mishmash of nanobots rather than living beings. They’re often hiding, either under the sand, ground, or elsewhere, and burst up to strike, skewering prey with their tentacles, firing energy bolts, or manhandling soldiers with their superior speed and strength. Even the regular grunts are extremely durable, often tanking multiple shots or moving too fast to be hit, and it was only through blind luck that Cage killed the Alpha in the first place. The Mimics are controlled by the Omega, with the Alpha overseeing the invasion and signalling for a reset upon its death, with all the aliens retaining the knowledge of each day, as Cage does. The longer he has the power, the more aware of his presence they become; the infected begin to see visions of the Omega, something the big brain uses to lure the soldiers into a trap. Indeed, Dr. Carter suggests that the Omega allowed the victory at Verdun as part of a grander plan to wipe out humanity, making them an almost invincible force. So powerful is the threat of extinction that the UDF’s only thought is to counterattack with everything they have. At one point, Cage and Vrataski infiltrate Brigham’s office, using Cage’s foresight to finally convince him to hand over Dr. Carter’s experimental transponder to learn the Omega’s true location, only for Bingham to immediately order even Vrataski’s arrest and forcing the two to reset to simply steal it. Cage’s power is constantly at risk since he must die to reset the day; it cannot be passed on but can be lost via a blood transfusion, which is what cost Vrataski the power. This eventually strips the ability from Cage, forcing him and Vrataski to recruit J-Squad for one last, desperate mission to destroy the Omega in Paris.

The Nitty-Gritty:
At first glance, Edge of Tomorrow is simply another generic, sci-fi war film with many of the tropes you’d expect from the genre. You’ve got the gruff, uncompromising General; the tough, but somewhat fair, Drill Sergeant; and a squad of ground-level troops simply trying to defend their world. J-Squad are sadly one-dimensional, despite Cage spitting facts and exposition about them, but are at least visually distinct. Griff is constantly walking around in a pink bath robe, for example, Kuntz “doesn’t talk much”, and Kimmel literally goes into battle balls out. Though as thirsty for combat as their Master Sergeant and far better trained than Cage, J-Squad is as doomed to failure as every UDF campaign and we witness their hubris, downfall, and deaths numerous times as Cage lives, dies, and repeats his time loop over and over. Though they give him nothing but abuse, they show respect for and surprise regarding his combat prowess in different time loops when this cowardly, pathetic deserter is suddenly blasting around at speed and picking off Mimics with uncanny precision thanks to Vrataski’s brutal training. Vrataski is a loner by nature, training by herself in a mechanical simulator and fighting solo on the battlefield regardless of how many troops follow her. She often dies alone in battle as well and constantly keeps Cage at arm’s length, hiding injuries and insisting on pushing onwards even when he begs her to stop because she won’t make it. Her stubbornness is her greatest strength and she impresses this fighting spirit upon Cage, eventually transforming him into a more hardened soldier over who-knows-how-many time loops.
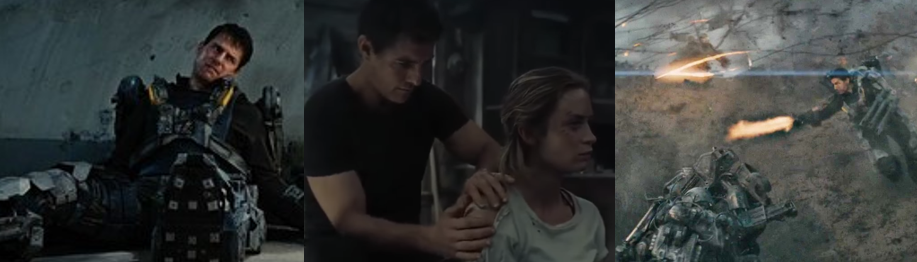
Cage’s repeated experiences improve his skills but burden him with knowledge.

As someone who dislikes Tom Cruise, I get a perverse pleasure out of seeing him die over and ever. He gets skewered, eaten, shot, and blown up multiple times throughout the film, suffering broken limbs, a shattered spine, and being crushed under vehicles. With each loop, he gets a little better, pushing further along the ill-fated beach assault and committing to memory the movements of the Mimics, exactly as a videogame player gets better through trial and error. We’re never given an exactly tally of how many times Cage relives the day, but he sometimes burns through days in quick succession, such as when he’s blindsided by threats or struggles with his combat training, much to his frustration. A series of montages show him failing time and again, but also his progression; once a lumbering liability who couldn’t disengage the safety on his weapons, he graduates to sprinting with an uncanny deftness and blasting Mimics with his shoulder cannons, saving those who despise him and pushing further into France. Much of Cage’s experiences aren’t shown to us, however. Edge of Tomorrow cleverly frames some of his and Vrataski’s excursions as his first experiences, only to reveal that he’s been at that same barn before and even learned to fly a helicopter. These sequences are all very gritty and realistic, with the beach assault resembling equally doomed real-life military campaigns and the UDF’s weaponry being surprisingly low-tech, save for the exosuits. These are surprisingly practical effects, with some CGI enhancements, and effectively make even a novice like Cage a super soldier, though we don’t see their full potential until Cage masters their functions. The Mimics, by comparison, are entirely CGI but they work well as an unknowable, monstrous “Other” for humanity to rally against, even if I find their design visually confusing. Cage eventually becomes burdened by knowledge; tortured by Vrataski’s repeated deaths and the virtual hopelessness of the situation, he deserts the campaign entirely at one point, only to be branded a coward. When he learns that the Omega is setting a trap for them to regain its power, Cage goes for the transponder to try and change the future, only to end up losing his powers and being given one last try to get the job done.
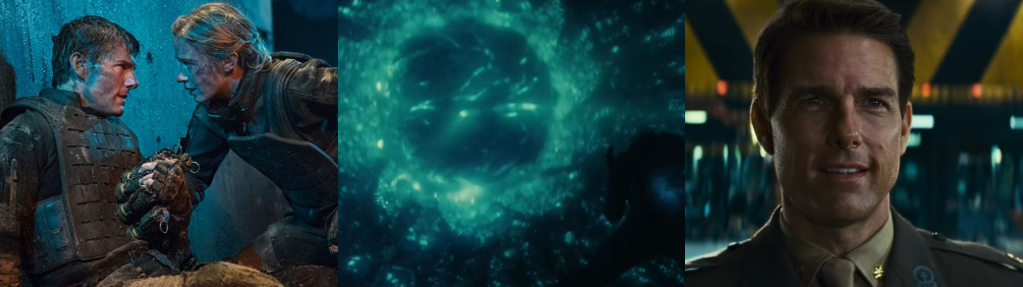
Stripped of his powers, Cage heads a final assault that results in the dawn of a new day.

Having been wounded and saved by a blood transfusion, Cage escapes military custody with Vrataski and the two enlist the help of J-Squad in defying orders and flying a night-time assault on the Louvre, the true location of the Omega. Essentially a suicide mission for all involved, this murkily shot mess of a sequence sees all of J-Squad heroically perish to cover their insertion into the iconic pyramid, leaving Cage and Vrataski the last survivors (ironically, Cage survives events in this sequence that would’ve surely reset his day previously). Cornered by the Alpha and realising victory will cost their lives, Vrataski finally expresses her regret and not getting the time to know Cage better, giving him an awkward kiss before sacrificing herself in the “fiery crucible” of combat against the Alpha, unaware that she and Cage have basically lived a lifetime by this point. Left alone with only a gun and a belt full of grenades and his harsh training, Cage plunges into the water’s beneath the Louvre to blow the Omega to kingdom come, only to be mortally wounded by the Alpha. However, he manages to pull the pins with his last act, destroying the Omega and earning himself another drenching in alien blood. This time, Cage awakens a few days earlier to find a strange energy pulse from the Louvre has mortally disabled all Mimics, effectively ending the threat overnight. He’s amazed to find J-Squad all alive and well, the war finally over, and himself restored to his previous life. Naturally, his first thought is to visit Vrataski, grinning like a moron when she greets him with her usual barking wit.

The Summary:
Edge of Tomorrow is a surprisingly good time. Like I say, I’m not a fan of Tom Cruise but he’s actually pretty enjoyable here. Seeing him play a slimy, cowardly, untrained soldier who gets repeatedly killed brought a lot of joy to me as a sycophant and I enjoyed watching him improve with every failure, getting more and more combat proficient and transforming into a soldier on par with Vrataski. This is masterfully conveyed not just through the physical representation of his abilities and proficiency with the exosuit (he demands additional rounds, forgoes his helmet, and show a veteran familiarity with its functions) but also in him assuming the same “thousand-yard stare” as Vrataski, becoming numb to the bloodshed and death over time. Yet, he retains a humanity that wasn’t immediately apparent thanks to his selfish nature. He genuinely wants to find a way to save everyone in his battalion and is frustrated to lose even a single one of them. Emily Blunt was stunning as Vrataski, embodying the stern, brutal efficiency of a battle-hardened soldier. I loved that she constantly pushed Cage, forcing him to think like her, and how she cooled over time to show a vulnerability beneath her façade. The Mimics were generic, but serviceable; they’re weird, bio-mechanical octopus things who want only conquest and human blood and that’s all you really need. The twist is their weird ability to control time, which is kind of swept under the rung and has a few logistical holes in it, but it makes them a unique and insurmountable foe. Character actors like Bill Paxton and Brendan Gleeson steal every scene there in and lend Edge of Tomorrow some legitimacy, and I liked the bleak, brutal nature of the combat (even if it was largely bloodless). In the end, I think Edge of Tomorrow is an under-rated alien invasion flick; there’s a lot to like here, especially with the time loop gimmick, and I always enjoy giving it a watch, even if it can be a bit generic visually.

My Rating:

Rating: 4 out of 5.

Great Stuff

Did you enjoy Edge of Tomorrow? If you’ve read All You Need Is Kill, how do you think the film works as an adaptation? What did you think to Tom Cruise’s performance? Did you also enjoy seeing him fail and die time and again and get a little better with each reset? What did you think to Emily Blunt and the depiction of the Mimics? Do you think the film needs a sequel? Is there a day in your life you’d like to relive over and over? Whatever your thoughts, drop them in the comments and go check out my other sci-fi content.


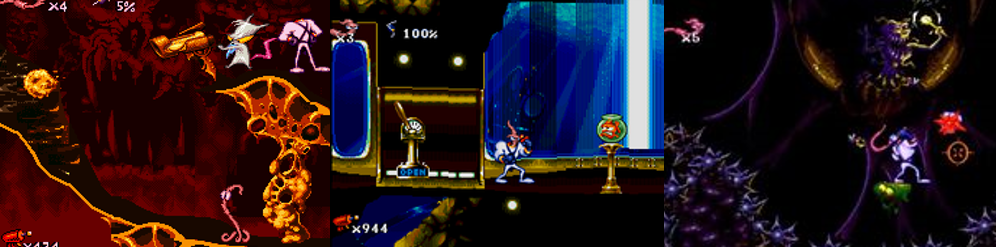
Game Corner [Sci-Fanuary]: Earthworm Jim (Mega Drive)


January sees the celebration of two notable dates in science-fiction history, with January 2 christened “National Science Fiction Day” to coincide with the birth date of the world renowned sci-fi writer Isaac Asimov, and HAL 9000, the sophisticated artificial intelligence of Arthur C. Clarke’s seminal 2001: A Space Odyssey (1968), being created on 12 January. Accordingly, I dedicated January to celebrating sci-fi in all its forms.


Released: October 1994
Developer: Shiny Entertainment
Also Available For: Game Boy, Game Boy Advance, Game Gear, Master System, Nintendo Switch, Nintendo Wii, PC, SEGA CD, Super Nintendo Entertainment System (SNES); PlayStation 3 and Xbox 360 (HD remake)

The Background:
During the eighties and nineties, anthropomorphic characters were king. It seemed every cartoon, toy, or company mascot was some kind of humanoid animal, generally fighting otherwordly or intergalactic forces. The most prominent examples from this time were, of course, the Teenage Mutant Ninja Turtles (TMNT), though mascot platformers were prevalent in videogames thanks in no small part to the phenomenal success of Sonic the Hedgehog (Sonic Team, 1991). After successfully licensing the TMNT, Playmates made the bold decision to develop a franchise of their own. Impressed by Doug TenNapel’s sketch of an earthworm, they purchased the rights and TenNapel joined programmer David Perry and the rest of the team at Shiny Entertainment, simultaneously programming for both the Mega Drive and the SNES using custom-made tools. Created as a satire of the genre, the developers enjoyed exploring their creativity, free from the restrictions of licensed characters, and the project was expanded upon with a line of action figures, comics books, and a hugely enjoyable cartoon. This was made possible by Earthworm Jim’s critical and commercial success; critics praised the quirky story, fluid animations, and zany action. Sadly, Earthworm Jim’s time in the spotlight wasn’t to last. Though followed by a highly-regarded sequel, even a later high-definition remake couldn’t atone for Jim’s failure to capitalise on his early success in 3D and handheld ventures, leaving him another videogame icon sadly lost to time.

The Plot:
A renegade ship steals an ultra-high tech super suit from the evil Queen Pulsating, Bloated, Festering, Sweaty, Pus-filled, Malformed, Slug-for-a-Butt. Although intercepted by the Queen’s henchman, Psy-Crow, it lands on unassuming earthworm, Jim, transforming him into an anthropomorphic superhero.

Gameplay and Power-Ups:
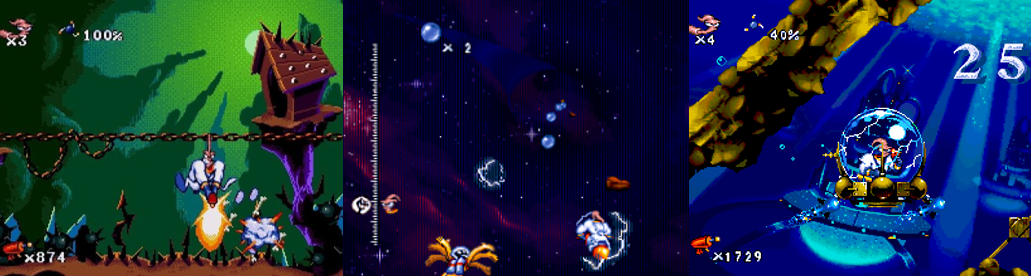
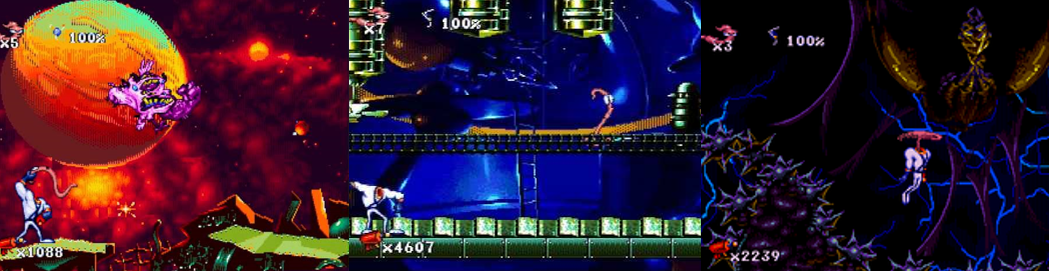
Earthworm Jim is a 2D, run-and-gun action platformer in which you assume to role of perhaps the most unlikely and bizarre superhero in all of videogaming, an earthworm given incredible powers by an alien suit. Players guide Jim through various surreal worlds, from a crow-infested junkyard to claustrophobic underwater base, to Hell itself, blasting at everything in their way and pulling off some tricky platforming feats. Earthworm Jim has two attacks: one is to throw his worm body like a whip and the other is to unload with his Plasma Blaster. You can change the button configurations from the main “Options” menu, though I got along fine with the default: A to whip, B to fire, and C to jump. Jim has a good jump and can grab ledges to pull himself up. He can also spin his worm self like a helicopter blade to glide across gaps or down narrow shafts (though I had difficult pulling this off). For longer gaps, Jim can snag his worm self onto various hooks and swing across gaps, a finnicky system, especially when you must perform successful swings or make your way up hooked columns. The hit detection on the hooks is iffy at times and Jim is very cumbersome when swinging, but I found holding up on the directional pad helps. Jim can also cross chains using his hands and head to bypass gaps and spike beds, or whip wheels to open doors and gates. Jim’s default shot is a rapid-fire, ammo-chewing burst that cuts through most enemies. When your ammo runs dry, it’ll slowly refill but you can boost it by grabbing Plasma Power. Just be aware that your ammo isn’t refilled at the start of each stage.

Blast away with Jim’s Plasma Blaster or struggle to master the game’s vehicles and mechanics.

Earthworm Jim can also grab Mega Plasma to fire a massive, concussive blast that’s great or blowing enemies away or whittling down bosses. Unfortunately, there’s no way to save this ammo for boss battles; once you grab the “Plasma!”, it becomes your default until you run out so choose your shots wisely. You replenish Jim’s health, which is measured in percentages, by grabbing Suit Power or a Super Suit Power for a full refill, grab extra lives, and Continue markers to respawn when you inevitably die. While everything in each level is out to hurt you, there are some things that’ll aid you. You must free hamsters in Down the Tubes, pressing A to chomp up Bob the Goldfish’s kitten guards, and also take control of extremely fragile spherical underwater craft to navigate between Bob’s lair. When in this craft, you have thirty seconds of air that you can replenish at air stations (if you’re careful enough) but you must avoid the narrow caves and walls as you boost around with A as the craft can only take so many hits. Jim also possesses his own pocket-sized rocket ship, which he’ll hop onto when finishing a stage. You’ll then race against Psy-Crow in numerous Andy Asteroids bonus levels, dodging asteroids and grabbing shields and accelerators for a burst of speed. You must hold A to accelerate and can collect “Fuel Pods” (though they do nothing) and even bash into Psy-Crow to slow him down. Fail to beat him to the end and you’ll have to battle him, but succeed and you’ll gain nothing except pride. Occasionally, Jim will be separated from his super suit. This first happens in the boss battle against Evil the Cat but also occurs in Level 5. Without his super suit, Jim’s just a regular earthworm and can only hop about, but you can jump into fan blades to be tossed ahead to reunite with your suit before Professor Monkey for a Head ditches it down a pit. Other times, you’ll be running on jewels to reach higher areas or teleport around, or take more traditional teleporters to reach new areas.

Bizarre levels and oddball gameplay mechanics make for a very challenging experience.

Earthworm Jim is quite the challenging experience. You can set the game’s difficulty in the “Options” menu, but even “Practice” gets pretty difficult as you progress further. Most stages are very linear, but you’ll be climbing, jumping, and running about in twisted, winding environments, often falling to lower levels or spike pits when you miss swings. Environmental hazards start quite mundane, such as debris falling down conveyor belts, flame bursts, electrical bolts, and such, but soon you’re facing monsters and bugs that bite you in two or being assaulted by voracious dogs and ghosts. In Down the Tubes, you won’t stand a chance against Bob’s muscular cat bodyguards and must jump to the alcoves above them and hold up until the past by, and ride ravenous hamsters to even the odds. Andy Asteroids stages get faster and more difficult as you progress, with more asteroids to avoid and Psy-Crow blasting ahead and stealing your power-ups, just as the very environment in later stages conspires against you. You’ll be whipping wheels to open gates, hitting levers to release hamsters, smacking switches to reverse escalators, and jumping to Dyson spheres that burst with electrical energy. The difficulty really ramps up in For Pete’s Sake, an escort mission where you must keep Peter Puppy safe from UFOs, tentacles, pits, and meteor strikes by either blasting hazards or whipping him. If he gets attacked, he transforms into a bestial form and shreds your health, setting you back a bit, too. This is a cakewalk compared to Buttville, though, a nightmare realm made almost entirely of spikes and tricky swing challenges. You’ll need to master Jim’s helicopter float just to get past the maddening first section, a narrow shaft full of spikes, to say nothing of avoiding swinging into the jagged spikes lining the floor of the stage.

Presentation:
Earthworm Jim is one of the most impressive games on the Mega Drive. It has a surreal, bonkers cartoon presentation that elevates it above the competition and gives it endless visual appeal. Jim is at the forefront of this, featuring numerous idle animations (from off-key singing, flexing, and blasting himself in the face), sound bites, and slick animation frames that make him a joy to control and watch. He reacts to everything, yelling in pain, swinging his worm self like a lasso, and reacting in horror at times, infusing him with a madcap personality that perfectly matches the insanity offered by the game. Between stages, partially animated pixel art compliments your gameplay and Jim turns into Tex Avery when meeting Princess What’s-Her-Name in the finale, only to be dejected when she’s crushed by an errant cow and consoling himself by swiping her crown! The cow isn’t even that random since players launch it in New Junk City, and weird, quirky humour like this is all over Earthworm Jim. From lawyers making up Evil’s minions in Hell, to the Professor literally having a monkey attached to his head, Earthworm Jim is crammed with visual gags and personality. The soundtrack compliments this, often being subdued or a simply bop, though What the Heck? does impress with a remix of “Night on Bald Mountain” underscoring the action. I did notice some instances where the music cut out, though, especially after pausing the game, though Earthworm Jim otherwise runs as smooth as butter and is a joy to play in terms of how responsive everything is. If you’re looking for story and cutscenes, you won’t find either here. The manual details the narrative alongside a few comic book pictures, but the game itself just starts up with no context and never tries to explain anything that’s happening, which is actually pretty great.

Earthworm Jim is one of the most colourful, cartoonish, and bonkers games on the system.

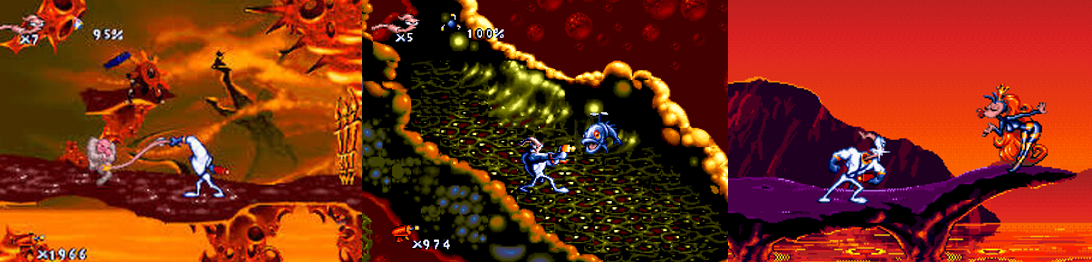
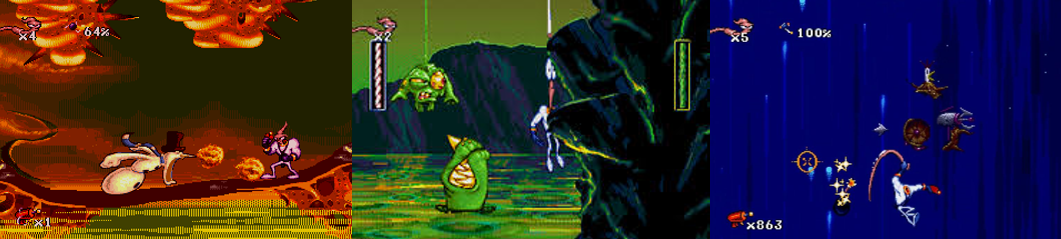
Earthworm Jim’s stages are absolutely bonkers. You start in New Junk City, a junkyard filled with bouncy tyres, fragmented cliffs, and monstrous dogs just waiting to bite your leg. There’s an impressive art deco effect to the background but it’s nothing compared to What the Heck?, where Evil the Cat hangs out in the distance and you must platform across sinister-looking Hell structures. Down the Tubes makes everything much more claustrophobic, restricting you to the glass tubes and rooms of Bob’s lair, but a water effect over the action and a beautiful rendition of the lair make this a visually memorable location. The simply named “Level 5” is a mad scientist’s dream of conveyers, escalators, 1950s-style machinery, and Dyson spheres. You’ll regularly by separated from your suit here and will briefly be encased in a mesh cage as the Professor toys with you. For Pete’s Sake is a simple barren, alien landscape but the looming planet, weighted platforms, seesaws, and never-ending onslaught of hazards bring it to life, to say nothing of Peter’s looming threat if your aim is a little off. Intestinal Distress is easily the most disgusting level, being made up of gross, mucus-like platforms and tubes, while Buttville is a spike-ladened nightmare hive. A lightning storm looms in the background, insta-kill hazards pop out from holes, and hooks and spikes close in all around you, really upping the threat level. The Andy Asteroids stages are simple chases through high-speed wormholes but those sensitive to flashing lights may struggle at the finish line, which bombards you with a strobe effect. Finally, the Snot a Problem challenges see Jim bouncing down a cliff on a bungee cord, bashing into Major Mucus and avoiding the Mucus Phlegm Brain below. If you’re lucky enough to own the HD version, you’ll be treated to a comic book-style intro sequence that gives a largely wordless account of Jim’s origin. There are also graphical differences between the Mega Drive, Mega-CD, and SNES versions and improved audio quality on the Mega-CD version.

Enemies and Bosses:
Surprisingly, there aren’t that many enemies in Earthworm Jim. The stage layouts and hazards are generally your most persistent enemy, with baddies merely existing as another obstacle to overcome. Defeating them makes your life easier since they won’t dog you when you inevitably miss a jump or a swing. None of them drop health or ammo and there’s no scoring system, so it’s literally a case of killing them to not lose health. New Junk City houses crows and ravenous dogs; crows swoop down and bite your head while the dogs bite your legs, though you’ll also have to watch for falling junk. What the Heck? sees you fighting off dark spirits (essentially a combination of the crows and dogs) and suited-up lawyers who block your shots with their cash-firing briefcases. Bob’s cat minions are completely invulnerable in Down the Tubes, requiring you to avoid or eat them with a hamster, but you’ll also encounter weird gas-spewing spheres that show up later in the game, too. Level 5 sees you attacked by the Professor’s weird science experiments, which explode into maggots when hit or see eyeballs constantly spawning to swarm you and disembodied brains pouncing in your face. Strange helicopter fish spit small fish at you in Intestinal Distress and bugs burst from nests in Buttville, compounding your attempts to safely navigate the spike-filled environment.

Quirky, often disgusting mini bosses have you rethinking your attack strategies.

For Pete’s Sake charges you with temporarily subduing the many tentacles bursting from the ground and finding off UFO attacks and meteor storms. If Peter is hurt or falls, he becomes a bestial creature that attacks you, shrugging off your shots and setting you back. However, your most persistent foe is Queen Pulsating, Bloated, Festering, Sweaty, Pus-filled, Malformed, Slug-for-a-Butt’s main henchman, Psy-Crow. You’ll race him in the Andy Asteroids stages, barging him to slow him down and snagging power-ups to beat him to the end, but must battle him if you fail. Fortunately, this fight isn’t too hard; simply fire at him to stun him and then whip him until he flees. Some stages see you facing off with mini bosses, too, such as the living trashcan in New Junk City and the snowman waiting in What the Heck? The trashcan is tougher than it looks not just because of its powerful uppercut and it constantly launching debris, but also because it can only really be damaged by the Mega Plasma or from behind. The snowman is much easier, despite warping around by turning into goo and spitting fireballs. Similarly, battling Major Mucus in a bungee fight isn’t too bad; it’s similar to the rope section from Battletoads (Rare, 1991) and sees you barging the living snot ball into walls to whittle away its snot bungee. Still, you have to be careful of his counterattack, spinning top move, and the one-shot Mucus Phlegm Brain. Although you encounter Professor Monkey for a Head, you don’t get to fight him. Instead, you fire at him and chase him around his lab, and he sets his steampunk-style robot chicken on you. This thing is completely immune to your attacks and clucks about spitting egg bombs. You need to whip a target to drop explosives on it, the shoot or whip it while in freefall not unlike the Snot a Problem stage.

While some bosses are innovative or ridiculous, others are unnecessarily difficult.

The first real boss you face is Chuck, the owner of the junkyard, though he’s actually easier to face than his sentient trashcan. Chuck drops anvils and crates and such from an overhead crane; simply avoid these and whip the crates onto the spring beneath him to deal damage. He’ll spit up fish and eventually move back and forth but he’s way easier to defeat if you time your whips properly. Evil the Cat is a touch trickier; he randomly pops up in What the Heck? to toss bombs and cause stalactites to rain down, then somehow separates Jim from his suit. In this phase, you must jump over his flame bursts until he destroys his platform, reuniting you with your suit. In the second phase, Evil attacks from the darkness and you must blast him nine times, avoiding the flame bursts, to finally put him down. Bob the Killer Goldfish is a joke by comparison, potentially because of how difficult Down the Tube’s underwater sections are. Simply walk up to Bob and Jim tips over his bowl, leaving him flailing on the ground. At the end of Intestinal Distress, you’re attacked by Doc Duodenum, a strange, mucus-like being that hops about and spits goo but it’s easily put down with your regular attacks. Queen Pulsating, Bloated, Festering, Sweaty, Pus-filled, Malformed, Slug-for-a-Butt herself awaits at the end of Buttville, her gigantic egg sac looming overhead not unlike the Xenomorph Queen. Gloop leaks from this and hurts you and you must hop to temporary spinning platforms, avoiding her scepter swipe and taking out the bugs swarming around her. The biggest threat here is the bed of spikes and potentially running out of ammo, but simply fire at her as you spin around and she’ll soon burst like a pimple. Frankly, the weird growth you fight before her is far harder. This…thing…spits goo, which is bad enough, but the ground is constantly moving you towards a spike wall and the ground also has spikes in it. It gets faster as you deal damage, too, and can really burn through your health and lives!

Additional Features:
With no high score table and no collectibles or unlockables, there isn’t much else on offer in Earthworm Jim. You can challenge the game on a harder difficulty, of course, and replay the game to try and reach new areas of each level for additional goodies, but your main reason for going back will be to discover the hidden areas. Not only are there secret areas hidden behind the foregrounds, you can access the secret stage Who Turned Out the Lights?, the Professor’s dark and dingy basement where spotlights briefly illuminate your surroundings and a hungry, unkillable creature stalks from the shadows. Other replay incentives include the cheat codes, inputted from the pause screen, that refill your health, ammo, grant an extra life, and allow you to skip stages. There’s also a debug mode that allows you to freely move the camera around each stage and grants invincibility (though, oddly, some enemies can still hurt you) that also protects you in underwater sections. Those playing the Mega-CD version can also play through an additional level, Big Burty, and battle the blind dinosaur of the same name. This stage (and Who Turned Out the Lights?) was missing from the HD version but was replaced by digital fantasy stages where a keyboard-playing cat ruled supreme. The HD version also included online and offline co-op mode where up to four players navigated all-new levels, in addition to leaderboards and Achievements/Trophies that challenged you to such tasks as collecting stuff, beating single and multiplayer levels, and finishing the game in under fifty minutes. Finally, if playing on Nintendo Switch Online, you can take full advantage of the save state and rewind features to really level the playing field on this challenging game.

The Summary:
I’ve played Earthworm Jim before, mainly on emulators, and have been a big fan of the series since it first came about. I loved the cartoon and have long coveted the action figures, so it was a must buy for my Mega Drive library once I started seriously collecting for the system. However, I’d previously played through the HD version on PlayStation 3, a game I remember beating without cheats. That wasn’t the case here. Earthworm Jim is almost unforgiving in its later stages, throwing spikes and pits and platforming challenges that will have you gripping your controller in frustration. So, yes, the debug mode helped a lot for this playthrough since it meant I didn’t have to worry about my health or oxygen, but it was no help at all with whipping those hooks or navigating the spiked, nigh-impossible nightmare that is Buttville. It also wasn’t much use against the damn trashcan, or that robot chicken, both of which can be a pain in the ass to defeat, especially as the game rarely indicates when your attacks deal damage. Racing against Psy-Crow can also become very difficult; fighting him isn’t so bad but it’s a waste of ammo, something you desperately need when navigating stages and defeating bosses. I do think the game would’ve benefitted from a meter system to measure Jim’s ammo. Like, firing his gun depletes a meter that refills over time, rather than forcing you to wait around for your ammo to slowly replenish. Still, while the game is very difficult at times, a lot of the time it’s simply challenging and you do get better at judging when to whip at hooks and how to navigate past hazards. It helps that Earthworm Jim looks fantastic; it has sprite animation so smooth and slick that it rivals the likes of Aladdin (Virgin Games, 1992) and Sonic the Hedgehog 2 (SEGA Technical Institute, 1992), basically resembling a playable cartoon. It plays really well, offering a quirky, action-packed experience while also making you think outside the box at times, especially when Jim loses his suit. Jim is also a wonderfully realised, bonkers character with so much life and personality and his enemies are equally memorable for their bizarre appearances and attack patterns. It’s not the most accessible game and at times will have you tearing your hair out, but my God is Earthworm Jim an enjoyable experience, if only to look at!

My Rating:

Rating: 4 out of 5.

Great Stuff

Are you a fan of Earthworm Jim? How do you think the game holds up against other action platformers? Did you also find the game challenging at times, and struggle with the swinging mechanics? Which of Jim’s outrageous villains was your favourite? Did you ever beat the game on the hardest difficulty? Would you like to see Earthworm Jim make a comeback? What are some of your favourite sci-fi-orientated videogames? Feel free to share your memories of Earthworm Jim in the comments and then check out my other sci-fi content on the site.

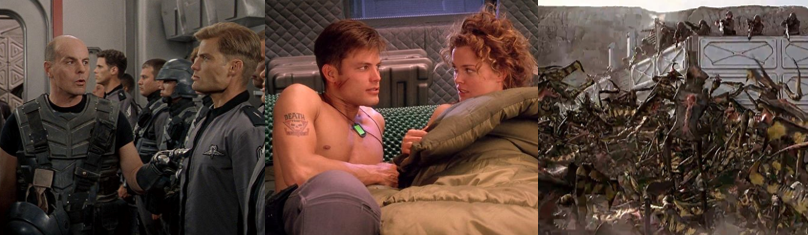
Movie Night [Sci-Fanuary]: Starship Troopers


January celebrates two notable dates in science-fiction history, “National Science Fiction Day” on January 2 and Arthur C. Clarke’s HAL 9000’s birthday on January 12. Accordingly, I’m dedicating January to celebrating sci-fi with an event I call “Sci-Fanuary”.


Released: 7 November 1997
Director: Paul Verhoeven
Distributor: TriStar Pictures
Budget: $100 to 110 million
Stars: Casper Van Dien, Denise Richards, Neil Patrick Harris, Dina Meyer, Clancy Brown, and Michael Ironside

The Plot:
In the 23rd century, mankind wars with the “Bugs” of Klendathu. Youngsters Johnny Rico (Van Dien), Carmen Ibanez (Richards), and Carl Jenkins (Harris) enthusiastically join the fight, only to find war is not the glamourous affair portrayed by the media.

The Background:
First published as a two-part serial in The Magazine of Fantasy & Science Fiction as Starship Soldier, Robert A. Heinlein’s 1959 pro-military sci-fi tale of humanity’s war against arachnid aliens was just the inspiration writer Ed Neumeier and producer Jon Davison needed to sell their similarly-themed concept to TriStar Pictures. TriStar were far more receptive to their pitch for Bug Hunt at Outpost 7 once it was pitched as an adaptation of Starship Troopers and the Outpost 7 concept was tweaked to accommodate Heinlein’s work. Neumeier and Davison quickly recruited and reunited with Paul Verhoeven to direct based on his predication towards satirical subtext. Though production slowed in the mid-nineties, the ensuing effects tests finally convinced the studio to get the project moving in collaboration with other studios. Despite Neumeier’s attempts to remain faithful to the source material, Verhoeven introduced satirical elements regarding the media, military, and politics and removed the trooper’s power armour to put them at a greater disadvantage. While Phil Tippett and his studio created the practical and visual effects for the film and Verhoeven meticulously drafted detailed storyboards, Verhoeven purposely cast young, beautiful actors to evoke Nazi propaganda films. The cast endured combat training in harsh weather conditions to prepare for the film, which initially debuted at number one at the box office, though it barely cleared $120 million in profit. Reviews were mixed or largely negative upon release, with many missing the satirical elements and criticising its characterisations. Positive reviews praised the action and effects, and its violent content, and it has gone on to be regarded as an increasingly relevant cult classic that led to numerous divisive direct-to-DVD sequels, videogames, and a surprisingly well regarded CGI cartoon.

The Review:
Starship Troopers doesn’t pull any punches, even from the start. The movie opens with a platoon of gung-ho soldiers from the Mobile Infantry (MI) division of the United Citizen Federation (UCF) charging into battle with the Arachnids (derisively referred to as “Bugs”) on their hostile home world, Klendathu. Joined by a FedNet correspondent (Gregg Travis) who exposits the danger of both the Bugs and their world and boisterously hails the bravery and righteousness of the UCF’s troopers (before being summarily devoured by an Arachnid), the infantry immediately realise that all their training and heavy machine guns are largely superfluous against the Arachnid threat. Slaughtered and torn to pieces, the troopers are left bloodied, with Private John Rico seemingly left for dead following a brutal wound to the leg. The story then dramatically jumps to one year prior, when Rico was a fresh-faced, lovelorn senior trying to steal a kiss from (and seal the deal with) his beautiful, determined, but somewhat nauseous girlfriend, Carmen Ibanez. Alongside their friend and budding psychic, Carl Jenkins, and Rico’s jump ball teammate, Isabelle “Dizzy” Flores (Meyer), they are three young, sexy kids taught from an early age by the likes of seasoned veteran Jean Rasczak (Ironside) of the sanctity of enlisting. Those who enlist and complete their federal service are awarded “citizenship”, gaining such perks as the right to vote and have children, while ordinary “civilians” have little influence in the body politic. Though talented on the field and boasting a stronger stomach than his beau, Rico is completely naïve to the dangers of enlistment, repeatedly knocks back Dizzy’s affections, and is ruled by his heart when it comes to his decisions. Thus, he clashes with both his parents (Christopher Curry and Lenore Kasdorf) and rival player Zander Barcalow (Patrick Muldoon) when it comes to his life choices and Carmen.

Enlistment tests our three young leads in different, often painful ways.

Indeed, swayed by the perceived honour that’s associated with Citizenship and desperate to stay close to Carmen, whose top grades make her a shoe-in for the fleet academy, Rico disregards his parents’ very real concerns that he’s signing up to get himself hurt or killed for a girl and readily enlists. Since he doesn’t have the grades to be a pilot like Carmen or the psychic aptitude to be part of the overly fascist military intelligence division like Karl, Rico’s assigned to tough, no-nonsense (and scene-stealing) drill sergeant Zim (Brown) and immediately thrown in the deep end. Alongside his new best friend, wisecracking Ace Levy (Jake Busey), Rico is subjected to harsh physical tests, constant berating from Zim, and resentment towards Dizzy when she follows in his footsteps. His placement in the Mobile Infantry ironically means Rico’s further away from Carmen, who takes to flying like a duck to water and finds herself under Zander’s tutelage, quickly gaining a reputation as a fearless and unconventional pilot. Still, Rico’s physicality and natural charisma serve him well until he makes a critical error during a live-fire exercise and causes the death of fellow cadet Breckinridge (Eric Bruskotter). Although Zim vouches for Rico’s potential and he takes his ten lashes, Carmen’s ending of their relationship and Breckinridge’s death weigh heavily on Rico and cause him to quit. However, right as he’s about to make amends with his parents, his home of Buenos Aires is obliterated by a Bug Meteor, sparking all-out war and Rico’s return to combat to get a measure of revenge. This leads to the opening assault on Klendathu as a direct counterattack, a siege that leads to thousands of deaths as the Bugs blast ships from orbit and slaughter the ground troops.

Rico, Ace, and Dizzy join Rasczak’s Roughnecks on the frontline of the conflict.

Though listed among the dead, Rico survives thanks to the intervention of Rasczak, commander of “Rasczak’s Roughnecks”, an elite infantry squadron who absorb Rico, Dizzy, and Ace into their ranks. Rasczak demands only the finest work from his troopers and orders them to shoot anyone, even their own people, if it means sparing them a more gruesome fate. Impressed by Rico’s valour, Rasczak quickly promotes him to Corporal after his football skills and natural leadership take down a particularly dangerous Tanker Bug. While associating with Rasczak’s Roughnecks, Rico finally sees what’s been in front of him and gives in to Dizzy’s affections, though their tryst is short-lived as the group is ordered to investigate a distress call from Planet P. There, they discover a ravaged UCF outpost and General Owen (Marshall Bell) driven to the brink of madness after witnessing the Bugs sucking the brains out of their prey. The squad realises all-too-late that the distress call was a trap and are besieged by Bugs in a gory slaughter that leaves Rasczak mortally wounded. After Rico mercy kills him and assumes command of the survivors (now renamed “Rico’s Roughnecks”), he’s embittered when his order to carpet bomb P is countermanded and yet duty-bound to return to P when ordered by Jenkins, now a high-ranking colonel, to flesh out the rumoured “Brain Bug” residing there. While Carmen is aghast at Carl’s callous nature, especially after Dizzy’s death, he justifies his decisions as the natural fallout of war. His ultimate goal is to capture the Brain Bug and thereby learn more about the Arachnid’s nature to better fight them, though this goal requires the sacrifice of hundreds and even thousands of lives both in the Mobile Infantry and the fleet. The relationship between the three is strained as a result; fleet and infantry don’t mix as it is (since “MI does the dyin’, fleet just does the flyin’”) and the increasing incompetency of the revolving door of UCF officers doesn’t help matters. Still, the allure of combat remains; Rico readily accepts his mission, even if it’s potentially a one-way trip, and even Zim “busts [his] ass down to Private” to get back on the front line.

The Bugs represent a monstrous, alien force but is man the true enemy in this interstellar war…?

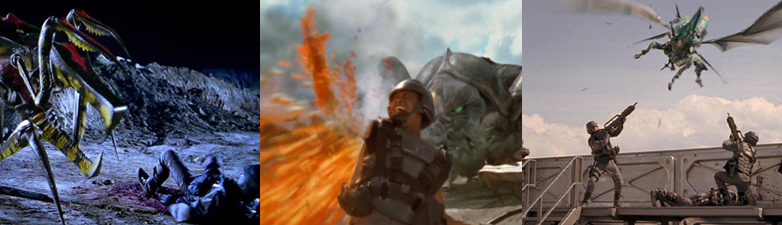
On the surface, the Arachnids are a perfectly horrific and monstrous alien threat. They’re gigantic spider- and bug-like aliens that attack in swarms, slicing limbs, gobbling up their prey, and even spitting fire and firing plasma from their rears. They’re an uncivilised and obviously non-human alien species, one apparently capable of blasting asteroids from orbit towards Earth, and they’re incredibly resilient. Not only are their larger variants armour-plated, not only can they burrow underground and fly, but even their spider-like drones continue to be a threat after their limbs are blown off. Indeed, it takes almost an entire clip just to put one down, and that’s when the troopers are aiming at centre mass, and even then there are hundreds more to take the place of their fallen. Starship Troopers does suggest, more than once, that the Bugs aren’t the aggressors in this fight, however. There’s an off-hand suggestion that they were riled by humans venturing into their airspace, and that the UCF is seeking to colonise the Bug world for their resources, and even the implication that the Buenos Aires attack was perpetrated by the UCF. Such discourse is quickly dismissed, however, especially be the impassioned troopers, who believe wholeheartedly in slaughtering every Bug they encounter. They certainly have their work cut out for them, something not helped by the UCF’s bizarre insistence on relying on ground troops rather than orbital bombardment, the Bugs’ sheer numbers, and the fact every battle takes place on alien worlds. Analogous to the futility and ill-conceived strategies used in the Vietnam War, the Bugs overwhelm the heavily armed but poorly protected troopers, making mincemeat out of them and even sucking out their brains as an act of intimidation. The UCF itself is an aggressive force that controls all the media, society, and strategy regarding the Bugs. They make enlistment to look as attractive as possible to bolster their numbers and it takes the entire movie for them to develop better weapons and defences towards their warmongering efforts. Though Rico clashes with Zim and Zander and even Carl, the various divisions are portrayed as united against the Bugs. This hatred has torn down social and gender inequalities and given humanity a common enemy to rally against, even if it means sacrificing certain freedoms (or their lives).
The Nitty-Gritty:
Starship Troopers was a pretty big deal in my social circle back in the day and a regular watch at sleepovers, mainly for the action and gore. Yet, despite my love for the film and the science-fiction genre, I’ve never gotten around to reading the original book. From what I gather, there are many differences between the two, particularly regarding gender, politics, and the portrayal of the military (who utilise mech suits in the source material). The film instead opts to focus on satire; dark, bleak, biting satire as only Paul Verhoeven can deliver. Taking his portrayal of the media in RoboCop (ibid, 1987) and cranking it up the eleven, Verhoeven presents the UCF-controlled media as a constant recruitment drive. Every bad decision from the various Sky Marshalls is twisted into a propaganda piece designed to encourage viewers to enlist to stamp out the Bug threat. Unedited footage from doomed frontline assaults is aired alongside pro-military advertising specifically targeted at children (portraying killing Bugs as fun and necessary), those who showcase psychic potential, and anyone curious to “know more” about the ongoing campaign. The hypocrisy of the broadcasts is staggering, and anyone who dares question the stratocratic regime is seen as being somehow “lesser”. Rico’s father openly criticises Rasczak’s teachings, preferring Rico apply to Harvard than go to war, and is ridiculed by his son as a result. Rasczak is seen as a heroic, aspirational figure, one responsible for saving many lives and killing many Bugs, who believes in the sanctity of aggressive force as a decisive factor in any conflict. This is again bolstered by the media, which teaches the best ways to kill a Bug, showcases the gruesome experiments performed on the Brain Bug, and highlights the gung-ho attitude of Rico’s Roughnecks as a means to coerce anyone watching into enlisting and following in their footsteps, regardless of the thousands already dead and the untold numbers sporting artificial limbs as a result of enlisting.


While the effects and gore still hold up, our three leads seem a bit miscast in their roles.

As enjoyable as Starship Troopers’ satire of the military, politics, and futility of war is, it’s equally enjoyable at a far more primal level. Just as the media glamorises war, the horrifically one-sided battles between the MI and the Arachnids is as gory and brutal as you could ask for from Verhoeven. Largely portrayed as swarming, voracious CGI bug, the Arachnids make for fearsome alien foes, sporting sharpened limbs, large mouths, and capable of slaughtering our naïve young troopers in numerous creative ways. They’ll dice you up, eat you whole, immolate you, and suck your brains from your skull, clambering over your bloodied remains to take out your friends as they go. Even the mighty fleet is of little consequence to them and the MI’s rifles are so ineffectual that it often takes some creative physical feats (or a well-aimed nuke) to thin out the Bugs’ numbers. Although there are no humanoid aliens like in the book, the Bugs have a decent amount of variety and their effects hold up pretty well thanks to the film using model shots and animatronics alongside the CGI. Unfortunately, Starship Troopers is a little let down by its young, sexy main cast. This in itself is a creative way to further emphasise that these kids have no idea what they’re signing up for, but Denise Richards is such a blank, vacant void that I’m totally on side with Rico’s mum in thinking she’s a bit of a bimbo. Dizzy, despite her clingy obsession with Rico, is a far more attractive prospect. Ballsy, fearless, and capable, she’s much more Rico’s equal and it’s a shame he’s so late coming to that realisation. I don’t mind Casper Van Dien here and he has an undeniable physical appeal and charisma, but he seems a little out of his depth as a leading man. Similarly, as much as I love Neil Patrick Harris, he seems a little miscast. Thankfully, Clancy Brown, Dean Norris, and the immortal Michael Ironside lend some much-appreciated gravitas to proceedings and command the screen every time they appear.

The MI captures a Brain Bug, seemingly turning the tide in humanity’s favour.

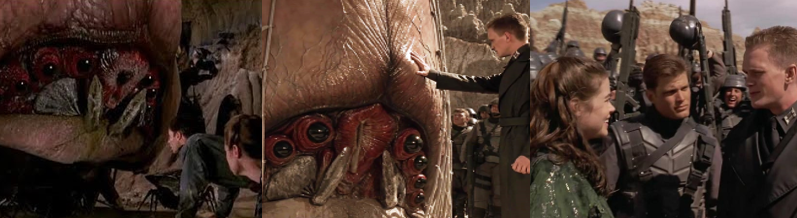
So, yeah, it turns out the assault on Klendathu was doomed to fail. The UCF bit off way more than it could chew and were forced to refocus on targeting the neighbouring worlds, like P. After they finally hooking up, Rico is devastated when Dizzy is mortally wounded on P. However, her death galvanises his belief in the UCF and the virtues of Citizenship and he completes his transformation into a devout, battle-hardened copy of Rasczak (even copying his idol’s mannerisms and declarations when commanding his Roughnecks). While many of Rico’s troopers were killed so Carl could get evidence of a Brain Bug, he doesn’t hesitate to return with the surviving troopers and a contingent of “kids” fresh from the academy to flush out and capture the grotesque Bug commander. During the assault, Carmen and Zander are shot down and presumably killed; though Sugar Watkins (Seth Gilliam) offers to lead a rescue party, Rico stoically orders to stay on mission. Luckily for him, Carmen and Zader are captured and brought to the slobbering, larvae-like Brain Bug, which slurps out Zander’s brains and is only stopped from doing the same to Carmen thanks to Rico’s timely intervention. Despite Carl’s earlier stoicism regarding their lives, he subtly influenced Rico, using his psychic powers to nudge him in Carmen’s direction so she could be rescued. Though Sugar heroically sacrificing himself (literally going down fighting) to cover their escape, they make it out injured but alive and are stunned to see that the Brain Bug was captured, offscreen and through means unknown, by none other than Zim, now a private under Rico’s command. Carl arrives and “mind melds” with the Brain Bug and announces that it’s afraid, to the uproarious delight of the solders, and the Bug is taken to be probed and dissected to learn how to better battle the creatures. The film ends with Carl declaring that, one day, everyone will forget that it was a lone infantryman who turned the tide of the war, delivering a soliloquy that sells the MI as the most important division of the war effort, and the three reaffirming their friendship. We also get one final propaganda piece touting humanity’s inevitable victory over their monstrous alien foe, which is presented as a stirring piece selling the military as brave, conquering heroes but is, again, a ridiculous satirical misrepresentation of the bloody truth of their lives.

The Summary:
As mentioned, Starship Troopers was a constant favourite when I was a kid. As teenagers, we loved the film for its gore, monstrous aliens, and because we got to see Dina Meyer’s boobs. I grew up on Paul Verhoeven’s movies so I was well into the splattergore on show here, the bloody action, and his ludicrous satire of the media, politics, and military. These elements are what really help Starship Troopers stand the test of time; as media and the government become more controlling, oppressive, and hypocritical, it’s hard to not see our modern times reflected in this sci-fi classic. The effects hold up really well, too, again thanks to using practical effects wherever possible and focusing on strong, bloody, uncompromising scenes of brutality even as they exist side-by-side with amusing moments, such as Zim nailing Ace’s hand to a wall with a knife just to prove a point. The only real downside for me are the three main actors: they’re all perfectly fine and portraying them as naïve, fresh-faced youngsters makes sense in the narrative, but I do think they’re a little miscast at times and not quite up to the task of carrying the film. Veteran actors and the satirical subtext counterbalance this, but all the gore and brain sucking in the world can’t get me invested in Denise Richards’ lifeless performance. Still, Starship Troopers is as appealing to me now as it was when I was a teenager. It’s crazy to me that it didn’t get stronger sequels as there was real franchise potential here. What I really like about this film is how layered the subtext and satire is, allowing for numerous critical and academic interpretations and discussions on what on the surface appears to be a mindless sci-fi action flick but is actually a compelling commentary on the glamorised portrayal of fruitless warfare.

My Rating:

Rating: 4 out of 5.

Great Stuff

Did you enjoy Starship Troopers? Have you ever read the book and, if so, how do you think the film works as an adaptation? Do you agree that the three main actors were a little out of place in the film? What did you think to the Bugs and their capabilities? Were you a fan of the satirical subtext woven throughout the movie? What did you think to the subsequent movies and spinoffs, and would you like to see another big-budget entry in the franchise? Whatever your thoughts on Starship Troopers, feel free to leave a comment below and be sure to check out my other sci-fi content across the site.

Wrestling Recap: Women’s Royal Rumble (2018)

The Date: 28 January 2018
The Venue: Wells Fargo Center; Philadelphia, Pennsylvania
The Commentary: Michael Cole, Corey Graves, and Stephanie McMahon
The Stipulation: Thirty woman over the top rope battle royale for a WWE Women’s Championship opportunity at WrestleMania
Notable Competitors: Asuka (Winner), Sasha Banks (#1), Trish Stratus (#30), and Michelle McCool (Most Eliminations)

The Build-Up:
It should be no surprise, with how dominating the World Wrestling Entertainment (WWE) is in the wrestling industry, that the WWE has been at the forefront of creativity. By 1988, the then-World Wrestling Federation (WWF) stepped into the mainstream with their inaugural WrestleMania before hosting their first Survivor Series event. To see in the new year, the legendary Pat Patterson sold WWF chairman Vince McMahon on the Royal Rumble, an over-the-top-rope battle royale that eventually became one of the biggest wrestling events of the year thanks to its winners earning a World Championship match at WrestleMania. In the long history of the event, only two women had ever competed in a Royal Rumble match. Indeed, women’s wrestling was little more than an afterthought for decades, especially in WWE, where cheerleaders and models were made to roll around in mud pits. In 2015, WWE’s latest crop of female wrestlers sought to change this. However, while competitors like Paige were at the forefront of changing the perception of women’s wrestling, it was Stephanie McMahon who took credit for spearheading a revolution in the division. Despite the first-ever all-female WWE pay-per-view, Evolution, not being a ratings success, WWE’s female superstars continued to push for a bigger spotlight. The derogatory “Divas” term and title were dropped and women started main eventing shows, pay-per-views, and competing in more gimmick matches. This led to the first-ever women’s Money in the Bank ladder match and, naturally, their first-ever Royal Rumble match.

The Match:
It’s crazy to think how long it took for the WWE to produce a women’s Royal Rumble match. It’s fitting (and surely no surprise) that the first of these occurred in the same year that the WWE produced their first (and, to date, only) women’s-only pay-per-view event. This was the year of the “Women’s Revolution”, after all, which probably explains why this match was the main event of the show. As a side note, I actually had the pleasure of watching this Royal Rumble event live thanks to having a three-month subscription to the WWE Network at the time, which is a rarity for me. It was fitting that two of the key figures in the Women’s Evolution movement, “The Boss” Sasha Banks and Becky Lynch, started this match. Their time alongside Bayley and “The Queen” Charlotte Flair as the “Four Horsewomen” helped change people’s perception of women’s wrestling so it was only right that they kicked off the first-ever women’s Royal Rumble. The two old frenemies started the match with a lock-up and some reversals, going through the early stages of a wrestling match and even going for submission holds rather than trying to toss each other over the top rope. Sarah Logan ran out to break up their showcase, aggressively attacking both and trying to muscle Becky out of the ring. Strangely, Sasha made the save (potentially because Sasha’s group, the Riott Squad, had been causing issues in the Raw women’s division), eating a headbutt for her troubles. Glorified cheerleader Mandy Rose, a poor substitute for the injured Paige, was next out and she and Logan focused on putting the hurt on Sasha and Becky. In record time, the four were joined by women’s legend and Hall of Famer, Lita (one of my favourites of the Attitude Era), to a raucous ovation. Sasha and Becky set aside their differences to take on Lita, but she floored them with clotheslines and got into it with Mandy, an awkward exchange that saw Mandy tumble to the floor. Kairi Sane, still riding a wave of momentum from winning the Mae Young Classic, was number six and immediately went after everyone with an enthusiastic gusto, including hitting her Insane Elbow drop onto Sasha Banks and Becky Lynch. With Kairi standing tall in a ring littered with bodies, powerhouse, Tamini stalked out and began throwing her weight around, though she soon fell foul of a Lita DDT just as Sasha and Becky took her Twist of Fate and Lita-sault. Lita then beckoned in Tamini and dropped her from the ring, only to be immediately dumped by Becky, much to the disdain of the crowd.

Legends and notable figures mixed it up with the WWE’s modern-day female stars.

Dana Brooke cartwheeled her way into the match next and things returned to a lacklustre brawl as the woman exchanged strikes and stomps and showed little interest in eliminating each other. Dana finally dumped Kairi when she went to the top once too often and Torrie Wilson made a surprising WWE return, though her momentum was cut short by the manic Sarah Logan. Still, Torrie made an impression by clumsily eliminating Dana Brooke, only for Sonya Deville to take her place and lay into Sasha with some hard-hitting strikes. Though she failed to eliminate Becky, Sonya took Torrie out of the match before Liv Morgan entered the fray, taking it to Sasha and teaming up with her Riott Squad teammate, Sarah Logan. Molly Holly was the next Legend to get involved, immediately asserting herself by eliminating Sarah Logan and taking out Sasha out with the Molly-Go-Round. In no time at all (seriously, what was with these timings?), Lana, of all people, came in at number thirteen and got the shit kicked out of her by Liv and Deville. Lana fought back as best she could, but luckily Michelle McCool was next out and the Riott Squad were more interested in fighting her. Naturally, they were no match, and Michelle was soon tossing both women, Molly Holly, and the boisterous Lana. As Becky and Sasha tried to haul out Michelle, Ruby Riott joined the melee and was immediately and repeatedly fighting to stay in the match as everyone tried to toss her. Vickie Guerrero shrieked her way out next, screaming like a banshee and earning her the ire of all. Setting aside their differences, Sasha, Becky, Ruby, and Michelle launched Vickie out to thunderous applause. Number seventeen was Carmella, who unceremoniously got her Money in the Bank briefcase smacked into her face courtesy of an enraged Guerrero, delaying her entry into the ring.

Occasionally feats of strength and agility couldn’t make up for the plodding in-ring action.

When Natalya mocked Carmella during her entrance, she got tugged off the ring apron; Carmella then clumsily scuffled with Becky before finally being planted with the Bexploder. Another glorified cheerleader, Kelly Kelly, was next, McCool was dumped by Natalya, and the women continued to meander as Naomi took everyone out with her Rear View hip attack. Sasha and Becky took turns shutting her down, immediately dousing her fire, before Becky was finally tossed by Ruby Riott. The next Legend entrant was Jacqueline, who showcased her power and experience by running through the competitors, though she failed to eliminate Kelly even with Natalya’s help. Mere moments later, surly Nia Jax stormed the ring and got the usual “monster” treatment. She effortlessly eliminated Jacqueline, Kelly Kelly, and Ruby Riott (with a military press, no less). Naomi went after Nia with gusto, throwing kicks and trying to throw her off balance. When she was knocked from the ring, Naomi was caught by Nia’s victims and walked the barricade and rode a ringside chair back to the ring…only to be immediately dumped by Nia! The NXT Women’s Champion, Ember Moon, was number twenty-three. Despite an injury from a previous match with Shayna Bazler, Ember went for Nia and got tossed like a ragdoll for her troubles. Nia was next challenged by the “Glamazon” Beth Phoenix, the only competitor to have competed in a Royal Rumble before. Beth showed no fear and attacked Nia, but couldn’t quite muscle her up. Even Natalya could only help to shove Nia through the ropes. After an emotional hug, Natalya threw Beth to the floor and got stomped by Carmella in recompense. The “Empress of Tomorrow”, Asuka, energetically took to the ring and floored everyone before renewing her NXT rivalry with Ember Moon, who hit a one-arm version of her Blockbuster-like Eclipse. Asuka no-sold the move, however, and soon took Ember out, bad arm and all.

Asuka’s surprise victory over the Bellas was usurped by Ronda’s awkward appearance.

Mickie James made a return next and continued the tradition of targeting Sasha and dropping women with neckbreakers before flailing about trying to chuck Natalya and Asuka. Nikki Bella was next in the ring, drawing mockery from the crowd due to her association with John Cena, taunting Charlotte Flair (who was at ringside with Alexa Bliss), and sending the screaming Carmella from the ring. The competitors ganged up on Nikki but luckily, her twin sister, Brie, made the save, milking the crowd’s love for her husband, Daniel Bryan, and teaming with her sister. A heartbeat later, Bayley arrived and also rekindled her NXT rivalry with Asuka, before certified Legend Trish Stratus came out at number thirty. Trish’s presence angered the modern stars, forcing her to plant both Bellas with a Stratusfaction. Though she arrived too late to battle Lita, Trish and Mickie James turned back the clock for a bit before Trish dumped her outside. Everyone then jumped Nia, aiding the Bellas in hefting her over the top rope. Sasha then immediately tossed Bayley, while Natalya locked Trish in the Sharpshooter and got kicked from the ring as a consequence. Sasha then got in Trish’s face and dumped her as she went for the Stratusfaction. Sasha then betrayed Asuka and beat her with the Bellas, directing them to double-team Asuka but being summarily betrayed by the twins while she was mocking Asuka. Despite being outnumbered, Asuka fought off the Bella’s attack and damn-near kicked their heads off; Nikki then stupidly betrayed her sister one last time, leaving her alone with Asuka. Despite Nikki’s best efforts, Asuka’s tenacity won out and, after tying the Bella up with a leg scissors, Asuka unceremoniously dumped Bella to punch her ticket to WrestleMania. Asuka’s celebration and confrontation with the WWE’s Women’s Champions was then completely usurped when “Rowdy” Ronda Rousey sauntered out to play mind games with all three and awkwardly point to the WrestleMania sign.

The Aftermath:
Considering how often Corey Graves, Michael Cole, and Stephanie McMahon hyped up this match as “history in the making”, the first-ever women’s Royal Rumble was a largely dull and tedious affair. The match lacked much of the excitement associated with the stipulation, relying far too much on bringing back Legends or roping in NXT competitors to round out the clearly limited women’s division. The in-ring action was clunky and awkward; there was a lot of standing around, dead air, and far too much half-hearted brawling as competitors stalled for time. The time between entrants was also a joke, with some appearing within a minute and others taken more like four to come out. The Naomi spot was fun, I did like seeing the returning stars, and I liked that Asuka won, but Ronda Rousey showing up at the end really stole Asuka’s thunder. Of course, much of the immediate aftermath did revolve around the question of which WWE Women’s Champion Asuka would challenge at WrestleMania. Asuka was bullied into facing Nia Jax at the Elimination Chamber event to keep the match from becoming a triple threat, though Asuka ultimately decided to face the SmackDown! Women’s Champion at the Showcase of the Immortals. To the surprise of many, Asuka not only lost that match but was forced to submit to Flair’s Figure-Eight, ending her celebrated undefeated streak. She went on to repeatedly fall short of capturing the belt in matches against Carmella after she successfully chased in her briefcase on Flair and it wouldn’t be until the end of the year that Asuka finally won the belt by defeating Becky Lynch and Charlotte Flair in a Tables, Ladders, and Chairs match. As for Ronda Rousey, she made her in-ring debut at WrestleMania by teaming with Kurt Angle in a winning effort against Triple H and Stephanie McMahon, impressing many with her transition from the octagon to the squared circle, before decimating Raw Women’s Champion Alexa Bliss later that year at SummerSlam. The WWE continued to include women’s Royal Rumble matches and shine a greater spotlight on their female division, to varying success, in the years that followed.

My Rating:

Rating: 2 out of 5.

Could Be Better

What did you think to the first-ever women’s Royal Rumble match? Do you agree that the pacing and in-ring action was confusing and disjointed? Which of the returning stars were you most happy to see back in the ring? Who was your pick to win and what did you think to Asuka’s victory? Do you also think Ronda Rousey stole Asuka’s thunder? Which Royal Rumble matches and events are your favourite? Who’s your pick to win this year? I’d love to see your thoughts on the Royal Rumble in the comments so go ahead and leave them there, then check out my other wrestling content on the site.

Game Corner [Sci-Fanuary]: Metroid Dread (Nintendo Switch)


January celebrates two notable dates in science-fiction history, “National Science Fiction Day” on January 2 and Arthur C. Clarke’s HAL 9000’s birthday on January 12. Accordingly, I’m dedicating January to celebrating sci-fi with an event I call “Sci-Fanuary”.


Released: 8 October 2021
Developer: MercurySteam / Nintendo EPD

The Background:
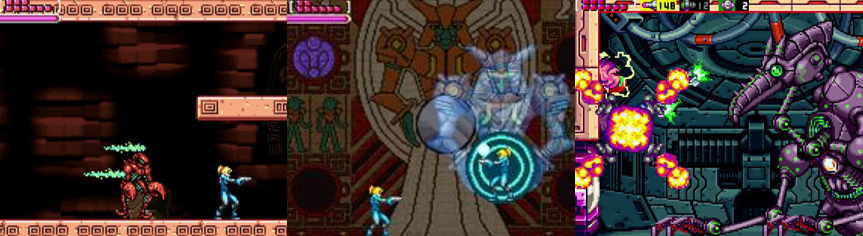
Despite popularising the “Metroidvania” subgenre and the hefty praise heaped upon the franchise, it’s fair to say that the Metroid series (Various, 1986 to present) is one of Nintendo’s under-rated properties. The original release is known as one of the greatest games ever made, to say nothing of the universal acclaim shown to its 16-bit sequel and successful jump to 3D first-person shooting. After suffering a blow with the poor reception of Metroid: Other M (Team Ninja/Nintendo SPD, 2010) and Metroid Prime: Federation Force (Next Level Games, 2016), Metroid bounced back with Metroid: Samus Returns (MercurySteam/Nintendo EPD, 2017), a remake of the divisive Metroid II: Return of Samus (Nintendo R&D1, 1991) that was successful enough to see MercurySteam develop a new Metroid title. Conceived as a sequel to Metroid Fusion (Nintendo R&D1, 2002) and initially developed for the Nintendo DS, producer Yoshio Sakamoto wanted to place further emphasis on stealth gameplay but the project remained dormant for several years when initial prototypes failed to meet his standards. After much speculation, the project was eventually revived for the Nintendo Switch, largely thanks to MercurySteam’s work on Samus Returns. Returning to the series’ roots with a 2.5D perspective and forcing players to swiftly and silently avoid mechanical pursuers, Metroid Dread aimed to live up to its title by marrying the traditional exploration and combat mechanics of the series with a constant sense of dread. The result was a warmly received title that was praised for its return to form, vast exploration options, and challenging gameplay and bosses.  

The Plot:
The Galactic Federation dispatches versatile Extraplanetary Multiform Mobile Identifiers (E.M.M.I.) robots to investigate the X Parasites. However, when the E.M.M.I. go haywire, Samus is deployed, uncovering a sinister plot by rogue Chozo to exploit the Metroids. 

Gameplay and Power-Ups:
Metroid Dread is a 2.5D action/adventure game very much in the style of Super Metroid (Nintendo R&D/Intelligent Systems, 1994) in which players once again assume the role of famed bounty hunter Samus Aran, fresh off Metroid Fusion, and navigate the many corridors, caves, and laboratories of the creatively named planet ZDR, picking up new items and upgrades and returning to previous areas to obtain even more items or progress further. As ever, Samus comes equipped with her arm blaster, which you fire with Y. Later upgrades allow you to charge up a more powerful shot by holding the button, and you can also switch to Samus’s missiles with the R trigger, holding it to fire and using the L trigger to freely aim with a laser sight. B allows you to jump; holding it lets you jump higher while the Space Jump and the Screw Attack allow infinite jumping and a spinning attack. Samus can slide under narrow gaps or past certain enemies with ZL, transform into her Morph Ball with the same button when standing still (or tilt the left stick down when crouching) and gains the ability to jump, place various bombs, and cling to certain surfaces while in this form with the Spider Magnet ability. Samus’s weapon and suit upgrades are managed from the + menu, where you view an expanded map, which is unlocked at various map stations (though the onscreen mini map is extremely useful). The + menu also allows you to view your mission log and place helpful markers on the map. You can enter a separate menu with – to alter in-game settings such as the rumble feature, use any compatible Amiibos, load previous checkpoints, or quit to the main menu.

All Samus’s old and new abilities are nothing against the E.M.M.I, who require a special cannon.

All of Samus’s signature abilities make a return in Metroid Dread. They’re once again waiting at various Chozo Statues and will open up the game in various ways, such as allowing free movement when underwater and resisting extreme heat or cold. You’ll grab the Charge Beam for a stronger charged shot, the Wide Beam to fire three simultaneous shots to open certain doors, the Diffusion and Plasma Beam to fire through the environment and destroy tougher, metallic enemies, and the Grapple Beam to swing or hang from certain blocks and platforms and shunt blocks out of the way. Samus can also utilise various missiles, freezing enemies with the Ice Missile and targeting multiple enemies or weak spots at once with the Storm Missile. Unlike her beam shots, these use up ammo so you’ll need to defeat enemies to refill your stock or find upgrades to increase your maximum capacity. Samus’s newest weapon is the Omega Cannon, a situational, finite upgrade acquired by defeating various eye-like Central Units. This temporarily allows you to hold L and Y to fire a concentrated beam that eventually melts metallic shielding and hold L and R to charge the Omega Blaster, which you must then fire with Y to dispatch the aggravating E.M.M.I. robots encountered throughout ZDR. In multiple instances, Samus will enter an E.M.M.I. Zone and must stealthily avoid the clambering, relentlessly E.M.M.I. Until she gets the temporary Omega Cannon, her only hope of avoiding detection is the Phantom Cloak (which consumes Aeion energy to allow temporary invisibility by pressing in the right-stick) and the new Parry function. When E.M.M.I. or other enemies attack, there is a brief flash that’s your indication to tap X. This will Parry the attack, stunning the enemy and allowing you to one-shot them for additional resources, stun them, or deliver massive damage. It’s absolutely essential that you master this technique as some enemies are a chore to fight without it, though the timing required to stun the E.M.M.I. is so tight that you may never get it right. Samus can also find upgrades that allow her to run at super-fast speed, shift past sensors and across gaps (again at the cost of Aeion energy), scan her environment to uncover hidden blocks, and even obliterate enemies and obstacles in the final escape sequence of the game.

ADAM’s advice will direct you to the next area or terminal that needs activating.

As ever, you’ll grab ammo and health orbs from defeated enemies, who respawn when you leave the screen, and can find upgrades the increase your maximum health, missile, and Power Bomb capacity. You won’t find and upgrades for the Aeion meter as it automatically refills over time, but you can still find ammo and health restoration points all over ZDR, as well as interfaces where you are given hints and objectives by the initially condescending ADAM. This also allows you to manually save your game and a waypoint marker will appear on your map, with teleporters, elevators and other transports allowing for a degree of fast travel. However, you will be revisiting several areas of ZDR over and over again, particularly the elaborate halls of Ferenia, a once thriving Chozo temple. As you obtain new abilities, previously impassable ways open up. You can squeeze through gaps and blast around small tunnels with the Morph Ball, clamber up or cling to blue surfaces with the Grapple Beam, and blow up or run through blocks, and better navigate underwater. For such a large and interconnected map, Metroid Dread is surprisingly linear; areas are often impassable due to flaming obstacles or debris, forcing you to go a certain way, though you can acquire abilities and upgrades out of order if you’re persistent enough. Large areas are a death sentence without the temperature resistant suit upgrades, many areas are seeped in darkness and require you to power up generators, awakening enemies and hazards, and you’ll redirect thermal flows to reach new areas more than once. Other times, you’ll blast several targets to open doors, push or drag them out of the way entirely, or use temporary platforms or your Phase Shift ability to bypass gaps or breakable blocks. Typically, though, the game has a very clear structure that it rarely deviates from. You enter a new area, restore power or redirect thermal flow, maybe blow open a glass corridor or dodge flaming or buzzsaw hazards, and endure a gruelling E.M.M.I. Zone until you destroy the E.M.M.I. and gain a new ability to repeat this process in another area.

Presentation:
Overall, Metroid Dread looks really good. The whole game has a dark, foreboding feel to it that’s reflected in its ominous soundtrack and the various environments, which are either dank or in disrepair or swarming with monstrous enemies. Samus herself looks both familiar and different; she’s had a bit of a glow up and doesn’t come to resemble her usual orange and red colour scheme for some time. Her suit changes colour and reflects the environment around her as you progress, which was a great way to add to the ambiance and visually show her becoming more powerful and capable. Though largely silent, taking in ADAM’s patronising tone and the exposition spouted by the likes of Raven Beak and Quiet Robe, she does utter a line at one point (though in the Chozo language) and screams in agony when defeated, her suit exploding and revealing her form-fitting costume beneath. Although the game doesn’t make a great first impression with its surprisingly plain title screen, motion comic-like opening, and long loading times, the pre-rendered cutscenes showcase Samus’s capabilities and wary nature through her body language and action-focused mentality. Each E.M.M.I. is introduced through a suitably ominous cutscene that showcases its different abilities, such as increased shielding or speed or climbing ability, and everything becomes very tense when you’re trapped in an E.M.M.I. Zone, desperately trying to escape to the nearest exit before it inevitably skewers you with its spiked appendage.

While the game looks and sounds great, it’s rare that areas make much of a visual impression.

While character and enemy models are very impressive and detailed, I wasn’t massively impressed with the variety in the game’s environments. Sure, there are some nice touches here and there, like rain and water raging outside Burenia, Chozo Soldiers scampering about in the background, various wildlife (from insects to writhing tentacles to disgusting slug-like barriers obstructing doors), and areas changing as they crumble and collapse around you, but there are often far too many dark, samey corridors and areas for my liking. While you’ll venture into dripping caves, explore flooded laboratories, wade through lava, and frantically flee from extreme cold, many areas are just the same dark, futuristic locations repeated over and over. You’ll quickly see a pattern of having to traverse these foreboding areas, repute with sparking power lines and small jump scares, and restoring power to them or redirecting thermal energy to access new areas, with little separating one area from the next. Similarly, the E.M.M.I. Zones are all largely indistinguishable, being very cold and grey and military in their appearance, with only more complicated layouts changing things up. Maybe there’s some water, or more E.M.M.I. probes, or you need to slide and destroy blocks a bit more, but the general look of each E.M.M.I. Zone doesn’t change much, which is odd considering the E.M.M.I. have different colour schemes. Thankfully, Ferenia and the Itorash are on hand to mix things up a bit. These ornate, gold-themed Chozo environments are filled with large Chozo statues, banners, windows, and a sense of grandeur that are in stark contrast to ZDR’s other more bland environments, though again you revisit Ferenia so often that each screen starts to become indistinguishable. I think it would’ve helped a lot to give each area a more prominent theme. Like, have a dark, dishevelled lab but just on one section of the map, lump the frozen and water sections together, combine the caves with the lava/red-hot sections, and maybe do a little bit more to make things feel more varied than they actually were.

Enemies and Bosses:
ZDR is crawling with bug-like enemies for you to Parry away and blast with your arm cannon. Many are small and simple cannon fodder, like the slug-like Plys, amorphous blobs, squid-like creatures, spider-like Yampas, swarming eels, and various burrowing insectoids that chase you in narrow tunnels and fly out of the dark. While these are easily bested with your basic attacks, larger enemies (like the crab-like Muzbys and rock-encrusted Obsydomithons) require your Parry to stun and defeat. As you progress, robotic enemies become more prominent; large tetrapot robots blast at you with a powerful eye beam, the spherical Autclast causes flames to burst across the ground, and E.M.M.I. probes either float in place or explode when you get close, dealing damage and giving away your location. When exploring Ghavoran, you’ll encounter the whale-like Hecathon that slowly floats overhead, draining your health with its wide energy beam; a similar enemy awaits in Burenia, but even basic enemies become a formidable threat when Raven Beak unleashes the X Parasites. These gelatinous blobs infect any onscreen enemies, turning them into gooey zombies that absorb a great deal of shots and utilise additional attacks. While you can defeat them in much the same way as before, you must absorb the X Parasite that’s released to refill your health and/or ammo or else it’ll simply attach to another enemy or cause another foe to spawn, which can be quite a headache. Interestingly, though, neither the titular Metroids or the traditional Space Pirates appear as enemies in Metroid Dread.

Fights between the Central Cores, E.M.M.I.’s, and Chozo Soldiers quickly become laborious.

Easily the most persistent foes in Metroid Dread are the E.M.M.I. robots. There are six of these bastards to contend with, with each encounter being more difficult that the last. Similar to the SA-X from Metroid Fusion, Samus can only avoid the E.M.M.I. upon first entering an E.M.M.I. Zone since her weapons are useless against it. If it catches her, you can try and Parry its instant-kill attacks but the timing is so tight that I rarely managed to succeed. Instead, you must flee through the E.M.M.I. Zone until you find the Central Core. These eye-like mechanical spheres float overhead while numerous projectiles fly at you from the walls and ceilings. You must blast the Central Core with missiles and your charged shot to destroy it and temporarily gain the Omega Cannon, but even then it’s not so easy to put the E.M.M.I. down. Not only does the Omega Cannon take time to charge, the E.M.M.I. are ridiculously fast and often shielded, meaning you need to get some distance and use the Omega Spread before you can even fire your kill shot. E.M.M.I. are soon joined by probes that give away your location, scamper across walls and ceilings, squeeze through gaps, and can even freeze or outright kill you with their spotlight. The Phantom Cloak helps you avoid detection, but keep an eye on your Aeion meter and avoid touching the robots as it’ll instantly give you away. Over time, they become more aware of your presence, and you have less room to charge your shot, though it’s always a relief to blast them in the head and put them down for good. As if the dread caused by these persistent assholes isn’t bad enough, you’ll also be forced to battle numerous Chozo Soldiers, both mechanical and organic and sometimes faced with two at a time! These nimble, heavily armed and armoured warriors leap about the screen taking shots at you and charge with a lance, hiding behind a shield and crashing to the ground from above. Luckily, you can Parry their attacks if your timing’s right and use the Storm Missiles to deal a lot of damage very quickly, but you’ll have to watch out for a massive mouth laser and a wide goo attack when they become infected by the X Parasite and increase in their aggression.

Monstrous bosses require all of your skills to get around and dish out damage.

Other, more monstrous bosses also await on ZDR. Corpius (a horrendous mixture of a lizard and a scorpion) lashes with its tail, requiring you to jump or slide under it and pepper its ugly face with missiles or a charged shot. Corpius also boasts an acid spit and the ability to turn invisible, though a shining weak spot remains for you to target, and you must cling to the walls to avoid its acid belch. When it reappears, you have a small window to Parry its attacks and deal massive damage, provided you remember to keep hammering R during the Parry sequence, which is true for all subsequent boss battles. Metroid Dread also includes a rematch with the gargantuan Kraid. At first, he’s chained up and can only swipe at you or rain claws from above (which you can shoot for resources). Blast his head, avoiding his fireballs, and the battle descends to a lower level, where you must rain fire on Kraid’s bulging belly button, which spews purple blobs and splash damage. After enough hits, you must scramble up the temporary platforms to the magnetic strip above to hit his head, which is easier said that done given how much crap is on the screen (though you can make quick work of him if you grabbed the Morph Ball out of sequence). While in Burenia, you’ll battle the tentacled mollusc Drogyga. This takes place entirely underwater and sees you blasting Drogyga’s orbs and tentacles until a button lights up. You must quickly blast it to lower the water, then use the overhead grapple point to reach another and drain the water entirely, leaving Drogyga briefly vulnerable. You must repeat this multiple times and be quick to avoid its massive tentacle counterattack or Parry its attacks for additional damage, which is good practise for the more aggressive and versatile Escue. This enlarged, X-empowered winged beetle shields itself with an electrical field and lunges at you with an attack that can be tough to dodge. Escue also fires destructible orbs that either home in on you or cause massive splash damage, and even keeps up its attack when you whittle it down with missiles and charged shots, reducing itself to a hardened shell of X that spits out smaller parasites and must be bombarded with Ice Missiles.

As they become bigger, more aggressive, and tougher, bosses will test your mettle to the limit!

While exploring Cataris, you’ll’ve noticed the corpse of a massive, mutated spider-like creature in the background. You’ll fight one of these, Experiment No. Z-57, to defrost the region, with the battle taking place in multiple phases. At first, Experiment No. Z-57 lingers in the background, firing a massive mouth laser that briefly irradiates the floor and taking a massive swipe at you. The Space Jump and Storm Missiles are essential here, as is a successful Parry when Experiment No. Z-57 comes into the forefront to take a shot at you. Parrying initiates the second phase where you blast its limbs to keep it from charging a powerful shot, then frantically Space Jump to avoid screen-filling plasma waves and a double-sided claw swipe, before initiating another Parry sequence that should finish it off. Similar to Escue, Golzuna is an enlarged, X-empowered variant of a typical enemy, the Muzby, now completely invulnerable thanks to its rock-like hide save for a single weak spot on its rear. Due to its bulk, Golzuna is slow and difficult to jump over; it charges at you and fills the screen with explosive pink orbs, restricting your movements. Staying on the move is the key to this battle, which eventually reduces Golzuna to a hardened shell that, like with Escue, is destroyed with Ice Missiles. After several encounters, you’ll eventually confront the maniacal Chozo, Raven Beak, aboard the Itorash in a true test of your skills. In the first phase, Raven Beak is shielded by a golden aura and completely invulnerable. He’ll launch a devastating three-hit melee attack, bathe the arena in a health-sapping red beam, and spawn giant orbs that can be destroyed for resources, but take multiple shots to pop. When he stands at the far end, you must Parry his rush to deal damage; similarly, when he taunts, get in close and immediately Parry his attacks to move to the next phase. Here, Raven Beak is much faster and there is no health or ammo to help you. He spawns wings, darts at you (easily slid under), fires a big charged shot (easily dodged), or spews a stream of shots that you must desperately Space Jump to avoid in a circle motion, all while bombarding him with Storm Missiles. The final phase is much like the first, but Raven Beak sports faster, more powerful attacks and a barrage of energy waves. Again, you must hit your Parries and unload all your missiles and charged shots at least three times to win. With no checkpoints between phases and very little health and ammo, this is a gruelling final bout even with maximum health and ammo capacity.

Additional Features:
While you require all of Samus’s weapon and suit upgrades to clear the game, many of the health and ammo-increasing power-ups can be missed. These are marked on your map and it’s highly recommended that you seek them out as you’ll need that extra ammo and health in the later stages, and Samus tends to take quite a bit of damage even with expanded health. If you look at your save file, you’ll see a percentage completion counter for the number of items you’ve found. Your map indicates where items can be found in each area and finding 100% in all areas unlocks art to view in the game’s ‘Gallery’ mode. As is usually the case for a Metroid title, you’ll see different endings and unlock different artwork depending on how fast you beat the game and on which difficulty. At the start, you can pick between “Rookie” and “Normal” mode, and you’ll unlock “Hard” mode after your first playthrough on “Normal”. This is selectable when beginning a new game, though your original save file can be returned to at any time, allowing you to seek out items you’ve missed. You can also unlock and play through a “Boss Rush” mode and grant yourself health and ammo refills using Amiibos. However, there are no other costumes to unlock, data files to scan, or hidden collectibles to find beyond the health and ammo upgrades.

The Summary:
I was excited to get stuck into Metroid Dread. After largely enjoying four of the classic Metroid titles and being impressed by the detailed, moody 2.5D aesthetic, I was eager to get to grips with this more traditional Metroid adventure. Graphically, the game impresses; I may not have liked how samey many environments were or the repetitive gameplay loop, but the depth to each screen and the attention to detail in the ominous lighting, foreboding atmosphere, and detailed character models was very impressive. The controls are tight and responsive; I wasn’t a big fan of the aiming system at times, and the Parry mechanic became laborious as enemies became faster and more aggressive, but Samus has never controlled better, overall, than here, in my experience. I even enjoyed how comparatively linear the game was. I rarely felt like I was lost and enjoyed exploring, even if I potentially played out of sequence at times. Sadly, though, I did not enjoy the E.M.M.I. encounters, which quickly became a frustrating chore, with little variation except it getting harder to line up your shot. I also didn’t like how the E.M.M.I. basically killed you the moment they grabbed you. I liked the tension (the “dread”, if you will) at times, but I wonder if these sections might’ve been better if restricted to certain areas. Like, maybe you travel to Cataris and avoid an E.M.M.I. the entire time. Or if the encounters had been more varied and less restrictive, like maybe an E.M.M.I. stalks you throughout Ghavoran, causing cave-ins and changing the environment as you go. Similarly, the Central Core battles were all basically the same, which is a shame considering how varied the other bosses were. I think merging the E.M.M.I. and the X-Parasite concept might’ve worked better; maybe E.M.M.I. nanobots infect enemies instead of the X, just to mix things up. It’s hard not to be a little disappointed by the gameplay loop in Metroid Dread. It’s fun the first few times but there’s only so many times you can restore power, flee from and destroy an E.M.M.I., then fight a boss before it starts to feel repetitive.

My Rating:

Rating: 3 out of 5.

Pretty Good

What did you think to Metroid Dread? Did you enjoy the E.M.M.I. encounters or did they start to become annoying for you as well? What did you think to the Parry mechanic and the more linear nature of the game? Which of the bosses and upgrades was your favourite? Did you ever get 100% completion? Which of the Metroid games is your favourite? Whatever your thoughts, feel free to leave a comment below and be sure to check out my other Metroid content across the site.

Screen Time [Sci-Fanuary]: I Am Groot (Season One and Two)


January sees the celebration of two notable dates in science-fiction history, with January 2 christened “National Science Fiction Day” to coincide with the birth of world renowned sci-fi writer Isaac Asimov. HAL 9000, the sophisticated artificial intelligence of Arthur C. Clarke’s seminal 2001: A Space Odyssey (1968), was also created on 12 January. Accordingly, I am dedicating January to celebrating sci-fi in all its forms.


Season One and Two

Air Dates: 10 August 2022 and 6 September 2023
Director: Kirsten Lepore
Network: Disney+
Stars: Vin Diesel, Trevor Devall, James Gunn, Fred Tatasciore, Bradley Cooper, and Jeffrey Wright

The Background:
Created by Stan Lee and Larry Lieber, the original version of Groot was a far cry from the loveable tree-monster who won the hearts of audiences in Marvel Studios’ Guardians of the Galaxy films (Gunn, 2014 to 2023). Vin Diesel’s surprisingly nuanced performance made the character a household name and Marvel wisely capitalized on the cute appeal of Baby Groot with a series of animated shorts to bolster Disney’s new streaming platform. Seeking to hearken back to a simpler time in Disney animation, when short-form storytelling didn’t rely on much dialogue, director and head writer Kirsten Lepore was inspired by her son when exploring Groot’s childhood. She also met with Guardians of the Galaxy director James Gunn to explore Groot’s mischievous characterisation. Though Gunn questioned the canonicity of the shorts, Lepore was open to producing more episodes since she and Marvel Studios had plenty more ideas to pull from. Despite the character’s limited vocabulary, Vin Diesel returned to record new “I am Groot” lines and Bradley Cooper even recorded a cameo as Rocket Raccoon. The second series revisited ideas pitched for the first and featured a cameo by Jeffrey Wright as Uatu the Watcher that injected some comedy into the otherwise stoic overseer. The show also recycled the Baby Groot CGI model created by Luma Pictures and Lepore took inspiration from the original Star Wars trilogy (Various, 1977 to 1983) when suggesting designs for Baby Groot’s supporting cast. When it first streamed, I Am Groot was the third highest streaming series in America and both seasons were widely praised for its adorable main character, quirky humour, and playful nature.

The Plot:
Baby Groot (Diesel) takes the spotlight in a series of shorts exploring his adventures growing up, getting into trouble among the stars, and deciding the fate of the entire multiverse!

The Review:
I Am Groot is a CGI animated series of shorts made for little kids. Each episode last about five minutes and features very little dialogue, consisting primarily of Baby Groot’s many different inflections of “I am Groot”. Therefore, they don’t take too much time to watch and it’s easier and fairer to just lump both seasons together into one review. Series one begins some time after Baby Groot first sprung to life in his little plant pot on the Eclector. He’s just a sapling but he still needs care and attention, which is provided to him by a couple of automated robots, who routinely water and tend to him. However, he’s growing so quickly that he cracks his pot, causing the robots to replace him with a sturdier bonsai plant. Naturally, Baby Groot isn’t impressed with this and attacks his replacement, causing both their pots to break from a fall. Luckily, Baby Groot survives and finds he’s got legs, allowing him to take his first steps and get into more mischief. He even makes it up to the bonsai plant by befriending it afterwards, and this caring side to Baby Groot is revisited a couple of times in the show. For example, Groot discovers a colony of ant-sized Grunds living under a rock on an alien world in “The Little Guy”. While Baby Groot initially enjoys toying with them as a God-like figure, he’s stunned when they showcase advanced technology and bombard him with laser fire! While protecting himself in the foetal position, the terrified Baby Groot accidentally farts out a leaf, much to the delight of the Grunds, who immediately devour the offering. Inspired, Baby Groot quickly forgets the attack and gathers up armfuls of leaves to feed the colony, only to accidentally step on them and back away nonchalantly (though the Grunds are actually fine). Similarly, in series two’s “Are You My Groot?”, Baby Groot adopts a strange alien bird, playing with it and feeding it his snacks. Groot’s fondness for the bird and enjoyment of being a surrogate parent are juxtaposed by his annoyance with the bird’s clingy nature and constant pooping. However, Baby Groot still sheds a tear when the bird finds its siblings and flies off with its bulbous, equally quirky mother.

Baby Groot both causes and finds mischief, though always in the spirit of good-natured fun.

In “Groot’s Pursuit”, Baby Groot’s awoken by a mysterious clanging and bravely investigates, hoping to get a good night’s sleep. Though his initial search turns up nothing, he fails to notice a mysterious liquid goop from a broken vial until he’s surprised by the Iwua (Devall), a shape-shifting alien who’s just as mischievous as Groot. Indeed, the Iwua impersonates Groot, leading to a dance-off that Groot thoroughly enjoys until the Iwua first criticises his technique and then reveals its true form, leading to Groot tricking the creature into an airlock and ejecting it into space. In “Groot Takes a Bath”, Baby Groot enjoys some relaxation time in a mud bath, only to find the mud causes his leaves to sprout wildly. Though initially horrified, Groot returns to the mud bath again and again as he grooms himself different hairstyles, outfits, and looks, each time saddened to find the leaves wilt within moments. Eventually, he uses up all the mud, leaving him saddened. When a local bird laughs at his misfortune, glad to see the cheeky little baby tree get his comeuppance after his fun kept the bird awake, Groot improvises and trims the bird’s feather to fashion himself a stylish scarf. Series one ends with Groot’s literal “Magnum Opus”, a meticulously crafted drawing of him and his friends and family, the Guardians of the Galaxy, as they appeared during his emotional sacrifice at the end of the first film. Baby Groot’s so determined to bring the piece to life that he scours the ship for items, including a clipping from Rocket Racoon’s (Cooper) tail and samples from the ship’s fuel cells. This creates a glittery explosion that not only finalises his titular masterpiece but also tears a hole in the Eclector, one Baby Groot adeptly begins sealing with duct tape when Rocket comes to investigate all the noise. Though alarmed that Groot has caused the ship to both flood and catch fire, Rocket’s outrage is quickly quashed when he sees the picture, which warms his heart even as he’s sucked into the hole and rescued by Baby Groot’s extendable arms.

At times, Baby Groot’s hijinks put both him and the entire universe in danger.

While searching for new batteries for his videogame controller, Baby Groot pulls himself from his pit of snacks and roots around in Rocket’s treasure trove of stolen items, eventually slapping a prosthetic nose to his face and gaining a sense of smell. Amazed, he explores these new sensations but quickly ditches the appendage when he returns to his filth with his batteries and is disgusted by the stench. Though he’s tempted to grab a brush and clean the place up, Baby Groot decides it’s better to just toss the nose away and get back to his game, content to sit in the mess. In “Groot’s Snow Day”, Baby Groot explores a snowy planet and builds a snowman. Deciding his frosty friend would look better with a few modifications, he ransacks the Milano and stuffs the snowman with cybernetic enhancements, unwittingly bringing it to life. The robotic snowman immediately attacks with its lasers and heads to the ship, intent on spreading further destruction, though Groot seemingly destroys it by launching a well-timed snowball at a compromised engine part lodged in its head. Groot then searches high and low for some credits to get himself a sweet treat from a passing ice cream ship, awestruck by its flashing lights and assortment of frozen goodies. After many pratfalls, Baby Groot finally gathers some coins and is left despondent when the ship moves on. Desperate, he commandeers a space capsule and gives chase, ultimately crashing through the ice cream ship and gifting him as many treats as he could want. Finally, the Watcher (Wright) observes and narrates Baby Groot’s exploration of an ancient tomb said to contain a sacred seed that will bring peace and prosperity to the universe. Despite the Watcher’s best efforts, Baby Groot continually puts himself in danger and gets distracted from his quest, preferring to desecrate the tomb and take a nap. By the time he finally spots the seed, Groot’s more interested in retrieving his ball, causing the seed to be consumed by lava and the temple to crumble. However, the Watcher consoles himself with the understanding that the prophecy was a metaphor and that Groot, emerging from the rubble with fresh leaves sprouting, was the “seed” that would rise from the temple.  

The Summary:
I had a good time with I Am Groot. Obviously, your expectations need to be quite low considering it’s primarily aimed at kids, but I enjoyed Baby Groot’s pratfalls and adventures. As ever, Vin Disel does a great job of making “I am Groot” convey so many different meanings. Baby Groot expresses curiosity, sadness, anger, and even affirms his own identity with these three words, showing caring, mischievous, lazy, and poignant aspects of his personality. The entire show is shot from Groot’s perspective (not literally, of course; I mean at his level), not unlike the classic Tom and Jerry cartoons (1940 to present). We never see any of the other Guardians of the Galaxy save for an obscured cameo of Drax the Destroyer in the shower and Rocket’s heart-warming appearance in “Magnum Opus”, though the crew are obviously around as someone’s flying the ship and visiting all these worlds. It might’ve been fun to hear some of the crew shouting or talking off-camera, reacting to Groot’s antics or just giving a bit more life to the ship, but the framing purposely keeps things at Baby Groot’s level to suggest that he gets up to all these adventures on the regular, largely without anyone noticing. As a sapling, Baby Groot is still understanding himself and the universe; he can stretch his limbs at will but is surprised when he sprouts leaves, for example. He learns as he goes, like any child would, and takes pleasure in simple things, like relaxing in a mud bath or eating ice cream. He still enjoys a dance and gets shirty when the Iwua offers him tips and we see the origin of what would become a teenage obsession with videogames as he sits in a fetid pit chomping on snacks and ignoring his personal hygiene.

Unbeknownst to his family, Baby Groot is getting into all kinds of mischief.

Baby Groot also shows a passion for creativity and construction; he cobbles together all sorts of random items to spruce up his picture and (literally, if unexpectedly) bring his snowman to life. These talents seem to be borrowed from Rocket, who’s forever scrounging away parts and putting together outrageous devices, and it shows that Groot is influenced by his adopted family. This also fosters a caring side to him; he’s driven to feed both the Grunds and the weird little bird that imprints on him and is genuinely upset when he thinks he’s crushed them and his adopted baby returns to its kin. A highly volatile and emotional little sapling, Baby Groot lives a life of extremes; he’s super excited to see the ice cream ship pass by, grows increasingly frustrated at failing to find any coins, and is so desperate to get a treat that he collides with the ship at full speed! If you listen to the all-seeing, all-knowing Watcher, you’d be fooled into thinking that Groot is some prophesised hero destined to usher in a golden age for the universe. However, he’s just a cheeky little tree-boy who enjoys playing his games, bouncing his ball, and doodling, even if his work accidentally endangers his family or defiles an ancient tomb. The Watcher is convinced that the seed is pivotal to the safety and security of the universe and comically aghast when Baby Groot fails to recognise this, and is ultimately forced to reinterpret the prophecy since, like Rocket, the Watcher cannot stay mad at the adorable little sapling. Ultimately, I Am Groot is worth checking out if you’re a fan of Groot and the Guardians of the Galaxy, but obviously will have more appeal to little kids, who will no doubt relate to and enjoy Baby Groot’s mischievous antics. It’s fun getting a sense of what these characters do when no one’s looking and how they interact with the world around them, and Baby Groot is a cute little bugger you can’t help but fawn over. The show’s not going to give the Minions anything to worry about any time soon, but it’s a fun enough distraction to have on in the background as a break from Marvel’s increasingly high stakes action and there’s no shame in that.

My Rating:

Rating: 3 out of 5.

I Am Groot

I am Groot? I am Groot, I am Groot? I am Groot, I am Groot, I am Groot? I am Groot? I am Groot? I am Groot? I am Groot, I am Groot? I am Groot, I am Groot, I am Groot? I am Groot? I am Groot?

Mini Game Corner [Sci-Fanuary]: Metroid: Zero Mission (Nintendo Switch)


January celebrates two notable dates in science-fiction history, “National Science Fiction Day” on January 2 and Arthur C. Clarke’s HAL 9000’s birthday on January 12. Accordingly, I’m dedicating January to celebrating sci-fi in an event I call “Sci-Fanuary”.


Released: 19 June 2024
Originally Released: 9 February 2004
Developer: Nintendo R&D1
Also Available For: Game Boy Advance (Original); Nintendo 3DS, and Nintendo Wii (Virtual Console)

A Brief Background:
Metroid (Nintendo R&D1/Intelligent Systems, 1986) owes its creation to Nintendo’s success with their industry-saving Nintendo Entertainment System (NES), producer Gunpei Yokoi and directors Satoru Okada and Masao Yamamoto collaborated on the title, and Alien (Scott, 1979). Alongside Castlevania (Konami, 1986), the game birthed a videogame subgenre dubbed “Metroidvania” and Metroid was praised for its challenging gameplay. Since being recognised as one of the greatest games ever made, Metroid spawned numerous sequels and spin-offs and was ported to many subsequent Nintendo consoles. Nintendo (and Metroid) veteran Yoshio Sakamoto oversaw the development of this Game Boy Advance remake, which came about when someone working on Metroid Fusion (Nintendo R&D1, 2002) suggested porting Super Metroid (Nintendo R&D1/Intelligent Systems, 1994) to the console. The developers fittingly sought to return to the franchise’s roots, while still adding new elements to make the game feel fresh and modern. Principally, this involved placing greater emphasis on the story, allowing players to pick between difficulty settings, providing Samus with a new form-fitting suit, and adding an epilogue to the story. Reviews for the enhanced remake were largely positive; its content and features and refined controls were praised, though many complained of its short length and that newcomers would get more from it. Still, Zero Mission was said to be one of the best Game Boy Advance titles and it finally found a life outside of its system once Nintendo made it available through their online consoles.

The Review:
Metroid: Zero Mission is a Game Boy Advance remake of the original game, following essentially the same narrative structure (bounty hunter Samus Aran explores Zebes, conquering monstrous bosses to confront Mother Brain, leader of the Space Pirates) and offering the same power-ups, but with a decidedly 16-bit glow up that basically reimagines the original game as though it were a 16-bit title. Consequently, the game looks, sounds, and plays almost exactly like Super Metroid and Metroid Fusion, enhancing Samus’s abilities with moves like the Speed Boost, Spineshark, and ledge grab and allowing her to better dispatch her enemies with an expanded move set, one ripped entirely from those aforementioned games. You fire her trademark blaster arm with B or X (eventually acquiring power-ups that allow you to charge a shot, temporarily freeze enemies, and fire through enemies and obstacles), jump with A (again upgrading this to the iconic Screw Attack and Hi Jump Boots), hold the Left trigger to stand in place and aim in multiple directions, and quickly acquire the Morph Ball to squeeze through tunnels. As you’d expect, you can acquire upgrades that let Samus jump and lay bombs in this form and upgrade her suit to reduce the damage she takes or resist extreme heat and acid pools. Zero Mission adds not only a mini map to the main screen but a large, detailed map for each area of Zebes, expanded whenever you find a Map Room and easily allowing you to see where you need to go (thanks to Chozo Statues highlighting your next objective) and any hidden secrets to find or bosses to confront. Pausing the game lets you review this map, see Samus’s currently available weapons and upgrades, and enter sleep mode. From the main menu, you can select up to three save slots (manually saving in various save rooms) and choose to play on either “Easy” or “Normal” mode.

Alongside the 16-bit glow up, Samus sports some returning and new abilities.

Thanks to the graphical upgrade, Zero Mission is almost completely indistinguishable from the original Metroid and aesthetically has much more in common with Super Metroid and Metroid Fusion as a result. The basic layout is still there (go left at the start of the game and you’ll still find the Morph Ball, for example), with you still ploughing through hallways, dropping down vertical shafts, and riding elevators to explore Brinstar, Norfair, Kraid’s Lair, Ridley’s Lair, and Tourian, but each area is far more visually interesting compared to its 8-bit predecessor. Lava and acid bubbles beneath you, platforms crumble, enemies constantly spawn, and you’ll be backtracking and finding alternate routes as your abilities expand, as always, all while traversing various rocky, mechanical, and ominous environments. Backgrounds are given far more depth and detail, rain effects sweep across the terrain, volcanic caverns smoulder, and enemies are far more detailed (and much bigger) this time around. The game’s story is also given an upgrade with partially animated sequences, Samus’s inner monologue, and in-game graphics providing suitably dramatic cutscenes. The soundtrack has also been upgraded, featuring 16-bit versions of Metroid’s tracks and various remixes that work in tandem with the graphical improvements to again allow the game to stand side-by-side with its 16-bit counterparts. Areas also have new gimmicks, such as the Morph Ball Launcher (which blasts you to new areas), overhead zip liners, and power generators and Chozo Statues that require your Morph Ball and recharge your health and missiles. The Speed Boost is incorporated to break through walls and reach new areas, some doors are barred by grotesque eyes, you’ll occasionally have to unleash small bugs to clear out vine blockages, dead bodies, discarded carcasses, and creeping vegetation are commonplace. Indeed, the entire world seems much bigger and more alive and dangerous than ever thanks to the updated visuals and ominous soundtrack.

New bosses and Super Metroid inclusions basically make this an entirely new game.

Those familiar with Metroid may also be surprised to find a few new enemies here: the hopping Barisutes act almost as mini bosses with their tough armour plated hides, larva-like Kiru Giru fill narrow tunnels and must be baited in to attack their underside with bombs (or shot from below), and Space Pirates shrug off even your strongest missiles. These appear alongside improved versions of the original enemies and Samus will have to hunt down, freeze, and explode every energy-draining Metroid in Tourian if she hopes to escape. Zero Mission also boasts five new bosses in the main portion of the game: two of these are gigantic, spiked, worm-like creatures that burst through the environment or up through acid, lunging at Samus and firing spores or spikes. The first, the Deorem, uses its spiked body to box you in and must be shot in its eye when it appears. The second, the Mua, lunges from an acid pit, giving you a small window to target its pulsating weak spot. Norfair itself later attacks by ensnaring a Kiru Giru in vines and unleashing spores. You must freeze the Rippers in the arena to hop to and attack the vines to send the enslaved creature crashing down. This monster lands in Ridley’s Lair, sheds its skin, and mutates into a grotesque wasp, the Imago, that flies around its nest, charging about and firing spikes from its stinger. You must use yourself as bait and then pelt the stinger with missiles to finally end it. Metroid’s classic bosses also appear in their respective areas, but they’re now reimagined duplicates of Super Metroid. Kraid is a gigantic, bulbous beast you must shoot in the head and mouth while hopping to temporary platforms, while Ridley flies about breathing fire, striking with his spiked tail, and trying to get his claws on you. Samus still braves a nightmare of projectiles and lava hazards when confronting Mother Brain, whose glass case must be shattered with missiles before you can attack her single eye, but her eye blast and the knockback from the swarming projectiles makes this a tricky affair.

A tense stealth section and all-new bosses await in the extended finale.

After making a desperate escape from Zebes, Samus’s ship is attacked and crash lands in the all-new Chozodia sector. Robbed of her armour and abilities, Samus has only her form-fitting Zero Suit and a crappy pistol on hand, meaning players must sneak past Space Pirates, laser traps, and spotlights, desperately running to safety when they inevitably trigger the alarm and only being able to briefly stun enemies. This is quite a tense and frustrating section; when you’re spotted, an alarm sounds, all doors lock, and Space Pirates chase you relentlessly. You can hide behind pillars or in dark corners, but it can be tough to find these when you’re in a panic and the Space Pirates sometime crawl through alternate paths or blast through destructible blocks to find you. Eventually, Samus makes it to the main bridges and the Chozo Ruins, where her mettle is tested by a holographic, lighting-casting projection. Make sure you don’t attack when the mirror of Samus is in the sphere as you’ll take damage. Instead, target the central sphere when images appear and you’ll regain all your abilities, and more. Previously, you’ll have explored different Chozo Ruins and acquired “unknown items” that were incompatible with your suit; these are enabled here. This allows you to plough through Space Pirates with ease with the Plasma Beam, continuously jump with finnicky Space Jump, and freely move through liquid with the Gravity Suit. You’ll also acquire the Power Bombs here and it’s advisable to backtrack to use these new abilities to uncover previously hidden expansions to your health and ammo. When you’re ready, you challenge Mecha Ridley which, though intimidating and powerful, is actually a pretty anti-climactic final boss. You can simply jump over its claw swipes, fireballs, and lasers and pummel the glowing core on its chest to defeat it with much less trouble than its biological counterpart. Samus then has five minutes to make it to an escape shuttle to finish the game, and players are of course treated to different ending images depending on how fast they made it to the end and how many power-ups they acquired. Completing the game also unlocks an additional gallery mode and, impressively, a fully playable port of the original Metroid.

The Summary:
Given I much prefer Samus’s 16-bit adventures to her original game, I was pleasantly surprised by Metroid: Zero Mission. The game is similar enough, but different, featuring a far more visually appealing graphical style that perfectly matches its 16-bit counterparts and updates the original game to be comparable to its successors. If anything, I feel like more could’ve been changed; the Chozodia was a fun addition, but it was more of an unexpectedly epilogue that served as padding. Perhaps if each area featured stealth sections where Samus was reduced to her Zero Suit as part of a Chozo test it might’ve helped with the game’s pacing. The new bosses could’ve been fought at the end of these sections, with the “unknown item” power-ups being rewarded and allowing Samus to get progressively more powerful, as usual. It was a tense and surprising inclusion, though, one that fundamentally changed how you play. I just wonder if more could’ve been done with it, perhaps allowing players to try the whole game with the Zero Suit? The other changes were very welcome (except for the Spineshark; I’ll never enjoy that ability), especially to the returning bosses. Sure, seasoned Metroid players will have a distinct advantage but recreating the Super Metroid battles made these bosses far more intimidating and epic. It’s a shame Samus didn’t get any new abilities beyond the standard Super Metroid ones, which again I feel could’ve been addressed by emphasising the Zero Suit more, but Zero Mission does a fantastic job of bringing the original Metroid up to par with its successors. As if that isn’t enough, you unlock the original game, so anyone who doesn’t like the changes can just play the original game after!

My Rating:

Rating: 3 out of 5.

Pretty Good

Have you ever played Metroid: Zero Mission? How do you think it compares to the original game? Did you like the graphical upgrade and the changes to the bosses? What did you think to the Chozodia section, and do you agree the pacing was a little off? Did you ever get the best ending and play through the original Metroid? Which Metroid game is your favourite? Whatever your thoughts, feel free to leave a comment below and be sure to check out my other Metroid reviews.

Back Issues [Sci-Fanuary]: Tales to Astonish #13


January celebrates two notable dates in science-fiction history, “National Science Fiction Day” on January 2 and Arthur C. Clarke’s HAL 9000’s birthday on January 12. Accordingly, I’m dedicating January to celebrating sci-fi with an event I call “Sci-Fanuary”.


Story Title: “I Challenged… Groot! The Monster from Planet X!”
Published: 27 June 1960 (cover-dated: November 1960) 
Writers: Stan Lee and Larry Lieber
Artist: Jack Kirby 

The Background:
Nowadays, the lovable tree-monster Groot is all-but a household name thanks to his celebrated appearances in the Marvel Cinematic Universe (MCU), courtesy of Vin Diesel’s surprisingly complex performance considering the character simply says “I am Groot” over and over. While Groot is best known as a key member of the Guardians of the Galaxy, his first appearance was in a decidedly less heroic role. Debuting in Tales to Astonish, a science-fiction anthology series perhaps best known for introducing readers to Doctor Hank Pym/Ant-Man, this far more eloquent portrayal of Groot sought to capture and study humankind. This version of Groot later joined the Howling Commandos, a paranormal strike team working under the Strategic Hazard Intervention Espionage Logistics Directorate (S.H.I.E.L.D.) He was largely supplanted by a different member of his species, also called Groot, who first appeared in the Annihilation: Conquest event (Various, 2007 to 2008) before joining the Guardians of the Galaxy and being the inspiration for the MCU’s version of the character.

The Review:
The story of how one brave man stood up to the hulking tree-monster from Planet X, Groot, begins late one night as married couple Leslie and Alice Evans return home from a trip to the cinema. Their mundane drive through the night is interrupted when Leslie spots a brilliant luminous object falling from the heavens and crashlanding in a nearby forest. While he’s eager to check it out, Alice easily convinces him to ignore it and take her home because she’s “tired” (*wink-wink, nudge-nudge*). However, being a curious biologist, Leslie can’t help himself and goes to investigate off-panel, bringing a sample of the mysterious object to his laboratory for study. One day, Alice comes charging into the lab claiming that two of their trees (as well as some of their neighbour’s trees) are missing. Though he brushes the phenomenon off as a cheap prank, Leslie’s sure that what he saw in the forest is somehow connect and heads over there. However, when he arrives, Leslie’s astonished to find the glowing object emitting a powerful light and to witness a gigantic wooden giant, a living tree, commanding and controlling wooden objects to fly to him and add to his monstrous stature. Panicked, Leslie naturally rushes into town to warn the sheriff. Luckily, one of the lawman’s men is on hand to report that the creature is heading to town and, before long, a barricade is erected and armed men are confronting the giant.

Unassuming biologist Leslie holds the key to defeating the monstrous, tree-like Groot.

Surprisingly, the titan halts its march and addresses the townsfolk, introducing itself as Groot, monarch of Planet X, and his intentions to take the entire village back to his home world to study the Earthlings. Terrified, the townsfolk prepare to defend themselves, only for Groot to mentally command the surrounding trees to encircle the town. Its intention is that the trees will bury beneath the town’s very foundations to form a giant net that will whisk the town and all its inhabitants into space, presumably somehow sustaining them for their journey back to Groot’s world. There, he proclaims he and his kind will conduct research on them; the exact specifics aren’t clear, but the threat is enough to rile up the townsfolk. Unfortunately for them, Groot easily shrugs off their small arms fire; however, Leslie bravely steps up and claims to know the key to stopping Groot’s plot. Yet, when he immediately runs off, his peers and even mighty Groot believe him to be a coward. Since the town’s bullets and even flaming torches cannot penetrate Groot’s thick hide, there’s nothing to stop the creature enacting his plan, and even Alice chastises Leslie’s apparently cowardice back at his lab. However, she and the others are amazed when Leslie rushes back to Groot and deposits two boxes to the ground. To their shock and relief, Groot is painfully felled and killed by “the deadliest enemy of wood”, termites! With the towering goliath slain, the town is in Leslie’s debt, stunned at such a simple solution, and even Alice sees her man in a new light by the end.

The Summary:
Well, this was a bit of schlock, B-movie-level fun! The entire setup is like something ripped straight out of a Roger Corman flick and the execution is on the same level as an ambitious monster movie from the 1950s. Our main protagonist is not some muscle-headed jock or even a cop; he’s just a simple biologist, one whose wife constantly chastises him for not being a “real man”. He’s much happier with his lab equipment and studying animals and fauna, it seems, and motivated by scientific curiosity first and foremost. Leslie wants to investigate the crash site simply to see what wonders fell from beyond our world and is driven to distraction studying a sample of the glowing material. It’s not made clear what he’s looking at or what it really does; I assume it’s a small piece of what would become Groot, but the story glosses over what Leslie’s research uncovers. It might’ve been good to setup the ending in these panels; have Leslie’s study of Groot reveal the key to defeating the monstrous giant rather than randomly having Leslie pull termites from his ass. While Alice doesn’t get much to do but react to stuff and criticise her sapling husband, the town sheriff and inhabitants are certainly gung-ho. Thankfully, we’re spared any lengthy scenes of Leslie being branded a madman and the cops and townsfolk are soon grabbing guns and torches to defend themselves against Groot. However, like Alice, they see action and gusto as the true mark of bravery. Thus, they throw insults and judgement at Leslie when he seemingly flees in fear and are confused and perplexed when their weapons and moxie are nothing compared to a few termites.

The mighty Groot has come to enslave, not conquer, but poses a significant threat.

Naturally, Groot is the main reason to read this bizarre story from Marvel’s golden age. The build up towards the creature’s big reveal is both brief and tense. Due to the limited page count, there’s only so much the writers can do, but I liked that the town’s trees went missing as a foreshadowing of Groot’s reveal. Those more familiar with the heroic Groot may be shocked by this creature’s more grotesque appearance. Groot is a towering, tree-like alien who adopts a menacing stance at all times. Interestingly, though, Groot is seemingly a scientist, like Leslie. It’s there to capture and study the town, not conquer the Earth, and makes no aggressive moves towards the humans even as they fire upon it. I mean sure, it wants to wrap the town up in a ridiculous cage of trees and branches, whisk them away to Planet X, and perform God-knows-what on them in its lab, but it’s not rampaging through town, squashing people beneath its trunk-like feet, or otherwise attacking them. Yet, Groot is framed as being “unconquerable” due to its incredible size and strength. However, it’s notable that the townsfolk only have small arms and flaming torches on hand; we have no idea how heavier ordinance would’ve fared against Groot. Of course, we have no need to discover this since Groot is easily and painfully taken down and killed by a group of termites. This simple solution is straight out of The War of the Worlds (Wells, 1898; Pal, 1953) and shows how man’s ingenuity is our greatest asset, rather than brute force. A peculiar and whimsical science-fiction tale clearly inspired by 1950s B-movies, “I Challenged… Groot! The Monster from Planet X!” is notable for its early depiction of what would become one of Marvel’s most endearing characters and short enough to provide a brief bit of entertainment, but you’re not really missing much if you’ve skipped this one and I wouldn’t say it’s really worth seeking out unless you’re really curious about Groot’s understated first appearance.

My Rating:

Rating: 2 out of 5.

Could Be Better

Have you ever read “I Challenged… Groot! The Monster from Planet X!”? If so, what did you think to it? Did you enjoy the B-movie feel of the story? What did you think to Groot, its design and motivations? Were you amused by the way Leslie managed to destroy the creature? Would you like to see Marvel bring back sci-fi anthologies like Tales to Astonish? What are some of your favourite Groot stories and moments? Feel free to share your thoughts on Groot in the comments and go check out my other sci-fi content on the site.

Game Corner [Sci-Fanuary]: Metroid Fusion (Nintendo Switch)


January celebrates two notable dates in science-fiction history, “National Science Fiction Day” on January 2 and Arthur C. Clarke’s HAL 9000’s birthday on January 12. Accordingly, I’m dedicating January to celebrating sci-fi with an event I call “Sci-Fanuary”.


Released: 8 March 2023
Originally Released: 18 November 2002
Developer: Nintendo R&D1
Also Available For: Game Boy Advance (Original); Nintendo 3DS, and Nintendo Wii (Virtual Console)

The Background:
Nintendo introduced gamers to Samus Aran in August 1986. Her debut title was celebrated for its challenging gameplay, is now regarded as one of the greatest games ever, and helped popularise the action/explorationMetroidvania” subgenre. Nintendo followed Metroid with the Game Boy-exclusive Metroid II: Return of Samus (Nintendo R&D1, 1994), a contentious and divisive title whose narrative nevertheless directly influenced Samus’s jump to Nintendo’s ground-breaking 16-bit console. After two years in development, Super Metroid (Nintendo R&D1/Intelligent Systems, 1994) was universally praised for its impressive visuals and tight gameplay, becoming a must-have title for any Super Nintendo owner. Despite this, it would take over ten years for Samus to receive another solo title, with the first footage of “Metroid IV” being shown at the 2001 E3 convention. The team behind Super Metroid returned for Metroid Fusion, introducing a mission-based structure to the gameplay to guide players towards objectives rather than them having to figure things out blindly as before. The developers also took the opportunity to revamp Samus’s appearance and the way she replenished her health and missiles, as well as simplify the controls compared to Super Metroid. Like Super Metroid, Metroid Fusion received critical acclaim; the gameplay, graphics, and mechanics were praised, though many were disappointed by its short length. While Metroid ventured into the 3D arena after Fusion, a sequel came less than ten years later, and the game eventually became available outside the Game Boy Advance (albeit digitally) as Nintendo branched out into virtual consoles.

The Plot:
While exploring planet SR388, bounty hunter Samus Aran is attacked by the parasitic “X” organisms. Though saved by a Metroid-based vaccine, Samus is physically altered. Despite this, she investigates a Biologic Space Laboratories (BSL) space station overrun by the X, now led by “SA-X”, an X parasite mimicking Samus at full power!

Gameplay and Power-Ups:
Metroid Fusion is a 2D, action-orientated exploration title that takes a lot of inspiration from Super Metroid. As in that game, you (as Samus Aran) will be exploring a vast space station home to numerous elevators and hidden tunnels to various high-tech laboratories, caverns, flooded and lava-filled areas, and other regions, all infested by the X parasite. This time around, Samus’s abilities are restricted by her superiors, represented by a station computer that gives the player objectives, points you in the right direction, and offers advice about how to tackle each area. In this regard, Metroid Fusion is the most linear Metroid game so far; the station computer warns you of nearby hazards, says what weapon or upgrade you need to overcome them, and highlights your objective on the game’s map screen. That’s not to say you won’t be backtracking and searching high and low for secret passages and hidden power-ups, but it definitely helps to have an in-game system guiding you along. This, in conjunction with the helpful mini map and the larger full map (accessed with the + button), means it’s easier than ever to navigate the station’s different environments, at least at the start of the game. The + menu also allows you to review Samus’s current suit, abilities, and weapons, refresh yourself on your current objective, and enter sleep mode if you ever need a break. As always, Samus can only save at designated Save Stations (though you can make liberal use of the Switch’s save state and rewind feature to compensate for this) and she can replenish her health, and missile and bomb ammo, at various Recharge Stations. Defeated enemies will also replenish these, but things are a little different this time around. When defeated, enemies release an X parasite that must be collected to refill your health or ammo. If you linger too long, it’ll spawn another enemy, or a tougher variant, adding a level of anxiety that was missing from the previous games.

All of Samus’s abilities return, though she’s strangely light on new tricks.

Samus’s abilities are limited at the start of the game, narratively explained by her being fragile following her encounter with the X. To begin with, you can fire her trademark arm cannon with B or Y, holding the button to charge it and aiming in all directions. A allows her to jump, and she’ll jump higher the longer you hold the button, and you can enable precision aiming while holding down the Left trigger. As you explore the game’s locations and defeat bosses, you’ll gradually regain all her signature abilities. Samus will gain missile upgrades that deal additional damage, open different doors, and even freeze enemies, eventually allowing you to charge up a wider shot by holding the R trigger. She can also morph into a spherical ball to pass through vents and narrow tunnels, eventually dropping bombs and hopping to higher tunnels. Her arm cannon can be upgraded to increase her rate of fire and pass through enemies and walls, shredding enemies who normally take multiple shots to defeat. Her jumping ability can also be enhanced, allowing her to jump higher and continuously and adding her signature “Screw Attack”, though abilities like the Space Jump can be difficult to master due to the finnicky timing required to sustain her jumps. This is equally true of Samus’s aggravating wall jump, which is just as frustrating as in Super Metroid, though thankfully I found it wasn’t necessary to clear the game. Samus’s suit can also be upgraded to withstand extreme temperatures, allowing her to enter frozen areas, freely move through water, and even endure lava. While Samus’s suit will change with each upgrade, she doesn’t showcase anything new her with two exceptions: Samus can grab ledges, making platforming and entering tunnels much easier, and absorbs the different coloured X parasites to refill health and ammo. However, her maximum health, missile, and bomb count can still be expanded by searching around. While you’re told how to use all these abilities and the map even highlights when there’s something in each area, you’ll get no direction on how to use her wall jump or her “Shinespark” ability. The Speed Boster lets Samus crash through certain blocks, but you can press down when she’s at full speed to store that energy and then direct her to smash through higher blocks, which I found extremely aggravating and difficult. I still don’t know why simply jumping while running and pressing A at a wall isn’t enough to pull off these manoeuvres.

Activate consoles, clear areas of hazards, and stay far away from the SA-X!

The level layout of Metroid Fusion again owes a lot to Super Metroid, with long vertical shafts, bio-organic areas, and ominous facilities being the order of the day. Puzzles are generally solved using Samus’s abilities; you can uncover destructible blocks by blasting the environment or laying a Power Bomb, though sometimes you need to find an alternative route to access them. Lifts, doors and tunnels will take you to new areas, with the game’s bosses often wrecking the environment and forcing you to take a longer path around blockades or hazards. Samus will be constantly searching for Data Rooms, Navigation Rooms, security consoles, and the like to discover her objective, restore power to an area, or unlock coloured doors. Sometimes, these will remove obstacles such as water or encroaching darkness from an area, though her suit upgrades often circumvent these. Sometimes, you’ll need to drop Power Bombs to break open tubes; often, you’ll be climbing ladders or clinging to overhead rails; occasionally you have to race against a timer to solve overloads or escape areas; and you can again freeze enemies to make temporary platforms. Enemies respawn after you leave a screen, as ever, but the unique X parasites revive corpses or spawn new enemies while you’re on the screen. Some doors are barricaded by disgusting, energy-shooting eye growths that need to be destroyed, some blocks and platforms crumble under your feet, and some areas are veritable mazes that have their pathways hidden within the foreground. Easily the biggest edition to the game is the nigh-unstoppable SA-X, a twisted doppelgänger of Samus that occasionally stalks the corridors or wrecks the background. When the SA-X appears, take the computer’s advice and stay out of sight or run as it can drain your health in seconds with its advanced abilities. On the few occasions when you’re chased by the SA-X, you can use your Ice Missiles to (very) briefly freeze it, adding a great deal of tension to the game in these instances.

Presentation:
Visually, the game also owes a lot to Super Metroid and its Aliens (Cameron, 1986) inspirations. The BSL space station is ominously empty, often devoid of music, and home to a huge docking bay (where Samus’s ship is parked), a series of large ventilation shafts, and elevators that take you to the station’s other areas. As you progress, you’ll return here a few times and explore new areas, such as the Sub-Zero Containment area that houses Ridley’s frozen husk, a teeming Habitation Deck (where Samus frees the friendly Dachoras and Etecoons from confinement), and the sprawling Reactor Silo, with Samus exploring each to tackle various issues with the space station. There are six “Sectors” to explore, all accessed by a main elevator system (though you can take alternative paths when this system fails or is inaccessible) and each with new areas to uncover as you expand Samus’s repertoire. You won’t explore these in numerical order, and you’ll also have to backtrack to them both as part of the story and to find all of Samus’s upgrades and power-ups. Sector 1 is a cavernous area, featuring rocky platforms spotted with vegetation, not unlike SR388, where Samus initially has to find and destroy atmospheric stabilisers to dispel the mist filling the area. Later, she ventures into mechanical hallways similar to Tourian, discovers Metroid husks in lava-filled caves, and battles Neo-Ripley in a large, cargo hold-like room. Sector 2 is like a Mayan temple, full of ancient ruins completely overtaken by foliage. Plants, vines, and flowers swarm the environment, creating a jungle-like feel and masking pathways, and these are married with a coral reef-like subsection. Sector 3 is both a sweltering laboratory and an arid desert, featuring a desolate, muddy aesthetic and a baking boiler room that threatens to destroy the entire station.

The surprisingly chatty Samus visits some interesting, if familiar, locations.

Sector 4 is basically an aquarium; it features a blue theme, lots of water, exposed power nodes that’ll sap your health, and beautifully detailed underwater sections full of anemones and a tranquil water effect. Sector 5 is a frozen laboratory filled with glass panels in the background and that’s eventually wrecked when an X-infused creature, the Nightmare, escapes captivity. Sector 6 is another cavern, but this time dank and dark, save for areas sporting vivid mushrooms. It’s also home to a restricted laboratory; Samus needs a beam upgrade to enter, where she’ll find various Metroids held captive. These are then unleashed when the SA-X arrives and blasts the environment, forcing Samus to make a desperate escape up a shaft while avoiding the panicked jellyfish. The SA-X and other bosses are prone to affecting the game’s environments; they’ll crash through walls, block off doors, and seal off some areas, forcing you to either escape, find alternative paths, or battle them in enclosed areas. Metroid Fusion focuses on story more than any previous game, featuring lovely cutscenes at the start and at various points throughout the story that showcase the SA-X’s power and Samus’s reaction to the events happening around her. This is further reinforced through various cutaways that detail Samus’s inner thoughts as she thinks of her former commander and ponders her newfound physiology. The game’s soundtrack is a further extension of Super Metroid; remixes of classic Metroid themes are featured, as are ambient sounds and suitably ominous tracks, but nothing really stood out to me as particularly new or memorable. Everything looks and sounds and plays really well, but the game owes so much to Super Metroid that it almost feels like a remake at times. I would’ve liked to see more variety in the locations and more effort put into the soundtrack, rather than playing it so safe.

Enemies and Bosses:
The BSL space station and its six Sectors and various areas are teeming with all kinds of alien lifeforms that are all hostile to some degree thanks to the X. The theme here is bugs and vegetation, as every enemy is some kind of insect or mollusc or plant-life turned monstrous, with only a few exceptions. We’ve got scuttling bug-like Gemmers, slug-like Choots that spring up from the ground and lazily float down, crab-like Dessgeegas that jump at you sideways, weird coloured balls floating around pumping out toxic gas, the Xenomorph-like Genesis creatures pouncing from above and below, and the armoured Gerubus crabs that need missiles to be dispatched. Piranha-like fish, tiny snails, and even zombified corpses are all infected by the X and, occasionally, stronger versions will be spawned upon defeat or you’ll need to defeat enemies a certain way to open up doors. Some enemies will be more than familiar to players of Super Metroid: the crustacean-like Evirs swim about firing projectiles from their tails, worm-like Funes snap at you from walls, and the Space Pirates even make an appearance. Kind of. The Zebesians are functionally the same, clambering up walls, firing shots from their claws, and even resisting your shots unless you charge up a beam or blast them from behind with missiles. Each defeated enemy releases an X parasite that must be collected, but you’ll also encounter blue X parasites that damage you until you upgrade your suit. Metroids also make a brief appearance, though they’re more of an annoyance than a threat as they simply knock you back rather than causing damage.

The X parasites assume some monstrous forms to keep you from your full arsenal.

There are twelve bosses to battle in Metroid Fusion, though one is encountered twice. Many of the bosses will not only be familiar to Super Metroid players but are simply super-powered X parasites. Defeating them reveals their true form, the eye-like Core X, which floats around firing lasers or protecting itself with spikes or electricity. Defeating this restores your health and ammo and bestows a new ability, but their inclusion essentially means every boss fight is a two-stage affair. The first you encounter, the Arachnus X, is an armadillo-like creature that stomps around, rolls at you, slashes with its pinchers, or unleashes an energy wave attack. Luckily, there are small tunnels you can retreat into to avoid these, though you’ll need to be wary of its widespread fireball attack, and it’s only vulnerable from the front and to your missiles. Next, you’ll battle the weird, plant-like Zazabi X, a strange jellyfish-like tentacle that hops around and tries to squash you. While it’s overhead, you can shoot up to bombard it with missiles but be sure to move as it saps your energy if it envelops you. Serris X presents quite the challenge. This serpentine beast bursts from the ground and circles the screen, taking up a lot of real estate and getting faster the more damage you deal to its head. You’ll then have your first encounter with the Security Robot B.O.X., a crab-like walker that charges you and spits bombs that spew fire plumes. Luckily, there’s a rail overhead you can grab to fire missiles into its opening from above, which eventually causes it to flee. When you battle it again later, these overhead rails are essential to avoid the electrified water in the arena, and it now sports a missile barrage in its arsenal!

Gigantic, disgusting bosses will test you patience and skill.

Since you get a lot of experience battling Core X’s, targeting their eyes and dodging them as they float about, the Barrier Core X doesn’t pose much of a problem beyond being bigger, surrounded by smaller variants, and retreating to the water. The giant spider, Gedo X, is much more formidable; if this thing gets you in its mandibles, you’re in for a bad time! Luckily, you can retreat to the corners of the cargo bay in your Morph Ball to leave it bouncing around aimlessly. Gedo X also spits a spew of fireballs you’ll need to avoid and eventually starts dropping garbage on you, so you’ll need to dodge this as well as you frantically target its head with Super Missiles. Plant Core X reminded me of the Mother Brain battles from the first two games. This tangled mess of vines and thorns has infested a Chozo Statue and is protected by spore-spitting flowers and carnivorous plants. Pieces of the boss fall off and become hazards as you pepper it with Super Missiles and, while the spores eventually stop, the creature rears to life and blasts you with Plasma Beams! Like SA-X, Nightmare X’s threat is foreshadowed as soon as you venture into Sector 5 and see its shadow flying about it. Later, it wrecks the area and you’re forced to confront it, where it’s revealed to be this gigantic, bio-mechanical…thing that takes up most of the screen! Nightmare X hovers around erratically, fires a barrage of lasers from its arm/wing/things, and is only vulnerable to Super Missiles and the Charge Beam, and only in its mewling face. You must lure it to one side of the room and clamber up the ladders to attack it, marvelling as its face bleeds and degenerates as it takes damage, but your missiles will be useless when it engages it gravity-warping abilities so make sure to switch to the Charge Beam.

Some familiar faces, a formidable doppelgänger, and a ghastly Metroid beast await in the finale.

After a tense, manic escape from the Restricted Zone that sees you blast the SA-X into space, you’ll come face-to-face with an X masquerading as Samus’s archenemy, Ridley. Another gigantic sprite, Ridley flies about the place and charges at you, testing your reaction time and agility. It also breathes fire and tries to grab you. While this drains your energy, you can pummel it with Super Missiles to deal big damage, though it’s also recommended to use the Charge Beam. Eventually, the shrieking creature crumbles and you defeat one more Core X before finally facing SA-X. This X is a perfect copy of Samus in her classic suit and with all her abilities; it pops up throughout the game searching for you or chasing you down, decimating you with its Screw Attack and Ice Beam. You can finally settle the score in this fight but the SA-X is fast and powerful and you can only damage it with a fully charged Plasma Beam. Your Ice Missiles briefly freeze it but the window of opportunity is very small so be ready to Screw Attack to safety. After enough hits, it mutates into a monstrous form, one much easier as it simply tries to crush you, but it surprisingly saves you in the final fight when it sacrifices itself to empower you in the battle against the Omega Metroid. This gargantuan, insectile, alien monstrosity rips through the docking bay and is fought against a time limit. Initially, it’s invulnerable, but the SA-X’s Ice Beam lets you to damage it. However, you need to hit hard and fast and escape to safety. If its slashes land, you’ll be stun locked and killed in seconds or waste valuable time, so rush in, blast its head, and quickly retreat to end it. With the timer ticking down and the Omega Metroid’s huge hit box, this can be a frustrating test of patience and sadly lacks much strategy beyond shooting and retreating.

Additional Features:
Scattered all around the space station and its Sectors are numerous power-ups that will increase your maximum health and the number of missiles and Power Bombs you can carry. These are invaluable as the game progresses and tougher enemies and specialised hidden blocks become more prominent. You’ll gain all of Samus’s weapon and suit upgrades by defeating bosses, Core Xs, or from the odd Chozo Statue, so you don’t have to worry about missing anything. Maps are automatically provided when you interact with the Navigation Room or activate consoles as well, and as ever you can utilise the Nintendo Switch’s save state and rewind feature to drastically reduce the game’s difficulty. You get three save slots with Metroid Fusion and each one tracks your completion percentage, which is tied to how many power-ups you’ve found as well as how quickly you’ve played through the game. These factors also impact the ending you get upon finishing the game, with five on offer in the North American and European versions and eleven in the Japanese version, ranging from seeing Samus pose in her suit to showing off her form-fitting blue suit. If this is incentive enough for you to challenge the game again and finish it faster, then by all means go ahead, but there is nothing else on offer here, which is a bit of a shame as it would’ve been nice to see an SA-X skin or Samus’s blue suit form unlocked.

The Summary:
Although I’ve played a few Metroid games now, I still feel unaccustomed to the franchise. Nostalgia and a longing for Super Nintendo games means Super Metroid is probably my favourite of the series, so I was naturally very pleased with Metroid Fusion. As mentioned, the game has so much in common with Super Metroid that it’s basically a remake, with Samus’s abilities copied wholesale alongside many familiar locations and bosses. I didn’t expect the call-backs to Metroid II though, that was pretty neat, and I enjoyed seeing the game’s environments change as you explore the space station. There’s always something happening, be it an overload or a power drain or an escaped monster, and it’s a fun reason to backtrack and try out Samus’s new abilities. Pitting you against a ticking clock was a great way to break up the action, and adding an element of danger to defeating enemies with the X parasites was a neat touch, too. I also enjoyed the threat of the SA-X; this formidable double increases the tension and causes nothing but trouble throughout your adventure. Unfortunately, I don’t think it was utilised enough. There were some areas where the SA-X was entirely absent, and I think running from it, sneaking around it, or engaging with it multiple times would’ve helped the game stand out more from Super Metroid. Like, one of Samus’s power-ups could’ve been left lying in the open and be stolen by the SA-X and maybe you have to sneak around to retrieve it. Or you’d see it in the background or something. I would’ve liked to see more done to each area, too, to properly embrace each theme. All of them share similar high-tech features, just with different colours, which was a bit disappointing. Still, I imagine this was a great Metroid experience upon release as Super Metroid wasn’t available on the go like it is now and it still holds up really well as a companion piece to Super Metroid that does just enough to make it unique.

My Rating:

Rating: 4 out of 5.

Great Stuff

Did you enjoy Metroid Fusion? Did you like how similar it was to Super Metroid or would you have liked to see it stand out a bit more? What did you think to the SA-X and do you think more could have been done with the concept? Which of the areas was your favourite? Did you ever achieve 100% completion and Samus’s true form? Which Metroid game is your favourite? Whatever your thoughts, feel free to leave a comment below, and be sure to check out my other Metroid reviews across the site.

Mini Game Corner [Sci-Fanuary]: Mega Man 2: The Power Fighters (Xbox Series X)


January celebrates two notable dates in science-fiction history, “National Science Fiction Day” on January 2 and Arthur C. Clarke’s HAL 9000’s birthday on January 12. Accordingly, I’m dedicating January to celebrating sci-fi with an event I call “Sci-Fanuary”.


Released: 22 July 2022
Originally Released: August 1996
Developer: Capcom
Also Available For: Arcade, GameCube, GameTap, Nintendo Switch, PC, PlayStation 2, PlayStation 4, PlayStation 5, Xbox, Xbox One, Xbox Series S 

A Brief Background:
After ushering in Capcom’s debut in the home console market, the excessively difficult (but no less lauded) Mega Man (Capcom, 1987) eventually spawned enough of a franchise to become a Nintendo staple. Despite this, Capcom remained at the forefront of the popular arcade scene thanks to their blockbuster tournament fighter, Street Fighter II: The World Warrior (1991), which soon spawned numerous imitators to its throne. While Capcom later appeared reluctant to create new Mega Man games, a well-received (if simplistic) spin-off fighter was released to arcades in 1995. The following year, Capcom released a sequel, one that expanded upon the original’s cast and mechanics to produce a more fleshed-out version of the concept. Like its predecessor, Mega Man 2: The Power Fighters was included in various home console ports and featured as part of Capcom Arcade 2nd Stadium, which is the subject of this review.

The Review:
Like its predecessor, Mega Man 2: The Power Fighters is a 2D, largely one-on-one tournament fighter (though two players can team up to dominate their foes). The original playable cast (the titular Mega Man, his loner older “brother” Proto Man, and grim anti-hero Bass) are joined by the mysterious Duo and again pick from three story paths. Although I’ve heard that each of the four characters has different attributes, I noticed only minor differences between them, with the except of Duo. While the others all fire shots from their arm cannons, Duo attacks with an extendable arm and fires out a fist; he’s also a bigger target and potentially a bit slower. The controls remain unchanged, with players attacking with A and holding the button to charge a more powerful shot or using a rapid-fire variant with X. You jump with B (jumping higher the longer you press it), executing either jumping shots or wall jumping off the arena sides to dodge incoming attacks. Pressing down and B sees you dash ahead, while Y switches between your available Special Weapons. As ever, you acquire these by defeating Robot Masters and they’re tied to an energy meter, though this time you must pick up the Special Weapon orb after a victory and your friend can steal it from under you. Finally, you can press in the right-stick to enter a coin and continue fighting where you left off if you’re defeated, selecting a new character if you wish, with your health and weapon energy fully restored. Visually, sprites and attack animations are lifted wholesale from its predecessor. I didn’t find the all-new backgrounds as interesting as the first game’s and it was a little disappointing to not see more detailed environments or additional cameos included. The same can be said of the music, which is more of the same, though more sound bites are included here alongside additional cutscenes. These often feature Roll bestowing you an upgrade or Doctor Thomas Light giving exposition on your enemy and advancing the paper-thin plot, with the more impressive sprite art being saved for the endings, as you’d expect.

New abilities, new allies, and a new character slightly expand the scope of this sequel.

Some other tweaks include the pre- and post-fight text being more animated, characters having victory poses, and enemies dropping health and weapon energy pick-ups as you attack, giving you a bit more leeway in tougher bouts. Enemies can also block your attacks and reflect your shots, two abilities that you’re denied, and will enter a “pinch” mode when their health drops to half, increasing and varying their attacks and putting you on the defensive. To even things up, each character has a special attack they can perform by pressing up and X with a fully charged shot, with Mega Man unleashing a jumping uppercut, Proto Man firing a short-range burst of energy, Bass performing a crescent kick, and Duo hitting an uppercut/slam combination. Furthermore, Eddie appears during fights and bestow a robot helper who temporarily replaces your Special Weapon function until their life bar runs out. Mega Man is aided by Rush, allowing him to spring higher by jumping on the robo-dog’s back and send him flying at foes by charging his primary shot. Proto Man and Duo are aided by Beat, who grants them a temporary invincibility, and Bass is joined by Treble, who fires his own attack when you press X and can also be sent charging at enemies. Additionally, each story path sees you gifted an “upgrade” that either increases your attack power, adds a super jump (performing by pressing up and B), or increases the length of your weapon energy bar. These additions appear alongside the same features as the first game, including customisable borders and filters, a helpful rewind and save state feature, the ability to alter the game’s speed, difficulty, and the length of the one-round fights, and an optional invincibility mode that will disable both Capcom Arcade 2nd Stadium’s Achievements and the in-game “Triumphs” you can earn by playing. Again, you shouldn’t really need this option with the rewind and save state features. No Achievements are tied to beating the game without taking damage, earning a perfect no-damage victory bestows only points, and the game is just as easy as before, with the exception that I noticed enemies seem to take more hits to defeat this time around.

Alongside new Robot Masters, foes gain additional attacks when their health drops.

In true Mega Man fashion, you can circumvent this by acquiring specific Special Weapons to target specific Robot Masters. This time, you can freely select which enemy you face, though the damage you take in each fight still carries over to the next, so it pays to think about the order you tackle the Robot Masters. You’ll have an easier time against Plant Man, for example, if you defeat Heat Man and get the Atomic Fire weapon; similarly, Dive Man is weak to the Thunder Beam and Napalm Man is weak to the Gemini Laser. Gameplay is largely unchanged from the last game, with no stage hazards to be concerned about and the backgrounds noticeably changing to different times of day, locations, or other visuals depending on which path you take. There are no chases to worry about this time (though you can fight on stages that appear to spin or bob up and down in water or lava) and battling the Robot Masters still consists of an arcade-style rendition of the main games’ boss battles. Your foe will jump about firing their signature weapon, then add a few extra attacks when their health drops. Those that return from the last game (Heat Man, Plant Man, Gyro Man, Slash Man, Cut Man, Shade Man, Gemini Man, Napalm Man, and Guts Man) remain largely unchanged except for their “pinch” attacks, though I did notice that their health bars increase as you gain victories. New Robot Masters fit in very well with their counterparts, with Air Man blowing you back with his chest fan and firing mini tornados, Bubble Man capturing you in his slow but powerful bubbles, Centaur Man charging you and firing arrows, Dive Man bestowing homing torpedoes, Elec Man blasting three-way Thunder Beam, Pharaoh Man floating around with telekinesis and utilising a two-way wave attack, Quick Man moving with a shadow effect and speeding up your attacks with the Quick Boomerang, Shadow Man bombarding you with Shadow Blades, and Stone Man erecting stone walls and giving you a slow stone hand to fire as a ground shot. With enemies able to block, reflect, and power up, bouts do last a little longer, but the continued absence of combos and other mechanics means you can simply plough through to win as before.

It’s surprising how much of the game is a tease for Mega Man 8

After defeating the six Robot Masters in your chosen path, you’ll enter Dr. Wily’s fortress and fight one of three additional bosses before meeting the mad doctor face-to-face. Returning from the last game is the Yellow Devil; slightly redesigned and far tamer than before, the Yellow Devil jumps more, fires a barrage of cubes and a focused laser blast from its eye, as well as slapping you, firing projectiles, and transforming into a sphere. The Mad Grinder from Mega Man 7 (Capcom, 1995) appears to fire buzzsaws and flatten you with his steamroller appendage, flinging his mohawk and spitting fireballs but being notably weak to the Centaur Arrow, while Mega Man 2’s (ibid, 1988) Mecha Dragon pops up to roast you with large fireballs, deal continuous damage with its flame breath, and spawn smaller minions. Defeat each other these and Dr. Wily will attack in his newest contraption for a three-stage final bout. In the first phase, Dr. Wily summons a robot minion to distract you, fires a robotic fist to punch or flick you, and defends himself with those same hands, firing small projectiles or a larger mouth cannon. In the second phase, he takes to the air as a smaller target, launching bombs, taking shots, and trying to target you with an explosive attack. Take this out and you’ll be given ten seconds to finish him off as he teleports between pods, though you’ll only be denied seeing Dr. Wily beg for mercy if you fail to finish him. You’ll get different endings depending on which character or character combination you play as, with Duo’s being a massive tease for Mega Man 8 (ibid, 1996) and the introduction of Zero, Mega Man briefly questioning his morals, Proto Man refusing Dr. Light’s help, and Bass continuing to disrespect his creator. After viewing these, and the end credits, you can enter your name in the high score table and try a different story path or play again to try and beat your best score.

The Summary:
Although Mega Man 2: The Power Fighters expands on the original game with a few new features, it remains as barebones as the original and thus there isn’t too much to say about it. I definitely think it’s a superior game thanks to the deeper variety in the playable characters, Robot Masters, and in-game action, but it’s not enough to bump the overall score any higher. I wasn’t exactly blown away by what Duo brought to the table and, while I liked the robot helpers, it bugged me that you have to pick between using them or using your Special Weapons. Having health and weapon energy drop in fights made things a touch more interesting, and I like the competitive nature of two players fighting to snag the Special Weapon after defeating a Robot Master, but it remains a colourful, enjoyable, but strangely shallow arcade interpretation of the boss battles from the mainline games. The new story paths weren’t bad, though I could’ve done with more story being included in each, and the addition of upgrades and special attacks helped mix things up, but the combat is still ridiculously simplistic compared to other fighters so there’s not much incentive to come back, especially as Capcom Arcade 2nd Stadium doesn’t include game-specific Achievements. I’ll give it this: the fights lasted longer and were more engaging this time, both because the Robot Masters seem tougher and have that “pinch” mode, and Dr. Wily’s sub-bosses were definitely more impressive this time around. But the uninteresting backgrounds, the lack of a tangible differences between the fighters, and the simplistic nature of the combat keep this from being the glow up it had the potential to be. It’s still a nice bit of cartoonish arcade fun, but you’ll quickly be returning to deeper, more challenging fighters after blasting through this one.

My Rating:

Rating: 3 out of 5.

Pretty Good

Did you ever play Mega Man 2: The Power Fighters in an arcade? What did you think to Duo and the added combat mechanics? Which of the new Robot Masters was your favourite? Did you like the addition of robot helpers? Would you like to see Mega Man tackle the fighting genre again someday? How are you celebrating the science-fiction genre this month? Whatever your thoughts on Mega Man 2: The Power Fighters, share then below and check out my other Mega Man reviews!