Game Corner: The Legend of Zelda: Breath of the Wild (Nintendo Switch)

Released: 3 March 2017
Developer: Nintendo EPD

The Background:
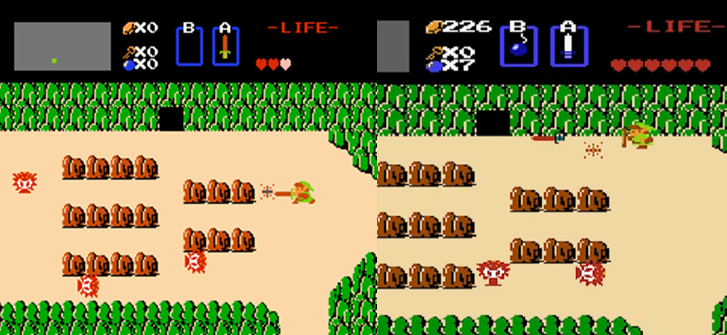
As I detailed in my review of the first game, The Legend of Zelda (Nintendo EAD, 1986) was an extremely popular title when it released on the Nintendo Entertainment System (NES) and sold over 6.5 million copies. This, of course, was only the beginning for the series, which has become one of Nintendo’s most lucrative and popular franchises of all time, which made a successful jump to 3D with The Legend of Zelda: Ocarina of Time (ibid, 1998) and has largely aimed to be bigger and better with each successive entry. Development of Breath of the Wild began sometime after the release of The Legend of Zelda: Skyward Sword (ibid, 2011), a commercial success that was easily the largest and most complex Zelda title released at that time. For the next title, though, series producer Eiji Aonuma wanted to completely rethink the conventions of the franchise and create a much bigger, more interconnected world. After developing an 8-bit prototype to experiment with physics-based puzzles, Aonuma encouraged his team to rethink the game’s approach to puzzles and to create a grand, open world adventure more akin to The Elder Scrolls V: Skyrim (Bethesda Game Studios, 2011). To further separate it from other entries in the franchise, it was also the first Zelda title to use voice acting in cutscenes (though Link remained unnervingly silent), the physics were purposely built to be the most realistic yet, and the game was specifically designed so that players were free to explore and experiment (they could even skip the story entirely, if skilled enough). Breath of the Wild proved immensely popular upon release; many reviewers considered the game to be a “masterpiece” and one of the most immersive videogames ever made. Breath of the Wild also won numerous awards, was the third-bestselling Zelda title at the time, and earned itself a direct sequel after Aonuma’s team found they had too many ideas for the game to be limited to downloadable content (DLC).

The Plot:
After a botched resurrection attempt leaves Ganon little more than a calamitous force of nature, Princess Zelda and Link, the warrior chosen to wield the legendary Master Sword, found their forces overwhelmed when Calamity Ganon corrupted the machines they built to repel him. After Link was gravely injured, Zelda placed him in suspended animation and magically sealed herself within Hyrule Castle to hold Calamity Ganon at bay. One hundred years later, Link awakens, his memories fragmented, and begins a quest to rediscover his destiny and end Calamity Ganon’s threat once and for all.

Gameplay:
The Legend of Zelda: Breath of the Wild is a massive open-world adventure game in which players are once again placed into the role of Link, the elf-like hero who continually finds himself resurrected and reborn time and time again throughout the ages to oppose Ganon’s evil. Unlike the vast majority of Zelda titles, players have no option to rename Link, making Breath of the Wild one of the few games in the series to actually use the name “Link” as the character’s name; similarly, Link forgoes his traditional Peter Pan garb of green tunic and hat in favour of a multitude of different clothing options and these are the first indicators that the game is very different from traditional Zelda games.

Link’s combat options are simple but quite varied and rely on timing and strategy.

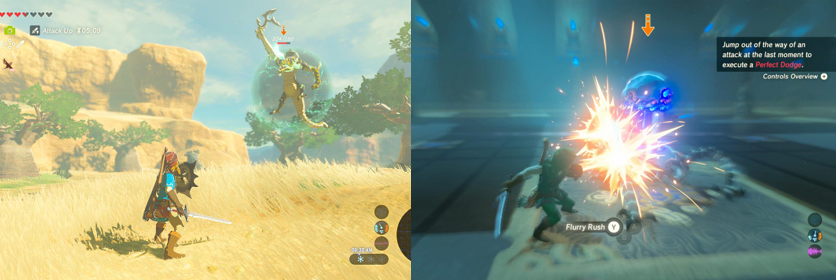
If you’ve played a 3D Zelda title before, particular Ocarina of Time, you’ll be immediately familiar with most of Breath of the Wild’s controls: players can target nearby enemies by holding ZL (sadly, there’s no option to target without holding the bumper), which will cause Link to immediately raise whatever shield he is carrying to block enemy attacks or reflect certain attacks back by pressing A. Pressing Y will allow Link to attack with his equipped weapon and pressing ZR sees him whip out his bow and shoot arrows for a ranged attack. Returning from Skyward Sword is the stamina wheel, which depletes when you hold B to sprint or when swimming, gliding, or climbing one of the game’s many hills and mountains. In a major addition to the series, Link can now jump whenever he wants with a press of the Y button or charge up a spin attack by holding down X and perform some jumping strikes and dodges just like in the Nintendo 64 games; he can also throw his weapons and perform a flurry attack by dodging incoming attacks at just the right moment.

You can’t just rush into battle or areas as your weapons will break or burn up if you do.

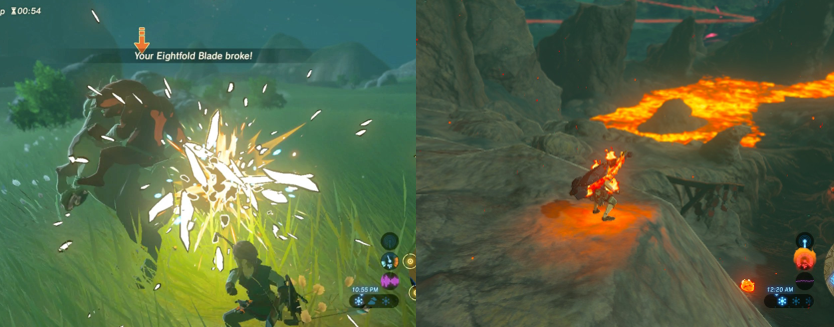
The biggest addition to the combat is the inclusion of destructible weapons; every single melee weapon, shield, and bow you acquire in the game has a limited number of uses and, the more you use them, the more you’ll wear them out. Weapons that are made out of wood will also catch fire (causing Link to catch fire and take damage in the process) as well and many shatter in only a single use, meaning that Breath of the Wild’s combat is much more about strategy and it is often far better to simply avoid or run away from battles rather than break your more powerful weapons. Honestly, it’s an annoying and frustrating system that means you’re almost constantly worrying about the status of your weapons and being prepared for the game’s more challenging obstacles. I feel like there could have been a middle ground where there are some weapons (wooden ones, for example) that break and some situations where you lose them (enemies could knock your shield out of your hands with larger weapons, for example, and weaker steel swords could shatter on stronger rocks) but, instead, every single weapon has a finite number of uses, which made me very anxious and made combat more exasperating than enjoyable. Combat is made all the more troublesome by the fact that Link is the weakest he has ever been; as always, you begin the game with three hearts of health and, because the game is so big (even the relatively enclosed opening area), it’s very easy to be overwhelmed by even the bog standard Bokoblin enemies. Unlike in previous Zelda titles, defeated enemies will never drop health-restoring hearts, meaning the only way you can replenish your health is by picking up edible items (apples, acorns, meat, and so forth) and eating them. Indeed, the key to bolstering Link’s stamina, health, and attack prowess is to make use of the game’s cooking mechanic, whereby Link can toss up to five items into a cooking pot and brew up dishes or elixirs to increase his maximum hearts, his stamina, attack and/or defence, his stealth prowess, or resist certain elemental conditions. The only way to permanently increase your hearts is to conquer the game’s four dungeons (known as “Divine Beasts”) or acquire Spirit Orbs from the many Ancient Shrines scattered (and, often, hidden) throughout Hyrule.

Track down and complete Shrines to earn Spirit Orbs and increase your health and stamina.

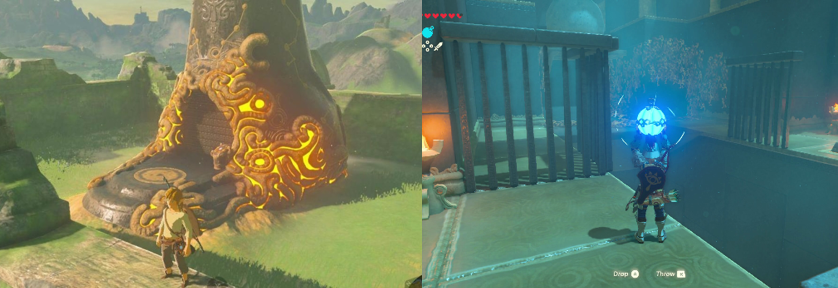
You’ll want to hunt down and visit these Shrines on a regular basis as, since the game has only a handful of traditional dungeons, these make up the bulk of your concern and are the only way of increasing your maximum health and stamina and, thus, your chances of success. Each Shrine also acts as a fast travel point once activated, allowing you to quickly teleport all across the vast kingdom of Hyrule from the main menu, but their primary function is to bestow Link with four (technically five, I guess) Shiekah Runes that are used to conquer puzzles both in and outside of the Shrines. These puzzles may be simple things such as activating switches, creating ice platforms to cross water, lifting metallic objects, creating electrical currents, or floating along on updrafts but they can also be extremely challenging combat scenarios against spider-like Guardian Scouts. As you progress and explore further, you’ll come up against some truly head-scratching puzzles that force you to freeze objects and attack them to build up kinetic energy, navigate through mazes, retrieve orbs from dangerous environments, and make full use of your inventory and abilities in order to solve them. Thankfully, the Shrines don’t need to be beaten to activate them as fast travel points but it’s highly recommended that you beat as many as you possibly can as you’ll refill your health upon successful completion and move one step closer to increasing your maximum health and stamina. And you’ll definitely need to do this as, while you can head straight to Hyrule Castle to take on Calamity Ganon without tackling the game’s story, I really wouldn’t recommend it as I had a great deal of difficulty taking on even minor enemies and puzzles with the game’s mechanics. Breath of the Wild throws absolutely everything in your path to keep you from succeeding: at night, Stalfos and similarly-skeletal enemies will rise from the ground to chase you down; every so often, gameplay is rudely interrupted by the rising of the Blood Moon, which resurrects all enemies you’ve defeated since playing; and you’ll even be beset by a variety of environmental hazards.

Rupees are hard to come by and items have a steep cost, keeping you on the back foot.

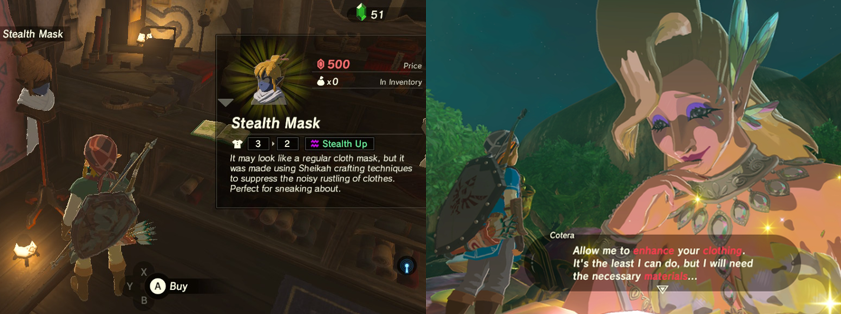
When climbing higher, the air temperature will drop, causing Link to shiver uncontrollably; when exploring Death Mountain, the air becomes unbearably hot, causing his wooden items to combust; and Hyrule is plagued by wind, rain, and thunderstorms that will causing Link to be struck by lightning if he’s got anything metal equipped! In many of these situations, Link will steadily lose hearts and be at great risk, meaning that you need to cook up something to stave off these debilitating effects or acquire, or buy, clothing to resist the elements. As in all Zelda games, Link can purchase new items using Rupees; however, similar to how enemies don’t drop hearts, it’s very rare that defeated enemies will drop Rupees. As a result, the main way you’ll earn Rupees is by finding them in chests (usually after defeating an enemy encampment) or selling some of the many items and minerals you pick up along the way. Sadly, the best armour and more useful elixirs and weapons carry a high price tag, meaning it’s quite difficult to save up enough to buy what you want (it doesn’t help that the four Great Fairies, who will upgrade your clothing using monster parts, charge up to 10,000 Rupees just to “restore their power”). As a result, like with the combat, it feels like you’re constantly on the back foot as you never have enough money, never have enough ammo, and your weapons could break at any moment, all of which makes it a very stressful experience at times as you might spend Rupees to replenish your health at an Inn only to be decimated by a random Guardian out in the field.

Paragliding and climbing are two pivotal mechanics in the game and essential for traversal.

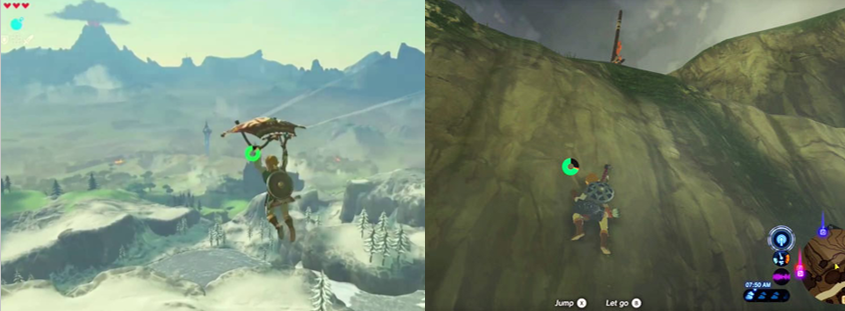
While Link can pick up a great many items, ingredients, and monster parts, his weapon inventory is extremely limited; sometimes, you may have to discard or use up a weapon to grab a better, more powerful one and the only way to increase your inventory slots is to randomly find Koroks hidden all over Hyrule. Each one you find gifts you with a Korok seed, which can be used to buy one extra slot at a time, with the cost of these inventory slots increasing each time. Two of the game’s more prolific mechanics are the paragliding (which I believe is a carry over from Skyward Sword) and climbing mechanics; once you acquire the paraglider, you can jump from higher areas or use air currents to glide along, covering vast distances (for as long as your stamina holds out), which is great for spotting Shrines or avoiding dangerous areas. Climbing is also heavily dependant on your stamina but it’s generally better to get to the high ground to find secrets and survey the area and you’ll have to climb up a number of Sheikah Towers in order to painstakingly map out the massive overworld map. Since Hyrule is the biggest it has ever been, Breath of the Wild can be extremely daunting; travel is helped not just by the fast travel system but also the inclusion of horses and other ridable animals. When you come across a horse, you should press the left analogue stick to make Link crouch and take slow steps to approach it undetected, then you can mount the animal and sooth it with L. Once you’ve calmed the horse, you can ride it to one of Hyrule’s many stables to register it (for a price, of course); while your horse can’t follow you everywhere (they can’t cross the Gerudo Desert, water, or rockier areas, for example), you can call it by pressing down on the directional pad (D-Pad) to whistle and recover them from a stable (so, if you’re in the far West but left your horse in the far East, you can visit a stable and they’ll bring your horse to you). Horses can be named and have different statistics that determine how tough and fast they are but there are a couple of things to consider: thanks to the game’s dodgy physics, it’s easy to fall into water with your horse, which will cause it to become trapped if there’s no way for it to return to shore, and horses can also be killed if they take too much damage (usually by Guardians), though a Great Fairy will resurrect them if this happens. Similarly, as I mentioned, you can’t take your horse into the desert, but you can temporarily commandeer a Sand Seal to quickly traverse the temperate sandstorms.

A number of NPCs have side quests and missions for you, which can earn you a few nifty rewards.

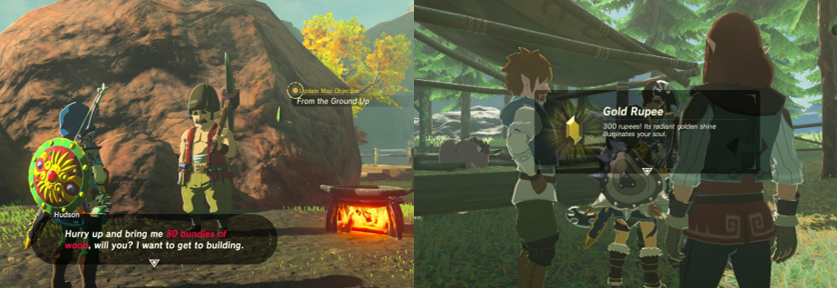
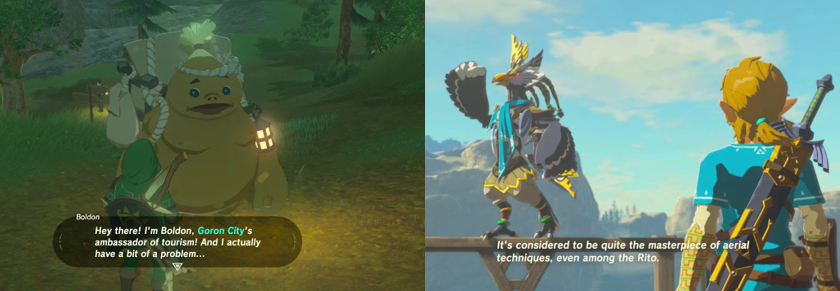
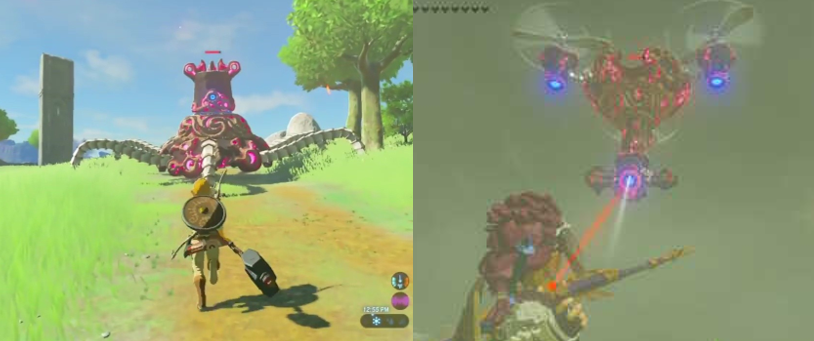
Link’s journey involves a great many side quests and interactions with the largest number of non-playable characters (NPCs) ever seen in a Zelda title; even when journeying from one town to another you may stumble across NPCs who have side quests and missions for you, ranging from collecting a number of items, photographic objects, defeating enemies, or bringing them something. In the game’s larger towns, you’ll find more substantial side quests, many of which are tied into the game’s main objectives; you can’t just climb up Death Mountain to reach the Divine Beast Vah Rudania, for example; you first have to cook up an elixir to resist the heat or complete a side quest to earn heat-resistant armour, rescue a Goron from captivity, and then make your way up the mountain shooting at the Divine Beast while defeating enemies and taking out drone-like Guardian Skywatchers first, all of which can take a good few hours. Every time you complete a main or side quest, you’ll be gifted with access to Rupees, weapons, or other items so it can be worth it to veer away from your main objective and help out the multitude of NPCs in their often strange and convoluted requests. There is, honestly, almost too much to do and see in Breath of the Wild: wild animals roam the countryside as often as enemies, many of which will randomly attack you but all of which can be killed off for ingredients; camp fires are scattered around, which allow you to advance time to avoid night-time attacks and weather; Beadle wanders around to give you the chance to buy supplies; NPCs randomly get attacked by monsters and will reward you with cooked dishes; towers can be climbed to find chests; enemies camp out all over the place; rafts often sit near bodies of water for you to sail to far off islands by using a Korok Leaf; chests must be magnetically pulled out from water, sand, and snow; and it’s super easy to stumble into ruins, small villages, and other areas of desolation or civilisation when trying to follow the main story. It can get a bit daunting at times: you’ve got the cooking, the breakable objects, and the Shrines to worry about, keeping you constantly on edge. Even when you conquer the Shrines, you need to travel to a town or village and find a Goddess Statue to pray at in order to receive your Heart or Stamina Container and, thanks to how easy it is for enemies to overwhelm you and defeat you, you’ll be seeing the “Game Over” screen over and over again without boosting your odds through food or clothing. Autosaves are frequent, however, and you can manually save whenever you like and it’s very easy to reload a previous save if you make a massive blunder along the way.

Graphics and Sound:
Full disclosure, the last 3D Zelda game I played with The Legend of Zelda: Twilight Princess (Nintendo EAD, 2005), which was the biggest Zelda adventure at the time so to say that Breath of the Wild blew my mind is an understatement. Without a doubt, the game is absolutely gorgeous to look at; the overworld is gigantic, ranging from wide, seemingly endless fields to the explosive, lava-filled region of Death Mountain, to the desolate wastelands of the Gerudo Desert and snowy mountain peaks, with some areas featuring more than one weather and seasonal effects to worry about (the Gerudo Desert, for example, can be boiling hot in the day and freezing cold at night).

Hyrule is full of the remnants of lost civilisations and the ruins of a time long forgotten.

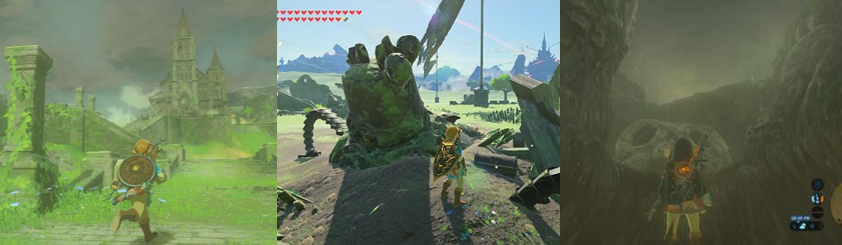
As soon as you step out of the Shrine of Resurrection, you can see the vastness of Hyrule but it’s not until you paraglide down into Hyrule proper that you see just how huge Hyrule now is. Without a horse or fast travel, it can take many actual, real-world minutes just to travel from one point to another and you’ll be beset by all manner of dangers along the way. Winds blow, rain falls, lightning strikes trees (and you…), and day turns to night turns to day in a constant cycle, all of which brings Hyrule to life as, perhaps, the most lively and realistic gaming environment I’ve ever seen. The remnants of Hyrule’s past glory and iconic locations from the Zelda series are everywhere, including destroyed outposts, the overgrown wreckage of the Temple of Time, and scattered, destroyed Guardians (be cautious when approaching for loot, though, as they’re often playing possum).

Each race of Hyrule lives in a distinct environment, which only adds more life and depth to the game.

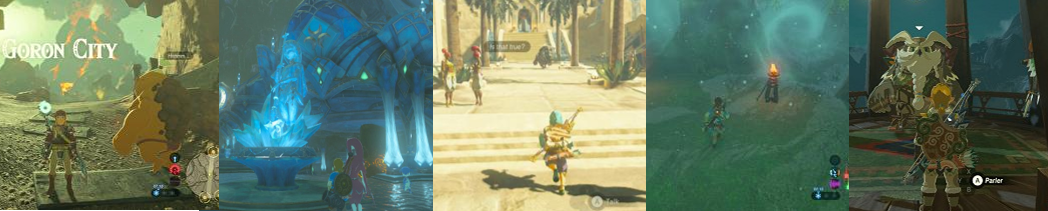
Like any good Zelda game, variety is the name of the game when it comes to Breath of the Wild; a degree of traditional society is retained throughout Hyrule thanks to places like Kakariko Village and Hateno Village but you can also visit the rock-eating Gorons, the sea-faring Zoras, the woodland imps known as Koroks, the desert-dwelling Gerudos (a society comprised entirely of women), and the man/bird hybrids the Ritos. Each one has their own visual style and a lives in a distinct area: the Gorons dwell in and around Death Mountain, working in mines nearby; the Zora’s live in the gorgeously ornate Zora’s Domain, which is full of water and waterfalls; the Rito are surrounded by snow and mountains; the Koroks are hidden deep within a dense, misty forest that will kick you out if you wander in unaided; and the Gerudo dwell within a desert town and set the guards on any males who dare intrude.

Dialogue is given through text boxes and voiced cutscenes, though Link stays eerily silent.

Character models are of equally high quality; they don’t necessarily move all that much but they are generally quite varied and full of life and personality. Each of Hyrule’s races can be found all over the land as well, with Gorons wandering around selling wares, Zora’s popping up in bodies of water, and Korok sprouting out of the most random of locations. Each one communicates using speech bubbles and text but, when the game switches to its higher quality cutscenes, characters will also talk as well. Link, however, remains silent which, to be honest, is a bit weird as the game’s story and script is often geared towards characters specifically addressing him or asking him questions, which makes his silence really stand out. Oddly, many conversations you have with NPCs give you the option of one or more answers, implying that Link can speak so it just feels like the game could have been tweaked a little to cover for his silence in speaking cutscenes. Cutscenes come in a variety of forms, from in-game graphics, higher quality cinematics, and distorted flashbacks to Link’s past as he uncovers more of his memories. Thankfully, you can speed up text scrolling with B and skip cutscenes if necessary and, often, the game skips over them for you (such as if you fall to a dungeon boss, for example). Musically, Breath of the Wild is the most elaborate of the series I’ve ever seen; a lot of the time, music gives way to ambient effects and slowly creeps in or suddenly kicks up to set the tone of an area or emphasise an enemy attack. It’s a grandiose, operatic score that escalates as you conquer the four Divine Beasts, defeat Ganon’s underlings, and take on the calamitous King of Evil himself in the finale, when the traditional Zelda theme kicks in with suitably dramatic impact.

Enemies and Bosses:
Hyrule is, as always, also populated by a wide variety of enemies, all of which freely roam its fields, mountains, and wastelands and will attack you on sight if they spot you, often calling for reinforcements if near an enemy camp, and all of which will drop weapons and monster items for your use. Some of the basic enemies include gelatinous Chuchus and bat-like Keese, which can be protected by elemental conditions, but, primarily, you’ll be fighting different varieties of Bokoblins. These goblin-like creatures like to set up camps, shoot at you from on high with arrows, and attack with spears and swords; they’re the most basic of enemies but are formidable through their sheer numbers and your comparative weakness and even rise from the grave to attack you in skeletal forms. They’re often accompanied by the much larger Moblins, which attack with kicks and bigger, longer weapons, but you’ll also have to contend with a variety of Lizalfos, who are often camouflaged or leap out at you from hiding, damn annoying Octorocs, who pop out from water to spit rocks at you that always seem to hit, and robe-clad Wizzrobes, who dance around mockingly shooting elemental magic at you and teleporting all over the place. Easily the most daunting of the regular enemies are the Lynels; these centaur-like creatures are basically like mini bosses and you won’t actually be able to defeat one for a long, long time as they’re just too tough. Once you get a healthy stock of hearts, food, and more powerful weapons (particularly the Master Sword), though, you’ll stand a much better chance of besting these ridiculously powerful enemies.

Guardians are a significant threat and extremely difficult to destroy or escape from.

However, there are only a handful of Lynels to worry about; the Guardians are far more frequent and troublesome as they often sit amongst the wrecked shells of their kind and fire what basically amounts to an instant-kill laser in your direction. At first, you have no chance of destroying these bastards and they’re only found in a handful of places but, once you conquer the Divine Beasts (and when you storm Hyrule Field on the way to Hyrule Castle), they’ll start to scuttle around the overworld in regular patrols. If they spot you, do everything you possibly can to avoid them, even if it means going far out of your way, and don’t even think about trying to outrun them without a horse! They can be defeated using special weapons and by targeting their limbs and eyes but, most of the time, it’s a fool’s errand and it’s simply easier to flee for your life! The flying variants are much easier to take out in comparison but once you see they’ve got a lock on, make sure you pace yourself to sprint away at the last second or else you (and your horse) will be toast.

The Divine Beasts need to be quelled before you can explore and restore them.

As there are only four dungeons in the game, Breath of the Wild is quite light on actual bosses; you will, however, have to do battle with Master Kohga of the desert-dwelling Yiga Clan in order to reach Vah Naboris, the Divine Beast of the Gerudo Desert. Kohga likes to hurl boulders your way but you can easily stun him with arrows and use Magnesis to repel his attacks in the brief windows of opportunity you get; honestly, sneaking through the clan’s hideout was more troublesome than the fight itself. The reverse is true of the dungeons, which focus on annoying puzzles and are largely devoid of enemies and populated mainly by “Malice”, a health-draining black/red goo that must be dispelled by shooting an eyeball. Just getting to the Divine Beasts and, thus, their bosses is like a boss battle in itself; each one can be tackled in any order and all of them must be quelled before you can enter them. I took on the Divine Beast Vah Ruta first, which spits ice projectiles at you that must be smashed with your Cryonis ability before using the bow and a special Zora outfit to swim up waterfalls and destroy the cannons on the Divine Beast. Similarly, Divine Beast Vah Rudania needs to be shot at by loading cannons with your bombs and a particularly hardy Goron. To bring down the Divine Beast Vah Medoh, you must protect yourself from the frigid cold and use the paraglider to destroy cannons on the Beast’s sides with Bomb Arrows while the Rito, Tiba, draws its fire away from you. Easily the most difficult of the Divine Beasts to bring down, though, was Vah Naboris, which forces you to stay within a protective field and surf, almost uncontrollably, across the sand using a Sand Seal while shooting a limited supply of Bomb Arrows at its feet.

Waterblight Ganon attacks from a distance with a deadly spear and ice blocks.

Inside each of the Divine Beasts, you must first rotate, tilt, and manipulate the gigantic structures to activate five terminals and then you’ll do battle with a “phantom” aspect of Ganon, each of which sports two attack phases that will truly test your mettle, especially in the early going and if you’re underequipped. I first took on Waterblight Ganon and it was like hitting a brick wall! Teleporting around the arena and attacking with a long spear, Waterblight Ganon can be hurt with Bomb Arrows but can end you pretty quickly with just a couple of hits. In the second phase, the arena floods and you’ll need to shatter Waterblight Ganon’s ice blocks with Cryonis and dodge its thrown spear, again using Bomb or Shock Arrows (or Ancient Arrows if you manage to get some) to deal the most damage. This was a tough hill to climb for me and the first time I had to go off and cook up some defensive food to give me an edge as its attacks were too much at the time. Next, I took on Thunderblight Ganon, who was also quite the formidable foe thanks to his incredible speed! Thunderblight Ganon throws a few electrical balls your way, which are easy to dodge while firing arrows at him, but you have to have your shield up pretty quick when he dashes in for the attack or else you’ll miss your best opportunity to strike him. In the second phase, he drops a number of metal pillars into the arena and then electrifies them; you need to stay the hell away from these, grab one with Magnesis, and move it near him so he shocks himself, all of which is really hard to do as the camera and controls really get in the way here. This only stuns him, though, and he then follows up with even faster, more frequent attacks and you absolutely must make sure that you don’t have any metal weapons or armour equipped or else you won’t last long at all and eat or drink some concoctions to increase your defence, attack, and resistance to electricity.

Fireblight Ganon wields a massive sword and tosses a huge fireball your way.

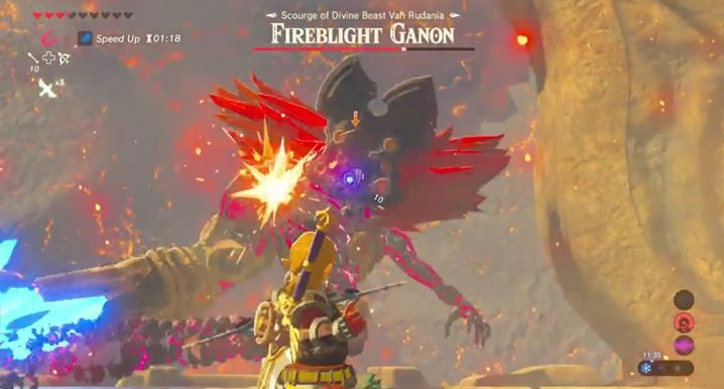
I then decided to give myself a break and tackle Fireblight Ganon next; this battle takes place in a much bigger arena, making it a bit easier to keep your distance and catch your breath, though Fireblight Ganon wields a massive sword so it helps to stay up close to him. In the second phase, he launches a massive fireball your way so be sure to hide behind the main terminal in the arena; you should also use this for cover if he busts out his Guardian laser and be sure to unequip any wooden weapons and utilise any Ice Arrows or ice-themed weapons you have to hand (though I also did some decent damage with Shock Arrows when I ran out of Ice Arrows). Finally, there’s Windblight Ganon which, again, takes place in a much bigger arena that is full or destructible columns that you can use for cover. Windblight Ganon hovers out of reach of your sword strikes and rapidly shoots at you with a laser pistol but you can bring him down using air currents to glide upwards and fire a few Bomb Arrows at him. In the second phase, he throws out tornados to wreck the arena and also sends out four drones to heavily magnify his laser attacks but I found it easier to simply concentrate on attacking him whenever possibly, scoffing down food as and when necessary, rather than be distracted by the drones.

Calamity Ganon is a massive, spider-like monstrosity that borrows attacks from other bosses.

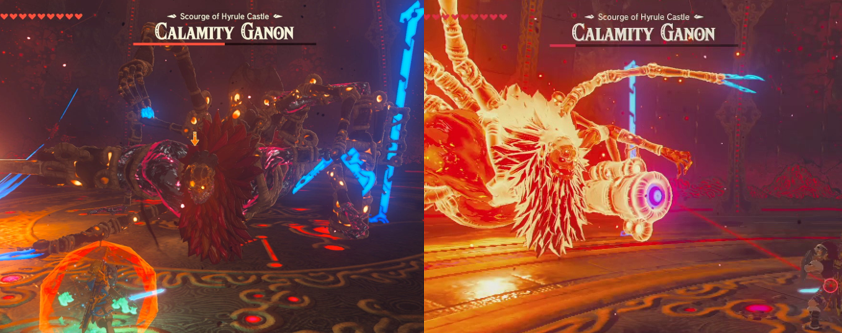
With the four Divine Beasts restored and taking aim at Hyrule Castle, you must then storm the Malice-ridden castle itself, which acts as a quasi-dungeon of sorts and is full of Guardians, enemies, and treasure, with only one Shrine for fast travel. There is, however, a shortcut up the West-side waterfall that takes you to the inner sanctum, where Calamity Ganon dwells. A monstrous, nightmarish amalgamation of the four phantoms, Calamity Ganon is the most horrific form I’ve ever seen Ganon in but this fight can be tipped greatly in your favour by defeating the other bosses as the Divine Beasts will drain half of Calamity Canon’s health. If you are stupid enough to go straight to the final boss without conquering the dungeons, or with less than four beaten, you’ll have to fight Ganon’s phantom forms before you can even take on Calamity Ganon so I really wouldn’t recommend going into this with just a stick and your undies. Calamity Ganon mixes and matches attacks from the other bosses, swinging a gigantic, flaming sword at you, causing flames and fireballs the scatter across the arena, throwing a spear at you, and blasting at you with a Guardian laser. I rushed up close and went to town on him as quickly as possible with the Master Sword (which doesn’t lose its charge in Hyrule Castle), dodging and hitting flurry attacks if I was lucky enough, and shooting at him with Ancient Arrows when he scuttled up the walls. In the second phase, Calamity Ganon protects himself in an impenetrable, flaming shield and is completely immune to your attacks; he ups his fire game with Fireblight Ganon’s fireball and also conjures Windblight Ganon’s tornados.

Ganon transforms into a rampaging beast and must be put down with some well-placed arrows.

In this phase, you really need to have mastered the “Perfect Guard” move (hold ZL to target and, right before an attack hits, press A to knock it away/back with your shield) as the only way to stun Calamity Ganon and thus damage him is to reflect his Guardian lasers back at him, which I found to be incredibly difficult to get right. Once defeated, Calamity Ganon transforms into a gigantic, Malice-infused, boar-like creature, Dark Beast Ganon, and rampages across Hyrule Field! Similar to the final boss of Twilight Princess, this battle takes place on horseback and the hardest thing about it, really, is keeping control of your horse as the camera and controls make manoeuvring around Ganon troublesome at times; touching Dark Beast Ganon will hurt you and cause you to be knocked from your horse so keep your distance and stay away from his face to avoid his big laser attack. When Zelda gives you the nod, golden symbols will appear on Ganon’s body and you must shoot at them with the Bow of Light (which, thankfully, has infinite ammo). When Dark Beast Ganon’s health is down to one sliver, a glowing weak spot appears on his forehead; now you must use the updraft from Ganon’s laser attack to glide into the air and use your arrows to strike the Malice eyeball and finally defeat Ganon and be treated to the game’s anti-climatic ending.

Power-Ups and Bonuses:
Breath of the Wild has an abundance of items, weapons, pick-ups, and power-ups for you; an overabundance, it seems at times, as you can pick up a variety of monster parts, minerals, food, and weapons to be equipped, sold, or cooked for a variety of effects. With all the food, meat, and fish (thankfully there’s no fishing mini games this time around) in the game, you can either eat some of them for a quick health boost or cook them up in a variety of combinations for stat boosts and extra help. I may have missed something but it doesn’t seem like there’s a way to keep track of your recipes so I kind of just tossed them in a pan and hoped for the best. When around a Great Fairy Fountain, you can sneak up on fairies and grab them, which is super helpful as they’ll restore your health a bit when all your hearts are empty. As you explore, defeat enemies, and open chests, you’ll acquire different melee weapons; these come in all shapes and sizes, from simple branches and torches, to skeletal arms, to rusty swords, double-handed blades and axes, and even elemental weapons. You can also grab Magic Rods for limited elemental attacks and a lot of these weapons have buffs applied to them that increase their attack and durability. Each handles differently as well; bigger weapons will deal more damage and break tough rocks but are painfully slow and you can’t use your shield at the same time. Eventually, you’ll be able to acquire the legendary Master Sword but, to even pull it from its pedestal, you’ll need at least thirteen permanent hearts (temporary hearts are no good) to yank it free and, though it’s the only weapon in the game that doesn’t break and you can shoot beams of energy if you have full health, it does run out of energy and become unusable for a few minutes.

Sadly, no shield or bow is as durable as the Master Sword as they’ll all eventually break.

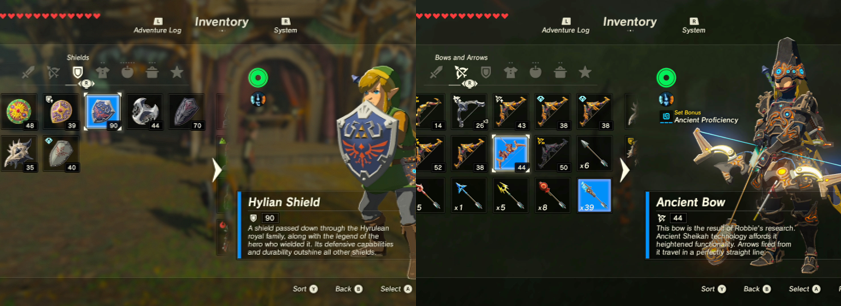
Still, it’s doing better than the game’s shields; again, these come in all shapes, sizes, materials, and with different buffs but the difference is that you can’t ever acquire a permanent shield. The best you can hope for is to liberate a powerful shield from Hyrule Castle but I found I was too afraid to equip it in case I wasted it defending against a regular Bokoblin attack. You can also acquire a number of different bows; some of these shoot further than others or even shoot multiple arrows at once, which I found to be more of a hinderance than a help as I was constantly running low on arrows. You can pick up elemental arrows (Fire, Ice, and Shock), which are super useful against water and fire enemies, Bomb Arrows (which are great for rock-based enemies and bosses), and the super powerful Ancient Arrows. Any Ancient gear is the most powerful in the game, especially against bosses and the Guardians, but they’re extremely rare and expensive. You’ll also acquire various items of clothing, each of which has different benefits; some protect you from extreme cold, heat, and lightning, some allow you to swim faster or up your defence, attack, or stealth, and others are more cosmetic or needed to enter specific areas. You can mix and match them, pay to dye them different colours (which is largely pointless), and upgrade and strengthen them at a Great fairy Fountain. Some are acquired through Shrines and side quests and the only way you’ll ever get Link’s trademark outfits is if you’re patient, skilled, and dedicated enough to conquer all one hundred and twenty Shrines (or fork out for special Amiibos).

The various Runes replace traditional magic and allow you to progress and solve puzzles.

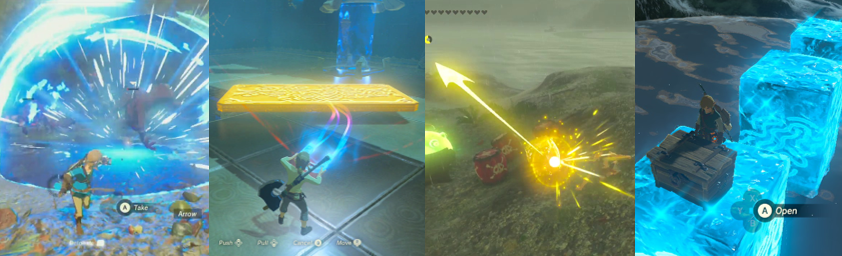
Your first task at the start of the game is to power up your Shiekhah Slate (an obnoxious device that resembles a tablet or Nintendo Switch) with four Runes: the Remote Bomb allows you to throw or place either a spherical or square bomb; Magnesis allows you to push, pull, and move around magnetic metal objects; Stasis freezes certain objects in place and allows you to attack them to build up kinetic energy and move them about; and Cryonis allows you to form and shatter ice blocks. Later, you learn another Rune ability, Camera, which allows you to take photographs to solve side quests and such and each of these can be upgraded to make them more powerful or useful. Since Breath of the Wild is one of the few Zelda games to not give you a magic meter or other actual items (like the hookshot), these Runes take their place and the bombs are especially helpful for dealing some extra damage and saving your melee weapon from wearing out as you can throw an infinite supply and a limited only by a brief bit of cooldown.

Link earns helpful temporary abilities by taking down the Divine Beasts.

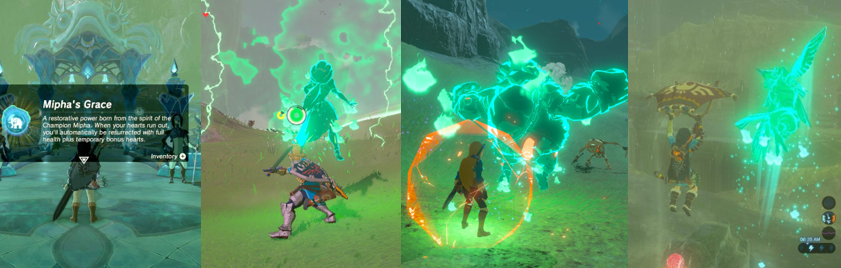
Similarly, every time you conquer a Divine Beast, you are awarded with a Heart Container and a key item that will greatly assist you in your quest: Mipha’s Grace is one of the best as it will completely restore your health and award you with additional temporary hearts upon death; Urbosa’s Fury allows your spin attack to unleash an electrical blast, which can be great for stunning enemies; Daruk’s Protection protects Link with a protective aura for as long as ZL is held down and will parry incoming attacks to give you a window to attack; and Revali’s Gale allows you to charge up a jump by holding down Y and blast you high into the air with an air current. You can activate and deactivate these at any time but, honestly, I don’t know why you would do that; each also comes with a limited number of uses and a cooldown period, meaning you have to wait about ten minutes before you can use them again.

Additional Features:
As I mentioned before, there are numerous side quests in Breath of the Wild and one hundred and twenty Shrines to find and conquer. The rewards for these vary from a few Rupees to new weapons and armour and, generally, it’s not always worth your time completing every single one of them unless you’re aiming for one hundred percent completion (which you thankfully don’t need to finish the game). However, the only way you’re going to see Link in his traditional outfit (or unlock the Dark Link outfit) is if you complete each of them; primarily, though, the side quests are there to emphasise how big and alive this version of Hyrule is and to strengthen your immersion in the game, so it’s entirely up to you, but it can lead to you acquire stronger weapons, armour, and some unique riding companions. Some of the Shrine challenges are very unique, though, like the one on Eventide Island that sees you stripped of all of your weapons and left to fend for yourself with whatever you can find as you strive to recover three orbs all without being able to save. Three others see you navigating labyrinths and one particularly long side quest sees you visiting specific areas of Hyrule to recover Link’s lost memories.

A number of sub-bosses and gigantic creatures can be found prowling around Hyrule.

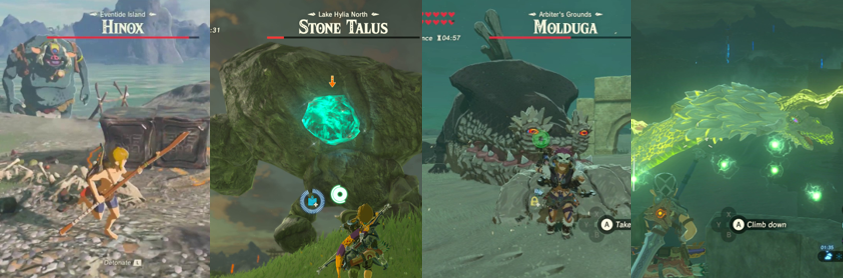
Hyrule is also populated by a number of gigantic sub-bosses; be wary when you approach a big stone as it will probably come to life as a Stone Talus, which can only be felled by bringing it to its knees and climbing up it to attack the weak spot on its “head”. Far more frequently, you’ll come across the massive cyclopean Hinox; these are much easier to take on and defeat as you can stun them with a shot to the eye and attack them at will but they do have a tendency to rip up trees to swing at you and chase you almost relentlessly. Out in the desert, you’ll also encounter the Graboid-like Molduga, which burrow under the sand to attack you and are best tackled with your bombs. While you’ll also encounter three elemental dragons in your travels, these cannot be defeated and are simply there to cause destructive weather occurrences and to be mined for rare materials. I mentioned before that the ending is very anti-climatic and it’s true; it’s much more sombre and reflective than the massive celebration seen at the end of Ocarina of Time, for example, and it kind of felt like the developers either ran out of time or didn’t put much effort into the ending as the journey was the primary focus. When you finish the game, your save file gets a star marked on it but that’s it; you can return to your last save (which should be an autosave right before the final fight) so you can go after anything you’ve missed along the way but the only way you’re going to get additional content is if you shell out for the DLC. The expansion pass adds new gear, enemies, and challenges to the game and also includes an even harder story mode to play through but, since I struggled so much with the base game, I don’t think I’ll be paying for this any time soon.

The Summary:
There’s no denying that The Legend of Zelda: Breath of the Wild is a stunning achievement for the series, and in videogaming; the game is massive, full of life and variety and things to do, and will keep you busy for hours on end (it took me at least thirty days just to clear the main story objectives). Never has Hyrule been bigger and more immersive; just travelling a short distance can be an adventure in itself and you’ll find yourself fighting tooth and nail against even the most basic of enemies for the smallest rewards but even a bundle of five arrows can be a blessing when you’re running short on supplies. The graphics are more than impressive, bringing the Zelda concept truly to life in a way that titles like Ocarina of Time and Twilight Princess hoped for but could never quite achieve; it never feels like anywhere or anything is off limits and you can travel to the highest, furthest points as long as you’re properly equipped and prepared without worrying about barriers or invisible walls. And yet…Breath of the Wild is one of the most frustrating an inaccessible videogames I’ve ever experienced. There really is far too much going on, way too much to think and worry about, and the simplicity and accessibility of earlier Zelda titles has been lost in service of appealing to fans of games like Skyrim. I think if Breath of the Wild had focused on one or two mechanics, or tweaked some of them a bit, it would have been much more enjoyable for me; as I said, not having every weapon break would be a good start, as would putting less focus on cooking and eating food to survive. In many ways, it feels like the most Zelda game ever but also, paradoxically, the least Zelda game ever as all the recognisable elements are there but they’re so drastically different, and the game is so dramatically difficult at times, that it was actually a turn off. I was expecting an epic, sprawling, immersive adventure and Breath of the Wild delivers but every battle is a stress as you can easily die or break your coveted weapons in the smallest of skirmishes, some mechanics like jumping, the frustrating instances of forcing you to use motion controls, and climbing can be a bit janky, as can the in-game camera and physics, and I just felt like the game was punishing me over and over again. To make matters worse, I didn’t even feel a cathartic sense of accomplishment after beating the game since the ending was so anti-climatic; I just felt drained and relieved and I’m hoping that approaching the remainder of the game’s Shrines and side quests in a more casual manner will allow me to think more highly of the game in time.

My Rating:

Rating: 3 out of 5.

Pretty Good

What did you think to The Legend of Zelda: Breath of the Wild? Where would you rank it amongst all the other Zelda titles, specifically the 3D adventures? Were you a fan of the new elements introduced in this game, the breakable weapons, and the difficulty and challenge offered by the game? Did you every conquer all the Shrines and which was your most, or least, favourite? What order did you tackle the Divine Beasts in and which of Ganon’s phantoms was the most difficult for you? Which area and/or race of the game was your favourite and what was your preferred clothing and weapon load out? What did you name your horse? Which Zelda game is your favourite and why? Whatever your thoughts on Breath of the Wild, drop a comment down below.

Game Corner [National Pokémon Day]: Pokémon Shield (Nintendo Switch)


Upon the release of Pokémon: Blue Version and Pokémon: Red Version (Game Freak, 1996), a new craze swept through playgrounds across the world. An entire generation grew up either playing Pokémon, watching the anime, playing the trading card game, and watching the feature-length movies as clever marketing and a co-ordinated release and multimedia strategy saw Nintendo’s newest franchise become not just a successful videogame franchise but a massively lucrative and popular multimedia powerhouse that endures to this day. Accordingly, February 27th is now internationally recognised as “National Pokémon Day” and a day for fans of the long-running and beloved franchise to come together in celebration of all things Pokémon.


Released: 15 November 2019
Developer: Game Freak

The Background:
I’ve talked about Pokémon a few times but, until now, I haven’t actually sat down and done a proper review of one of the games; as I’ve indicated previously, Pokémon was an instant cultural phenomenon back when the games first dropped, taking playgrounds by storm and dominating almost every aspect of my generation through a slew of merchandise. I remember being so adamant about purchasing Pokémon: Blue Version that I bought it brand new rather than getting a cheaper copy of Pokémon: Red Version and my friends and I routinely played the game at break times at school or on the Nintendo 64 thanks to Pokémon Stadium (Nintendo EAD/HAL Laboratory, 1999). Although the developers originally intended my favourite games/generation of Pokémon, Pokémon: Gold Version and Pokémon: Silver Version (Game Freak, 1999) to be the final entries in the series, Pokémon videogames continued to be developed, with new features, improved graphics and mechanics, and a whole bunch of new Pokémon being introduced in each generation.

Pokémon‘s home consoles games largely diverted from the RPG formula of the main series.

However, in all that time, we never really got a proper version of Pokémon on home consoles; they were always spin-offs, battling games, or neutered versions of the main role-playing experience, which remained exclusive to Nintendo’s handhelds. Nintendo’s development of their Switch console changed that, however; thanks to the Switch’s unique ability to be both a handheld and a home console, players were finally able to experience a main series Pokémon game in glorious high definition with the release of Pokémon: Let’s Go, Pikachu! and Pokémon: Let’s Go, Eevee! (ibid, 2018) Though remakes of the first Pokémon games, the Let’s Go games (like pretty much all Pokémon games) proved both successful and popular and, eager to keep their unstoppable cash-cow afloat, Game Freak began developing an original main series Pokémon title for the Nintendo Switch. This time, much to my interest and appreciation, the games would be set in a new region that was heavily inspired by locations in the United Kingdom, featured the return of mechanics from previous Pokémon games alongside some all-new ones, and would later expand upon its limited roster of Pokémon through a number of expansion packs.

The Plot:
After years of waiting, the time has come for you and your childhood friend, Hop, to receive your very own Pokémon from Professor Magnolia. After Hop’s brother, Pokémon League Champion Leon, endorses your entry into the Gym Challenge, you prepare to journey across the region of Galar to earn a spot in the Pokémon League but, after a fateful encounter with the legendary Zamazenta, you also stumble upon a plot to use Galar’s precious Wishing Stars to cause Pokémon to enter a rampaging Dynamax state and bring about the apocalyptic “Darkest Day”!

Gameplay:
I had (have? It’s honestly hard to tell these days) a friend once who told me that the reason he fell out of playing Pokémon was that the games hadn’t really changed since the days of Blue and Red. Personally, I find that a comfort; it means that if you haven’t played a Pokémon game in some time, perhaps years, you can still pick up a title like Pokémon Shield and know exactly how to play as the core gameplay mechanics are basically identical to how you remember them. Accordingly, Pokémon Shield is a role-playing game (RPG) in which you play as a young, up-and-coming Pokémon Trainer; as you explore Galar with your chosen Pokémon, you’ll encounter wild Pokémon which must be fought and defeated (or captured to be added to your team) and other Pokémon Trainers.

Battle other Pokémon to level-up, learn new moves, and increase your Pokémon’s stats.

Battling other Pokémon earns your Pokémon both experience points (EXP) and effort value points (EVP); you can track your EXP using a handy gauge beneath your Pokémon’s hit point (HP) bar and, once it is full, your Pokémon will grow a level and its statistics (Attack, Defence, Speed, and the like) will grow depending on what sort of Pokémon you battled and the otherwise-hidden EVP you gained from each battle. When your Pokémon level-up, they may learn new moves; since each Pokémon can only know four moves at a time, it pays to think ahead about what moves you want your Pokémon to have. For example, you might have a Pokémon with a high Special Attack stat; if this is the case, it’s probably better to not load it up with Attack moves as it won’t deal as much damage. Conversely, your Pokémon may have a low Defence or Speed stat so you might want to invest in a few moves that raise these stats in battle (Iron Defence, Dragon Dance, etc). Through proper EVP training, though, you can tailor Pokémon to battle how you wish but it does take more effort; personally, I like my Pokémon to be proactive and aggressive, with a range of attacks suited to their strengths rather than worrying about raising stats. In the course of levelling-up, your Pokémon may also evolve; this process allows some Pokémon to assume an entirely new form, gaining significant stat boosts at the same time. Evolution is sometimes tied to other factors, such as using special stones, bonding with your Pokémon, having them hold a special item, the weather and time of day, or through trading them with a friend. Battling, capturing, and levelling-up Pokémon is essential not just to making your team stronger and earning Pokémon Dollars to spend on various items but also to complete the PokéDex. Each time you encounter a Pokémon, some of its data will be recorded so you know where to find it and what “Type” of Pokémon it is but you’ll only complete its PokéDex entry by capturing it yourself.

Always ensure that you have the type advantage and make full use of your Pokémon’s abilities.

I mentioned Pokémon “Types” just then so I’ll get into that now; each Pokémon can be either one or a combination of two types and using type advantage is key to becoming a stronger and more capable Pokémon Trainer. Because of the tried-and-tested type mechanic, Pokémon battling is, essentially, like a game of rock, paper, scissors: Fire-type Pokémon are super effective against Grass- and Ice-types, for example, while Grass-types have the edge over Water- and Rock-types, and Water-types will make short work of Fire- and Ground-types. It’s a simple system that you can usually gauge by considering the colour and location of the Pokémon you encounter (a blue-coloured Pokémon on or in water is probably going to be a Water-type, for example) but one neat addition to this game is that the next time you encounter a Pokémon, whether you’ve caught it or not, the game will tell you which of your moves are effective or ineffective against it, making battling much less a case of trial, error, and experience. Being that Game Freak love to mix things up with each new generation and region, familiar Pokémon have also been given new typings in Pokémon Shield (Rapidash, for example, is traditionally a Fire-type Pokémon but is now a duel Psychic/Fairy-type Pokémon so it’s better to use Ghost- or Dark-type attacks) and, as is the standard now, Pokémon also come with different “Natures” and “Abilities” which give them slightly different traits or abilities in battle (such as raising stats causing or removing weather effects, or powering up certain moves).

Inflate your Pokémon to giant size with the new “Dynamax” mechanic.

Pokémon Shield’s big new thing is the “Dynamax” mechanic and the game’s Wild Area; normally in Pokémon games, you travel from town to town using “Routes”, passing through caves and forests and such along the way and, while you still do that here, Pokémon Shield introduces a vast open area filled with a variety of wild Pokémon and shifting weather patterns. Here, you can catch and train up your team but you’ll also encounter glowing Pokémon Dens; if these have a shaft of red light coming from them, you can participate (alone or with computer-controlled or online players) in a “Max Raid Battle” against a Pokémon that has entered the Dynamax state and grown to gigantic size. In these battles, which also occur in each of the game’s Gym Leader battles, you have the opportunity to Dynamax one of your own Pokémon; essentially the same thing as “Mega Evolution” from the previous games, Dynamaxing may allow you to perform more elaborate moves but it only lasts a few turns and you can just as easily defeat a Dynamax Pokémon with a normal Pokémon. It adds a slight wrinkle to the usual gameplay, though, as you’ll earn better rewards from such battles, like Technical Machines (TMs) and Technical Records (TRs) to teach your Pokémon new moves, special stones and items, and Watts (which is, annoyingly, a separate form of currency).

It’s easier than ever to find, battle, and capture wild Pokémon.

I glossed over it earlier but, as always, one of the main aims of the game is to capture Pokémon; you won’t get very far without a diverse team of at least four different Pokémon types (though it is conceivable) so it’s highly advised that you catch a variety of Pokémon and teach them diverse moves to make things easier on yourself. Thankfully, you can now see wild Pokémon on the map, meaning random battles are a thing of the past; you can choose to avoid or run past wild Pokémon, sneak up on them to battle rarer ones, or whistle or ring your bike’s bell to attract them, which is all very helpful if you’re in a rush or want to grind for levels. Pokémon are caught in the usual way; you battle a wild Pokémon until its HP is low (preferably in the red and with a status effect (paralyse, sleep, etc) inflicted upon them) and then throw one of the game’s many different Poké Balls. The lower the level of the Pokémon, the easier it is to catch and you’ll be able to catch higher level Pokémon as you defeat the Galar Gym Leaders; however, it has to be said that capturing Pokémon has become pathetically easy over the years. Back in the day, I would waste my entire stock of Poke Balls on some Pokémon but, now, you can often capture a Pokémon with your first ball without even weakening it, which severely reduces the fun and challenge of the game.

There’s so much hand-holding that it’s almost insulting.

Speaking of which, Pokémon Shield has to include some of the most annoying and unnecessary hand-holding I’ve ever experienced; Pokémon games have often employed mini tutorials and hand-holding techniques but Pokémon Shield really takes the cake as you’ll be constantly lectured on how to battle, how to capture Pokémon, what each building is in a town, where to go, and what to do. There’s never any danger of you getting lost or not knowing where to go next as characters spell it out for you, force you where you need to go, block your exit until you’ve fulfilled an objective, and your handy-dandy map constantly displays your current objective and where you need to go. I’m sure it’s helpful for young or new players but I’ve been playing Pokémon since the start so it would have been nice to be able to turn this feature off.

Graphics and Sound:
Thanks to the power of the Nintendo Switch, Pokémon has never looked better; no longer forced into the classic top-down RPG perspective, the game makes full use of its engine to display a number of dynamic camera angles (even giving you full camera control in the Wild Area), and every time you visit a new town or area, you get a nice little look at what the location has to offer.

Locations draw heavily from the varied architecture and landscapes of the UK.

Locations are based on those from right here in the UK; accordingly, there’s a lot of beautiful countryside (most of it barraged by ever-changing weather conditions), farm land, little towns and villages, and large, industrial towns based on the likes of London. Like the UK, Galar is united through a comprehensive rail system that allows you to quickly travel between towns; the stations are reminiscent of those here in the UK and you’ll also see other similar landmarks and familiar elements, such as a clock tower, an ostentatious ferries wheel, red phone booths, and Victorian/Gothic architecture. I guess because of this UK-influence, there’s a heavy emphasis on football and football-inspired iconography, meaning you’ll take on the Gym Leaders in massive stadiums packed with cheering crowds which really helps up the scale of these battles. The whole game has the usual anime-inspired aesthetic that Pokémon has been known for only now it’s heavily infused with some steampunk influences because of the nature of the region as well as being sleek and modern when in Galar’s bigger towns and featuring crystalline mines and more fantastical locations like Glimwood Tangle. Characters are all well modelled and expressive; while the game still doesn’t use voice acting, their personalities are all expressed through their dialogue boxes (featuring an abundance of British slang which really appealed to me; characters often casually call each other “Mate” or “Luv” and speak with recognisable British quirks and expressions) and their body language.

We’ve got some funky Pokémon designs, as is to be expected at this point.

Though the base game “only” features four hundred of the eight hundred available Pokémon, each one has their own fully-rendered model with unique animations; add to that the various different regional forms, new evolutions, and the Dynamax and Gigantamax forms and you have plenty of little critters to choose from and keep you busy. As mentioned, they all appear on the overworld as well, making the Pokémon world finally feel large and alive, and they all have their own unique cries (with Pikachu still being the only one to speak its name, such is its popularity and appeal) and the new Pokémon and forms available here aren’t too bad. We’ve got such things as a football-loving rabbit, a bongo-drumming ape, fluffy sheep, cute little electric puppies, chubby chipmunks, and anthropomorphic lumps of glowing coal. Then there’s weird shit like a haunted teapot, an animated apple, and penguins with ice cubes on their heads! I have to say, though, that I remain unimpressed with a lot of the names for these new Pokémon; I mean, come on, a Fire-type rabbit and you call it “Cinderace” instead of “Hareblazer”!? The legendary Pokémon aren’t all that much to shout about either; the mascots, Zacian and Zamazenta, are okay, I guess, and Eternatus is pretty bad-ass but the majority of the other legendaries are locked behind the pay wall of the game’s expansion pass. In terms of sound, not much really jumped out at me; the classic Pokémon games were full of catchy little tunes that brought Routes, towns, and battles to life and while that is true of Pokémon Shield, none of it really stuck with me…with the exception of the Gym Leader battle theme! This rocking, energetic piece changes tempo depending on how well you are doing and ramps up once the Gym Leader busts out their Pokémon’s Dynamax form; this theme alone really got the blood pumping for those battles and worked with the stadium setting and roaring crowd to really make the stakes feel high for a change.

Enemies and Bosses:
As you explore Galar, you can choose to battle the various Wild Pokémon that are wandering throughout the overworld; these will hide in grass or underwater, run out into the street, chase you (or run from you), or more powerful variants may pop up in the Wild Area. In each instance, you have much more flexibility about engaging or fleeing from these battles; when you battle, you’ll still earn EXP even if you capture the Pokémon and, in a change that I’m sure irked many, all of your Pokémon will gain some EXP from every battle (but only those that actually participate will gain the most and the EVP from each battle). Like all Pokémon regions, Galar is also populated by other Pokémon Trainers; these days, the game clearly shows you a fellow Trainer’s line of sight so you can try to sneak past or avoid them but I recommend battling every one you come across to level-up your team faster and earn more money. Pokémon Trainers are generally armed with only one or two Pokémon in the early going but eventually have more (and far stronger) Pokémon in their team.

Team Yell are not Team Rocket, that’s for sure; they’re just a bunch of try-hard fanboys.

When battling, be sure to keep an eye on the Power Points (PP) of your Pokémon’s moves; each move has a certain amount of PP and, when it’s spent, you can’t use that move anymore and may be reduced to literally struggling to survive. Similarly, as with many Pokémon games, you may have to battle two trainers at once in a double battle either alone (with two of your Pokémon) or with a computer-controlled partner (usually Hop). In these battles, it’s important to consider the effect your attacks may have on your partner and the game encourages players to use moves like Helping Hand or Wide Guard to help protect or buff your partner (of course, because I adopt an aggressive approach to battling, I don’t do this). As in every other Pokémon game, you’ll also run afoul of a team; in this case, it’s the punk-rock-inspired Team Yell. Unlike other teams, though, Team Yell aren’t out to steal or manipulate Pokémon or to destroy the world; instead, they are the cheerleaders and groupies for one of your rivals, Marnie. Led by Marnie’s older brother (and Gym Leader), Piers, Team Yell generally cause a nuisance by blocking your path or forcing you into a single or double battle at various points but are little threat compared to the likes of Team Rocket or Team Magma/Aqua.

Hop, your childhood friend and rival, makes up for his lack of skill with enthusiasm.

As I alluded to above, the game also includes the standard rival mechanic; for the most part, your rival is Hop, your childhood friend, with whom you have a friendly rivalry with. Hop will accompany you into new locations and areas, often battling alongside you or while you’re battling someone else, and is extremely enthusiastic in following in his brother’s footsteps and besting the Gym Leaders before you. As a result, when you encounter Hop he will generally challenge you to a Pokémon battle but, as the plot eventually reveals, Hop is no Blue or Silver; hell, he isn’t even a good substitute for May! You’ll have no trouble at all wiping the floor with Hop each and every time you battle him and he actually drags you down in double battles since he’s so useless; the only time he’s a threat is right at the end of the post-game when he’s captured Zacian and, even then, it is that legendary Pokémon that causes you the most trouble as opposed to Hop himself. Marnie and Bede are also two of your rivals, though you encounter and battle them far more infrequently than Hop. Both share the same desire as you and Hop to conquer the Gym Challenge and, though Bede is disqualified from the Challenge after he steals a bunch of Wishing Stars, he returns to interrupt the finals of the Champion Cup to battle you once more. However, if you have a well-balanced team at a high level, neither of these rivals will really cause you much of a headache.

Before you can take on the Gym Leaders, you’ll have to complete their various missions…

That strategy also applies to the game’s Gym Leaders, who act, as always, as the closest thing Pokémon has to “bosses”. You must defeat each of the eight Gym Leaders to earn Badges and qualify for the Champion Cup; each time you defeat a Gym Leader, they award you with a TM, some clothes to wear, and you earn the right to capture and own Pokémon of a higher level. There’s a pretty big gap between the start of the game and your first battle against Milo, meaning that, if you’re anything like me, you run the risk of your Pokémon being over-levelled and thus ignoring your commands so, again, it’s best to have a diverse team at different levels to ensure that doesn’t happen until you have acquired the right badge. Before you can battle a Gym Leader, you’ll have to take on their Gym Mission; before, you used to just walk into the Pokémon Gym and battle the Gym Leader’s disciples, maybe solving a puzzle or two, but the games have increased the puzzles and requirements to reach the Gym Leader over the years and Pokémon Shield is the culmination of that. As a result, you’ll be herding Wooloo around, solving a water puzzle, earning points in double battles while your partner tries to scuttle you, navigate a maze, answering questions and battling a gauntlet of Trainers like it’s a stage audition, battle members of Team Yell down a dingy alleyway block by Mr. Mimes, and having to conquer three Trainers in double battles. The challenge of these missions varies and ranges from ridiculously easy to unnecessarily annoying but the end result is the same; eventually, you’ll get dressed into your special stadium attire and head out onto the Gym Leader’s stadium to challenge for a Gym Badge.

Even with their Gigantamax Pokémon, the Gym Leaders are easily bested.

When battling Gym Leaders, the battles are given more variety thanks to the use of more dynamic camera angles which alternate between shots of the battle and the crowd and include televised shots. Again, though, anyone who has played Pokémon before has a distinct advantage in these battles; if you’re anything like me, you’ll grind and train between Gym battles and ensure that your team is as strong as possible to take full advantage of each Gym Leader’s chosen type. Milo uses Grass-types, Nessa uses Water, Kabu uses Fire, Allister uses Ghost-types, Opal and Bede favour Fairy-types, Melony uses Ice-types, Piers and Marnie use Dark, and Raihan uses Dragon-types. You always know which type each Gym Leader uses before you challenge them and the game smartly places wild Pokémon in the nearby region that will give you an advantage in battle that, and your training, means that you can easily sweep through each of the Gym Leaders without breaking a sweat even when they bust out their Gigantamax Pokémon. Of course, it wouldn’t be a Pokémon game without some kind of nefarious deed going on; in this case, Rose, president of Macro Cosmos and the chairman of the Galar Pokémon League, has been gathering the Wishing Stars than enable Dynamaxing in order to bring about the fabled Darkest Day through mass Dynamaxing and the awakening of the legendary Pokémon, Eternatus. Before you can stop him, you’ll have to battle his co-conspirator and secretary, Oleana, who leads you on a wild goose chase that sees you battling corrupted League Staff in order to get a key to confront Rose; you’ll then have to battle Oleana herself who, despite the diversity of her team, is easily bested if your team is well-trained and varied enough to match her Pokémon.

When Rose awakens Eternatus, only you (and some Legendary Pokémon) can quell the beast.

When you finally confront Chairman Rose deep within the Hammerlocke Energy Plant, you won’t be faced with much of a challenge since all of his Pokémon are Steel-types; this means that he is easily decimated with a Fire-type Pokémon but, after he is defeated, you are forced to battle the enraged Eternatus after Leon fails to capture it. Eternatus appears in two forms, its regular form and its horrific Eternamax form; you can’t capture it in its base form or use Dynamax when battling either of its forms and you’re forced to team up with Hop, Zamazenta, and Zacian to whittle its HP down and capture it (with, again, a ridiculous amount of ease; time was that legendary Pokémon were nigh-on impossible to catch but modern Pokémon games make them a breeze!) After all that palaver is taken care of, you finally get to finish off the Champion Cup; in a change of pace, rather than tackling the Elite Four of the region and the regional champion, Pokémon Shield has you participate in a three round, single-elimination tournament against the other Gym Leaders to earn the right to face Leon. This is a bit disappointing as, rather than facing off with Galar’s best and brightest Trainers, you end up doing what is, essentially, a “boss rush”. On the plus side, Leon can actually be a tough battle thanks to the strength and variety of his Pokémon (though, to be fair, I only found this because I started with the wrong Pokémon in the lead of my team). Once you defeat Leon and become the Champion, the credits play pretty much right away (there’s no Hall of Fame ceremony here) and you move on to the post-game.

Some of the game’s toughest challenges await in the post-game.

In the post-game, you have to travel all around Galar revisiting the Pokémon Gyms to quell the anger of various out-of-control Dynamax Pokémon; for the first few battles, you’ll fight alongside Piers, Hop, and another Gym Leader but, for the rest, you go it alone. Luckily, though, by this point your team should be well in the late-level-fifty or early-sixties so these battles aren’t much of a hassle. You’re also introduced to two new antagonists, the ridiculously-named Sordward and Shielbert, who see themselves as the rightful kings of Galar and are actually pretty tough since their Pokémon are at level sixty. It’s actually beneficial, for the first time ever, when you battle them alongside Hop, and once you defeat them you’ll get to battle and capture Zamazenta. Unlike Eternatus, Zamazenta is not so easily caught in the usual assortment of Poké Balls but, luckily, you can just toss your Master Ball at it to snag it without any effort at all.

Power-Ups and Bonuses:
As you explore Galar, keep an eye out for red and yellow Poké Ball-like items on the ground and twinkles of light; picking these up will award you with items, TMs, ingredients, and other helpful pick-ups to aid you in your battles. You can also use for Pokémon Dollars and Watts to spend in various ways; Poké Marts are now a thing of the past, with these shops now being located inside of Pokémon Centers, but you can also spend your money at various travelling merchants across the map and in clothing stores. You can buy and pick up helpful items that will heal a certain amount (or all) of a chosen Pokémon’s HP, restore their PP, revive them from fainting, or heal them of any detrimental status effects. You can also acquire different types of Poké Balls; the standard variant is decent enough in the early going but you may need to utilise the Great and Ultra Balls to capture higher-level Pokémon or use special balls to increase your chances (Dive Balls for Pokémon caught while fishing, for example, or Net Balls for Bug-types). You can also get your hands on items that increase your Pokémon’s level, Dynamax level, stats, PP, and EXP or which can be used once in a battle to raise certain stats or increase certain abilities.

You have many different options for travelling around Galar.

These days, Hidden Machines (HMs) aren’t really a thing anymore so you don’t need to worry about wasting a move slot or a member of your team with moves like Surf or Fly. Instead, you can call upon a Flying Taxi to fly around the map and upgrade your Rotom Bike to cross over water; the Rotom Bike is far faster than your usual jog, as well, and can be further upgraded to go even faster. You can still get TMs, though, which can be used multiple times to teach new moves to your Pokémon. TRs are a new addition and are primarily earned through Max Raid Battles and spending Watts; these break after use, though, so be sure to spend your Watts wisely.

Dynamaxing is cool but somewhat limited and hardly a requirement.

Your biggest power-up in Pokémon Shield, besides the usual evolution mechanic, is the new Dynamax mechanic. However, Dynamaxing is quite limited; unlike Mega Evolution, you can only Dynamax at certain specific points in the game and it is, honestly, rather pointless. It’s impressive to see and fun to behold two giant, goofy-looking Pokémon butting heads but, as I mentioned, you can defeat Dynamax Pokémon with a regular Pokémon as long as you’re strong enough and have the type advantage. Some Dynamax Pokémon make things difficult by putting up a barrier that must be whittled down but, otherwise, it’s a fun and interesting new feature that, I feel, is a bit squandered and wasted because of its limitations.

Additional Features:
It’s a Pokémon game so, naturally, there is a lot to do; most of these additional features are holdovers from previous Pokémon games: battling, capturing, and evolving Pokémon; any Poké Ball having a random chance of capturing a Pokémon without fail; leaving Pokémon at the Day Care to breed new Pokémon; customising your avatar’s gender, hair style, and clothing at the start of the game and throughout by buying new clothing; meeting the game developers in a hotel; using the menu screen to save, view items and your map; and customising your Pokémon team placement, moves, and markings, and acquire various items through the online Mystery Gift function.

I must have skipped or missed the point of collecting League Cards…

There are, however, some changes, as you might expect; characters will award you with their League Cards (though I’m not sure of their purpose; it seems you can swap and trade them online, though) and you can also customise your own League Card using the PC in the Pokémon Center. You’ll also find the Name Rater, Move Deleter, and Move Reminder non-playable character (NPC) in the Pokémon Center; amalgamated into one character, you can change your Pokémon’s nickname and delete and relearn moves as often as you like with this NPC. Furthermore, you can press Y during battles to see what your moves will do and get a snapshot of any status and type ailments you need to be aware of and press X to throw a Poké Ball without having to access the in-game menu; your PokéDex even offers you recommendations for Pokémon to catch in the immediate area to help you take on upcoming Trainers and Gym Battles and every time you acquire an item for the first time, a little text box tells you what it is in another case of helpful hand-holding. Some of the game’s additional features are more fun and useful than others; when it’s your birthday, the Pokémon Centre NPCs will make a big fuss of you, which is a nice touch, but then you can also sit on chairs and benches for absolutely no reason or benefit other than immersion. You eventually acquire the ability to access your PC boxes remotely so you can swap your team out on the go, which is useful, and, while you can retake the Champion Cup over and over and even invite specific characters to compete against you in it, you still can’t rebattle previously defeated Pokémon Trainers.

Toss it all in a pan, whip up a curry, and get a fancy medal for your troubles.

There is a startling amount of online connectivity in Pokémon Shield; when connected to the internet and in the Wild Area, other players will spontaneously appear to join you in Max Raid Battles and offer helpful items. You can also battle and trade with others players online, as usual, but you’ll need to pay for the Switch’s online service to do any and all of these things, which is a real greedy move on Nintendo’s part as you never had to do that in the previous games! You can also set up a tent at any time, and may encounter other player’s Pokémon Camps; here, you can “speak to” and play with the Pokémon in your team to improve your bond with them. Doing this, and being a good, consistent trainer, means your Pokémon try harder in battle and will land more critical hits, keep themselves from fainting, or even shake off status effects to please you. In the Pokémon Camp, you can also take part in the game’s newest mini game: curry making. By exploring the overworld and shaking trees, you’ll acquire a variety of berries and other ingredients to throw into a cauldron and whip up a variety of curries. While camping gains your team some EXP by default, curry will provide them with a lot more EXP and also restore their HP; certain NPCs will also rate and reward your curry-making skills and you can make curry with other players if they join you in a camp. Furthermore, by accessing the PC, you can send your Pokémon off on jobs to earn them some EXP outside of battling (though I never actually bothered with this).

To get the most out of the post-game, you’ll need to pay for the expansion pass…

You can also acquire rewards by using the Lotto ID on any PC, which will randomly check the identification numbers of your Pokémon and award a prize if it matches, take part in the Rotom Rally to race through the Wild Area collecting balloons for boosts and time, or visit the various cafés across Galar once a day to compete in a double battle for additional rewards. As you conquer the Gym Leaders, you’ll also acquire fans; NPCs will cheer you on when you roll into the stadium and congratulate you after each victory, which is nice, and you are often given the choice of a couple of responses to in-game dialogue but it doesn’t really affect the story in any meaningful way so go nuts and tell that loser Hop what you really think about him! As mentioned, Pokémon Shield also continues the tradition of featuring some post-game content; this sees you revisiting the Galar Gyms to battle Dynamax Pokémon, opposing Sordward and Shielbert, and mainly exists to give you the chance to capture Zamazenta. While you can still use fossils to resurrect long-extinct Pokémon, there are no roaming legendaries to be found in the base game and the closest the game has to a powerful Super Boss is the aforementioned battles against Zamazenta and Hop. Once you clear the post-game, the Battle Tower opens up and you can take on its level-capped challenges to rise up the ranks, earn Battle Points (BP), and acquire rarer items but I’ve never liked the Battle Tower so I didn’t spend much time there. Honestly, Pokémon Shield’s post-game is severely lacking, especially compared to other Pokémon games; this may be because Nintendo are charging players £20 to expand the Galar region with new areas, Pokémon, forms, and challenges with their expansion passes, which is a bit of a piss-take and I am honestly shocked at how greedy Nintendo have become!

The Summary:
It’s been a while since I played a main series Pokémon game; I was pretty happy to be all but done with the franchise before I got my Nintendo Switch but revisiting the world of Pokémon is like meeting an old friend you’ve lost touch with. While there are a few new mechanics here and there to make things interesting for long-time players, Pokémon remains as accessible as ever thanks to the core gameplay mechanics staying largely the same even all these years later. All that’s really changed is the presentation and, to be fair, Pokémon Shield looks fantastic and really increases the scope and size of its world to make you finally feel totally immersed in a live, breathing environment. Unfortunately, for every good idea Pokémon Shield has, there are a few nitpicks that drag it down a bit: Dynamax is an interesting mechanic and I do prefer it to Mega Evolution in a lot of ways but it’s far too limited, there’s way too much hand-holding for my tastes, you still cannot have rematches with NPCs and, while you can encounter other players in the Wild Area, Nintendo still refuse to let you download an NPC of your friends into the game to act as a rival, and the game is maybe too helpful with all of its new features, meaning that there really isn’t much challenge for veterans of the franchise. Still, the presentation is great, especially in the way the game handles battles against Gym Leaders, and it is a top-class game in its own right…I just wish Nintendo hadn’t gotten so greedy and forced you to pay for the online features and post-game content.

My Rating:

Rating: 3 out of 5.

Pretty Good

What are your thoughts on Pokémon Shield? Perhaps you bought Pokémon Sword instead; if so, why was that and which of the two do you prefer? Which starter did you pick and why, and who made it on to your final team? What did you think to the Dynamax mechanic and the way the game presented Gym battles? What features did you like, or dislike, or would you like to see return to the series? Were you also annoyed at the hand-holding in the game or do you like always knowing exactly what to do and where to go? What did you think to Hop and the post-game content? Are you planning on buying the expansion pass? Which Pokémon game, generation, and creature is your favourite and why? How are you celebrating National Pokémon Day today? Whatever your thoughts, drop them in the comments below.

Game Corner [Zelda Day]: The Legend of Zelda (Nintendo 3DS)


On 21 February 1986, The Legend of Zelda (Nintendo EAD, 1986) was first released in Japan. The creation of legendary game designer Shigeru Miyamoto and Takashi Tezuka, The Legend of Zelda launched one of Nintendo’s most popular franchises, with its silent protagonist, Link, and his vast fantasy world of sword and sorcery not only enduring over time but constantly evolving and improving as the series progressed.


Released: 7 June 2011
Originally Released: 21 February 1986
Developer: Nintendo
Original Developer: Nintendo EAD
Also Available For: Family Computer Disk System (Famicom), Game Boy Advance, GameCube, Nintendo Entertainment System (NES), Nintendo Switch, Nintendo Wii, Nintendo Wii U

The Background:
The Legend of Zelda was created by designer Shigeru Miyamoto (the man responsible for Nintendo’s popular mascot, Super Mario) and Takashi Tezuka; in fact, Zelda and Super Mario Bros. (Nintendo EAD, 1985) were developed simultaneously and so, to separate the two games, Zelda was purposely made far less linear and based around both exploration and experimentation, with Miyamoto drawing inspiration from his childhood love of exploring forests and caves. Although players are free to name the game’s protagonist, he was dubbed “Link” to suggest an emotional “link” between the player and their avatar and his story was framed as a “coming of age” tale that would allow the player to grow alongside their silent, but by no means less iconic, game character. The Legend of Zelda was hugely successful for Nintendo, with the game selling well over 6.5 million copies and Nintendo even commissioned a special gold cartridge variant for its North American release. The game was met with universal praise during its release and is still regarded as one of the greatest adventure game of all time. Although I was aware of the franchise thanks to the much-maligned animated series, being a SEGA kid growing up I didn’t play a Zelda title from start to finish until I got The Legend of Zelda: Link’s Awakening (ibid, 1993). This was enough to hook me on the franchise, however, which grew to a deep affection thanks, of course, to The Legend of Zelda: Ocarina of Time (ibid, 1998). The original title, though, had always eluded me so, with this year marking the game’s thirty-fifth anniversary, I figured now was as good a time as any to sit down and give it a go.

The Plot:
The peaceful kingdom of Hyrule is suddenly invaded by the malevolent Ganon (or “Gannon”, as he’s referred to in-game) and his monstrous army. Having already stolen the Triforce of Power, one part of the legendary Triforce, he kidnaps Princess Zelda to acquire the Triforce of Wisdom. However, after she separates the Triforce of Wisdom into eight fragments, it’s up to Link, a plucky young boy from the forest, to journey across the land, recover the Triforce fragments, and put an end to Ganon’s dreams of world conquest.

Gameplay:
The Legend of Zelda is a 2D, top-down action/adventure game set in the fantasy land of Hyrule. One of the few NES titles to feature a battery back-up save feature, players can create one of three save files and save their progress whenever they die in the game, which is a necessary feature given how large the game is. Unlike the majority of Zelda games, though, the name you give to your save file isn’t reflected in-game; when you rescue Princess Zelda at the game’s conclusion, she refers to you as “Link” no matter what you title your save file, making this original adventure one of only a handful of Zelda titles to actually use that name to refer to its green-garbed protagonist.

Defeat enemies with your trusty sword, which shoots out beams when you’re at full health.

Once you’ve created your save file, you are immediately dropped into Hyrule and left to fend for yourself. Link moves in a grid-like pattern across the map and comes complete with a shield that will block most enemy projectiles as long as he is facing them. If you enter the cave at the top of the game’s first screen, you’ll acquire a sword, allowing you to dispatch most enemies in one of two ways: the first is a tried-and-tested sword swipe and the second is an energy bolt that fires from your sword as long as you are at full health, which really helps to clear the screen of enemies from a safe distance. Defeated enemies may occasionally drop hearts or fairies to refill your health, bombs to allow you to deal explosive damage to enemies and uncover secret passageways, or Rupees (or “Rupies”/”Rubies”), the in-game currency. Link can hold a maximum of 255 Rupees and will sporadically stumble across merchants hidden in dungeons or caves who will sell him a variety of items, weapons, and power-ups.

The majority of Hyrule and the game’s dungeons are accessible right from the start.

As you might expect from a Zelda title, the game’s overworld is pretty expansive, covering forests, mountains, and beachfronts. A mini map is present in the top-left of the game’s heads-up display (HUD) but, out in the overworld, is next to useless since all you can see is a little green dot (representing you) on a blank, grey background. In dungeons, you can collect a Dungeon Map to make navigation a lot easier but, again, it’s not as helpful as it could be since there’s no distinction between floors, meaning it’s very easy to get lost or turned around or to wander around Hyrule with no idea of where you are or need to go. Your goal in the game is to visit eight dungeons (referred to in the game as “Levels”) and retrieve the eight pieces of the Triforce of Wisdom; you can track your progress towards this goal from the game’s inventory menu and non-playable characters (NPCs) can offer you (extremely) vague hints about how to progress but, otherwise, much of the game’s adventure is in your hands. As a result, pretty much the entirety of Hyrule is available for you to explore and visit as long as you have, at least, some bombs available to you. This means that it’s very easy to wander around the overworld and stumble into the game’s harder dungeons before you’re ready, which can add an additional layer of challenge to the game if you’re brave enough to attempt to tackle these tougher levels out of sequence. It also means that you can acquire some of the game’s more powerful and useful weapons early, at the very least, though some can be useless without others (I, for example, acquired the Book of Magic long before I got the Magic Rod, making said book all but useless).

Zelda‘s dungeons are largely indistinguishable beyond their colour palette and enemy placements.

Given that I played through 90% of this game blind and without a guide, I have to say that that this is all-but-inevitable as, while the game’s first two dungeons are easily found almost right next to each other, it’s entirely up to you to explore your surroundings so it’s pretty easy to stumble into the harder levels when you only have three of four hearts in your health bar. As big as Hyrule is, though, many of the dungeons are actually quite small; inside, you’ll be tasked with defeating enemies and solving very (very) simple puzzles (generally as taxing as pushing a certain block or bombing a certain wall) to open doors, or collect keys to open doors, grabbing a new weapon or item, Dungeon Map and Compass to aid with your navigation within the dungeon, and then defeating a boss to extend your health bar and retrieve a piece of the Triforce of Wisdom. One interesting feature I was surprised to see was that you can carry keys from one dungeon to another, which can give you an edge with the game’s harder dungeons and allow you to take shortcuts here and there. Gameplay follows a very simple formula from start to finish: explore the immediate area, uncover secrets, find a dungeon, and retrieve a piece of the Triforce of Wisdom. The only time the gameplay is changed up is when you descend down hidden staircases inside the dungeons and enter a short 2D area where the level’s weapon or key item can be found. Otherwise, gameplay variety comes from utilising different weapons to battle enemies and bosses or factoring in the erratic patterns of the game’s enemies, who like to attack in something resembling a co-ordinated effort or en masse, requiring both some strategy on your part and a healthy supply of hearts in order to survive the damage put out by the game’s later enemies. As a result, Zelda’s difficulty is, largely, up to you; if you clear Level-1 and then stumble into Level-8, it’s probably best to leave that later dungeon and seek out Level-2 to 3 to give yourself a better chance of success.

Graphics and Sound:
The Legend of Zelda is a very basic 2D adventure; like Super Mario Bros. and many videogames of that era, the graphics are extremely simplistic and, largely, require quite a bit of imagination and suspension of disbelief on the part of the player. Link is immediately and instantly recognisable against the game’s many different backgrounds and compared to the enemy sprites thanks to his green tunic and cute little sword and shield but, obviously, you’re not going to see many frames of animation or layers of detail in this game. Additionally, I found that the game struggled a bit when there were a lot of sprites onscreen and/or sounds playing at the same time; the iconic Zelda theme plays constantly on the overworld and, when Link is low of health, the game emits a constant beeping to inform you and enemies make little noises when they shoot at you or are destroyed and all of these sounds can blend into each other and the game slows down noticeably when a hoard of Lynels incessantly shoot projectiles at you.

Though limited by the hardware of the time, Zelda is a vast and ambitious adventure.

Despite the game’s limited graphical capabilities, Hyrule is surprisingly vast, varied, and detailed at times; the entire land is surrounded by sea that you cannot cross and made up of forests, mountains, beaches, and icy regions. You’ll have to navigate a series of repeating, identical screens in a maze-like puzzle, dodge boulders as they rain down from Death Mountain, explore a haunted graveyard, cross the water using a raft, enter a waterfall, descend into caves, and cross beaches while Leevers randomly pop out at you as you explore looking for merchants, additional items and weapons, and the elusive dungeon entrances. Dungeons are generally recognisable in the overworld but, sometimes, you’ll enter what appears to be a dungeon only to find a merchant or other NCP. When you do find a dungeon, you’ll be treated to a different in-game tune, which is refreshing, but will find that most dungeons are aesthetically very similar just with a different colour palette. Dungeons get progressively bigger as you progress, though, and are filled with more enemies; you’ll also find that you’re required to visit different floors using staircases and bomb walls more frequently to access different areas and properly progress, which adds an additional layer of challenge to the game. Each dungeon also has its own unique layout and appearance as seen on the map screen to help distinguish them but, for the most part, they’re quite similar and not themed around elements like later Zelda dungeons would be.

Zelda uses text and (very) simple and vague dialogue to convey its plot and your objective.

For an adventure game, The Legend of Zelda is extremely light on story and dialogue; the game’s story is told through some text when you wait around on the title screen but, beyond that, you’ll need to read the game’s instruction manual to learn more about the plot and the lore of Hyrule since the NPCs offer only cryptic clues and vague statements. Dialogue and character interaction is practically non-existent in The Legend of Zelda, which I find a bit surprising given how prominent it would become in the series and how heavy it featured in more traditional role-playing games (RPGs) released around the same time, such as Final Fantasy (Square, 1987). However, given the amount of grammatical errors and incongruous dialogue contained within the first Zelda this is, perhaps, a good thing; it also means that the onus is on the player to explore every nook and cranny and to experiment with every weapon on every screen on the game to uncover secrets and new areas, placing an emphasis on exploration and player immersion rather than hand-holding.

Enemies and Bosses:
Link will have to contend with a wide variety of enemies on his grand quest; the overworld is alive with numerous enemies, some of which are specific to certain areas and each of which presents a different challenge thanks to their attack patterns and difficulty. It’s very rare that you’ll take on just one or two enemies at a time and, generally, you’ll have to battle about four or five at once and often a mixture of different enemies, requiring a certain amount of strategy on your part as you can’t always take the direct approach in battle. One of the most common enemies in the game are the Octorocs (octopus-like creatures that spit projectiles at you), Peahats (bulbous vegetation that hover in the air and can only be destroyed when briefly stationary), Tektites (spider-like enemies that hop around the screen), aforementioned Leevers (spiked globs that burrow in and out of sand), and the Keese (bats that flutter around the screen). While you’ll encounter different coloured variants of most of these (and other enemies) that are tougher, these are the most common enemies and are easily dispatched with one sword swing.

Zelda‘s tougher enemies can be a real headache thanks to their numbers and attack patterns.

As you progress, though, you’ll encounter far more formidable enemies: Moblins launch spears at you, Goriyas toss boomerangs your way, Ropes (why they’re not called “snakes” is beyond me) charge at you head-first, and Wallmasters will drag you back to the first screen of the dungeon you’re in if you’re not careful. Some of the game’s toughest and most annoying enemies include the Wizzrobes (who constantly teleport around the screen, often directly into where you’re walking, and fire energy bolts that can easily drain your health if you’re caught in a crossfire), Darknuts (who can only be attacked from behind and wander around in an unpredictable pattern), and the aforementioned Lynels. You’ll also have to be careful about getting too close to seemingly harmless Armos statues in case they spring to life, avoid getting eaten by a Like-Like lest it take away your shield upgrade, and make sure you have plenty of health or arrows to make battling the Poe’s Voice that much easier.

The Dodongo might be pretty pathetic but the Manhandla was a pain in my ass!

The game features nine dungeons to explore, which means nine bosses to contend with; make sure you familiarise yourself with each of these bosses, though, as you’ll encounter all of them on multiple occasions as sub-bosses in the game’s later dungeons. Technically, you can battle them in whatever order you like as long as you’re tough enough to survive the dungeon and their damage output but it’s best to try and take them on in sequential order to give yourself the best chance at success. This means that the first boss you fight should be Aquamentus, a horned dragon that spits out three projectiles that you must dodge between. This boss is fought in Level-1 and Level-7 and is made all the easier if you have the energy to use your sword beam or ammo enough to shoot arrows at it, which will make short work of it. The Dodongo, in comparison, is a pretty pathetic excuse for a boss; it lumbers around the screen doing little to nothing and is easily dispatched by placing bombs before its mouth. Later on, you’ll have to contend with three of these at once but, since they don’t make any effort to attack you, they’re easily the weakest of all the game’s bosses. Unfortunately, the same can’t be said for the Manhandla boss; this piranha-like bastard was the bane of my life since it popped up three times throughout the quest. It slowly bounces around the arena firing projectiles at you and is very tricky to hit thanks to the limited reach of Link’s depowered sword and Link’s restricted range of movement; it’s much faster and more efficient to use bombs to deal massive, successive damage to the Mandhandla but be wary as, the more parts of it you destroy, the faster its movements become.

Bosses range from frustratingly awkward to ridiculously easy depending on how equipped you are.

One of the toughest bosses in the game, for me, was the multi-headed dragon Gleeok; this monstrosity sports two, three, or four heads, spits projectiles towards you that are difficult to avoid, and is only able to be damaged by awkwardly slashing at its neck or, more effectively, shooting arrows at it. Be careful, though, as when the Gleeok’s heads are severed they will float around the arena shooting projectiles at you and cannot be harmed. Compared to Gleeok, Digdogger and Gohma are a walk in the park, especially once you have acquired the recorder and the bow; Digdogger is completely invulnerable until you play the recorder and reduce it down to its core but, once you do, you can just whack it until it’s defeated. Similarly, Gohma can be a bit of a pain with its sporadic movements and projectiles but a few well-timed shots to its exposed eye will put it away without any real issues; the most difficult thing about many of these bosses is having enough health, the right weapons, and being able to navigate the arena when projectiles are being fired at you from both the boss and the nearby statues.

Despite his fearsome appearance, Ganon is quite a pushover once he’s out in the open.

Of course, the main objective of the game is to assemble the eight pieces of the Triforce of Wisdom, battle through Level-9 (which is accessed by bombing a specific rock formation on Death Mountain and features swarms of the game’s toughest enemies and a new sub-boss, the Patra, which can only be destroyed after first taking care of the tiny little eyes it shields itself with), and confront the evil Ganon. For the final boss of the game, Ganon isn’t that much of a challenge; he turns invisible and fires a series of projectiles at you, forcing you to swipe somewhat blindly around the screen until you hit him. Land four this and he appears in all his monstrous glory…and is easily destroyed with one hit from a Silver Arrow for a disappointingly anticlimactic end to the game.

Power-Ups and Bonuses:
Link begins the game with three hearts’ worth of health which, very quickly proves to be far too little to get past the game’s tougher enemies and dungeons. Fortunately, every time you defeat a dungeon boss, you expand your maximum hearts by one and can find additional Heart Containers hidden on the overworld or for sale from certain merchants, which will increase it to twenty units. Certain weapons also have similar limitations; for the majority of the game, you can only carry six bombs at a time until stumbling across a merchant who will allow you to carry double that amount (…for a small fee), the only way to get arrows is to buy them, and your usage of the Red Candle is restricted. Thankfully, the Blue Candle and Magic Rod are not so restricted, allowing you to light up dark areas and deal damage to enemies (but watch out because the flame you conjure can also hurt you!)

A number of key items and upgrades will vastly improve your chances at success.

As you might expect from a Zelda title, Link has access to a decent variety of weapons and items: enemies sometimes drop a clock (which causes enemies to freeze in place and gifts Link with invincibility for a brief period), the boomerang allows him to attack from a distance, the stepladder lets him cross one tile of water, the raft allows him to drift across water at certain points on the map, and he can also find a Power Bracelet to move blocks and upgrades for his sword and shield to block more projectiles and deal additional damage. Eventually, you’ll also be able to purchase health-restoring medicines and other expensive items to aid your quest: one such item is a Magic Key that renders all other temporary keys redundant and a piece of food to get past Goriyas (though you’d never know that you need to use this item). You can also buy a Blue Ring and find a Red Ring, both of which significantly reduce the amount of damage you take while also changing Link’s tunic to blue and red, respectively.

Additional Features:
Whereas later Zelda titles placed significant emphasis on a variety of side quests, I only really came across one in this first title (barring the hidden Heart Containers on the overworld) which involved taking a letter from one NPC to another to be able to purchase medicines. After finishing the game, you will unlock the “Second Quest”, which replaces your save file sprite to one of Link holding his sword aloft and overwrites your save file from the beginning but mixes up the locations of dungeons, enemies, and items and also increases the difficulty of the game’s enemies. You can, however, jump straight into this mode by naming for save file “ZELDA” and also make frequent, fragrant, and continuous use of the 3DS version’s save state ability to make beating this difficult and finicky first Zelda title much less of a headache.

The Summary:
After years of hearing so much hype about how good The Legend of Zelda is and having experienced a number of 2D and 3D Zelda titles, I was excited to finally experience the first in the series and, for the most part, The Legend of Zelda lived up to the hype. It’s definitely a product of its time and suffer somewhat from the limitations of the NES hardware and the simplistic graphics, gameplay, and sound but it’s still an ambitious little action/adventure title that was both offering something unique at a time largely dominated by space shooters and platformers. Everything on offer in The Legend of Zelda was expanded upon and improved as the series progressed but, for this first entry, the player is required to utilise a lot of exploration, experimentation, and utilise the bare minimum of information to find the pieces of the Triforce of Wisdom. I went in mostly blind and did okay, for the most part, and only had to turn to a guide for the last two dungeons and to track down a couple of the game’s more elusive items so it’s definitely do-able but the game is handicapped somewhat by this format since it’s very easy to just get lost and end up wandering around in circles or being absolutely bludgeoned by the game’s tougher enemies. Honestly, I have nothing but respect for those who managed to get through this game back in the day without the benefit of save states since it’s a deceptively tough title, one that I’m sure kept many kids busy for many hours or even days with its vast landscape and tricky bosses.

My Rating:

Rating: 4 out of 5.

Great Stuff

What are your thoughts on The Legend of Zelda? Did you own this on the NES back in the day or did you, perhaps, discover it later on a different console? How do you feel it holds up these days, especially against later Zelda titles? Which Zelda game, character, or dungeon is your favourite and why? Would you like to see a return to the top-down style of gameplay for Zelda or do you prefer to more action-orientated, open world approach? How are you celebrating The Legend of Zelda’s debut today? Whatever your thoughts, memories, or opinions of The Legend of Zelda, and the Zelda franchise overall, feel free to drop a comment below and check in next Sunday for more Zelda content.

Game Corner: Double Dragon Neon (Xbox One)

Released: 12 September 2012
Developer: WayForward Technologies
Also Available For: Nintendo Switch, PC, PlayStation 3, Xbox 360

The Background:
Double Dragon (Technōs Japan, 1987) was a pioneer of the sidescrolling beat-‘em-up genre; an incredibly popular arcade title upon release, the game was equally popular when it was ported to home consoles, with the Nintendo Entertainment System (NES) version being particularly noted for both its difficulty and addictiveness. While a number of sequels followed throughout the nineties, the series pretty much died out for some time and was mainly represented by ports and remakes. Developers WayForward Technologies revived the franchise in 2012 for this part-sequel, part-remake, part-parody that replaced traditional 2D sprites with a 2.5D, cel-shaded style and a heavy eighties-inspired soundtrack and aesthetic. I first played the game on the PlayStation 3 and remember enjoying it well enough, despite a troublesome difficulty curve, so I was excited to try the Xbox 360 version out on the Xbox One when I recently got the chance.

The Plot:
Under the direction of the cosmic sorcerer lich Skullmageddon, the Shadow Warriors gang kidnap Marian once again and, true to form, the martial arts brothers Billy and Jimmy Lee must journey across, and beyond, the world in order to rescue her!

Gameplay:
Double Dragon Neon is a 2.5D sidescrolling beat-‘em-up with light platforming elements in which players assume control of either Billy or Jimmy; while both characters look and control exactly the same (except for a palette swap), players cannot select which of the Lees to control (player one is Billy and player two is Jimmy and that’s all there is to it). Still, whereas the Lee brothers were a bit clunky and awkward to control in the original videogame, they have a lot more versatility this time around; players can tap X for a quick combo, Y for a stronger attack (and mix and match for more diverse combos), jump with A, and press B to grab enemies when they’re stunned or to pick up and throw weapons and objects.

Though they look practically identical, the Lees have a lot of moves at their disposal.

Unfortunately, control is still quite sluggish in a lot of ways; walking speed is painfully slow and players have to hold RT to sprint ahead but there’s quite a delay between pressing RT and your avatar actually breaking into a run. Luckily, you can duck with LT and, with a well-timed press of this trigger, you’ll successfully pull off a “Gleam” dodge and briefly increase your attack power. You’ll notice under your health bar another bar, represented by lightning, that slowly refills over time; pressing RB will allow you to pull off a “Sosetsitsu” special moves at the cost of draining this bar. These are equipped by finding and purchasing cassette tapes and equipping them in the sub menu and there are many different special moves available, from a fireball to a whirlwind kick and a screen-clearing dragon attack, all of which can be upgraded and cost more of your Sosetsitsu energy to perform.

While you can find health and power-ups, you can also buy them with the cash you earn from fights.

Double Dragon Neon sees you exploring stage stages (referred to as “Missions”) and battling a variety of enemies, from thugs to sorcerers and robots. When you start the game, you get two lives but can acquire more if you destroy objects (barrels, vases, crates and the like) found in the stages. If you lose all your lives, you can continue but, while you have infinite continues, you’ll have to restart the mission right from the beginning. Thankfully you can, occasionally, find cans and bottles of fizzy drink (“Crystal Dragon Kick”) to partially or fully replenish your health. As you defeat enemies and smash objects, you can also pick up cash, which can be spent in a handful of shops to purchase health, extra lives, and cassette upgrades.

A variety of environmental hazards dog your progress but can also be used against your enemies.

While the majority of the gameplay involves running right and beating up endless waves and different palette swaps of enemies, you’ll also have to deal with a number of stage hazards; the classic Double Dragon pit and conveyor belts make a return, which allow you to toss or lure enemies to their death, but you’ll also have to contend with falling platforms, arrows and missiles raining from the sky, and even avoid being sucked out of an airlock! Unfortunately, the clunky nature of the game’s controls, movement speed, and the very noticeably button lag can make this annoyingly difficult, especially in the graveyard stage which is littered with rolling spiked logs! You also need to be wary when breaking open containers as some, especially those in Skullmageddon’s palace, contain grenades that will explode in your face if you’re not careful! Double Dragon Neon also includes the standard “moving elevator” stage but greatly expands upon the difficulty of this trope by placing you precariously on a platform as it flies down an icy slope and bombarding you with a near-endless slew of enemies!

Graphics and Sound:
“Neon” is a pretty apt descriptor for this game as Double Dragon Neon is a neon-drenched, cel-shaded spectacle to be sure! The game features large, brightly colourful graphics and models that are full of character and an absolutely bonkers aesthetic that is heavily inspired by some of the most popular eighties movies and cartoons. Die hard fans of the original Double Dragon may, actually, be a little put off by this as, while the game features an extremely faithful recreation of that game’s first stage, it quickly ends up blasting off into outer space and dropping you into hidden genetics laboratories.

The game’s stages and graphics have a striking cel-shaded quality to them.

To be fair, though, my experience with the original game/s is quite limited and vague so maybe this was a thing in the first game but Double Dragon Neon sees you battling on the streets, into a futuristic dojo that doubles as a space ship (complete with Death Star-like throne room), butting heads with a particularly annoying helicopter and tank in the countryside of what appears to be feudal Japan, traversing a haunted graveyard, and working your way through Skullmageddon’s elaborate fortress before battling him in another dimension entirely! A lot of the environments are quite dark and dreary at times, which allows the character models and more garish aspects of the game to pop more, while others are brighter and more visually pleasing, but all of them are fairly elaborate and have a lot of depth to them. If you explore within the limited confines of the screen, you may also find a few hidden areas, shops, or Tapesmiths to improve your odds against the game’s increasingly tough difficulty spike.

The game is a fantastic homage to the arcade games, music, and style of the eighties.

While the graphics are attractive and help to make up for the occasionally clunky gameplay and lag, Double Dragon Neon’s soundtrack is one of the most appealing aspects of the game. Embracing its eighties aesthetic, the game features pop and rock music heavily inspired by bands of the time as well as rockin’ remixes of classic Double Dragon tunes to give it a real energetic beat and a catchy ambiance that you can’t help but hum along to as you wade through countless Williamses. Double Dragon Neon also features some limited voice acting, mainly clips and quips from the Lees (who speak in a “surfer dude” style that was popular in cartoons at the time) or their enemies, but it is Skullmageddon who really takes the cake! An elaborate pastiche of the likes of Skeletor, Mumm-Ra, and Shao Kahn, Skullmageddon is an over-the-top, flamboyant, Saturday morning cartoon of a villain who takes the game into absolutely ludicrous territory but he’s cheesy in the greatest way possible and I absolutely loved it!

Enemies and Bosses:
Double Dragon Neon has a decent amount of enemy variety going on; while, for the most part, you can expect to battle palette swaps and reskins of most of the enemies you’ll encounter in the first Mission, enemy models are large and colourful and have some personality to them thanks to their tendency to shout insults your way. Generally, you’ll come up against denim-clad street thugs but you’ll also encounter some more prominent, named enemies, such as the cartwheeling Williams, whip-wielding Linda, and a couple of robotic foes called “Hoverbizzles”. Of course, one of the more physically imposing enemies is the muscle-bound Abobo; these massive freaks of nature often come crashing through walls and can deal heavy damage with a few meaty swings or grapple moves and can take quite a bit of punishment before they’ll be stunned enough to knock over.

The teleporting, ranged attackers that you fight can be some of the more annoying enemies.

Just when you’ll feel like you’ve gotten the hang of these guys, you’ll encounter palette swapped variants, multiple Abobos at once, and then reskinned versions, Bimmy and Jammy, who are failed attempts at cloning the iconic Lee twins. You’ll find that enemies such as these act as mini bosses, of sorts, since the game is actually quite light on actual boss encounters. Other troublesome foes include the likes of Shun, the incredibly annoying Geishas, and Bao Boshi, who all have a frustrating tendency to teleport around the screen (usually either right in your path or irritatingly out of reach) and toss projectiles at you while other enemies attack you from behind or clobber you with weapons. One of the more annoying things about the game’s enemies is how they often continue to launch their attack animations even after they’ve been hit, meaning you can easily get hurt even though the enemy should be stunned but, thankfully, stage hazards will damage them just as much as they do you so it’s recommended that you use everything at your disposal to take them out.

The Killacopter and Giant Tank are two of the more frustrating bosses you’ll encounter.

As mentioned, Double Dragon Neon is surprisingly light on bosses but you won’t really notice as Missions tend to end with either you facing a slew or gauntlet of enemies or battling guys like Abobo. When you hit Mission 5 and 6, however, you’ll have to contend with the “Killacopter”, an indestructible helicopter that constantly hovers just out of reach, fires missiles at you, spawns wave-upon-wave of enemies, and tries to skewer you with its blades. The Killacopter hounds you throughout Mission 5 and lends air support to the Giant Tank boss of Mission 6, which is easily one of the game’s more frustrating boss encounters. You are constantly bombarded with bombs, missiles, and explosions and have to painstakingly make your way up the tank, destroying its cannons, to toss explosive barrels into its one weak spot. Considering how tough Mission 6 is, this can be a really maddening experience and had me raging on more than one occasion.

The game is full of homages to other franchises and pop culture.

Another boss you’ll battle is the Mecha Biker, who is a clear rip-off of Mega Man; the Biker blasts across the screen on his futuristic, Akira (Otomo, 1988) inspired bike trying to run you down or burn you with its flames, before resorting to his blaster and slide attack after you destroy his ride. He’s probably the easiest of the game’s bosses once you get him off his bike as it’s pretty simple to avoid his shots by either dodging them with your roll or standing right next to him at the edge of the screen, which lets you pummel away without fear of injury, but I especially enjoyed how his death animation was a clear homage to Mega Man’s explosive death. You’ll also fight a giant, genetically engineered, mutated plant, Marian II (a clear homage to Little Shop of Horrors’ (Oz, 1986) Audrey II); Marian II attacks either by spitting acid, bones, and other projectiles in a spray from its mouth or, primarily, by trying to stomp and bash you with its pod-like appendages. It’s best to concentrate on attacking one of these at a time as, after they’ve been damaged enough, they’ll burst open to reveal a ravenous shark head and a fire-breathing Tyrannosaurs rex! With these come new, more damaging and frustrating attack patterns as you’ll have to try and move your clunky ass out of the way of screen-covering flames or dash attacks. Though the fight is helped somewhat by Marian II’s rare tendency to drop health and other recovery items, you absolutely cannot rely on this so it’s best to concentrate on one pod at a time (I recommend the right pod, which is the shark head) unless you’re trying to earn the “Jawsome!!!” Achievement.

Skullmageddon is a cheap spam artist who deals huge damage and can take a hell of a beating!

Naturally, your ultimate challenge comes in the form of Skullmageddon; you’ll battle this bony bastard three times, with each fight being similar but getting progressively harder each time. The first time you face him, he’s not too difficult as long as you have mastered the Gleam dodge and you avoid his teleport surprise attack as this deals massive damage. The second fight is largely the same but made more troublesome by the fact that he’s supported by an evil, brainwashed version of Marian who fires projectiles at you and causes stage hazards to keep you from attacking Skullmageddon. Skullmageddon’s attacks are much faster and more frequent this time around and he and Marian will power up an ultimate attack if you don’t deliver a good kick to Marian to disrupt her.

Giga Skullmageddon is the game’s greatest challenge so it’s best to upgrade and equip your tapes!

After freeing Marian from her brainwashing, she transports you through a portal for the final battle against Skullmageddon’s strongest form yet (and the most frustrating boss by far): Giga Skullmageddon! For this battle, you’re transformed into a “Rob-Bro” but, while this allows you to one-shot the handful of enemies in the area (including Abobo), it’s just a skin that really doesn’t help you in the fight against Giga Skullmageddon. This time around, Skullmageddon is relentless and can significantly drain your health, or kill you out-right, if he lands a blow from his massive sword when he’s teleporting around the screen unless you have the right cassettes equipped. Skullmageddon still stops to gloat at times and launches a slew of projectiles that you can dodge to get some good hits in but, after he’s absorbed enough damage, he’ll start raining fire down into the arena (which, occasionally, includes much-needed power-ups and extra lives), dashing around at lightning speed, protecting himself from damage, and dramatically increasing in speed and ferocity. You’ll need to swap between different Sosetsitsu tapes throughout the battle to help tip the odds in your favour but, even with that, this is, without a doubt, one of the toughest boss battles I’ve ever experienced and, to make things worse, if you lose you have to replay through all of Mission 10 right from the start to even attempt it again!

Power-Ups and Bonuses:
As mentioned above, you can refill your health with Crystal Dragon Kick and also acquire extra lives, either by searching around, defeating enemies, or buying them from shops but you can also collect batteries to refill your Sosetsitsu faster. Many enemies will also carry weapons that you can pick up and use; these range from baseball bats to whips, knives, and hairpins but you can also grab boomerangs and fans for useful ranged attacks and explosive jars and grenades (but be careful with these last two as they can hurt you as well!) You can also tackle the game with another player and, by pressing in the right analogue stick, perform a high five for a temporary power boost.

Be sure to upgrade your Stance and special move tapes to have a greater advantage in battle.

As you explore, you’ll find cassette tapes that allow you to equip different special moves and “Stances”; each of these can be upgraded by a Tapesmith for some Mythril, which can only be acquired by beating bosses. Each special move deals more damage and takes away more Sosetsitsu energy as you upgrade it; I found I mostly relying on the Spin Kick or the Fire Ball but an upgraded version of the Dragon Swarm can be useful when fighting Giga Skulmageddon. The Stance tapes affect your stats and come with a few useful benefits, such as increasing your health, attack, or defence or allowing you to absorb some health or become more powerful with every blow you land. It helps to mix and match them depending on the situation but, for the most part, you can stick to a set layout…at least until the final boss, which will require you to have better health and defence.

Additional Features:
Double Dragon Neon has thirty Achievements for you to earn. These are quite random and diverse and range from mundane stuff like grabbing two enemies at once or grabbing enemies in mid-air ten times to using every weapon, throwing hairpins at every enemy, and finishing every Mission with the Ro-Bro skin (which requires a code to unlock). Easily the most difficult Achievements involve beating the game on its higher difficulty settings or in two-player co-op with friendly fire enabled but there’s also one that requires you to hit a punching bag eighty-seven times to access a secret area filled with swarms of the game’s hardest enemies! As you clear each mission, the game map opens up so you can revisit previous stages, which is fine, but you’ll have to start a whole new game if you want to try a different difficulty setting. When fighting through some stages, you will come across keys that can be used in shrines to get extra cash, tapes, and power-ups but you may have to endure some particularly frustrating areas to reach these shrines. Similarly, gigantic Tapeworms will sometimes burst through walls and beating on them allows you to grab some extra goodies, a hidden area can be found right before fighting Giga Skullmageddon that can give you a slight (slight!) edge in the fight, and defeating him unlocks a concept art gallery, if you like that sort of thing.

The Summary:
Double Dragon Neon is a pretty decent upgrade of a classic beat-‘em-up title; with an amazing soundtrack, some impressive graphics, and decent gameplay mechanics, the game is a lot of fun as a throwback to the eighties and traditional sidescrolling beat-‘em-ups. Unfortunately, it also suffers from some annoying enemies, hazards, and has a very prominent difficulty spike that is only exacerbated by the noticeable input lag and sluggish controls. As great as the game looks and sounds, this can be a real turn off as it leads to some cheap deaths and hits and needless frustration rather an a fully polished experience; yet, as challenging as the game can be, it’s also a lot of fun and very satisfying to playthrough so I’d say it’s well worth your time and probably even better with a friend in tow.  

My Rating:

Rating: 3 out of 5.

Pretty Good

Have you ever played Double Dragon Neon? If so, what did you think to it and how do you think it compares to other Double Dragon games and beat-‘em-ups? Were you a fan of the game’s neon-drenched, eighties-inspired aesthetic and soundtrack? How did you find the game’s difficulty and input lag? Did you enjoy the game’s many references to other Double Dragon games, franchises, and pop culture? Did you ever beat the game in two-player mode? Would you like to see another Double Dragon game released in either this style or a more traditional aesthetic? What’s your favourite beat-‘em-up franchise? Whatever your thoughts on Double Dragon Neon, or Double Dragon and beat-‘em-ups in general, feel free to leave your thoughts in the comments.

Game Corner: Wario Land 3 (Nintendo 3DS)

Released: 2 May 2012
Originally Released: 21 March 2000
Developer: Nintendo R&D1
Also Available For: Game Boy Color

The Background:
After his debut in Super Mario Land 2: 6 Golden Coins (ibid, 1992) Mario’s dastardly doppelgänger, Wario, quickly usurped Nintendo’s portly plumber as the face of Mario’s handheld sub-series. After the critical and commercial success of Wario Land II (ibid, 1998), Wario’s adventures continued on the Game Boy Color, a long-awaited colour upgrade to Nintendo’s popular handheld console. Wario Land 3 continued the tradition of expanding upon its predecessors, featuring far more emphasis on backtracking, exploration, and experimentation and would be the last in the series to release before Nintendo released the technically-superior Game Boy Advance console. Still, Wario Land 3 was a much-lauded success upon release and was eventually brought to the Nintendo 3DS Virtual Console some twelve years after its debut, which is the version I’ll be looking at today.

The Plot:
After Wario’s plane crash lands in a dense forest, he stumbles upon a mysterious cave and is sucked into a magical music box . An enigmatic hidden figure beseeches Wario to find five other music boxes to free him from his imprisonment and, excited at the prospect of finding more rare treasure, Wario dutifully sets out to satiate his lust for riches.

Gameplay:
Like its predecessors, Wario Land 3 is a sidescrolling action/platformer in which players take control of Wario, Mario’s mischievous and greedy lookalike. As in Wario Land II, Wario is functionally immortal; though he takes significant knockback from enemy attacks, he cannot ever be killed and faces no consequences for being attacked except being knocked from a platform or into another hazard. As a result, the player never needs to worry about replenishing Wario’s health or lives or being penalised for being attacked as long as they are patient enough to climb back up to where they were when they were knocked back. Wario begins the game noticeably less capable than in previous titles; he can still jump (shocking, I know!) and can barge into enemies with a shoulder charge but he can no longer pick up enemies and throw them…at least, not from the start. Instead, Wario must find power-ups in coloured treasure chests hidden throughout the game’s many levels to reacquire many of his usual skills, such as the butt stomp and the ability to pick up and throw enemies. Wario can, however, still roll into a ball when pressing down on a slope or coming off a zip-line to pass through narrow passageways.

Wario needs to re-learn some of his patented and basic abilities from the last games.

The main objective of the game is to visit each of the twenty-five levels found at each compass point on the overworld; each one contains four coloured keys and four chests of the same colour which house treasures, power-ups, and key items. Wario must collect each one to open up new areas of the overworld and progress further; this means that each level must be revisited multiple times with Wario’s new abilities and new areas opened up with the treasures and each compass point will only be fully accessible once all treasures have been collected. This makes the game much bigger and more confusing than even its predecessor, which featured branching story paths depending on the choices you made during gameplay; here, you constantly have to backtrack to old levels in order to open up new ones and, someti s, key items will affect multiple levels at once. Thankfully, Wario can return to the mysterious figure in the Temple at any point for a hint on which level to go to, though it’s up to the player to figure out what’s changed in that level or which of Wario’s new abilities needs to be used to progress. The game’s overworld is split between the four compass points (North, South, East, and West) and Wario can quickly travel to each one by pressing the “Select” button on the overworld. From here you can also check on which treasures you have acquired, reactivate key items to remind yourself of where to go, and, eventually, trigger the game’s day and night cycle (which, otherwise, automatically switches to one or the other every time you finish a level, with the time of day also affecting the levels in certain ways).

You’ll need all the Coins you can find to beat the annoying golfing mini games.

Within each level, you can also find a number of Coins, including eight large Musical Coins; unlike previous games, though, the amount of Coins you have doesn’t affect the game’s ending and Wario’s capacity is capped at 999 Coins. Instead, Wario uses Coins to play a number of hidden golf mini games found in each level, which is necessary to open previously blocked paths and find more keys and chests. The golf mini games help to break up the gameplay a bit but is needlessly frustrating when you first play it since you’re not really given any direction on what to do. Basically, by moving the screen to the right, you can see where Wario’s shot will land on the field; you need to press A and then quickly press it again when the slider reaches a power level high enough to avoid getting stuck in water, lava, or the rough grass and then quickly press it again when it hits the blue area of the slider to take your shot. You get four shots at hitting the Para-Goom and, if you fail to sink it in the goal, you’ll have to pay some more Coins to try again. When I first played this, I was frustrated by the finicky controls and vague directions but, once you play it a couple of times, it’s not so hard to get the timing down and the 3DS’s save state feature really helps speed the process up.

Wario’s “Reactions” will allow him to find more treasure and reach new areas.

As in the previous game, Wario can still change forms when hit with certain attacks; these will briefly alter Wario in strange and amusing ways to help him break through previously impassable blocks, reach higher areas, or pass through small spaces and figuring out how to use these different transformations (or “Reactions”, as the game calls them) is key to finding all the keys, chests, and Musical Coins. When in a level, you can also save your progress at any time, see which keys you currently hold, which chests you’ve opened, how many Musical Coins you’ve collected, and even return to the overworld map all with an appreciated ease. Compared to the last two Wario Land games, Wario Land 3 is much more difficult and time consuming; thanks to the abundance of backtracking and vague hints, it can be very difficult to know where you need to go and what you need to do. Thus, you are encouraged to experiment; if you see something blocking your path, try using all of Wario’s abilities as some will affect the obstacle or possibly even destroy it. When exploring a level for the first time, try to take note of your surroundings and out of reach areas as you may need to return later with different abilities to access these parts of the level, and be sure to visit the Temple if you ever forget the levels your key items have affected or opened up. For the most part, though, I found Wario Land 3 best played in short bursts of about an hour or so tackling each level in turn as they opened up or changed rather than trying to slog through it in extended sittings, which may have contributed to my more annoying experiences with the game as it never seemed to end.

Graphics and Sound:
Wario Land 3 was easily the best looking entry in the series at that point; thanks to being made exclusively for the Game Boy Color, the game is full of bright, vibrant colours that really pop out at you. While Wario is actually a little more subdued in his colouration, appearing almost monochrome, this actually helps him to stand out against the colourful backgrounds and, as you’d expect, he’s full of life and character, falling asleep if left idle for too long and scratching his butt when left halfway up a ladder. There is a lot of level variety on offer in Wario Land 3; each compass point of the map is home to at least six different levels and, rather than each compass point having a fixed theme, every level looks different and has different gimmicks contained within.

Levels are more varied, detailed, and colourful than ever and change as you progress.

You’ll explore standard platforming levels such as forests, deserts, volcanoes, and ice levels but also explore ruins, swamps, towns, castles, and caves. Each one has at least two different colour palettes thanks to the day/night cycle and, though they start off relatively small and restrictive, each one is quite large, with many different layers and areas to explore as you gain new abilities and affect the overworld. Wario Land 3 has a bit more emphasis on story this time around, with short cutscenes playing whenever Wario acquires a new item to show how it has affected the overworld map. When you find new power-ups, a short tutorial will play showing you how to use Wario’s new ability (which can be revisited at any time from the pause menu) and there are a few instances of dialogue, primarily from the hidden figure, to relay the game’s simple plot. As you’d expect from a Mario/Wario title, the soundtrack is suitably chirpy and catchy, though I can’t say that it really made much of a lasting impression on me.

Enemies and Bosses:
Since the game’s plot does not involve the Black Sugar Gang this time around, you’re faced with a whole slew of all-new enemies, many of which behave very similar to those from the last two games. Accordingly, you’ll come across spear-wielding Spearhead’s who will prick you with their sharp weapons, Para-Gooms who descend from the air and shield themselves with spiked umbrellas, puffer fish-like Haridamas which sprout spikes when they get close, and annoying birds that fly across the screen and stun you but can make for a boost to higher areas if you can time your jump correctly. You’ll also come up against a bunch of enemies that will change Wario’s form with their attacks or abilities; Appleby and Doughnuteers throw delicious apples and doughnuts your way, Fire Robota’s spout flames, Hammer-bots relentlessly try to squash you with their giant hammers, floating jellyfish try to sting you, and Zombies constantly spring out when it’s most inconvenient to hurl their heads at you. For the most part, these enemies are placed in or near areas where you’ll need the accompanying Reaction to progress further but, equally as often, they’re simply placed to be annoying so if you don’t need a specific transformation be sure to avoid them.

Often, the direct approach is insufficient to defeat Wario Land 3‘s bosses.

Wario has a tough battle ahead of him this time around as he must battle eleven different bosses in his quest for the five magical boxes; because of the nature of the game, though, it’s entirely possible to battle these bosses out of order depending on what abilities you have and key items you’ve found, which can mix up subsequent playthroughs of the game. With the exception of the final boss, each of Wario Land 3’s bosses requires three hits to defeat and, like in the last game, each one will expel you from the boss arena if you get hit or mess up, changes up their attack patterns as the fight progresses, and requires quite a bit of skill on your part to defeat. The Doll Boy, for example, sits atop a totem pole tossing hammers at you; you must avoid these and destroy his totem pole to bring him down to ground level then frantically avoid his hammer swings to jump on his head and finish him off with a shoulder barge. Similarly, Wormwould pops out of the ground to spit rocks at you that will send you tumbling off the platform if they hit you so you need to use your ground pound on his head before he gets the chance. Each boss is unique and requires different strategies to get around their attacks; Wolfenboss has to be knocked out of the air by ricocheting a Kuri at the right angle, for example, while Mudee is fought while you’re clinging to a net and requires you to time a ground pound onto its body while avoiding its spiked tail. Anonster, meanwhile, can only be brought down to ground level by throwing its own web balls up at it, which can be tricky because it’s hard to judge the angle of your throw.

Wario’s final challenge is a gigantic, demonic clown that is actually capable of killing him.

Some bosses are more unique and frustrating than others, though: Jamano plunges the arena into darkness, forcing you to quickly navigate around the small area hitting four skulls to bring the exorcising light and Wario needs to avoid Helio’s infectious stings and ground pound a pump to inflate and explode the boss. Easily the two most frustrating bosses, for me, though were Pesce and Shoot; Pesce, a weird rat/piranha hybrid, can only be defeated by poisoning it with mouldy cheese but it’s really tricky to time the dropping of the cheese so the damn thing actually eats it. Shoot is similar to Dunk from Wario Land II in that you must beat him at a ball-based game, in this case football. You need to avoid being squashed by Shoot but it’s not made clear exactly how you’re supposed to smash him into the goal; the easiest way I found was to lure him near to the goal (but not too near) and then barge him when he’s bouncing in the air as I could never get him into the goal when the goalie was stunned by a ground pound. After finding all five musical boxes, Wario returns to the hidden figure, who reveals himself to be a demonic clown entity and the game’s final boss. This is the only time in the game that you can get a game over as Wario will instantly be defeated if the clown grabs a hold of him. You need to jump over, or duck under, his hands and stun his fists with a ground pound and then jump and throw the fist into the clown’s face four times to win. Honestly, the most difficult part of this boss was getting the timing of my attacks and jumps right as his fists swing at you pretty fast and it’s easy to lose your grip on the stunned hand if you’re not fast enough.

Power-Ups and Bonuses:
As mentioned before, Wario can acquire upgrades for his abilities and relearn classic skills from various treasure boxes. This includes an upgrade to his shoulder attack and ground pound to break through tougher blocks, being able to charge up an enemy before throwing it to throw it higher and further, the ability to swim (and then swim through currents), smashing objects from below, and performing a high jump by pressing up and jump at the same time.

Many of Wario’s Reactions return from Wario Land II and function in the same way.

Wario also assumes a number of different forms upon being hit with certain attacks or encountering certain hazards. Many of these return from Wario Land II, such as Fat Wario (who destroy enemies by touching them and can smash through special blocks), Fire Wario (who, after running around with his butt on fire for a while, eventfully becomes engulfed in flames to break through special blocks), Flat Wario (who is small enough to squeeze through tiny gaps but extremely difficult to control, with the game forcing you to desperately try and float him through gaps in vertical areas), Zombie Wario (who passes through thin platforms when jumping on them), and Puffy Wario (who relentlessly float upwards until he hits a ceiling or block). You can also become Ice Skatin’ Wario when frozen (more of a hindrance than a help), Snowball and Ball o’ String Wario to become an unstoppable ball and break through special blocks, Bouncy Wario (helpful to reach high areas but difficult to control), Bubble Wario (which can let you pass through directional currents to reach goodies but is often just an annoying hazard), Invisible Wario to get past Seeing-eye Doors, and Vampire Wario. This last one is pretty cool as you become a Dracula-type figure and can turn into a vampire bat by pressing B and fly up to new areas but, since this latter mechanic is the only useful thing about this Reaction, I’m not sure why Wario doesn’t just become a bat by default.

Additional Features:
There are one hundred treasures to find in Wario Land 3; you’ll need all of Wario’s abilities and certain key items to find them all as some are not only hidden in previous levels but also in hidden levels on the overworld map. Thankfully, you don’t need to find them all to complete the game and you don’t get a different ending for having them all but collecting all one hundred does unlock a time attack mode. There are also, as mentioned, eight large Musical Coins to be found in each level; collecting all of these opens up a fourth golf mini game if you just can’t get enough of that particular gem. Of course, if you’re playing the 3DS version of the game, you can also make liberate, unapologetic use of the save state system to make the game a little easier on yourself.

The Summary:
Wario Land 3 really surprised me; I kind of expected the series to get a bit simpler as it progressed but, if anything, the Land sub-series just got bigger and more ambitious as it went on. This is easily the biggest of this sub-series both in terms of graphics and its scope which is great for a classic handheld title and I can’t fault the game for being packed full of content but…man, is this a long, convoluted game. Wario Land 3 really kicked my ass as I went into it expecting quick, easy, pick-up-and-play gameplay and was, instead, forced to constantly backtrack and explore all over the game’s vast overworld and numerous levels. This was great for expanding the depth and range of the sub-series and makes for an addictive and engaging handheld experience; I tried to limit my play time to short bursts of a few hours or so but often found myself getting sucked into the game as I tried to track down one more treasure chest or unlock one more level for my next session.

My Rating:

Rating: 3 out of 5.

Pretty Good

Have you ever played Wario Land 3 before? How did you find it compared to the other Wario Land videogames? Were you a fan of how big the game was and its emphasis on backtracking and exploration or did you find it maybe to be a bit too ambitious for its own good? What are your thoughts on Wario as a character and his wacky sub-series? Would you like to see more of him and his unique gameplay mechanics or do you think he’s better suited as a side character relegated to mini games? Whatever thoughts you have on Wario and Wario Land 3, feel free to drop a comment below.

Game Corner & Knuckles: Sonic 3 & Knuckles (Xbox One)


Following a highly anticipated release, bolstered by an extravagant marketing and release schedule, Sonic the Hedgehog 2 (SEGA Technical Institute, 1992) not only improved on every aspect of its influential predecessor but also went on to become the second best-selling SEGA Mega Drive game of all time. Expectations were high for the equally-anticipated third entry, a game that ended up being so big that SEGA made the decision to split it into two, birthing perhaps the greatest 2D Sonic adventure in the process.


Released: 10 June 2009 / 9 September 2009
Originally Released: 2 February 1994 / 18 October 1994
Developer: Sonic Team
Original Developer: SEGA Technical Institute
Also Available For: Gamecube, Mega Drive, Nintendo DS, Nintendo Wii, PC, PlayStation 2, PlayStation 3, PlayStation 4, PlayStation Portable, SEGA Saturn, Xbox, Xbox 360

The Background:
Sonic the Hedgehog 2 was a blockbuster hit for SEGA; thanks to the title selling over 400,000 units in its first week alone (and over six million during the Mega Drive’s lifespan), SEGA was able to catch up to Nintendo in the “Console Wars” of the mid-nineties, raising their stake in the home console market by 40%. Anticipation was high for the release of the third Sonic game, which saw development split between two teams: a Japanese team and an American team, with Yuji Naka, Hirokazu Yasuhara, and Roger Hector at the heart of the game’s development. Sonic 3 introduced a new antagonist character for our heroes; numerous designs were submitted before the team settled on Takashi Yuda’s concept of a super strong red echidna eventually dubbed “Knuckles”. However, thanks to a combination of a strict deadline to release in time for a major McDonald’s marketing campaign, and Naka’s wish for the game to vastly expand upon the gameplay, mechanics, and lore of the previous two games, Sonic 3 proved to be too big for a single 34-megabite cartridge so the decision was made to split the game in two to hit their projected release date. While this proved to be an expensive decision for us gamers, both Sonic 3 and Sonic & Knuckles became two of the Mega Drive’s best-selling titles, with both games selling over one million copies in the United States. Both games received critical acclaim praising both the graphics and Sonic & Knuckles’ innovative “Lock-On” technology. Sadly though, the game (particularly Sonic 3) has run into some legal troubles over the years, mainly regarding Sonic 3’s soundtrack, which meant not only was a combination cartridge of the two games cancelled but a remaster for mobile devices was shot down and Sonic 3 (and, consequently, Sonic 3 & Knuckles) is frequently missing from modern-day compilations.

The Plot:
Doctor Eggman’s Death Egg space station has crash-landed on the mythical floating Angel Island, home to the Master Emerald and Knuckles, the sole surviving member of the legendary echidna race. Eggman has tricked the gullible and hot-tempered Knuckles into thinking Sonic and Miles “Tails” Prower wish to steal the Master Emerald, making recovering the seven Chaos Emeralds and putting a stop to Eggman’s diabolical schemes twice as hard for our dynamic duo!

Gameplay:
As you might expect, both Sonic 3 and Sonic & Knuckles are 2D, sidescrolling action/platformers in which you travel across a total of twelve stages (known as “Zones”): six in Sonic 3 and six more in Sonic & Knuckles. Just like in Sonic 2, the majority of the game’s Zones are split into two “Acts” but, in a twist, you’ll now have to battle a boss at the end of each Act (with the second Act typically featuring a showdown against Eggman in one of his deadly contraptions). Just as Sonic 2 took everything about its predecessor and improved upon it considerably, so too does Sonic 3 & Knuckles expand upon the options available to you; Zones are now bigger than ever, featuring numerous different paths and mechanics all geared towards having you blast through faster than ever before. Even better, the games are designed with each character’s specific abilities in mind; each character can run, jump, roll into a ball, and blast away in a Spin Dash but they all have different unique abilities as well, meaning that some paths are only available to Knuckles, for example, or some areas can only be reached using Tails’ unique (if limited) flying and swimming mechanics.

Each character has their own abilities to help them take different paths in Zones.

Sonic 3 & Knuckles still keeps its controls simple, though, and each of these different abilities is easily activated simply by pressing a button twice; press A twice as Sonic and you’ll be surrounded by his “Insta-Shield” (a brief flash of lightning that can protect Sonic from projectiles and extend the reach of his spin attack to cause damage). Press A twice as Tails and you’ll be able to fly or swim by then rapidly tapping the same button; Tails can even carry Sonic up to new areas but he does get tired rather quickly so, while this is useful for skipping large portions of the game’s Zones, it does have its drawbacks. Knuckles, meanwhile, is probably the most versatile character; he can glide, climb up walls, and bash through certain walls to reach entirely new areas (and bosses) that are unique to him. He is, however, the game’s “hard mode” as he is noticably slower than his two counterparts and his jump is much shorter. As in Sonic 2, the game gives you the option of selecting how to play, this time from its innovative and unique save state menu; while you’re limited to choosing between either Sonic or Knuckles in Sonic & Knuckles, Sonic 3 (and Sonic 3 & Knuckles) allows you to pick between Sonic, Tails, Knuckles, or Sonic and Tails (who, thankfully, is far more useful this time around thanks to his expanded moveset and the game’s new Special Stages). As always, though, you can collect Golden Rings to protect you from harm, earning extra lives for every one hundred and activating Starposts to create a checkpoint and enter the new Bonus Stages if you’re holding a certain number of Rings.

Every Zone is packed with gimmicks but none were more infamous than Carnival Night’s barrel!

Speed is a far greater aspect of Sonic 3 & Knuckles; while the first game heavily promoted how fast and powerful it was, it really wasn’t until Sonic 3 & Knuckles that Sonic Team actually delivered on that promise. Zones are massive, filled with slopes, loops, springs, and all kinds of nifty, unique new mechanics to rocket you forwards. You’ll jump from crumbling (or disappearing) platforms, swing from vines, rush down waterways, bash through walls, teleport across the Zone, and be transported through the air through a number of fast-paced and exciting new mechanics. Each Zone has a unique gimmick to it that is implemented in a far more impressive and engaging manner: Angel Island Zone catches fire halfway through, Marble Garden Zone sees you using pulleys and spinning tops to navigate vertically and desperately trying to outrun the collapsing environment, Sandopolis Zone features a variety of new sand-based mechanics before having you frantically search out for light switches to scare off ghosts, and Sky Sanctuary Zone has you teleporting around, jumping from crumbling platforms, and bouncing from fluffy clouds. Every Zone is densely packed with features and innovative gimmicks, far more than any previous Sonic title, and perhaps none so infamous as Carnival Night Zone’s notorious barrel. I won’t be arrogant enough to say that this barrel wasn’t an obstacle for me back in the day but I don’t have nearly as many bad memories of it as some do; through trial and error, I think I slipped past it easily enough but the solution is simplicity in itself: simply stand still and press up and down alternatively until it lowers enough for you to continue on.

Zones are huge, with multiple paths and areas exclusive to certain characters.

Although the games do have a far greater emphasis on speed, there are still a few slower sections and small puzzles for you figure out; generally, these are as simple as pressing a switch to lower water, reverse gravity, or open doors but, other times, you’ll be blocked off by unbreakable walls or tossed to new areas by Knuckles. There’s always another way around in Sonic 3 & Knuckles, though, no matter who you’re playing as or what you’re up against; balloons allow you to bounce yourself to higher areas in Carnival Night Zone, for example, and you can cause sand to fill the pyramid tomb of Sandopolis Zone Act 2 to progress further (though be careful as you’re just as likely to get crushed if you dawdle). Additionally, you have some returning concerns to be aware of, such as spikes, bottomless pits, and drowning if you linger underwater too long without a shield or grabbing an air bubble. Gameplay is fast and full of variety thanks to the dense nature of the Zones and their many gimmicks but there are a few aspects from Sonic 2 that don’t make the cut, unfortunately; Sonic’s biplane, the Tornado, only shows up in cutscenes, for example. However, things do get mixed up considerably when you reach Lava Reef Zone; not only is this Zone a mixture of lava-based hazards and a crystal-infested cave, it also wildly differs depending on which character you play as. Sonic and Tails will have to play through two Acts, culminating in the reactivation of the Death Egg and a tense battle against Eggman, before proceeding on to the long-awaited Hidden Palace Zone to go head-to-dread against Knuckles. Play as Knuckles, though, and you’ll face no boss in Lava Reef and Hidden Palace is little more of a transitional Zone to take you to Sky Sanctuary Zone, where Knuckles’ game culminates in a final showdown with Mecha Sonic.

There are some bugs and glitches that can see characters reach areas they shouldn’t.

Indeed, the narrative of Sonic 3 & Knuckles differs depending on which game you play; if you play the combined game, the story is far more cohesive, tracking Sonic and Tails across Angel Island, battling Eggman, dealing with (and eventually allying with) Knuckles, and finally returning Angel Island to the sky. Knuckles’ story, though, takes place after the end of the game no matter which version you play; this means his Zones are presented slightly differently, with the background changing to show the island is in the sky, and he faces a vengeful Eggrobo and the aforementioned Mecha Sonic rather than Dr. Eggman. This, in addition to the myriad of different paths Knuckles’ abilities afford him, means that playing as Knuckles offers a slightly different experience in a variety of ways since you won’t face the same obstacles as Sonic and Tails (or you will, but in different ways). Obviously, no game is perfect and Sonic 3 & Knuckles is no exception; occasionally, you’ll go so fast that you’ll out-run the camera, potentially falling victim to one of Eggman’s “secret traps” (or, more accurately, running into a kill zone or causing the game to soft-lock). You can also use glitches and manipulate the game to have characters enter areas they normally can’t but, personally, I never really ran into anything like this in a normal playthrough. Thanks to Sonic 3 and Sonic 3 & Knuckles’ unique save feature, you were able to have multiple save states back in the day, which made completing the game and collecting the Chaos Emeralds easier than ever as you could just jump into any Zone whenever you liked. This feature was, unfortunately, missing in Sonic & Knuckles, which did make that game a bit more difficult back in the day as you would have to complete it in one sitting, but, while the Xbox Live version of the game doesn’t recreate the expansive save state features of Sonic 3 & Knuckles, you do get three save slots for each game to, at least, reduce Sonic & Knuckles’ difficulty a bit.

Graphics and Sound:
For my money, Sonic 3 & Knuckles is not only the best 2D Sonic game of its time but also the best looking and sounding; Zones are absolutely huge and full of life and little elements to really make them stand out. No two Acts of any Zone are the same as the environment will change (sometimes subtly, sometimes explicitly) between Acts: Angel Island Zone bursts into flame, Mushroom Hill Zone changes seasons, Ice Cap Zone switches from a mountain top to a frozen sea, the Death Egg looms in the background of Launch Base Zone Act 1, takes off in Act 2, and sits ominously in Lava Reef Zone Act 2 (notably it is missing when playing as Knuckles since his story takes place after Sonic and Tails’s), and Death Egg Zone has been ungraded from a mere elaborate corridor to a twisting, mechanical nightmare of futuristic paths and technology and gravity-shifting mechanics.

Sonic 3 & Knuckles‘ level variety is second to none!

No doubt about it, Sonic 3 & Knuckles features some of my favourite Zones ever; from the aforementioned Marble Garden Zone to Ice Cap Zone, with its unique and breathtaking snowboarding sequence, to the bouncy goodness of Mushroom Hill and the exciting dread of Lava Reef Zone. Even Zones that are more annoying, like Hydrocity Zone, are fun to play through since they look great, are fast-paced, and are filled with interesting gimmicks to keep you moving forward. The game expands and improves upon numerous mechanics from its predecessors, too; while Wing Fortress Zone was decent enough in Sonic 2, Flying Battery Zone takes everything that worked in that Zone and expands upon it, making it feel much more alive and engaging. While Carnival Night Zone isn’t quite as iconic as Casino Night Zone, I actually prefer it for its music, presentation, changing landscape, and better implementation of gimmicks. It’s not like the “casino” theme was completely abandoned either as it shows up, merged expertly with the rotating Special Stage mechanic of the first game, in one of the game’s two all-new Bonus Stages.

Cutscenes and Act/Zone transitions tell the game’s story and help connect its world.

Additionally, Sonic 3 & Knuckles has, hands down, my favourite Special Stage design ever. Gone are the annoying, rotating mazes and cumbersome half-pipes of its predecessors, replaced with an eye-catching spherical design that has you collecting Blue Spheres, avoiding Red Spheres, and, despite some noticeable slowdown and the Stages increasing in speed and difficulty the more you play, these Stages are, by far, the easiest of the classic 2D Sonic titles, which only increases their appeal to me. Probably the best thing about Sonic 3 & Knuckles is its heavy inclusion of cutscenes, all of which perfectly convey the game’s simple (but far more detailed) story through the simple use of pantomime and music. The game opens immediately after the ending of Sonic 2, with Super Sonic flying alongside the Tornado and crashing head-first into Knuckles, who swipes the Chaos Emeralds and runs off with a chuckle. Knuckles reappears at numerous points throughout Sonic and Tails’ story to cause them havoc, activating switches and traps to cause them to fall or be blasted into the next Zone. Even when he’s not present, there is usually a means for the characters to progress to the next Zone, which really makes it feel as though the games (and the island) are linked together in a cohesive way. Not only that but, when you clear Act 1, the next Act immediately loads from that spot without cutting away, giving a sense of the scale of the game’s Zones.

Sonic 3 & Knuckles has probably the best soundtrack of the classic 2D titles.

Characters and sprites are more detailed than ever; Sonic is easily the most noticeably different, now far pudgier and sporting adorably oversized hands and feet, but each has their own idle animation to encourage you to get back to the game and the game’s Badniks and bosses are some of the most impressive and detailed yet, with each taking full advantage of their unique environment. And then there’s the soundtrack; originally composed by famed pop star Michael Jackson, the soundtrack was hastily reworked after SEGA cut their ties to Jackson but similarities between the games tracks and Jackson songs can still be identified. Regardless, both Sonic 3 and Sonic & Knuckles have fantastic soundtracks, full of energy and unique themes not only for the Zones and bosses but also for Knuckles. Sadly, Sonic 3 & Knuckles utilises Sonic & Knuckles’ soundtrack rather than Sonic 3’s (which is superior, in my opinion), and the game’s music is often altered when it is ported for other systems, but that doesn’t stop it from being easily the best and most memorable of all the classic 2D Sonic games.

Enemies and Bosses:
As always, you’ll have to contend with Eggman’s Badniks; although still quite cute to look at, these Badniks look more dangerous than ever but are, in actual fact, no more aggressive or dangerous than in previous games. Their placement is much improved over Sonic 2 and their level of difficulty both escalates and drops as you progress due to the nature of Sonic 3 & Knuckles being two games spliced together.

Badniks and hazards are more deadly than ever, often using the environment against you.

This means that you’ll be merrily bouncing off of Rhinobots in Angel Island Zone, dodging Turbo Spiker’s rocket-powered spike in Hydrocity Zone, and timing your attacks to bust open Pointdexter when playing through Sonic 3 and then back to smashing open relatively harmless enemies like Butterdroid and Madmole once you land in Mushroom Hill Zone before you frantically try to smash apart Toxomister before its Ring-draining cloud chokes you to death. As if that isn’t enough, many Badniks and hazards use your enivonment against you; Cluckoid blows a wind to keep you back (often trapping you in a nearby sticky vine in the process), hazards can freeze you into a block of ice, Rock’n can only be damage with a Spin Dash attack, and Chainspikes will try to impale you on their razor sharp chains. Additionally, you’ll also encounter ghosts in Sandopolis Zone that grow increasingly aggressive as the lights dim darker and can only be dissipated by turning the lights up full. Helpfully, though, the game’s many shields (and Sonic’s Insta-Shield) can not only repel enemy projectiles but you’ll also be able to use Spiker’s spikes as a spring to bounce away from danger.

To mix things up a bit, you’ll have to face a mini boss at the end of every first Act.

In a change of pace from the previous two games, you’ll also have to battle a mini boss at the end of every first Act before you can reach the goal post and clear the Act. These range from a hovering, flame-spewing tank to a tree-chopping robot and a sentient animal capsule. Perhaps having learned something from the unique bosses of Sonic the Hedgehog CD (SEGA, 1993), these mini bosses (and the game’s main bosses) require a little more thought that just ramming head-first into them; Hydrocity Zone’s mini boss, for example, rockets around the arena and sucks you up in a whirlpool and can only be damaged when its rockets stop spinning, and Launch Base Zone has you take on two mini bosses at once, each one attacking you (and protecting itself) with a mace-like chain that only speeds up with its partner is destroyed.

Mini bosses generally require a bit more strategy than just “jump and attack”.

Similarly, if you try to blindly attack Sandopolis Zone’s golem, you’ll just get hurt, so you need to attack its head and force it into quicksand to dispose of it, and you’ll find the only way to destroy Flying Battery Zone’s mini boss is to trick it into attacking itself. Probably the game’s most troublesome mini boss (at least, for me) is the mechanical Cyclops you battle in Death Egg Zone; essentially an upgraded version of the Wing Fortress Zone boss, this mini boss has you ramming a giant eye, watching out for explosive spikes, and avoiding spinning spiked platforms while it tries to fry you with is deadly laser.

After he eludes you in Launch Base Zone, you finally confront Knuckles in Hidden Palace Zone.

When playing as Sonic and Tails, you’ll also have to contend with Knuckles; however, Knuckles only appears in cutscenes to cause you grief and you won’t actually get to go blow-for-blow against him until you reach Hidden Palace Zone. Here, Knuckles with glide, Spin Dash, and jump at you much like the battle against Mecha Sonic from Sonic 2. Simply jump on Knuckles’ head or smack him out of the air a few times and he’ll soon be beaten; afterwards, he is enraged to find Eggman has stolen his coveted Master Emerald and, though, wounded, assists you in reaching Sky Sanctuary Zone. Finally, you have the prerequisite showdowns with Dr. Eggman himself; again, though, Knuckles never actually battles Dr. Eggman; barring glitches, Knuckles will, instead, battle against an Eggrobo but, with a couple of exceptions, battles the same bosses as Sonic and Tails. Eggman isn’t messing around this time; rather than try to smack you with a wrecking ball or run you over in the first battle, Eggman will hide behind a waterfall in Angel Island Zone, blasting at you with flame cannons and generally hovering over a bottomless pit.

The direct approach rarely works in this game as Eggman isn’t playing around this time.

After that, you’ll have to mix up your attack strategies a bit, using whirlpools and explosions in the water to ram into Eggman’s craft in Hydrocity, flying around the screen (or dodging spiked chains) to ram into Eggman’s drill machine in Marble Garden Zone, trying not to get sucked into an electrical field in Carnival Night Zone, watching out for blasts of chilled air in Ice Cap Zone, and dodging massive weighted balls in Launch Base Zone. Eggman’s flame machine returns in Mushroom Hill Zone, this time in a chase boss battle that sees you avoiding spiked hazards and jet blasts in what was, probably, the inspiration for the boss battles of Sonic Advance 2 (Dimps/Sonic Team, 2002). Dr. Eggman’s contraptions are even more formidable as you play through Sonic & Knuckles: he swings around at you in Flying Battery Zone, trying to fry and skewer you at the same time; hides behind a massive laser-spouting golem in Sandopolis Zone; and is completely protected from your standard attacks in my favourite regular boss battle of the base game, the Lava Reef Zone boss. Here, you have to jump from platform to platform, avoiding spiked bombs and trying not to fall into lava as Eggman tries to tip you towards him. The Flame Shield really helps in this battle as it allows you to stand on the lava and just hop over the bombs until they send Eggman packing.

Eggman hops into his deadliest Death Egg Robot yet for the penultimate battle!

When playing Sonic 3, you’ll face something of a gauntlet in Act 2 as you’ll have to battle Eggman in Launch Base Zone, knock the smirk of Knuckles’ face in a cutscene, before facing Eggman in two separate contraptions on the outskirts of the Death Egg. The first machine is pretty simple (dodge his lasers and ram him when the little electric ball isn’t blocking your attack) but the second is one of my favourite boss battles of 2D Sonic (with a kick-ass, ominous track to boot). This sees Eggman jump into his “Big Arm” Egg-O-Matic and fly across the screen trying to land on you, grab you, and pound the Rings (or life) out of you. He also flies along the bottom of the screen trying to skewer you with his spikes and the only way to damage him is with a well-timed jump to his cockpit but, once you do, the Death Egg will crash again (this time in the Lava Reef Zone’s volcano) and you can move on to the Sonic & Knuckles portion of the game. Note that when Knuckles faces this boss, it’s in the actual Launch Base Zone as, in his story, the Death Egg is completely absent from the Zone since it’s already been destroyed. When playing as Sonic and Tails, you’ll travel to the Death Egg Zone and battle Eggman in a far bigger, more intimidating and dangerous version of his Death Egg Robot mech. This is, essentially, a three-stage boss battle; first, you have to avoid being squashed by its fingers, destroying them one (or two, if you time your jumps right) at a time. Once its fingers are destroyed, it chases you from the left side of the screen, destroying the platform you’re on and trying to fry you with flames from its nostrils. You’ll have to jump over these flames and smack it in the nose to expose its Master Emerald power core (and weak spot); however, Eggman also charges a screen-filling laser blast from the Master Emerald that you’ll have to watch out for and you’re constantly at risk of falling or slipping to your death.

Although Sonic and Tails battle him three times, it’s up to Knuckles to put down Mecha Sonic.

Once you’ve landed the final hit, be sure to angle your jump back to the platform; now, you have to chase after Eggman as he flees with the Master Emerald, ramming him as you go until he is defeated while desperately trying to not bounce or fall as the platform crumbles behind you. If you’re playing as Knuckles, though, you won’t get to experience this battle or the game’s final Zone; instead, you face Mecha Sonic in Sky Sanctuary Zone. Mecha Sonic acts as Sonic and Tails’s mini boss in Sky Sanctuary Zone, appearing three times; in the first, he’s in Eggman’s wrecking ball machine from the first game, then he jumps into the Metropolis Zone bubble machine from Sonic 2, before essentially recreating the battle against his namesake from Sonic 2. Knuckles, though, has to face a powered-up Mecha Sonic, who absorbs power from the Master Emerald to turn into Super Metal Sonic; faster, invulnerable, and blasting both large energy bolts and weird ring-things at you, Super Mecha Sonic can only be damaged when he reverts to his base form, which gives you a small (very small) window to ram him once (maybe twice) before he powers back up.

Grab all of the game’s Emeralds to pursue Eggman through the atmosphere as Super/Hyper Sonic!

Collect all seven Chaos Emeralds in Sonic & Knuckles (or all seven plus the seven Super Emeralds in Sonic 3 & Knuckles), and you’ll get access to the game’s true final Zone, the Doomsday Zone. Here, Super/Hyper Sonic must fly through the asteroid-littered atmosphere in pursuit of Eggman, who fires missiles and bullets at you, all while racing against the clock as your Rings are continuously drained in these forms. Luckily, Rings are scattered throughout the atmosphere and you can dash ahead by pressing A but it can be very tricky to manoeuvre as not only are asteroids blocking your path, Eggman’s bullets and missiles can send you flying back a ways and Eggman can only initially be damaged by causing his homing missiles to crash into his cockpit. Once you’ve done this enough times, he’ll escape in his Death Egg Robo mech and be finally vulnerable to your head-on attacks but, again, you have to be careful to not let asteroids and projectiles slow you down and be sure to grab any Rings you see or else you’ll fall to your death in seconds.

Power-Ups and Bonuses:
As is the tradition in Sonic titles, numerous computer monitors are scattered throughout the game’s Zones. Smashing these monitors will award you with such rewards as ten extra Rings, an extra life, a speed up, or an invincibility but don’t go blindly rushing in to break every monitor you see as there are special new Eggman monitors which, when broken, will damage you.

While all the characters can grab the elemental shields, only Sonic can utilise their full potential.

Sonic 3 & Knuckles mixes things up with the inclusion of three elemental shields; the Water Shield (which keep you from drowning), the Flame Shield (which protects you from flames and lava), and the Lightning Shield (which attracts Rings to you and protects you from electrical hazards). In an interesting piece of realism, the latter two shields will be lost if you jump into water and, while all three characters can acquire these shields, only Sonic can get the most out of them. Grabbing each one as Sonic replaces his Insta-Shield with a new ability (the bounce, flame burst, and double-jump, respectively) which more than makes up for his inability to fly, climb, or swim.

Additional Features:
While both Sonic 3 and Sonic & Knuckles come with a handful of Achievements to earn, you sadly don’t get to earn any additional Achievements for playing Sonic 3 & Knuckles. Still, these Achievements are pretty standard fare for the Xbox Sonic ports, featuring such requirements as finishing the game, reaching certain Zones, collecting one (and all) of the Chaos Emeralds, or collecting a certain number of Rings. Thankfully, there are no timed Achievements this time so you don’t have to worry about finishing the game in under an hour or beating certain Zones in a certain time, but this does make getting all of each game’s Achievements incredibly easy As is the tradition, each character can access the game’s Special Stages to try and earn one of the Chaos Emeralds.

Every character gets a flashy Chaos power-up this time around.

You may be tempted to leap into the sparkling halo found when you pass a Starpost with certain Rings but this simply brings you to one of three Bonus stages (where you can earn extra Rings, lives, shields, continues, and bump up your score); instead, hidden throughout the game’s Zones are a number of Giant Rings. Once you find one of these Rings and jump into it, you’ll have to collect every single Blue Sphere to earn a Chaos Emerald. These Blue Sphere Special Stages speed up the longer you’re inside them to make things more difficult and increase in difficulty as you progress, throwing more maze-like constructions in your way and peppering your path with instant-fail Red Spheres. Still, there’s no time limit to worry about and Tails doesn’t cause you any trouble like he did in Sonic 2; plus, there’s only a few Special Stages where a wrong move can cause you hassle and, thanks to the game’s save state feature (in all versions of the games), you can easily return to one of the earlier Zones and retry for a Chaos Emerald as often as you need. Because of this, Special Stages are only really difficult when playing the base Sonic & Knuckles as Sonic since there was no save feature in the original version and, even now, it’s harder to find the elusive Giant Rings with Sonic’s more grounded moveset. Once you collect all seven Chaos Emeralds, both Sonic and Knuckles can transform into Super Sonic or Super Knuckles after collecting fifty Rings and jumping. This will make them invincible and super fast but will drain their Rings over time (and, of course, they can still drown, be crushed, or fall to their deaths). Once you clear Launch Base Zone, you’ll be stripped of your Chaos Emeralds and will have to power them up into Super Emeralds by clearing seven more Special Stages. This allows Sonic and Knuckles to become Hyper Sonic and Hyper Knuckles and allows Tails to become Super Tails. In these forms, characters are even faster and have additional abilities (Hyper Sonic also glows like a rainbow and can dash ahead, Hyper Knuckles can shake the screen to destroy Badniks by gliding into walls, and Super Tails is surrounded by similarly-powered-up Flickies that home in on enemies and bosses to deal additional damage).

Compete in the game’s somewhat-improved multiplayer mode or access addition features with the”Lock-On” feature.

Sonic 3 also comes with a multiplayer component that allows a second player to play as Tails alongside Sonic, as in Sonic 2, or two players to go head-to-head as Sonic, Tails, or Knuckles in the game’s split screen mode. While this is nowhere near as awful as Sonic 2’s thanks to the screen not being stretched to ugly proportions, it is very zoomed out and Knuckles is missing his moveset, though you are able to play through five unique Zones in three different match types (Grand Prix, Match Race, and Time Attack). Sadly, though, this mode (and a playable Tails) is absent from Sonic & Knuckles. As mentioned before, the Xbox Live version of these games doesn’t allow for the original save feature but it does come with three save states for each game and access to online leaderboards. Owning both Sonic 3 and Sonic & Knuckles not only allows you to play Sonic 3 & Knuckles but also gives you access to the “Blue Sphere” mini game to take on a near-infinite number of the game’s Special Stages and, best of all, if you also purchase Sonic 2, you’ll be able to play as Knuckles in that game too.

The Summary:
I love Sonic 2, don’t get me wrong, but Sonic 3 is worlds better in every single way and Sonic 3 & Knuckles is just about as perfect a 2D Sonic game as you can get. Certainly, for me, this combined title is the quintessential 2D Sonic title, with only Sonic Mania Plus (PagodaWest Games/Headcannon, 2018) coming close to matching the scope and entertainment offered by Sonic 3 & Knuckles. With massive Zones, loads of gimmicks and tweaks that pretty much perfected Sonic’s gameplay, a fantastic soundtrack, some of the most detailed and animated graphics of the 16-bit era, and a simple but wonderfully well told story, Sonic 3 & Knuckles is the complete package for any self-respecting Sonic fan. Blisteringly fast, with loads of replay value and additional features to keep you coming back for more, the only thing keeping Sonic 3 & Knuckles from being infallible is SEGA’s inability to release a proper remaster of the title for a new generation of players.

My Rating:

Rating: 5 out of 5.

Fantastic

How do you feel about Sonic 3 & Knuckles? Which of the two games did you prefer? What did you think about Sonic & Knuckles’ “Lock-On” technology? Where do you rank the games against Sonic’s other 2D titles? Perhaps you prefer a different 2D Sonic game; if so, which is it and why? How did you feel about Knuckles upon his debut, the new Super forms introduced in this game, and would you have liked to have played as Sonic and Knuckles or Tails and Knuckles? Would you like to see a remaster of the title? How are you celebrating the anniversary of Sonic 3’s release today? Whatever your thoughts, please feel free to share them and your memories of Sonic 3 & Knuckles below.

Game Corner: Call of Duty: Black Ops (Xbox 360)

CODBLOPSLogo

Released: 2010
Developer: Treyarch
Also Available For: Nintendo DS, Nintendo Wii, PC, PlayStation 3

The Background:
It’s the final week of “CoD Month” here on my site. So far, I’ve played all three titles in the Call of Duty: Modern Warfare Trilogy (Infinity Ward/Sledgehammer Games, 2016), Call of Duty 3 (Treyarch, 2006), and Call of Duty: World at War (ibid, 2008) and I’ve been less than impressed with what I’ve seen so far. For the longest time, I’ve never been much of a fan of the Call of Duty titles (Various, 2003 to present), mainly because I don’t really get on with first-person shooters (FPS) at the best of times. The perspective can be difficult to judge, enemies shoot at you from nowhere, and I just find them (especially military shooters) quite generic and uniform and, so far, the Call of Duty games I’ve played haven’t done much to change my views. World at War was probably the one I enjoyed the most and, it turned out, spawned a spin-off series for the Call of Duty franchise that continued with this title. Black Ops was another title that happened to come with the Xbox 360 I bought a while back and I’ve heard a lot of positive things about this title, especially, among all the Call of Duty games. So, one last time, I sat down to plough through one more Call of Duty game simply for the Achievements and to see if my personal bias could be swayed.

The Plot:
Sixteen years after the events of World at War, the United States and the Soviet Union are locked in a “Cold War” that moved warfare away from the trenches and towards more clandestine operations. Black Ops revolves around the discovery of “Nova-6”, a deadly chemical weapon that is in the hands of several Russian sleeper agents placed across the globe, and the race against time to locate, isolate, and destroy it before it can kill millions.

Gameplay:
Call of Duty: Black Ops is a first-person shooter that sees you in the role of SAD/SOG operative Captain Alex Mason; unlike the other Call of Duty games I’ve played so far, you primarily control Mason throughout the game’s campaign but, at various times, you’ll also play as CIA paramilitary operations officer Jason Hudson. Also in a change from the previous Call of Duty titles I’ve played, Black Ops’ protagonists are actually vocal, talking during gameplay and in cutscenes, which is a nice change of pace.

CODBLOPSControls
Call of Duty‘s control scheme was pretty standard by this point.

When it comes to the controls, you know the story by this point and nothing is really different here: you reload with X, jump with A (still as useless as ever unless you’re vaulting over walls), switch weapons with Y, and sprint for a bit by holding in the left analogue stick. Grenades and other explosives are tossed with the Left and Right Buttons, you aim and shoot with the Left and Right Triggers, respectively, and can shoot wildly from the hop or try to be a bit more accurate but pulling on the Left Trigger to aim down your sights. Pressing B allows you to assume one of three stances: standing, crouching, or prone, each of which alters your aim and ability to be stealthy or open to enemy fire.

CODBLOPSHealth
There’s no regenerating your haz-mat suit so stay out of gunfire!

Health still automatically replenishes when you avoid enemy fire, and you still get a generous amount of checkpoints to help you reload when you’re inevitably blown up by a random grenade but Black Ops mixes things up a bit by having a few missions where your health “bar” doesn’t really mean shit: the first is when you pilot vehicles (such as the Mi-24 Hind attack helicopter and an attack boat) and the vehicle’s damage doesn’t auto-repair and the second is when you (as Hudson) must walk through a cloud of Nova-6 in a haz-mat suit. As you take damage, the suit cracks and doesn’t auto-heal so you’re at risk of being exposed to the deadly nerve agent if you linger too long or rely on the traditional auto-heal mechanics, which is actually a nice touch and harkens back to FPS games of old where auto-healing wasn’t a thing.

CODBLOPSMason
Mason’s plight is a central part of the game’s narrative.

A helpful mini map is located at the top left of your heads-up display (HUD); this shows your location, the location of your allies, enemies, and the direction of your objective. Maybe I’m just used to them by this point but I actually found this mini map quite useful as it actually gives you a far better idea of the layout of your current area and where you need to go. As always, the game isn’t all just mindless shooting; in fact, story plays a major role in Black Ops. Having a vocal protagonist really helps with this and Mason is right in the middle of the Russian’s plot to gas their Capitalist enemies as he was captured and brainwashed by the Soviets; the narrative is framed by several cutscenes wherein Mason is interrogated by US personnel regarding his actions and the action frequently cuts away to more of these scenes. Sadly, these cutscenes can’t always be skipped; sometimes, you’re able to skip them by holding the A button but you’ll have to sit through a fair few which is annoying on repeated playthroughs.

CODBLOPSVehicles
Black Ops also sees you piloting helicopters and driving attack boats.

Also breaking up the action are a variety of other gameplay sections; there’s the vehicle-based ones I mentioned above which are basically similar to the tank- and helicopter-based missions of previous games but actually much more enjoyable. When controlling the Hind, you both pilot the craft and shoot with a machine gun and missiles; while it’s quite difficult to manoeuvre and get a good bead on targets (especially other helicopters), it’s still quite fun to be up in the air and have a greater field of view. The boat mission is pretty much exactly the same as a tank-based mission from World at War except you’re on a boat, in the water, and it’s night-time in the jungle; the boat is still a bit slippery and awkward to control but it’s fun just wrecking shit up with its armaments.

CODBLOPSInfiltrate
Guide your ground team from the air and then infiltrate with stealth.

One mission also sees you inside of an SR-71A aircraft; from here, you’ll use a thermal radar to direct your ground forces and then switch down to them to clear out the opposition. Once the mission switches to the ground proper, you’ll have to rappel down to a facility and utilise the same stealth tactics seen in the previous games to progress further. Stealth also plays a big part in another mission where you must first avoid an overhead helicopter, silently dispatch of two guards, and then infiltrate a Soviet missile based while wearing their uniforms. As dark and grave as World at War was, Black Ops is even more so. The game opens with Mason escaping from a desolate Soviet prison where he reconnects with Viktor Reznov from the previous game; Reznov’s edict is literally burned into Mason’s mind as he finds himself compelled to assassinate a number of Axis scientists throughout the game’s narrative. Oh, and did I mention that you end up going to Vietnam? Well…you do. Similar to how the Japanese elements made the last game more brutal and affecting, seeing the Viet-Cong charge blindly into gunfire and try to slice your throat out is legitimately jarring, almost as much as them capturing Mason and his comrades and forcing them to play Russian Roulette!

Graphics and Sound:
Building upon the level of detail seen in World at War, Black Ops is probably the darkest, grittiest, and most detailed of the series thus far (at least, of the ones that I’ve played). Character models continue to be the weakest aspect but it’s easily forgiven when you realise how detailed and elaborate many of the game’s locations are: the Vorkuta Gulag isn’t just a desolate, rust-filled prison; it’s a desolate, rust-filled prison in the middle of a snow-swept landscape that is perfect for a high-speed motorcycle escape to a train. Khe Sanh, and Vietnam in general, is rendered with a horrifically affecting realism that really captures the humid and horrific conditions of that particular conflict and stands in start contrast to the dark urban landscapes you run through in Kowloon City.

The game’s attention to detail and voice cast is just as good as ever.

Voice work is even more important than ever to Black Ops because it actually features a speaking protagonist; Sam Worthington (remember when he was a thing?) takes centre stage as the tortured and haunted Mason, Gary Oldman returns as the revolutionary Reznov, and even Ed fuckin’ Harris shows up to voice Hudson. I also took much greater note of the music in this Call of Duty title; there’s a foreboding, heavy feel to the tunes of this game alongside the traditional stirring military melodies and, in true Apocalypse Now (Coppola, 1979) fashion, the troops stationed in Vietnam like to blast the Rolling Stones’ “Sympathy for the Devil” at full volume in their base camp and when blowing enemy encampments to smithereens.

Enemies and Bosses:
Like World at War, Call of Duty: Black Ops has far more enemy variety than in the previous titles. Rather than simply gunning down Nazis, you’ll mostly be clashing with Soviets, Vietnamese, and even British Commandos. As always, these enemies are formidable thanks to their flagrant use of cover, melee, and explosives to whittle your health to nothing in no time at all.

CODBLOPSFinale
Storm the Rusalka to end the threat of Nova-6.

While bosses aren’t really a thing in Black Ops, when flying the Hind, you’ll come up against a couple of enemy attack choppers that must be destroyed before you can progress and, when in your attack boat, you’ll specifically have to trade shots with another boat to complete the mission. When joining the assault on the Rusalka, you’ll have to provide cover fire from your attack chopper and also bring down another enemy Hind, before eventually confronting and killing Nikita Dragovich, one of the key minds behind Nova-6, in a quick-time event.

Power-Ups and Bonuses:
As with other games in the series, Black Ops is going for realism over the more flamboyant aspects of other FPS titles so the closest thing you’ll get to upgrades is when you are able to call in air strikes, take control of armoured vehicles, or happen across an armoury.

CODBLOPSWeapons
Blow enemies into flaming chunks or cut them down with duel pistols.

Despite this, and the setting of the game, Black Ops has some pretty nifty weapons on hand for you to use; though you’re still limited to only having two at a time, some of the stand-outs for me were the Franchi SPAS-12, a pump-action shotgun that can also fire incendiary rounds, the Python (a high impact .357 Magnum), and the Beretta Model 682, all of which are great for close-quarters dismemberment. You can also grab a crossbow (that can also fire explosive arrows) and a couple of nifty grenade and rocket launchers, like the “China Lake” and the M72 LAW, and even duel-wield pistols and smaller submachine guns at various points.

Additional Features:
As with the other Call of Duty titles, you can choose to play on a number of different difficulty settings and earn a fair amount of Achievements. These are generally earned after clearing missions in the main solo campaign but also pop with when find all of the Intel hidden throughout the game, complete certain missions with certain weapons, kill a certain amount of enemies in certain ways, or slaughter some poor, innocent test monkeys as quickly as possible. Multiplayer returns in Black Ops but, this time, you’re able to set-up a multiplayer match against computer-controlled opponents, meaning I was actually able to experience a Call of Duty free-for-all deathmatch for the first time. When in this mode, you can select or create a class where you customise your weapon loadouts, perks, and other aesthetics, which is a nice touch, and you can tweak the level of difficulty of your computer-controlled foes but I was absolutely owned by the computer even on the easiest setting and found it was little more than a standard deathmatch.

CODBLOPSZombies
The “Zombies” modes continue to be a lot of fun.

Returning from World at War is the “Zombies” sub-game wherein you must try to survive for as long as possible against endless waves of zombies in a variety of maps; one of these has you playing as John F. Kennedy, Richard Nixon, Robert McNamara, and Fidel Castro in a fantastic piece of ridiculousness that is massively at odds with Call of Duty’s more serious tone…and I love it! The more zombies you kill, the more points you earn to spend on fortifying your defences, unlocking new areas, or accessing better weapons but the best part about the “Zombies” mode in this game is the inclusion of Dead Ops Arcade, a top-down arcade title that plays very similar to Smash TV (Williams, 1990) and Dead Nation (Housemarque/Climax Studios, 2010) and was honestly the most fun I’ve had playing a Call of Duty title.

CODBLOPSBanner

The Summary:
Call of Duty: Black Ops was far more enjoyable for me than any of the Modern Warfare titles and a fine follow-up to World at War but I still find myself largely unimpressed. If anything, it’s annoying that it took this long for the series to feature a speaking protagonist right from the get-go but, while the game is better for it, I didn’t find Mason particularly compelling; you can see the big twist in his narrative coming a mile away (thanks in no small part to the constant cutscenes that jerk you abruptly from the gameplay to slap you in the face with the twist before it’s revealed), it’s outrageous to me that he was allowed back into active service after the big reveal, and the idea of chemical attacks or sleeper agents isn’t exactly new by any stretch of the imagination. Still, by taking everything that worked in the Modern Warfare games and in World at War and applying them in a more intimate story with greater stakes, Black Ops actually worked for me on a level the other Call of Duty titles didn’t. It helped a lot that areas were far more recognisable, varied, and interesting, that the locations were unique and engaging, and that the developers included Dead Ops Arcade and so many recognisable political figures happily blowing holes in zombies.

My Rating:

Rating: 3 out of 5.

Pretty Good

What did you think of Call of Duty: World at War? Where does it rank for you compared to the other Call of Duty titles? Do you think I have committed the ultimate sacrilege by besmirching the good name of the Call of Duty franchise or do you agree that the series is somewhat over-rated and stagnated? Whatever you think, please do leave a comment below and come back for more content and reviews in the near future.

Game Corner: Battletoads (2020; Xbox One)

Released: 20 August 2020
Developers: Dlala Studios and Rare
Also Available For: PC and Xbox One X

The Background:
Make no mistake about it, the Teenage Mutant Ninja Turtles (TMNT) were hot shit back in the day; though the TMNT first began life as a ridiculous, dark, and gritty comic book, they shot to fame and into the cultural consciousness with the 1987 cartoon series and a line of action figures and the franchise was the hottest kids commodity at that time. That success also, inevitably, brought a slew of knock-offs and imitators, many of which, like the Battletoads, were reasonably popular in their own right. Conceived of as a direct response to the TMNT, the Battletoads (Rash, Zitz, and Pimple) were space-faring adventurers who made their debut in the appropriately-titled Battletoads (Rare, 1991), a sidescrolling beat-‘em-up that is notorious for being one of the hardest titles in the Nintendo Entertainment System (NES) library. Battletoads was fairly well received and a number of follow-ups were produced, including a pretty kick-ass arcade title in 1994, but the franchise quietly died off and remained dormant until Microsoft surprised everyone at the 2018 E3 with the announcement of an all-new entry in the beloved series. Perhaps bolstered by the reception of Rare Replay (ibid, 2015), Rare chose to revive their franchise as an Xbox One and PC exclusive, one not hampered by hardware restrictions, and effectively reintroduced the Battletoads to a whole new generation of gamers.

The Plot:
After being awoken from a fantasy simulation after twenty-six years, the Battletoads are dismayed to find that they are no longer intergalactic heroes. Seeking to reclaim their former glory, they set out to defeat their long-time nemesis, the Dark Queen, but end up joining forces with her to confront a greater threat, the evil alien race known as “Topians”.

Gameplay:
Like its predecessors, Battletoads is a 2D, sidescrolling beat-‘em-up in which up to three players can battle across numerous stages spread between four chapters (referred to as “Acts”). When you begin a new game, you can select from three different difficulty levels (“Tadpole” being the “Easy” mode, “Toad” normal, and “Battletoad” being the hardest). Once you’ve selected a difficulty, you’re locked in to it and will need to create a new, separate save file to play on one of the other modes but you can switch between these save files easily enough by pressing X on the main menu.

Each of the Battletoads handles a little differently, with different strengths and weaknesses.

There are three characters to pick from (Zitz, Rash, and Pimple) and, while each of the titular Battletoads controls the same, you’ll find that each one has their own strengths and weaknesses: Rash is the all-rounder, with decent speed and attack power; Zitz is the weakest but also the fastest, able to string combos together much quicker; and Pimple is the slowest but also the most powerful of the three. Unlike in the previous games, you can freely switch between any of the Battletoads on the fly by pressing left, up, or right on the directional-pad (D-pad) to “tag in”, allowing you to mix and match your attack strategies on the fly. While there is no life system, this effectively gives you (in single player mode, at least) three lives since, if a Battletoad is defeated, you automatically switch to one of the other two and, after a short time, any toad that has been knocked out will regenerate a portion of their health and allow you to tag them back in. This adds another level of strategy to the game as you might want to favour Zitz for the majority of a stage and save Pimple for the boss battles but it’s important to not hog all the health-restoring flies for any one Battletoad as it could leave you at a disadvantage later down the line. Fortunately, the game is extremely generous with checkpoints, which refill and resurrect your team to full health, meaning you can easily jump right back into the action and you are even given the option of skipping ahead if you continuously die.

The Battletoads assume a variety of wild animations and forms when performing their attacks.

Being a sidescrolling beat-‘em-up, combat is obviously at the forefront of Battletoads’ gameplay; each character can unleash a quick combination of strikes with repeated presses of the X button, launch enemies into the air with Y, and charge up a powerful “Morph Attack” (which sees them transform into a variety of outlandish and amusing forms) by holding down the B button. You can also jump with A (revolutionary, I know), hold or press RT to run or evade, respectively, and hold down LT in conjunction with other button presses for different effects (press A and you’ll spit gum to render enemies immobile for a few seconds and press Y to pull enemies, flies, and collectables closer with your tongue). You can also wriggle the right analogue stick to perform a taunt, though I never discovered the point of this move beyond grandstanding.

Gameplay isn’t all punching as you’ll have to do some tricky platforming and puzzle solving, too.

While the majority of the game involves simple, arcade-style fighting, the monotony is broken up in a variety of ways; you can use LT and B to latch on to special hooks and battle in the background and foreground, for instance, and you’ll be required to press switches to open doors or raise and lower lifts at various points. You’ll also have to drag crates around to reach higher levels and use these techniques in lieu of your fighting abilities to solve various puzzles. In the game’s third Act, the Battletoads split up and Pimple is left to perform some rudimentary platforming, dodging spikes and other hazards, and climbing a mountain by pressing switches in the right order to clear a path. Similarly, when controlling the Dark Queen, you’re asked to run as quickly as possible through an all-too-familiar maze-like stage using her dash and unique ability to float to get past the many spiked hazards in your way rather than fighting.

This was easily the hardest and most frustrating part of the game for me.

You’ll also have to complete a couple of different mini games to open up electronic doors either by completing an electronic circuit or hacking your way. The first is relatively simple, involving the rotation of wires to allow a current to travel from one point to another but it gets a little trickier as you progress by introducing dead ends and different directions. The second is quite a unique little mini game that sees you moving an 8-bit Battletoads icon across a horizontal grid while avoiding moving red hazards; this can be tricky when playing with others as one touch of these hazards will reset the grid for all players but, if you struggle and fail enough times, the game gives you the option to automatically hack the door. Other times, you’ll have to complete a number of quirky quick-time events (QTEs), the most prominent of which is an eccentric version of rock/paper/scissors, but you’ll also be completing menial tasks such as massages, sending e-mails, and signing autographs with rotations of the analogue sticks and repeated button presses. Later, you’ll need to use these skills as Pimple to fight off besmirched cult members and be sure to keep your wits about you after defeating the game’s final boss as you’ll need to perform a few QTEs before the battle is officially over. Some of the mini games, however, aren’t as much fun or easy to understand; at one point you have to complete three in a row with hardly any time to register what you actually have to do but by far the worst and most frustrating part of the game was when you have to reboot the systems of your space ship. The mini game displays a number of symbols, each one relating to a different mini game, and you have a very short space of time to find the game you need and complete it, all with the most vague of onscreen prompts to direct you. The worst part is that this section just keeps going and going, is very unforgiving, and it can be really difficult to see where you’re supposed to be looking as the mini games are all quite small by the end.

Gameplay has a surprising amount of variety and just the right amount of challenge.

Finally, gameplay is mixed up further by the return of the Turbo Tunnel, panic-inducing chase sequences, and some overhead shooting stages. Thankfully, the Turbo Tunnel is nowhere near as harrowing as in the NES game; for one thing, your view is from behind, which makes it much easier to see oncoming hazards. Each hit or mistake costs you a Battletoad but checkpoints are generous and, while it goes on for some time, it’s actually more exhilarating than frustrating. The Turbo Tunnel returns at the end of the game but, while it is harder, it’s a much shorter section; the spirit of the old tunnel is evoked in the sledging sequence, though, which has you holding X, Y, or B to grind along different platforms and that can be very difficult when you’re also required to jump with A. One of the most harrowing sequences from the NES game, the rat race, is recreated when you, as the Dark Queen, have to outrun falling stomach acid but, thanks to her dash and barge attacks and, again, many generous checkpoints, it’s nowhere near as impossible or demanding as the original game. Finally, the space shooting sections, while also a lot of fun, see the screen literally fill with enemy ships and projectiles to become one of the most elaborate “bullet hell” shooters I’ve ever played and these stages do tend to drag on a bit and are probably the most “unfair” of the game’s stages at times.

Graphics and Sound:
Battletoads is a fantastic throwback to a simpler time in gaming; like Streets of Rage 4 (Dotemu/Lizardcube/Guard Crush Games, 2020), the game favours brought, vibrant graphics and backgrounds and a rockin’ soundtrack that includes remixes of classic Battletoads tracks. Unlike that game, however, Battletoads is far more over the top and cartoony; the toads themselves are full of life and wacky antics and these is best seen through their zany attacks that see them growing comically enlarged feet, fists, or transforming into sharks, bulls, jackhammers, and even whipping out a Battletoads (Rare, 1994) arcade cabinet to damage enemies.

Stages and graphics are colourful, wacky, and wonderfully enlivened by a cartoony aesthetic.

Stages are varied and have a lot of depth, with some fun things to see in the background; you’ll travel through futuristic neon streets, a disused carnival, and wacky alien landscapes. Sadly, though, there is no “moving elevator” stage and there aren’t many chances to interact with your environment; there are no barrels to smash, no weapons to acquire, and your interactions are generally limited to activating switches or spitting bubblegum at various targets. Still, the simplicity of the interactivity in no way renders the environments lifeless or boring as they’re packed full of little details and things to see and distract you.

It’s a good job the story is so full of mapcap fun as it’s a surprisingly big part of the game.

Battletoads is very big on story and features a number of cutscenes and lots of voice acting; the titular heroes are pretty funny, being out of touch superheroes obsessed with becoming relevant in a world that has passed them by, and everyone has distinct and amusing personalities, from the exasperated Dark Queen to the flamboyant Tobians, Uto and Pia. While I enjoyed these cutscenes, which reminded me a lot of Rick and Morty (2013 to present) and were full of Rare’s signature, quirky sense of humour, it was a bit annoying that you aren’t always given the option of skipping them on subsequent playthroughs.

Enemies and Bosses:
As you make your way through the game’s stages, you’ll come up against a host of weird enemies; many of them, like the different coloured anthropomorphic rats, Topian cops, and disgruntled lumberjacks, are mostly disposable cannon fodder for you to go to town on. Some of their variants, though, will block your attacks with a guard or shield that can only be broken with your charged Morph attack, and will also toss projectiles your way. When in the space shooting sections, you’ll come up against a number of different ships, some which fill the screen with projectiles of all kinds that will truly test your reaction skills and patience. Other enemies can be a bit more troublesome: Kernel will charge up an electrical attack that electrifies nearby water and can cause massive damage; Fewcharge will unleash a laser beam that covers a large portion of the screen; and be sure to dash out of the way of Brucey when its about to charge at you. As you progress, you end up having to face multiple variations of these enemies at once, which can be very difficult and requires a lot of strategy and awareness on your part as your health will be drained quite quickly if you’re not careful.

Porkshank is a big, tough first boss but easily defeated once you master his simple attack patterns.

It’s a good job Battletoads has so much enemy variant and challenge involved in its combat since it’s surprisingly light on boss battles. The first boss you face, Porkshank, is a gigantic pig whom you fight three times in the first stage. The first encounter requires you to evade his combo of attacks, the second sees him try to charge at you head-first, and the third sees him split into two and do both attacks at the same time. While he can absorb a great deal of damage, as long as you dodge out of the way and charge up a Morph attack or quickly switch to Pimple, it’s pretty simple to get past him without any real trouble. The enormous Guardian boss requires a little more strategy on your past; the entire arena continuously fills with Blinkeys, pink eyes (hah!) that try to distract you from dragging the Summoner Eye out of its protective field. Each time you damage the Summoner Eye, the Guardian tries to crush you with its massive fists and then you have to smack a piece of debris into the gargantuan creature; the cycle then repeats twice more but with more Summoner Eyes to attack and more fists to damage.

Axeley is definitely one of the game’s more frustrating and troublesome bosses.

One of the game’s most difficult and frustrating bosses is Axeley, a crazed lumberjack who fills the arena with bombs that are very difficult to avoid before leaping into the arena and causing shockwaves with each impact. When his giant axe gets stuck, you can attack with extreme prejudice but, for his next two phases, he starts rolling logs at you that are extremely hard to jump over, tossing in more bombs, and performing far more jumping attacks to keep you constantly on guard while you wait for your brief window to attack. I would recommend using Zitz for the most part and keeping track of Axeley’s movements so you can switch to Pimple and get the most out of that brief window of opportunity.

Once you get past Dirtbag’s slew of projectiles, you’ll have to avoid the Dark Queen’s “helpful” tornados.

Dirtbag can also be quite the tricky encounter; like with Porkshanks, you’ll encounter him in a couple of different confrontations in the space shooting sections but the difference is that Dirtbag likes to attack with a variety of projectiles that you have to squeeze between and relentlessly fire at his ship while using your shield and evade to escape from harm. What makes this difficult is that you’ll most likely get to this boss with very little health left because of the gauntlet of enemies you have to blast through first and it seems like only parts of Dirtbag’s ship are vulnerable. Although you don’t actually fight against the Dark Queen this time around, she does actually help you in a penultimate battle before the final boss; her version of help, however, involves conjuring tornados that are just as likely to hurt or kill you as they are to toss enemies from the stage so be sure to stay away from them wherever possible.

Uto and Pia might be flamboyant but they’re no joke when you finally have to battle them!

The game’s final bosses are the Topians, Uto and Pia, essentially two intergalactic beings who stole the Dark Queen’s power and are practically Gods. When you fight them, they will take it in turns to launch attacks such as spherical projectiles that bounce across the arena and protect them and a giant laser beam that’s particularly difficult to avoid, turn invisible and intangible, and come crashing down onto the stage, all of which cause massive damage. Once they’re injured enough, they’ll team up for real for their final phase but, luckily, only one of their health bars needs to be whittled down. Still, I recommend taking advantage of the invincibility option that becomes available after a few deaths or when you’re close to failure.

Power-Ups and Bonuses:
I mentioned this earlier but, strangely, there are no power-ups or weapons to pick up in Battletoads; while you can’t grab barrels (…or enemies) to throw around and there’s no score-increasing items, you do accrue a high score as you progress. Each fight that isn’t a boss battle receives a grade; the better your combo and the less hits you take, the higher your score becomes and, at the end of every stage, you receive a grade based on your performance and will earn an extra collectable if you manage to get at least an A ranking for every fight in each stage. When in the shooting stages, the scoring system continues but you can actually pick up power-ups that improve your ships weaponry for a limited time, turning it into a spread shot, a high-powered laser, or bolts of magenta energy to cause massive damage against your relentless enemies.

Additional Features:
Battletoads has sixty-one Achievements for you to earn; many of these are tied to the game’s story and can’t be missed but you’ll also get ones for defeating a number of enemies, breaking through their block attacks, finding collectables, or using your various toad abilities. Others are a little more obscure or challenging, like entering a button code in the credits, finding every collectable, or finishing the game on the highest difficulty. Of course, you can also play Battletoads with up to two friends; in co-op mode, you can revive your team mates when they’re defeated and you can go head-to-head to get the highest score but there’s not really anything on offer once you finish the game. You can play as a couple of different characters in the game’s story but they aren’t added to the roster for replays, there’s no one-on-one fighting mode, and no boss rush or skins to unlock, which is a shame since it would have been a good way to put the points you earn to good use to unlock classic 8- and 16-bit skins. You can, however, unlock a special Battletoads themed ship for Sea of Thieves (ibid, 2018) once you complete all of Act 1…so there’s that, I guess.

The Summary:
I was somewhat apprehensive going into Battletoads; I’ve played the original NES game on Rare Replay and couldn’t get past the Goddamn Clinger-Winger stage but I did have a lot of fun with the arcade version of the game. Thankfully, this version of Battletoads is much, much easier than its NES counterpart; I was worried Rare were going to pull a troll move on us and make a ridiculous frustrating throwback to that era of nigh-impossible videogames but, instead, they delivered an extremely enjoyable beat-‘em-up with just the right level of challenge and variety to keep things interesting. I was genuinely surprised at how much Battletoads had to offer; calling it a simple beat-‘em-up is probably doing the game a disservice and this may go a long way to explaining why many of the clichés and traditions of beat-‘em-ups are missing. It’s more like a combat-heavy action/platformer and it never lets any one mechanic last long enough to become monotonous or repetitive. While a lot of these gameplay mechanics might have been annoying and frustrating at times (that damn system reboot sequence, for example), once you’ve gotten past them you can focus on a different section that more than makes up for those challenging moments. Perhaps best of all, it makes the Turbo Tunnel actually doable and I never ran into a truly game-breaking roadblock; it’s a shame that there’s not more to it in terms on unlockables and stuff but I can forgive that for the more enjoyable aspects of the game.

My Rating:

Rating: 4 out of 5.

Great Stuff

How did you find Battletoads? Which of the three Battletoads was your preferred character? What did you think to the game’s mechanics and presentation and how did you find it as a revival of the franchise? Are you a fan of the franchise and, if so, which game is your favourite? Did you find the original game as difficult as its reputation or were you able to clear it without any real difficulty? Which of the TMNT knock-offs was your favourite and would like to see more revivals of old franchises? Whatever your thoughts on Battletoads, or memories of the franchise, feel free to leave them in the comments below.

Game Corner: Call of Duty: World at War (Xbox 360)

CODWaWLogo

Released: 2008
Developer: Treyarch
Also Available For: Nintendo Wii, PC, PlayStation 3

The Background:
At this point, I have played four Call of Duty (Various, 2003 to present) titles and I have to say that, so far, I am less than impressed with any of them, and the series in general. Before I played Call of Duty: Modern Warfare Trilogy (Infinity Ward/Sledgehammer Games, 2016), I had little to no interest in Activision’s long-running franchise (that kicked off its first spin-off with this title) primarily because I don’t really like military-style shooters and my love for first-person games died out shortly after Perfect Dark (Rare, 2000). Admittedly, a lot of this is due to my personal bias against being shot in the back or by enemies I can’t see, struggling with the perspective and the controls, and generally just finding first-person shooters (FPS) difficult to navigate at the best of times. However, when I bought my Xbox 360, it came with a couple of Call of Duty titles, one of which was this one and, since I’m doing “CoD Month” on my blog for January and I would hate to waste the G associated with the game, I sat down and rushed through it mainly to see if my bias against the series was justified and to obtain a few extra Achievements.

The Plot:
Despite Call of Duty 4: Modern Warfare (Treyarch, 2007) bringing the series into the then-modern day, World at War returns the plot to World War Two, specifically focusing on the Pacific and Eastern Front skirmishes between the Allied Forces of the United States and Europe against the Axis Powers of Japan, the Soviet Union, and Nazi Germany.

Gameplay:
Call of Duty: World at War is a first-person shooter that casts you in the role of Private/ Private First Class C. Miller of the United States Marine Corps’ 1st Marine Division, Private Dimitri Petrenko, and Petty Officer Locke. While each character’s narrative sees them fulfilling different objectives in different parts of the world (or at different parts of the same location), each controls exactly the same and just like the characters in Call of Duty 4: Modern Warfare. The A button lets you jump and vault over walls, Y switches weapons, X reloads, and pressing in on the left analogue stick sees you break out into a finite sprint.

CODWaWControls
The controls are exactly as established in the Modern Warfare trilogy.

Pressing the B button allows you to either crouch, go prone, or stand to avoid or engage with enemy gunfire while pressing in the right analogue stick allows you to melee kill enemy soldiers. You can toss a variety of grenades and other explosives with the Left and Right Buttons and aim and shoot with the Left and Right Triggers, respectively. Again, you can either shoot somewhat wildly from the hip or snap to the nearest target and aim down the sights of your gun by pulling on the Left Trigger and, similar to Call of Duty 3 (Treyarch, 2006) this can be problematic as you’re aiming without the assistance of modern technology such as laser sighting. As is largely the standard for FPS titles, your health will automatically recover once you avoid damage for a few seconds; the more damage you incur, the longer it will take to replenish. There are a number of checkpoints in the game for when you do inevitably die, though, and there’s plenty of cover for you to duck behind but you have to keep your wits about you as your enemies won’t hesitate to throw a grenade at you or come charging at you head-first with their bayonet drawn.

CODWaWMissions
The action is broken up by some intense missions involving assassination and dog-fighting.

A helpful radar/mini map combination sits in the bottom left of your heads-up display (HUD); this shows you the location of your allies, enemies, and a star marking your objective. Should you forget your objectives, you can bring them up at any time by pausing the game, which you may have to do from time to time as the game can be both painfully linear and frustratingly unclear at times; if you miss a vague order from one of your team mates, you may find yourself shredded to pieces or blow up before you even know what it is you’re supposed to be doing or where you’re meant to be aiming or directing your air strike. Gameplay is broken up a bit through the use of vehicle sections: as Miller, you’ll call in air strikes and jump on a small tank-like vehicle and use remote-controlled rocket strikes to destroy enemy tanks; Petrenko meets up with Sergeant Viktor Reznov in Stalingrad (who promptly wastes a lot of your time lecturing you about the finer arts of sniping and the evils of General Heinrich Amsel) and is tasked with performing a tricky assassination; and Locke later pilots a PBY Catalina flying boat to shoot down Japanese planes and ships.

CODWaWDark
World at War is probably the darkest of the Call of Duty‘s I’ve played.

Overall, the game is far more intense and gritty than the other titles I’ve played; for one thing, the Japanese troops you encounter are far more sadistic and aggressive than those of previous titles, leaping up from hidden bunkers, charging at you head-first, and even detonating themselves and your own dead comrades. Similar to the controversial airport mission in Call of Duty: Modern Warfare 2 (ibid, 2009), you’ll also accompany Reznov to Berlin and murder a whole bunch of injured and surrendering German soldiers, which is a bit disturbing. A similar event occurs at Shuri Castle, where Japanese troops appear to surrender and instead assassinate one of your team mates with grenades!

Graphics and Sound:
Call of Duty: World at War is the best of both worlds in this regards as it takes the classic World War Two setting of the original games and applies the modern coat of paint the series had received in Call of Duty 4; this means, again, that locations are recreated with a fantastic level of detail and, thanks to the fact that we travel to more exotic locations (Makin Island, Peleliu, Okinawa, and the Reichstag among others), actually make this game far more visually interesting than its predecessors.

CODWaWGore
Gore is plentiful in World at War.

While character models are still the weakest part of the game, they’re largely garbed in elaborate camouflage outfits or rugged guerrilla outfits that, again, help them to stand out compared to their more uniformed Nazi counterparts but also against their environments. Also, unlike previous games in the series thus far, enemies can be dismembered by your shots; arms and legs will blow off, chests will be blown apart, and large pools of blood accompany the many dead bodies you’ll leave in your wake. Again, though, locations, weapons, and vehicles still have the same high level of attention to detail I’ve come to associate with these games that really emphasises how desolate and horrific the Second World War was.

CODWaWVA
Gary Oldman reassumes his famous Russian accent to bring Reznov to life.

Call of Duty: World at World really brings the big guns to its vocal performances thanks to the inclusion of Gary Oldman as Reznov and Kiefer Sutherland as Corporal Roebuck. Of all the Call of Duty titles I’ve played so far, I had the least amount of issues with World at War’s dialogue; it wasn’t fully of overly macho “Hoo-rah!” or military slang like the Modern Warfare games but also wasn’t repetitive and annoying like in Call of Duty 3, though it still sticks to the stirring military tunes that pepper these games.

Enemies and Bosses:
Call of Duty: World at War has far more variety in the types of enemies you’ll encounter than the other Call of Duty games I’ve played in that you’ll battle both Japanese troops and Nazis this time around. Generally, the enemies you come up against are just as wily as ever; hiding behind cover, tossing grenades at you, and bashing you with their weapons whenever you get close but the Japanese troops are on another level entirely. The Japanese are aggressive, suicidal maniacs who burst out from hidden bunkers in the fields, clamber up and snipe at you from trees, charge at you head-first screaming “Banzai!” and trying to skewer you, or simply blow themselves up to kill you and your comrades. They also don’t hesitate to rush at you in waves upon waves, clambering over their fallen brethren to get to you, and force you into a quick-time event whenever they try and grapple with you.

CODWaWReichstag
The game’s final mission sees you storming the Reichstag.

As always, you won’t really come up against boss battles in the traditional sense. You’ll need to make use of air strikes and heavier weaponry to take out tanks and enemy placements and protect some naval ships from kamikaze pilots, which is about as deep as that gets, and the game’s final mission sees you (as Petrenko) storming the Reichstag in a bid to liberate it from Nazi control. This was easily one of the most frustrating and tiresome missions in the game as you have to disable some anti-tank guns, wipe out the ground forces who pop up out of nowhere, have the high ground, and throw grenades at you, and then try to not get crushed by a falling column or roasted alive by a flamethrower-wielding Nazi.

Power-Ups and Bonuses:
Call of Duty has always placed a greater emphasis on realism compared to other FPS games and, as a result, your power-ups are largely limited to the lovingly-recreated weaponry and vehicles made available to you. As always, you’re limited to holding only two weapons at a time, some more suitable than others. Given the setting of the game, you’ll often find yourself running through and clearing out trenches, so you might need to Trench Gun or the shotgun to make bloody corpses of your opposition. The Panzerschreck is perfect for taking out tanks and enemy aircraft and you can make use of Molotov Cocktails and flamethrowers to roast your enemies alive if you’re feeling particularly sadistic.

CODWaWTank
Jump in the tank and wreck some Nazi shit!

You also get to jump into a flame tank and use its cannon to blast Nazi bunkers, tanks, and towers while roasting soldiers with its flamethrower and pilot a PBY-5A Catalina aircraft to shoot down Japanese fighters. One thing I did like about this mission was that you had to constantly switch from the front, back, and side turrets as the mission progressed and you really got a sense of the claustrophobic space in this small aircraft but actually shooting at and hitting your targets (especially the planes) as a tall order thanks to the game’s less-than-helpful aiming reticule.

Additional Features:
Call of Duty: World at War features a number of different difficulty settings for you to play on, each one affecting the challenge in different ways, in addition to a number of Achievements. The majority of these can’t be missed as they’re tied to story progression but others will have you performing more specific tasks, like air bombing a certain number of enemies, burning soldiers out of trees, or completing a sniper assassination with a handgun. If you explore your environment well enough, you’ll also find Death Cards attached to makeshift graves; find all of these and you’ll get another Achievement and special gameplay options for the game’s co-operative mode. As with its predecessors, World at War features a multiplayer component that I wasn’t able to fully explore since I don’t have Xbox Gold. It also features a co-operative mode, however, that allows two players to player through the main campaign at the same time, which is a nice touch and I wonder why this wasn’t incorporated until the fifth game in the series. Brand new to the series, though, is the game’s “Nazi Zombies” mode in which up to four players are forced to survive against endless waves of Nazi zombies in a variety of maps. The more zombies you kill, the more points you earn to spend on fortifying your defences, unlocking new areas, or accessing better weapons. While an interesting mode to include, I can’t say that it hooked me too much as you have to play and grind quite a bit to get the most out of it but it’s a nice breath of fresh air after the game’s more sombre main campaign and I wonder how I would feel about an entire Call of Duty game in this vein.

CODWaWBanner

The Summary:
Of all the Call of Duty games I’ve played so far, World at War is probably the best but that’s still not really saying much. The game makes use of all the improvements brought to the series in Call of Duty 4 and applies them to a truly horrific time in the Second World War, offering a greater visual variety to the locations and enemies you’ll encounter. The inclusion of a couch co-op mode and the zombie survival game is a nice touch and I felt this did a much better job at presenting an appealing, intuitive, and coherent military shooter than Call of Duty 3 but, at the same time, it’s still not very innovative. There’s an “x factor” that is just missing for me, mainly because of how bland even this game’s more exotic locations appear. The zombie mode had more promise as it was skewing towards the ridiculous; I get that Call of Duty is a far more serious FPS title, though, but, for me, it’s just not as much fun as other FPS games.

My Rating:

Rating: 2 out of 5.

Could Be Better

What did you think of Call of Duty: World at War? Where does it rank for you compared to the other Call of Duty titles? Do you think I have committed the ultimate sacrilege by besmirching the good name of the Call of Duty franchise or do you agree that the series is somewhat over-rated and stagnated? Whatever you think, please do leave a comment below and come back next Wednesday for the last Call of Duty review of “CoD Month”.

Game Corner: Ōkami HD (Xbox One)

GameCorner

Released: 12 December 2017
Originally Released: 20 April 2006
Developer: Capcom/HexaDrive
Original Developer: Clover Studio
Also Available For: Nintendo Switch, PC, PlayStation 3, PlayStation 4 (HD) and Nintendo Wii, PlayStation 2 (Original)

The Background:
Originally released for the Nintendo Wii and PlayStation 2 back in 2006, Ōkami was the result of many combined ideas from the staff at Clover Studio. However, it was Hideki Kamiya, best know for developing Resident Evil (Capcom, 1996), who pushed for the game to focus on nature before the gameplay was eventually refined and the game’s unique visual presentation settled upon. Though sales were considered to be somewhat poor and resulted in the closure of Clover Studios, Ōkami won (and was nominated for) several awards and enjoyed widespread critical acclaim, with critics praising the game’s length, use of the Wii’s motion controls, and attention to detail. However, many of these same reviews also pointed out some flaws in the game’s lengthy dialogue scenes and getting the game to register control inputs. Regardless, a HD remaster was later released, which received equally high praise and is generally considered to be the definitive version of the title.

The Plot:
One hundred years ago, in the land of Nippon, the feared white wolf Shiranui and renowned swordsman Nagi fought and sealed the eight-headed demon Orochi, giving their lives in the process. When Orochi returns, the sun goddess Amaterasu takes Shiranui’s form and, alongside a lewd, fairy-like artist named Issun, travels far and wide to rid the land of Orochi’s curse and the darkness that threatens to devour Nippon and all its inhabitants.

Gameplay:
Ōkami is a narrative-heavy, semi-open-world action/adventure game; while it does have some elements of role-playing games (RPGs), the action and gameplay mechanics are very much like the Legend of Zelda series (Various, 1986 to present), with much of the game’s central concept being very similar to the wolf-based gameplay seen in The Legend of Zelda: Twilight Princess (Nintendo EAD, 2006). I’m obviously not the first to make that comparison but it still rings true, though the difference here is that you play as a wolf from start to finish whereas Link would transform to and from a wolf throughout Twilight Princess, which remained primarily a classic 3D Zelda title that focused on swordplay and other mechanics rather than solely on the wolf.

Amaterasu acts very much like a wolf, often for comedic effect.

In Ōkami, you are (eventually…) put in control of the white wolf Amaterasu who, for all her intelligence and sentience, looks, acts, animates, and controls very close to how a wolf or dog would, generally for comedic effect. This means that she can not only run along on all four paws, leaving a trail of blossoming flowers in her wake as her speed increases, but will also whimper, howl, and curl up into a ball when left idle. Amaterasu’s main form of attack is to tackle enemies head on with a press of the X button (which also functions as a ground and mid-air dash), bark with the B button (which doesn’t really seem to do anything but spook non-playable characters (NPCs)), jump (and wall jump) with A (and automatically jump over small objects as she runs at them, like Link in his 3D adventures, though Amaterasu doesn’t have to worry about taking fall damage), and dig up treasures and other objects with the Y button.

Amaterasu has a bit of trouble swimming but is perfectly happy to bite NPCs…

Amaterasu can also perform a doggy paddle when in water but will, eventually, run out of stamina and be dropped back on the last piece of dry land she stood on, though you can eventually earn techniques and abilities to make traversing water far easier. You can also bite with the Y button, which allows you to pick up objects (such as keys or other key items) to unlock doors or complete side quests; you can also bite NPCs or other animals for a laugh, if you like.

Issun acts as your guide and seeks to learn the thirteen brush techniques alongside you.

Amaterasu is not alone in her quest; she’s joined by the lewd travelling artist and swordsman Issun. Issun functions a lot like Navi from The Legend of Zelda: Ocarina of Time (ibid, 1998) in that he will constantly interrupt your progress and gameplay to spout dialogue and exposition and occasionally point you in the right direction or towards objects of interest but differs not only through his womanising ways and blunt sense of humour but also by actually aiding you in combat somewhat. Amaterasu is in possession of the “Celestial Brush”, an enchanted paint brush that allows players to solve puzzles, gain new combat techniques, and attack enemies by holding down the RB button and drawing with X.

Battles take place within a magically-enclosed arena and mostly boil down to button mashing.

As you explore the various different overworlds of Nippon, you’ll encounter floating, ominous Demon Scrolls; though these can, largely, be easily avoided, they will chase after you if you get to close and, upon touching you, lock you into a magically-enclosed arena to battle a number of enemies. When fighting in these arenas, your controls change slightly; now, you can attack with one of two different equippable weapons (or “Divine Instruments) which allow you to strike, defend, or unleash a ranged or combination attack with a variety of Reflectors, Rosaries, and Glaives and deal either massive damage or a finishing blow with the Celestial Brush (easier said than done thanks to the game’s odd idea of perspective). If you don’t feel like battling, you can attack the mystical barrier to open a hole to allow you to escape, avoid the Demon Scrolls, or slash at them with you Celestial Brush to make it easier to get around them. However, I’d advise battling every enemy at every opportunity as it’s a great way to earn rewards since you’re evaluated after each battle and earn additional Yen for finishing fights quickly and without taking damage.

Stay out of Cursed Zones and dispel them by destroying Devil Gates.

There’s no escaping from boss battles or Devil Gates, though, and, when you enter new areas, you’ll find they’ve been cursed with a life-sapping black fog that can only be cleared by destroying a number of Devil Gates dotted around the area. Passing into one of these Devil Gates forces you to battle a number of enemies that are, generally, a little tougher than the average minions but defeating them is still pretty easy thanks to the breadth of the game’s simple, but effective, combat and victory will restore the land to its natural beauty and allow you to hunt for goodies.

Earn Praise to increase Amaterasu’s health, ink pots, Astral Pouch, and purse.

As a God, Amaterasu can earn Praise by performing a number of tasks and side quests; these range from using the Celestial Brush to blossom and bloom withered trees, freeing areas from the cursed fog, feeding the myriad of wild animals you’ll encounter, helping out NPCs, and defeating bosses. Praise can then be used to upgrade Amaterasu’s maximum health, ink pots (using the Celestial Brush consumes ink, which automatically regenerates over time), Astral Pouch (when filled with the various food you can find throughout Nippon, this allows Amaterasu to resurrect from death if defeated), and her purse. As you upgrade each, the amount of Praise needed to upgrade further will increase so it’s recommended that you do anything and everything you can to gain even a small amount of praise. Honestly, though, the game isn’t really that difficult so you might not need all of these upgrades to succeed; I never died once in my playthrough and never seemed to be in danger of reaching the limit of my purse so I’m not entirely sure why you need to increase its capacity.

Purchase items, weapons, and equip Holy Artefacts to gain additional abilities and power-ups.

Like many RPGs and adventure games, Ōkami, sadly, doesn’t feature an autosave feature; instead, you must manually save at various Origin Mirrors (which also fully restore your health and ink) scattered across Nippon or after clearing the game’s dungeon (be sure to make at least one extra save file in case you get stuck or blunder into the game’s final dungeon with unfinished business still to do as you won’t be able to get back to the overworld otherwise). As you defeat enemies, break pots, dig up treasure chests, and generally play the game, you can collect various items to help you in your quest; ink pots will refill your ink, Solar Energy refills a portion of your health, food fills up your Astral Pouch, various treasures can be sold, items aid you in battle (different sizes of bones for health, Inkfinity tags to grant temporary infinite ink, buffs for your attack and defence and so forth), and Yen to purchase new weapons, items, and to pay to learn new techniques from the Onigiri-Sensei. You can also find Demon Fangs, which can be traded for Holy Artefacts; you can equip up to three of these to walk on water, safely cross lava, keep Demon Scrolls away, or attract collectables, among other things. Stray Beads can also be collected to earn both an Achievement and an extremely powerful Holy Artefact that basically makes you unstoppable. It’s one of those games where there’s a lot to see, do, and collect and many different ways to upgrade your abilities without the traditional use of experience points as you can also find and purchase Gold Dust to strengthen your Divine Instruments.

I struggled a bit with the camera, which made drawing vines far more difficult than necessary.

While you are given full 360-degree camera control, you may find that the camera is still less than helpful at some points as it can stutter, get stuck behind objects, and automatically snaps back to its default position every time you leave or enter an area or finish a cutscene, which is annoying as I much prefer the more zoomed out perspective. You can also hold LB to enter a first-person perspective to get a better view of your surroundings and both Amaterasu and the environment will turn transparent to help you spot platforms, areas, or Konohana Blossoms but, often, I found it awkward to actually direct Amaterasu and her brush, especially in certain boss battles and situations.

The brush techniques are simple to do but the game often struggles to register the correct input.

This is because it’s never entirely clear where your drawing will appear on the screen: sometimes, you’ll draw a straight line to slash open a rock and just bloom some flowers on the ground; other times, you’ll try to bloom a tree only to cause the sun to rise or a wind to pick up. This is because the thirteen different Celestial Brush techniques you acquire are all extremely simple in execution (generally one or more lines or a swirl of ink) but the game sometimes seems to get confused about wheat you’re doing, meaning you can waste ink performing the game’s more costly techniques or be needlessly frustrated by something as simple as drawing a line from point A to point B thanks to the dodgy camera and perspective.

I noticed a bit of pop-up and slowdown at times.

Perhaps as a hold over from its time as a Wii and PlayStation 2 game, Ōkami features a fair amount of pop-up; Demon Scrolls, pots, boulders, and certain other landmarks will fade in and out of existence as you explore and I, personally, encountered a lot of annoying slowdown upon loading up my save file or when battling large groups of enemies. There are some benefits to this, though; Demon Scrolls don’t respawn until you leave the area you are in, for one thing, but pots do so it’s pretty easy to stock up on health, ink, and Yen as long as you can be bothered to keep breaking these items open.

There’s a lot to see and do in Ōkami so you’ll always be kept busy, at least.

Ōkami is a pretty exhausting experience, to be honest; I was expecting maybe a ten to twelve hour game but my final playthrough clocked in at more like fifty hours. There is a lot to see and do and a fair amount of backtracking required once you learn new techniques, as well as many side quests and distractions to keep you busy. The game features numerous towns spread across a wide, open field, with new areas (such as a swamp, bustling city, beach front, and frozen region) being equally large and full of things to do, as well as ten dungeons that vary in length and difficulty. Many of these dungeons revolve around a specific gimmick (the vine or wind technique, for example) and might be as simple as collecting a key from one area to unlock a door, learning a new technique, and then battling a boss to manipulating the game’s day/night cycle to raise or lower water levels.

Objectives and puzzles are generally simple but can be a bit vague at times.

Thankfully, the game has an extensive menu on offer that allows you to view, use, and equip items, review your objectives, read up on enemies and bosses you’ve faced, and keep track of any pending quests. The downside, however, is that many of these objectives and side quests, like the game’s puzzles, can be annoyingly vague at times; the map, while helpful, doesn’t display the names of everywhere you’ve visited (this only happens when you’re fast travelling, which is annoying) and Issun is more likely to berate you for taking too long to figure stuff out than help you actually solve puzzles, which range from pushing spheres either down a simple, narrow corridor or through a treacherous bit of quicksand and onto weighted switches (which can be tricky as Amaterasu doesn’t have opposable thumbs!), desperately trying to attach vines to a log (against a time limit) as it speeds through a raging stream, gathering ingredients or acquiring a mask to sneak past enemies, draining water, activating lifts, blasting open walls with cannons to reach new areas, or using your various brush techniques to cross chasms or navigate the dungeon.

Graphics and Sound:
Similar to The Legend of Zelda: The Wind Waker (ibid, 2002), Ōkami is presented in a gorgeous cel-shaded style that causes everything, from NPCs to environmental objects to Amaterasu, to pop out at you. Unlike that game, though, where everything kind of blended together to resemble a cartoon, Ōkami draws its inspiration more from the Ukiyo-e style of Japanese watercolour and wood carving art. Indeed, the game is heavily (and unapologetically) steeped in both Japanese cultural, mythology, and folklore; the result is a game with a distinct visual, artistic, and narrative identity and, while the Zelda comparisons are many, I found myself more reminded of Mystical Ninja Starring Goemon (Konami Computer Entertainment Osaka, 1997), a similarly bonkers action/adventure title full of weirdly hilarious and crude humour, eccentricities, and heavily influenced Japanese cultural and folklore.

Ōkami has many beautiful locations, each distinct from each other.

Functionally, there’s not much here you haven’t seen before, particularly if you’ve played any of the 3D Zelda titles; Amaterasu travels to little towns and across wide, open plains, visiting dank dungeons, sunken ships, bustling cities, frozen wastelands, and even shrinking down to meet the pixie-like Poncles. Thanks to the game’s unique visual presentation, though, every area feels like a fresh and distinct take on clichés such as the water- or wind-based temples. The miniature village of Ponc’tan stood out for me quite a bit as it was a surreal, magical little mushroom kingdom that was a far cry from the ostentatious reality of Sei’an City or the quiet simplicity of Sasa Sanctuary.

The cel-shaded graphics really add to the game’s character and help it stand out.

Each place you visit has something new to see and a distinct flavour to it; the aforementioned Sasa Sanctuary is populated exclusively by the Sparrow Clan, for example, while frozen village of Wep’keer is home to the shape-shifting Oina tribe. Even the lands that surround these areas are teeming with life and NPCs, from merchants and blacksmiths to deities and talking dogs, moles who want to play hide and seek, the lethargic Susano, a bear who is particularly fond of balancing on spheres, the unfriendly and demonic Mr and Mrs Cutter, and Yoichi, who professes to Nippon’s greatest archer. Each of these NPCs, and others, needs Amaterasu’s help in some way and is given a little introduction so you know who they are and brought to life through the game’s unique visual style and a number of quirky characteristics.

Cutscenes are a mixture of in-game graphics and motion comic cinematics.

Being an action/adventure game in the spiritual style of a 3D Zelda title, Ōkami features an abundance of cutscenes and dialogue; thankfully, you can skip these, though you’ll miss out on a lot of the game’s lore and information vital to your progression if you do. These cutscenes are rendered using both the in-game graphics and, at times, a kind of motion comic presentation where the narrator explains what’s going on as images are drawn onto a scroll. When characters do speak in the game, it’s largely through a combination of text boxes, pantomime, and a Banjo-Kazooie-like (Rare, 1998) gibberish, which I find endlessly charming, though it can be laborious having to constantly press A to advance the text. Worst of all is that, all-too-often, NPCs will waffle on and then finish talking, only for the game to indicate (though the presence of a green triangle over the NPC’s head) that the NPC has more to say; because of this, I’d advise pressing B rather than A so you don’t have to worry about accidentally jumping rather than continuing the conversation.

The game mixes charming gibberish with a suitably Japanese soundtrack and aesthetic.

In keeping with its heavily Japanese presentation, Ōkami also features a soundtrack that is distinctly Japanese; inspired by classical Japanese works, the game features a blending of traditional and modern Japanese musical sensibilities to create a suitably whimsical and magical sense of awe and scope to the game’s proceedings. However, while it’s functional enough and serves to bring life to the various areas and situations you find yourself in, I can’t say that it was particularly catchy or memorable.

Enemies and Bosses:
In keeping with the game’s off the wall visual style and influence from Japanese folklore and mythology, Ōkami is populated by a wide variety of demonic creatures and weird and wacky monsters for you to fight. While their appearances may change as you progress, and their attacks and ability to absorb damage may become more aggressive and formidable, respectively, you are pretty much taught the fundamentals of how to handle the majority of the game’s enemies in the first few hours of gameplay.

Battling the different Imps will teach you the basics of tackling the majority of Ōkami’s enemies.

The first types of enemies you’ll encounter are the Imps, which can either be Green, Red, Blue, Yellow, or Black; each one is slightly different, with the Blue Imps gliding in the air and needing to be slashed down, the Yellow Imps burrowing underground, and the Black Imps attack using the skulls of their victims. When you later encounter the Guardians, Namahage and Clay Army, you’ll find that these enemies are, essentially, stronger variants of the Imps and the same tactics can be used to defeat them regardless of how much tougher these later enemies are.

The game’s tougher enemies will require a more strategic approach on your part.

That’s not to say that the game doesn’t feature some pretty tough enemies; flying enemies like the Crow Tengu and Dead Fish can be troublesome since they like to block your attacks, the Wheel enemies require you to use your elemental brush techniques to make them vulnerable to attack (which can be difficult if you’re low on ink), and many of the larger enemies, such as the Ogres, are completely resistant to your attacks until you knock off their giant stone masks. Similarly, the Bud Ogre and Igloo Turtle will require your elemental brush techniques to get through their defences and, often (especially later in the game), you’ll be tasked with fighting a number of different types of enemies all at once, which requires a surprising amount of strategy at times.

Get used to battling these bastard giant spiders!

As you enter new areas and explore Nippon and the game’s dungeons, you’ll encounter new enemies and many of the bigger/tougher ones could be classed as sub-bosses. Each of Ōkami’s dungeons is, of course, capped off by a boss battle, each of which is unique in its execution. The first boss of the game, the Spider Queen, is actually one of the most annoying and frustrating bosses you’ll encounter as the only way to damage her is to use the vine technique to attach three vines from nearby Konohana Blossoms to the hooks on her butt. This will fell her and cause her abdomen to open up like a flower, allowing you a short window of time to attack the eye-like globs that act as her sole weak point. You better get used to this piece of shit battle, though, since you’ll fight three Bandit Spiders in the game’s hidden Devil Gate Trials and the Spider Queen as part of the Ark of Yamato’s boss rush.

You’ll need to snuff out the Crimson Helm’s flames to deal actual damage.

In comparison, the Crimson Helm is a veritable walk in the park, especially later when you have even more elemental powers at your disposal. This minotaur-like oaf charges at you wielding giant swords and covered in armour but you can lure him into crashing into pillars and attack him to break his armour off, and then use the wind technique to put out his flames and deal actual damage. Since you don’t need to worry about fighting the damn camera to expose the Crimson Helm’s weak point, this boss battle is actually enjoyable.

Stun Orochi with Sake to destroy its bell and leave its heads vulnerable.

After reaching the Moon Cave, you’ll battle the resurrected Orochi, the eight-headed dragon that has cursed the land and is the subject of such terror and legend. Though large and imposing, Orochi is pretty simple to put down as long as you’re patient and clever about it; to start with, Orochi is invulnerable thanks to his golden armour so you have to use Amaterasu’s water-bending technique to direct some Sake-infused water into three of Orochi’s heads until it collapses, which allows you to attack a bell on its back. Once you whittle the bell’s health down, Orochi will be vulnerable and you must contend with the different elemental and physical attacks of each head, stunning them with the same Sake-tainted water and destroying each in turn. Though tedious, it’s stupidly easy to avoid Orochi’s attacks, so the battle’s difficulty comes from having the patience to destroy Orochi’s heads and the skill and timing to complete an annoying quick-time event (QTE) that follows the main fight, which sees Susano deliver the final blow to Orochi.

True Orochi is supposed to be Orochi’s peak form but it’s defeated just as easily as before.

This isn’t, however, where the game ends; nor is it the last time you fight Orochi. When you briefly take a trip to a hundred years in the past, you’ll battle “True” Orochi, which is supposed to be Orochi at the peak of his powers…but it’s exactly the same as the previous battle, with the same level of difficulty and the same tactics, with the only difference being that the legendary warrior Nagi delivers the killing blow. You’ll also have to defeat Orochi one last time in the Ark of Yamato’s boss rush but you don’t have to complete the QTE that time, which is great since the game has a bit of trouble recognising that you’ve cut Orochi’s heads during these sequences.

Blight’s speed is easily neutralised to leave it vulnerable to your charged attacks.

After besting Orochi, the game’s bigger, far more expansive second half begins. The first boss of this next stage of the game is Blight, a possessed sword and suit of armour that is quite possibly the easiest boss in the game. Thanks to Amaterasu’s time-slowing “Veil of Mist” technique, you can slow Blight to a crawl for a few seconds, allowing you to dodge its attacks and attack it until its weak point, the possessed blade Goldnail, which can be easily dispatched using charged Glaive attacks.

Some bosses can drain your ink or both block and counter your attacks.

When you explore the sunken ship and the waters around Ryoshima Coast, you’ll encounter the gigantic Water Dragon, which cannot be defeated and must be fled from and then entered to retrieve a key item. While inside of the Water Dragon, you’ll battle the Tube Foxes and an evil form of one of your allies, Rao; the Tube Foxes exhibit a decent amount of agility and can drain your ink, which can be bothersome, while you’ll need to reflect Evil Rao’s daggers back at her and attack when she’s vulnerable on the ground. Neither are particularly difficult though Evil Rao reappears in one of the game’s more frustrating Devil Gate Trials where you have to not only fight multiple versions of Evil Rao but also the similarly-sword-wielding Wakka.

You’ll need to direct lightning to Ninetails’ sword and destroy its spirits to deefat it.

The final boss of the game’s second portion is Ninetails, a large, nine-tailed kitsune who can only be harmed by directing lightning to its sword; this splits Ninetails into nine ghostly humanoids who attack Amaterasu incessantly. As you weather their attacks and destroy them, you’ll reduce Ninetails’ tails; do this enough times and Ninetails will be reduced to a normal, one-tailed fox and be vulnerable to your attacks but it’s still best to deliver massive damage with Amaterasu’s Thunderstrike technique. Though big and able to copy many of Amaterasu’s, and even cancel out any brush techniques you use, the hardest thing about this boss is dealing with all of the spirits that Ninetails splits into since they don’t flinch after being attacked.

Amaterasu battles Nechku and Lechku alongside other wolf allies.

When you reach the conclusion of the Waku Shrine, the game’s final (and biggest) dungeon, you’ll battle the giant mechanical owl Nechku; this fight is relatively simple since Shiranui, Amaterasu’s past self who is significantly more powerful, does the majority of the leg work for you. After defeating Nechku, you travel deeper into the dungeon and battle it again, this time as Amaterasu and alongside another of her friendly rivals, the shape-changing Oki, and Nechku is joined by its twin, Lechku. In this case, you need to use your Celestial Brush to interact with one of the many different items the two whip out in order to stun them and then grab Oki and fire him like an arrow to deal greater damage. Having two bosses to contend with makes this one of the more challenging boss battles but it’s still far from difficult, especially since you can slow things down with the Veil of Mists, and neither Nechku or Lechku appear in the Ark of Yamato’s boss rush.

Yami’s design is a bit underwhelming after all the mental shit we’ve seen up to this point…

Speaking of which, be sure to save before you board the Ark of Yamato as you won’t be able to return once you enter. Inside, you’ll have to battle the Spider Queen, the Crimson Helm, Blight, Ninetails, and Orochi again one after the other (though you can rest up and save between each battle) in order to confront the game’s true final boss, Yami. Yami (which is just a giant, glowing sphere, which is a bit underwhelming after everything you’ve seen and fought up to that point) strips you of all of your abilities and you must attack it, dealing with its five different forms to regain your abilities. In its first form, it tries to smash you with either a hammer of its spherical body, causing holes to form in the floor of the arena (if you fall down them, you respawn in the arena but take damage) and attacking it restores your Rejuvenation, Power Slash, and Greensporout techniques, which allow you to crack open the sphere at deal actual damage to Yami’s core.

Yami has multiple forms and attacks, each of which require your restored brush techniques.

Yami’s second form sees it engulf itself in fire and split into platforms, launching flaming parts of itself at you and forcing you to do some tricky platforming or jumping to damage the core and restore your Cherry Bomb, Waterspout, and Crescent techniques. Its third form sees it launch fireballs and freezing ice blocks at you and forces you to attack a slot machine to conjure these attacks, missiles, and even health and ink pots. Its fourth form sees Yami sprout legs and tentacles, which whip at you and form into swords for you to use Thunderstrike on, and is the toughest of Yami’s base forms since it takes a little more to expose the core, which can absorb quite a lot of damage.

Yami’s final form doesn’t hold back but it’s still not much of a challenge for your many abilities.

For its final form, Yami sprouts a claw hand to protect its core, which constantly shields itself from your brush techniques. The only way to damage this final form is to use Sunrise to dispel the darkness in the arena, reflect missiles back at it, and attack the core when it busts out its massive laser. You can also deal damage by attacking Yami’s hand, which is easy enough to dodge, and its spherical shell to, eventually, stun it and expose the core to your more powerful attacks. This was the first time in the entire game I actually bothered to use items to increase my attack power as Yami can take quite a beating but, otherwise, this boss is tedious and long-winded but far from difficult.

Power-Ups and Bonuses:
Amaterasu has many options available to her to power-up her attacks and abilities; as mentioned, Gold Dust can increase the power of each of the Divine Instruments, which you can acquire after beating bosses, from weapons shops, or in treasure chests hidden throughout Nippon. You can also find and buy various Steel Fist Sake or Steel Soul Sake to increase your attack and defence, respectively.

The Onigiri-Sensei will teach you all kinds of new attacks, like shitting to annoy your enemies…

As you explore, you’ll be able to pay an extortionate amount of money to the Onigiri-Sensei to upgrade and learn new attacks and techniques. This allows you to add additional attacks and build greater combos, dodge (and counter attack after a dodge), double jump, increase your attack power by equipping two of the same type of Divine Instrument and, of course, piss or shit in the middle of battle to insult enemies and force them to drop Demon Fangs!

Use your elemental brush techniques to solve puzzles and damage enemies.

One of the main objectives Amaterasu has, beyond restoring peace to Nippon, is the awakening of the thirteen Celestrial Brush Gods and re-learning their brush techniques. Most of these are elemental based, allowing you to conjure and manipulate fire, water, and wind, while others are tied to nature, allowing you to blossom withered trees. You can use the different brush techniques to open doors, repair broken bridges, cause platforms and paths to appear, and to attack enemies, with certain enemies being vulnerable to certain elements.

Slow down time, conjure bombs, and then spend a whole bunch of Yen upgrading your techniques.

You can also use these techniques to slow down time, blow open cracked walls and floors with bombs, scale walls using cat statues, and freeze objects. You can perform multiple brush attacks at once but not in the same moment; so, if you want to do a Power Slash, draw a Cherry Bomb, and direct lightning to an enemy, you need to press and hold RB and draw with X in three separate instances rather than in one. By tossing an exorbitant amount of Yen into three Divine Springs, you can upgrade some of these abilities to make them stronger or allow you to draw more objects on screen at once.

Additional Features:
Ōkami has fifty-one Achievements for you to earn, the majority of which are worth a mere 10G each, even some of the more time-consuming and long-winded ones, and are directly tied to story-based events so they can’t be missed. Technically, the only ones you can potentially miss are the “No Furball on the Menu” Achievement (which requires you to quickly draw yourself a lily pad and then use an Inkfinity Stone to relentlessly conjure wind to quickly carry you safely to shore before the Water Dragon can eat you) and the “From Imps to Demons” Achievement since the Fire Doom Mirror can only be fought during one mission in the game. The others can be achieved with enough patience by earning loads of Praise and Yen to max out all of your abilities and attacks and making sure that you defeat every enemy you see and don’t die (which is pretty easy to do).

Hunt down monsters and compete in races to earn Praise and Achievements.

As you might imagine, there are a whole host of side quests to keep you busy as you play, with many of them resulting in you earning Praise, Yen, and an Achievement. One has four NPCs ask you to hunt down and destroy certain monsters, which is easy enough to do (simply interact with every Demon Scroll in the surrounding area and they’ll eventually crop up), while another has you winning races against three different opponents (well, I see “win” but you only really need to win one of these races; the others just require you to catch up to your opponent and tackle them in three separate, increasingly-difficult challenges).

I can’t say that I was a fan of either of these mini games…

There are also a few mini games to eat up your play time; one has you tackling moles for rewards and is optional but the other two, the digging and fishing mini games, are required to complete to progress the story and to earn all of the game’s Achievements. I struggled a bit with the fishing mini games at first since the game didn’t seem to want to register my brush strokes but then I must have either gotten better or the game decided to play along and let me draw the line and slash the fish without much issue. The digging mini games are a lot of trial and error that have you digging, bashing, slashing, and exploding rocks against a time limit while an NPC follows along, walking into spikes and needing to be guided to a specific point to unearth a treasure.

The Kusa 5 are, apparently, even tougher than Orochi and must be fought in waves.

There are also a couple of optional boss battles, of sorts; as part of the story, you have to find and recruit the five Canine Warriors and, after finishing Oni Island, you can return to the Gale Shrine to battle these five dogs once more. Known as the Kusa 5, you must fight them in both groups and waves. As in the initial battles against the dogs, they like to dash, jump, and tackle you, dig holes to bury you and hurt you with the dirt, and leave explosive turds to damage you. In this battle, they are said to be more powerful than Orochi and, while that’s certainly true, they’re actually slightly less bothersome to fight since they can be damaged without jumping through a bunch of hoops and you can always use the Veil of Mist technique for an advantage.

You won’t last long in the Devil Gate Trials if you come unprepared.

You can also learn a more powerful dig move to unearth three secret Devil Gate Trials; at first, these chasms are guarded by three Bandit Spiders but, when you return, you’ll have to pass through ten Devil Gates in succession, defeating wave upon wave of the game’s toughest and most annoying enemies. If you leave the area at any point, you’ll have to start all over again, so it’s best to stock up on items and equip the Wood Mat (which restores your health, at the cost of some Yen, when you leave Amaterasu idle) to heal up between gates. This, and the Kusa 5, are easily the most challenging parts of the game but challenging in a way that is tedious and annoying rather than necessarily difficult as, as long as you spam the Veil of Mist and equip the right Divine Instruments, you should be able to best each trial with the skills you’ve mastered.

Upon completion, you’ll unlock a gallery and some skins to use in New Game+.

After you defeat Yami and complete the game, you receive both a final evaluation and a number of awards, unlocking a gallery and such from the main menu and some skins to utilise in the game’s “New Game+” mode. When you play New Game+, you retain all of the progress you made in your first playthrough except for the brush techniques, some weapons, and a few Holy Artefacts and other items. This means that it’s pretty easy to finish upgrading any of Amaterasu’s abilities you missed the first time around and to make short work of the game’s earlier enemies but I’d recommend creating a save point before you enter the Ark of Yamato so you don’t have to play through the entirety of the game from the start to finish your Bestiary or treasure tome.

The Summary:
Ōkami is certainly a beautiful game to look at and play through and I can see why many praise its visual presentation and narrative; it’s a long, sprawling adventure that sees you exploring a unique and quirky fictional land, meeting and battling all kinds of characters and monsters, and certainly stands out against other games of its type. However, as lovely as it is to look at and as fun as it can be to play, I was often frustrated by a lot of little annoyances; the day/night cycle, for one thing, the camera’s jerkiness and clumsiness (especially in boss battles), for another, and the game’s unreliable nature when it comes to registering brush strokes. The platforming and jumping aspects can also be needlessly annoying and, at times, the hints and directions you get are far too vague. While this opens the game up to exploration and experimentation, it can be annoying to be stuck in a room or area with no idea of how to proceed and the map is less than helpful in this regard. Still, overall, it’s a solid title with some intense and engaging boss battles, a rich and intriguing lore, and plenty of side quests and distractions to constantly keep you busy.

My Rating:

Rating: 3 out of 5.

Pretty Good

Have you ever played Ōkami? If so, did you play the original version or, like me, have you only experienced the HD version of the game? If you’ve played both, how do you find the HD version holds up compared to the original? What did you think to Ōkami’s unique world, characters, and lore? Did you find the game to be a bit too long and convoluted and the brush and camera to be less than reliable or were you engrossed in the game’s complex story and pleased with the game’s controls and mechanics? Which of the game’s areas, dungeons, bosses, and/or characters was your favourite and why? Would you like to see more from Ōkami or do you feel its best that it was one and done and how would you compare the game to others in its genre, like the Zelda series? Whatever your thoughts on Ōkami, feel free to leave a comment below.