
To commemorate, the culmination of their long-running and successful X-Men movies, 20th Century Fox declared May 13th as “X-Men Day”, a day to celebrate all things Mutant and X-Men and celebrate Marvel’s iconic collection of superpowered beings who fight to protect a world that hates and fears them.

Released: 16 May 2006
Developer: Z-Axis
Also Available For: Game Boy Advance, GameCube, Nintendo DS, PC, PlayStation 2, Xbox
The Background:
Ever since Stan Lee and long-time collaborator Jack Kirby created the X-Men in 1963, Mutants have featured prominently in Marvel Comics and grew to greater mainstream prominence thanks to the influential animated series from the nineties, the success of which led to 20th Century Fox purchasing the film rights and producing a successful long-running live-action franchise. The X-Men have also have a storied history in pixels and polygons; the Mutant team first came to life on the Nintendo Entertainment System in what was essentially a vertical shooter, but the characters arguably saw the most success in their numerous arcade ventures and team-based brawlers. To coincide with the release of X-Men: The Last Stand (Ratner, 2006), publisher Activision was tasked with creating a tie-in videogame to be released across all available platforms and bridge the gap between X2: X-Men 2 (Singer, 2003) and the third entry. However, just as X-Men: The Last Stand was critically panned, X-Men: The Official Game failed to impress with its poor enemy A.I., repetitive gameplay, and for being little more than a shameless cash-in.
The Plot:
Still reeling from the death of Doctor Jean Grey, James “Logan” Howlett/Wolverine, Bobby Drake/Iceman, and Kurt Wagner/Nightcrawler battle radical terrorist group known as Hydra and their gigantic, Mutant-hunting Sentinels, encountering some of their worst enemies in the process.
Gameplay:
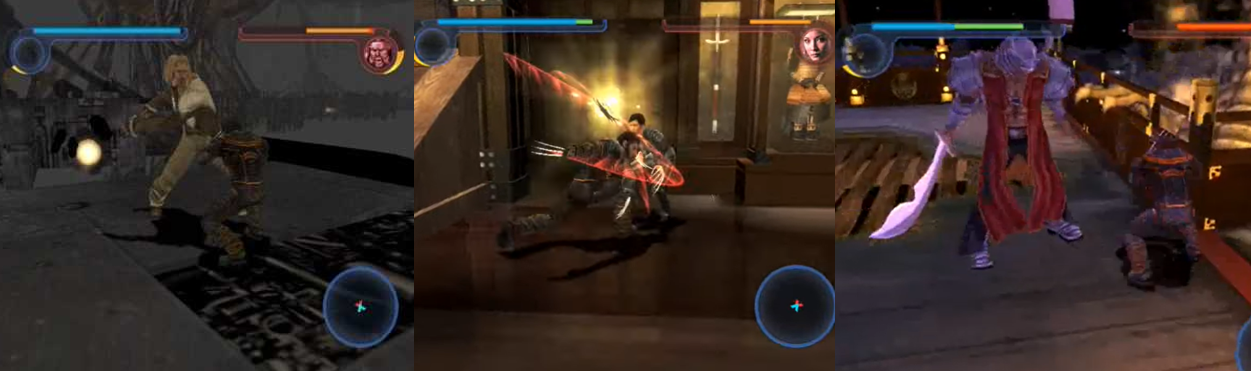
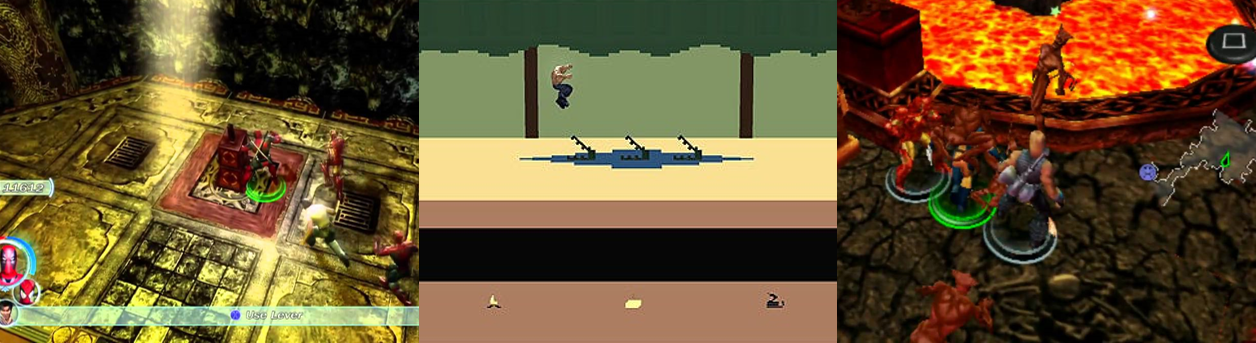
X-Men: The Official Game is a third-person action game with three distinct gameplay styles split across its three playable characters, Wolverine, Iceman, and Nightcrawler, who embark on an adventure that takes place soon after the events of X-Men 2 and fills the gap between that film and X-Men: The Last Stand to explain why Nightcrawler is missing from the team in the third movie. While the levels in X-Men: The Official Game are pretty linear, the developers furnished players with a helpful mini map which indicates friendly non-playable characters (NPCs), enemies, and points you in the direction of your next objective/s. There are a few branching paths you can sometimes take, either by smashing through walls and windows as Wolverine or teleporting to higher areas as Nightcrawler, but these generally just lead to a collectible and it is actually pretty easy to get turned around as everything looks very similar. Although each character has a distinct way of playing, there are some similarities between all three: both Wolverine and Nightcrawler can jump with A and dish out attacks and combos with X and Y, Nightcrawler and Iceman can both target foes with the Left Trigger, and all three will automatically heal from minor wounds (though Wolverine and Nightcrawler and able to dramatically speed this up by holding the Left Bumper or pressing the Right Bumper, respectively, whenever it’s safe to do so, though any movement at all will cancel out this healing boost).

Wolverine’s gameplay is very much that of a hack-and-slash brawler; however, fans of genre-defining titles like the God of War series (Various, 2005 to present) will be left disappointed as Wolverine is quite a clunky and limited character thanks to the presentation and camera angles offered by this game. With a tap of LB, Wolverine can sheath and unsheathe his claws (which is more of an Easter Egg than anything), which he can use to slash at the multitude of minions who come charging at him in any given level. Using combinations of X, Y, and B (which pushes enemies away), Wolverine can string together some basic combos; he can also block incoming attacks by holding the Left or Right Trigger (and you can flick the analogue stick while blocking to pull off an awkward dodge roll to try and get away from sticky situations), and successfully landing attacks will build up his “Fury Meter” which, when full, powers up your attacks and healing for a short time with a press of the Right Bumper. Nightcrawler has similar capabilities in combat, but his levels are much more focused on platforming with his signature teleport and a bit of semi-stealth. Nightcrawler can also string together punches and kicks for combos, but you’re best served using his relocation attack; pressing B sees him automatically teleport behind the nearest enemy to pummel them with X or smash them with Y, which is great for taking out groups of enemies quickly. RT allows Nightcrawler to teleport to a variety of surfaces, from pipes to bridges and walkways, and is great for quickly traversing areas and getting to consoles or control panels which need rewiring with X. Of the three, Iceman is the most unique as he’s constantly moving forwards on an ice slide and his levels play much more like chasers or dogfight simulators. Holding A lets Iceman boost ahead, while RT brakes and RB allows him to flip around quickly to retarget enemies. X unleashes an ice beam, which is great for freezing up pipes or putting out fires, while B tosses out his Hailstorm attack and Y puts up a temporary frost shield. You’ll need to constantly tap LT and B when faced with multiple targets, but Iceman’s levels are much more geared towards preventing catastrophes or reaching a goal and are often accompanied by an anxiety-inducing time limit.

The game’s story mode is laid out in a linear mission-based structure; at various points, the narrative branches off to follow each of the three characters and, prior to starting a mission, you can pick from three difficulty settings: “Novice”, “Hero”, and “Superhero”. These will dictate how tough the enemies are, with enemies on “Superhero” able to whittle your health to nothing in just a few hits or under sustained gunfire, but there are perks to completing the mission on higher difficulties as you earn more “Mutation Evolutions” on these settings. These power-up each character’s stats, raising such attributes as their overall health, the damage their attacks deal, and their health and energy recovery, and the only way you’ll only be able to max out your abilities is by beating every mission on “Superhero” mode. This, however, is easier said than done; the game is very stingy with its checkpoints, meaning that failure to complete some of the game’s more monotonous tasks requires you to start the mission over right from the beginning. Following glorified training missions for each character, you’ll be thrust into the game’s story mode and, very quickly, will see everything X-Men: The Official Game has to offer. Wolverine will pretty much always be tasked with clearing away all enemies, with wave upon wave teleporting in or rushing in through doors, though he sometimes has to dodge hazards such as flaming vents and cages or destroy something in order to progress. Nightcrawler almost always has to teleport about the claustrophobic environments, activating panels or rewiring stuff, and occasionally luring exploding probes to power nodes or Sentinels to open doors. Iceman is either racing towards something or fending off attacks, often against a time limit; this means you’ll be dousing fires and cooling down nuclear reactors with your ice beam or chasing down an enemy or towards a goal before time runs out. Occasionally, another X-Men appears to help out; Ororo Munroe/Storm accompanies Wolverine and Nightcrawler you can have her instantly kill all enemies with her lightning by pressing in the left stick, while Nightcrawler also has to deactivate shields so that Piotr “Peter” Rasputin/Colossus can destroy some power generators, but Iceman has no such help when desperately trying to stop Giant Sentinels from marching on the downed X-Jet. Sometimes Iceman will have to slide through “nav points” (essentially glorified rings) and avoid laser hazards and mines, sometimes Wolverine’s locked in a room and forced to fight a gauntlet of enemies, and sometimes Nightcrawler has to destroy glowing crystals to keep enemies from spawning, but it’s all very repetitive and your objectives tend to be to do something once and then repeat it three or four times until the mission abruptly ends.
Graphics and Sound:
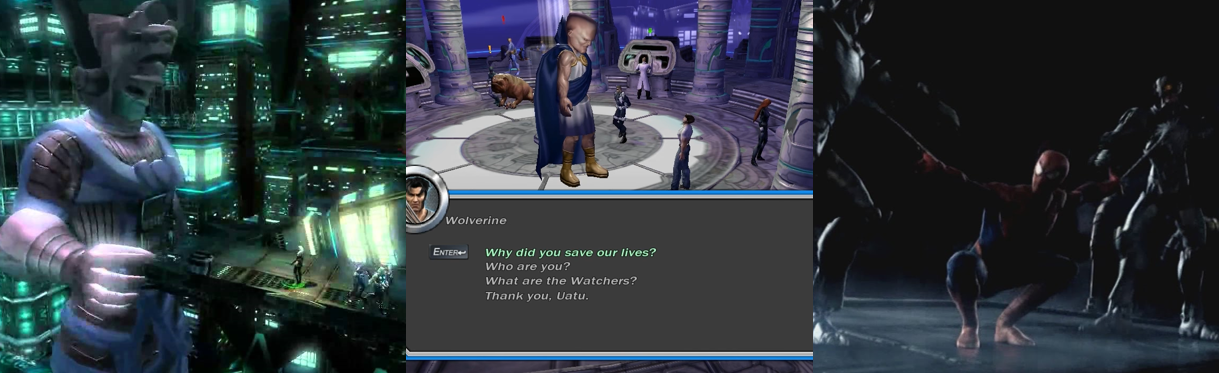
In all honesty, X-Men: The Official Game doesn’t look all that bad; the in-game graphics are pretty decent, with stylistic versions of the film characters well represented for the most part, though the range of animation offered by the three is somewhat lacklustre. Of them all, Nightcrawler looks the best; I love his little coat and how he spins around on poles with a flourish and sometimes gallops on all fours, and it’s a stark contrast to Iceman, who is either relatively static due to his gameplay or ragdolling all over the place when knocked from his slide. Wolverine looks good, but his gameplay is tedious and clunky and severely hampered by the lack of a lunge attack, though he does gain some extra animation frames when in Fury Mode or trying to pounce on larger enemies. The game’s music is pretty decent; it’s mostly all ripped from X-Men: The Last Stand, and many of the film’s cast return to voice their respective characters. In fact, the vocal work may be one of the best things about this game; it’s great hearing Hugh Jackman and Patrick Stewart not only reprise their roles but do it without the lifelessness and boredom that so often accompanies videogame tie-ins.

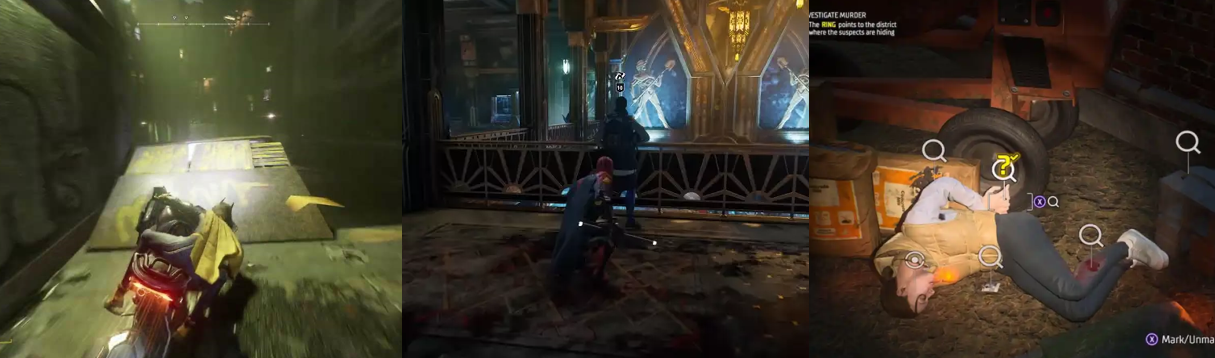
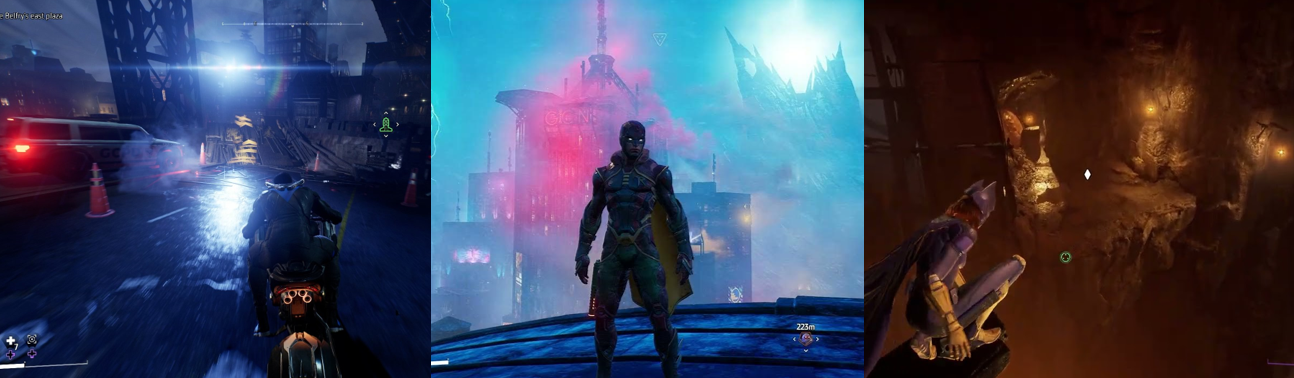
Sadly, the same praise can’t be levelled at the game’s environments and cutscenes. Cutscenes are accomplished using a motion comic aesthetic not unlike those employed at various points in games by NetherRealm Studios; these painted pictures have a very limited range of movement, no lip synching, and the cutscenes come off as cheap and rushed and quite unsightly as a result. The in-game environments are okay, but disappointingly bland; the whole game makes a clear effort to evoke the grey, grounded, semi-sci-fi aesthetic of Singer’s films but there’s generally not really much to see since areas are so linear and empty. You’ll get to fight on the Statue of Liberty in a call-back to the first film and revisit the surprisingly unflooded Alkali Lake facility from the second film and the Weapon X laboratory, all of which are very well realised interpretations of the film locations but are so grey and drab that even cheeky references to Wade W. Wilson/Deadpool can’t save them. Thankfully, once the game gets away from recreating areas from X-Men 2, locations become a bit more visually interesting; the Sentinel factory is great, with a massive Sentinel head looming in the background, as are the colourful levels that take Wolverine to an elaborate Japanese palace and garden grounds, but the game really shines once you get into the Master Mold’s control centre, a gigantic airship full of electrified wires and ominous dread that evokes the Borg Cube. Iceman’s chase through the streets of Hong Kong is similarly a visual spectacle thanks to the neon signs, bridges, and skyscrapers, all of which helps to really elevate the game’s presentation after the first few drab missions and despite the tedious gameplay.
Enemies and Bosses:
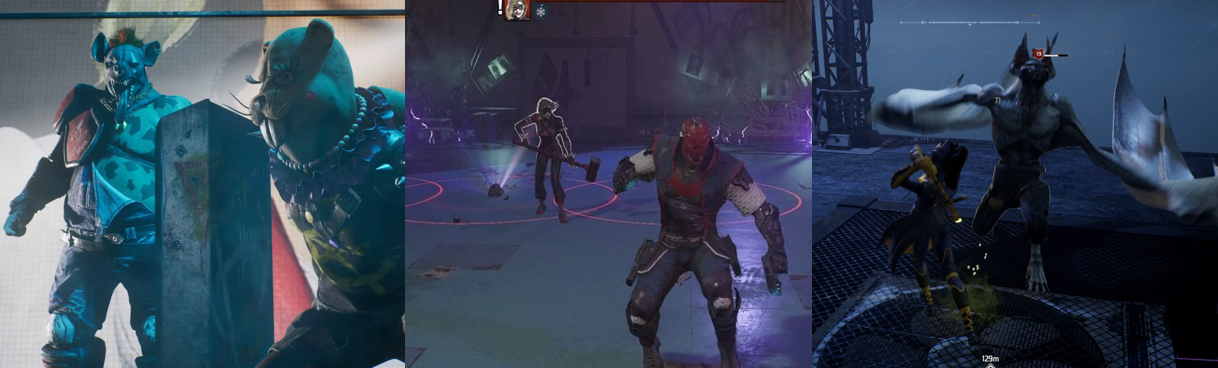
With such varied and colourful characters as the X-Men and the Brotherhood to work with, it’s no surprise that the developers chose to mainly have you wade through an endless supply of generic and boring Hydra thugs. These guys come packing machine guns, electrified axes and lances, and claws and can mostly be taken out with some quick combos but some will block your attacks. For Wolverine, things get a little more interesting as he gets to battle the Hydra “Wind Unit” (who are basically ninjas with two katana), while Iceman is often blasting at smaller Sentinels or fire dragons conjured by John Allerdyce/Pyro. Nightcrawler will also have to deal with Sentinels but he can only take them out by teleporting to them and luring explosive drones to them before the robots can blast him off with a shockwave. Later, Nightcrawler is placed in a nightmarish illusion by Jason Stryker and forced to battle off teleporting demonic entities, and you’ll also encounter Hydra goons packing bazookas and heavy cannons in some levels. For the most part, the enemy AI is pretty dumb; they’ll easily lose track of you and won’t think to go around certain obstacles, but in wider, more open areas they can be incredibly annoying and persistent, catching you in a crossfire or swarming around you to deplete your health in seconds while you desperately try to escape to safety.
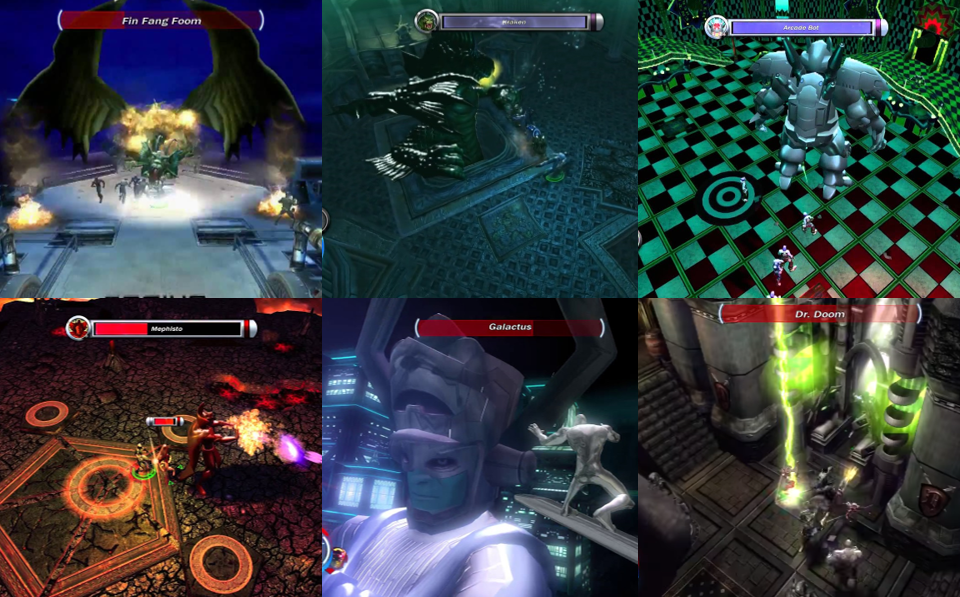
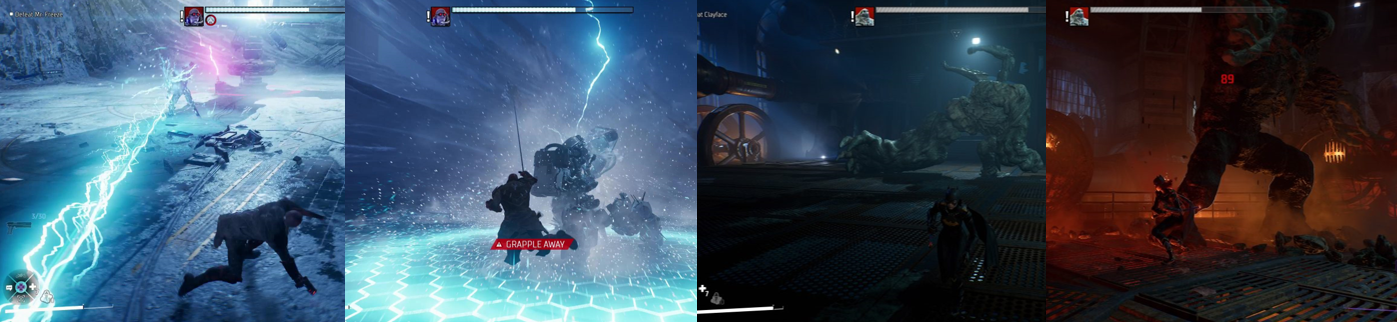
Each character also has to deal with a number of bosses, with some fought multiple times in different forms. During Wolverine’s first training mission, you’ll battle against Victor Creed/Sabretooth to learn the basics of combat; Sabretooth makes a return as the final boss of the game, too, where he’s fought within the decaying remains of the Master Mold facility and significantly more powerful even against your upgraded stats. Sabretooth charges at you with a shoulder barge, can hit slow but powerful combos, grabs and lunges at you, and even has his own Fury Mode that speeds him up and makes him more aggressive. Still, the best thing to do is to avoid his attacks, hit a quick combo, and then stay out of his reach to build up your Fury Meter before unleashing it (avoiding pressing Y as this lunge isn’t effective against him) to whittle down his health bar. Halfway through the fight, Sabretooth flees to a lower level, where debris is a concern for both you and him, and you’ll also have to worry about his health slowly replenishing if you take too long, but he’s not especially difficult to put down. Yuriko Oyama/Lady Deathstrike makes a return in this game and you’ll battle her a couple of times, too; the first time you fight her, it’s within the eye of a hurricane and you have to be careful of being blasted about by the winds while also pushing her into the hazard, and the second time is within a Japanese temple and forces you to fend off waves of enemies between rounds. Still, Lady Deathstrike may be faster and nimbler than Sabretooth, but the same hit-and-run tactics work well against her and it’s much easier to get her trapped in a corner and just go at her full pelt until she goes down. Wolverine’s toughest foe is easily the Silver Samurai; this hulking armoured bastard can teleport about, has great reach with his broadsword, doesn’t get stunned by your attacks, and can send out both energy blades and electrified shockwaves and forces you to fight his minions between bouts. Once again, simply run or dodge about to avoid the brunt of his attacks and build up your Fury Meter and then just tank him as he’s a bit of a damage sponge and can easily cut you down with just a few swipes of his sword.

Nightcrawler only gets one boss to fight against, but it’s one of the more frustrating ones in the game; while on the rainswept Brooklyn Bridge, he and Storm must fend off clones of James Madrox/Multiple Man while teleporting about the place and defusing his many bombs against a time limit. Afterwards, Nightcrawler has to battle him alone and more directly; the “prime” Multiple Man will occasionally set an explosive charge and, if enough of them go off, the bridge will be destroyed and you’ll lose the mission but try and disarm them and you’ll be beaten to death in seconds by his ceaseless doubles. Your best bet is to stay on the move, dashing to safety and healing when you can, and hoping that he doesn’t set any of these charges (or quickly interrupt him before he can). The hardest thing about this battle, though, is actually dealing damage to Multiple Man; he seems either impervious to your attacks or only hurt after you take out his clones, which can be hard to do as they swarm around you, making for a boss battle more about luck than anything. Iceman primarily battles against Pyro; first, Pyro tries to burn down and destroy a fission plant, then he tries to overload a nuclear reactor, and then he conjures a gigantic fire serpent to target the toxic waste canisters. If enough of these are destroyed, the mission ends so make sure you’re rapidly switching target locks and throwing out your Hailstorms to take out the fire dragons. The serpent itself is also quite a damage sponge, and can set you ablaze if you get too close, but if you power-up Iceman’s Hailstorm attack that makes things a lot easier. Definitely his hardest challenge is stopping a seemingly endless army of Giant Sentinels from destroying the X-Jet in Hong Kong; these huge armoured hulks can only be destroyed by targeting six yellow power nodes, but the ones on the front are super hard to hit not just because of aiming difficulties but also because of their high-powered lasers. Destroy one, and another drops soon after, and another, and this was the first mission where I actively had to drop the difficulty down to “Novice” to get past it and even then it was a pain in the ass!
Power-Ups and Bonuses:
Unfortunately, there are no collectible power-us available here. Wolverine and Nightcrawler can built meters (either by landing attacks or waiting for it to charge, respectively) to speed up their healing but the closest Iceman gets is destroying Sentinels to gain extra time until fifteen are taken out. As mentioned, Storm and Colossus will accompany you for some missions; Storm can unleash her lightning, but you’ll need to wait for her meter to fill up too, and you’ll also need to get back to help Colossus fend off the Hydra goons before they deal too much damage to him.
Additional Features:
There are sixteen Achievements up for grabs here, with three insulting 0G Achievements awarded after clearing each character’s training mission, three more being rewarded for completing the story mode’s three vaguely defined acts, and three more earned after fully upgrading each characters Mutations. You’ll no doubt notice a few collectibles in each level of the game; every mission hides five Sentinel Tech files and one Weapon X file, and collecting all of these for each character will award another three Achievements and also unlock a bonus costume for each character and a “Danger Room Challenge” for each. Unfortunately, while these collectibles aren’t too difficult to find even without a guide, the rewards you get are pretty pathetic; the costumes are little more than street clothes variants and just having one each is more than a disappointment, it’s a travesty. The Danger Room Challenges amount to timed obstacle courses and challenges used to test your character’s gameplay and abilities, but you earn nothing for completing them so there’s no point in them even being there. Aside from all that, your only other option is to try and beat every mission on “Superhero” to fully upgrade every character, something you won’t really be motivated to do since the gameplay is so uninspiring that even the promise of cutting down goons dressed in Wolverine’s signature wife-beater won’t be incentive enough to ever play this game again.

The Summary:
I tend to go into movie tie-in videogames with pretty low expectations; while I’ve played a fair amount that are pretty good, there’s no denying that they’re generally very rushed, lacking in content, and don’t have a lot going for them. On the plus side, they can sometimes be quite cheap and have some easy-to-snag Achievements, and that’s basically what you’re getting here with X-Men: The Official Game. There’s some decent stuff on offer here; Nightcrawler, especially, is pretty fun to play as and I enjoyed teleporting about the place and pummelling enemies with his attacks, and even Iceman was quite fun in the few missions where you weren’t forced to battle against an arbitrary time limit. Sadly, and most confusingly, it’s Wolverine’s gameplay that really drags this one down; he’s very restricted in his offense and the lack of checkpoints really makes getting through some missions, but especially his tedious gauntlets, a frustrating chore. Awful cutscenes aside, the presentation is pretty good; the game makes a decent attempt at recreating iconic locations from the first two films while infusing a more comic book aesthetic and storyline into the movie timeline, but locations are far too bland and repetitive to really be all that interesting, even in the latter parts of the game. Bosses battles are equally uninspiring; thanks to Wolverine getting the bulk of them, they’re hardly a selling point of the game’s few strengths and, overall, there are far better superhero and action videogames out there for you to put your time into. A serious lack of options, unlockables, and replayability hamper this title; while it’s not too difficult to blast through it in about four to six hours, it’s unlikely you’ll be motivated to try and get everything you miss the first time around and, despite a few entertaining aspects, it remains a cheap cash grab designed solely to leech off the popularity of Fox’s X-Men films rather than actually trying to be an entertaining videogame experience in and of itself.
My Rating:
Could Be Better
Did you enjoy X-Men: The Official Game? Which of the three characters was your favourite? Did you enjoy the game’s effort to bridge the gap between X-Men 2 and X-Men: The Last Stand? Which of the game’s missions and bosses was your favourite and do you feel like Sentinels are a little overdone in Marvel games? Did you ever fully upgrade the characters and find all the collectibles? Were you disappointed by the lack of options and unlockable extras? What’s the worst (or best) videogame tie-in you’ve ever played? Which X-Men videogame is your favourite and how are you celebrating X-Men Day today? Whatever you think about X-Men: The Official Game, and X-Men in general, feel free to share your thoughts below.


You must be logged in to post a comment.