In 1981, Shigeru Miyamoto and his team at Nintendo R&D1 created Donkey Kong, an arcade title that was not only one of the earliest examples of the platform genre but also introduced gamers everywhere to two of Nintendo’s most recognisable characters: Mario and Donkey Kong. Mario, of course, shot to super stardom but today’s a day to celebrate everyone’s favourite King Kongknock-off and to say: Happy birthday, Donkey Kong!
Released: September 2018 Originally Released: 15 July 1983 Developer: Nintendo R&D2/Ikegami Tsushinki Also Available For: Game & Watch, Game Boy Advance, GameCube (via Animal Crossing (Nintendo EAD, 2001)), Nintendo Entertainment System (NES), Nintendo Wii (Virtual Console)
A Brief Background: Early into 1981, Nintendo had run into a bit of trouble; their plans to expand into North America with Radar Scope (Nintendo R&D2/Ikegami Tsushinki, 1980) had failed and then-president Hiroshi Yamauchi turned to young designer Shigeru Miyamoto to create a new arcade cabinet to turn their fortunes around. When plans to base this new machine on the popular comic strip character Popeye fell through, Miyamoto, inspired byBeauty and the Beast (Barbot de Villeneuve, 1740) and King Kong (Cooper and Schoedsack, 1933), retooled the concept into Donkey Kong, a classic tale of man versus ape that would see gamers guide the character of Jumpman across conveyer belts and up construction sites to rescue Lady from the clutches of a cranky, stubborn ape. Following some suggestions from Nintendo’s American distributors, “Jumpman” and “Lady” were renamed to “Mario” and “Pauline”, respectively, and Donkey Kong was released across the United States in July 1981 and became the financial and critical success Nintendo desperately needed to break into the U.S. Naturally, ports soon followed; versions ofDonkey Kong showed up on the ColecoVision, Atari 2600, and Intellivision as well as other home systems like the ZX Spectrum and MSX. A modified, scaled-down version of the game was also released as one of the launch titles for the NES, the console which dragged the videogame industry out of its darkest hour, and it is this version of the game which was later released for the Nintendo Switch Online and which I’ll be discussing here.
The Review: Donkey Kong is as 8-bit as 8-bit can be; stages consist of a stark, blank black background and are dominated by the iconic red girders and the large, looming, grinning features of the titular ape. While the arcade original was one of the first games to tell an onscreen story through the use of simple animations that we would, today, describe as cutscenes, the NES version omits these entirely but the game is charming enough to look at regardless. Donkey Kong’s genre is a bit difficult to define given that videogame genres hadn’t really been fully established back in the early eighties beyond space shooters and obscure puzzle games but it is, essentially, a vertical action/platformer in which an early iteration of Nintendo’s flagship character and mascot, Mario, must run and jump up and across a series of platforms while avoiding hazards in order to rescue Pauline from Donkey Kong’s clutches at the top of the screen. Generally, I find Mario to be quite a slippery and unwieldy character to play as but, in his debut appearance, he moves more like he has lead weights in his shoes; his default movement is a steady but weighty jog and his jumps constantly feel like he’s struggling against the pull of gravity. The game also employs little to no momentum-based physics, meaning it’s easy to clip hazards and lose a life as a result. Gravity continues to be the bane of your existence as Mario takes a ridiculous amount of fall damage in Donkey Kong; drop from any height, be it one platform above or from the top of the screen, and you’re going to die. Leaping from a moving conveyer to a small platform that’s slightly below you? Instant death. Accidentally fall down a hole when you remove the rivets from stage three? Dead. As a result, there’s little margin for error in Donkey Kong and, if you screw up, you’re gonna die; there are no second chances here.
The game’s three stages loop continuously, getting faster and harder with each playthrough.
As you play, you’ll notice a ‘Bonus’ score counter in the game’s limited heads-up display (HUD). This continuously counts down as you play, reducing the bonus score you’ll get upon completing a stage if you take too long. Also, if it reaches zero, guess what? Yep, you lose a life, making it a combination bonus score/time limit for additional pressure. Unlike the original arcade game, the NES version of Donkey Kong features only three stages: the first is a construction site, the second features conveyor belts, and the third and final stage has you removing rivets to bring Donkey Kong crashing to the ground. Each time you complete these three stages, the game continues on a loop, getting faster and harder with each subsequent playthrough, however there is no true end to the game; Mario simply keels over and dies once you reach stage twenty-two, meaning that your main incentive to play the game again and again is to beat your own personal high score. As you jump your way to rescue Pauline, you’ll be able to earn points by leaping over enemies (whatever you do, don’t jump on to them like you might expect Mario to do!) and collecting (what I assume are) Pauline’s parasol and purse from across the stages, Mario’s sole method of fighting back in this game is his trusty hammer; two hammers can be found in stage one and three (you’ll just have to fend for yourself in stage two) and collecting one will send Mario into barrel-and-fireball-bustin’ frenzy as a frenetic tune plays. The hammer will destroy anything it touches, allowing you to clear the way for your progress, but you cannot jump while holding it which, honestly, makes it kind of useless as hazards will have respawned by the time you’re ready to progress further.
Barrels, springs, and living fireballs are the game’s primary hazards and enemies.
Mario is an extremely simple and yet surprisingly expressive sprite; unlike other avatars like Pac-Man, he has clearly-defined features such as a prominent nose, moustache, and his signature overalls and cap meaning that he easily stands out against the game’s otherwise-limited colour palette. Pauline looks like a bit of a mess but, luckily, Donkey Kong makes up for it by being big and full of character despite his obviously-limited frames of animation. The game features some iconic and simple melodies, boasting such features as separate tunes for the title screen, each of the game’s three stages, and for completing a stage. It’s limited by the hardware of the time, clearly, but it’s enough to have you humming along as you play. Far from the Goombas and Koopas that would later plague Mario’s every waking hour, Donkey Kong mainly has you avoiding barrels tossed at you by the giant ape. These can roll along, drop off ledges, and fall down ladders seemingly at random, meaning you constantly have to be on your toes to make split-second decisions about when to jump or climb a ladder. These barrels can also bounce around the screen, drop down vertically, and take a dip into some oil to transform into anthropomorphic flames. In stage two, Donkey Kong will also toss bouncing springs at you; as the game speeds up, these can be extremely difficult to avoid as the window of opportunity is so small and the game’s hit boxes are deceptively big. In stage three, you’ll also have to watch out for more troublesome balls of fire that wander around the stage seemingly at random, going up ladders and suddenly changing direction to cost you a life. Of course, the game’s primary antagonist is Donkey Kong himself; should you brave his many hazards and attempt to tackle him directly, you’ll lose a life. As a result, the only way to defeat him is to get to the game’s third and final stage. Here, you’ll have to avoid the aforementioned fireballs while jumping over eight rivets. Once all eight are removed, the girders will vanish from beneath Donkey Kong and he will crash comically down onto his head so you can make love hearts with Pauline. Honestly, it’s probably the game’s easiest stage as the first two can get pretty hairy when the game speeds up, making the climax a little anticlimactic even for an 8-bit title.
The Summary: I’ve played Donkey Kong before; I’m pretty sure I had it on the Amiga back in the day and I remember sucking at the version that was included as a mini game in Donkey Kong 64 (Rare, 1999) but this is the first time I’ve properly sat down and put some time into the game. It’s a simple bit of 8-bit fun and an enjoyable slice of nostalgia; gameplay is easy to get to grips with and the controls are responsive even if Mario does feel a bit weighty in his movements. The sprites and music and charming and indicative of their era and the game offers a fair amount of challenge thanks to it speeding up the more you play. Being an 8-bit title, the main motivation for playing is to achieve, or beat, a high score. The game does offer four gameplay modes: two for a solo player and two for two players but I don’t have anyone to play with so I was only able to play the one-player game. From what I can tell, though, the two-player mode is a case of each player taking it in turns to play rather than a simultaneous co-op mode. When playing Donkey Kong on the Nintendo Switch, you get a few extra options that dramatically reduce the game’s difficulty thanks to the Switch’s ‘suspend menu’ mode, which allows you can create a save point at any time and rewind the game back so you can correct any mistakes you might have made. It’s obviously limited in terms of its features and options, which does affect my rating of the game, but it’s a fun enough title that’ll keep you occupied for as long as you feel like playing (in my case…about half an hour or so).
My Rating:
⭐⭐
Rating: 2 out of 5.
Could Be Better
Did you ever own Donkey Kong for the NES back in the day? Perhaps you played the arcade version out in the wild; if so, when and what was that like? Which port of Donkey Kong is your favourite? Which Donkey Kong videogame is your favourite and why? How are you celebrating Donkey Kong’s anniversary this year? Whatever your thoughts on Donkey Kong, feel free to leave a comment below.
So, for no better reason than “Mar.10” resembling Mario’s name, March 10th is widely regarded as being “Mario Day”, a day to celebrate Nintendo’s portly plumber, an overalls-wearing mascot who literally changed the videogame industry forever and shaped the home console market of the nineties. To commemorate Mario Day this year, March has been “Mario Month” as I have celebrated everyone’s favourite Koopa-flattening plumber on each Wednesday of the month.
Released: 18 September 2020 Originally Released: 1 November 2007 Developer: Nintendo Original Developer: Nintendo EAD Tokyo Also Available For: Nintendo Wii and Nvidia Shield
The Background: The concept of Super Mario Galaxy’s gameplay finds its genesis in Super Mario 128, a tech demo designed to showcase the power of Nintendo’s GameCube compared to the Nintendo 64 and other consoles at the time. Specifically, it was the concept of running, jumping, and exploring shifting, spherical bodies that caught Mario creator Shigeru Miyamoto’s imagination and many of the game’s concepts and ideas were thought up before Nintendo Wii was even developed, including new gameplay mechanics such as adding a spin attack to Mario’s arsenal to make it easier to attack enemies on spherical, 3D plane. After tweaking the gameplay to make things a bit more challenging for players, the team worked on implementing unique ways to take advantage of Mario’s space-based adventure, including gravity-based mechanics, new transformations and ways to play, and focusing on making the game fun to play rather than simply rushing to finish it. Super Mario Galaxy was a critical and commercial success, selling over 350,000 units in Japan during its first week alone and over 12.80 million copies worldwide by March 2020. The game also won, or was nominated for, numerous gaming awards and received an equally-well-received sequel in 2020. While that game wasn’t included in Super Mario 3D All-Stars (Nintendo, 2020) for the Nintendo Switch, Super Mario Galaxy was, meaning that I recently finally got the chance to play this game through, my to my delight.
The Plot: All of the Mushroom Kingdom has gathered together for the centennial Star Festival. Unfortunately, the diabolical Bowser, King of the Koopas, gatecrashes the celebrations and kidnaps not just Princess Peach but her entire castle, hurtling them into outer space! Guided by Rosalina and the Lumas, Mario resolves to explore the entire galaxy, collecting both Power Stars and Grand Stars to power Rosalina’s Comet Observatory and rescue Princess Peach.
Gameplay: Super Mario Galaxy is a 3D action/platformer that brings back many of Mario’s controls and abilities from Super Mario 64(Nintendo EAD, 1996); not longer hampered by a water-spewing jetpack, Mario is, thankfully, once again able to backflip and long jump in addition to using his patented triple jump, side jump, and wall kicks to navigate the game’s many and varied Galaxies.
Mario has a few new tricks up his sleeve that change the way you play.
Mario can still hop on the heads of his enemies to dispatch them or use his ample rump to squash them flat but, in the absence of his punching attacks, players can now use the touch screen to gather and launch “Star Bits” at the screen to attack enemies, destroy certain objects, and reveal Yellow Coins. This allows a second player to work alongside Mario in a pretty lacklustre implementation of a two-player co-op mode but, thankfully, Mario is gifted with a new spin attack that allows him to take out enemies and helicopter his way across tricky gaps. As in the previous 3D Mario games, Super Mario Galaxy is structured around a central hub world (in this case Rosalina’s “Comet Observatory”) from which you can enter the game’s forty-two different stages (referred to as “Galaxies”) from different areas in the hub world. Each Galaxy has anywhere from one to six different missions, the completion of which awards you with a Power Star; once you collect sixty Power Stars, you’ll be able to access the game’s final Galaxy and battle Bowser, but you’ll need all 120 to see the game’s true ending.
There are many Galaxies and missions to complete, with additional challenges on offer.
It may seem, on the surface, that Super Mario Galaxy has far too many stages on offer but not all of the Galaxies are accessible right from the start or even while you’re visiting that Galaxy. Other areas of the Comet Observatory will open up as you collect Power Stars, with numerous small, more challenging Galaxies cropping up along the way and Mario’s skills being tested by a series of “Prankster Comets”. These see you return to previous Galaxies to earn a new Power Star with only one sliver of health, racing against Mario’s doppelgänger, “Cosmic Mario”, completing the Galaxy within a time limit, and contending with much faster enemies and obstacles. Furthermore, Galaxies are actually quite small in a lot of ways and tackled in sections; you’ll be dropped into a Galaxy and be tasked with navigating spheres, jumping to platforms, and blasting across the area using Launch Stars, with each mission allowing you, and tasking you, to access different areas of the Galaxy to mix up the stage each time you visit. Super Mario Galaxy’s main selling point is its use of gravity- and space-based stages; almost every planet, block, or platform you stand on has its own gravitational force, allowing you to run all around it without fear of falling to your death and you can easily jump to another traversable body and get sucked into its gravity to make platforming a simple but, eventually, challenging affair as you’ll have to use all of Mario’s skills to jump and navigate across Galaxies without being sucked into a black hole and to his death.
Ride the air currents with a Floaty Fluff or put Mario’s Olympic skills to good use when on ice.
Gravity also comes into play in other ways, such as hitting clock-like arrows to change its direction or navigating across walls, blocks, and platforms while the gravity shifts in different directions. You’ll also be required to perform specific tasks or do some extremely light puzzle solving to cross the Galaxy or access the Power Star. This includes pounding on switches, collecting five yellow Star Chips to assemble a Launch Star, directing Banzai Bills or tossing Bob-ombs to blow up cages, hopping up or across temporary platforms, collecting five Silver Stars, finding Star Bunnies, racing against certain enemies or a time limit, or using a Koopa shell or manta ray to dart through rings underwater or through a water slide. Other times, the environment will assemble itself around you or become intangible thanks to a ghostly light, which will test your reaction times as much as your patience, or Mario will have to run over flip switches to progress, collect a Key, or grab a ? Coin to spawn musical notes to collect. You’ll also have to grab on to a Floaty Fluff to float across air currents, rotate Bolt Lifts by running on them to reach platforms, hitch a ride in a bubble, awkwardly run across (or skate by pressing Y) icy platforms, smash coconuts to damage certain enemies, hit levers, or fling Mario across the arena using sticky Sling Pods.
Many classic Mario staples make a welcome return in Super Mario Galaxy.
Some of the game’s more troublesome sections come from the inclusion of blue Pull Stars; you need to tap the screen to draw Mario towards these little bastards, holding down to keep him hovering there and releasing it at the right moment to slingshot across the area, usually while in a race, against a time limit, or avoiding a load of obstacles. By far the most frustrating gameplay element, though, are the missions that require you to hop onto a Star Ball and navigate mini golf-like obstacle courses full of hazards and platforms to roll off. Though Mario can jump when on the Star Ball, you are forced to use the Nintendo Switch’s lousy gyroscopic controls to roll him about, which is needlessly annoying since I found it extremely difficult to hold the machine in a way that actually made Mario move where I wanted him to and, often, Mario simply rolled wherever he wanted, often to his death. Similar to its predecessors, Mario’s health is again measured with a pie chart but, this time around, Mario can only take three hits before he’ll lose a life. Mario can still replenish his health by collecting Yellow Coins, though, and a number of checkpoints appear in the game’s Galaxies (though I found there was no onscreen indication of when you had passed one of these checkpoints) which means you won’t always have to restart the Galaxy from the very beginning. Extra lives are extremely plentiful, however, with 1-Up Mushrooms placed helpfully in or near the game’s trickier sections and Mario can earn an extra life for every fifty Coins and/or Star Bits he collects and, later in the game, Princess Peach will gift you with five extra lives via a Toad courier.It’s highly advisable to collect every Star Bit you see as hungry Lumas will appear within the Galaxies and in the Comet Observatory and feeding them is the only way to unlock all of the game’s Galaxies. You can keep track of your progress by speaking to various non-playable characters (NPCs), such as Rosalina, the Toads, and the Lumas and a map of the Comet Observatory shows you which Galaxies you need to revisit by use of a little crown to indicate when a Galaxy has been completed. Finally, unlike its predecessor, Super Mario Galaxy not only returns to the kind of stage variety we saw in Super Mario 64 but also brings back classic 2D Mario staples such as warp pipes and ? Blocks.
Graphics and Sound: If there’s one area that Super Mario Galaxy excels in it’s presentation; the game is absolutely gorgeous, popping with colour and variety and oozing a cartoonish charm at every turn. It retains the cute, cuddly, almost action figure aesthetic of Super Mario Sunshine but improves upon it immensely, with all of the game’s environments brought to life through a fantastic use of colour, lighting, music, and intractable elements. Each Galaxy is populated by a variety of NPCs, including Toads, Lumas, Honeybees, Gearmos, and Penguins, all of whom each talk to you through speech bubbles or can be spoken to for hints or more useful rewards like Power Stars. Toads and Lumas also begin to populate the Comet Observatory as you progress, which really helps to bring some life to the hub world, which disappointingly otherwise takes more inspiration from Princess Peach’s Castle in Super Mario 64 than the lively Delfino Plaza.
Super Mario Galaxy‘s stages are full of colour, challenge, and variety.
Thankfully, Super Mario Galaxy is almost the exact opposite of Super Mario Sunshine when it comes to level and gameplay variety. Each of the game’s Galaxies is unique in its presentation, with Mario visiting Galaxies of ice, lava, water, sand battleships, beachfronts, and toy-strewn bedrooms. In the Ghostly Galaxy, you’ll explore a haunted mansion that is reminiscent of both Big Boo’s Mansion from Super Mario 64 and the titular mansion of Luigi’s Mansion (ibid, 2001), explore sunken pirate ships, clamber up honey-drenched walls, race across stony platforms to avoid being sucked into deadly quicksand, and blast out from an active volcano, with every Galaxy and Star mission being an energetic and fun, yet challenging, burst of action and, at times, intensity. Perhaps best of all, Super Mario Galaxy brings back a lot of classic Mario tunes and sound effects to really bring the title back to its roots. Rather than using full blown voice acting, the game opts for speech bubbles, brief voice clips, and a heavy use of gibberish and pantomime for the few instances of dialogue. Cutscenes are also heavily reduced compared to its predecessor, with the opening cinematic split across a brief tutorial and the game opting to tell the story of Rosalina and the Luma’s through an adorable children’s book.
Enemies and Bosses: Many of Mario’s recognisable enemies make their return in Super Mario Galaxy, with each one being slightly tweaked to accommodate Mario’s new mechanics. You can jump on Goombas to dispatch them, which will produce a Coin, but if you spin into them and kick them away you can get Star Bits, for example, adding a little strategy to how you play. Bullet Bills are often fired at you from the cannons of Bowser’s many battleships, you’ll need to toss Bob-ombs to destroy garbage or break open cages, Bloopers patrol beneath the waves, and Chomps freely roll around various Galaxies looking to take a bite out of you. Boos also make a return, now being completely immune to all of Mario’s attacks and only vulnerable to beams of light, and you’ll also encounter old favourites such as Koopas, Pokeys, Wrigglers, Twomps, Piranha Plants, and Magikoopas (who conjure fireballs your way and teleport to avoid your attacks).
Enemies old and new provide a minor nuisance to Mario’s galaxy-spanning quest.
New enemies include the bomb-throwing Cluckbooms, explosive Bomb Boos, electrified jellyfish, and easily-dispatched bugs. Just as Gombeetle’s protect themselves from your Star Bits and standard jump attacks with an armoured shell, Crabber’s can only be attacked from their exposed rear and you’ll need to use your spin attack to put out Lil’ Cinder’s flames before you can dispatch them. Mandibugs will charge at you with their pincer-like jaws, Micro Mecha-Bower’s try to roast your behind, and Monty Moles like to burrow under the dirt to catch you off guard but, while your butt stomp will serve you well in taking care of these enemies, you’ll need to use your spin attack to push the members of the Topman tribe into electrified walls to end their threat.
Run around the Dino Piranhato whack its tail but watch out for the flames!
You’ll battle sixteen bosses throughout the course of Super Mario Galaxy, with eight of them needing to be fought more than once. The first boss you’ll have to contend with is the Dino Piranha, a large, aggressive, and hungry variant of Petey Piranha. This boss stomps around a small sphere trying to trample you to death and can only be defeated by hitting its rock-encrusted tail with a spin attack. Later in the game you battle a far more formidable version of this boss, the Fiery Dino Piranha, in the Melting Molten Galaxy. Though the strategy remains the same, this battle is much more difficult by the fact that the Fiery Dino Piranha’s tail becomes engulfed in flames and the boss’s ability to spit fireballs out at you.
Use Mario’s spin attack to knock King Kaliente’s shots back at him.
Another boss you’ll go up against twice is King Kaliente, a gigantic octopus that emerges from lava to shoot flaming projectiles at you; unfortunately for him, though, he also spits out a coconut, which you can hit with your spin attack to damage him. He crops up again in Bower Jr’s Lava Reactor with the battle being made more difficult by the fact that you’re now stood on a series of small platforms that sink into lava and King Kaliente’s more frequent and aggressive attacks (though, again, the strategy remains the same; you should also be prepared to parry coconuts with the boss since it likes to knock them away as the fight progresses).
Major Burrows and Bouldergeist require a little more strategy on your part.
Major Burrows and Bouldergeist are also fought twice across the course of the game, with the battle being much tougher the second time around. Major Burrows is, basically, a giant Monty Mole and is only vulnerable when he pops up from the ground; once he does, you can perform a ground pound to scare him completely out of his hole and then attack him as he runs around the spherical stage. Bouldergeist is, by comparison, much tougher since the only way you can break off his rock-like hide is to trick Bomb Boos into colliding with him. Once his exterior is smashed, Mario must then swing a Bomb Boo into Bouldergeist’s exposed core using his spin attack but before it explodes in his face, all of which is made much more troublesome by Bouldergeist’s desire to pummel you with his hands, smash you with boulders, and erect destructible rocky walls to box you in.
Super Mario Galaxy features some big, colourful, and unique bosses battles.
Interestingly, the boss you’ll encounter the most isn’t Bowser; it’s Topmaniac, the gigantic leader of the Topman tribe who is easily disposed of by jumping on its head to get rid of its spikes and then using your spin attack to bash it into the electrified walls of the arena. The game’s bosses are all quite large, memorable affairs though: you’ll need to lure Bullet Bills over Megaleg’s legs to destroy the cages on its head; navigate icy platforms and use wall jumps to reach Baron Burr and thaw him out with Mario’s spin attack; dispatch waves of Mandibugs to ground pound the large Stink Bug Parent; you’ll need to use similar tactics (in conjunction with Banandelions and Mario’s Bee power-up) to defeat the bomb-dropping Bugaboom; fire yourself at Tarantox’s glowing red boils with Sling Pods; and fire Koopa shells at the skeletal remains of Kingfin as it swims through the dark waters.
You’ll face Bowser three times, with the final fight being a three stage boss battle.
Despite his prominence in the last game and frequent appearances throughout Super Mario Galaxy, you’ll only battle Bowser Jr the one time; Bowser Jr shoots cannonballs at you from his flying pirate ship and can only be damaged by throwing Koopa shells at him. This gets very intense during the final stages as Bowser Jr also starts firing Banzai Bills at you, meaning there are a lot of projectiles and hazards to watch out for at the same time. In comparison, you’ll fight Kamella three times, with each battle having a very similar strategy to fighting Bowser Jr; Kamella conjures both fireballs and green shells that you can throw at her, though she also summons Magikoopas, wandering fireballs, and teleports about the arena to make it harder for you to hit her. As in Super Mario 64,you’ll also battle Bowser three times throughout the game, with your strategy to defeating him remaining relatively unchanged in each bout. Bowser likes to generate shockwaves across the small spherical planet you fight him on and must be lured into pounding through a sheet of glass to set his tail on fire; as he flees in pain, you can hit him with your spin attack, which can be hard to do as Bowser slides all over the sphere in an erratic pattern on the back of his shell. When you encounter Bowser again, he’ll perform his own spinning attack and launch numerous fireballs your way but it’s the finale battle of the game where Bowser is at his most formidable. This is a three phase boss battle that first sees Mario having to time his spin attack just right to hit Bowser out of the rocky exterior he has protected himself with, desperately outrun Bowser’s powerful spinning attack, and puts your jumping and reaction skills to the test avoiding the many shockwaves and fireballs that Bowser fills the small arena with. As long as you keep your wits about you and watch Bowser’s frenzied spinning, charging, and jumping attacks, these battles mainly come down to a question of properly timing your spin attack to put en end to Bowser’s latest threat.
Power-Ups and Bonuses: As in all Mario games, you can collect Yellow Coins in each Galaxy; you no longer need to worry about collecting a hundred of these for a hidden Power Star, or any Red Coins (which is a blessing after Super Mario Sunshine’s massive overuse of the concept), but you will get an extra life for every fifty Coins you collect. The game’s big, new feature is the Star Bit mechanic, which allows you to fire at enemies and objects on the screen; it’s advisable to frantically swipe at any and all Star Bits you see to add to your grand total and collect extra lives but don’t get so distracted to you lose focus on what you’re doing! At various points throughout the game, you’ll find or be given the opportunity to purchase a Life Mushroom, which will double Mario’s health meter; if you spot one of these, grab it as you’ll probably need it for an upcoming boss battle or tricky section. Mario also has a number of transformations this time around, some which are familiar, some which are new, but none of which are as prominent as you might expect. You can grab a Rainbow Star to briefly become invincible, allowing you to run through enemies and hazards without fear, for example, but this only lasts for a short period of time.
Grab a power-up to temporarily gain access to some new, and familiar, abilities.
Other temporary power-ups include the returning Fire Flower (which allows you to shoot fireballs and defrost snowmen), the Ice Flower (which allows you to walk across water and wall jump up waterfalls using ice platforms), and the Red Star (which allows Mario to fly unimpeded like an upgraded version of the Wing Cap). It’s a shame that these power-ups are so limited in their appearances and use, to be honest, as it would be fun to revisit the game’s Galaxies and explore them using Flying Mario or open new areas as Fire Mario, for example. Mario has other, less temporary power-ups at his disposal as well: the Bee Mushroom allows him to fly for a short time by tapping or holding A and to climb up honey-covered walls; the Boo Mushroom transforms Mario into a Boo, which allows him to float indefinitely and pass through certain walls by becoming temporarily incorporeal; and the Spring Mushroom allows Mario to bounce extremely high into the air with a well-timed press of the A button. Each of these transformations will be lost if Mario touches water or an enemy and, of the three, Bee Mario is the most often used and Spring Mario is easily the most unwieldy thanks to Mario bouncing all over the place, but none of them are as prominent as power-ups in previous Mario titles such as the Wing Cap and Raccoon Mario (which both feature on the front covers of their respective games).
Additional Features: As in its predecessors, Super Mario Galaxy requires you to collect a number of special objects to progress further. There are 120 Power Stars to be found in the game, including Grand Stars to be won from boss battles, and rarer Green and Red Power Stars found in hidden Galaxies or from finding Mario’s brother, Luigi, in specific areas of each Galaxy. You only need sixty Power Stars to battle the final boss but, once you finish the game, a new Galaxy will appear and you’ll be tasked with collecting the remaining Power Stars to see the game’s true ending. This new Galaxy introduces you to the Purple Comet mechanic; when the Purple Comet is in orbit around a Galaxy, you’ll have to collect one hundred Purple Coins to earn a Power Star. This can be quite frustrating and troublesome as you’re often racing against a time limit, which continues to count down even after the Power Star spawns, with Luigi’s Purple Coin mission being easily the most maddening trial of them all since it forces you to run across disappearing and rotating platforms over an endless void and against a time limit. If you’ve missed any of the other Prankster Comet Stars, you’ll have to chat to a Luma in the Comet Observatory to put them in orbit and collect any you’re missing.
Collect all 120 Stars to play through the entire game again as Luigi and earn that elusive 121st Star.
Once you have all 120, you then have to go through the game’s gruelling final Galaxy and battle Bowser again in order to see an additional cutscene and unlock Luigi as a playable character! Yes, finally, after the lacklustre rewards of the last two games you actually get something substantial for all your hard work. You can switch to Luigi when accessing your saved file, which will begin a new game from the start as Luigi, who jumps higher and further than his stoutly brother. Sadly, though, you must then play through the entire game all over again, collecting the same 120 Power Stars as Luigi, in order to access the game’s final final Galaxy and claim the elusive 121st Power Star by collecting another one hundred Purple Coins during the Star Festival celebrations. I don’t mean to complain about this since I have been waiting to play as Luigi, and get a decent completion reward, since Super Mario 64 but, as much as I enjoyed the game, it’s a bit much to ask players to do everything all over again as Luigi since you’re pretty exhausted after getting the first 120 Stars.
The Summary: Super Mario Galaxy was an incredibly enjoyable experience; right from the start, as soon as I experimented with Mario’s controls, I knew that I would prefer this game over Super Mario Sunshine. It plays much more like Super Mario 64, returning a lot of Mario’s abilities and controls from that game, which makes platforming and gameplay all the better. Add to that the game’s fantastic presentation, use of classic Mario elements, and unique setting and you have an extremely grandiose and accessible Mario adventure. While it was disappointing to see Mario still confined to a hub world and acquiring Power Stars on a mission-by-mission basis, and the game was maddeningly frustrating at times, Super Mario Galaxy does some pretty impressive things with its unique concept. Through clever use of its gravity mechanics, a rising level of challenge, and being packed full of bright, colourful environments, characters, and content, there’s certainly a lot more on offer in Super Mario Galaxy than in its predecessors and the game is presented in a way that encourages short bursts of gameplay, making it a perfect title to play on the go or in your down time.
My Rating:
⭐⭐⭐⭐
Rating: 4 out of 5.
Great Stuff
What did you think of Super Mario Galaxy? Did you play the original Wii version and, if so, how do you find the Switch remaster holds up? Were you a fan of the game’s space- and gravity-orientated gameplay or do you feel like the concept was a bit outlandish even for Mario? What did you think to the game’s level of challenge? Which Power Star did you struggle the most with, which Galaxy was your favourite, and what did you think of the new characters the game introduced? Did you ever finish the game as Luigi and get all 121 Power Stars? Either way, I’d love to hear your thoughts and memories of Super Mario Galaxy, and your feedback regarding Mario Month, in the comments below.
So, for no better reason than “Mar.10” resembling Mario’s name, March 10th is widely regarded as being “Mario Day”, a day to celebrate Nintendo’s portly plumber, an overalls-wearing mascot who literally changed the videogame industry forever and shaped the home console market of the nineties. To commemorate Mario Day this year, I’ve made March “Mario Month” and am spending each Wednesday talking about everyone’s favourite Koopa-flattening plumber.
Released: 18 September 2020 Originally Released: 19 July 2002 Developer: Nintendo EAD Also Available For: Nintendo GameCube
The Background: After the success of Super Mario 64(ibid, 1996), a sequel had been in development for several years; however, despite a title apparently in line to be released in the early days of the Nintendo GameCube’s release, Nintendo opted to focus on Mario’s brother, Luigi, for the GameCube’s launch. Beginning life as a tech demo tentatively titled Super Mario 128, Super Mario Sunshine was retooled to both expand upon the mechanics and gameplay of its predecessor and to have Mario utilise a water pump as both a weapon and to navigate his environment. Upon release, the game garnered widespreadcriticalacclaim for its presentation, music, and gameplay, though some did criticise the game’s camera and more frustrating moments. For my part, I had been attempting to buy a copy of the game for many years, having only found it to be extortionately expensive for such an old title, so I was delighted when the title was included in Super Mario 3D All-Stars (Nintendo, 2020) for the Nintendo Switch, which is the version I’ll be looking at today.
The Plot: Mario arrives at Isle Delfino for a vacation with Princess Peach, her long-time steward Toadsworth, and several other Toads. However, upon arrival, they find that the once-pristine island has been polluted and plastered with graffiti and Mario, as the prime suspect, is charged with cleaning up the graffiti, recovering the missing Shine Sprites, and uncovering the mystery of his shadowy doppelgänger.
Gameplay: Like Super Mario 64, Super Mario Sunshine is a 3D action/platformer. However, while Super Mario 64 had you leaping through magical paintings inside of Princess Peach’s castle, Mario finds himself jumping and hopping around the tropical island resort of Isle Delfino and its surrounding areas. While, at first, it seems as though Mario retains all of his abilities from Super Mario 64, this isn’t actually the case; Mario can still run, jump, double-, and triple-jump, wall jump, and perform a sideways jump to reach higher areas but he can no longer duck, crawl, long jump, or perform a backwards somersault. This is massively problematic coming into this game right after playing Super Mario 64 as you don’t realise how helpful those abilities are until they’re missing.
Use F.L.U.D.D. to attack enemies and hover to out-of-reach areas.
Also, Mario can no longer punch or kick enemies. He can still perform a running dive (and can now use this to slide away like a rocket if he dives onto wet ground) and a ground pound, which is useful, but his primary mode of attack and manoeuvring is to utilise Professor E. Gadd’s Flash Liquidizer Ultra Dousing Device (“F.L.U.D.D.”), a water-blasting jetpack, of sorts, that not only allows Mario to clean up toxic waste, sludge, and graffiti but also to blast at enemies to stun them or topple them over and hover short distances. Mario gains a slight amount of height the longer you hold the jump button to help him reach higher areas but it’s an awkward and cumbersome system, one that makes platforming and jumping far more frustrating than it needs to be as Mario tends to spiral off like a madman, spewing water everywhere, or fall just short or reaching far away (or high up) platforms thanks to F.L.U.D.D.’s limited tank and the game’s bothersome controls.
Shadow Mario has framed Mario and spread goop and graffiti throughout Isle Delfino.
Since Isle Delfino has been polluted and graffitied by “Shadow Mario”, and the population holds Mario himself responsible, you’ll be spending a lot of your time spraying your environment with water. Entering any of the many (many) bodies of water allows Mario to not only swim and dive but also refill F.L.U.D.D. Even when F.L.U.D.D. is full, though, you can’t just spray until the tank is empty; instead, your water will sputter out after a short time whenever you try to spray stuff for a long time. If you get muck on you, you can wash it off in water or by wriggling the control stick, which can also double as a whirlwind-like jump that I, honestly, found little use for.
This time, there’s no reprieve in water or from Coins other than the common yellow variants.
As in Super Mario 64, Mario has a health meter, this time measured by a glowing sun. While health can be replenished by collecting Yellow Coins, you’ll no longer instantly regain health by entering water, though you can keep yourself from drowning by collecting Coins and sucking in air bubbles. Also, while you’ll still find Red and Blue Coins in the game’s various stages, these won’t refill your health, though Mario is far less likely to plummet to his doom this time around since there is always a massive body of water to break his fall. Rather than being confined to a castle, Mario has the run of Isle Delfino, a bright and lively seaside port town that is populated by Piantas (goofy little characters who offer vague hints and task you with bringing them fruit) and a few of Peach’s Toads. Still, the general premise is the same; explore a hub world and enter into one of the game’s eight stages, seven of which featuring eight missions (known as “Episodes”) that allow Mario to recover one of Isle Delfino’s 120 Shine Sprites.
Shine missions range from the easy, to the lazy, to the maddeningly annoying!
Mario can, again, also find Shines in the hub world and by collecting 100 Coins in each of the stages (and easily keep track of any missing Shines using the map/totals screen) but, unlike in Super Mario 64, each Shine can only be obtained in its corresponding Episode (the Red Coins, for example, don’t appear in every Episode) and you’re still unceremoniously spat out of the current stage every time you collect a Shine (even a 100 Coin Shine), all of which means that, while each stage changes in various ways from Episode to Episode, there’s a lot less freedom and choice to how you recover the Shines. To recover the Shines, you’ll be tasked with performing such familiar tasks as defeating bosses, collecting eight Red Coins, or racing against another character. Each Episode also has you chasing after Shadow Mario, spraying him as you go until he yields a Shine, while some have you collecting another eight Red Coins in a startling example of laziness on the developers’ part. Other times, you’ll be running around in circles desperately trying to figure out what you need to do; each Episode opens with a short cutscene to help guide you in how to obtain its Shine but a lot of the time it’s very difficult to figure out what you need to do. Other times, you’ll be racing or collecting Red Coins against a time limit, returning to previous stages with new upgrades and abilities to get missing Shines or be tasked with performing needlessly difficult tasks, such as rolling watermelons to a pier or surfing on a Blooper without touching anything as you’ll have to start all over again or lose a life, respectively!
The damn obstacle course stages can go burn in a fiery pit!
While the game is much prettier and far more aesthetically pleasing than Super Mario 64, the same blocky visuals make an unwelcome return in the game’s many obstacle course stages; these hidden areas are found in each stage and see Shadow Mario steal away F.L.U.D.D., leaving you to run and jump across various moving, rotating, and temporary platforms without the aid of your water jet or Mario’s more useful jumping skills from the previous game. Generally, you can find at least one, if not two, 1-Up Mushrooms in these secret stages and you are going to need them as, while the game’s camera allows for full 360 degree control and is much improved over the last game’s camera, it’s still sometimes painfully difficult to get a decent angle, to say nothing of Mario’s continued slipperiness and instability (seriously, it’s like he doesn’t even try to stay on or hang from ledges!) Add to that the fact that you’ll have to frantically run around long rotating platforms, try not to slide off of cog-like blocks, and be reliant on Piantas throwing you to far away or high up platforms in these stages and it all amounts to the game’s most frustrating moments by far.
While the game is gorgeous to look at, I wasn’t exactly blown away with the stage variety.
While Isle Delfino is a much livelier and visually interesting environment, with lots to see, do, and find compared to Peach’s Castle, the variety in the game’s stages leaves a lot to be desired. It sounds stupid but the game really does rely way too much on F.L.U.D.D. and its tropical island theme; this means that every stage is full of water and such clichés as beach fronts, theme parks, and ports. While it’s nice that you’re far less likely to fall down a bottomless pit and that you can see the other stages way off in the distance, it got pretty tiresome and boring quite quickly as all of the game’s stages felt far too visually similar. Super Mario 64 was full of stage variety; one minute you’d be exploring sunken depths or sliding about in an ice and snow world, the next you’d be flying through the clouds or exploring a gas-filled maze. While some Episodes in Super Mario Sunshine inject some variety, with a haunted hotel being the focus for most of Sirena Beach and Pianta Village featuring a distinct (if frustrating) cage maze beneath it, I never got the same feeling of diversity while playing through the game and, when it did try something new, it was often frustrating shit like clambering up temporary platforms, trying to not slide off of moving and twisting fairground rides, or shooting yourself into the air using spontaneous sandscastles.
Graphics and Sound: If there’s one thing Super Mario Sunshine has going for it, it’s its bright, colourful, and attractive graphics and presentation. In keeping with the tropical theme of the game, Mario is wearing a short-sleeved shirt and will not only doze off when left idle but also wipe sweat from his brow when in the shade. He, and all of the game’s characters, also have a plastic, action figure-like quality to them and are far more expressive thanks to the game’s greater processing power. While I grew tired of the tropical theme pretty quickly, the developers definitely went all-in with it; the water effects are amazing, with waves rippling, rising, and falling in the many instances of sea, and the lighting effects really make it feel as though you’re caught in the unrelenting heat of tropical sunshine.
Some Episodes spice things up but the game’s aesthetic doesn’t really alter until the final stage!
Each of the game’s worlds, and the hub world, are populated by Pinatas, all of whom have funny little reactions to being squirted or jumping on and offer vague hints to your goal for that Episode, which really helps to make the place feel alive compared to Peach’s Castle, which was basically deserted. Though each stage doesn’t really deviate from the overall tropical theme, there are some distinctions to help them stand out; you’ll be traversing ropes and running up a hill in Bianco Hills, fly on the back of a stone bird through the skies of Gelato Beach, and dive into the polluted depths of Noki Bay, with different Episodes offering slightly different variations on each stage in an attempt to spice things up. Things don’t really become visually different until you reach the eighth and final stage, Corona Mountain, which is a volcano full of instant death spikes and lava and awkward boat steering sections. The game relates its incredibly basic story with beautiful, fully voiced cutscenes. While Mario still only communicates through pantomime and characters use the tried-and-tested speech bubbles outside of the cutscenes, it’s refreshing to see Mario embracing full motion cutscenes for a change. As for its soundtrack, long-time series composer Koji Kondo and Shinobu Tanaka largely eschew the traditional Mario themes for an appropriately tropical theme which, while fitting for the game’s aesthetic, wasn’t quite as memorable to me as Super Mario 64’s music.
Enemies and Bosses: Despite taking place in an entirely new environment, Super Mario Sunshine sees the return of a number of Mario’s traditional enemies, though many have undergone a slight aesthetic change to better fit in with their tropical locations. This means you’ll be coming across Bob-ombs, Boos, Bullet Bills, and Piranha Plants but you won’t just be able to smack them or jump on the to take them out this time. Instead, you generally must make use of F.L.U.D.D. to clean them off, whittle them down, expose them, or stun them to toss them at other enemies. You’ll also come across a number of new enemies as you explore Isle Delfino’s sun-drenched locations, many of which are rather troublesome to take care of: Chain Chomplets must be doused with water until they cool off and then ricocheted into water to dispose of them; Cataquacks will fling you into the air when you get near and must be stunned with water so you can butt stomp them; and the Electrokoopas will throw their electrifying shell at you and are only vulnerable for a short time. By far one of the worst obstacles, though, are the swirling clouds that appear in various Episodes; these will dart at you and are very difficult to dodge, meaning you’ll probably be knocked out of the air mid-jump or sent plummeting off a high ledge to have to climb all the way back up again.
Petey Piranha and Glooper Blooperpop up for a coupleof boss battles.
Super Mario Sunshine features far more bosses than its predecessor; some of these are more like mini bosses, such as the aforementioned chases against Shadow Mario, the Piranha Plants made of sludge that need water sprayed into their mouths until they are defeated in order to open up new areas, and the Monty Moles who incessantly shoot Bob-ombs and Bullet Bills at you from cannons. Twice in the game you’ll have to contend with Petey Piranha and Glooper Blooper in Bianco Hills and Rico Harbour, respectively. The first time you battle Petey, it’s in an enclosed area and he shoots gunk at you that spawns enemies or headbutts you if you get too close. The second time, he’s flying around Biano Hills and must be shot out of the sky but, in both battles, you must frantically squirt water into his mouth to make him reel over and vulnerable to a ground pound. Glooper Blooper, meanwhile, sits there spitting ink at you and trying to squash you with its tentacles; you must ground pound all (or most) of his tentacles to give yourself enough time to pull out the cork stuck in his mouth and send him flying away (though you can make this easier by pulling off his tentacles in the same way).
Wiggler and King Boo return, bigger and badder than ever!
As in Super Mario 64, you’ll also battle Wiggler and King Boo; this time around, Wiggler is a far more troublesome foe as he stomps around Gelato Beach in random patterns and can only be toppled over by causing sandcastles to spring up beneath his feet, leaving him open for a ground pound or three. King Boo is also far more formidable; this time, you have to content with three spinning rings and a roulette, which will see enemies, Coins, and fruit tossed into the arena. The only way to damage this King Boo is to grab a spicy red pepper, toss it at him, and then toss a different fruit at him three times, which isn’t immediately obvious when you first drop into the arena.
Phantamanta and Eely-Mouth can be frustrating boss battles.
Two of the game’s more unique, if frustrating and troublesome, bosses, for me, were Sirena Beach’s Phantamanta and Noki Bay’s Eely-Mouth. The Phantamanta is little more than a shadow that glides over the sandy beaches and resort leaving icky sludge in its wake; spraying it with water is the key to defeating it but, every time you do, it splits into smaller and smaller parts which, combined with the life-sapping sludge, can make this a tricky battle. Eely-Mouth is a giant eel fought in the dark depths of Noki Bay; Mario dons a diver’s suit for this battle, which means you are constantly fighting with the controls as Mario bops and hovers and darts all over the place seemingly at random, slowly drowning as time passing, and you’re desperately left trying to clean the eel’s foul, rotten teeth with F.L.U.D.D. to unearth a golden tooth that is your true goal without drowning or being eaten up.
Bowser might be gigantic but the biggest hazard is the precarious nature of the boss arena.
Though a prominent force throughout the game, you never actually battle Shadow Mario in a boss battle; after being revealed to be Bowser Jr in disguise, you take on a giant mechanical version of Bowser in Pinna Park. In this battle, you’re forced into a rollercoaster and must shoot rockets at Mecha Bowser while also blasting Bullet Bills out of the sky. While this is good practice for a particularly annoying timed Shine mission that has you shooting balloons with just as little control, the rollercoaster’s constant speed and spinning means getting a clear shot is easier said than done and that’s without factoring in Mecha Bowser’s fire breath. After finally getting through the treacherous Coronoa Mountain, you’ll go head-to-head with Bowser once more; this time, he’s grown to giant size and is sitting inside of a jacuzzi tub full of caustic water. Bowser tries to fry you with his fire breath and burn you with the acid-like sludge while Bowser Jr shoots homing Bullet Bills at you. The only way to win this battle is to use F.L.U.D.D.’s rocket nozzle to perform five rocket-powered ground pounds at the five spokes of the arena. However, while this eventually leads to Bowser’s defeat, it causes the already-unstable arena to further crumble and the two dragon-turtle’s attacks to increase in speed. Still, probably the hardest thing about this boss battle is not slipping or tumbling from the arena and to your death.
Power-Ups and Bonuses: Although Mario can still collect 1-Up Mushrooms for extra lives, Yellow Coins for health, and both Red and Blue Coins for Shines, there are no invincibility power-ups to be found this time around and, after swapping flowers and capes for special caps in Super Mario 64, Super Mario Sunshine primarily revolves around you making good use of F.L.U.D.D. to traverse the game’s various tropical environments. Though versatile, F.L.U.D.D. is largely more of a pain in the ass than an asset thanks to some awkward controls and mechanics at times. However, you can acquire a couple of additional nozzles to make things a bit easier; the rocket nozzle allows you to charge up and release a burst of water to go flying high into the sky and the turbo nozzle allows you to blast away across both land and water, both of which are incredibly useful for reaching new areas and out of reach or temporary Blue Coins.
Yoshi finally gets his time in the sun (…literally) but be sure to keep him away from water!
After being relegated to an after-game cameo in Super Mario 64, clearing the fourth Episode of Pinna Park will see Yoshi eggs appear in each of Super Mario Sunshine’s stages (with the exception of Corona Mountain) and the hub world. If you bring the egg the fruit it asks for, it will hatch and you’ll finally be able to ride either a pink, orange, or purple Yoshi! Yoshi can eat up fruits and certain enemies with his long tongue, use his flutter jump to reach platforms, and each Yoshi can create goopy platforms of a different nature (ascending, stationary, and forward-moving, respectively). As great as it is to actually be able to ride on Yoshi, though, there are some drawbacks; the first is that you can’t ride the traditional green Yoshi, then there’s the fact that he can’t spit fireballs and his supply of fruit drains over time, and, of course, the glaring flaw that your Yoshi will explode when it comes into contact with water, which is particularly frustrating when trying to reach a secret Shine in Delfino Plaza.
Additional Features: Similar to how Mario’s brother was left with a purely solo adventure for his GameCube outing, this is once again a solo adventure for Mario; even after clearing the game, you can’t unlock any additional characters to play as, which is a real shame considering we missed out on playing as Luigi in Super Mario 64. If you talk to the various Pinatas in the game’s Episodes after collecting enough Shines, they’ll eventually gift you a pair of sunglasses that slightly darken the game’s presentation. After clearing the game for the first time, you can pair these with a super snazzy Hawaiian shirt (though neither of these can be worn outside of the Episode you are playing, unfortunately). Clearing the game once also allows you to return to the Delfino Airstrip to collect eight Red Coins for another Shine. While that’s slightly more than in Super Mario 64, it’s still a bit disappointing; once again, you don’t need all 120 Shines to clear the game but having them all slightly changes the ending you get. However, obtaining them all is no mean feat; I finished the game with 90 Shines, which was all eight stage-based Shines, all 100 Coin Shines, and a handful found around the hub world but, to get them all, you’re going to need to find all of those Blue Coins and secret stages, which can be needlessly frustrating.
The Summary: I was super excited to finally play Super Mario Sunshine; I missed out on it back when I was playing the GameCube on the regular and have been putting off getting it for ages (literally years). The bright, colourful graphics and my fond memories of Super Mario 64 really appealed to me and fuelled my desire to finally get my hands on this game. Yet, despite a promising start, I was left disappointed. There’s a lot to see and do and to like; the graphics are gorgeous, the F.L.U.D.D. concept is interesting (if flawed), and it’s great to be able to ride Yoshi again but there are so many frustrating elements to the game that really let it down. There’s very little stage variety, too many missions per stage (with too many repeating, such as the Red Coin challenges), too much water for my liking (no matter how fitting it is for the game’s setting), and just far too many instances where you slip or fall from platforms, ledges, or ceilings or fail to make jumps because of an awkward camera angle or Mario just deciding to miss or fall. The secret obstacle course stages are an absolute ball ache and, just as the game seems to be getting interesting, it’s over in uncharacteristically anticlimactic fashion, leaving me feeling disheartened and drained rather than encouraged to hunt down the last few Shines.
My Rating:
⭐⭐
Rating: 2 out of 5.
Could Be Better
What are your thoughts on Super Mario Sunshine? Did you play it on the GameCube back in the day or, like me, did you first experience it on the Nintendo Switch? What did you think to F.L.U.D.D. and the game’s tropical island setting? Were you also frustrated by the controls, mechanics, and over-reliance on the setting or did you, perhaps, enjoy the different direction the game took and the challenge it offered? Were you glad to be riding Yoshi again and did you manage to find all 120 Shines? What other setting would you like to see Mario placed into? Whatever your thoughts, drop a comment below and pop back next Wednesday for the final instalment of Mario Month!
So, for no better reason than “Mar.10” resembling Mario’s name, March 10th is widely regarded as being “Mario Day”, a day to celebrate Nintendo’s portly plumber, an overalls-wearing mascot who literally changed the videogame industry forever and shaped the home console market of the nineties. To commemorate Mario Day this year, I’ve made March “Mario Month” and am spending each Wednesday talking about everyone’s favourite Koopa-flattening plumber.
Released: 18 September 2020 Originally Released: 23 June 1996 Developer: Nintendo Original Developer: Nintendo EAD Also Available For: Nintendo 64, Nintendo DS (Remake), Nintendo Wii (Virtual Console)
The Background: By the end of 1983, the videogame industry was dead after crumbling under the weight of countless overpriced consoles and poor quality titles. From the ashes, Nintendo stepped in and pretty much single-handedly rebuilt the industry with the release of the Nintendo Family Computer (Famicom)/Nintendo Entertainment System (NES), a machine marketed not as another home videogame console but as a more market-friendly “Entertainment System”. The videogame industry was resurrected from the dead with the NES and the blockbuster success ofSuper Mario Bros. (Nintendo EAD, 1985) and given a massive kick into overdrive following the release of the SEGA Mega Drive and Sonic the Hedgehog (Sonic Team, 1991). The “Console Wars” of the mid-nineties resulted in some of the greatest 8- and 16-bit releases, a series of videogames that defined an entire generation, and ensured that videogames were big business once more. Very quickly, though, the story became about which developer could be the more innovative than the other and who would crack 3D gaming first. SEGA attempted to break into the 32-bit arena with a series of expensive add-ons for the Mega Drive while Nintendo played the long game, discussing various CD-based options with both Sony and Panasonic and inadvertently creating one of the industry’s biggest gaming powerhouses, the PlayStation, when talks with Sony fell apart. Initially developed as the “Ultra 64”, the Nintendo 64 was Nintendo’s first fully-3D home console and was officially announced to the world on 24 November 1995; although the console favoured more expensive and limited cartridges over CD-ROMS, this dramatically sped up the load times of its titles and helped to reduce piracy. The console also utilised a unique (and massively under-rated) controller that included an analogue stick for full 3600 movement and could be fitted with Rumble and Memory Paks, and the system launched a number of first- and third-party titles that would be exclusive to the console. One such title was, of course, Super Mario 64. Developed over the course of three years, Super Mario 64 sought to showcase exactly what the Nintendo 64 was capable of by offering large, open 3D worlds that allowed for exploration, experimentation, and offered a diverse field of view. The game was a massive critical and financial success and is still the best-selling Nintendo 64 videogame of all time; just as Super Mario Bros. had set the standard for 2D sidescrolling platformers back in the day, so too did Super Mario 64set the standard for 3Dplatformers in this new era of gaming. The game was later ported to the Nintendo DS in what is, in my view, the definitive version of the game thanks to the additional elements it provides but it was also included in Super Mario 3D All-Stars (Nintendo, 2020) for the Nintendo Switch, which is the version I’ll be looking at today.
The Plot: Princess Toadstool (finally referred to as “Peach” for the first time outside of Japan) invites Mario to her castle with the promise of cake but, when he arrives, he finds that the diabolical Bowser, King of the Koopas, has kidnapped the Princess and hidden the castle’s Power Stars within a series of paintings throughout the castle. Never one to back down from a challenge, and motivated by the promise of a sweet treat, Mario leaps into the castle’s magical paintings to retrieve the Stars and rescue Peach and the castle’s Toad guards from Bowser’s clutches.
Gameplay: I think it’s safe to say that everyone who owned a Nintendo 64 back in the day also owned Super Mario 64; it was the first (and, for a long time, the only) Nintendo 64 title I had when I got the console and all of my friends had it, too. Thanks to the realities of life, it was also the first Nintendo home console I owned and the first main-line Mario game I had ever owned and, honestly, it was a pretty great way to experience of Mario’s unique world and cast of characters (not to mention mind-boggling through its crisp 3D models and tight controls). Super Mario 64 is a 3D action/platformer in which you play as the titular Mario. The game takes place entirely within Princess Peach’s Castle and the grounds outside of it; within the castle are a series of magical paintings that lead Mario to a total of fifteen Courses, each with six mission-based Power Stars to collect and one hidden Star. You can also find a number of additional secret Stars in other paintings and mini Courses scattered throughout the castle and you’ll need to collect a certain amount in order to open doors to more Courses. Once you have enough Stars, however, Courses can be attempted in any order you wish but you may be limited in what you can do if you haven’t unlocked the game’s three cap-based power-ups and you’ll need a boss key to access the castle’s upper and lower areas, plus at least seventy Power Stars to battle the final boss and all 120 to see the game through to 100% completion.
Peach’s Castle is the game’s hub world, with Stars hidden in paintings and needed to open doors.
When you enter a Course, you must select a Star Mission to tackle; at first, you’ll only be told of the first mission but, once you’re in the Course, you can generally attempt to obtain any Star you wish (with some exceptions). This means that you can free the Chain-Chomp instead of racing Koopa the Quick, for example. Each Star comes with a vague hint about how to acquire it (“Lil’ Penguin Lost” or “Shining Atop the Pyramid”) but it’s not always massively clear what you have to do to obtain these Stars, encouraging exploration and experimentation (or a quick Google search). Collecting one hundred Yellow Coins in every Course will also award you with a Power Star and, sometimes, you’ll have to revisit secret Courses to obtain another Star you may have missed but, generally, the Star Missions are quite similar across all courses (battle a boss, find five secret areas, utilise a cap, scale to the top, etc). As in his 2D outings, Mario’s primary form of traversal and attacking is his ability to jump but this ability has been expanded exponentially to allow for a far more diverse means of movement and to showcase the capabilities of the Nintendo 64. Pressing jump once will see Mario perform a hop; press it again and he will jump higher, and press it a third time while running and Mario will somersault even higher, allowing him to reach out-of-reach ledges with ease. If you press the R button while running and then press jump, Mario will throw himself forwards to cover faster distances in one dramatic leap, which is great for reaching faraway platforms or navigating Mario at a faster pace. It doesn’t end there, either; Mario gains momentum as he runs and jumps, meaning if you jump onto an enemy’s head while running, you’ll get a boost upwards and jump further.
You’re required to fulfil certain objectives to acquire each Course’s Stars.
Mario can also perform a wall kick to scale vertical shafts quickly but not, it has to be said, with a great deal of ease; as will come up numerous times in this review, the wall kick is somewhat hampered by the game’s janky camera and how difficult it can be to properly judge your perspective and alignment to certain walls and objects. When you can pull it off though (which, to be fair, is more often than not and can be perfected with practise), it’s a nifty little trick that you can combine with long jumps and triple jumps to move Mario’s pudgy behind at a break-neck pace. For what I believe is a first in the series, Mario can also perform a series of melee attacks to fend off his foes. Pressing the attack button once will see him perform a punch but press it twice more and he’ll perform another punch followed by a big ol’ kick to send enemies flying. You can also perform a sweep kick while crouching, a jump kick, and a diving attack by running, jumping, and hitting the attack button, a ground-pound (where Mario will flatten enemies with his butt), and also pick up certain blocks and even enemies to toss them at other enemies. It’s quite a deep control scheme, to be honest, offering a range of smooth and crisp combat and movement options; you can run Mario in any direction at full speed and, with a twitch of the analogue stick and a press of the jump button, side-flip around to get the drop on enemies, wall kick your way up to otherwise inaccessible areas, or backflip your way to another Power Star with ease.
Mario visibly shows the affects of low health but it’s easily replenished through a variety of means.
Mario can also grab onto ledges to save himself from accidental falls and pull himself up from tricky jumps; however, this isn’t as reliable as you might think and it’s just as easy to bounce head-first off of a platform or ledge and fall to your death or go careening down a bottomless pit or into a river of butt-burning lava. Similarly, the game’s camera can sometimes get stuck behind other objects, which can cause it (and Mario) to freak out a bit; Mario also stutters and jitters if positioned too close to an edge and will most likely fall to his death if you don’t quickly tap that jump button. Thankfully, Mario is far more durable than in the majority of Mario videogames; he has a life bar (represented be a colourful pie chart) that loses a segment each time he takes a hit or other damage. Once all segments are drained, Mario loses a life and is unceremoniously spat out of the Course he was in and will have to attempt the Course over from the beginning. Luckily, Mario can refill his health by running through spinning Hearts dotted around each Course, collecting Coins, or taking a dip in water and is only dependant on Mushrooms to gain an extra life. Take care when swimming, however, as Mario’s health will slowly deplete and he’ll eventually drown unless you collect Coins or suck in an air bubble and he’s also not capable of surviving being sucked into quicksand. Compounding matters is the fact that certain enemies and hazards will cause Mario’s iconic cap to fly off; if you lose your cap, be sure to collect it as quickly as possible as you’ll take double damage without it!
Graphics and Sound: Even now, after the release of so many technically superior 3D action/platformers, Super Mario 64 holds up ridiculously well. It’s a testament to how diligently Shigeru Miyamoto and his team worked to showcase the power and capability of the Nintendo 64 as character models still look spot on to this day, seamlessly retaining their quality and stability (unless you move Mario too far away from the camera, of course), and the game is just as silky smooth as ever. Sure, Bowser doesn’t look so great these days (and he, along with all of the character models, were vastly improved in the DS remake) but it’s cute to see all of Mario’s eccentricities, from his enthusiastic shouts when he hops around, his triumphant cry of “Her-r-re we go-o-o!” whenever he grabs a Star, and the way he falls into a mumbling sleep when he’s left idle for a short time.
In most Courses, you’re only one stupid mistake away from plummeting to your death.
Having said that, though, there are some issues that are more noticeable with the benefit of hindsight. The game’s Courses vary wildly in their scope and quality; the first, Bob-omb Battlefield, is basically a tutorial area where you’ll quickly get to grips with the game’s controls and mechanics. As user friendly as you could like, Bob-omb Battlefield features some basic enemies and hazards and is completely devoid of bottomless pits, something the vast majority of the game’s other Course cannot say. Courses like Whomp’s Fortress, Cool, Cool Mountain, and Tall, Tall Mountain are all much more limited in their scope, substituting a quasi-sandbox arena for vertically-themed stages that hover over a bottomless pit, meaning you’re always one stupid mistake away from falling to your death. Things don’t get really frustrating, however, until you reach the game’s final Courses; Tick Tock Clock and Rainbow Ride suspend you over a vast, empty void that will truly test your skill and patience thanks to the game’s dodgy camera and some very tricky and frustrating platforming elements. Other stages, like Jolly Roger Bay and Hazy Maze Cave, also feature an abundance of water; this isn’t a massive issue as Mario is quite a capable swimmer but he’s not exactly a fast swimmer and the game’s controls noticeably lag when he’s under water. Combine this with the aforementioned camera troubles and how easy it is for the camera to get stuck behind objects and these Courses can be difficult to navigate. The camera is serviceable for the most part, to be fair, and automatically and diligently following Mario around to provide the optimal viewpoint but Nintendo really should have integrated full 3600 camera control into the Switch version to correct this one glaring flaw.
There’s both variety and a lack of variety in Super Mario 64‘s Courses…
Still, the game offers a fair amount of variety in its Courses; Big Boo’s Haunt and Lethal Lava Land are standouts for me thanks to their unique mechanics and visual presentation but, at the same time, it lacks variety in a number of other instances. For example, Jolly Roger Bay and Dire, Dire Docks are essentially the same stage with the same music and, as much as I like Snowman’s Land, did we really need two snow/ice-themed stages? Plus, playing the game now, it’s really hard not to notice how basic a lot of the stage geometry is; everything is very angular and blocky, which isn’t surprising given it was a Nintendo 64 launch title, but it’s one of the many reasons why I prefer Banjo-Kazooie (Rare, 1998) since it improved and expanded upon everything Super Mario 64 pioneered. The game only really has a handful of cutscenes, all of which are rendered using the in-game graphics and are simply there to establish the game’s simple plot, relay that you’ve opened up new areas or discovered a Star, and convey the game’s ending. These are accompanied by a few instances of voice acting from Peach as Mario, Bowser, and other enemies are limited to a few sound bites, grunts, and yelps, which adds to the game’s cartoonish charm. Finally, Super Mario 64 is bolstered by a bombastic and catchy soundtrack from long-time Mario and Nintendo composer Koji Kondo; a lot of the tracks are re-used on multiple Courses but they’re so fitting and memorable that I can forgive it and if you don’t find yourself humming along to the main castle theme then you honestly have no soul.
Enemies and Bosses: If I’m being brutally honest, Super Mario 64 doesn’t feature much in the way of enemy variety; within the first handful of Courses, you’ll have encountered pretty much all of the enemies and hazards the game has to offer but, to be fair, these are all used sparingly and to great effect. They’re generally present to cause you some issues when trying to jump and clamber up to new areas rather than being formidable challenges in their own right; you’re far more likely to get bumped off a ledge and to your death rather than beaten to a pulp by these enemies. You’ll come up against classic Mario enemies such as Goombas (who now hop up in alarm and charge at you head-first when you cross their eye line), Bob-ombs (who chase you relentlessly as their fuse ominously burns down before exploding in a shower of Coins), Boos (who turn incorporeal when you face them so you’ll have to sneak up on them from behind or perform a backflip into a ground-pound), Koopas (give them a thump to ride their shell like a skateboard), and Shy Guys (annoying little bastards that buzz all around you shooting fireballs your way and send Mario into a whirlwind spin if he jumps on them). Each of these has been brought to life with a snazzy 3D makeover that imbues them with simple, but charming, attack and movement patterns and characteristics.
The strategy for beating these two will serve you well for the remainder of the game’s bosses.
You’ll also come up against some new enemies; Amps will spin around in a tight circle and electrocute Mario if he touches them, Bubba will swallow him whole if he enters the water while exploring the “Tiny” side of Tiny-Huge Island, three different varieties of Bullies will try to knock Mario off platforms and to his death, Chuckyas and Heave-Hos will also try to throw Mario to his doom, and Klepto and Ukkiki will steal Mario’s cap if given half a chance. You’ll also have to sneak up on the sleeping Piranha Plants to knock them out without getting bitten and watch out for that Goddamn piano in Big Boo’s Haunt as it’ll randomly spring to life to scare the piss out of you! Not every Course in Super Mario 64 has a boss battle but nine out of fourteen isn’t bad. The first one you come across, King Bob-omb, teaches you the fundamental mechanics Mario will need to defeat not only Chuckyas but also Bowser himself as you’ll have to run around the King to grab him from behind and then throw him three times without being thrown off the top of his mountain to defeat him. The second boss, the Whomp King, is even easier to defeat; simply run beneath him or dodge out of the way when he tries to squash you and ground-pound his back three times and he’ll burst into pieces to award you a Star.
Bosses might be big and talk a good game but they go down pretty easily.
In Big Boo’s Haunt, you’ll do battle with three Big Boos but, despite their intimidating size, they’re as easily dispatched as any other Boo with the only troublesome one being the Big Boo you battle on the balcony at the top of the haunted house because of the risk of falling. You’ll also encounter a large variant of the Mr. I enemy in this Course but, again, it’s defeated in exactly the same way as any other Mr. I (simply run around it until it gets dizzy and explodes). You’ll also encounter larger variants of existing enemies in Lethal Lava Land and Snowman’s Land, in this case the Bullies; again, though, the hardest thing about fighting these guys is making sure you don’t accidentally slip off the small platform you fight them on or let them push you into the molten lava or freezing water, respectively. Finally, you’ll have to do battle with the Eyerock inside the pyramid in Shifting Sand Land and a Wiggler on Tiny-Huge Island; the Eyerock is probably the most challenging boss before the final battle with Bowser as it constantly shields its one (well, two really) weak point (the eye) in its rock-like fists, tries to squash you at every opportunity, and can easily shove you off the platform and to your death (luckily, though, you’ll restart right before this battle if you immediately enter the painting again). The Wrigger is pretty much the same basic deal as the Whomp King; although he looks intimidating due to his size, he only looks big because you’re small and you simply ground-pound him three times to take him out, making sure to dodge him as he wriggles around the arena faster and faster with each hit.
Bowser isn’t messing aroundin the third and final fight and throws everything he has at Mario!
The game’s true boss is, of course, Bowser, Mario’s long-time enemy and most persistent foe. You’ll battle Bowser three times and each time you must have the correct number of Stars to access a troublesome mini Course that leads to the Warp Pipe into Bower’s arena. Each time you face Bowser, the general strategy is the same; avoid his attacks and run around him to grab his tail, then rotate the analogue stick to swing him around and then press the attack button to send him flying into one of the many bombs that line the outskirts of each arena. The first time you face Bowser, he’s pretty weak; he’ll stomp around in a circle, slowly spitting fireballs at you, and isn’t much of a threat as long as you don’t run into him, get hit by his burning flames, or fall off the platform and you’ll only have to toss him into a bomb once to take him out, making him functionally weaker than King Bob-omb. The second battle ramps things up a bit; Bowser can still be defeated with one bomb but he’ll now jump up and come crashing down on the platform, tilting it into a steep angle that will send you sliding into a bomb yourself or down to the fiery depths below. Bowser also now teleports across the arena if you get too close to him to prolong the battle and will tilt the stage each time he leaps up to the arena from a missed throw so make sure your accuracy is on point when you send him flying. The final battle is where Bowser really brings his A game; the music is far more ominous and foreboding and Bowser can now charge at you, spit a slew of fireballs onto the arena (including blue ones that bounce all over the place) and produce shockwaves that must be jumped over every time he lands from a jump. To make matters worse, Bowser must now be thrown three times before he is defeated and, after taking two hits, will stomp around the arena in a tantrum, causing parts of it break off until it resembles a Star and limiting your options for escape and movement. It’s not all bad, though; some of Bowser’s flames will produce Coins to replenish your health and, technically, the strategy remains the same; as with every Bowser battle, it’s just a question of patience and getting your shot lined up to throw him into the final bomb and finally get your cake!
Power-Ups and Bonuses: Although Mario can still collect a 1-Up Mushroom for an instant extra life and three different types of Coins (Gold, Red, and Blue, each offering different increments to your total Coin count), no other traditional Mario power-ups are present and unlike in other Mario videogames where Mario would collect a Super Mushroom to grow bigger and gain an extra hit or a Fire Flower to throw fireballs at enemies, Super Mario 64 takes inspiration from Super Mario Land 2: 6 Golden Coins(Nintendo R&D1, 1992) and Wario Land: Super Mario Land 3 (ibid, 1994) by giving Mario access to three different caps to aid his progress.
Soar through the sky, pass through walls, or become invincible with Mario’s special caps.
The Wing Cap gives Mario the ability to fly after performing a triple jump or being shot out of a cannon; by diving and pulling up, you can fly higher and further but just make sure you land before it wears off or you’ll suffer a damaging fall. The Vanish Cap turns Mario invisible and incorporeal, allowing him to walk through enemies and wired cages and the Metal Cap allows Mario to walk underwater and renders him functionally invincible at the cost of his speed and more elaborate jumping mechanics. Each cap must be activated by ground-pounding giant switches inside three different hidden mini Courses and are essential to collecting all 120 Power Stars but, it has to be said, their use is surprisingly sparse and you’ll be relying on Mario’s base moveset for the vast majority of the castle’s challenges.
Additional Features: As big and involving as Super Mario 64 is, there’s sadly not a whole lot of replay value to be had especially compared to the DS remake, which featured four playable characters, additional Courses and Stars, and mini games to pass the time. You can mess around with Mario’s big, goofy 3D face on the title screen, stretching and distorting it at your leisure, which is a nice touch, and the game also allows you to have four different save files and to erase or copy each one, allowing for multiple playthroughs. Additionally, while you only need seventy Stars to take on the final battle against Bowser and clear the game, you won’t get 100% completion unless you collect all 120 Stars. This is easier said than done, especially on Courses like Wet-Dry World, Tall, Tall Mountain, and Rainbow Ride which have lots of difficult platforming sections, bottomless pits, and barely enough Coins for you to get those hidden one hundred Stars. You’ll also need to search the castle thoroughly for hidden Courses (like the Princess’s secret slide), talk to the Toads scattered throughout the castle, and catch Mips the Rabbit to find some hidden Stars.
Find all 120 Stars and you’ll get…very little of value, to be honest…
Stars are also obtained by finding eight Red Coins in the cap and Bowser stages and other hidden Courses around the castle; luckily, you can track your progress from the pause menu and from the file selection screen so you always know where you might have missed a Star or two. Sadly, though, finding all 120 Stars doesn’t really offer much in terms of a reward. If you defeat Bowser with all 120, he’ll have some slightly different dialogue to acknowledge your efforts and, after reloading your completed save file, you’ll find you now have access to a cannon on the castle grounds. Use this to blast yourself onto the castle rooftop and you’ll find Yoshi, who has a special thank you message from the developers and awards you with one hundred lives before buggering off. Unfortunately, though, this is completely redundant as you’ve beaten the game and acquired every Star so there’s no real incentive to explore the completed Courses again with your abundance of lives. Perhaps it would have been better to have Yoshi be accessible from a new save file, or even placed within Courses to offer a new Star challenge. Hell, I would have even accepted a ‘New Game+’ mode where the entire game is mirrored but, instead, you get a tantalising cameo and a whole shit load of extra lives that are basically pointless as you’re more likely to just start a new game from scratch than to go back through stages you’ve already completed to 100%.
The Summary: Super Mario 64 is still an absolutely gorgeous and incredibly fun gaming experience; even now, some twenty-three years after its release, it still holds up remarkable well as one of the tightest, slickest, and most engaging 3D platformers ever. While the likes of Banjo-Kazooie and Sonic Adventure(Sonic Team, 1998) are technically far superior games, Super Mario 64 set a standard for all 3D platformers to strive to achieve and which many failed to match. It cannot be denied, however, that the game does still have some lingering issues; the camera, for all its diversity, is the most glaring and Mario’s tendency to get a bit stuck on platform edges or to hug walls when standing too close to them as well as his willingness to just slip to his death can all lead to some frustratingly unfair deaths and game overs but, for the most part, all of the game’s shortcomings can be overcome with the right degree of patience, skill, and experience. Once you master the game’s simple controls and mechanics, you can perform all kinds of nifty tricks and feats to aid your progress and you’ll find that the game has given you more than enough tools to find all 120 Stars if you’re skilled enough. With its stunning, colourful visuals, tight and responsive controls, catchy music, and addictive gameplay that is easy to learn and master, Super Mario 64 is positively brimming with gameplay variety. There’s always a new area to unlock and explore, new Courses and hidden Stars to discover, and the attention to detail is staggering for a Nintendo 64 launch title. My only regret is that Nintendo didn’t add in a widescreen feature or patch in that two player co-op mode they had planned or even the ability to play as Luigi after finding all 120 Stars in the Switch version but none of that diminishes the fundamental appeal of Super Mario 64.
My Rating:
⭐⭐⭐⭐⭐
Rating: 5 out of 5.
Fantastic
Did you play Super Mario 64 back in the day? Was it your first game for the Nintendo 64 or did you pick it up later? Perhaps you first experienced it on the Nintendo DS; if so, which version of the game do you think is the best? Which of the game’s Power Stars, Courses, enemies, or bosses caused you the most (or the least) hassle? Do you think Yoshi and his one hundred lives was a good enough reward or would you have liked to see something else; if so, what? What are your fondest memories of the Nintendo 64? Perhaps you hated the system; if so, why (and what’s wrong with you?) Whatever you think, comment below and let me know and don’t forget to come back next week for more Mario content.
So, for no better reason than “Mar.10” resembling Mario’s name, March 10th is widely regarded as being “Mario Day”, a day to celebrate Nintendo’s portly plumber, an overalls-wearing mascot who literally changed the videogame industry forever and shaped the home console market of the nineties. To commemorate Mario Day this year, I’ve made March “Mario Month” and am spending each Wednesday talking about everyone’s favourite Koopa-flattening plumber.
Released: 21 October 2010 Originally Released: 14 July 1993 Developer: Nintendo Original Developer: Nintendo EAD Also Available For: Nintendo 3DS (Virtual Console), Nintendo Wii (Virtual Console), Nintendo Switch (Online), Super Nintendo Entertainment System (SNES)
A Brief Background: After debuting in Donkey Kong(Nintendo R&D2/Ikegami Tsushinki, 1983) and receiving his own arcade title (alongside his brother, Luigi), Shigeru Miyamoto’s overalls-clad plumber Mario was all set to star in a new game exclusively for the Nintendo Entertainment System (NES) that would be everything Mario Bros.(Nintendo R&D1, 1983) was not: where Mario Bros. was limited and sparse and lacking in colour and variety, Super Mario Bros. would be colourful, with bigger characters and more dynamic gameplay mechanics. Perhaps the most famous platformer in videogame history, Super Mario Bros. taught players everything they needed to know in its first iconic World, allowed for two players to play together (in turns, of course, given the nature of the title), and introduced pretty much every single popular mechanic and feature that the series is still known for today and set the standard for 2D platformers for an entire generation. Having sold over 40 million copies worldwide, the game was later given a 16-bit makeover for the SNES compilation title Super Mario All-Stars (Nintendo EAD, 1993) that brought the graphics, sound, and gameplay up to the standards set by Super Mario World(ibid, 1990). To commemorate the twenty-fifth anniversary of Super Mario Bros., Super Mario All-Stars was re-released on the Nintendo Wii on 21 October 2010. Although a bare-bones release that didn’t even include Super Mario World, the special anniversary edition of this game sold out extremely quickly and, even now, the base version of the game can set you back a high price on eBay and Amazon (though it is, thankfully, available through Nintendo Switch Online if you pay their surprisingly reasonable subscription fees).
First Impressions: I’ve played Super Mario Bros. before, both the NES original and the 16-bit remake for the SNES. However, since I grew up with the Mega Drive and ploughing through robot-infested landscapes with their supersonic mascot, I am by no means a competent Mario player. I played a lot of the Game Boy titles and a couple for the Nintendo DS but I didn’t really sit down and play a Mario game from start to finish until a bought a Nintendo 64. As a result, my opinion on Super Mario Bros. is one that is likely to cause some amount of controversy because…I hate this game. The music is great, don’t get me wrong; it’s peppy and full of life and the Worlds are bright and colourful and full of unique enemies and iconic characters and items but Goddamn is this a bitch to play! Seriously, Mario slips and slides all over the place and controls like he’s constantly running on ice; it’s ironic to me that Yuji Naka was inspired to make Sonic move so fast due to him constantly trying to beat World 1-1 faster and faster as Super Mario Bros. feels far more faster and out of control than Sonic the Hedgehog (Sonic Team, 1991) thanks to its slippery and awkward controls.
There’s certainly a fair amount of World variety on offer…if you can get that far…
Mario (or Luigi, if you prefer) will jog along at a snail’s pace until you hold down the B button, which breaks him out into a run. Running builds momentum which, in combination with holding down the jump button, allows you to jump higher and faster but while Mario’s jumping abilities have been vastly improved over those in Donkey Kong and Mario Bros. (there’s no fall damage/death and it’s much easier to jump to where you intend without gravity weighing you down), it’s stupidly easy to run face-first into enemies (and no, not the first Goomba you encounter) or fall head-first down one of the game’s many (many) bottomless pits (seriously, this game alone has more bottomless pits than Sonic has ever seen!). The good news is, though, that you no longer die in one hit…as long as you grab a Super Mushroom or a Fire Flower. Either one will allow you to take one hit but the Fire Flower is recommended as it allows you to be a little more proactive at dispatching enemies other than just jumping on their heads. Sadly, though, Super Mushrooms and 1-Up Mushrooms often appear out of nowhere and you may find yourself careening down one of those pits trying to grab it, killing yourself in a desperate attempt to stave off death. The game’s World’s are divided up nicely, though, and have a lot of variety to them; one minute you’ll be hopping through the Mushroom Kingdom, the next descending through a pipe to the underground or desperately trying to navigate Blooper-infested waters, before you finally make it to one of Bowser’s castles and are faced with a gruelling test of your skills as you dodge fireballs, jump over pits of lava, and finally send the King of the Koopas to a fiery end…only to be told that the Princess is in another castle!
My Progression: Okay, this is going to sound really bad but just remember that I flat-out admitted up top that I am not a consummate Mario player…
I couldn’t even beat World 1-1.
I know.
I know!
But, in my defence, I was rushing quite a bit as I bought the game as a gift and was just trying it out for size. Still, imagine my shame when I couldn’t even get through the first World when I know that I have beaten it at least once before and I’ve beaten far harder games (some of them even Mario titles) in the past. Still, I did discover the secret Warp Zone, which allowed me to skip ahead to World 4 and…I couldn’t beat that World, either. I then found another Warp Zone that took me to World 8 and I promptly exhausted my remaining lives before I even got within sniffing distance of Bowser’s Castle. It’s at that point that I shut the game off, wrapped it up for my friend, and promptly decided to wallow in indescribable self-pity and shame.
I don’t even want to beat Super Mario Bros. anyway. I don’t have to. Why should I? I don’t have to prove anything…Oh God, I suck so hard! I am so ashamed that I couldn’t do better; I wanted to and was glad to make up for this later but I was too ashamed and too unimpressed with the game’s slippery, alien controls and physics to want to continue. It’s a classic, addictive, and entertaining title that is well deserving of its reputation but I just struggle to get to grips with Mario’s 2D offerings even after all these years. Have you ever beaten Super Mario Bros.? How highly do you rate it in the pantheon of all-time greatest videogames? Do you, perhaps, agree with my thoughts and experiences and find it to be a difficult game to get the hang of or do you think I just suck at Mario, Nintendo, and life in general? Perhaps you’d like to insult my inability to clear even the first damn World, let alone the entire game! If so, no matter what you think or have to say, do please leave a comment and check out my other Mario content.
So, for no better reason than “Mar.10” resembling Mario’s name, March 10th is widely regarded as being “Mario Day”, a day to celebrate Nintendo’s portly plumber, an overalls-wearing mascot who literally changed the videogame industry forever and shaped the home console market of the nineties. To commemorate Mario Day this year, I’m making March “Mario Month” and celebrating everyone’s favourite Koopa-flattening plumber every Wednesday from today.
Released: September 2018 Originally Released: 9 September 1983 Developer: Nintendo R&D1 Also Available For: Amstrad CPC, Apple II FM-7, Arcade, Atari, Commodore 64, Game & Watch, Game Boy Advance, ZX Spectrum, Nintendo 3DS (Virtual Console), Nintendo Entertainment System (NES), Nintendo Wii (Virtual Console), PC-88
A Brief Background: Mario made his inauspicious debut in Donkey Kong (Nintendo R&D2/Ikegami Tsushinki, 1983); in that game, the avatar formally known as “Jumpman” would die from the briefest of falls and was originally a carpenter. However, after playing with the concept and exploring other gameplay mechanics, creator Shigeru Miyamoto redesigned Mario into a format where he would be capable of carrying his own arcade title (fitting, considering Miyamoto originally intended for Mario to be Nintendo’s go-to, catch-all character to feature in numerous titles and roles). Released in Japan on 14 July 1983 and in North America on the 20th, Mario Bros. featured Mario (and introduced his palette-swapped brother, Luigi) knocking over baddies in the sewers of New York. Though the arcade cabinet was only modestly successful in Japan, the NES port sold over 1.60 million copies and, despite the title being massively overshadowed by its NES follow-up, the title has been ported to numerous systems, the most recent of which being the Nintendo Switch, which is the version I’ll be talking about today.
The Review: Mario Bros. is a wraparound platformer in which players take control of either Mario or Luigi and venture through thirty-five largely-similar stages (called “Phases”); the stages are set within the sewers of New York City and, as was popular in arcade games, players and enemies can exit on the left side of the screen and emerge on the other (or vice versa) to endlessly loop around the one-screen stages. In Donkey Kong, Mario’s only defence was to jump over hazards or grab a hammer and smash them to pieces; in Mario Bros., the hammer is gone and titular brothers still can’t dispatch enemies by jumping on them. The only way to take out the game’s handful of enemies is to attack them from below; as they pass overhead, jump at the platform above you and you’ll either topple the enemy over or deal some damage to get them prepped to be knocked over, and then you can run into them to kill them off and earn some points. Dispatch all onscreen enemies and you’ll have cleared that Phase and can move on to the next; wash, rinse, and repeat. This is easier said than done, however; one of the biggest complaints I have with playing Mario videogames (especially the 2D titles) is how slippery and unwieldy Mario can be and Mario Bros. is no different. The characters slip and slide all over the place, meaning it’s pretty easy to run head-first into an enemy or miss-time a jump as you fly right past the platform edge.
Bop enemies from underneath to tip them over and dispatch them all to clear the Phase.
At the same time, Mario’s jump is nerfed; it’s literally like trying to run on ice and jump underwater as the moment you press the jump button, gravity does everything it can to make vertical movement difficult for you. You simply lose all momentum and easily miss a jump even when you’re standing right next to it, which can be frustrating when you’re just trying to make a simple jump upwards or across. Luckily, Mario and Luigi don’t take fall damage but, like a lot of titles at the time, it’s one-hit kills and there is no health bar or health power-ups. As you might expect, then, the objective is to defeat enemies and collect Coins in order to earn the highest score possible, earning more points for taking out enemies simultaneously. There’s not a lot to the game; Phases remain largely the same but enemies and hazards increase in speed and difficulty as you progress and you are invited to collect as many Coins as possible in the game’s timed Bonus Stages every now and then in order to increase your score. It’s hard to get a more classic, pure-blood 8-bit title than Mario Bros.; it belongs in the same conversation as titles like Donkey Kong, Pac-Man (Namco, 1980), and Space Invaders (Taito, 1978) for traditional, 2D arcade action. By utilising a far more stripped back aesthetic and stage layout compared to Donkey Kong, the developers seem to have freed up some space for slightly more detailed sprites and enemy variety but it can’t be denied that it lacks the big, bold sprites of Donkey Kong.
The graphics are simple but there is a lot happening onscreen as things speed up.
While the Phases don’t change very much as you play, there are far more sprites onscreen at any one time (including two simultaneously playable characters if you have a friend to play with) and much more enemy variety compared to Donkey Kong. Luigi might be a simple recolour but it’s better than nothing and indicative of the hardware limitations of the time. What probably lets the game down the most beyond the lack of stage variety has to be the music as there’s no really memorable tunes here and it’s easy to see why this game would be forgotten compared to its big brother. Mario and Luigi will primarily be faced with little turtles known as Koopas Shellcreepers; though relatively harmless and predictable compared to the game’s other enemies, they’ll still kill you if they touch you so bump them from underneath to turn them on their shells and kick them out of there! You’ll also encounter Sidesteppers (which are basically just crabs and require two hits before they’ll tip over), and Fighter Flies (which hop around the stages) as you progress through later Phases. As if that wasn’t bad enough, red and green fireballs emerge from the pipes and sides of the screen, as does Slipice (which slides around and will transform platforms into literal ice unless you shatter them from beneath). Mario Bros. contains no boss battles or primary antagonist to test your skills against; instead, you’ll encounter more and more and increasingly-faster versions of these enemies. Each enemy will react to others or to Coins and change their direction, as well, meaning it can require a bit of strategy and forethought to topple them all when the Phases hit their highest difficulty.
Enemies increase in their frequency and difficulty but there are no bosses to fight here.
There is very little to aid Mario and Luigi in their quest to clear up the sewers; there are no power-ups to pick up or weapons to obtain, meaning you’re forced to rely on your skills and ability to work with the game’s dodgy physics and controls. You can, however, attack a “POW” block to flip every onscreen enemy in one screen-shaking hit. The “POW” block can only be hit three times, however, and once it’s gone you’ll have to wait until the next one spawns in after a Bonus Stage so it’s best to save it for the game’s harder Phases. As a conversion of an 8-bit arcade title, the primary objective of the game is to achieve, or beat, a high score. You can pick from four different modes: two are for a single player and two are for two players but, since I don’t have anyone to play with, I could only play the standard ‘Game A’ game. If you do have a friend, though, you have the option of playing as Mario and Luigi in two player co-op, which I’m sure increases the replay value to the game exponentially. Even better, the Nintendo Switch provides a few extra options to make things easier for you; using the Switch’s ‘suspend menu’ mode, you can create a save point at any time and rewind the game so you can correct any mistakes you might have made.
The Summary: Mario Bros. is a decent enough port of the original arcade game. Unfortunately, there wasn’t really a lot to the game to begin with and the NES version doesn’t really add or improve upon the format very much. However, as fun a distraction as Mario Bros. is and as attractive as the old school 8-bit sprites look, it definitely wears out its welcome a lot faster than Donkey Kong or its follow-up title. Within the first three or five stages, you’ve basically seen everything there is that the game has to offer and, though the game increases in speed and difficulty, there’s just less to it compared to other arcade titles or even Donkey Kong, which requires far more skill to get through. As a videogame, Mario Bros. is much better as a mini game to be included in other Mario titles (as it was on the Game Boy Advance) rather than a full game in and of itself and it’s not surprising that Nintendo was able to improve upon this formula when the bar was set so low.
My Rating:
⭐⭐
Rating: 2 out of 5.
Could Be Better
Did you ever play Mario Bros. back in the day, on NES or out in the arcade? What did you think to it compared to other Mario titles and arcade games of the time? Which of the two brothers did you always play as and what was your best score in the game? How are you celebrating Mario Day this year? No matter what you think about Mario Bros. or Mario games in general, leave a comment below and pop back next week for another review as part of Mario Month.
The Background: As I detailed in my review of the first game, The Legend of Zelda(Nintendo EAD, 1986) was an extremely popular title when it released on the Nintendo Entertainment System (NES) and sold over 6.5 million copies. This, of course, was only the beginning for the series, which has become one of Nintendo’s most lucrative and popular franchises of all time, which made a successful jump to 3D with The Legend of Zelda: Ocarina of Time(ibid, 1998) and has largely aimed to be bigger and better with each successive entry. Development of Breath of the Wild began sometime after the release of The Legend of Zelda: Skyward Sword(ibid, 2011), a commercial success that was easily the largest and most complex Zelda title released at that time. For the next title, though, series producer Eiji Aonuma wanted to completely rethink the conventions of the franchise and create a much bigger, more interconnected world. After developing an 8-bit prototype to experiment with physics-based puzzles, Aonuma encouraged his team to rethink the game’s approach to puzzles and to create a grand, open world adventure more akin to The Elder Scrolls V: Skyrim (Bethesda Game Studios, 2011). To further separate it from other entries in the franchise, it was also the first Zelda title to use voice acting in cutscenes (though Link remained unnervingly silent), the physics were purposely built to be the most realistic yet, and the game was specifically designed so that players were free to explore and experiment (they could even skip the story entirely, if skilled enough). Breath of the Wild proved immensely popular upon release; many reviewers considered the game to be a “masterpiece” and one of the most immersive videogames ever made. Breath of the Wild also won numerous awards, was the third-bestsellingZelda title at the time, and earned itself a direct sequel after Aonuma’s team found they had too many ideas for the game to be limited to downloadable content (DLC).
The Plot: After a botched resurrection attempt leaves Ganon little more than a calamitous force of nature, Princess Zelda and Link, the warrior chosen to wield the legendary Master Sword, found their forces overwhelmed when Calamity Ganon corrupted the machines they built to repel him. After Link was gravely injured, Zelda placed him in suspended animation and magically sealed herself within Hyrule Castle to hold Calamity Ganon at bay. One hundred years later, Link awakens, his memories fragmented, and begins a quest to rediscover his destiny and end Calamity Ganon’s threat once and for all.
Gameplay: The Legend of Zelda: Breath of the Wild is a massive open-world adventure game in which players are once again placed into the role of Link, the elf-like hero who continually finds himself resurrected and reborn time and time again throughout the ages to oppose Ganon’s evil. Unlike the vast majority of Zelda titles, players have no option to rename Link, making Breath of the Wild one of the few games in the series to actually use the name “Link” as the character’s name; similarly, Link forgoes his traditional Peter Pan garb of green tunic and hat in favour of a multitude of different clothing options and these are the first indicators that the game is very different from traditional Zelda games.
Link’s combat options are simple but quite varied and rely on timing and strategy.
If you’ve played a 3D Zelda title before, particular Ocarina of Time, you’ll be immediately familiar with most of Breath of the Wild’s controls: players can target nearby enemies by holding ZL (sadly, there’s no option to target without holding the bumper), which will cause Link to immediately raise whatever shield he is carrying to block enemy attacks or reflect certain attacks back by pressing A. Pressing Y will allow Link to attack with his equipped weapon and pressing ZR sees him whip out his bow and shoot arrows for a ranged attack. Returning from Skyward Sword is the stamina wheel, which depletes when you hold B to sprint or when swimming, gliding, or climbing one of the game’s many hills and mountains. In a major addition to the series, Link can now jump whenever he wants with a press of the Y button or charge up a spin attack by holding down X and perform some jumping strikes and dodges just like in the Nintendo 64 games; he can also throw his weapons and perform a flurry attack by dodging incoming attacks at just the right moment.
You can’t just rush into battle or areas as your weapons will break or burn up if you do.
The biggest addition to the combat is the inclusion of destructible weapons; every single melee weapon, shield, and bow you acquire in the game has a limited number of uses and, the more you use them, the more you’ll wear them out. Weapons that are made out of wood will also catch fire (causing Link to catch fire and take damage in the process) as well and many shatter in only a single use, meaning that Breath of the Wild’s combat is much more about strategy and it is often far better to simply avoid or run away from battles rather than break your more powerful weapons. Honestly, it’s an annoying and frustrating system that means you’re almost constantly worrying about the status of your weapons and being prepared for the game’s more challenging obstacles. I feel like there could have been a middle ground where there are some weapons (wooden ones, for example) that break and some situations where you lose them (enemies could knock your shield out of your hands with larger weapons, for example, and weaker steel swords could shatter on stronger rocks) but, instead, every single weapon has a finite number of uses, which made me very anxious and made combat more exasperating than enjoyable. Combat is made all the more troublesome by the fact that Link is the weakest he has ever been; as always, you begin the game with three hearts of health and, because the game is so big (even the relatively enclosed opening area), it’s very easy to be overwhelmed by even the bog standard Bokoblin enemies. Unlike in previous Zelda titles, defeated enemies will never drop health-restoring hearts, meaning the only way you can replenish your health is by picking up edible items (apples, acorns, meat, and so forth) and eating them. Indeed, the key to bolstering Link’s stamina, health, and attack prowess is to make use of the game’s cooking mechanic, whereby Link can toss up to five items into a cooking pot and brew up dishes or elixirs to increase his maximum hearts, his stamina, attack and/or defence, his stealth prowess, or resist certain elemental conditions. The only way to permanently increase your hearts is to conquer the game’s four dungeons (known as “Divine Beasts”) or acquire Spirit Orbs from the many Ancient Shrines scattered (and, often, hidden) throughout Hyrule.
Track down and complete Shrines to earn Spirit Orbs and increase your health and stamina.
You’ll want to hunt down and visit these Shrines on a regular basis as, since the game has only a handful of traditional dungeons, these make up the bulk of your concern and are the only way of increasing your maximum health and stamina and, thus, your chances of success. Each Shrine also acts as a fast travel point once activated, allowing you to quickly teleport all across the vast kingdom of Hyrule from the main menu, but their primary function is to bestow Link with four (technically five, I guess) Shiekah Runes that are used to conquer puzzles both in and outside of the Shrines. These puzzles may be simple things such as activating switches, creating ice platforms to cross water, lifting metallic objects, creating electrical currents, or floating along on updrafts but they can also be extremely challenging combat scenarios against spider-like Guardian Scouts. As you progress and explore further, you’ll come up against some truly head-scratching puzzles that force you to freeze objects and attack them to build up kinetic energy, navigate through mazes, retrieve orbs from dangerous environments, and make full use of your inventory and abilities in order to solve them. Thankfully, the Shrines don’t need to be beaten to activate them as fast travel points but it’s highly recommended that you beat as many as you possibly can as you’ll refill your health upon successful completion and move one step closer to increasing your maximum health and stamina. And you’ll definitely need to do this as, while you can head straight to Hyrule Castle to take on Calamity Ganon without tackling the game’s story, I really wouldn’t recommend it as I had a great deal of difficulty taking on even minor enemies and puzzles with the game’s mechanics. Breath of the Wild throws absolutely everything in your path to keep you from succeeding: at night, Stalfos and similarly-skeletal enemies will rise from the ground to chase you down; every so often, gameplay is rudely interrupted by the rising of the Blood Moon, which resurrects all enemies you’ve defeated since playing; and you’ll even be beset by a variety of environmental hazards.
Rupees are hard to come by and items have a steep cost, keeping you on the back foot.
When climbing higher, the air temperature will drop, causing Link to shiver uncontrollably; when exploring Death Mountain, the air becomes unbearably hot, causing his wooden items to combust; and Hyrule is plagued by wind, rain, and thunderstorms that will causing Link to be struck by lightning if he’s got anything metal equipped! In many of these situations, Link will steadily lose hearts and be at great risk, meaning that you need to cook up something to stave off these debilitating effects or acquire, or buy, clothing to resist the elements. As in all Zelda games, Link can purchase new items using Rupees; however, similar to how enemies don’t drop hearts, it’s very rare that defeated enemies will drop Rupees. As a result, the main way you’ll earn Rupees is by finding them in chests (usually after defeating an enemy encampment) or selling some of the many items and minerals you pick up along the way. Sadly, the best armour and more useful elixirs and weapons carry a high price tag, meaning it’s quite difficult to save up enough to buy what you want (it doesn’t help that the four Great Fairies, who will upgrade your clothing using monster parts, charge up to 10,000 Rupees just to “restore their power”). As a result, like with the combat, it feels like you’re constantly on the back foot as you never have enough money, never have enough ammo, and your weapons could break at any moment, all of which makes it a very stressful experience at times as you might spend Rupees to replenish your health at an Inn only to be decimated by a random Guardian out in the field.
Paragliding and climbing are two pivotal mechanics in the game and essential for traversal.
While Link can pick up a great many items, ingredients, and monster parts, his weapon inventory is extremely limited; sometimes, you may have to discard or use up a weapon to grab a better, more powerful one and the only way to increase your inventory slots is to randomly find Koroks hidden all over Hyrule. Each one you find gifts you with a Korok seed, which can be used to buy one extra slot at a time, with the cost of these inventory slots increasing each time. Two of the game’s more prolific mechanics are the paragliding (which I believe is a carry over from Skyward Sword) and climbing mechanics; once you acquire the paraglider, you can jump from higher areas or use air currents to glide along, covering vast distances (for as long as your stamina holds out), which is great for spotting Shrines or avoiding dangerous areas. Climbing is also heavily dependant on your stamina but it’s generally better to get to the high ground to find secrets and survey the area and you’ll have to climb up a number of Sheikah Towers in order to painstakingly map out the massive overworld map. Since Hyrule is the biggest it has ever been, Breath of the Wild can be extremely daunting; travel is helped not just by the fast travel system but also the inclusion of horses and other ridable animals. When you come across a horse, you should press the left analogue stick to make Link crouch and take slow steps to approach it undetected, then you can mount the animal and sooth it with L. Once you’ve calmed the horse, you can ride it to one of Hyrule’s many stables to register it (for a price, of course); while your horse can’t follow you everywhere (they can’t cross the Gerudo Desert, water, or rockier areas, for example), you can call it by pressing down on the directional pad (D-Pad) to whistle and recover them from a stable (so, if you’re in the far West but left your horse in the far East, you can visit a stable and they’ll bring your horse to you). Horses can be named and have different statistics that determine how tough and fast they are but there are a couple of things to consider: thanks to the game’s dodgy physics, it’s easy to fall into water with your horse, which will cause it to become trapped if there’s no way for it to return to shore, and horses can also be killed if they take too much damage (usually by Guardians), though a Great Fairy will resurrect them if this happens. Similarly, as I mentioned, you can’t take your horse into the desert, but you can temporarily commandeer a Sand Seal to quickly traverse the temperate sandstorms.
A number of NPCs have side quests and missions for you, which can earn you a few nifty rewards.
Link’s journey involves a great many side quests and interactions with the largest number of non-playable characters (NPCs) ever seen in a Zelda title; even when journeying from one town to another you may stumble across NPCs who have side quests and missions for you, ranging from collecting a number of items, photographic objects, defeating enemies, or bringing them something. In the game’s larger towns, you’ll find more substantial side quests, many of which are tied into the game’s main objectives; you can’t just climb up Death Mountain to reach the Divine Beast Vah Rudania, for example; you first have to cook up an elixir to resist the heat or complete a side quest to earn heat-resistant armour, rescue a Goron from captivity, and then make your way up the mountain shooting at the Divine Beast while defeating enemies and taking out drone-like Guardian Skywatchers first, all of which can take a good few hours. Every time you complete a main or side quest, you’ll be gifted with access to Rupees, weapons, or other items so it can be worth it to veer away from your main objective and help out the multitude of NPCs in their often strange and convoluted requests. There is, honestly, almost too much to do and see in Breath of the Wild: wild animals roam the countryside as often as enemies, many of which will randomly attack you but all of which can be killed off for ingredients; camp fires are scattered around, which allow you to advance time to avoid night-time attacks and weather; Beadle wanders around to give you the chance to buy supplies; NPCs randomly get attacked by monsters and will reward you with cooked dishes; towers can be climbed to find chests; enemies camp out all over the place; rafts often sit near bodies of water for you to sail to far off islands by using a Korok Leaf; chests must be magnetically pulled out from water, sand, and snow; and it’s super easy to stumble into ruins, small villages, and other areas of desolation or civilisation when trying to follow the main story. It can get a bit daunting at times: you’ve got the cooking, the breakable objects, and the Shrines to worry about, keeping you constantly on edge. Even when you conquer the Shrines, you need to travel to a town or village and find a Goddess Statue to pray at in order to receive your Heart or Stamina Container and, thanks to how easy it is for enemies to overwhelm you and defeat you, you’ll be seeing the “Game Over” screen over and over again without boosting your odds through food or clothing. Autosaves are frequent, however, and you can manually save whenever you like and it’s very easy to reload a previous save if you make a massive blunder along the way.
Graphics and Sound: Full disclosure, the last 3D Zelda game I played with The Legend of Zelda: Twilight Princess (Nintendo EAD, 2005), which was the biggest Zelda adventure at the time so to say that Breath of the Wild blew my mind is an understatement. Without a doubt, the game is absolutely gorgeous to look at; the overworld is gigantic, ranging from wide, seemingly endless fields to the explosive, lava-filled region of Death Mountain, to the desolate wastelands of the Gerudo Desert and snowy mountain peaks, with some areas featuring more than one weather and seasonal effects to worry about (the Gerudo Desert, for example, can be boiling hot in the day and freezing cold at night).
Hyrule is full of the remnants of lost civilisations and the ruins of a time long forgotten.
As soon as you step out of the Shrine of Resurrection, you can see the vastness of Hyrule but it’s not until you paraglide down into Hyrule proper that you see just how huge Hyrule now is. Without a horse or fast travel, it can take many actual, real-world minutes just to travel from one point to another and you’ll be beset by all manner of dangers along the way. Winds blow, rain falls, lightning strikes trees (and you…), and day turns to night turns to day in a constant cycle, all of which brings Hyrule to life as, perhaps, the most lively and realistic gaming environment I’ve ever seen. The remnants of Hyrule’s past glory and iconic locations from the Zelda series are everywhere, including destroyed outposts, the overgrown wreckage of the Temple of Time, and scattered, destroyed Guardians (be cautious when approaching for loot, though, as they’re often playing possum).
Each race of Hyrule lives in a distinct environment, which only adds more life and depth to the game.
Like any good Zelda game, variety is the name of the game when it comes to Breath of the Wild; a degree of traditional society is retained throughout Hyrule thanks to places like Kakariko Village and Hateno Village but you can also visit the rock-eating Gorons, the sea-faring Zoras, the woodland imps known as Koroks, the desert-dwelling Gerudos (a society comprised entirely of women), and the man/bird hybrids the Ritos. Each one has their own visual style and a lives in a distinct area: the Gorons dwell in and around Death Mountain, working in mines nearby; the Zora’s live in the gorgeously ornate Zora’s Domain, which is full of water and waterfalls; the Rito are surrounded by snow and mountains; the Koroks are hidden deep within a dense, misty forest that will kick you out if you wander in unaided; and the Gerudo dwell within a desert town and set the guards on any males who dare intrude.
Dialogue is given through text boxes and voiced cutscenes, though Link stays eerily silent.
Character models are of equally high quality; they don’t necessarily move all that much but they are generally quite varied and full of life and personality. Each of Hyrule’s races can be found all over the land as well, with Gorons wandering around selling wares, Zora’s popping up in bodies of water, and Korok sprouting out of the most random of locations. Each one communicates using speech bubbles and text but, when the game switches to its higher quality cutscenes, characters will also talk as well. Link, however, remains silent which, to be honest, is a bit weird as the game’s story and script is often geared towards characters specifically addressing him or asking him questions, which makes his silence really stand out. Oddly, many conversations you have with NPCs give you the option of one or more answers, implying that Link can speak so it just feels like the game could have been tweaked a little to cover for his silence in speaking cutscenes. Cutscenes come in a variety of forms, from in-game graphics, higher quality cinematics, and distorted flashbacks to Link’s past as he uncovers more of his memories. Thankfully, you can speed up text scrolling with B and skip cutscenes if necessary and, often, the game skips over them for you (such as if you fall to a dungeon boss, for example). Musically, Breath of the Wild is the most elaborate of the series I’ve ever seen; a lot of the time, music gives way to ambient effects and slowly creeps in or suddenly kicks up to set the tone of an area or emphasise an enemy attack. It’s a grandiose, operatic score that escalates as you conquer the four Divine Beasts, defeat Ganon’s underlings, and take on the calamitous King of Evil himself in the finale, when the traditional Zelda theme kicks in with suitably dramatic impact.
Enemies and Bosses: Hyrule is, as always, also populated by a wide variety of enemies, all of which freely roam its fields, mountains, and wastelands and will attack you on sight if they spot you, often calling for reinforcements if near an enemy camp, and all of which will drop weapons and monster items for your use. Some of the basic enemies include gelatinous Chuchus and bat-like Keese, which can be protected by elemental conditions, but, primarily, you’ll be fighting different varieties of Bokoblins. These goblin-like creatures like to set up camps, shoot at you from on high with arrows, and attack with spears and swords; they’re the most basic of enemies but are formidable through their sheer numbers and your comparative weakness and even rise from the grave to attack you in skeletal forms. They’re often accompanied by the much larger Moblins, which attack with kicks and bigger, longer weapons, but you’ll also have to contend with a variety of Lizalfos, who are often camouflaged or leap out at you from hiding, damn annoying Octorocs, who pop out from water to spit rocks at you that always seem to hit, and robe-clad Wizzrobes, who dance around mockingly shooting elemental magic at you and teleporting all over the place. Easily the most daunting of the regular enemies are the Lynels; these centaur-like creatures are basically like mini bosses and you won’t actually be able to defeat one for a long, long time as they’re just too tough. Once you get a healthy stock of hearts, food, and more powerful weapons (particularly the Master Sword), though, you’ll stand a much better chance of besting these ridiculously powerful enemies.
Guardians are a significant threat and extremely difficult to destroy or escape from.
However, there are only a handful of Lynels to worry about; the Guardians are far more frequent and troublesome as they often sit amongst the wrecked shells of their kind and fire what basically amounts to an instant-kill laser in your direction. At first, you have no chance of destroying these bastards and they’re only found in a handful of places but, once you conquer the Divine Beasts (and when you storm Hyrule Field on the way to Hyrule Castle), they’ll start to scuttle around the overworld in regular patrols. If they spot you, do everything you possibly can to avoid them, even if it means going far out of your way, and don’t even think about trying to outrun them without a horse! They can be defeated using special weapons and by targeting their limbs and eyes but, most of the time, it’s a fool’s errand and it’s simply easier to flee for your life! The flying variants are much easier to take out in comparison but once you see they’ve got a lock on, make sure you pace yourself to sprint away at the last second or else you (and your horse) will be toast.
The Divine Beasts need to be quelled before you can explore and restore them.
As there are only four dungeons in the game, Breath of the Wild is quite light on actual bosses; you will, however, have to do battle with Master Kohga of the desert-dwelling Yiga Clan in order to reach Vah Naboris, the Divine Beast of the Gerudo Desert. Kohga likes to hurl boulders your way but you can easily stun him with arrows and use Magnesis to repel his attacks in the brief windows of opportunity you get; honestly, sneaking through the clan’s hideout was more troublesome than the fight itself. The reverse is true of the dungeons, which focus on annoying puzzles and are largely devoid of enemies and populated mainly by “Malice”, a health-draining black/red goo that must be dispelled by shooting an eyeball. Just getting to the Divine Beasts and, thus, their bosses is like a boss battle in itself; each one can be tackled in any order and all of them must be quelled before you can enter them. I took on the Divine Beast Vah Ruta first, which spits ice projectiles at you that must be smashed with your Cryonis ability before using the bow and a special Zora outfit to swim up waterfalls and destroy the cannons on the Divine Beast. Similarly, Divine Beast Vah Rudania needs to be shot at by loading cannons with your bombs and a particularly hardy Goron. To bring down the Divine Beast Vah Medoh, you must protect yourself from the frigid cold and use the paraglider to destroy cannons on the Beast’s sides with Bomb Arrows while the Rito, Tiba, draws its fire away from you. Easily the most difficult of the Divine Beasts to bring down, though, was Vah Naboris, which forces you to stay within a protective field and surf, almost uncontrollably, across the sand using a Sand Seal while shooting a limited supply of Bomb Arrows at its feet.
Waterblight Ganon attacks from a distance with a deadly spear and ice blocks.
Inside each of the Divine Beasts, you must first rotate, tilt, and manipulate the gigantic structures to activate five terminals and then you’ll do battle with a “phantom” aspect of Ganon, each of which sports two attack phases that will truly test your mettle, especially in the early going and if you’re underequipped. I first took on Waterblight Ganon and it was like hitting a brick wall! Teleporting around the arena and attacking with a long spear, Waterblight Ganon can be hurt with Bomb Arrows but can end you pretty quickly with just a couple of hits. In the second phase, the arena floods and you’ll need to shatter Waterblight Ganon’s ice blocks with Cryonis and dodge its thrown spear, again using Bomb or Shock Arrows (or Ancient Arrows if you manage to get some) to deal the most damage. This was a tough hill to climb for me and the first time I had to go off and cook up some defensive food to give me an edge as its attacks were too much at the time. Next, I took on Thunderblight Ganon, who was also quite the formidable foe thanks to his incredible speed! Thunderblight Ganon throws a few electrical balls your way, which are easy to dodge while firing arrows at him, but you have to have your shield up pretty quick when he dashes in for the attack or else you’ll miss your best opportunity to strike him. In the second phase, he drops a number of metal pillars into the arena and then electrifies them; you need to stay the hell away from these, grab one with Magnesis, and move it near him so he shocks himself, all of which is really hard to do as the camera and controls really get in the way here. This only stuns him, though, and he then follows up with even faster, more frequent attacks and you absolutely must make sure that you don’t have any metal weapons or armour equipped or else you won’t last long at all and eat or drink some concoctions to increase your defence, attack, and resistance to electricity.
Fireblight Ganon wields a massive sword and tosses a huge fireball your way.
I then decided to give myself a break and tackle Fireblight Ganon next; this battle takes place in a much bigger arena, making it a bit easier to keep your distance and catch your breath, though Fireblight Ganon wields a massive sword so it helps to stay up close to him. In the second phase, he launches a massive fireball your way so be sure to hide behind the main terminal in the arena; you should also use this for cover if he busts out his Guardian laser and be sure to unequip any wooden weapons and utilise any Ice Arrows or ice-themed weapons you have to hand (though I also did some decent damage with Shock Arrows when I ran out of Ice Arrows). Finally, there’s Windblight Ganon which, again, takes place in a much bigger arena that is full or destructible columns that you can use for cover. Windblight Ganon hovers out of reach of your sword strikes and rapidly shoots at you with a laser pistol but you can bring him down using air currents to glide upwards and fire a few Bomb Arrows at him. In the second phase, he throws out tornados to wreck the arena and also sends out four drones to heavily magnify his laser attacks but I found it easier to simply concentrate on attacking him whenever possibly, scoffing down food as and when necessary, rather than be distracted by the drones.
Calamity Ganon is a massive, spider-like monstrosity that borrows attacks from other bosses.
With the four Divine Beasts restored and taking aim at Hyrule Castle, you must then storm the Malice-ridden castle itself, which acts as a quasi-dungeon of sorts and is full of Guardians, enemies, and treasure, with only one Shrine for fast travel. There is, however, a shortcut up the West-side waterfall that takes you to the inner sanctum, where Calamity Ganon dwells. A monstrous, nightmarish amalgamation of the four phantoms, Calamity Ganon is the most horrific form I’ve ever seen Ganon in but this fight can be tipped greatly in your favour by defeating the other bosses as the Divine Beasts will drain half of Calamity Canon’s health. If you are stupid enough to go straight to the final boss without conquering the dungeons, or with less than four beaten, you’ll have to fight Ganon’s phantom forms before you can even take on Calamity Ganon so I really wouldn’t recommend going into this with just a stick and your undies. Calamity Ganon mixes and matches attacks from the other bosses, swinging a gigantic, flaming sword at you, causing flames and fireballs the scatter across the arena, throwing a spear at you, and blasting at you with a Guardian laser. I rushed up close and went to town on him as quickly as possible with the Master Sword (which doesn’t lose its charge in Hyrule Castle), dodging and hitting flurry attacks if I was lucky enough, and shooting at him with Ancient Arrows when he scuttled up the walls. In the second phase, Calamity Ganon protects himself in an impenetrable, flaming shield and is completely immune to your attacks; he ups his fire game with Fireblight Ganon’s fireball and also conjures Windblight Ganon’s tornados.
Ganon transforms into a rampaging beast and must be put down with some well-placed arrows.
In this phase, you really need to have mastered the “Perfect Guard” move (hold ZL to target and, right before an attack hits, press A to knock it away/back with your shield) as the only way to stun Calamity Ganon and thus damage him is to reflect his Guardian lasers back at him, which I found to be incredibly difficult to get right. Once defeated, Calamity Ganon transforms into a gigantic, Malice-infused, boar-like creature, Dark Beast Ganon, and rampages across Hyrule Field! Similar to the final boss of Twilight Princess, this battle takes place on horseback and the hardest thing about it, really, is keeping control of your horse as the camera and controls make manoeuvring around Ganon troublesome at times; touching Dark Beast Ganon will hurt you and cause you to be knocked from your horse so keep your distance and stay away from his face to avoid his big laser attack. When Zelda gives you the nod, golden symbols will appear on Ganon’s body and you must shoot at them with the Bow of Light (which, thankfully, has infinite ammo). When Dark Beast Ganon’s health is down to one sliver, a glowing weak spot appears on his forehead; now you must use the updraft from Ganon’s laser attack to glide into the air and use your arrows to strike the Malice eyeball and finally defeat Ganon and be treated to the game’s anti-climatic ending.
Power-Ups and Bonuses: Breath of the Wild has an abundance of items, weapons, pick-ups, and power-ups for you; an overabundance, it seems at times, as you can pick up a variety of monster parts, minerals, food, and weapons to be equipped, sold, or cooked for a variety of effects. With all the food, meat, and fish (thankfully there’s no fishing mini games this time around) in the game, you can either eat some of them for a quick health boost or cook them up in a variety of combinations for stat boosts and extra help. I may have missed something but it doesn’t seem like there’s a way to keep track of your recipes so I kind of just tossed them in a pan and hoped for the best. When around a Great Fairy Fountain, you can sneak up on fairies and grab them, which is super helpful as they’ll restore your health a bit when all your hearts are empty. As you explore, defeat enemies, and open chests, you’ll acquire different melee weapons; these come in all shapes and sizes, from simple branches and torches, to skeletal arms, to rusty swords, double-handed blades and axes, and even elemental weapons. You can also grab Magic Rods for limited elemental attacks and a lot of these weapons have buffs applied to them that increase their attack and durability. Each handles differently as well; bigger weapons will deal more damage and break tough rocks but are painfully slow and you can’t use your shield at the same time. Eventually, you’ll be able to acquire the legendary Master Sword but, to even pull it from its pedestal, you’ll need at least thirteen permanent hearts (temporary hearts are no good) to yank it free and, though it’s the only weapon in the game that doesn’t break and you can shoot beams of energy if you have full health, it does run out of energy and become unusable for a few minutes.
Sadly, no shield or bow is as durable as the Master Sword as they’ll all eventually break.
Still, it’s doing better than the game’s shields; again, these come in all shapes, sizes, materials, and with different buffs but the difference is that you can’t ever acquire a permanent shield. The best you can hope for is to liberate a powerful shield from Hyrule Castle but I found I was too afraid to equip it in case I wasted it defending against a regular Bokoblin attack. You can also acquire a number of different bows; some of these shoot further than others or even shoot multiple arrows at once, which I found to be more of a hinderance than a help as I was constantly running low on arrows. You can pick up elemental arrows (Fire, Ice, and Shock), which are super useful against water and fire enemies, Bomb Arrows (which are great for rock-based enemies and bosses), and the super powerful Ancient Arrows. Any Ancient gear is the most powerful in the game, especially against bosses and the Guardians, but they’re extremely rare and expensive. You’ll also acquire various items of clothing, each of which has different benefits; some protect you from extreme cold, heat, and lightning, some allow you to swim faster or up your defence, attack, or stealth, and others are more cosmetic or needed to enter specific areas. You can mix and match them, pay to dye them different colours (which is largely pointless), and upgrade and strengthen them at a Great fairy Fountain. Some are acquired through Shrines and side quests and the only way you’ll ever get Link’s trademark outfits is if you’re patient, skilled, and dedicated enough to conquer all one hundred and twenty Shrines (or fork out for special Amiibos).
The various Runes replace traditional magic and allow you to progress and solve puzzles.
Your first task at the start of the game is to power up your Shiekhah Slate (an obnoxious device that resembles a tablet or Nintendo Switch) with four Runes: the Remote Bomb allows you to throw or place either a spherical or square bomb; Magnesis allows you to push, pull, and move around magnetic metal objects; Stasis freezes certain objects in place and allows you to attack them to build up kinetic energy and move them about; and Cryonis allows you to form and shatter ice blocks. Later, you learn another Rune ability, Camera, which allows you to take photographs to solve side quests and such and each of these can be upgraded to make them more powerful or useful. Since Breath of the Wild is one of the few Zelda games to not give you a magic meter or other actual items (like the hookshot), these Runes take their place and the bombs are especially helpful for dealing some extra damage and saving your melee weapon from wearing out as you can throw an infinite supply and a limited only by a brief bit of cooldown.
Link earns helpful temporary abilities by taking down the Divine Beasts.
Similarly, every time you conquer a Divine Beast, you are awarded with a Heart Container and a key item that will greatly assist you in your quest: Mipha’s Grace is one of the best as it will completely restore your health and award you with additional temporary hearts upon death; Urbosa’s Fury allows your spin attack to unleash an electrical blast, which can be great for stunning enemies; Daruk’s Protection protects Link with a protective aura for as long as ZL is held down and will parry incoming attacks to give you a window to attack; and Revali’s Gale allows you to charge up a jump by holding down Y and blast you high into the air with an air current. You can activate and deactivate these at any time but, honestly, I don’t know why you would do that; each also comes with a limited number of uses and a cooldown period, meaning you have to wait about ten minutes before you can use them again.
Additional Features: As I mentioned before, there are numerous side quests in Breath of the Wild and one hundred and twenty Shrines to find and conquer. The rewards for these vary from a few Rupees to new weapons and armour and, generally, it’s not always worth your time completing every single one of them unless you’re aiming for one hundred percent completion (which you thankfully don’t need to finish the game). However, the only way you’re going to see Link in his traditional outfit (or unlock the Dark Link outfit) is if you complete each of them; primarily, though, the side quests are there to emphasise how big and alive this version of Hyrule is and to strengthen your immersion in the game, so it’s entirely up to you, but it can lead to you acquire stronger weapons, armour, and some unique riding companions. Some of the Shrine challenges are very unique, though, like the one on Eventide Island that sees you stripped of all of your weapons and left to fend for yourself with whatever you can find as you strive to recover three orbs all without being able to save. Three others see you navigating labyrinths and one particularly long side quest sees you visiting specific areas of Hyrule to recover Link’s lost memories.
A number of sub-bosses and gigantic creatures can be found prowling around Hyrule.
Hyrule is also populated by a number of gigantic sub-bosses; be wary when you approach a big stone as it will probably come to life as a Stone Talus, which can only be felled by bringing it to its knees and climbing up it to attack the weak spot on its “head”. Far more frequently, you’ll come across the massive cyclopean Hinox; these are much easier to take on and defeat as you can stun them with a shot to the eye and attack them at will but they do have a tendency to rip up trees to swing at you and chase you almost relentlessly. Out in the desert, you’ll also encounter the Graboid-like Molduga, which burrow under the sand to attack you and are best tackled with your bombs. While you’ll also encounter three elemental dragons in your travels, these cannot be defeated and are simply there to cause destructive weather occurrences and to be mined for rare materials. I mentioned before that the ending is very anti-climatic and it’s true; it’s much more sombre and reflective than the massive celebration seen at the end of Ocarina of Time, for example, and it kind of felt like the developers either ran out of time or didn’t put much effort into the ending as the journey was the primary focus. When you finish the game, your save file gets a star marked on it but that’s it; you can return to your last save (which should be an autosave right before the final fight) so you can go after anything you’ve missed along the way but the only way you’re going to get additional content is if you shell out for the DLC. The expansion pass adds new gear, enemies, and challenges to the game and also includes an even harder story mode to play through but, since I struggled so much with the base game, I don’t think I’ll be paying for this any time soon.
The Summary: There’s no denying that The Legend of Zelda: Breath of the Wild is a stunning achievement for the series, and in videogaming; the game is massive, full of life and variety and things to do, and will keep you busy for hours on end (it took me at least thirty days just to clear the main story objectives). Never has Hyrule been bigger and more immersive; just travelling a short distance can be an adventure in itself and you’ll find yourself fighting tooth and nail against even the most basic of enemies for the smallest rewards but even a bundle of five arrows can be a blessing when you’re running short on supplies. The graphics are more than impressive, bringing the Zelda concept truly to life in a way that titles like Ocarina of Time and Twilight Princess hoped for but could never quite achieve; it never feels like anywhere or anything is off limits and you can travel to the highest, furthest points as long as you’re properly equipped and prepared without worrying about barriers or invisible walls. And yet…Breath of the Wild is one of the most frustrating an inaccessible videogames I’ve ever experienced. There really is far too much going on, way too much to think and worry about, and the simplicity and accessibility of earlier Zelda titles has been lost in service of appealing to fans of games like Skyrim. I think if Breath of the Wild had focused on one or two mechanics, or tweaked some of them a bit, it would have been much more enjoyable for me; as I said, not having every weapon break would be a good start, as would putting less focus on cooking and eating food to survive. In many ways, it feels like the most Zelda game ever but also, paradoxically, the least Zelda game ever as all the recognisable elements are there but they’re so drastically different, and the game is so dramatically difficult at times, that it was actually a turn off. I was expecting an epic, sprawling, immersive adventure and Breath of the Wild delivers but every battle is a stress as you can easily die or break your coveted weapons in the smallest of skirmishes, some mechanics like jumping, the frustrating instances of forcing you to use motion controls, and climbing can be a bit janky, as can the in-game camera and physics, and I just felt like the game was punishing me over and over again. To make matters worse, I didn’t even feel a cathartic sense of accomplishment after beating the game since the ending was so anti-climatic; I just felt drained and relieved and I’m hoping that approaching the remainder of the game’s Shrines and side quests in a more casual manner will allow me to think more highly of the game in time.
My Rating:
⭐⭐⭐
Rating: 3 out of 5.
Pretty Good
What did you think to The Legend of Zelda: Breath of the Wild? Where would you rank it amongst all the other Zelda titles, specifically the 3D adventures? Were you a fan of the new elements introduced in this game, the breakable weapons, and the difficulty and challenge offered by the game? Did you every conquer all the Shrines and which was your most, or least, favourite? What order did you tackle the Divine Beasts in and which of Ganon’s phantoms was the most difficult for you? Which area and/or race of the game was your favourite and what was your preferred clothing and weapon load out? What did you name your horse? Which Zelda game is your favourite and why? Whatever your thoughts on Breath of the Wild, drop a comment down below.
Upon the release of Pokémon: Blue Version and Pokémon: Red Version(Game Freak, 1996), a new craze swept through playgrounds across the world. An entire generation grew up either playing Pokémon, watching the anime, playing the trading card game, and watching the feature-lengthmovies as clever marketing and a co-ordinated release and multimedia strategy saw Nintendo’s newest franchise become not just a successful videogame franchise but a massively lucrative and popular multimedia powerhouse that endures to this day. Accordingly, February 27th is now internationally recognised as “National Pokémon Day” and a day for fans of the long-running and beloved franchise to come together in celebration of all things Pokémon.
Released: 15 November 2019 Developer: Game Freak
The Background: I’ve talked about Pokémon a few times but, until now, I haven’t actually sat down and done a proper review of one of the games; as I’ve indicated previously, Pokémon was an instant cultural phenomenon back when the games first dropped, taking playgrounds by storm and dominating almost every aspect of my generation through a slew of merchandise. I remember being so adamant about purchasing Pokémon: Blue Version that I bought it brand new rather than getting a cheaper copy of Pokémon: Red Version and my friends and I routinely played the game at break times at school or on the Nintendo 64 thanks to Pokémon Stadium (Nintendo EAD/HAL Laboratory, 1999). Although the developers originally intendedmy favourite games/generation of Pokémon, Pokémon: Gold Version and Pokémon: Silver Version(Game Freak, 1999) to be the final entries in the series, Pokémon videogames continued to be developed, with new features, improved graphics and mechanics, and a whole bunch of new Pokémon being introduced in each generation.
Pokémon‘s home consoles gameslargely diverted from the RPG formula of the main series.
However, in all that time, we never really got a proper version of Pokémon on home consoles; they were always spin-offs, battling games, or neutered versions of the main role-playing experience, which remained exclusive to Nintendo’s handhelds. Nintendo’s development of their Switch console changed that, however; thanks to the Switch’s unique ability to be both a handheld and a home console, players were finally able to experience a main series Pokémon game in glorious high definition with the release of Pokémon: Let’s Go, Pikachu! and Pokémon: Let’s Go, Eevee! (ibid, 2018) Though remakes of the first Pokémon games, the Let’s Go games (like pretty much all Pokémon games) proved both successful and popular and, eager to keep their unstoppable cash-cow afloat, Game Freak began developing an original main series Pokémon title for the Nintendo Switch. This time, much to my interest and appreciation, the games would be set in a new region that was heavily inspired by locations in the United Kingdom, featured the return of mechanics from previous Pokémon games alongside some all-new ones, and would later expand upon its limited roster of Pokémon through a number of expansion packs.
The Plot: After years of waiting, the time has come for you and your childhood friend, Hop, to receive your very own Pokémon from Professor Magnolia. After Hop’s brother, Pokémon League Champion Leon, endorses your entry into the Gym Challenge, you prepare to journey across the region of Galar to earn a spot in the Pokémon League but, after a fateful encounter with the legendary Zamazenta, you also stumble upon a plot to use Galar’s precious Wishing Stars to cause Pokémon to enter a rampaging Dynamax state and bring about the apocalyptic “Darkest Day”!
Gameplay: I had (have? It’s honestly hard to tell these days) a friend once who told me that the reason he fell out of playing Pokémon was that the games hadn’t really changed since the days of Blue and Red. Personally, I find that a comfort; it means that if you haven’t played a Pokémon game in some time, perhaps years, you can still pick up a title like Pokémon Shield and know exactly how to play as the core gameplay mechanics are basically identical to how you remember them. Accordingly, Pokémon Shield is a role-playing game (RPG) in which you play as a young, up-and-coming Pokémon Trainer; as you explore Galar with your chosen Pokémon, you’ll encounter wild Pokémon which must be fought and defeated (or captured to be added to your team) and other Pokémon Trainers.
Battle other Pokémonto level-up, learn new moves, and increase your Pokémon’s stats.
Battling other Pokémon earns your Pokémon both experience points (EXP) and effort value points (EVP); you can track your EXP using a handy gauge beneath your Pokémon’s hit point (HP) bar and, once it is full, your Pokémon will grow a level and its statistics (Attack, Defence, Speed, and the like) will grow depending on what sort of Pokémon you battled and the otherwise-hidden EVP you gained from each battle. When your Pokémon level-up, they may learn new moves; since each Pokémon can only know four moves at a time, it pays to think ahead about what moves you want your Pokémon to have. For example, you might have a Pokémon with a high Special Attack stat; if this is the case, it’s probably better to not load it up with Attack moves as it won’t deal as much damage. Conversely, your Pokémon may have a low Defence or Speed stat so you might want to invest in a few moves that raise these stats in battle (Iron Defence, Dragon Dance, etc). Through proper EVP training, though, you can tailor Pokémon to battle how you wish but it does take more effort; personally, I like my Pokémon to be proactive and aggressive, with a range of attacks suited to their strengths rather than worrying about raising stats. In the course of levelling-up, your Pokémon may also evolve; this process allows some Pokémon to assume an entirely new form, gaining significant stat boosts at the same time. Evolution is sometimes tied to other factors, such as using special stones, bonding with your Pokémon, having them hold a special item, the weather and time of day, or through trading them with a friend. Battling, capturing, and levelling-up Pokémon is essential not just to making your team stronger and earning Pokémon Dollars to spend on various items but also to complete the PokéDex. Each time you encounter a Pokémon, some of its data will be recorded so you know where to find it and what “Type” of Pokémon it is but you’ll only complete its PokéDex entry by capturing it yourself.
Always ensure that you have the type advantage and make full use of your Pokémon’s abilities.
I mentioned Pokémon “Types” just then so I’ll get into that now; each Pokémon can be either one or a combination of two types and using type advantage is key to becoming a stronger and more capable Pokémon Trainer. Because of the tried-and-tested type mechanic, Pokémon battling is, essentially, like a game of rock, paper, scissors: Fire-type Pokémon are super effective against Grass- and Ice-types, for example, while Grass-types have the edge over Water- and Rock-types, and Water-types will make short work of Fire- and Ground-types. It’s a simple system that you can usually gauge by considering the colour and location of the Pokémon you encounter (a blue-coloured Pokémon on or in water is probably going to be a Water-type, for example) but one neat addition to this game is that the next time you encounter a Pokémon, whether you’ve caught it or not, the game will tell you which of your moves are effective or ineffective against it, making battling much less a case of trial, error, and experience. Being that Game Freak love to mix things up with each new generation and region, familiar Pokémon have also been given new typings in Pokémon Shield (Rapidash, for example, is traditionally a Fire-type Pokémon but is now a duel Psychic/Fairy-type Pokémon so it’s better to use Ghost- or Dark-type attacks) and, as is the standard now, Pokémon also come with different “Natures” and “Abilities” which give them slightly different traits or abilities in battle (such as raising stats causing or removing weather effects, or powering up certain moves).
Inflate your Pokémon to giant size with the new “Dynamax” mechanic.
Pokémon Shield’s big new thing is the “Dynamax” mechanic and the game’s Wild Area; normally in Pokémon games, you travel from town to town using “Routes”, passing through caves and forests and such along the way and, while you still do that here, Pokémon Shield introduces a vast open area filled with a variety of wild Pokémon and shifting weather patterns. Here, you can catch and train up your team but you’ll also encounter glowing Pokémon Dens; if these have a shaft of red light coming from them, you can participate (alone or with computer-controlled or online players) in a “Max Raid Battle” against a Pokémon that has entered the Dynamax state and grown to gigantic size. In these battles, which also occur in each of the game’s Gym Leader battles, you have the opportunity to Dynamax one of your own Pokémon; essentially the same thing as “Mega Evolution” from the previous games, Dynamaxing may allow you to perform more elaborate moves but it only lasts a few turns and you can just as easily defeat a Dynamax Pokémon with a normal Pokémon. It adds a slight wrinkle to the usual gameplay, though, as you’ll earn better rewards from such battles, like Technical Machines (TMs) and Technical Records (TRs) to teach your Pokémon new moves, special stones and items, and Watts (which is, annoyingly, a separate form of currency).
It’s easier than ever to find, battle, and capture wild Pokémon.
I glossed over it earlier but, as always, one of the main aims of the game is to capture Pokémon; you won’t get very far without a diverse team of at least four different Pokémon types (though it is conceivable) so it’s highly advised that you catch a variety of Pokémon and teach them diverse moves to make things easier on yourself. Thankfully, you can now see wild Pokémon on the map, meaning random battles are a thing of the past; you can choose to avoid or run past wild Pokémon, sneak up on them to battle rarer ones, or whistle or ring your bike’s bell to attract them, which is all very helpful if you’re in a rush or want to grind for levels. Pokémon are caught in the usual way; you battle a wild Pokémon until its HP is low (preferably in the red and with a status effect (paralyse, sleep, etc) inflicted upon them) and then throw one of the game’s many different Poké Balls. The lower the level of the Pokémon, the easier it is to catch and you’ll be able to catch higher level Pokémon as you defeat the Galar Gym Leaders; however, it has to be said that capturing Pokémon has become pathetically easy over the years. Back in the day, I would waste my entire stock of Poke Balls on some Pokémon but, now, you can often capture a Pokémon with your first ball without even weakening it, which severely reduces the fun and challenge of the game.
There’s so much hand-holding that it’s almost insulting.
Speaking of which, Pokémon Shield has to include some of the most annoying and unnecessary hand-holding I’ve ever experienced; Pokémon games have often employed mini tutorials and hand-holding techniques but Pokémon Shield really takes the cake as you’ll be constantly lectured on how to battle, how to capture Pokémon, what each building is in a town, where to go, and what to do. There’s never any danger of you getting lost or not knowing where to go next as characters spell it out for you, force you where you need to go, block your exit until you’ve fulfilled an objective, and your handy-dandy map constantly displays your current objective and where you need to go. I’m sure it’s helpful for young or new players but I’ve been playing Pokémon since the start so it would have been nice to be able to turn this feature off.
Graphics and Sound: Thanks to the power of the Nintendo Switch, Pokémon has never looked better; no longer forced into the classic top-down RPG perspective, the game makes full use of its engine to display a number of dynamic camera angles (even giving you full camera control in the Wild Area), and every time you visit a new town or area, you get a nice little look at what the location has to offer.
Locations draw heavily from the varied architecture and landscapes of the UK.
Locations are based on those from right here in the UK; accordingly, there’s a lot of beautiful countryside (most of it barraged by ever-changing weather conditions), farm land, little towns and villages, and large, industrial towns based on the likes of London. Like the UK, Galar is united through a comprehensive rail system that allows you to quickly travel between towns; the stations are reminiscent of those here in the UK and you’ll also see other similar landmarks and familiar elements, such as a clock tower, an ostentatious ferries wheel, red phone booths, and Victorian/Gothic architecture. I guess because of this UK-influence, there’s a heavy emphasis on football and football-inspired iconography, meaning you’ll take on the Gym Leaders in massive stadiums packed with cheering crowds which really helps up the scale of these battles. The whole game has the usual anime-inspired aesthetic that Pokémon has been known for only now it’s heavily infused with some steampunk influences because of the nature of the region as well as being sleek and modern when in Galar’s bigger towns and featuring crystalline mines and more fantastical locations like Glimwood Tangle. Characters are all well modelled and expressive; while the game still doesn’t use voice acting, their personalities are all expressed through their dialogue boxes (featuring an abundance of British slang which really appealed to me; characters often casually call each other “Mate” or “Luv” and speak with recognisable British quirks and expressions) and their body language.
We’ve got some funky Pokémondesigns, as is to be expected at this point.
Though the base game “only” features four hundred of the eight hundred available Pokémon, each one has their own fully-rendered model with unique animations; add to that the various different regional forms, new evolutions, and the Dynamax and Gigantamax forms and you have plenty of little critters to choose from and keep you busy. As mentioned, they all appear on the overworld as well, making the Pokémon world finally feel large and alive, and they all have their own unique cries (with Pikachu still being the only one to speak its name, such is its popularity and appeal) and the new Pokémon and forms available here aren’t too bad. We’ve got such things as a football-loving rabbit, a bongo-drumming ape, fluffy sheep, cute little electric puppies, chubby chipmunks, and anthropomorphic lumps of glowing coal. Then there’s weird shit like a haunted teapot, an animated apple, and penguins with ice cubes on their heads! I have to say, though, that I remain unimpressed with a lot of the names for these new Pokémon; I mean, come on, a Fire-type rabbit and you call it “Cinderace” instead of “Hareblazer”!? The legendary Pokémon aren’t all that much to shout about either; the mascots, Zacian and Zamazenta, are okay, I guess, and Eternatus is pretty bad-ass but the majority of the other legendaries are locked behind the pay wall of the game’s expansion pass. In terms of sound, not much really jumped out at me; the classic Pokémon games were full of catchy little tunes that brought Routes, towns, and battles to life and while that is true of Pokémon Shield, none of it really stuck with me…with the exception of the Gym Leader battle theme! This rocking, energetic piece changes tempo depending on how well you are doing and ramps up once the Gym Leader busts out their Pokémon’s Dynamax form; this theme alone really got the blood pumping for those battles and worked with the stadium setting and roaring crowd to really make the stakes feel high for a change.
Enemies and Bosses: As you explore Galar, you can choose to battle the various Wild Pokémon that are wandering throughout the overworld; these will hide in grass or underwater, run out into the street, chase you (or run from you), or more powerful variants may pop up in the Wild Area. In each instance, you have much more flexibility about engaging or fleeing from these battles; when you battle, you’ll still earn EXP even if you capture the Pokémon and, in a change that I’m sure irked many, all of your Pokémon will gain some EXP from every battle (but only those that actually participate will gain the most and the EVP from each battle). Like all Pokémon regions, Galar is also populated by other Pokémon Trainers; these days, the game clearly shows you a fellow Trainer’s line of sight so you can try to sneak past or avoid them but I recommend battling every one you come across to level-up your team faster and earn more money. Pokémon Trainers are generally armed with only one or two Pokémon in the early going but eventually have more (and far stronger) Pokémon in their team.
Team Yell are not Team Rocket, that’s for sure; they’re just a bunch of try-hard fanboys.
When battling, be sure to keep an eye on the Power Points (PP) of your Pokémon’s moves; each move has a certain amount of PP and, when it’s spent, you can’t use that move anymore and may be reduced to literally struggling to survive. Similarly, as with many Pokémon games, you may have to battle two trainers at once in a double battle either alone (with two of your Pokémon) or with a computer-controlled partner (usually Hop). In these battles, it’s important to consider the effect your attacks may have on your partner and the game encourages players to use moves like Helping Hand or Wide Guard to help protect or buff your partner (of course, because I adopt an aggressive approach to battling, I don’t do this). As in every other Pokémon game, you’ll also run afoul of a team; in this case, it’s the punk-rock-inspired Team Yell. Unlike other teams, though, Team Yell aren’t out to steal or manipulate Pokémon or to destroy the world; instead, they are the cheerleaders and groupies for one of your rivals, Marnie. Led by Marnie’s older brother (and Gym Leader), Piers, Team Yell generally cause a nuisance by blocking your path or forcing you into a single or double battle at various points but are little threat compared to the likes of Team Rocket or Team Magma/Aqua.
Hop, your childhood friend and rival, makes up for his lack of skill with enthusiasm.
As I alluded to above, the game also includes the standard rival mechanic; for the most part, your rival is Hop, your childhood friend, with whom you have a friendly rivalry with. Hop will accompany you into new locations and areas, often battling alongside you or while you’re battling someone else, and is extremely enthusiastic in following in his brother’s footsteps and besting the Gym Leaders before you. As a result, when you encounter Hop he will generally challenge you to a Pokémon battle but, as the plot eventually reveals, Hop is no Blue or Silver; hell, he isn’t even a good substitute for May! You’ll have no trouble at all wiping the floor with Hop each and every time you battle him and he actually drags you down in double battles since he’s so useless; the only time he’s a threat is right at the end of the post-game when he’s captured Zacian and, even then, it is that legendary Pokémon that causes you the most trouble as opposed to Hop himself. Marnie and Bede are also two of your rivals, though you encounter and battle them far more infrequently than Hop. Both share the same desire as you and Hop to conquer the Gym Challenge and, though Bede is disqualified from the Challenge after he steals a bunch of Wishing Stars, he returns to interrupt the finals of the Champion Cup to battle you once more. However, if you have a well-balanced team at a high level, neither of these rivals will really cause you much of a headache.
Before you can take on the Gym Leaders, you’ll have to complete their various missions…
That strategy also applies to the game’s Gym Leaders, who act, as always, as the closest thing Pokémon has to “bosses”. You must defeat each of the eight Gym Leaders to earn Badges and qualify for the Champion Cup; each time you defeat a Gym Leader, they award you with a TM, some clothes to wear, and you earn the right to capture and own Pokémon of a higher level. There’s a pretty big gap between the start of the game and your first battle against Milo, meaning that, if you’re anything like me, you run the risk of your Pokémon being over-levelled and thus ignoring your commands so, again, it’s best to have a diverse team at different levels to ensure that doesn’t happen until you have acquired the right badge. Before you can battle a Gym Leader, you’ll have to take on their Gym Mission; before, you used to just walk into the Pokémon Gym and battle the Gym Leader’s disciples, maybe solving a puzzle or two, but the games have increased the puzzles and requirements to reach the Gym Leader over the years and Pokémon Shield is the culmination of that. As a result, you’ll be herding Wooloo around, solving a water puzzle, earning points in double battles while your partner tries to scuttle you, navigate a maze, answering questions and battling a gauntlet of Trainers like it’s a stage audition, battle members of Team Yell down a dingy alleyway block by Mr. Mimes, and having to conquer three Trainers in double battles. The challenge of these missions varies and ranges from ridiculously easy to unnecessarily annoying but the end result is the same; eventually, you’ll get dressed into your special stadium attire and head out onto the Gym Leader’s stadium to challenge for a Gym Badge.
Even with their Gigantamax Pokémon, the Gym Leaders are easily bested.
When battling Gym Leaders, the battles are given more variety thanks to the use of more dynamic camera angles which alternate between shots of the battle and the crowd and include televised shots. Again, though, anyone who has played Pokémon before has a distinct advantage in these battles; if you’re anything like me, you’ll grind and train between Gym battles and ensure that your team is as strong as possible to take full advantage of each Gym Leader’s chosen type. Milo uses Grass-types, Nessa uses Water, Kabu uses Fire, Allister uses Ghost-types, Opal and Bede favour Fairy-types, Melony uses Ice-types, Piers and Marnie use Dark, and Raihan uses Dragon-types. You always know which type each Gym Leader uses before you challenge them and the game smartly places wild Pokémon in the nearby region that will give you an advantage in battle that, and your training, means that you can easily sweep through each of the Gym Leaders without breaking a sweat even when they bust out their Gigantamax Pokémon. Of course, it wouldn’t be a Pokémon game without some kind of nefarious deed going on; in this case, Rose, president of Macro Cosmos and the chairman of the Galar Pokémon League, has been gathering the Wishing Stars than enable Dynamaxing in order to bring about the fabled Darkest Day through mass Dynamaxing and the awakening of the legendary Pokémon, Eternatus. Before you can stop him, you’ll have to battle his co-conspirator and secretary, Oleana, who leads you on a wild goose chase that sees you battling corrupted League Staff in order to get a key to confront Rose; you’ll then have to battle Oleana herself who, despite the diversity of her team, is easily bested if your team is well-trained and varied enough to match her Pokémon.
When Rose awakens Eternatus, only you (and some Legendary Pokémon) can quell the beast.
When you finally confront Chairman Rose deep within the Hammerlocke Energy Plant, you won’t be faced with much of a challenge since all of his Pokémon are Steel-types; this means that he is easily decimated with a Fire-type Pokémon but, after he is defeated, you are forced to battle the enraged Eternatus after Leon fails to capture it. Eternatus appears in two forms, its regular form and its horrific Eternamax form; you can’t capture it in its base form or use Dynamax when battling either of its forms and you’re forced to team up with Hop, Zamazenta, and Zacian to whittle its HP down and capture it (with, again, a ridiculous amount of ease; time was that legendary Pokémon were nigh-on impossible to catch but modern Pokémon games make them a breeze!) After all that palaver is taken care of, you finally get to finish off the Champion Cup; in a change of pace, rather than tackling the Elite Four of the region and the regional champion, Pokémon Shield has you participate in a three round, single-elimination tournament against the other Gym Leaders to earn the right to face Leon. This is a bit disappointing as, rather than facing off with Galar’s best and brightest Trainers, you end up doing what is, essentially, a “boss rush”. On the plus side, Leon can actually be a tough battle thanks to the strength and variety of his Pokémon (though, to be fair, I only found this because I started with the wrong Pokémon in the lead of my team). Once you defeat Leon and become the Champion, the credits play pretty much right away (there’s no Hall of Fame ceremony here) and you move on to the post-game.
Some of the game’s toughest challenges await in the post-game.
In the post-game, you have to travel all around Galar revisiting the Pokémon Gyms to quell the anger of various out-of-control Dynamax Pokémon; for the first few battles, you’ll fight alongside Piers, Hop, and another Gym Leader but, for the rest, you go it alone. Luckily, though, by this point your team should be well in the late-level-fifty or early-sixties so these battles aren’t much of a hassle. You’re also introduced to two new antagonists, the ridiculously-named Sordward and Shielbert, who see themselves as the rightful kings of Galar and are actually pretty tough since their Pokémon are at level sixty. It’s actually beneficial, for the first time ever, when you battle them alongside Hop, and once you defeat them you’ll get to battle and capture Zamazenta. Unlike Eternatus, Zamazenta is not so easily caught in the usual assortment of Poké Balls but, luckily, you can just toss your Master Ball at it to snag it without any effort at all.
Power-Ups and Bonuses: As you explore Galar, keep an eye out for red and yellow Poké Ball-like items on the ground and twinkles of light; picking these up will award you with items, TMs, ingredients, and other helpful pick-ups to aid you in your battles. You can also use for Pokémon Dollars and Watts to spend in various ways; Poké Marts are now a thing of the past, with these shops now being located inside of Pokémon Centers, but you can also spend your money at various travelling merchants across the map and in clothing stores. You can buy and pick up helpful items that will heal a certain amount (or all) of a chosen Pokémon’s HP, restore their PP, revive them from fainting, or heal them of any detrimental status effects. You can also acquire different types of Poké Balls; the standard variant is decent enough in the early going but you may need to utilise the Great and Ultra Balls to capture higher-level Pokémon or use special balls to increase your chances (Dive Balls for Pokémon caught while fishing, for example, or Net Balls for Bug-types). You can also get your hands on items that increase your Pokémon’s level, Dynamax level, stats, PP, and EXP or which can be used once in a battle to raise certain stats or increase certain abilities.
You have many different options for travelling around Galar.
These days, Hidden Machines (HMs) aren’t really a thing anymore so you don’t need to worry about wasting a move slot or a member of your team with moves like Surf or Fly. Instead, you can call upon a Flying Taxi to fly around the map and upgrade your Rotom Bike to cross over water; the Rotom Bike is far faster than your usual jog, as well, and can be further upgraded to go even faster. You can still get TMs, though, which can be used multiple times to teach new moves to your Pokémon. TRs are a new addition and are primarily earned through Max Raid Battles and spending Watts; these break after use, though, so be sure to spend your Watts wisely.
Dynamaxing is cool but somewhat limited and hardly a requirement.
Your biggest power-up in Pokémon Shield, besides the usual evolution mechanic, is the new Dynamax mechanic. However, Dynamaxing is quite limited; unlike Mega Evolution, you can only Dynamax at certain specific points in the game and it is, honestly, rather pointless. It’s impressive to see and fun to behold two giant, goofy-looking Pokémon butting heads but, as I mentioned, you can defeat Dynamax Pokémon with a regular Pokémon as long as you’re strong enough and have the type advantage. Some Dynamax Pokémon make things difficult by putting up a barrier that must be whittled down but, otherwise, it’s a fun and interesting new feature that, I feel, is a bit squandered and wasted because of its limitations.
Additional Features: It’s a Pokémon game so, naturally, there is a lot to do; most of these additional features are holdovers from previous Pokémon games: battling, capturing, and evolving Pokémon; any Poké Ball having a random chance of capturing a Pokémon without fail; leaving Pokémon at the Day Care to breed new Pokémon; customising your avatar’s gender, hair style, and clothing at the start of the game and throughout by buying new clothing; meeting the game developers in a hotel; using the menu screen to save, view items and your map; and customising your Pokémon team placement, moves, and markings, and acquire various items through the online Mystery Gift function.
I must have skipped or missed the point of collecting League Cards…
There are, however, some changes, as you might expect; characters will award you with their League Cards (though I’m not sure of their purpose; it seems you can swap and trade them online, though) and you can also customise your own League Card using the PC in the Pokémon Center. You’ll also find the Name Rater, Move Deleter, and Move Reminder non-playable character (NPC) in the Pokémon Center; amalgamated into one character, you can change your Pokémon’s nickname and delete and relearn moves as often as you like with this NPC. Furthermore, you can press Y during battles to see what your moves will do and get a snapshot of any status and type ailments you need to be aware of and press X to throw a Poké Ball without having to access the in-game menu; your PokéDex even offers you recommendations for Pokémon to catch in the immediate area to help you take on upcoming Trainers and Gym Battles and every time you acquire an item for the first time, a little text box tells you what it is in another case of helpful hand-holding. Some of the game’s additional features are more fun and useful than others; when it’s your birthday, the Pokémon Centre NPCs will make a big fuss of you, which is a nice touch, but then you can also sit on chairs and benches for absolutely no reason or benefit other than immersion. You eventually acquire the ability to access your PC boxes remotely so you can swap your team out on the go, which is useful, and, while you can retake the Champion Cup over and over and even invite specific characters to compete against you in it, you still can’t rebattle previously defeated Pokémon Trainers.
Toss it all in a pan, whip up a curry, and get a fancy medal for your troubles.
There is a startling amount of online connectivity in Pokémon Shield; when connected to the internet and in the Wild Area, other players will spontaneously appear to join you in Max Raid Battles and offer helpful items. You can also battle and trade with others players online, as usual, but you’ll need to pay for the Switch’s online service to do any and all of these things, which is a real greedy move on Nintendo’s part as you never had to do that in the previous games! You can also set up a tent at any time, and may encounter other player’s Pokémon Camps; here, you can “speak to” and play with the Pokémon in your team to improve your bond with them. Doing this, and being a good, consistent trainer, means your Pokémon try harder in battle and will land more critical hits, keep themselves from fainting, or even shake off status effects to please you. In the Pokémon Camp, you can also take part in the game’s newest mini game: curry making. By exploring the overworld and shaking trees, you’ll acquire a variety of berries and other ingredients to throw into a cauldron and whip up a variety of curries. While camping gains your team some EXP by default, curry will provide them with a lot more EXP and also restore their HP; certain NPCs will also rate and reward your curry-making skills and you can make curry with other players if they join you in a camp. Furthermore, by accessing the PC, you can send your Pokémon off on jobs to earn them some EXP outside of battling (though I never actually bothered with this).
To get the most out of the post-game, you’ll need to pay for the expansion pass…
You can also acquire rewards by using the Lotto ID on any PC, which will randomly check the identification numbers of your Pokémon and award a prize if it matches, take part in the Rotom Rally to race through the Wild Area collecting balloons for boosts and time, or visit the various cafés across Galar once a day to compete in a double battle for additional rewards. As you conquer the Gym Leaders, you’ll also acquire fans; NPCs will cheer you on when you roll into the stadium and congratulate you after each victory, which is nice, and you are often given the choice of a couple of responses to in-game dialogue but it doesn’t really affect the story in any meaningful way so go nuts and tell that loser Hop what you really think about him! As mentioned, Pokémon Shield also continues the tradition of featuring some post-game content; this sees you revisiting the Galar Gyms to battle Dynamax Pokémon, opposing Sordward and Shielbert, and mainly exists to give you the chance to capture Zamazenta. While you can still use fossils to resurrect long-extinct Pokémon, there are no roaming legendaries to be found in the base game and the closest the game has to a powerful Super Boss is the aforementioned battles against Zamazenta and Hop. Once you clear the post-game, the Battle Tower opens up and you can take on its level-capped challenges to rise up the ranks, earn Battle Points (BP), and acquire rarer items but I’ve never liked the Battle Tower so I didn’t spend much time there. Honestly, Pokémon Shield’s post-game is severely lacking, especially compared to other Pokémon games; this may be because Nintendo are charging players £20 to expand the Galar region with new areas, Pokémon, forms, and challenges with their expansion passes, which is a bit of a piss-take and I am honestly shocked at how greedy Nintendo have become!
The Summary: It’s been a while since I played a main series Pokémon game; I was pretty happy to be all but done with the franchise before I got my Nintendo Switch but revisiting the world of Pokémon is like meeting an old friend you’ve lost touch with. While there are a few new mechanics here and there to make things interesting for long-time players, Pokémon remains as accessible as ever thanks to the core gameplay mechanics staying largely the same even all these years later. All that’s really changed is the presentation and, to be fair, Pokémon Shield looks fantastic and really increases the scope and size of its world to make you finally feel totally immersed in a live, breathing environment. Unfortunately, for every good idea Pokémon Shield has, there are a few nitpicks that drag it down a bit: Dynamax is an interesting mechanic and I do prefer it to Mega Evolution in a lot of ways but it’s far too limited, there’s way too much hand-holding for my tastes, you still cannot have rematches with NPCs and, while you can encounter other players in the Wild Area, Nintendo still refuse to let you download an NPC of your friends into the game to act as a rival, and the game is maybe too helpful with all of its new features, meaning that there really isn’t much challenge for veterans of the franchise. Still, the presentation is great, especially in the way the game handles battles against Gym Leaders, and it is a top-class game in its own right…I just wish Nintendo hadn’t gotten so greedy and forced you to pay for the online features and post-game content.
My Rating:
⭐⭐⭐
Rating: 3 out of 5.
Pretty Good
What are your thoughts on Pokémon Shield? Perhaps you bought Pokémon Sword instead; if so, why was that and which of the two do you prefer? Which starter did you pick and why, and who made it on to your final team? What did you think to the Dynamax mechanic and the way the game presented Gym battles? What features did you like, or dislike, or would you like to see return to the series? Were you also annoyed at the hand-holding in the game or do you like always knowing exactly what to do and where to go? What did you think to Hop and the post-game content? Are you planning on buying the expansion pass? Which Pokémon game, generation, and creature is your favourite and why? How are you celebrating National Pokémon Day today? Whatever your thoughts, drop them in the comments below.
On 21 February 1986, The Legend of Zelda (Nintendo EAD, 1986) was first released in Japan. The creation of legendary game designer Shigeru Miyamoto and Takashi Tezuka, The Legend of Zelda launched one of Nintendo’s most popular franchises, with its silent protagonist, Link, and his vast fantasy world of sword and sorcery not only enduring over time but constantly evolving and improving as the series progressed.
Released: 7 June 2011 Originally Released: 21 February 1986 Developer: Nintendo Original Developer: Nintendo EAD Also Available For: Family Computer Disk System (Famicom), Game Boy Advance, GameCube, Nintendo Entertainment System (NES), Nintendo Switch, Nintendo Wii, Nintendo Wii U
The Background: The Legend of Zelda was created by designer Shigeru Miyamoto (the man responsible for Nintendo’s popular mascot, Super Mario) and Takashi Tezuka; in fact, Zelda and Super Mario Bros. (Nintendo EAD, 1985) were developed simultaneously and so, to separate the two games, Zelda was purposely made far less linear and based around both exploration and experimentation, with Miyamoto drawing inspiration from his childhood love of exploring forests and caves. Although players are free to name the game’s protagonist, he was dubbed “Link” to suggest an emotional “link” between the player and their avatar and his story was framed as a “coming of age” tale that would allow the player to grow alongside their silent, but by no means less iconic, game character. The Legend of Zelda was hugely successful for Nintendo, with the game selling well over 6.5 million copies and Nintendo even commissioned a special gold cartridge variant for its North American release. The game was met with universal praise during its release and is stillregarded as one of the greatest adventure game of all time. Although I was aware of the franchise thanks to the much-maligned animated series, being a SEGA kid growing up I didn’t play a Zelda title from start to finish until I got The Legend of Zelda: Link’s Awakening (ibid, 1993). This was enough to hook me on the franchise, however, which grew to a deep affection thanks, of course, to The Legend of Zelda: Ocarina of Time(ibid, 1998). The original title, though, had always eluded me so, with this year marking the game’s thirty-fifth anniversary, I figured now was as good a time as any to sit down and give it a go.
The Plot: The peaceful kingdom of Hyrule is suddenly invaded by the malevolent Ganon (or “Gannon”, as he’s referred to in-game) and his monstrous army. Having already stolen the Triforce of Power, one part of the legendary Triforce, he kidnaps Princess Zelda to acquire the Triforce of Wisdom. However, after she separates the Triforce of Wisdom into eight fragments, it’s up to Link, a plucky young boy from the forest, to journey across the land, recover the Triforce fragments, and put an end to Ganon’s dreams of world conquest.
Gameplay: The Legend of Zelda is a 2D, top-down action/adventure game set in the fantasy land of Hyrule. One of the few NES titles to feature a battery back-up save feature, players can create one of three save files and save their progress whenever they die in the game, which is a necessary feature given how large the game is. Unlike the majority of Zelda games, though, the name you give to your save file isn’t reflected in-game; when you rescue Princess Zelda at the game’s conclusion, she refers to you as “Link” no matter what you title your save file, making this original adventure one of only a handful of Zelda titles to actually use that name to refer to its green-garbed protagonist.
Defeat enemies with your trusty sword, which shoots out beams when you’re at full health.
Once you’ve created your save file, you are immediately dropped into Hyrule and left to fend for yourself. Link moves in a grid-like pattern across the map and comes complete with a shield that will block most enemy projectiles as long as he is facing them. If you enter the cave at the top of the game’s first screen, you’ll acquire a sword, allowing you to dispatch most enemies in one of two ways: the first is a tried-and-tested sword swipe and the second is an energy bolt that fires from your sword as long as you are at full health, which really helps to clear the screen of enemies from a safe distance. Defeated enemies may occasionally drop hearts or fairies to refill your health, bombs to allow you to deal explosive damage to enemies and uncover secret passageways, or Rupees (or “Rupies”/”Rubies”), the in-game currency. Link can hold a maximum of 255 Rupees and will sporadically stumble across merchants hidden in dungeons or caves who will sell him a variety of items, weapons, and power-ups.
The majority of Hyrule and the game’s dungeons are accessible right from the start.
As you might expect from a Zelda title, the game’s overworld is pretty expansive, covering forests, mountains, and beachfronts. A mini map is present in the top-left of the game’s heads-up display (HUD) but, out in the overworld, is next to useless since all you can see is a little green dot (representing you) on a blank, grey background. In dungeons, you can collect a Dungeon Map to make navigation a lot easier but, again, it’s not as helpful as it could be since there’s no distinction between floors, meaning it’s very easy to get lost or turned around or to wander around Hyrule with no idea of where you are or need to go. Your goal in the game is to visit eight dungeons (referred to in the game as “Levels”) and retrieve the eight pieces of the Triforce of Wisdom; you can track your progress towards this goal from the game’s inventory menu and non-playable characters (NPCs) can offer you (extremely) vague hints about how to progress but, otherwise, much of the game’s adventure is in your hands. As a result, pretty much the entirety of Hyrule is available for you to explore and visit as long as you have, at least, some bombs available to you. This means that it’s very easy to wander around the overworld and stumble into the game’s harder dungeons before you’re ready, which can add an additional layer of challenge to the game if you’re brave enough to attempt to tackle these tougher levels out of sequence. It also means that you can acquire some of the game’s more powerful and useful weapons early, at the very least, though some can be useless without others (I, for example, acquired the Book of Magic long before I got the Magic Rod, making said book all but useless).
Zelda‘s dungeons are largely indistinguishable beyond their colour palette and enemy placements.
Given that I played through 90% of this game blind and without a guide, I have to say that that this is all-but-inevitable as, while the game’s first two dungeons are easily found almost right next to each other, it’s entirely up to you to explore your surroundings so it’s pretty easy to stumble into the harder levels when you only have three of four hearts in your health bar. As big as Hyrule is, though, many of the dungeons are actually quite small; inside, you’ll be tasked with defeating enemies and solving very (very) simple puzzles (generally as taxing as pushing a certain block or bombing a certain wall) to open doors, or collect keys to open doors, grabbing a new weapon or item, Dungeon Map and Compass to aid with your navigation within the dungeon, and then defeating a boss to extend your health bar and retrieve a piece of the Triforce of Wisdom. One interesting feature I was surprised to see was that you can carry keys from one dungeon to another, which can give you an edge with the game’s harder dungeons and allow you to take shortcuts here and there. Gameplay follows a very simple formula from start to finish: explore the immediate area, uncover secrets, find a dungeon, and retrieve a piece of the Triforce of Wisdom. The only time the gameplay is changed up is when you descend down hidden staircases inside the dungeons and enter a short 2D area where the level’s weapon or key item can be found. Otherwise, gameplay variety comes from utilising different weapons to battle enemies and bosses or factoring in the erratic patterns of the game’s enemies, who like to attack in something resembling a co-ordinated effort or en masse, requiring both some strategy on your part and a healthy supply of hearts in order to survive the damage put out by the game’s later enemies. As a result, Zelda’s difficulty is, largely, up to you; if you clear Level-1 and then stumble into Level-8, it’s probably best to leave that later dungeon and seek out Level-2 to 3 to give yourself a better chance of success.
Graphics and Sound: The Legend of Zelda is a very basic 2D adventure; like Super Mario Bros. and many videogames of that era, the graphics are extremely simplistic and, largely, require quite a bit of imagination and suspension of disbelief on the part of the player. Link is immediately and instantly recognisable against the game’s many different backgrounds and compared to the enemy sprites thanks to his green tunic and cute little sword and shield but, obviously, you’re not going to see many frames of animation or layers of detail in this game. Additionally, I found that the game struggled a bit when there were a lot of sprites onscreen and/or sounds playing at the same time; the iconic Zelda theme plays constantly on the overworld and, when Link is low of health, the game emits a constant beeping to inform you and enemies make little noises when they shoot at you or are destroyed and all of these sounds can blend into each other and the game slows down noticeably when a hoard of Lynels incessantly shoot projectiles at you.
Though limited by the hardware of the time, Zelda is a vast and ambitious adventure.
Despite the game’s limited graphical capabilities, Hyrule is surprisingly vast, varied, and detailed at times; the entire land is surrounded by sea that you cannot cross and made up of forests, mountains, beaches, and icy regions. You’ll have to navigate a series of repeating, identical screens in a maze-like puzzle, dodge boulders as they rain down from Death Mountain, explore a haunted graveyard, cross the water using a raft, enter a waterfall, descend into caves, and cross beaches while Leevers randomly pop out at you as you explore looking for merchants, additional items and weapons, and the elusive dungeon entrances. Dungeons are generally recognisable in the overworld but, sometimes, you’ll enter what appears to be a dungeon only to find a merchant or other NCP. When you do find a dungeon, you’ll be treated to a different in-game tune, which is refreshing, but will find that most dungeons are aesthetically very similar just with a different colour palette. Dungeons get progressively bigger as you progress, though, and are filled with more enemies; you’ll also find that you’re required to visit different floors using staircases and bomb walls more frequently to access different areas and properly progress, which adds an additional layer of challenge to the game. Each dungeon also has its own unique layout and appearance as seen on the map screen to help distinguish them but, for the most part, they’re quite similar and not themed around elements like later Zelda dungeons would be.
Zelda uses text and (very) simple and vague dialogue to convey its plot and your objective.
For an adventure game, The Legend of Zelda is extremely light on story and dialogue; the game’s story is told through some text when you wait around on the title screen but, beyond that, you’ll need to read the game’s instruction manual to learn more about the plot and the lore of Hyrule since the NPCs offer only cryptic clues and vague statements. Dialogue and character interaction is practically non-existent in The Legend of Zelda, which I find a bit surprising given how prominent it would become in the series and how heavy it featured in more traditional role-playing games (RPGs) released around the same time, such as Final Fantasy (Square, 1987). However, given the amount of grammatical errors and incongruous dialogue contained within the first Zelda this is, perhaps, a good thing; it also means that the onus is on the player to explore every nook and cranny and to experiment with every weapon on every screen on the game to uncover secrets and new areas, placing an emphasis on exploration and player immersion rather than hand-holding.
Enemies and Bosses: Link will have to contend with a wide variety of enemies on his grand quest; the overworld is alive with numerous enemies, some of which are specific to certain areas and each of which presents a different challenge thanks to their attack patterns and difficulty. It’s very rare that you’ll take on just one or two enemies at a time and, generally, you’ll have to battle about four or five at once and often a mixture of different enemies, requiring a certain amount of strategy on your part as you can’t always take the direct approach in battle. One of the most common enemies in the game are the Octorocs (octopus-like creatures that spit projectiles at you), Peahats (bulbous vegetation that hover in the air and can only be destroyed when briefly stationary), Tektites (spider-like enemies that hop around the screen), aforementioned Leevers (spiked globs that burrow in and out of sand), and the Keese (bats that flutter around the screen). While you’ll encounter different coloured variants of most of these (and other enemies) that are tougher, these are the most common enemies and are easily dispatched with one sword swing.
Zelda‘s tougher enemies can be a real headache thanks to their numbers and attack patterns.
As you progress, though, you’ll encounter far more formidable enemies: Moblins launch spears at you, Goriyas toss boomerangs your way, Ropes (why they’re not called “snakes” is beyond me) charge at you head-first, and Wallmasters will drag you back to the first screen of the dungeon you’re in if you’re not careful. Some of the game’s toughest and most annoying enemies include the Wizzrobes (who constantly teleport around the screen, often directly into where you’re walking, and fire energy bolts that can easily drain your health if you’re caught in a crossfire), Darknuts (who can only be attacked from behind and wander around in an unpredictable pattern), and the aforementioned Lynels. You’ll also have to be careful about getting too close to seemingly harmless Armos statues in case they spring to life, avoid getting eaten by a Like-Like lest it take away your shield upgrade, and make sure you have plenty of health or arrows to make battling the Poe’s Voice that much easier.
The Dodongo might be pretty pathetic but the Manhandla was a pain in my ass!
The game features nine dungeons to explore, which means nine bosses to contend with; make sure you familiarise yourself with each of these bosses, though, as you’ll encounter all of them on multiple occasions as sub-bosses in the game’s later dungeons. Technically, you can battle them in whatever order you like as long as you’re tough enough to survive the dungeon and their damage output but it’s best to try and take them on in sequential order to give yourself the best chance at success. This means that the first boss you fight should be Aquamentus, a horned dragon that spits out three projectiles that you must dodge between. This boss is fought in Level-1 and Level-7 and is made all the easier if you have the energy to use your sword beam or ammo enough to shoot arrows at it, which will make short work of it. The Dodongo, in comparison, is a pretty pathetic excuse for a boss; it lumbers around the screen doing little to nothing and is easily dispatched by placing bombs before its mouth. Later on, you’ll have to contend with three of these at once but, since they don’t make any effort to attack you, they’re easily the weakest of all the game’s bosses. Unfortunately, the same can’t be said for the Manhandla boss; this piranha-like bastard was the bane of my life since it popped up three times throughout the quest. It slowly bounces around the arena firing projectiles at you and is very tricky to hit thanks to the limited reach of Link’s depowered sword and Link’s restricted range of movement; it’s much faster and more efficient to use bombs to deal massive, successive damage to the Mandhandla but be wary as, the more parts of it you destroy, the faster its movements become.
Bosses range from frustratingly awkward to ridiculously easy depending on how equipped you are.
One of the toughest bosses in the game, for me, was the multi-headed dragon Gleeok; this monstrosity sports two, three, or four heads, spits projectiles towards you that are difficult to avoid, and is only able to be damaged by awkwardly slashing at its neck or, more effectively, shooting arrows at it. Be careful, though, as when the Gleeok’s heads are severed they will float around the arena shooting projectiles at you and cannot be harmed. Compared to Gleeok, Digdogger and Gohma are a walk in the park, especially once you have acquired the recorder and the bow; Digdogger is completely invulnerable until you play the recorder and reduce it down to its core but, once you do, you can just whack it until it’s defeated. Similarly, Gohma can be a bit of a pain with its sporadic movements and projectiles but a few well-timed shots to its exposed eye will put it away without any real issues; the most difficult thing about many of these bosses is having enough health, the right weapons, and being able to navigate the arena when projectiles are being fired at you from both the boss and the nearby statues.
Despite his fearsome appearance, Ganon isquite a pushover once he’s out in the open.
Of course, the main objective of the game is to assemble the eight pieces of the Triforce of Wisdom, battle through Level-9 (which is accessed by bombing a specific rock formation on Death Mountain and features swarms of the game’s toughest enemies and a new sub-boss, the Patra, which can only be destroyed after first taking care of the tiny little eyes it shields itself with), and confront the evil Ganon. For the final boss of the game, Ganon isn’t that much of a challenge; he turns invisible and fires a series of projectiles at you, forcing you to swipe somewhat blindly around the screen until you hit him. Land four this and he appears in all his monstrous glory…and is easily destroyed with one hit from a Silver Arrow for a disappointingly anticlimactic end to the game.
Power-Ups and Bonuses: Link begins the game with three hearts’ worth of health which, very quickly proves to be far too little to get past the game’s tougher enemies and dungeons. Fortunately, every time you defeat a dungeon boss, you expand your maximum hearts by one and can find additional Heart Containers hidden on the overworld or for sale from certain merchants, which will increase it to twenty units. Certain weapons also have similar limitations; for the majority of the game, you can only carry six bombs at a time until stumbling across a merchant who will allow you to carry double that amount (…for a small fee), the only way to get arrows is to buy them, and your usage of the Red Candle is restricted. Thankfully, the Blue Candle and Magic Rod are not so restricted, allowing you to light up dark areas and deal damage to enemies (but watch out because the flame you conjure can also hurt you!)
A number of key items and upgrades will vastly improve your chances at success.
As you might expect from a Zelda title, Link has access to a decent variety of weapons and items: enemies sometimes drop a clock (which causes enemies to freeze in place and gifts Link with invincibility for a brief period), the boomerang allows him to attack from a distance, the stepladder lets him cross one tile of water, the raft allows him to drift across water at certain points on the map, and he can also find a Power Bracelet to move blocks and upgrades for his sword and shield to block more projectiles and deal additional damage. Eventually, you’ll also be able to purchase health-restoring medicines and other expensive items to aid your quest: one such item is a Magic Key that renders all other temporary keys redundant and a piece of food to get past Goriyas (though you’d never know that you need to use this item). You can also buy a Blue Ring and find a Red Ring, both of which significantly reduce the amount of damage you take while also changing Link’s tunic to blue and red, respectively.
Additional Features: Whereas later Zelda titles placed significant emphasis on a variety of side quests, I only really came across one in this first title (barring the hidden Heart Containers on the overworld) which involved taking a letter from one NPC to another to be able to purchase medicines. After finishing the game, you will unlock the “Second Quest”, which replaces your save file sprite to one of Link holding his sword aloft and overwrites your save file from the beginning but mixes up the locations of dungeons, enemies, and items and also increases the difficulty of the game’s enemies. You can, however, jump straight into this mode by naming for save file “ZELDA” and also make frequent, fragrant, and continuous use of the 3DS version’s save state ability to make beating this difficult and finicky first Zelda title much less of a headache.
The Summary: After years of hearing so much hype about how good The Legend of Zelda is and having experienced a number of 2D and 3D Zelda titles, I was excited to finally experience the first in the series and, for the most part, The Legend of Zelda lived up to the hype. It’s definitely a product of its time and suffer somewhat from the limitations of the NES hardware and the simplistic graphics, gameplay, and sound but it’s still an ambitious little action/adventure title that was both offering something unique at a time largely dominated by space shooters and platformers. Everything on offer in The Legend of Zelda was expanded upon and improved as the series progressed but, for this first entry, the player is required to utilise a lot of exploration, experimentation, and utilise the bare minimum of information to find the pieces of the Triforce of Wisdom. I went in mostly blind and did okay, for the most part, and only had to turn to a guide for the last two dungeons and to track down a couple of the game’s more elusive items so it’s definitely do-able but the game is handicapped somewhat by this format since it’s very easy to just get lost and end up wandering around in circles or being absolutely bludgeoned by the game’s tougher enemies. Honestly, I have nothing but respect for those who managed to get through this game back in the day without the benefit of save states since it’s a deceptively tough title, one that I’m sure kept many kids busy for many hours or even days with its vast landscape and tricky bosses.
My Rating:
⭐⭐⭐⭐
Rating: 4 out of 5.
Great Stuff
What are your thoughts on The Legend of Zelda? Did you own this on the NES back in the day or did you, perhaps, discover it later on a different console? How do you feel it holds up these days, especially against later Zelda titles? Which Zelda game, character, or dungeon is your favourite and why? Would you like to see a return to the top-down style of gameplay for Zelda or do you prefer to more action-orientated, open world approach? How are you celebrating The Legend of Zelda’s debut today? Whatever your thoughts, memories, or opinions of The Legend of Zelda, and the Zelda franchise overall, feel free to drop a comment below and check in next Sunday for more Zelda content.
Air Date: 2 October 2013 WorldwideNetwork: Pokémon TV Original Network: TV Tokyo Stars: Bryce Papenbrook, Lucien Dodge, Jamieson Price, Kirk Thornton, and Kyle Hebert
The Background: The brainchild of executive director Satoshi Tajiri, Pokémon began life as Capsule Monsters (later changed to Pocket Monsters and rebranded as Pokémon for the games’ worldwide release), a role-playing game inspired by Tajiri’s childhood days wandering through forests and collecting bugs. Thanks largely to the decision to produce two versions of the game, each with different Pokémon to collect and encouraging gamers to battle and trade with their friends to catch every Pokémon, the games sold very well in Japan and were soon localised for a worldwide audience. Fearing that American audiences would struggle to connect with the game’s cute concepts and creatures, Nintendo apparently spent well over $50 million localising, rebranding, and marketing the games for their international release. It turns out, however, that Nintendo were wrong to doubt Pokémon’s appeal; still, when Pokémon: Blue Version and Pokémon: RedVersion released in 1998, they were accompanied by an anime, a trading card game, and more advertisements and media coverage than you could shake a stick it. Of course, history shows us that this aggressive strategy paid off; Blue and Red sold over 30 million copies worldwide, birthing one of Nintendo’s most popular and enduring videogame franchises ever, and the anime continues to air to this day, with feature-lengthmovies and television specials being regularly produced.
Thanks to a co-ordinated marketing campaign, Pokémon dominated an entire generation.
In short, Pokémon was not just some short-lived fad of one generation but a multimedia blockbuster franchise that has spanned multiple generations and shows no signs of stopping. By 2013, there were over 720 Pokémon to be found, battled, and traded in comparison to the 150 regularly-obtainable Pokémon of the original videogames. The anime was well into its sixteenth season, having aired over 780 episodes, the sixteenth feature-length movie had just been released, the excellent ongoing Pokémon Adventures manga (Various, 1997 to present) was entering its eleventh chapter, and Pokémon was celebrating its fifteenth anniversary that year. This was also the year that Production I.G, Xebec, and OLM, Inc. produced a ninety-minute animated special, split into four parts, which retold the events of the original games in a way that was more faithful to the source material than the regular, ongoing anime. First broadcast on TV Tokyo ten days before the release of Pokémon X and Pokémon Y (Game Freak, 2013), the episodes were dubbed into English with a new voice cast and made available both on home media (in some countries) and to watch on various online platforms, including Pokémon TV.
The Plot: Red (Papenbrook) and his childhood friend and rival, Blue (Dodge), have been chosen to select their first Pokémon from Professor Oak (Hebert). Tasked with completing Oak’s lifelong dream of capturing and recording data on all Pokémon, they set out into the region of Kanto, battling both Gym Leaders and the nefarious Team Rocket in a quest to not only capture every Pokémon but also become Pokémon League Champion.
The Review: Pokémon: Origins is split into four parts, “File 1: Red” (Kawasaki, 2013), “File 2: Cubone” (Kuroda, ibid), “File 3: Giovanni (Takahashi, ibid), and “File 4: Charizard” (Tomiyasu, ibid). The animation style is quite different to that of the existing Pokémon series; for one thing, Origins looks much more professionally rendered and of a higher quality than even some of the Pokémon feature films. For another, many episodes feature music inspired directly from the videogames, with the classic Pokémon battle theme playing during Pokémon battles and the iconic, creepy Lavender Town theme playing when the story reaches the haunted Pokémon Tower. Of course, the anime did feature remixed versions of some recognisable Pokémon themes but nowhere to the degree of Origins; Origins also opens and closes each episode with a game save/load screen and includes dialogue boxes ripped right from the videogame.
Origins includes many aspects and mechanics from the videogames.
This closer fidelity to the source material brings Origins more in-line with Pokémon Adventures, which recreated many of the gameplay mechanics of the videogames with a surprising amount of detail and loyalty compared to the anime but also took the source material a bit more seriously as well, featuring blood, much higher stakes, and even Pokémon dying. While Origins doesn’t go fully down this path, it does go out of its way to stay closer to the source material than the anime: Red receives Technical Machines (TMs) and Hidden Machines (HMs) in the form of floppy discs, just like in the game; Pokémon battles (while generally much faster and glossed over thanks to Origins’ short runtime) are much more intense and closer to how they go down in the games (there’s no bullshit strategies like sprinkling water on an Onix to make it weak to electric attacks); and many of the items (such as the PokéFlute, the fishing rods, and the Silph Scope) from the videogame make an appearance, albeit a brief one.
Sadly, Origins glosses over many of the game’s important battles and plot points.
Something that lets Origins down, though, is the brevity of its narrative and the way it devotes the focus of each of its four episodes. “File 1: Red” begins in standard fashion, with Red and Blue beginning their Pokémon journey, establishing their rivalry (which is much friendlier than portrayed in the games or the early days of the anime), and Red learning the basics of Pokémon battling and capturing from Brock (Johnny Yong Bosch). However, from “File 2: Cubone”, each subsequent episode begins, and includes, a recap and a montage of sorts that glosses over what I consider to be some very important story beats: Red tells us about, and we briefly see, how he defeats the majority of the Gym Leaders (we only see him battle two in full throughout the course of the series), acquires the aforementioned fishing rods, captures the majority of his Pokémon (again, we only really see him capture a handful in any kind of detail), the evolution of his Charmander (Shin’ichirō Miki), and even his battles against the Elite Four and, most egregious of all, some of his most important encounters with the villainous Team Rocket.
Red and Blue begrudingly team up but Team Rocket are easily defeated despite their reputation.
Obviously, there are only four episodes of this mini series so the story cannot cover everything from the videogames but, for me, glossing over Red’s first meeting with Team Rocket and his eventual vendetta against them is a bit of a mistake. Take “File 2: Cubone”, for example; sure, it features Team Rocket having overtaken the Pokémon Tower, but it’s far more concerned with the trauma the group caused Cubone (Cristina Vee) and the ghost that haunts the tower. Red and Blue begrudgingly team up to solve both problems but Team Rocket is easily defeated first off-screen by Blue and then with a ridiculous amount of ease by Red, who successfully scares them off after defeating one of their Pokémon. Considering how the townsfolk were so afraid of Team Rocket’s power and threat earlier in this episode, this is more than a little disappointing and I would have preferred to see Red’s journey through Mt. Moon and his battle against Lieutenant Surge to help properly establish Team Rocket’s threat in this world. On the plus side, at least the group isn’t portrayed as largely ineffectual bunch of goofballs and Red takes his opposition to their plot a lot more seriously than Ash Ketchum (Veronica Taylor/Sarah Natochenny).
Although he stumbles in the first episode, Red quickly becomes a competent and capable trainer.
When comparing Red to Ash, it’s like comparing night to day or apples to oranges. There are some similarities but these are generally due to the fact that both characters are based on the avatar from the games and therefore follow the same path the player forges in the source material. While both are big Pokémon fans and excited to become Pokémon trainers and both start out knowing very little about the actual mechanics of Pokémon battling, capturing, and the scope of their journey, it takes Red a bit more time to learn that a close bond with his Pokémon is required to grow stronger and succeed in battle. While Brock does help to teach him these lessons, Red’s bond with Charmander is nowhere near as intense as Ash’s with Pikachu (Ikue Ōtani) yet he quickly becomes a far more competent trainer than Ash; in a surprising amount of restraint, Pikachu only appears in a brief cameo and, to separate Red from Ash even more, Red not only uses a far more competent Electric-Type Pokémon in Jolteon (Unknown) but only captures a Pikachu after he has become the Pokémon League Champion! Granted, most of this is implied, seen in montages, or takes place between episodes but Red captures way more Pokémon (mainly because he’s much more committed to completing the PokéDex than Ash), easily defeats pretty much every trainer and Gym Leader he comes up against, and has a far more well-balanced and well-trained team than Ash has ever had. Hell, Red even ends up with Articuno (ibid) in his squad and, generally speaking, has much more in common with his counterpart from Pokémon Adventures, who was also a far more competent and capable trainer compared to Ash.
Blue is humbled in defeat, realising Red’s bond with his Pokémonhas made him superior.
One thing that helps separate Origins from the anime is the relationship between Red and Blue; in the games, and the anime, these two had a largely antagonistic relationship throughout the story until facing off in the Pokémon League. Here, though, while Blue is arrogant and a blowhard and determined to complete the PokéDex before Red and become a more powerful and capable trainer than him (he picks Squirtle (ibid) not because it matches his name but specifically because it will give him the type advantage over Red’s Charmander), he and Red have a much more friendly rivalry than one based on actual animosity. Blue sees himself as Red’s superior and seems to both be motivated to beat Red to the punch wherever possible and happy to walk away from confronting the likes of Team Rocket when it doesn’t suit him but the two are generally more about ribbing on each other and winding each other up about their progress and abilities than actually hating each other. Sadly, though, because of the brevity of the mini series, Red and Blue only battle head to head twice in this story; the first time, Red is soundly defeated as his strategy of mindlessly attacking without having properly developed trust and partnership with his Charmander prove his downfall. Brock specifically uses Blue as an example of a trainer who has established this bond and it is from both of them that Red learns to put his love and trust into his Pokémon, which are treated as his beloved partners and allies rather than mere tools. However, when they face-off again in “File 4: Charizard”, the tables have turned; though Blue has already become the Pokémon League Champion, he falls to Red despite having amassed a team powerful and diverse enough to conquer any and all opponents not because of his lack of strength but because he had failed to maintain the bonds of trust and friendship between himself and his partners. Humbled by his defeat, Blue nevertheless congratulates Red on his victory and accomplishments and the two retain a friendly rivalry for the final episode of the anime, one based on Blue’s desire to one-up Red at any opportunity while still acknowledging his skill and capability.
Battling with Red awakens a passion that Giovanni had long forgotten.
Despite much of Origins being reduced to quick montages, there is still a strong sense of Red’s capability throughout the anime; after learning valuable lessons from Blue and Brock, Red goes from strength to strength, easily defeating other trainers and Gym Leaders even when he has a massive type disadvantage. Not counting that initial battle against Blue, Red only runs into two roadblocks throughout his journey, the first being his showdown against Giovanni (Price). Though Red’s first meeting with the Team Rocket boss is glossed over in a recap, his battle against him for the Earth Badge is a significant part of the aptly-named “File 3: Giovanni”. The strength of Giovanni’s Rhyhorn (Unknown) alone is enough to wipe out all of Red’s team even when Red has the type advantage but Red’s determination and passion for both battling and towards his Pokémon awakens something in Giovanni he had long forgotten. Exhilarated by the thrill of the battle (even though it’s ridiculously one-sided in his favour for the majority of the time), Giovanni is impressed, humbled, and even grateful to have been defeated by such a zealous trainer. So touched is Giovanni that he disbands Team Rocket and wishes Red well on the remainder of his journey, urging Red to follow the path that he (Giovanni) strayed from long ago and pledging to carve a new path for himself going forward.
Mewtwo represents Red’s final, and greatest, challenge.
The second obstacle Red encounters is hinted at in “File 2: Cubone” and forms the central focus of “File 4: Charizard” and it is, of course, Mewtwo (ibid). Mewtwo’s threat is immediately established by how badly, and easily, it overwhelms Blue, leaving him badly injured and putting the wind up the usually arrogant trainer. Nevertheless, motivated by the desire to finally complete Oak’s PokéDex, Red heads to Cerulean Cave to confront the creature, which is still a genetic copy of the mythical Pokémon Mew (Christine Marie Cabanos) but, unlike in the anime and manga, it never speaks or communicates in any way other than brutal, aggressive battle. Far from the nuanced, tortured character in other media, Mewtwo is portrayed more as simply an extremely powerful Pokémon to be captured like any other, which is much more in-line with its position in the games as a “super boss” of sorts rather than a pivotal plot point. However, even Red is unable to match Mewtwo’s monstrous power; luckily, though, he was gifted two Mega Stones by the mysterious Mr. Fuji (Kirk Thornton) in “File 2: Cubone” and, even more helpfully, they just so happen to react to the close bond between Red and Charizard (Shin’ichirō Miki) and allow Charizard to mega evolve into Mega Charizard X (did I mention that Origins came out around the same time as Pokémon X and Y?) This is enough of a power boost to allow Red to overwhelm Mewtwo faster than it can react and capture it with a ridiculous amount of ease; seriously, Red throws two Ultra Balls and captures Mewtwo with the second, which is some serious bullshit when you think about how many damn balls it can take to snag Mewtwo in the games. I would have liked to see Red use a Master Ball but, sadly, he never acquires one in Origins as it’s merely an unfinished prototype in this story.
Origins ends with Red eager to find morePokémon, starting with the mythical Mew.
Regardless, Red is successful and captures all 150 Pokémon but his mission is far from over as, while celebrating with Oak and Blue, he remembers that Mewtwo was created from Mew and rushes out a bundle of excitement and anticipation at the prospect of encountering and capturing still more Pokémon. It’s here, and in Red’s steadfast determination in battle, that we see the closest links between Red and Ash: both are stubborn in battle and endlessly excited about capturing and finding new Pokémon. However, Red ends Origins a far more accomplished and experienced trainer; he’s the Pokémon League Champion, for one thing, and now has numerous Legendary and incredibly powerful Pokémon in his possession. In this regard, Origins ends exactly as a standard game of Blue or Red would end, with the character having numerous Pokémon at their disposal and ridiculously overpowered. While Ash does also grow and become more accomplished as a trainer, this takes…what? A hundred episodes? Two hundred? And even then he still makes rookie mistakes; no such foibles befall Red but, to be fair, much of his growth as a trainer and a character is implied, rushed through in montages, or takes place between episodes and relies heavily on the viewer’s familiarity with the videogames to fill in the blanks whereas the anime is able to use many (many) episodes to show Ash’s numerous lessons and growth.
The Summary: Pokémon: Origins is an extremely enjoyable, gorgeously-animated anime; everything from the character designs, Pokémon battles, and sounds is fantastic to look at and closely reminiscent of the source material. Unlike the anime (and a lot of Pokémon media), Pokémon do not constantly speak their names and instead have more realistic, animal sounds like in the games; Japanese text is also left unaltered, which is refreshing, and while many elements, mechanics, and important plot points from the games are glossed over, at least they’re actually included here rather than either being ignored or significantly altered. As much as I enjoy the anime (specifically the films because of their focus on Legendary Pokémon), it can be grating at times to follow a character as annoying and unreliable as Ash and, because of that, Red is a breath of fresh air. Like his manga counterpart, Red is competent, brave, and determined; he starts out as a rookie, knowing very little about the basics and nuances of Pokémon battling, and quickly matures to the point where he can defeat Gym Leaders with ease, single-handedly brings down Team Rocket (something Ash is still struggling to do), and not only captures Legendary Pokémon but casually uses them as part of his team just like the player would. His fidelity to the player’s character and journey is commendable; he learns the same lessons that the player does throughout the game while still being his own distinct character separate from the player’s avatar, Ash, and even his manga counterpart.
Origins‘s fidelity is impressive, though it rushes through many usually-important plot points.
It’s this fidelity to the source material that elevates Pokémon: Origins and makes up the majority of its appeal; the anime strayed too far from the gameplay mechanics and spirit of the games for my taste, as much as I enjoy it, so it’s refreshing to see such a well-crafted and well-animated series tell a very similar story to the anime but in a way that is so much closer to the source material. The only thing that lets Pokémon: Origins down is the brevity of its narrative; limiting its story to just four episodes means so much of the game’s story gets glossed over and the focus can be a bit skewed at times. While, at its core, it focuses on Red’s journey and his mission to complete the PokéDex and his ongoing rivalry with Blue and Team Rocket, I can’t help but feel like this would have benefitted from being more like ten episodes to spend a bit more time on Team Rocket, Red’s battles against the Kanto Gym Leaders, and, specifically, his battles against the Elite Four.
My Rating:
⭐⭐⭐⭐
Rating: 4 out of 5.
Great Stuff
What did you think about Pokémon: Origins? How do you think it holds up when compared to the anime and numerous feature films? Did you enjoy how faithful it was to the source material or do you feel that it was weighed down by focusing on fidelity over telling a more unique story? Do you agree that certain parts were rushed or were you happy with the story it told? Which character, or Pokémon, is your favourite and why? How did you capture Mewtwo when you first played Pokémon? Whatever you think, do please leave a comment below and join me next Saturday for National Pokémon Day!


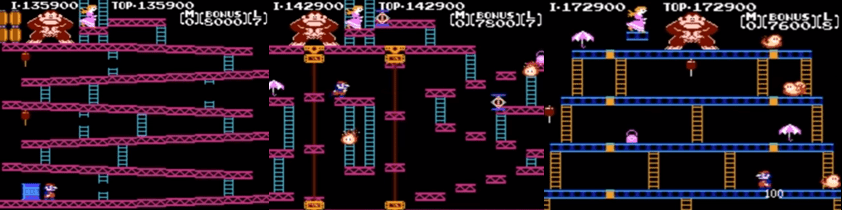
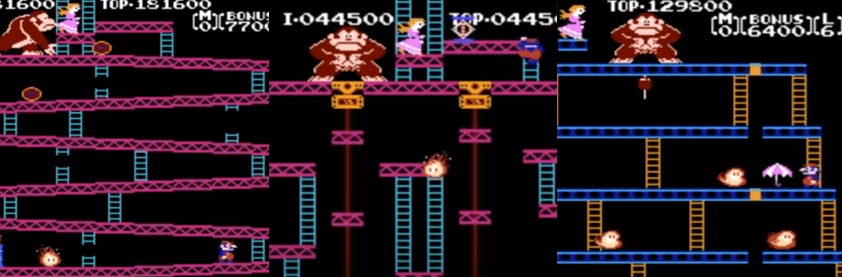


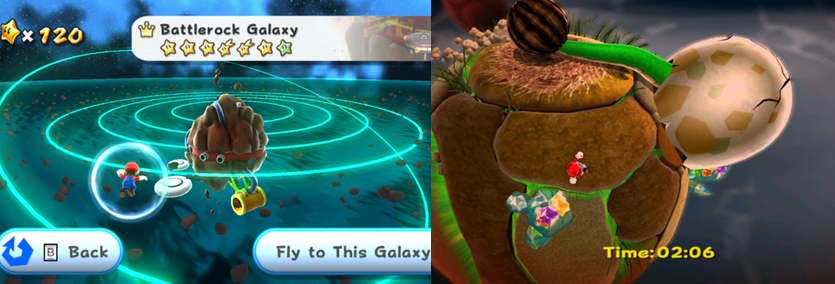


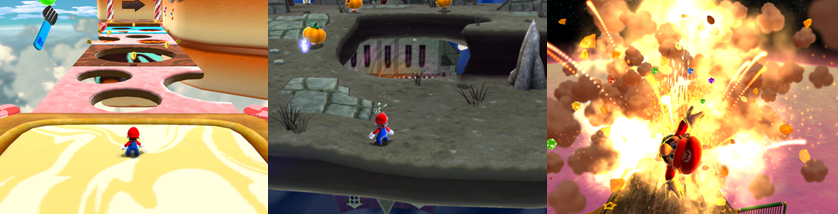


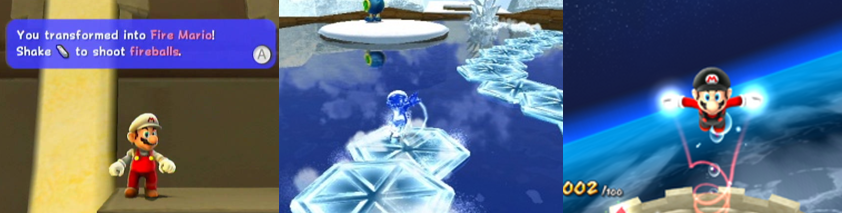
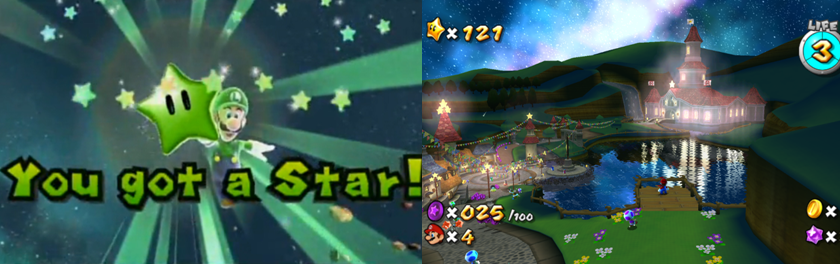


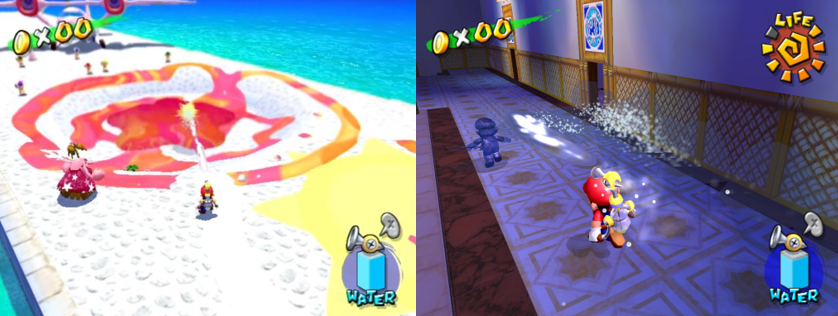
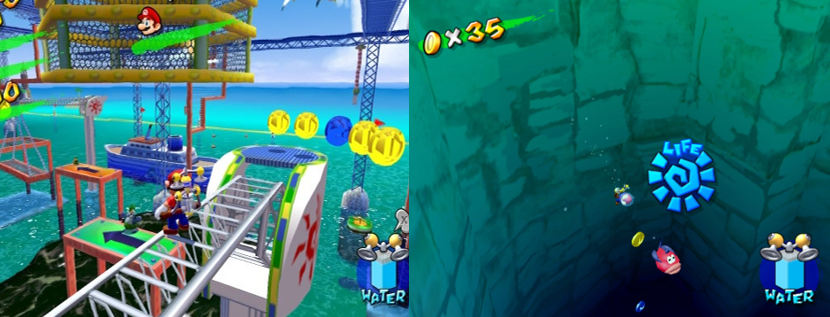
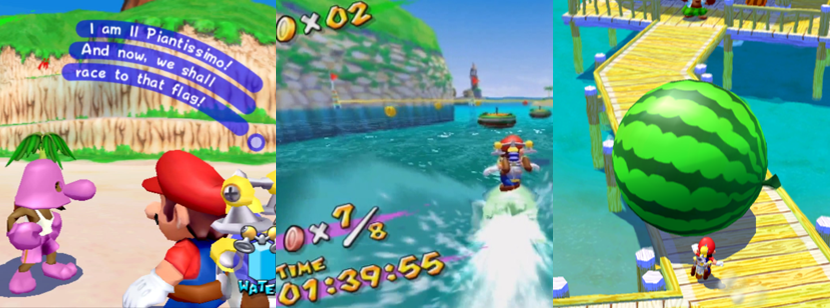
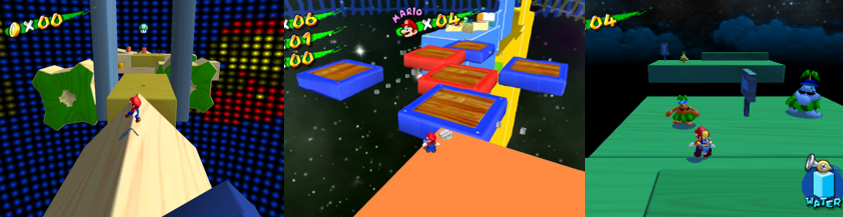

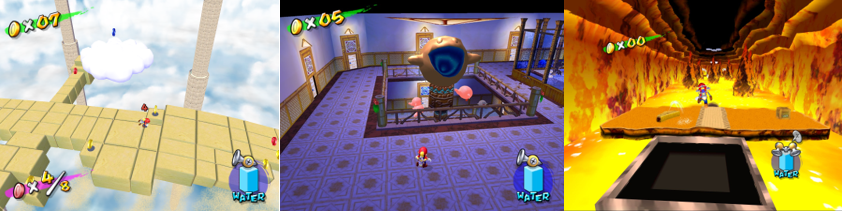

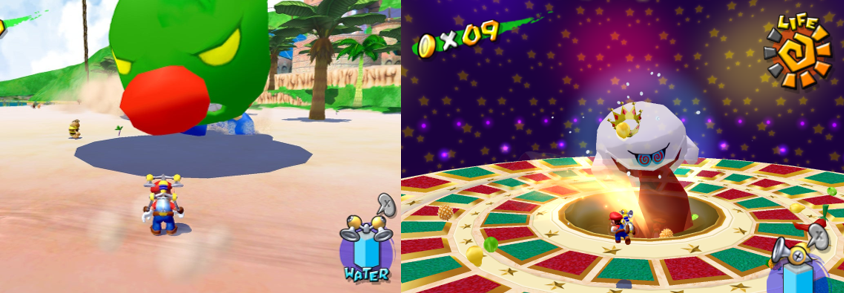

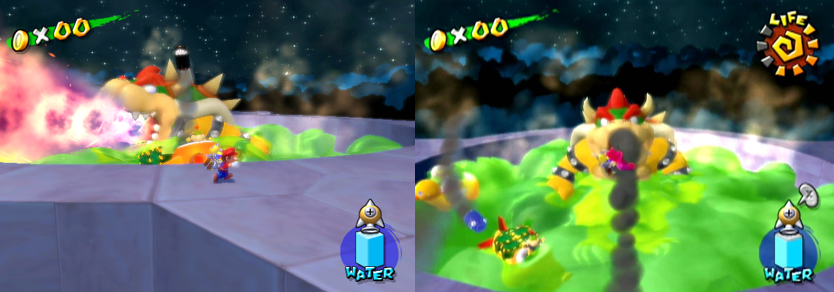


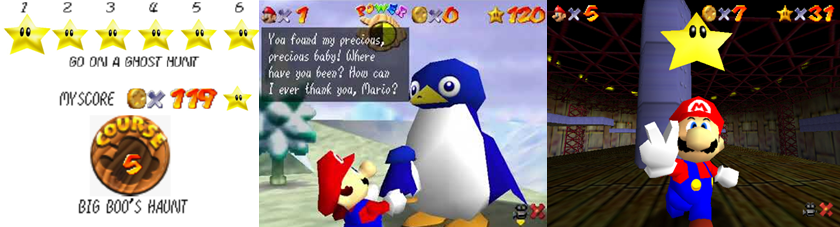
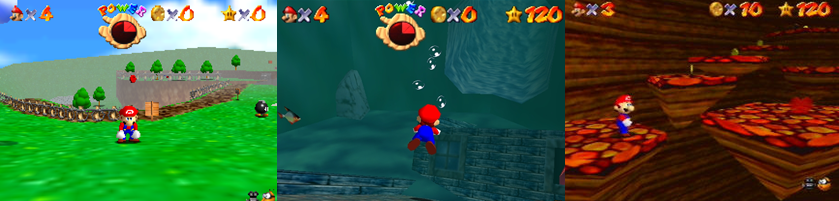
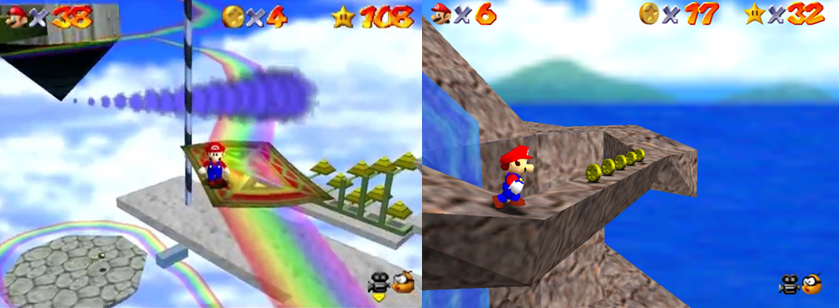
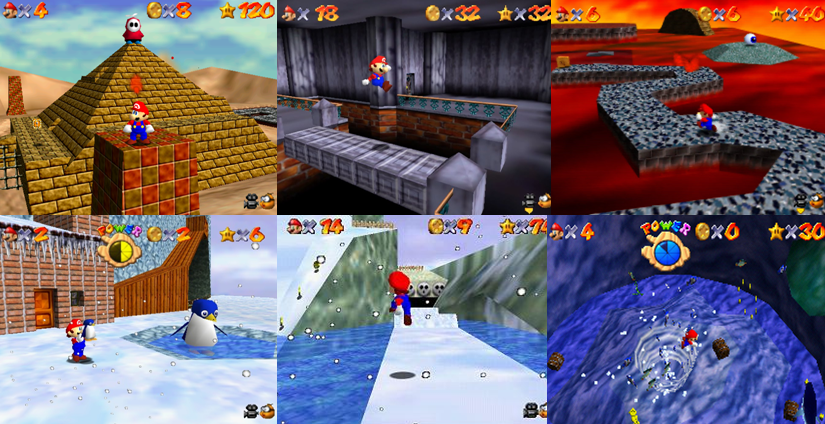
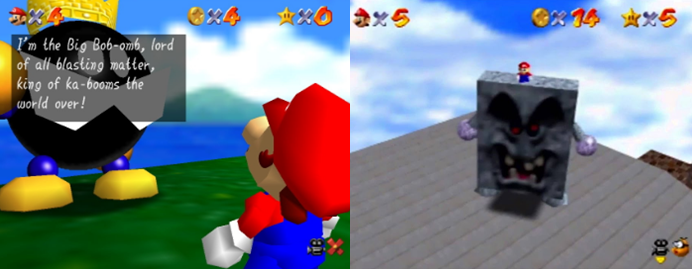
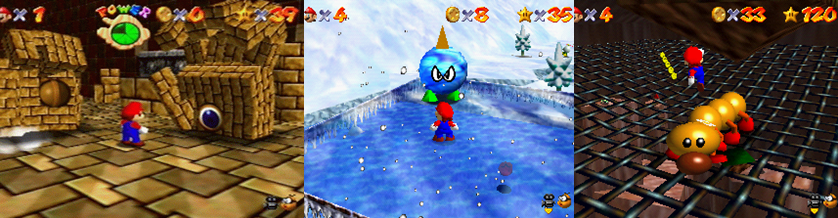
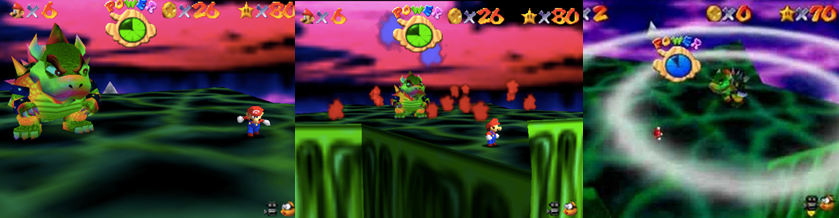
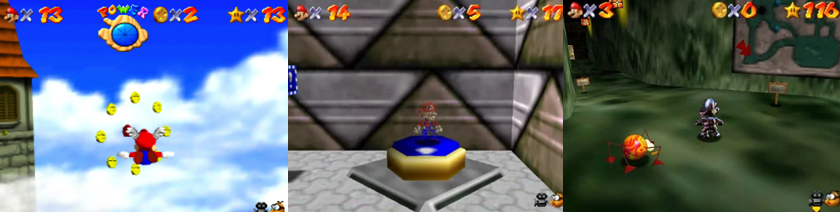
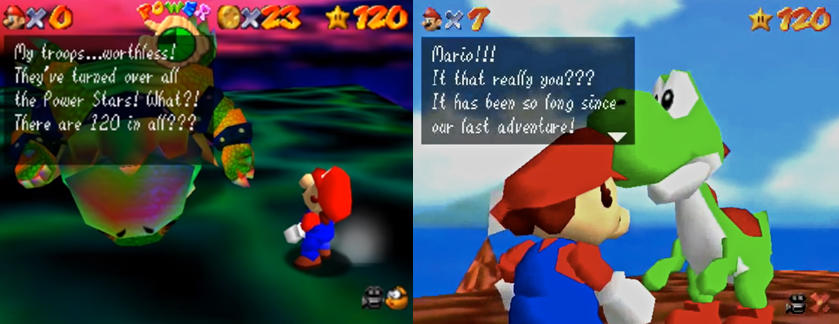


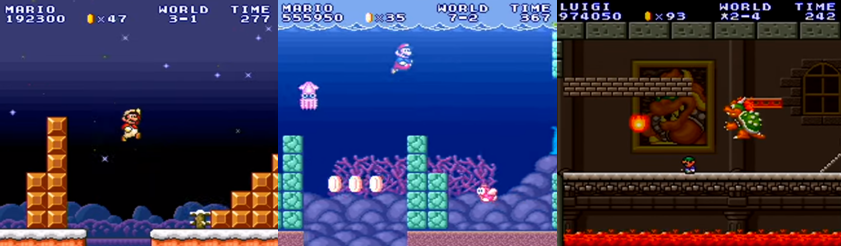


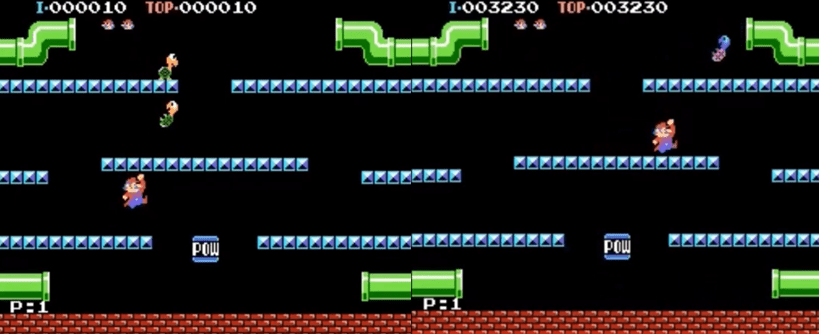


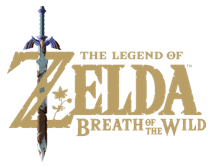
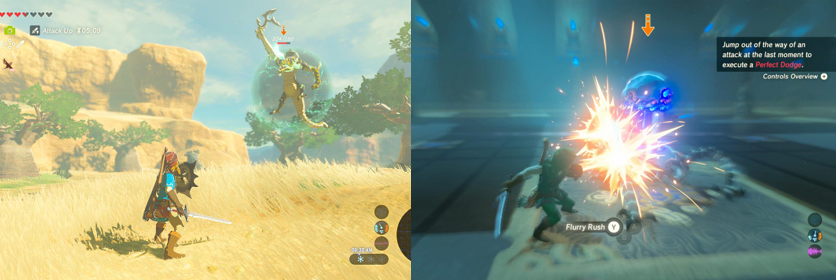
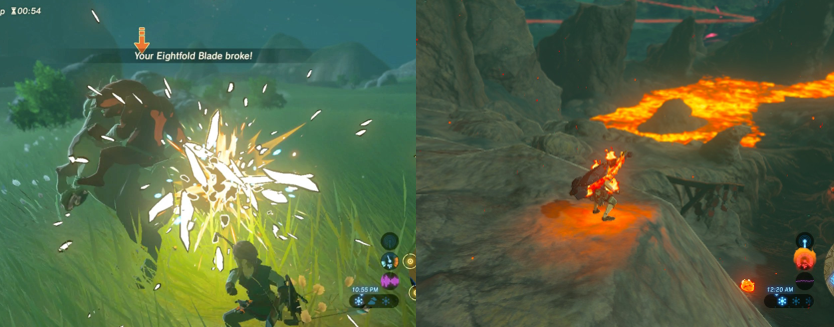
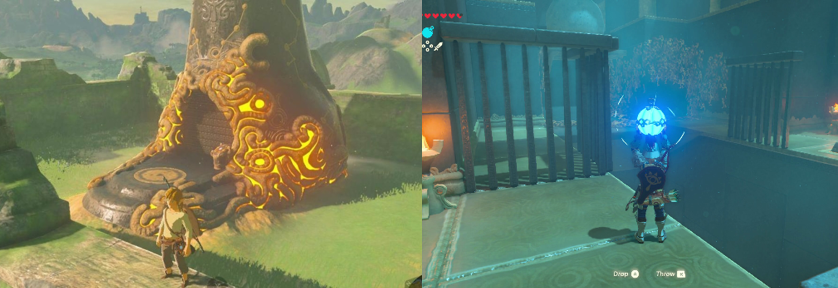


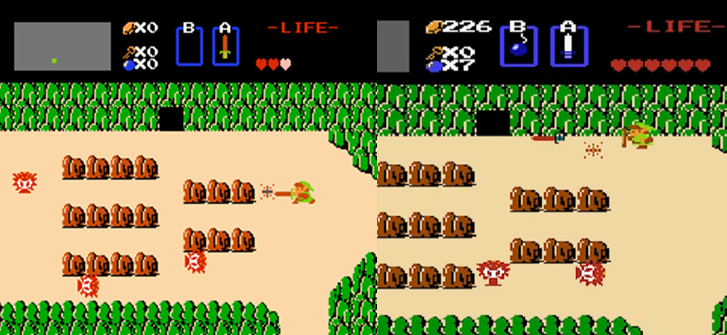

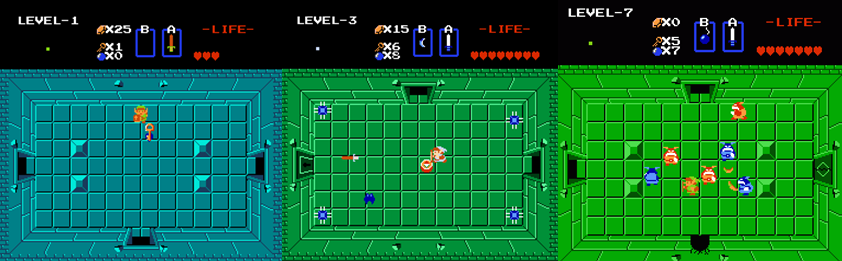
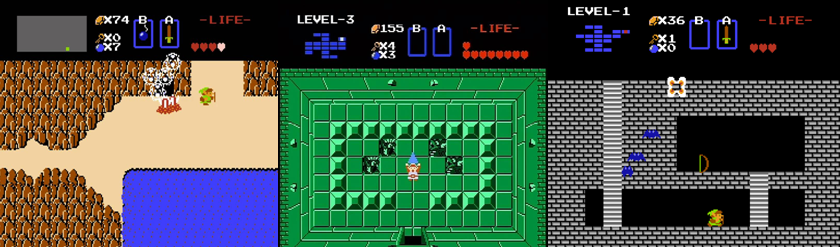
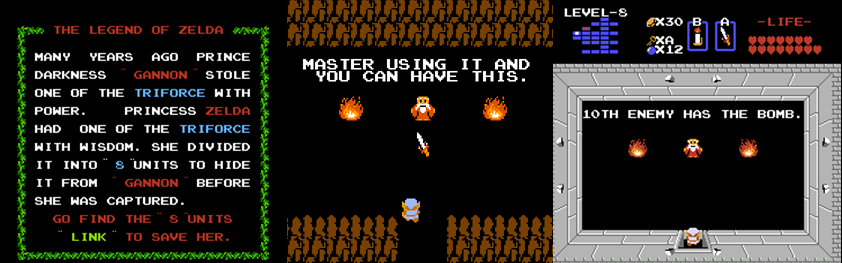
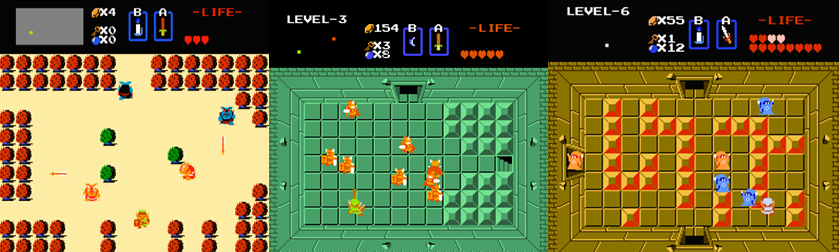


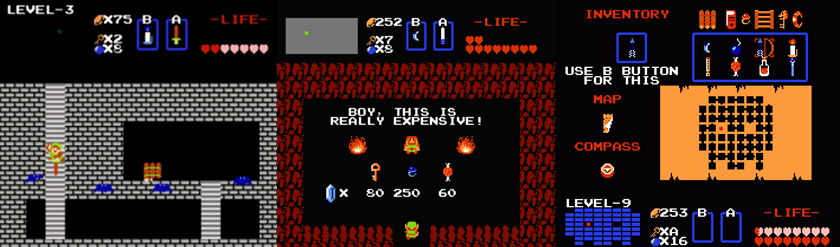


You must be logged in to post a comment.