So, for no better reason than “Mar.10” resembling Mario’s name, March 10th is widely regarded as being “Mario Day”, a day to celebrate Nintendo’s portly plumber, an overalls-wearing mascot who literally changed the videogame industry forever and shaped the home console market of the nineties.

Released: 10 December 2021
Originally Released: 11 August 2000
Developer: Intelligent Systems
Also Available For: Nintendo 64, Nintendo Switch 2, Nintendo Wii, Nintendo Wii U, iQue Player
Metacritic Scores: 93 / 8.8
Quick Facts:
Though Super Mario RPG: Legend of the Seven Stars (Square, 1996) enjoyed rave reviews, it took nearly five years to get this spiritual successor. When Square bowed out due to other commitments, Nintendo turned to HAL Laboratory and Intelligent Systems, with art director Naohiko Aoyama crafting Paper Mario’s distinctive mixture of 2D and 3D graphics. Originally conceived as Super Mario RPG 2 and produced for the ill-fated Nintendo 64DD add-on, the game aimed to be a cute, kid-friendly adventure. Paper Mario has been met with critical acclaim and is widely considered one of the role-playing games (RPG) of its era.
Gameplay and Power-Ups:
Paper Mario is a 2D/3D hybrid RPG in which players guide a craft paper version of Mario (and his new allies) through a diorama-like version of the Mushroom Kingdom across nine chapters (including the prologue), assisting non-playable characters (NPCs), becoming stronger through battling, and liberating the captive Star Spirits from Bowser’s minions. Players are given four save files and no difficulty options or settings before venturing into this quasi-cel-shaded adventure. Helpful signposts and some NPCs provide gameplay hints (sometimes for a small fee), and the game’s menus do a decent job of telling you what does what and when. Like in Super Mario RPG and most RPGs from this era, the controls are pretty simple, with players using A to jump, interact with the environment, confirm selections, and talk to other characters, B to speed up onscreen text and exit menus, and performing a spin with ZL to cover more ground. Outside of battles, the right stick toggles the heads-up display, opens the partner and item menus, and allows some partners to perform actions, like Kooper flying at enemies in his shell to initiate battles or Mario holding Watt to light up dark areas. As you progress and locate treasure chests, you acquire battle items for Mario that can be used on the overworld, allowing you to strike enemies or hit switches with Mario’s hammer with B or perform a ground pound or spin jump by pressing A in mid-air. These either initiate battles, activate switches, or uncover hidden Star Pieces, which you trade for Badges. In battle, you select attacks with A and switch characters with ZL, tapping A as enemies attack to reduce damage or ward of status effects like poisoning or dizzying.
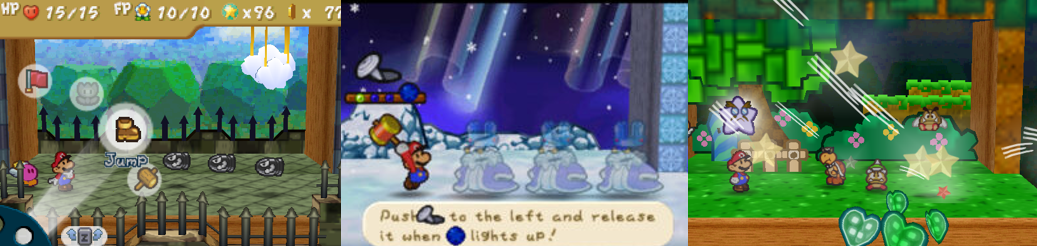
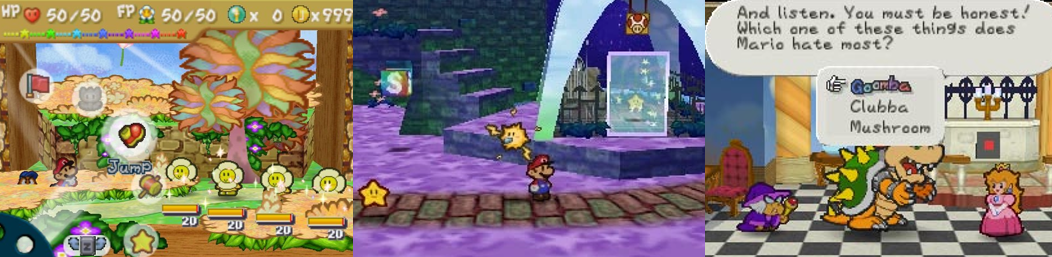
Unlike other RPGs, Mario’s stats don’t increase from levelling-up and he doesn’t earn experience points. Instead, most battles award “Star Points”, with players earning more depending on how long the fight goes and how many enemies are defeated. Once you earn 100 Star Points, Mario levels up and you can increase either his maximum Health Points (HP), Flower Points (FP), or Badge Points (BP). As you explore, you’ll find or purchase Badges to equip; each one costs BP to equip, so you may need to shuffle them about or upgrade your BP to hold more. These add additional attacks and buffs to Mario, such as allowing him to strike multiple enemies, shrink them, or knock them into each other. Performing these actions costs FP, with both HP and FP being restored at Toad houses, by hitting Heart Blocks, or by collecting or using items. Your partner’s special attacks also cost FP, so you must be mindful of your attacks or risk running out. When performing special attacks, you must complete various actions, such as holding or tapping A at the right time, moving the left stick, or matching button presses. Success increases the power and effectiveness of your attack, though you must be aware of what Badges you have equipped and which enemies you’re facing as some attacks won’t harm armoured foes or you take damage if your enemy has a spiked head. Badges also increase your maximum HP and FP, trade attack power for defence (and vice versa), and allow you to use more items in battle. Defeating enemies and smashing blocks also awards Coins, which you can spend on items and Badges. Mario’s inventory is painfully limited but you can store items at various shops and use them to restore HP and/or FP, heal status effects, attack all enemies, knock them over, and increase your attack or defence. Upon rescuing each Star Spirit, Mario also gains a Spirit Power, which drains his Star Energy (though this refills automatically, and manually, over time). This allows him to restore some HP and/or MP, put enemies to sleep, temporarily immobilise enemies, attack them all at once, or potentially instantly defeat any non-boss enemy. Unfortunately, only Mario can use Star Spirits and items, which can make battles needlessly tedious when you’re low on HP, FP, or Star Energy.
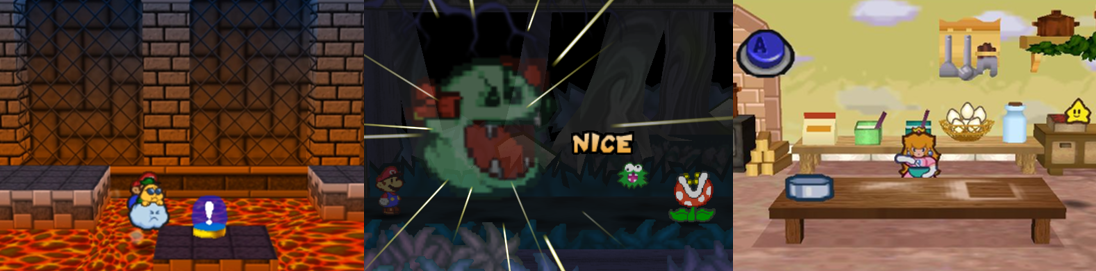
Mario is joined by friendly versions of his most recognisable foes, with each offering different special abilities in and out of battle. Mario superfan Goombario offers hints about each location and attacks with a headbutt, Kooper (my go-to partner) attacks multiple enemies and hits switches from afar with his shell, Bombette destroys cracked walls, Parakarry carries you across small gaps and is great for targeting flying enemies, Lady Bow turns you invisible and intangible (as long as you stay still) to sneak past enemies or pass through objects and attacks, Watt lights up dark areas and boosts Mario’s attacks or paralyses enemies, Sushie can be ridden across water, and Lakilester floats you over spike pits and lava while tossing multiple spike balls at enemies. You can only have one partner at a time and it’ll cost you a turn to switch to them in battle, and you share your HP and FP with them (though enemies rarely attack them), though you can freely switch on the overworld. Each can be upgraded using hidden Super Blocks, adding additional attacks to their repertoire, though I rarely used Goombario or Parakarry in battle. As you clear chapters, you’re treated to an interlude where you control Princess “Peach” Toadstool as she sneaks about and spies upon Bowser and his minions, learning key information to relate to Mario using her tiny star companion, Twink. These are essentially stealth missions, with players avoiding detection and later utilising a magical parasol to transform into one of Bowser’s guards. Peach must also whip up a cake using specific instructions to woo Gourmet Guy and even participates in the game’s final battle by powering Twink up with her enthusiasm. Mario’s also aided (though mostly forced to rescue) Kolorado, a Koopa archaeologist, is carried to the Yoshi-filled Lavalava Island by a friendly whale, and sporadically aided by the wizard Merlee, who buffs your attack, defence, or rewards at random depending on how much you pay. Chet Rippo also doubles your HP, FP, or BP at the cost of decreasing one of the other stats, though I saw little overall benefit to wasting money on this.
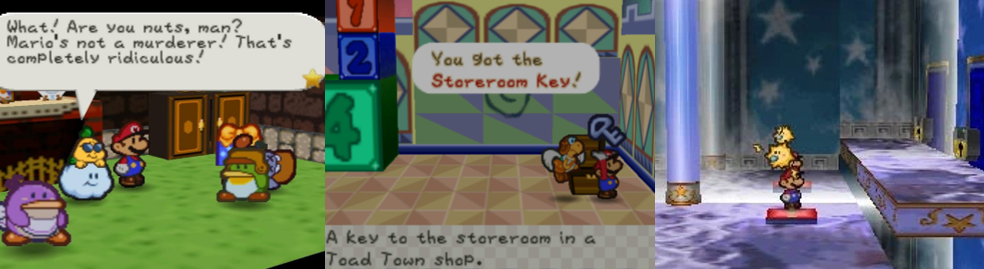
Things start off pretty simple in Paper Mario, with it being obvious where you need to go and the limited map being quite useful. As the game progresses, the map becomes less useful, and you must chat with more NPCs and use your partners to visit new areas. Warp pipes take you to the sewers for additional goodies or fast travel you to previous areas, there’s a train you must get moving to progress, and a haunted forest to traverse by paying attention to the background. While Toad Town acts as your central hub, each location includes an item shop and Toad house and other NPCs who aid you if you speak to them or help them out. At Dry Dry Outpost, you must go back and forth chatting with NPCs to track down head thief Moustafa and acquire a key item to get through the looping desert. When in Lavalava Island, you must search all around, crossing water on Sushie, to find the mischievous Yoshi kids, you’ll gather various items to use in Boo’s Mansion to access the throne room and recruit Lady Bow, and you’ll be hopping in and out of the Shy Guy’s Toy Box to retrieve the items the Shy Guys stole from Toad Town and get the model train within moving to new platforms. Like Super Mario RPG, Paper Mario marries some traditional platforming and puzzle solving with RPG gameplay, with you jumping to platforms, finding keys to open doors and free Toads, and using blocks or stairs to explore. You must hit various switches to uncover hidden paths or activate bridges, plug up magma to avoid being roasted, dive under bridges, smash through wooden panels, and even shift the environment to take alternative paths. Even dead ends can lead to goodies or hidden areas if you send Bombette out or light them up with Watt. When you reach the Shiver Region, Mario’s comically accused of killing the mayor and players must prove his innocence, only for the mayor to simply have been in shock! Players must sneak past (then frantically run from) Tubba Glubba, venture down the different paths of Flower Fields doing glorified fetch quests to plant a beanstalk up to the clouds, smash giant blocks, and raise or lower staircases to progress.
Presentation:
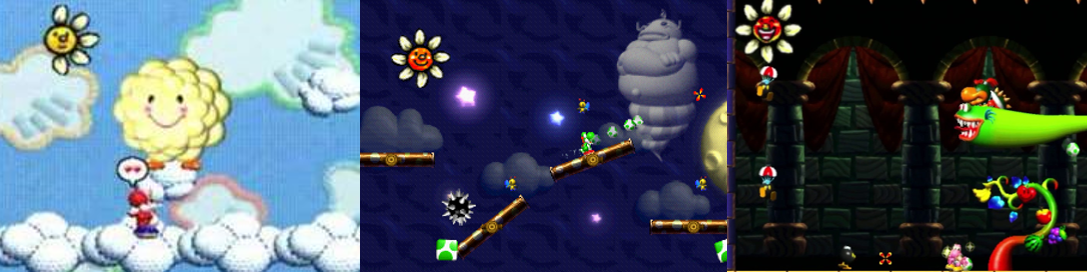
Paper Mario takes a page out of Yoshi’s solo ventures to present a colourful mishmash of traditional 2D sprites and 3D graphics, with the game’s locations all being rendered with a 3D pop-up book aesthetic. This certainly adds some fun character and depth to each location as the camera pans and moves in interesting ways, with buildings often collapsing like cardboard as you enter and exit and Mario flattening down to take a nap. When in battle, the backgrounds maintain the pop-up book aesthetic but with a 2.5D bent, making them (and the entire game) appear to be an elaborate stage play. Despite being a flat, 2D sprite, Mario and his companions showcase a great deal of charm and character in their victory poses and their fun, whimsical dialogue (although Mario never speaks). I especially liked the outrage Mario’s partners voice when he’s amusingly accused of murder and the sass Peach shows when constantly discovered by Bowser, who’s as childish as ever despite having unlimited power. Ironically, however, Mario’s animations are surprisingly limited, which speaks to the simplistic gameplay of the game’s battles. This is true of his partners and enemies, though Koopas will topple over, enemies spin around in a daze before poofing out of existence, and some mini and main bosses even taunt you or transform mid-battle. Although it took me some time to adjust to the visual presentation of Paper Mario, I enjoyed how colourful and daft everything was; the game leans into humour in a big way and is consistently presented as a casual RPG throughout. I was a bit disappointed to see Luigi and other Mario characters sidelined, but it was fun seeing all the enemies you usually bop without a second’s thought are actually thriving races. It was amusing seeing Goombas and Koopas be so enamoured by Mario, to have him partner up with friendly versions of a Bob-omb and Lakitu, and to explore the environment using their unique abilities. The game’s storybook aesthetic is carried through to its cutscenes and interludes, and the cheerful soundtrack, though I must admit that no tunes stuck in my head after my playthrough.
While Paper Mario isn’t exactly taxing the Nintendo 64 and plays things way too safe in a lot of ways, it performs really well and there’s a lot of visual variety in keeping with the Mario franchise. You start at Mario’s house where he and Luigi venture to Toad Town, only for Bowser to abscond with Peach’s entire castle and Mario forced to venture into deserts, haunted forests, and perilous mountains to liberate the Star Spirits. Toad Town alone has loads to see, from the post office to Club 64 at the docks and the dojo, but then you have places like Koopa Village (which you must save from a Fuzzy attack) and Lavalava Island’s Jade Jungle (which is full of hidden paths and little islands and leads to the hazardous Mt. Lavalava). Every location is full of NPCs and some change according to the story as Mario settles unrest, solves problems, or completes often tedious tasks. Flower Fields is perhaps the most engrossing area, sporting a hedge and pipe maze, thorny pits you must float over, and berries to collect and deliver, though I strangely enjoyed the confusing, twisted Forever Forest and even Dry Dry Desert. Each area sees you performing some convoluted tasks to reach a fortress or structure, in which you must get keys, hit switches, and progress towards the boss. Once you save all the Star Spirits, you ascend to Bowser’s Castle, taking a back entrance, rescuing captive Toads, avoiding lava and fire hazards, before reaching Peach’s all-too-quiet castle. Anyone who’s played Super Mario 64 will recognise the layout, though it’s been expanded to include a kitchen and other rooms and given a dark, ominous atmosphere thanks to being corrupted by Bowser’s evil. Other, more surreal areas also exist, such as Star Haven (a cosmic town populated by sentient stars and reached by traversing a mystical bridge formed by the Star Spirts) and Shooting Star Summit, where shooting stars fall harmless and the Star Spirits beg for your help. Additionally, the battle backgrounds change depending on where you are, adding a bit of variety to them even if the battle gameplay can get a bit tiresome at times.
Enemies and Bosses:
Many recognisable Mario enemies pop up in Paper Mario, respawning when you leave areas, though oddly failing to drop SP if you return at higher levels or battle undead enemies like Dry Bones or Gloombas. None of the regular enemies are especially difficult, sporting one or two attacks, but they do become more durable as you progress and appear alongside others who can make even simple enemies more troublesome. Goombas attack with a headbutt, sporting spiked hats to fend off Mario’s jumps or taking to the skies to avoid his hammer. Koopas are similar, though attack from a distance with their shells, while Fuzzies bite you to steal your HP and restore theirs and Bob-ombs explode in a kamikaze attack after being hit. Bullet Bills are endlessly fired by blasters, Monty Moles toss dirt, Boney Beetles, Clefts, and Koopatrols must be knocked over to make them vulnerable, and Bandits temporarily keep you from using items or certain attacks. Pokeys must be cut down to size, Bzzap!s defeated before they can poison you, and Duplighosts transform into your partner and gain their attacks! Colourful Magikoopas hover on broomsticks, fire magical blasts, and heal or buff their allies, some enemies (like the Groove Guy) call in backup or are engulfed in flames to deal fire damage, the various Clubbas hit hard with spiked maces, and Hammer Bros toss a bunch of hammers (or a single, powerful hammer). Some enemies are vulnerable to elemental attacks, such as the Bubbles and Embers and Frost Piranhas, while bigger, slightly more formidable enemy variants act as mini bosses, such as the Blue and Red Goomba Bros who hound Goombario, the giant Gloopers who lurk in the sewers, spitting ink and bopping your head, and the vulture-like Buzzar who attacks on Mt. Rugged, flinging his feathers and proving a formidable (if optional) challenge in the early game.
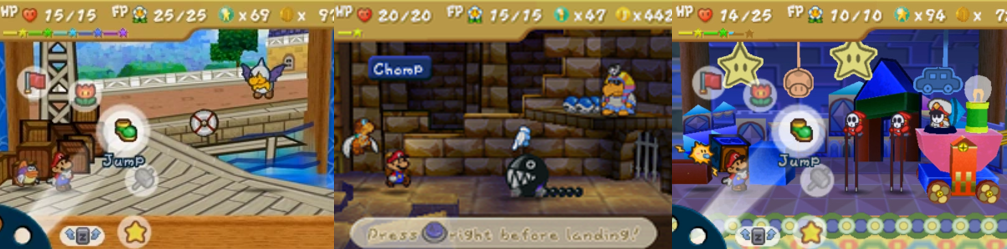
Similarly, Mario may encounter Stone Chomps in Dry Dry Ruins and must battle the Big Lantern Ghost to recruit Watt, which can be annoying as you must attack his lantern to light up the arena but not so often that he extinguishes the flame, and his attacks often incapacitate your partner. Players can also choose to pay off or fight Kent C. Koopa, a large, short-sighted Koopa who squashes Mario with a ground pound and needs two hits to topple over. When on the outskirts of Starborn Valley, players can either flee from or fight the ghost-like Monstar, though this is merely for show, and must answer questions about the game and its characters when confronted by the Guard Door. The half-hatched Jr. Koopa constantly hounds you between chapters, adding new attacks and becoming tougher as the game progresses. At first, he’s quite weak but then he gains wings to limit your attack options, wields a magical rod, protects himself and attacks with a spiked attachment, unleashes a lightning blast, and even heals himself. While it takes some time for bosses to become more problematic, you do face a lot of them, and they can be difficult if you have the wrong partner or waste turns so be sure to use the Heart and Save Blocks often helpfully placed right before them. Your first challenge is the enchanted Goomba King, who fights alongside the Blue and Red Goomba Bros, though you can easily defeat all three by attacking the Goomut Tree. Next, you track down the elusive and strangely familiar Koopa Bros, who attack in a makeshift Bowser mech and then in a totem formation, with you needing to topple them over and using Kooper to hit all four at once. Tutankoopa guards Dry Dry Ruins, summons a Chain Chomp to attack and distract you, and you must find and battle Tubba Blubba’s disembodied heart to save the Boos of Gusty Gulch. You’ll need Watt to tackle the Shy Squad, who rob Toad Town and attack as a swarm, on stilts, and in a totem like the Koopa Bros, before General Guy steps in with his toy tank…thing. General Guy tosses bombs and fires lightning bolts from the tank’s lightbulb, so I’d suggest targeting that first.
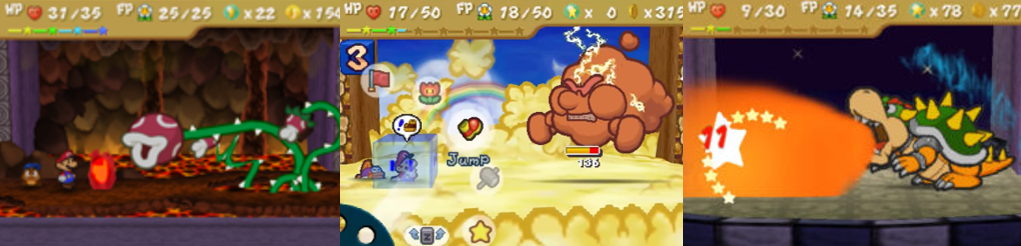
Things ramp up when you face the Lava Piranha, which is accompanied by two Lava Buds that join it in spitting projectiles. After you damage it enough, the spiked plant catches fire, necessitating the use of elemental attacks, and it adds a more powerful fire breath attack to its arsenal. I particularly struggled against Huff N. Puff, who spawns Tuff Puffs every time he’s hit which not only attack you but are consumed by him to restore his HP! You must tap A to reduce the damage of his wind breath, and to mitigate his lightning attack, and pop his Tuff Puffs (while still damaging him) so they don’t bolster his attacks or HP. The Crystal King wasn’t a pushover either as he summons Crystal Bits, freezes you, duplicates himself (with two of the three being intangible), and heals himself to undo all your hard work. While Bowser is unbeatable at the start of the game, he’s more vulnerable in the endgame, though he can make himself invincible with the Star Rod so you must cast Star Beam (which doesn’t cost FP but wastes a turn) to remove the spell. Bowser attacks with claw swipes (which can poison you so be sure to equip a nullifying Badge), fire breath, and a shockwave that incapacitates your partner. He also heals, grows, and becomes immune to the Star Beam thanks to Kammy Koopa. After knocking the old witch off with Peach and Twink, you gain the Peach Beam to dispel Bowser’s magic and continue the fight (with full HP and FP). Though Bowser’s lightning bolt, ground pound, and healing are aggravating, using Watt to power up Mario’s Mega Jump saw me to a hard-fought victory.
Additional Features:
There are 160 Star Pieces in Paper Mario, with many found by whacking or ground pounding certain tiles while others are out in the open or inside chests. If you take these to Shooting Star Summit, you can trade them for Badges, of which there are sixty-nine (nice!) varieties. These can either be found or bought, but you’ll need to upgrade Mario’s BP stat to equip the most Badges as some cost more BP than others. You can also acquire duplicates, allowing you to further boost Mario’s HP or FP, which are capped at fifty apiece (while the BP cap is thirty and Mario’s maximum level is twenty-seven). Although there’s no post-game content, there’s plenty to do, such as finding all the Special Blocks to upgrade your partners, finding all twenty-five of Parakarry’s lost letters, having Tayce T. cook up unique items, and taking on Chuck Quizmo’s quizzes. Your rewards are pretty much always Star Pieces or Badges, however, and there are no additional characters, worlds, or bosses to unlock. However, if you challenge the Toad Town dojo, you’ll face five additional battles against some tough opponents, culminating in a superboss showdown with the dojo’s Master, earning a diploma for each victory and changing some NPC dialogue to reflect your achievement. You can also purchase up to ten Li’l Oinks to populate a small farm in Toad Town, gaining rare items every time a Li’ Oink leaves the pen, and unlock Rip Cheato’s shop for some rare (and expensive) items. Otherwise, you can abuse the Nintendo Switch’s save state feature to help with some of the game’s trickier battles, though it’s still worth fighting every enemy and thinking strategically about which stat up level-up.
Final Thoughts:
I was hesitant about playing Paper Mario, despite how much I enjoyed Super Mario RPG. I assumed it would be a fun, colourful, whimsical little adventure with simple RPG mechanics and puzzles. And, mostly, I was right: Paper Mario isn’t going to be taxing most hardened RPG players, but there’s nothing wrong with a casual gaming experience. However, I was surprised by the difficulty spike near the end game, mainly because it feels forced due to the strange way levelling-up works and how limited your partners and their abilities are. So many battles would’ve been much easier if your partner could use items or Star Spirits and, while some Badges mitigate this, it can get annoying. While the visual presentation can be a little jarring (and disappointing given it’s not a true 3D RPG), the pop-up-book aesthetic works really well and made everything very charming and humorous. Similarly, while I was disappointed to see Luigi get the shaft again, I quite enjoyed Mario’s new partners and seeing a different side to his enemies, who have their own societies and towns and such. While I felt the game dragged in the middle, padding out the runtime with fetch quests and tedious puzzle solving, it usually led to a fun boss battle and some new abilities to make things easier. I enjoyed the variety in each area, who there was a lot to see and do and discover, and the little interactions between Mario and the NPCs. I was also a fan of the Peach-centric interludes, which were a nice break from the main gameplay loop, and how each partner’s abilities encouraged backtracking and exploration. While I don’t believe Paper Mario is better than Super Mario RPG, it was definitely a fun experience in short bursts. It lacked a lot of deeper RPG mechanics and features I expect from the genre, outstayed its welcome at times, and the BP gimmick needlessly handicapped the player’s abilities, but it was very bright and carefree and is probably worth your time if you need a break between more challenging RPGs.
My Rating:
Pretty Good
Did you enjoy Paper Mario? How do you think it compares to Super Mario RPG and later games in the series? Which of Mario’s partners was your favourite and did you like seeing his enemies expanded upon? Do you agree that the combat and gameplay got repetitive after a while? Which Badges did you equip for your playthrough? Did you ever find all the letters and defeat all the dojo’s combatants? Which Super Mario spin-off is your favourite and how are you celebrating Nintendo’s mascot this month? Feel free to share your memories and opinions of Paper Mario in the comments and subscribe to my Ko-Fi for more Mario content.


You must be logged in to post a comment.