The Date: 17 March 2002 The Venue: SkyDome; Toronto, Ontario, Canada The Commentary: Jim “J.R.” Ross and Jerry “The King” Lawler The Referee: Mike Chioda The Stakes: “Icon vs Icon” grudge match
The Build-Up: On 31st March 1985, Vince McMahon forever changed the face of the wrestling world with the very first WrestleMania, an elaborate pay-per-view event that became the hottest event of the calendar year for World Wrestling Entertainment (WWE) and what better way to celebrate than by looking back at one of the event’s most historic matches! For nearly two years, the World Wrestling Federation (WWF) went head-to-head with rival World Championship Wrestling’s (WCW) Monday Nitro but, in 2001, WCW was crippled by bankruptcy and shockingly purchased by McMahon, bringing the “Monday Night Wars” to a surprising end. When McMahon’s attempts to keep WCW alive fell through, the WWF began a storyline where WCW “invaded” the WWF; unfortunately, since WCW’s top names sat out their high-paying contracts, the WWF was forced to rely on lesser names, resulting in one of the biggest missed opportunities in wrestling. Ironically, within months of the Invasion ending, WCW stalwarts debuted in the WWF, including the dreaded New World Order (nWo). First teased when Scott Hall gatecrashed Nitro, the rechristened “Hollywood” Hogan led the nWo in hijacked WCW’s programming, recruiting numerous allies, capturing the top WCW titles, and even to their own ill-fated pay-per-view before ultimately outstaying their welcome and unofficially dissolving when WCW folded. When the original trio came to the WWF, it was as a “lethal dose of poison” McMahon planned to use to kill his company in a bid to push his rival, “Nature Boy” Ric Flair, out of the WWF. The nWo soon ran afoul of “Stone Cold” Steve Austin and the Rock; when Austin quashed a feud with Hogan due to backstage politics, Hogan and the Rock began a rivalry that saw Hogan and the nWo brutalise the Rock and even attempt to kill him by crashing a truck into an ambulance that the People’s Champion was trapped inside, thus setting the stage not just for a clash of icons but also a blood feud that spanned generations.
The Match: Everyone knew Hulk Hogan back in the day; hell, I’d wager everyone is aware of him now, for better or worse, but even I knew he was a big multimedia star back when I was a kid and barely able to watch wrestling outside of a few choice matches and segments. It was the WCW/nWo videogames that introduced me to the nWo and the despicable “Hollywood” Hulk Hogan but, while I was vaguely aware of the group during my early years as a wrestling fan, I wasn’t able to watch WCW back then, so it was quite the moment when Hogan, Hall, and Nash showed up at No Way Out in 2002. I was a keen watcher of wrestling by then, especially the SmackDown! brand, and was excited to see what these much-hyped interlopers would bring to the table, but even I was immediately disappointed when they downplayed their threat and made it more about their egos than actually taking over the WWF. Still, the hype was real for Hogan vs. The Rock; while, in hindsight, a six-man tag pitting Rock, Austin, and the Undertaker against the nWo might’ve been the bigger, better match for WrestleMania X8, it ultimately worked out all the better for the fans and wrestling history given how rare it was (and still is) to see generational stars clash like this. The first hint that the match wasn’t going to go exactly as planned can be heard the moment that god awful nWo music hits and Hogan saunters down to the ring playing air guitar and pandering, with his usual smug bravado, to a chorus of cheers. Yes, despite Hogan literally trying to murder the Rock in the build up to the match, the Toronto crowd were absolutely unashamed Hulkamaniacs and cheered Hogan all the way down that ridiculously long entrance ramp. It was so obvious that that J.R. had to point out that Hogan’s legacy and star power have almost superseded his more heinous actions and even Hogan seemed confused by the barrage of “Hogan! Hogan! Hogan!” chants coming from the nostalgia-drunk audience. To be fair, it’s not like the Rock was met by anything less than a rapturous reception, but was pretty clear that the fans had altered the execution of the match the moment the two went face-to-face, eye-to-eye in the ring and were met with duelling chants and, after exchanging sly looks with each other and the audience, the two clearly agreed to toss out the plan and give the people what they wanted.
Right as the match started, the crowd insisted on a double turn and both men readily accepted!
The two locked up in a test of strength that Hogan won to the adulation of the crowd; a second lockup saw the Rock caught in a side headlock and then blasted to the canvas by a shoulder tackle. In between each move, the Rock’s facial expressions told the whole story; he was stunned, livid, at Hogan’s power and the crowd’s reaction to his foe’s signature posing, and he flailed like a ragdoll as Hogan chopped at him and cut him down with a clothesline. Although many in the crowd cheered when the Rock floored Hogan with a flying shot of his own and got in his face, these were quickly drowned out by a chorus of boos that the two men milked to the nth degree. A bit of schoolyard shoving led to a flurry of punches from the Rock that caught Hogan off-guard and saw him catching his breath on the outside. The Rock followed, attacking from behind and rolling Hogan into the ring for a few more shots to the face and another explosive clothesline. Dazed, Hogan seemed primed for a Rock Bottom but he fought out of it, much to the delight of the crowd, and regained control with a bionic elbow off an Irish whip. Hogan dropped a few elbows and stamped on the Rock’s face, but the crowd didn’t care (if anything, they encouraged it!), they just kept chanting Hogan’s name as he whipped the Rock from one corner to another and pummelled him with big haymakers and clotheslines. The Rock got himself back in the game with an awkward-looking tackle, however, spitting barbs at the rapturous crowd after they jeered his attempts at a comeback. The audience leapt to their feet when Hogan planted the Rock with a back body drop for the first near fall and they even cheered when Hogan tied the Rock up in an abdominal stretch and attacked his ribs, raked his back a couple of times, went to work smacking him with the old school ten punches, and even biting the Rock’s forehead!
The fans refused to boo Hogan; no matter what he did, they were firmly behind the wrestling icon.
The Rock turned the tables and chopped Hogan, mocking him and the crowd between moves, but found his momentum shut down with a surprising chokeslam-like manoeuvre from Hogan. Even when Hogan blatantly choked the Rock, the crowd wouldn’t be dissuaded from cheering the Hulkster and this only became more apparent as the two exchanged punches and Hogan launched the Rock from the ring to a thunderous ovation! Hogan pressed his advantage by slamming the Rock into the steel steps and the barricade; then they cleared out the announce table, only for the Rock to try to smash his head in with a steel chair. The referee intervened, however, which allowed Hogan to floor the Rock with a stiff clothesline, but poor Mike Chioda got blasted by the Rock after Hogan countered an Irish whip. The Rock got back into it with a spinebuster and his patented sharpshooter; no stranger to the leg lock and operating on pure instinct, Hogan powered to the ropes but the Rock simply dragged him away, giving the Hulkster no choice but to tap out. However, Mike Chioda was still out, robbing the Rock of an early victory, so the People’s Champion roughly tried to bring the referee to his senses (to chants of “Rocky sucks!”), only to walk right into a low blow from Hogan. Hogan followed up with a Rock Bottom but only scored a two count thanks to the referee struggling to make the count. Frustrated, with Mike Chioda still somewhat out of it, Hogan took off his belt and whipped it across the Rock’s back but ended up being planted by the Rock’s super-slick DDT. The Rock then grabbed Hogan’s belt and got a measure of revenge, lashing Hogan over and over and even spitting on it to add insult to injury, but his attempt to finish Hogan off with a Rock Bottom led to the Immortal One powering out of the pin!
Although the Rock won, Hogan won back his fans and embarked on an unexpected nostalgia run.
The crowd leapt to their feet as Hogan “Hulked Up” in the ring; fists clenched, teeth gritted, he shrugged off blow after blow and answered with clubbing blows to the Rock’s face. Hogan whipped the Rock off the ropes and floored him with his signature Big Boot and the crowd were literally frothing as Hogan came crashing down with his patented Atomic Leg Drop. Mike Chioda fell to the mat but the crowd, Hogan, basically everyone lost their damn minds when the Rock kicked out at two! With Toronto at a fever pitch, Hogan went for his finishing combination again, but the Rock rolled out of the way and scored with another Rock Bottom. Rather than go for the cover, the Rock purposely hoisted Hogan up and hit a third Rock Bottom before springing to his feet and earning himself the three count off a People’s Elbow! While the crowd might have been torn, if not against the Rock, throughout the match, they were unanimously elated with this outcome and showered both men with a standing ovation. This only escalated when the clearly exhausted and wounded Hogan sheepishly offered his hand in a show of respect; still milking the electricity of his impromptu heel turn, the Rock hesitated but ultimately shook the Hulkster’s hand and the two briefly embraced before Hogan humbly stepped aside for his better. Unimpressed, Hall and Nash attacked their nWo teammate until the Rock made the save and, together, Hogan and the Rock fought off Hall and Nash to effectively (if unofficially) disband the nWo. Fatigued, Hogan then tried to leave the ring but the Rock couldn’t help himself; he stopped Hogan and all-but begged him to perform one last pose down and, despite his obvious pain and discomfort, Hogan conceded and basked in the unanimous show of respect and adulation from the uproarious Toronto crowd, much to the Rock’s obvious glee!
The Aftermath: This match has been heralded as one of the best wrestling clashes of all time, and for good reason; both men worked extremely well together and played to each other’s strengths and the Rock did a masterful job of working around Hogan’s limitations. What really makes this match, though, is the crowd; they are as big a part of the proceedings as the in-ring action and, without them causing an impromptu double-turn, I don’t know if this would’ve been as memorable as it was. However, the stars aligned perfectly, allowing Hogan to redeem years of wicked deeds during his time in the nWo with this one match and embark on an unexpected nostalgia tour over the next few years. Indeed, if it wasn’t obvious from the ending to this match, Hollywood Hogan turned face for the first time in years after WrestleMania X8. He would team up with the Rock (and Kane) to battle his former nWo teammates and found himself drafted to the SmackDown! brand, where he donned a new version of his classic red and yellow attire and rode his renewed fame all the way to a title shot, and victory, over Triple H the very next month at Backlash. The Rock was pivotal in securing Hogan this match as he gave up his own championship opportunity to film The Scorpion King (Russell, 2002); by the time he returned to the ring, not only was the WWF now known as WWE but Hogan had lost the Undisputed Championship to the Undertaker and was busy feuding with the likes of Kurt Angle and defending the WWE Tag Team Championship alongside Edge. Hogan and the Rock would, of course, face each other again a little under a year after this match. By this time, the Rock was firmly in the midst of his own “Hollywood” heel turn as an abrasive egomaniac and Hogan was embroiled in a feud with Vince McMahon. Before the two faced off at WrestleMania XIX, however, Hogan was forced to battle the Rock again at the 2003 No Way Out pay-per-view to the same result, but with the caveat that the Rock’s victory came after assistance from McMahon and a crooked referee. While both men would go on to have numerous other matches, their next biggest in-ring encounter came during the opening segment of WrestleMania XXX where Hogan, Rock, and Steve Austin shared the ring in an iconic (and hilarious) WrestleMania moment.
My Rating:
⭐⭐⭐⭐⭐
Rating: 5 out of 5.
Fantastic
What did you think to the Icon vs. Icon clash between the Rock and Hollywood Hulk Hogan? Do you think the match would be as memorable without the rampant Toronto crowd? Who was your pick to win this match at the time? Were you a fan of the nWo’s brief stint in the WWF? Would you have preferred to see Hogan face off against Steve Austin? Which generational wrestling icons would you like to see go one-on-one? How are you celebrating WrestleMania’s anniversary this year and what’s your favourite WrestleMania moment? Drop your thoughts below or leave a comment on my social media to let me know what you think about WrestleMania X8 and be sure to check out my other wrestling content across the site.
In April 1985, the first issue of the ground-breaking Crisis on Infinite Earths(Wolfman, et al, 1986) released and saw the temporary destruction of the “Multiverse”. To celebrate this momentous event, I’m discussing multiversal crossovers all throughout April in an event I dubbed “Crossover Crisis”.
Writers: Nancy A. Collins and David Imhoff – Artist: Jeff Butler
Story Title: “Goin’ South” Published: October 1995
Story Title: “A Day in the Life…” Published: November 1995
Story Title: “Face Off” Published: January 1996
The Background: Following on the heels of John Carpenter’s Halloween(Carpenter, 1978), which popularised the “slasher” sub-genre of horror cinema, Friday the 13th(Cunningham, 1980) proved to be a box office success, justifying the release of numerous sequels. Immediately, the slasher franchise became synonymous with its unstoppable, machete-wielding, hockey mask-wearing killer, Jason Voorhees (Various), a horror icon who has transcended the genre, becoming a mainstream figure who has branched out into videogames, toys, and various comic books. These would explore Jason’s complex mythology and pit him against other horror icons and, in fact, this latter gimmick was used in his very first comic book appearance as Jason ended up befriending Jedidiah Sawyer/Leatherface and his cannibalistic family in this curious and oft-forgotten three-issue series. Leatherface, of course, first appeared in the highly controversial and influentialTexas Chain Saw Massacre (Hooper, 1974), to which all masked slashers owe a great debt. Thanks to a myriad of sequels, remakes, and requels, the Texas Chainsaw Massacre franchise has suffered from the law of diminishing returns at times, though Leatherface and his iconic chainsaw remains a prominent horror figure. Given their childlike demeanours, violent bloodlust, and their unsettling family relationships, I guess it made sense for Topps Comics to have the two square off in this limited series, especially as the legal issues surrounding the long-awaited clash between Jason and Freddy Kruger (Robert Englund) wouldn’t be resolved for some time.
The Review: Our story begins as most Friday the 13thfilms do: with a bit of context about Crystal Lake, affectionately known to the locals as “Camp Blood” thanks to the actions of Pamela Voorhees and her zombie-like killer of a son, Jason. Given that this comic was published in 1995, the most recent film was Jason Goes to Hell: The Final Friday(Marcus, 1993), one of two ultimately unsuccessful attempts to finally do Jason in for good, which explains Jason’s somewhat odd-looking appearance. He’s kind of a mixture of his look from Friday the 13thPart VIII: Jason Takes Manhattan(Hedden, 1989) and Jason Goes to Hell, meaning his bulbous head is kind of eating into his mask. He also starts the story still chained to the bottom of Crystal Lake, indicating that this comic book takes place sometime after Friday the 13thPart VI: Jason Lives(McLoughlin, 1986) rather than after Friday the 13thPart VII: The New Blood (Buechler, 1988) since he hasn’t decayed enough to resemble his look in that film. Honestly, trying to figure out where or even if this comic fits into the already spotty Friday the 13thtimeline (or with that of the equally troublesomeTexas Chainsaw Massacre films) is a fool’s errand; it’s better to just say it’s an alternative tale that takes place after Jason Lives and the original Texas Chain Saw Massacre. Anyway, the story sees Crystal Lake abandoned due to Jason’s many rampages; in its place is a big industrial factory that pumps its waste into the lake, contaminating it so badly that its owners, Linhart Amalgamated, decide to cut their losses and ditch the lake entirely so they can build a fancy business district on its foundations. Naturally, they do this on the cheap, but the dredging is successful and sees the polluted water and its toxic waste loaded onto containers and transported across the country via barge, truck, and train.
When Jason finds himself in Texas, he’s welcomed into the grotesque Sawyer family.
This sees Jason forcibly extracted from his underwater prison and reanimates him, just as the local crazy warned, and he bursts out of his confinement in such a rage that he chops up a train-hopping hobo and his doggy! Jason then barges into the control carriage and kills the relaxing train conductors, splitting the head of one right down the middle with his machete! The train consequently derails and dramatically explodes, leaving Jason lost in the woods of “Sawyerville” in Texas, where he’s just about to hack up some poor randomer when he’s interrupted by Nubbins Sawyer/The Hitchhiker and Leatherface, who are also chasing the terrified man. Encouraged by the Hitchhiker, Leatherface and Jason immediately go at it, with Jason somehow able to deflect Leatherface’s chainsaw with his machete and knock it from his hands. However, the two brutish killers share an intense look as they clash weapons and Jason chooses to behead the victim and peacefully hand Leatherface his chainsaw, earning him the admiration of the Hitchhiker. Against his very nature, Jason is compelled to follow the two back to their humble abode, which is adorned with decorations made from the flesh and bones of their victims, which are also cooked up for the family to eat by Drayton Sawyer/The Cook. When the Hitchhiker and the Cook applaud Jason’s killing skills and berate Leatherface, the hockey masked killer wanders upstairs to find the unmasked Leatherface blubbering. Sensing a kindred spirit in the hulking cannibal, Jason silently invites him downstairs to join the family for dinner, specifically the Cook, the Hitchhiker, the bloated corpse of Aunt Amelia, and decrepit former butcher Grandpa Sawyer. Though struggling with the alien emotions bubbling within his enraged mind, Jason feels so comfortable and accepted with the cannibalistic misfits that he communicates his name to them by writing on the wall with “Kool-Aid” (that’s most likely just blood) and being welcomed to the family.
When Jason sees the way the Hitchhiker treats Leatherface, it unearths some bad memories.
Jason stays with the family, even resting in his own bedroom, where his dreams are dominated by flashbacks to when he drifted out to sea and almost drowned as a child. Tensions quickly rise as the Hitchhiker insults Jason by demanding he take off his mask and eat some scrambled brains, and then attacks Leatherface after being reprimanded by the Cook, which gives Jason a flashback to the violence he suffered at the hands of his abusive father. The Cook briefly placates Jason with a tour of the house, showing off the macabre kitchen, where fresh bodies hang on meat hooks, human meat is stored in the freezer, and more bodies are cooked up in the smokehouse. The Cook takes an immediate shine to Jason, approving of his friendship with Leatherface and sharing his dreams to one day serve his unique food to the social elite. After showing off his long-dead dog to Jason, the Hitchhiker is ordered to the family gas station, where he creeps out a travelling couple. He then rushes back to recruit Leatherface to pick up the “groceries”, but the Cook suggests he take Jason out instead to show him their ways. The Hitchhiker attacks the man with a hammer, bashing his brains in, and admonishes Jason for throttling the woman to death too quickly as the Sawyers enjoy hearing them squeal and, while the Cook is disappointed that the dead bodies aren’t younger, it’s a successful trip for the cannibals. The Hitchhiker then excitedly shows off his art collection to Jason, a room full of dead bodies that have been turned into chairs and other furniture. He delights in showing off a lamp, plant pot, and chair all made from skulls and bones and his pride and joy: a corpse dressed up as Santa Claus with a red lightbulb for a nose! When Leatherface sneaks in and accidentally destroys the Hitchhiker’s chair, the maniacal Sawyer beats his dim-witted sibling mercilessly, berating him the entire time and again causing Jason to remember how his own father routinely beat and demeaned him before his mother (strangely called “Doris” here) cleaved his head in with a machete. Accordingly, Jason defends Leatherface, though the Hitchhiker is less than impressed since he can’t actually feel pain.
When the relationship breaks down, Jason finds himself ostracised and longing for home.
When Jason moves to stab the Hitchhiker with a bone, Leatherface steps in and Jason retires to the house, troubled by his hesitation and recent behaviour. He ends up in the attic, longing for simpler times at Camp Crystal Lake, and the Cook comes to find him and apologise for the Hitchhiker’s behaviour. He also reveals that he set aside his dreams to look after the family as a promise to their mother, his sister, Velma, suggesting a degree of inbreeding in the family, and asks Jason to help him get Grandpa downstairs for dinner. The Hitchhiker continues to scold Leatherface, however; after accusing the mongoloid of reading his comic books, the Hitchhiker beats him in a rage, again compelling Jason to defend his friend. This time, it earns him a switchblade to the chest, which naturally doesn’t faze the hulking murderer, and Jason tears the house apart in pursuit of the maniacal Hitchhiker. Angered at Jason’s outburst, which sees Aunt Amelia beheaded, the Cook tries to stop him with a meat cleaver and a chase ensues, with Jason smashing into the kitchen and preparing to eviscerate the two before Leatherface bursts in with his chainsaw whirring. After a moment’s hesitation, Leatherface strikes, slicing Jason’s stomach and rekindling his rage; incensed at the betrayal, Jason buries his machete in Leatherface’s shoulder and the two go at it. Leatherface suffers a deep cut to the wrist but fails to land a blow of his own before the Hitchhiker bashes Jason’s head in with a hammer. Although the Hitchhiker is eager to treat Jason the same as anyone else, the Cook doesn’t feel right about eating him; not only did he genuinely like Jason, he suspects his meat wouldn’t be too appetising so he decides that he deserves a decent send off. Despite their differences, Leatherface angrily insists that Jason keep his mask on and the family drive Jason’s brained body to the nearby lake, where they tie cinder blocks to his angles, put his machete in his lifeless hand, and dump him in with a ceremonial kick. This is enough to spark Jason back to life; he cuts through his bonds and rises from the lake, briefly tempted to slaughter the Sawyers for their betrayal, but deciding that he’s had enough of strange people and strange places and begins the long walk back to Crystal Lake and the comfort of the familiar.
The Summary: This was an interesting anomaly of a comic; there’s definitely some crossover appeal between Jason and Leatherface and I think the story did a decent job of painting the two as kindred spirits, but I don’t think it fully lived up to this potential. This was more like Jason Meets the Sawyers since, while he does fight Leatherface very briefly twice throughout the story, he’s more touring their house and being welcomed into their family. I think one thing that’s kind of crucial for any crossover is seeing each character in the other’s location, but we don’t get that here as Jason spends the entire story in Texas, mostly in the Sawyer house, and I think it might have benefitted from having Jason and Leatherface spend more time together, killing randomers, and then demonstrating their differences in their methods. Leatherface is, essentially, a butcher, artist, and child-like figure but the comic only really delves into the last aspect of his personality. While this works in creating parallels between the way the Hitchhiker treats him and the way Jason’s father abused him, it doesn’t always land as the comic is understandably more interested in pairing Jason with characters who can actually talk beyond animalistic grunts.
While the two don’t fight much, they’re positioned as thematic parallels and the art’s suitably gory.
The artwork is pretty good; very exaggerated and stylised, but suitably gory and I really enjoyed the depiction of the Sawyer house, though it does seem like the story suffers from padding a bit as it stops to explore the Cook’s unrealised dreams and the Hitchhiker’s art collection. Because of this, I wonder if it might’ve been better as two thirty-page issues rather than being a three-issue arc as then we could’ve gotten to the titular fight a little faster. When Jason and Leatherface do fight, it’s very brief and not very bloody; neither really inflict much damage on each other and it just suddenly and anti-climatically ends when the Hitchhiker bashes Jason’s brains in. I enjoyed the text boxes that tried to explore Jason’s mindset and conflict over why he’s spared the family and chosen to stay with them, but at times it seems to be openly criticising the paper thin plot and the nonsensical reason behind why he would choose to stay with them. The narrative also suffers from repetition and constant flip-flopping; one minute Leatherface and Jason are buddies, sharing an unspoken bond, and the next Leatherface is attacking Jason with a chainsaw since he dared to raise a hand to the Hitchhiker. Similarly, the story repeats the same thread of Jason stepping in to defend Leatherface from the Hitchhiker more than once and it’s not really clear why the second time leads to a bigger falling out other than the story needing to end. Consequently, things get a bit muddled and boring considering it’s only three issues long, which is again why I think a two issue special would’ve been better. Still, it’s a fun little curio; the artwork is good, the gore is enjoyable, and the attempt to shed some light on Jason’s childhood and somewhat humanise him through Leatherface was admirable, if flawed. I’d actually like to see this done again, perhaps with a painted, gritty art style and a tighter plot, but it was inoffensive enough, if a bit forgettable.
My Rating:
⭐⭐
Rating: 2 out of 5.
Could Be Better
What did you think to the showdown between Jason and Leatherface? Were you disappointed that they only fought a couple of times and that it was rather brief? Did you enjoy seeing Jason interact and bond with the Sawyer family? What did you think to the Hitchhiker and the focus on exploring the family’s…unique lifestyle? Which horror icons would you like to see clash in a comic or movie? What’s your favourite Friday the 13th and Texas Chainsaw Massacre film? Whatever your thoughts on this horror crossover, feel free to leave them in the comments or on my social media.
In February 1991, readers of The New Mutants were introduced to Wade W. Wilson, AKA the wise-cracking, fourth-wall-breaking Merc With a Mouth himself, Deadpool. Rob Liefeld and Fabian Nicieza’s sword-swinging immortal went on to become one of Marvel’s most popular anti-heroes thanks to his metatextual humour, violent nature, and massively successfullive-actionfilms. It’s perhaps no surprise that Sideshow rechristened April 1st as “Deadpool Day” to give fans of the chimichanga-chomping mercenary an excuse to celebrate all things Deadpool.
Story Title: “A Kiss, A Curse, A Cure” Published: 13 May 1998 (cover-dated July 1998) Writer: Joe Kelly Artist: Steve Harris
The Background: By the 1980s, the X-Men were established as a successful cornerstone of Marvel Comics; they were so popular that then-chief editor Jim Shooter ordered a number of X-Men spin-off books, one of which was Chris Claremont and Bob McLeod’s The New Mutants. These Mutant youngsters were eventually tutored by the time travelling Mutant Nathan Summers/Cable and rechristened as X-Force, and famously went up against Fabian Nicieza and Rob Liefeld’s Deadpool in The New Mutants #98 (ibid, 1991). Heavily inspired by James Howlett/Logan/Wolverine and Peter Parker/Spider-Man (and with numerous similarities to DC Comics’ Slade Wilson/Deathstroke the Terminator), the self-styled “Merc With a Mouth” was initially introduced as an antagonist for the Mutant team. However, Deadpool proved popular and soon made guest appearances in other Marvel Comics before receiving his own four-issue miniseries, a precursor to his ongoing solo title and his own influx of popularity once he began breaking the fourth wall. One of the character’s other defining traits is his relationship with Lady (or Mistress) Death, a cosmic, reaper-like entity whom Wade is desperately in love with. Created by Mike Friedrich and Jim Starlin, Death is most prominently known for also being the object of Thanos’s affections; his motivation for gathering the Infinity Gems and eradicating half the life in the universe was to win her love. Thanos and Deadpool clashed over their love for death more than once; in fact, it was the Mad Titan who cursed Deadpool with immortality when Lady Death chose Wade over him.
The Review: This bumper annual opens with the super chatty Deadpool unexpectedly teleporting right into the path of a closed fist; the punch sends him careening over a cliff edge where, despite this best efforts, he plummets to the ground with a sickening impact. Just moments before, Deadpool had been working to make amends for his past deeds in San Francisco, and now he finds himself literally dead of a broken neck thanks to his mysterious assailant. Deadpool’s spirit initially balks at the idea of the fall killing him, or the sudden attack being real, but is forced to confront the truth when Lady Death greets him with a passionate kiss. Despite Deadpool asking to skip the flashbacks and cosy up to Death, she silently insists on forcing him to relive his traumatic origins and the story regularly shifts between the present and the past, where mercenary for hire Wade Wilson is given a tour of the Weapon X facility, a special weapons development branch of Department K, the superhuman arm of the Canadian government. At this point, Wade is a strapping young man with a head full of blonde hair and the potential to be a valuable asset to his government, but also riddled with terminal cancer. Since Weapon X has already made a veritable Captain Canada out of James Hudson/Vindicator, the general is confident that even trash like Wade can be moulded into a superhero with their program. Wade readily agrees, awestruck by the Vindicator and with little to lose from his prognosis. However, he fails to pass the grade and, with his conditioning worsening, he’s locked up in a hospice where his fellow outcasts have such a low life expectancy that they regularly take bets on how long they will survive from their horrific and invasive experiments.
After being killed, Deadpool relives his traumatic origins and first encounter with Lady Death.
This “deadpool” carries high stakes and is championed by the semi-cybernetic Worm Cunningham; however, when Worm tries to pull that shit on Wade, the heavily scarred and slowly dying mercenary pulls a gun on him and demands to be left alone before turning the gun on himself. Before he can pull the trigger, though, the gun (and Wade’s wrist) is crushed by the sadistic, super strong Francis Fanny/A-Man, who mocks Wade and the knocks him out to deliver him to the resident doctor, Emrys Killebrew, for further experimentation. Dr. Killebrew and the A-Man are amused by Wade’s torture, especially when he begs for death, and both delight in subjecting him to unspeakable torment to make the most of his raw materials. The experience is so traumatic for Wade that his mind breaks and he grows cynical, scorns his misfortunes, and finds his body further ravaged by cancerous tumours. His mind becomes so warped that he perceives Lady Death, who lingers in his cell, intrigued by his unique imagination, and is stunned to find that he can see her. After invasively confirming that he’s not suffering from some kind of aneurysm, Death postulates that Wade is a unique being who longs to die but is being artificially kept alive against his will. Frankly, she finds the entire thing quite the turn on, as does he since Death assumes an alluring form given the amount of times he’s begged for it; thus, she promises they can be together if he finds a way to die but, despite his best efforts, he’s thwarted at every turn. He’s constantly stopped from killing himself and subjected to nightmarish experiments that bring him to the brink of death and cause him agony, yet he remains alive thanks to Dr. Killebrew’s machinations. He’s become so unkillable that his odds in the Deadpool have risen to three thousand to one, and such a risk to himself that he’s confined to a high-tech wheelchair. However, he remains determined to reunite with Death and to get the A-Man out of his way; Worm, however, doesn’t fancy his odds since the A-Man boasts enhanced strength, instincts, speed, and durability.
Wade’s defiance causes the A-Man to kill his friend just for the chance to murder the mouthy mercenary.
Worm lets slip that the A-Man hates his real name and is psychotically triggered by the merest mention of it, which is all Wade needs to rile up the brutal guard. Wade’s taunting works, sending Francis into a violent frenzy and condemning him to endure electroshock therapy. The experience is so intense and extreme that it briefly allows Wade to speak with Death once more. While he’s not truly dead, he crosses over long enough to share a dance with her, and Wade’s mockery of the A-Man not only improves his standing in the Deadpool but also offers a glimmer of hope to the other inmates. There’s a defiant fire there that wasn’t there before, but Wade angrily denies that he’s a hero; he sees the world as cruel and unfair and hope as a waste of energy, much to Worm’s disappointment. Even Death wonders if he was a little hard on the semi-cyborg but Wade insists that the only thing he cares about is being with her; others can play the role of hero, after all. Still, Wade’s attitude and the rising insubordination sees the A-Man voice his grievances to Dr. Killebrew; despite the A-Man protesting that he’s less effective if the patients don’t fear him, Dr. Killebrew is unwilling to simply dispose of Wade since his body contains information vital to his research. To get around this, and teach Wade some respect, the A-Man threatens to subject Worm to violent torture unless Wade falls in line. While Wade is torn between saving his friend and standing up to the A-Man, he ultimately chooses the latter, berating the A-Man with a tirade of insults after Worm begs him to stay defiant. This results in Worm being viciously lobotomised, giving Wade no choice to end his suffering and consequently forcing Dr. Killebrew to order Wade’s execution for killing one of his test subjects.
Wade’s desire for revenge sees him live on as Deadpool and drives him to confront his tormentor.
As the A-Man gleefully takes the controls of Dr. Killebrew’s elaborate murder machine, Wade vows to make them pay for what they’ve done to him, the other patients, and to Worm even as the A-Man rips his heart from his chest. Death comes to him, eager to consummate their love and begging him to let go and be with him; however, while he wishes to finally be with her, his stubborn nature and desperate need for vengeance kick-start his Mutant healing factor and force his body to repair the damage. The experience further damages his psyche but also shuts Death off from him as he drives himself forward to get revenge on his tormentors. Wade relieves some guards of their weapons and goes on a killing spree, much to the A-Man’s surprise and anger. The A-Man crushes Wade’s spine (his entire abdomen, in fact) in a rage and is left stunned when Wade painfully and sickeningly heals from the damage right before his eyes. Wade then christens himself “Deadpool” and unloads two assault rifles into his abuser but, even as he lies dying on the floor amidst the chaos of a full-blown riot, the A-Man can’t help but mock Deadpool’s heavily scarred visage, which somehow remains despite his advanced healing factor. With the A-Man dead, Deadpool calls to Death to take him but she doesn’t answer, leaving him distraught and heartbroken, which in the present he assumes is her way of causing him pain for choosing revenge over her. A silent point from Death reveals that Deadpool’s killer was none other than the A-Man, now calling himself “Ajax”, resurrected and sent to hunt down all the escapees from the hospice, The ghosts of his victims implore Deadpool to finish the job so they can move on to the afterlife and, with one last regretful kiss to Death, Deadpool spontaneously returns to life and heads out to make Ajax pay once and for all.
The Summary: This was quite the surreal story. I believe this was the first real extended dive into Deadpool’s origins, and I recognise a lot of the elements from his first live-action movie, so that was kind of cool. While we don’t learn much about Wade’s life before Weapon X, and nothing about his time with the program since he dropped out of “hero school”, he has a reputation as being a mercenary and has a bit of sympathy to him because of his terminal disease. The main thrust of the story is to showcase just how horrific and traumatic Wade’s time at the hospice was. Wade’s unique speech patterns and manic thought boxes can be traced back to his time there, where the experiments and abuse fractured his mind and drove him to the point where he exists in this kind of limbo between life and death. That alone is alluring to Lady Death, but Wade’s crazed perspective on life also draws her attention, as does her desire to tease him with her affections. Naturally, since he longs for death, Wade finds her impossibly alluring and is desperate to be with her but he’s forever denied that thanks to a throwaway line from Dr. Killebrew about transplanting a healing factor into his ravaged body. When he finally is on the brink of death, Wade’s normally cold-hearted resolve has been replaced by a burning desire for revenge, spurning Death and close that door to him seemingly forever.
The story goes to great pains to examine the tragedy and torture that made Deadpool the man he is.
I do find this concept a little convoluted, similar to the idea that Wolverine has to literally fight off death every time he suffers a mortal injury. I think it clouds things a little and it’s simpler to just say he has a super-superhuman healing factor, but it only muddies the water if you think about it too much. While the concept of Death as a cosmic entity is proven to be real in Marvel Comics, it’s just as likely that Wade’s fracted mind is imagining her as this alluring skeleton woman and that he’s too stubborn, too powerful, and too stupid to die, despite wanting to deep down. Still, the story does a great job of humanising Deadpool and peeling back the layers behind his demented bravado; his experiences left him hating the world, cursing fate and the Gods alike, and wanting nothing more than to die, but the kindness of others and the brutality of his captors shifted him towards a different path. Dr. Killebrew and the A-Man are understandably one-dimensional characters; one’s a cackling mad scientist with no regard for his patients’ welfare and the other’s a superhuman sadist who delights in throwing his weight around and the suffering of others. I liked how Wade riled the A-Man up with insults and repeatedly calling him Francis, and that Wade became this revolutionary figure amongst the populace as a result, so the conflict was more about physical embodiments of oppression and freedom rather than an actual fist fight, which is fitting considering this extends to the physical and metaphysical aspect of Death. Ultimately, this was a decent and surprisingly tragic story designed to explain how awful Deadpool’s life has been and why he is the way he is. In that respect it worked well, and the art was serviceable enough most of the time, so it’s a good choice for anyone who’s just getting into Deadpool and wants to learn a bit more about his background and character.
My Rating:
⭐⭐⭐
Rating: 3 out of 5.
Pretty Good
Have you ever read Deadpool and Death Annual ’98? If so, what did you think about Deadpool’s trip down memory lane? Do you like the idea of him falling for Lady Death or do you find that aspect a bit convoluted? What did you think to the agonising torture Deadpool had to suffer and the characterisation of Dr. Killeshaw and the A-Man? Do you enjoy Deadpool’s manic sense of humour or do you find it a bit grating? What are some of your favourite Deadpool stories and moments and how are you celebrating Deadpool Day today? Whatever your thoughts on Deadpool, feel free to share them below or drop a comment on my social media.
Anthony “Tony” Stark/Iron Man first lived, walked, and conquered in Tales of Suspense #39, published in March 1963 and brought to life by Marvel mastermind Stan Lee, Larry Lieber, and Don Heck. Since then, ol’ shellhead has gone through numerous different armours, had many amazing adventures, featured in numerous videogames and cartoons, and shot into mainstream superstardom thanks to an iconic, career-defining portrayal by Robert Downey Jr.
Story Title: “Demon in a Bottle” Published: November 1979 Writers: David Michelinie and Bob Layton Artist: John Romita, Jr.
The Background: Long before Robert Downey Jr. uttered the unforgettable words “I am Iron Man”, Stan Lee sought to take a character his readers would hate (a rich, military industrialist), mix in some inspiration from Howard Hughes alongside some vulnerability and personal tragedy, and make him someone they could root for. When mounting deadlines kept Lee from writing Iron Man’s debut, he turned to younger brother Larry Lieber, while artist Don Heck and the legendary Jack Kirby handled the artwork. Although Iron Man is very much a mainstream superhero these days, that wasn’t always the case, which is surprising given his prominence in cartoons and Marvel Comics. Alongside a colourful collection of villains, Iron Man has served on Marvel’s premier super team, the Avengers, swapped places with his teenaged younger self, fought against and imprisoned his fellow heroes, and even battled a sentient version of his armour! But one of Stark’s most harrowing battles came in his addiction to alcoholism; as plotted by writers David Michelinie and Bob Layton, Stark was wracked with guilt after an armour malfunction caused him to accidentally kill a foreign ambassador. Following this, Stark’s drinking increased and this is only exacerbated by the ensuing investigation and the machinations of Justin Hammer, who was behind his armour’s troubles, and caused Stark to drunkenly lash out at friend and foe alike. Considering how important and influential the “Demon in a Bottle” arc was for Iron Man’s characterisation (it’s frequently cited as one of the top Iron Man stories), it’s ironic that Layton would later state that it was never the writers’ intention to raft anything more than a new personal drama for Stark to conquer and that they had no idea how pivotal it would be to the character for years to come.
The Review: The issue begins with Stark wallowing in his office. Although he was publicly exonerated and cleared of all charges, public opinion of the Armoured Avenger (who was still believed to be Stark’s bodyguard at the time) has been shaken, as has confidence in Stark International. Already haunted by the memory of the life he took, Stark indulged in a wild night of drinking that saw him spur his love interest, Bethany Cabe, and insult his faithful butler, Edwin Jarvis, so badly that the courteous footman resigned from his employ. Sat alone, surrounded by glasses and bottles of half-finished whiskey and headlines branding his alter ego a murderer, Stark can’t help but ruminate on the status of his armoured persona. Usually, Iron Man was the perfect scapegoat for Stark’s more illicit actions but he’s forced to accept the fact that he, not Iron Man, killed a man, is causing his company to go down the drain, and scared off his loyal manservant. Terrified of losing everything he’s spent a lifetime building up, and still necking back the whiskey, Stark decides that the only solution is to give up being Tony Stark completely and devote himself to Iron Man full-time. Thus, he gulps back another shot of liquid courage and takes to the skies, drunkenly crashing through the window of his office and heading out for some action.
When his drinking starts to impact his heroics, Stark desperately asks for help to overcome it.
It’s not long before he finds it, either. A train has conveniently derailed nearby; while there are no casualties, a tanker full of chlorine gas needs getting back on track, something Iron Man decides to handle personally. However, in his inebriated state, he neglects to account for the weight ratio and the tanker plummets to the ground, spewing toxic gas into the air and causing the Armoured Avenger to be labelled a nuisance by the on-site cops. Ashamed, Iron Man flies away, angry at himself for being so careless and admonishing himself for not having designed any new armours in weeks thanks to his responsibilities to Stark International. In despair, he returns to his office to pour a fresh drink and is startled to find Bethany waiting to confront him about his addiction. Bethany can see the signs as clear as day thanks to her previous experiences with her now-ex-husband, Alexander Van Tilberg, once a charming and successful diplomat who became withdrawn and angry after becoming addicted to pills. This addiction not only caused a rift between them but also cost Alexander his life, so she’s perfectly positioned to warn Stark about the self-destructive nature of his drinking. She hits him with just the right mixture of tough love and sympathy, pleading with him to admit he has a problem and to open up to her and the few friends he has left before it’s too late. Incredibly, her words get through to him and he drops his glass to the floor and timidly asks, practically begs, for her to help him.
Despite the temptation, Stark goes cold turkey, makes amends, and is resolved to win back his company.
What follows is a harrowing montage in which Stark goes cold turkey; rather than attend meetings or seek professional help, Stark is minded by the incredibly patient Bethany, who endures his mood swings and despair over the course of several painful days. In time, Stark rediscovers his love for designing, and Bethany’s support helps him to realise that he has a lot of bridges to mend. His first port of call is the Avenger’s mansion, where Jarvis has set up home since leaving. Stark’s initial relief, and elevation, to have made amends with his faithful butler soon hits rocky shores when Jarvis reveals that he was forced to sell his shares in Stark International to pay for his mother’s medical bills; it turns out that he was scammed by a loan shark and now Stark is in danger of losing control of his company to the Supreme Headquarters, International Espionage and Law-Enforcement Division (S.H.I.E.L.D.) Although extremely tempted to turn to the bottle, Stark pushes through with all the resolve and willpower he can muster to don his armour once more and confront Mr. Benchley, the lender to whom Jarvis sold his stock. When cash fails to convince the Mr. Benchley, Iron Man trashes his office and threatens to expose his shady business ethics to the authorities, only to learn that the loan shark has already sold the stock to S.H.I.E.L.D. Returning despondent to his office, Tony moves to pour himself a fresh glass and, despite the immense urge to drown his sorrows in alcohol, Bethany’s appeal and the support of his friends ultimately wins through. The issue ends with Stark having turned his back on the booze and determined to win back control of his company with a newfound resolve, supported by Bethany and Jarvis and on the road to recovery.
The Summary: The first thing that strikes me about this issue is the artwork; I didn’t read a lot of Iron Man as a kid as he didn’t tend to show up very often over here in the UK but what I did read was from the 1970s so I’m a bit biased towards John Romita Jr.’s rendition of Iron Man. While I prefer some of his other armours, particularly the “Silver Centurion” look or those that are more angular, Romita Jr. does a great job of updating Jack Kirby’s original design and making it seem like armour and not just flimsy fabric. Tony Stark also sports one of his best looks here outside of his later mullet, with a mop of dark hair, a sexy little moustache, and some outrageous bellbottoms, but it’s his facial expressions that win the day. Obviously, this is an extremely harrowing time for Stark; he’s at his lowest point, lost in depression, guilt, and self-doubt, and struggling to keep it all together and you really see this in the gamut of emotions etched into his features. He’s despondent, lost to a drunken joy, depressed, enraged, and literally bathed in sweat as he struggles, hands trembling, to resist taking another shot or reaching for that bottle. The text boxes do an equally masterful job of conveying, with trademark Marvel eloquence, the turmoil with Stark but a lot of these panels could’ve been left without any text and still been just as powerful, if not more so.
The story wonderfully showd the destructive effects of alcohol on Stark’s life.
Taken in a bubble, Stark’s battle with alcoholism seems to be very cut and dry; it’s important to remember that he was regularly swigging down the booze over a number of prior issues and, while this issue ends with him determined to turn his life around, it is by no means the end of his struggle and is instead the first step towards recovery. Still, I would have liked to see a little more of drunken Iron Man; the previous issues did a great job of showing drunk Tony lashing out at those closest to him and how his drinking has affected his social life, but seeing Iron Man stumble through heroics while tanked up is a startling visual. The issue plays it safe, with Iron Man’s mishap escalating an issue but one that is more inconveniently dangerous than life-threatening. Those who want to se ol’ shellhead go toe-to-toe in a fist fight while puking in his suit will be disappointed as this issue is very much an internal battle for Stark. Shaken by Bethany’s heart-breaking loss and moved by her persistent (if blunt) attempts to help him, Stark resolves to quit drinking altogether. As I touched upon, these days this would probably be rendered in a more realistic way but it’s certainly dramatic to see Stark suffering through withdrawal and sheepishly making amends with Jarvis. It’s a powerful issue, one that remains as prominent today as it did decades ago; it helps show a different vulnerability to Stark and portray him as a flawed hero, and man, as well as tackling the destructive nature of alcoholism in a way that isn’t as ham-fisted or cringe-worthy as some stories that touch upon similar issues. While it’s probably not the greatest Iron Man story ever told, it’s certainly significant and emotionally relevant to the character so it’s well worth checking out if only to experience one of the quintessential turning points in Iron Man’s long history.
My Rating:
⭐⭐⭐⭐
Rating: 4 out of 5.
Great Stuff
Have you ever read “Demon in a Bottle”? What did you think to Stark’s descent into alcoholism and the way the disease was portrayed here? Would you have liked to see more of Iron Man under the influence or do you think focusing on his social life was a better idea? Do you think Stark’s alcoholism has become a bit of a cliché at this point or do you enjoy how it makes him a flawed character? Have you ever struggled with addiction? What are some of your favourite Iron Man characters or stories? Where does Iron Man rank in your hierarchy of comic book characters? Are you doing anything to commemorate Iron Man’s debut appearance and, if so, what is it? Either way, I’d love to hear your thoughts on Iron Man so leave a comment below or on my social media.
Released: 22 March 2024 Director: Gil Kenan Distributor: Columbia Pictures Budget: $100 million Stars: Mckenna Grace, Paul Rudd, Callie Coon, Finn Wolfhard, Dan Aykroyd, and Ernie Hudson
The Plot: After embracing their family legacy as Ghostbusters, Callie Spengler (Coon) and her kids, Phoebe (Grace) and Trevor (Wolfhard), move into the team’s old firehouse headquarters in New York City with former teacher Gary Grooberson (Rudd). However, Ghostbusters old and new are forced to unite against a new demonic threat that threatens to blanket the city in an endless winter.
The Review: I think it’s only fair to say that, despite being a lifelong Ghostbusters fan, I wasn’t all that enamoured by Ghostbusters: Afterlife. I didn’t like how the film wasted so much of its runtime catching us up (or reminding us of) the Ghostbusters’ past, or that everyone slagged Doctor Egon Spengler off until the final act, which suddenly celebrated him and the late Harold Ramis. It felt a bit too safe at times, repeating many elements of the original film, and spent a lot of time building up the new characters and their dynamics but not in a ghost busting context. However, it ended with the promise that the Ghostbusters would be back in action in New York City and, to be fair, Frozen Empire opens with that very much being the case. After a pretty terrifying opening flashback showing the power of the film’s newest demonic villain, the film jumps to the present day to find Gary Grooberson busting ghosts alongside his surrogate family – matriarch Callie Spengler and her teenage children, Trevor and Phoebe. Having relocated to New York in the interim, the new team not only use the old firehouse, car, and equipment but new gear like Ecto-1’s gunner seat and remote-controlled ghost traps. As exhilarating as their new profession is for them, however, the Ghostbusters still attract a fair amount of negative press; their reckless ways cost the city millions in repairs and earn them the ire of perennial Ghostbuster hated Walter Peck (William Atherton), now inexplicably the Mayor of New York City and wielding the power to threaten the Ghostbusters’ livelihood (despite the financial backing of former Ghostbuster Doctor Winston Zeddemore (Hudson)). While this later becomes a real threat to their operation, Peck initially makes good on his promise by forcing the team to bench Phoebe since she’s underage, a catalyst that kicks off a handful of the film’s many plot threads.
Despite her enthusiasm for ghost busting, Phoebe is sidelined and makes some odd decisions.
Despite her vast intelligence and enthusiasm for the job, Phoebe is effectively barred from ghost busting, driving a wedge between her and her mother and testing her already awkward relationship with Gary. While Gary is eager to be more than just the kids’ confidant and friend, he’s unsure of his boundaries in his strangely unaffectionate relationship with Callie; while she urges him to be a more assertive father figure, he struggles to fill that role out of fear of overstepping the mark. This could’ve been an intriguing plot thread and, indeed, the ghost (no pun intended) of its potential is weaved throughout the film and hastily paid off in the climax but, for the most part, neither Phoebe or Trevor seem all that bothered. They largely accept Gary and Phoebe only lashes out at him due to her frustrations about being benched and ostracised from what she sees as her legacy. She finds some solace when she befriends a ghost girl, Melody (Emily Alyn Lind), which almost explores the question of what it means to be a ghost, adds a humanising element to the spookers, and hints towards Phoebe’s sexuality but, again, these elements are strangely undercooked and boil down giving her a friends to talk to who she stupidly risks her life to grow closer to, only to be burned when Melody begrudgingly betrays her. Much of the film does revolve around Phoebe, which is great as she was the standout character of Afterlife and some of the best parts of Frozen Empire revolve around her investigating the demonic Garraka alongside Doctor Raymond “Ray” Stanz (Aykroyd). Truthfully, these elements should’ve had much more screen time, same as Winston’s Paranormal Research Center, which could’ve offered Phoebe an alternative to ghost busting but instead existed as a fantastical expansion on the firehouse’s eco-containment field and uncomfortably positioned new character Doctor Lars Pinfield (James Acaster) and the returning as Lucky Domingo (Celeste O’Connor) as glorified zookeepers who forcibly extract, imprison, and experiment on unquiet spirits.
The bloated cast bogs down the run time, but at least the old team have more to do this time.
Still, at least Phoebe has something to do here. The same can’t be said for Trevor, who’s primary arcs here involve whining about wanting to be treated as an adult and trying, in vain, to capture Slimer, who’s taken residence in the firehouse attic. His reunion with Lucky is barely a factor and I honestly wouldn’t have missed him if he wasn’t in the film as he really doesn’t do anything of note accept try to help capture ghosts, which is a shame considering him and Phoebe should really be at the forefront of this new generation of Ghostbusters. Similarly, Callie has very little to do here; so little, in fact, that Phoebe angrily attacks her position in the team, criticising her for not being a scientist and only being a member because of her last name. Her sole function is to push Gary to back her up and be a more assertive father figure; otherwise, she’s basically a non-factor. This is the same for Podcast (Logan Kim), which is, again a real shame as he’s got a lot of screen presence and charisma and the whole point of Afterlife was setting up these kids as the new team. Instead, he’s just kinda here because he was in the last film and could easily have been missing without the plot being impacted. On the plus side, Ray gets a lot more to do this time around; Phoebe affectionately refers to him as “Dr. Ray” and Aykroyd’s enthusiasm is infectious, making him a real highlight. Similarly, Winston also gets more play as a mediator between Peck and the Ghostbusters, and offering solutions to their storage and tech issues. In fact, one of the best scenes is him and Ray interacting where Winston chastises Ray for his recklessness given his age, though this also makes me wish we saw more of the old team as mentors to the newbies.
Bungling Nadeem is potentially the only one capable of stopping the demonic Garraka.
This, however, leads into one of Frozen Empire’s biggest issues: there’s just too many characters here and not a lot for them to do. Doctor Peter Venkman (Bill Murray) also shows up, but more as an obligation and a cameo, with Murray appearing bored and painfully aged compared to Ernie Hudson. Former Ghostbuster receptionist Janine Melnitz (Annie Potts) rounds out the old cast, and even suits up at the end, but again is just here as nostalgia bait and really doesn’t offer much to the movie. Add to that the aforementioned James Acaster and a brief appearance by Patton Oswalt and you have a painfully bloated cast that left me thinking many of these roles could’ve been trimmed down, excised, or replaced with other characters and the film’s pacing would’ve been much improved. The most egregious new role, for me, was Nadeem Razmaad (Kumail Nanjiani), an awkward and out of place comic relief in a horror comedy stuffed with comedic actors. Nadeem sells his grandmother’s possessions to Ray, unaware that he’s giving up his responsibility to protect the orb (which contains Garraka’s evil) from harm, and reluctantly learns it’s his destiny to help stop Garraka by mastering his innate pyrokinetic abilities. Sadly, he’s more annoying than funny and, while his firebending abilities help out in the end, I could’ve easily done with him being excised, the Ghostbusters simply finding the orb, and more time being spent on Phoebe outfitting the proton packs with brass to tackle Garraka. This demonic demigod is more of a looming threat than a tangible presence, only appearing in the flesh (so to speak) in the final act, and is truly a terrifying figure, with many awesome powers, but sadly loses a lot of the menace established in the chilling opening with his poor body count. It’s a shame as I liked the aspect that other ghosts were terrified of him, and that he can control them, but it’s not like he manipulates an army of ghostly minions and he shows up way too late, and is far too monstrous, to have much characterisation beyond being unknowably evil.
The Nitty-Gritty: Given the presence of Callie and her kids and their newfound lives in the firehouse with Gary, a prominent theme remains family. As mentioned, Gary struggles to assume a more prominent role in the kids’ lives; he wants to be more than just a friend and co-worker and their mum’s boyfriend, but isn’t sure about how to go about that as he’s worried about overstepping the mark. As Phoebe becomes more outspoken and resentful, Gary gets some opportunities to be more assertive, but earns her respect and the “Dad” title by the conclusion simply by supporting her in the battle against Garraka. The familial theme is primarily supported by Phoebe and Gary, with Callie not showing any pressure about living up to her father’s legacy and Trevor more concerned with Slimer, so this fell a little flat for me. Another theme is of age; Winston chastises Ray for endangering himself and the kids by not letting go of his ghost busting ways, but not only continues to support the Ghostbusters but even suits up alongside them out of loyalty and nostalgia, unable to resist the call of adventure. Venkman also joins them and falls into this category, but simply by being present; he has no real arc in the film except being an ass who tries to steal the spotlight. Other notable themes include destiny, with Nadeem being sceptical and then astounded to learn of his birthright, and the question of what lies beyond, briefly explored in Phoebe’s interactions with Melody.
The nostalgia bait is strong in this one, but not enough to save the plodding pacing.
Even more so than Ghostbusters: Afterlife, Frozen Empire leans heavily on nostalgia; we’re back in New York City and in the firehouse, for starters, so many of the same locations are onscreen, most explicitly the New York Public Library, with convenient exposition basement. This doesn’t always land for me; it’s good to see Slimer back, even in a small role, but I could’ve done without seeing the Mini-Pufts as they weren’t really necessary and the “possessor” ghost could’ve filled that role. On the plus side, the outfits, equipment, and effects all look great; Ecto-1 has a lot of new features, like drones and remote control cars, we get to see Ecto-C (a motorcycle with sidecar and mounted proton pack), and some of the team don new red outfits and upgraded proton packs in the finale. The ghost effects are bolstered by CGI but seem to also include some traditional practical work, especially Slimer, though Garraka casts an intimidating figure whenever he’s onscreen, which just makes me wish we saw more of him. Actual ghost busting is few and far between here, which was disappointing for me considering it seemed like we’d see the Ghostbusters in full force. Instead, the film rehashes the overstuffed containment grid plot and spends more time exploring Phoebe’s burgeoning relationship with Many. However, I wasn’t sold on this; something about a human, talkative ghost raises some weird questions for me about the Ghostbusters’ work and I found it ludicrous that Phoebe, who’s basically a genius, would willingly have her spirit sucked out of her body to be closer to her new friend.
Ghostbusters old and new come together to take down Garraka and redeem the team’s reputation.
One aspect I did enjoy about Frozen Empire was that it at least had a new villain. Garraka may not’ve featured into the main plot as much as I’d like (though, to be fair, neither did the previous villains), but at least the film didn’t rehash Gozer again. Much of the film is focused on Garraka’s orb, its history, and the threat it poses if opened; so, naturally, Dr. Pinfield tries to extract its presence. However, it’s Phoebe who unwittingly unleashes the demon; tricky by a reluctant Melody, she leaves herself open to Garraka’s possession and speaks the incantation which unleashes him. He then promptly ushers in an unnatural ice age across the city and causes the containment unit to breach, which is said would give him an army of ghosts to control but this doesn’t actually happen; the spirits just fly off and we never see them do anything. The new and old Ghostbusters gather at the firehouse to fend of Garraka, only to find his power is so great that he can freeze their proton streams, leaving their fate in the hands of Phoebe and her brass-empowered proton pack and the bungling Nadeem. Luckily for them, Melody has a change of heart and gives Nadeem the flame necessary to weaken Garraka, which allows Phoebe and her family to ensnare him while the old Ghostbusters fiddly with the containment unit and suck him up. In the aftermath, Peck caves to the overwhelming public support and the Ghostbusters are celebrated as heroes once more and head out to round up the ghosts that escaped, presumably meaning the next movie will feature some actual ghost busting rather than a lot of exposition, nostalgia bait, and wasted characters. I just don’t get how Peck, a guy who worked for the Environmental Protection Agency, became Mayor of New York City. I don’t get why Dr. Pinfield and Doctor Hubert Wartzk (Patton Oswalt) needed to exist; I feel Ray, Peter, and/or Winston could’ve fulfilled their roles. I don’t get why Trevor, Lucky, and Podcast were sidelined, why there was little chemistry between Gary and Callie, or why the film played it so safe when it had a great opportunity to tell a new, fun story about a dysfunctional family of Ghostbusters who are mentored by their older (but no less spritely) superiors.
The Summary: If it’s not clear, I was left bitterly disappointed by Ghostbusters: Frozen Empire. The film’s runtime is shorter than its predecessor’s and not much longer than the original films and yet it just dragged so much, especially in the middle and with all the exposition into Garraka. I get wanting to explain the new threat, but it just went on and on and then the payoff was really flat and lacked any stakes as we never saw any civilians in danger. The film’s just far too bloated with too many characters and plot lines; I get Phoebe being mad about being benched, but she could’ve found a new life in Winston’s lab, researching ghosts and such, and found solutions to their problems from there. The family dynamic was lacking for me; Callie and Trevor may as well have been absent as they didn’t do anything of note, which was really disappointing considering how important they were in Afterlife. I liked that Ray and Winston had bigger roles, but I believe that the old team should be relegated to cameos and supporting roles, especially if you’re trying to establish a new generation of Ghostbusters. It’s difficult for me as there was a lot to like here in the aesthetic and nostalgia bait, but something was missing for me and Frozen Empire just faltered midway through and failed to stick the landing, making for a disappointing and often dull viewing experience that could’ve been so much more.
My Rating:
⭐⭐⭐
Rating: 3 out of 5.
Pretty Good
What did you think to Ghostbusters: Frozen Empire? Were you also thrown off by the pacing and bloated plot threads or did the nostalgia bait balance this out for you? What did you think to Phoebe’s sub-plot and her relationship with Melody? Would you have liked to see more from Garraka, and were you a fan of the “Firemaster” element? Which Ghostbusters movie is your favourite? Whatever your thoughts on Ghostbusters and Ghostbusters: Frozen Empire, leave a comment below and go check out my other Ghostbusters content across the site.
So, for no better reason than “Mar.10” resembling Mario’s name, March 10th is widely regarded as being “Mario Day”, a day to celebrate Nintendo’s portly plumber, an overalls-wearing mascot who literally changed the videogame industry forever and shaped the home console market of the nineties.
Released: 3 September 2020 Originally Released: 21 September 1990 Developer: Nintendo Original Developer: Nintendo EAD Also Available For: Game Boy Advance, Nintendo 3DS, Nintendo Wii, Nintendo Wii U, Super Nintendo Entertainment System (SNES) Classic Edition, SNES
The Background: After the videogame industry crumbled under the weight of overpriced consoles and mediocre titles, Nintendo basically saved the industry with the runaway success ofSuper Mario Bros. (Nintendo EAD, 1985). Despite its bizarre development, Super Mario Bros. 2(Nintendo R&D4, 1986) was also a highly praisedbest-seller, and Mario’s star only rose thanks to the unique marketing strategy behind Super Mario Bros. 3 (ibid, 1988) and that game also being a critical and commercial hit. In 1990, Nintendo were preparing to launch the 16-bit powerhouse that was the SNES and getting back into the thick of the “Console Wars”. Although the developers had to adapt to the new hardware, producer and Mario creator Shigeru Miyamoto was excited by the prospect of imaging new ideas, such as finally implementing a dinosaur companion for Mario. The goal was to refine Mario’s mechanics, impress gamers and critics with the SNES’s graphical capabilities, and deliver a fun, but challenging, gameplay experience to help sell their new console. Super Mario World exceeded in this goal; the award-winning game became the best-selling title for the SNES and has been inundated with widespreadcriticalacclaim ever since its release. The game was adapted into cartoons and comics, resulted in an equally successful spin-off series for Yoshi, in addition to being ported and remastered to new consoles over the years. Its legacy is so strong that it was naturally included as a launch title for the Nintendo Switch Online service in 2020, which is the version I’m reviewing here.
The Plot: When Mario, Luigi, and Princess “Peach” Toadstool visit Dinosaur Land, the princess is kidnapped by Bowser, King of the Koopas. Alongside their new dinosaur friend, Yoshi, the Super Mario Bros. must liberate the island from Bowser’s Koopaling progeny and confront Bowser in his castle to rescue the princess.
Gameplay: Like its predecessors, Super Mario World is a 2D, sidescrolling platformer in which players play as ether Mario or Luigi and journey across seven levels (referred to as “Worlds”) and two bonus Worlds, hopping on Bowser’s minions, collecting power-ups, and grabbing Coins for points and extra lives, all while racing against a timer. As is also tradition, the game features two play modes; one where you go solo and one where you switch between the brothers after each level to allow two players to go head-to-head, taking different routes on the large, varied, interconnected overworld and lending extra lives if required. Unlike in previous 2D Super Mario games, you can’t change the control scheme here, so you’ll be pressing B to jump (ranging from a little hop to a higher jump the longer you press the button) and swim, A to perform the new spin jump (which allows you to defeat certain armoured enemies and break blocks beneath your feet) and holding X or Y to run. You can get quite a bit of speed this time, too, which allows you to glide and fly across levels when you’re powered up by the Cape Feather or run up walls in certain situations. You can also hold X or Y to grab items like Koopa shells, blocks, and keys; these can now be thrown upwards, increasing your range of attack options and opening up new areas to explore. Finally, you can look up, scroll the screen with the left and right triggers, and duck; if you run and duck, you can slip through small gaps and reach bonus areas and secret exits.
Traverse a colourful new land using Mario’s new companion and power-up!
Interestingly, I didn’t notice any difference between Mario and Luigi; Luigi doesn’t jump higher or have less traction, meaning the differences between the two are a simple palette swap, which is odd considering they played differently in Super Mario Bros. 2. The brothers are joined by a new companion in this game, Yoshi. If you hit enough blocks, you’ll eventually spawn in a Yoshi egg, from which this helpful little dinosaur will hatch. Players can ride Yoshi and press X or Y to extend his sticky tongue and eat fruit or enemies, the latter of which can either be swallowed, spat out as Koopa shells, allow Yoshi to breathe fire, and add a “flutter” motion to his jump. Yoshi allows players to do everything they normally can but with the added bonus of acting as a permanent shield; when hit while riding Yoshi, you won’t power down and can simply hop back on him to continue onwards, but you can’t use your Fire Flower abilities while riding him and Yoshi isn’t able to climb vines and won’t accompany you into fortresses or castles. Yoshi can also gain the ability to fly, easily allowing you to cheese through levels, and you can sacrifice him for a boost jump if you’re feeling sadistic. Some levels also include different coloured Mini-Yoshis; carry these until they eat five pieces of fruit or enemies or a single power-up and they grow into an adult Yoshi, and other levels see you riding atop bulbous Monty Moles to safely cross spiked hazards. Mario and Luigi can also use springs to get around, often needing to pick up and toss them to clear higher obstacles, and these are much easier to control than in Super Mario Bros.: The Lost Levels (Nintendo R&D4, 1986); swimming and autoscrolling levels also return, but again I had no issues in dealing with these as the game’s mechanics were so refined. Another new addition is the “Item Stock” in the heads-up display (HUD); if you’re already powered up, new power-ups you acquire are stored in this box and will automatically drop down when you take a hit (or press ‘Select’), which can be a life saver, though you can’t stockpile power-ups on the overworld anymore. Another new feature is the addition of checkpoints mid-way through levels, which I find interesting as these levels felt shorter and far less frustrating than Super Mario Bros. 3’s; hitting this while in your base form will also automatically power you up, too.
The game’s challenge is very fair, offering fun visuals and incentives to keep playing.
Super Mario World gives you three save files to play with and the chance to manually save at certain points, such as after toppling a Koopaling or visiting a Switch Palace. Every level has a secret exit, sometimes accessed via a key or by taking a different route; this allows access to new areas on the overworld and to secret levels and Switch Palaces, where you activate giant-coloured switches to make their corresponding-coloured blocks solid and thus protect you from hazards in levels. This opens the game up to some replay value as you explore each level looking for secrets and new paths, and you’re given some hints towards this through the Message Blocks that convey story text and helpful tips. As ever, you can hop into pipes to find shortcuts, bonus areas, and explore caves and flooded sections; you can take vines up to the clouds, ride platforms, hop off Koopa Paratroopers, and make use of temporary blocks and platforms. Many Worlds contain Ghost Houses that are filled with shy Boos and feature a maze-like element; you’ll need to find the correct door, often by generating temporary platforms or paths using a Switch Block, all while avoiding the ghostly enemies and bottomless pits within. Other levels are autoscrollers that force you to make split-second decisions with your jumps; castles and fortresses are filled with lava, narrow hallways, rotating spiked maces, and crushing Thwomps, often all at once and in close-quarters situations to test your mettle. You’ll need to awkwardly create paths using Control Coins, activate spotlights in Bowser’s Castle, and deal with pipes that now go up and down and blast you through the sky. The background can also move vertically, requiring you to quickly take refuge in safe areas, and you’ll even be climbing on fences, bashing enemies and flipping around to the other side to avoid dangers. Massive, spiked columns crushing trunks, suffocating tar, painful spikes, and bottomless pits increase in their abundance, but Super Mario World is quite generous with its lives; you can find hidden areas where you play mini games to earn a whole bunch of extra lives, in addition to 1-Up Mushrooms popping out from blocks, the background, and being awarded for collecting Coins and defeating enemies.
Graphics and Sound: I was a SEGA kid growing up, so my exposure to the SNES came mainly from a friend who owned the console and a few games. Because of this, I’ve long been fascinated by the “other side” and, when I think of SNES, Super Mario World is one of the first games I think of because of its absolutely gorgeous presentation. This was a dramatic step up from Mario’s 8-bit adventures, featuring a colourful (and surprisingly unique) set of Worlds that really showcased the little things that made the SNES so impressive. Things like Mario’s cap flying back when he falls and bopping fruits on the trees to a touch of parallax scrolling, sprite zooming, and the ever-changing overworld mean Super Mario World remains the quintessential 2D Mario experience for me. Sure, there’s no difference between the brothers other than a palette swap but they’re much bigger and more detailed than ever before here; the addition of Yoshi also cannot be understated, especially as it wasn’t possible to include a character like this in Mario’s 8-bit adventures, and I loved how much quirky, cartoony humour was packed into the enemies, who swoop at you, are very expressive, and appear so much more versatile than simply wandering aimlessly around. Although Super Mario World recycles many of its music tracks for its various Worlds, this is the game I think of when I think of Mario music; every tune is so catchy and upbeat and stays in your head, and I relish hearing that end of level jingle and seeing Mario throw up the peace sign each time.
The game is deceptively big, colourful, and includes more story than ever before.
Super Mario World’s Worlds veer slightly away from elemental themes and more towards the fantastical; you’ll still be exploring thick forests, crossing bridges and bodies of water, venturing into caves, and hopping to mushroom-themed platforms, but there’s a fitting prehistoric bent to the majority of the game. Caves are filled with tar, glittering crystals, or frozen masses of ice; you’ll see hills and mountains in the backgrounds, cross plains filled with dinosaur-like enemies, and ride across lava on platforms made of skulls! Some Worlds are shorter than others, like the sky-themed Twin Bridges with its log platforms and track-based platforms guarded by saws, or contain unique overworld elements, like the Forest of Illusion, which requires you to explore to find the right exit and open up more of the map screen. Spooky levels like the Ghost Houses and the Sunken Ghost Ship impressed in their ambiance; there’s an ominous fog in the air, a creepy melody playing, and lightning flashing in the background, and I loved how the Sunken Ghost Ship was a wrecked recreation of the various Airships from Super Mario Bros. 3. The overworld changes as you find new exits, creating shortcuts and even changing seasons as you find more exits; this also allows you to take a shorter, far easier path to the final fight in the Valley of Bowser and avoid the pain of navigating the doorways and challenge of the longer path. Story is emphasised much more here, with text and fun little cutscenes pushing you onward after clearing each castle but, while Luigi’s sprite features in the cutscenes, the story text doesn’t change to reference him, which is a bit of a shame.
Enemies and Bosses: Many of Mario’s common enemies make a return here, including Goombas, various Koopa Troopers, Boos, the always-annoying Lakitu, and Bullet Bills, but these also come in new variants, meaning you’ll see rings of Boos, Boos disguised as blocks, and Boos that aren’t as shy as their peers and attack from the shadows, Super Koopas that dive from above, and many of them fill the screen either as expected or floating along in bubbles. Super Mario World sees the debut of enemies such as Magikoopas (who teleport in to fire a magical blast and are immune to our regular jump), Wigglers (who get very mad when you hop on them), the screen-filling Banzai Bills and Big Boos, alongside large, weird green bubbles, a lava dinosaur, and other dinosaur-themed enemies who wander about, breathe fire, or take a couple of hits to defeat. By far the most aggravating new addition is Chargin’ Chuck, a turtle protected by American football gear who can charge at you (destroying any blocks in their way), duplicate themselves, toss various projectiles (from footballs to rocks), summon other enemies, and prove highly resistant to your attacks thanks to their padding. You’ll also have to watch out for the Amazing Flyin’ Hammer Brother, who swoops overhead tossing an endless supply of hammers at you, and Sumo Brothers, who spawn flaming pillars with their jumping stomp.
Although enjoyable and cartoonish, the boss battles are a little too repetitive and easy.
In the game’s fortresses, you’ll battle four Reznors, fire-spitting Triceratopses on small, rotating platforms stationed over a bridge that slowly disintegrates over a pool of lava. The only way to attack the Reznor’s is from beneath, which is pretty simple despite their many fireball projectiles. In the Donut Secret House, you’ll battle a Big Boo, one that doesn’t freeze when you face it and instead fades in and out; while Big Boo can’t hurt you, his regular Boo minions can, and you’ll need to grab the blocks conveniently placed underfoot to defeat him. Like in Super Mario Bros. 3, you’ll have to defeat Bowser’s children, the Koopalings; but, while they differ in their abilities since they no longer have magic wands, they’re no less disappointing since all but one of them recycle three specific attack patterns. Iggy and Larry Koopa are fought on a tipping platform in a lava pool where you must avoid their shell attack and fireballs and bop on them to force them into the lava, Morton and Roy run up the arena walls and try to drop on you from above, and Lemmy and Wendy O Koopa fire bouncing projectiles and decoys, but you can easily avoid these and hop on them when they pop out from the pipes. The only Koopaling with his unique attack strategy is Ludwig von Koopa, who spins about in his shell and spits fireballs, but none of the Koopalings present much of a challenge and they’re actually easier to beat than before! When you finally reach the Valley of Bowser, you’ll battle the Koopa King on the castle roof; while a unique battle since you can only damage Bowser by timing throws of his Mechakoopas, it also doesn’t present much of a challenge. Bowser hides in his Koopa Clown Car, floating out of reach and tossing Mechakoopas in the first phase; in the second, he tries to crush you with a massive ball, and the third sees him bounce around in desperation. Between each phase, fireballs will rain from the sky and Peach will toss you a Super Mushroom, making this battle even easier, and I was a bit disappointed that it didn’t require you to do anything other than toss stuff upwards so it hits Bowser’s head.
Power-Ups and Bonuses: All of Mario’s signature power-ups return here, including the Super Mushroom, 1-Up Mushroom, the always-useful Fire Flower, and the invincibility-granting Super Star. Mario can again commandeer Lakitu’s cloud to briefly fly over levels, collect Coins for points and extra lives, and can even find rare Moon items that grant three extra lives. In addition to Yoshi, Super Mario World’s new power-up is the Cape Feather, which adds a cape to your sprite to swipe away enemies, slow your descent, and rocket you into the sky with a fun (if, at times, clunky) gliding/flying mechanic that can reach new areas and exits, cheese entire sections, and see you crashing into the ground for a massive area attack. You can also grab a Power Balloon to temporarily become inflated and cross gaps, collect five Yoshi-branded Dragon Coins in each level for a 1-Up, and grab random power-ups from Roulette Blocks.
Additional Features: There are ninety-six exits to find in Super Mario World, with the total amount you’ve found being tracked on your save file; there are also four Switch Palaces to find, up to three secret areas for most levels, and a whole bunch of Dragon Coins to collect if you feel like giving yourself an extra challenge. Finding secret exits is the only way to warp to Star World, which not only offers additional platforming challenges but also acts as a fast travel point across the overworld. Clearing Star World unlocks the game’s greatest challenge, Special Zone, which boasts eight demanding levels that owe their difficulty to Super Mario Bros.: The Lost Levels. Although there are no additional or remixed bosses to fight here, you’ll need all your patience and platforming skill to get past their gaps and wild enemy placements. Clearing this World permanently changes the overworld to an autumnal theme and changes some of the enemy sprites to have comical Mario faces, and you can skip right to this state (and access all hidden levels) by selecting the “SP Version” of the game from the Nintendo Switch Online menu. Naturally, this version of the game includes helpful save states and rewind functions; you’ll also find additional cutscenes and gameplay changes (particularly to Luigi), and various unlockables and enhancements in the Game Boy Advance version.
The Summary: I’ve played Super Mario World before, on original hardware, emulation, and the SNES Mini and I have beaten it in the past, but never in a proper, sit-down, focused playthrough like this. After struggling with 2D Mario, and being aggravated by Super Mario Bros. 3, I was worried that I was in for more of the same here, but it was pleasantly surprised by how much I enjoyed this gameplay experience. Mario and Luigi are so much better to control here now that they’re not slipping and sliding all over the place; the levels are fun, colourful platforming challenges with perfectly fair hazards and completion requirements; and the overall presentation is the best that 2D Mario has ever been, even accounting for the various 16-bit remakes. Although the game felt a little shorter and lacking in some features, it’s got some fun secret paths and invites exploration, as well as back-loading the adventure with some pretty challenging bonus levels. I really enjoyed how it carried over certain Mario tropes (the stone-and-lava castles, the whimsical nature, the underground and water sections, etc) without falling into the cliché of having elemental-themed Worlds. The dinosaur theme was fun and one I’d like to see revisited in a future game; Yoshi made for a fantastic new mechanic and companion, more than making up for the otherwise disappointing power-ups. While I was again let down by the bosses, I can’t fault Super Mario World; it just is SNES-era gaming to me and its many positives, particularly in the visuals, the soundtrack, the controls, and the level of challenge it offers, more than outweigh any concerns so I’m very happy to have finally given it the time and attention it deserves.
My Rating:
⭐⭐⭐⭐⭐
Rating: 5 out of 5.
Fantastic
Was Super Mario World in your SNES library back in the day? How do you feel it compares other Mario titles, specifically the 2D adventures? What did you think to Yoshi and the new cape power-up? Did you ever discover all the secret exits and beat the secret Worlds? Were you also disappointed by the boss battles? Would you like to see a return to Dinosaur Island? How are you celebrating Mario’s birthday this year? Whatever your thoughts on Super Mario World, feel free to share them below or drop a comment on my social media and be sure to check out my other Mario content!
So, for no better reason than “Mar.10” resembling Mario’s name, March 10th is widely regarded as being “Mario Day”, a day to celebrate Nintendo’s portly plumber, an overalls-wearing mascot who literally changed the videogame industry forever and shaped the home console market of the nineties.
Released: 11 July 2003 Originally Released: 23 October 1988 Developer: Nintendo R&D2 Original Developer: Nintendo R&D4 Also Available For: Nintendo Entertainment System (NES), Nintendo Switch Online, Nintendo Wii, Nintendo Wii U, Playchoice-10, Super Nintendo Entertainment System (SNES) Classic Edition, SNES
The Background: Following the infamous videogame crash after an influx of numerous overpriced consoles and mediocre titles, Nintendo were propelled to the forefront of the dying market by the unprecedented success ofSuper Mario Bros. (Nintendo EAD, 1985). Surprisingly, considering the game’s success and popularity, development of its sequel became one of the most bizarre stories in all of gaming. Since the difficulty of Super Mario Bros. 2(Nintendo R&D4, 1986) caused concern for Nintendo of America, whimsical Mario clone Yume Kōjō: Doki Doki Panic was retooled into an official Super Mario Bros.sequel and, despite its vast differences, became a highly praisedbest-seller. After briefly toying with employing an isometric perspective for the third game, developer Shigeru Miyamoto sought to both return to Mario’s roots and vastly expand upon his world and repertoire through new power-ups and a gaggle of new mini bosses based both on his staff and famous classical musicians. A shortage of ROM chips saw the release of Super Mario Bros. 3 significantly delayed; however, Nintendo used this time to employ a unique marketing strategy by licensing their products to be included in the kids adventure film The Wizard(Holland, 1989), with Super Mario Bros. 3 featured as a centrepiece. This resulted not only in many watching The Wizard just to get a glimpse of Mario’s latest adventure but also in the game becoming a best-seller for the NES and being universallypraised upon release. Super Mario Bros. 3 was so influential and celebrated that it formed the basis of a new Super Mario Bros. cartoon and the game has received several ports, including a 16-bit remaster for the SNES as part of Super Mario All-Stars (Nintendo EAD, 1993). This version of the game served as the basis for the later Game Boy Advance port, which was the fourth in the Super Mario Advance series of re-releases for the popular handheld. Featuring updated graphics and vocal performances from Mario voice actor Charles Martinet, Super Mario Advance 4 was also compatible with the short-lived e-Reader add-on (unless you lived in Europe) and the game was met with equally positive reviews that lauded the recreation of Mario’s classic gameplay and the expansion of his world and abilities, despite the smaller screen resolution and lack of additional content.
The Plot: When the Koopalings, the children of the Koopa King Bowser, conquer each of the seven kingdoms of the Mushroom World by stealing magical wands from their kings, it’s up to the Super Mario Bros. to travel to each kingdom, retrieve the stolen wands, and confront Bowser his own realm, the Dark Land.
Gameplay: As is generally the case for a classic 2D Super Mario videogame, Super Mario Bros. 3 is a 2D, sidescrolling action/platformer in which players must make their way through eight Worlds, each containing up ten Levels, running, jumping, and hopping from blocks and fantastical enemies to reach an end goal, this time in the form of a square that, when hit, will award an item card (collecting three of the same will award an extra life). This version of the game offers three save files and you can pick two ways to play, either as Mario alone or as Mario and Luigi, with you swapping between characters after losing a life or from the overworld map, and even being able to lend extra lives to the other player if they’ve run out. The controls are as simple as you could want from this type of game: A is for jumping and B is for running. However, holding A will see you jump higher and further, holding B for an extended time sees you build up the P Meter and break out into a sprint to cover greater distances (or even fly with certain power-ups), and you can also pick up blocks and certain enemies with B, similar to Super Mario Bros. 2, which can be tossed at other enemies or used to blow up or break through blocked walls. Pressing down will not only see you crouch to avoid projectiles but also allows you to slide down slopes to take out enemies or fit through small gaps when running, though I found it’s usually easier to use the character’s smaller base form to accomplish this. While both Mario and Luigi have the same capabilities, there are differences; Luigi is taller and has a little flutter jump to make him a superior jumper, but he’s also much slipperier to control and that’s really saying a lot considering how poor Mario’s traction is in this game!
Mario is back, bigger than ever and with a whole host of new abilities at his disposal!
Although it’s a shame to go from playing as four characters to just two, Super Mario Bros. 3 makes up for this by being absolutely massive! Each World has its own distinctive overworld, with different layouts, animations, and music accompanying them; you move across the map to access each Level or a Toad House to play a mini game, but you can also use pipes to warp around to different areas, access shortcuts, and take on optional battles against the likes of the Hammer Bros. for additional power-ups. While you’re not free to go wherever you like, there are options to skip Levels using these power-ups and other shortcuts, though you won’t get a “Perfect Clear” if you don’t conquer each Level and Fortress contained in each World. Levels are presented as short obstacle courses that gradually test your patience, platforming skills, and deductive reasoning; things start out simple enough, with you jumping to blocks, over gaps, and warping about using pipes against a variable time limit, knocking off enemies to increase your score and earn extra lives, but things quickly become very tricky once the hazards and requirements start to ramp up. Falling or temporary platforms, moving platforms, and projectile spitting enemies are commonplace here, as are respawning enemies, nigh-invincible enemies (unless you have a block or power-up handy), and you’ll often find yourself either trapped in a tight corner or sent plummeting to your death thanks to various hidden blocks popping up at the worst possible times! Sometimes, you’ll hit a block and a power-up will pop out; mostly, you’ll get Coins, but other times a climbable vine will lead to a secret power-up room, a P-Switch to grab some Coins, or the Level’s exit. Other times, you need to hop to erratic moving platforms, bounce off flying enemies for an extra boost, toss Bob-ombs to break through walls, or even grab a series of Starmen to make yourself invincible and bypass spikes, snapping piranhas, and flame bursts. Each World ends with you battling across the Koopaling’s Airships, dodging Bullet Bills, cannonballs, hopping across bolts, and avoiding jet flames as the screen bounces and tilts about. In World 8, you’ll also have to hop across tanks in a horizontal scroller, dodging many of the same obstacles, which naturally represent some of the hardest and most aggravating challenges in the game.
You’ll need all the help you can get to beat the rising difficulty and tricky platforming challenges!
While many of the game’s hazards and enemies will inevitably repeat, they are often used in creative and more difficult ways later in the game, from simple stuff like mixing different enemies into the Levels to more annoying inclusions, like constantly respawning enemies or platforms coming to life beneath your feet, or having to bounce perfectly off music note blocks and run across falling platforms. You’ll sometimes have to swim underwater, tapping A or making use of the Mario’s new Frog Suit power-up to more efficiently bypass Cheep-Cheeps and Bloopers; other times, the Levels autoscroll horizontally, vertically, and diagonally, putting your reaction times and platform skills to the test. There are also a number of looping mazes, often involving pipes or the lava-infested Fortresses, with some having exits so obscure that you’ll have no choice but to consult a guide (World 6-5, for example, traps you in an endless loop and forces you to awkwardly fly up a specific part of the stage using the Raccoon Suit while holding a Koopa shell to break through some blocks and reach the exit, none of which is very intuitive). As if the small platforms, singular blocks, and broken bridges aren’t bad enough, you’ll also have to contend with projectiles, blocks coming to life, timid ghosts who chase you when your back is turned, bottomless pits, instant-death lava, temporary moving platforms that you must jump on to change their direction to progress upwards, suffocating quicksand, leaps of faith, and treacherous platforming nightmares up in the clouds. Thankfully, you have infinite continues; when you lose all your lives, you can continue on with a fresh stock, though your score resets to zero. You’re prompted to save your game after clearing every Fortress and Airship, though you can manually create a temporary save at any time from the pause menu if you need to take a break. Gameplay is mixed at the Toad Houses, where you play various mini games for power-ups and extra lives; these reset after you lose all your lives and continue your game but can be really tricky. One sees you having to stop sliding tiles at just the right time, which I found all-but impossible; one sees you turning over cards to find doubles; the other has you picking from three chests; or you can fight a couple of Hammer Bros. to earn a chest containing a random power-up.
Graphics and Sound: This version of Super Mario Bros. 3 may very well be the best, visually speaking; while some changes were inevitably made to accommodate for the Game Boy Advance’s hardware and software specifications, the presentation is absolutely top-notch. The game pops with vibrant colours at all times, with some fun visuals in the backgrounds (such as big green hills, pyramids, clouds, and Bowser portraits), and a lot of visual variety even when some Levels recycle assets from others (the Fortresses, Airships, and most underwater Levels are the most obvious examples). Palm trees, icy platforms and slippery, snowy landscapes, unstable or incomplete bridges over water filled with ravenous fish or bubbling lava, and block- or cloud-based environments are commonplace, as you’d expect, but you can also venture underground into dank caves, crystalline mines, and sewage systems filled with a network of pipes and a wraparound screen feature similar to the original Mario Bros.(Nintendo R&D1, 1983). World 4 was one of my favourites as everything is gigantic here, including the pipes and enemies, turning even regular Koopas into monstrous foes, but I quite enjoyed the jaunts into the desert areas, even with that maniacal sun chasing after me! World 6 was one of my least favourites as everything’s covered in snow and ice, making a slippery game a hundred times more difficult to play, and the pipe mazes of World 7 also caused quite a headache. Things get suitably ominous in World 8, a lava-filled hellscape full of tanks, submarines, and airships; even the overworld is affected, restricting your vision until you clear certain Levels, and dropping you into darkened deserts and deep jungles filled with tricky platforming sections.
The game is whimsical and colourful, with some fun tunes and great visual variety.
One added benefit to being on the Game Boy Advance is the inclusion of voice samples; Mario and Luigi will shout with joy and wail in pain whenever they snag a power-up or lose a life, respectively, and the game is bolstered by some of the catchiest tunes in the entire franchise. While many of these are recycled across the game’s many Worlds, they never fail to be infectious and keep things whimsical, even when you’re tearing your hair out because you somehow slipped off a platform or weren’t quite pixel-perfect enough to make a jump. A couple of cutscenes also help punctuate the action; dialogue boxes have the Toads pleading for help when you reach each World’s castle and see the state of their king (there’s even a Yoshi cameo at one point); you’ll see the brothers hop onto the Airships and fall from the sky in triumph after securing each magic wand, and Princess Peach (and, later, Bowser) leaves letters for you containing words of encouragement and rare power-ups (or, in Bowser’s case, a final challenge). If you manage to get to the secret warp zone, you can skip ahead to different Worlds, which alters the order you play the game and also results in different cutscenes playing (such as seeing the Koopalings invade a castle beforehand) if you, for example, skip right to the final confrontation before besting the other Worlds. World 3 also has you control a little raft to get to different Levels and Toad Houses, World 2 contains pyramids for you to scale and conquer, and World 8 is littered with tanks and dangerous optional squares that pit you against some of the game’s toughest foes while hopping across a lava pit using precarious platforms! Although neither character has any idle animations, they can transform into a variety of super fun different forms with their different power-ups and everything runs very smoothly. This version of the game even includes a brand new opening cutscene, styled like a pantomime, in which Peach begs for help after the Koopalings attack, and you’ll even spot her screaming for help when battling your way through World 8.
Enemies and Bosses: Unlike Super Mario Bros. 2, which featured entirely new and fantastical enemies, Super Mario Bros. 3 features the return of many of Bowser’s most recognisable minions: Goombas, Koopa Troopas, Bloopers, Bullet Bills, Cheep-Cheeps, Spinys, Piranha Plants, and the ever-annoying Lakitus are constant hazards across each of the game’s eight Worlds. Spinys will drop from the ceiling and dash at you, Koopas will re-emerge from their shells if you hold them too long, and both them and the Goombas can be seen fluttering around with wings this time. The Hammer Bros. also return, usually guarding the end of Level goal or as mini boss challenges on the overworld; boomerang and fire-flinging variants also crop up, as do larger Sledge Bros., who can stun you with a ground slam. The only enemy to return from Super Mario Bros. 2 is the Bob-ombs, who will be endlessly spat out of cannons or spawn into areas where you need to use them to break certain blocks, and Super Mario Bros. 3 sees the debut of Mario staples such as the Thwomps (massive, angry blocks that try to crush you), Boos (shy ghosts who freeze when you’re facing them), Big Bertha (a massive Cheep-Cheep who’ll swallow you whole if you get too close), Chain Chomps (ravenous Pac-Man-like mouths attached to chains), and Dry Bones (skeletal Koopas that reassemble after being jumped on). You’ll also have to try and dodge the annoying wrenches tossed by the endlessly respawning Rocky Wrenches on the Airship Levels, be aware of spikes and blocks tossed by smaller enemies, hop across gaps on giant cannonballs, quickly jump over laser-spitting Bowser Statues, and run for your life when the Angry Sun swoops out of the sky!
Considering how tough it is to get to them, it’s a shame there’s not more variety to the Boom Boom fights.
While you can challenge the Hammer Bros. and their variants by landing on them on the overworld, it is possible to skip these confrontations; when you battle them, it’s highly advisable that you have the Fire Flower power-up, which makes short work of their constant stream of projectiles, and defeating them can net you a nifty rare power-up and make traversing the overworld a little easier. These mini bosses might be optional, but if you’re going for 100% completion then you’ll definitely have to battle one at the end of World 8-Tanks and you’ll need to go head-to-head with Bowser’s primary henchman, Boom Boom, on numerous occasions. Boom Boom awaits at the end of every Fortress in the game and acts as a mini boss throughout World 8; generally, getting to him is tougher than the battle itself as Boom Boom waits at the end of lava-, fireball-, Thwomp-, and hazard-filled obstacle courses that can really test your endurance. Boom Boom himself is fought in an enclosed arena, sometimes with mid-air blocks that act as obstacles, sometimes with an icy floor to send you sliding right into him, and sometimes he takes to the sky with wings and dive bombs you. In each fight, the strategy is the same: Boom Boom will wander back and forth, occasionally leaping at you with his spiked shell or diving at you from the sky, and you must hop on his head three times (or blast him three times with a power-up) to be victorious. If you’re playing the Nintendo Switch version, or the Japanese version of this game with the e-Reaper feature, you’ll also battle two Boom Booms at once on the World-e map, but I have to say that fighting this guy over and over, sometimes up to four times for each World, quickly grew as tedious as the multiple encounters with Birdo in Super Mario Bros. 2 and it’s a real shame that more variety wasn’t included here (like giving Boom Boom different power-ups or having more hazards in the arena).
There’s not much to the game’s bossbattles, with even Bowser being pretty simple to best at the end.
Sadly, this disappointment also extends to the Koopaling you encounter at the conclusion of each Airship. Each Koopaling wields a magic wand that fires a projectile into the cramped arena and jumps around, often retreating into their spiked shell to protect themselves, and can be defeated in three hits. While Wendy O. Koopa and Iggy Koopa can jump a little higher than others, which can mess up your attack strategy, Roy and Ludwig von Koopa can stun you by creating earthquakes, which leaves you vulnerable to their slow magic projectiles. Wendy and Lemmy Koopa are probably the most unique and memorable of the seven as Wendy fills the screen with candy rings that bounce all over the place and Lemmy rolls about on a magical ball firing smaller balls that can hurt you or be used as platforms to avoid his erratic rolling and bop him on the head. Again, though, while each of the Koopalings looks different and has slightly different attack patterns, they’re all basically the same; if you can reach them with a Fire Flower or Hammer Suit then you’re laughing, but the hardest thing about most of them is that you have the suffer through the entire Airship course all over again if you die fighting them. Their father, Bowser, appears only as the final boss of the game; after enduring some of the game’s hardest Levels, defeating more Boom Booms and dodging a whole host of enemies and hazards, you’ll reach Bowser’s Castle, a maze-like shrine to the Koopa King with branching and looping paths and lava pits. Bowser himself spits fireballs at you that you must duck or jump over and will leap into the air to crush you with a butt stomp; simply dash underneath him and cause him to destroy some of the blocks. Do this three times in the same area (or manage to blast him with enough projectiles) and he’ll plummet to his doom, leaving you to free Princess Peach and restore the peace to the land. You’ll also battle him twice more in World-e, with one battle being functionally the same and the second being made harder by the presence of unbreakable blocks included on the floor.
Power-Ups and Bonuses: After being disappointed by the lack of power-ups in Super Mario Bros. 3, I’m happy to say the Super Mario Bros. 3 goes above and beyond with its power-ups! Staples such as the 1-Up Mushroom, Super Mushroom, and Fire Flower return, granting an extra life, an extra hit, and the ability to throw fireballs, respectively, alongside Coins that grant extra lives when 100 are collected and the Starman, which grants brief invincibility. Super Mario Bros. 3 also debuts some brand new power-ups that have since become franchise staples, such as the warp whistle and cloud that will teleport you across the overworld, Blue Coins (though they have no additional value), hammers to break overworld blocks, and a music box to send enemies to sleep in this same area. Mario and Luigi also have some new forms here, such as the Frog Suit (which allows greater movement when underwater at the cost of impeding land movement), the Hammer Suit (which lets you toss a bunch of hammers and protect yourself from projectiles and the cost of sliding down hills), and by far my favourite Mario power-ups: the Super Leaf and Tanooki Suit. These grant you cute little raccoon ears and a tail (or a full raccoon suit, respectively) that lets you attack with a tail swipe, flutter jump by tapping A, and fly through the sky after building up enough speed. Pressing down and B while wearing the Tanooki Suit also transforms you into a statue to avoid damage from enemies and projectiles, and you can fly indefinitely when awarded with a P-Wing, easily allowing you to soar over the game’s more troublesome sections. There’s also an additional, somewhat secret power-up in the game; if you defeat a the shoe-wearing Goombas in World 5-3 in just the right way, you can hop into the shoe and safely pass over spikes and defeat spiked enemies, all while retaining any other power-ups you already have.
Additional Features: There are eight Worlds to explore in Super Mario Bros. 3, but that doesn’t mean you have to conquer every Level or Fortress found in each. The warp whistle and Lakitu’s Cloud items will let you skip entire Worlds and Levels if you wish, though you won’t be greeted with a “perfect” completion screen and the score on the save file menu won’t be at its maximum until you beat every Level in the game. There are numerous extra lands and shortcuts to find on the overworld that lead to Toad Houses where you can play mini games for extra power-ups, but some just lead to dead ends unless you beat Levels to unlock the gates or use a hammer item to smash the rock blocking your path. The NES and SNES versions of the game see players compete head-to-head to see who will challenge a Level, but this is entirely absent from this game as a traditional two-player mode is omitted. As mentioned, there is a whole extra World to explore included here, one that includes power-us, collectibles, and features from previous and subsequent Super Mario games, but it’s locked out from the European version of the game so the only way you can play World-e is to either import the game, cards, and e-reader or just play the re-release on Nintendo Switch Online. However, this version does still include a 16-bit remake of Mario Bros. that you can select from the main menu. This version of the game can be played with others and features all-new backgrounds, assets, and music; new POW Blocks, the Super Mario Bros. 2 power squat jump, and quality of life features have also been included, but there are no mirror mode, harder difficulty, or other unlockables included in this version of Super Mario Bros. 3.
The Summary: I knew what I was getting into when I chose to play this version of Super Mario Bros. 3; I didn’t actually have to play the Game Boy Advance version as I could’ve made things a lot easier on myself and played the Nintendo Switch Online or SNES Mini version but I decided that I wanted to experience the game on real hardware, especially as I just so happened to own the Game Boy Advance cart. In the end, I was conflicted: on one hand, this is a massively enjoyable platformer, with some of my favourite tunes and power-ups and containing a sprawling, surprisingly varied gameworld. Super Mario Bros. 3 definitely set a new standard for the franchise, which would pretty much always include an overworld, multiple power-ups, shortcuts, and battles against the Koopalings. Levels are short, action-packed obstacle courses that will really test your skills as a player; there are a lot of opportunities to snag new power-ups, different ways to tackle each Level depending on what you have in your inventory, and I the overall presentation is whimsical and fanciful. However, on the other hand, Super Mario Bros. 3 can be hard as balls sometimes! Now, granted, I’m not the most accomplished 2D Mario player; I often struggle with the precision platforming, abundance of death pits and instant-death traps, and Mario’s notorious lack of traction, but I was frequently left frustrated with Super Mario Bros. 3’s repetitive and uninspired bosses, almost unfair level of challenge, and the unintuitive methods required to beat certain Levels. For a game as big as this is, it’s really a shame that so much gets recycled; I don’t understand why every World ends with an Airship when assets for a Tank and Submarine-based variant exist in World 8 and could’ve mixed things up a bit. I don’t get why every Fortress has to include a fight against Boom Boom when we could’ve fought a Sledge Bro or Big Bertha or given him some different power-ups. And the final battle against Bowser was pretty underwhelming, to the point where I was expecting a second phase and genuinely surprised when the ending cutscene played. In the end, this is easily the best of the NES Mario games; it’s large and packed full of stuff to do, but is mired by a difficulty curve that is just a little too frustrating for me at times (though probably well within the skills of a more accomplished Mario gamer).
My Rating:
⭐⭐⭐
Rating: 3 out of 5.
Pretty Good
Did you enjoy Super Mario Bros. 3? Which version of the game is your favourite and which console did you first play it on? Were you disappointed that there weren’t more characters to play as or did you feel like the new power-ups made up for this? Did you also struggle with the traction and platforming challenges on offer here? Were you disappointed by the repetitive stage design and bosses or did the sheer size of the game balance this out? Which power-up or World was your favourite, and did you ever play through World-e? How are you celebrating Mario’s birthday this year? Whatever your thoughts on Super Mario Bros. 3, feel free to share them below or drop a comment on my social media and be sure to check out my other Mario content across the site!
“Talk about your psalms, talk about “John 3:16”…Austin 3:16 says I just whupped your ass!”
With those immortal words, spoken by the legendary pro wrestler “Stone Cold” Steve Austin after winning the King of the Ring tournament on 23 June 1996, a momentous wrestling career was about to unfold before our eyes that would see everyone’s favourite beer-swigging, finger-gesturing anti-hero become not just an industry icon but a mainstream icon as well. Here’s to yah, Steve!
The Date: 31 May 1998 The Venue: Wisconsin Center Arena; Milwaukee, Wisconsin The Commentary: Jim “J.R.” Ross and Jerry “The King” Lawler The Referee: Vince McMahon (guest) The Stakes: Initially a main event match for the WWF Championship with Pat Patterson as the guest ring announcer and Gerald Brisco as the guest timekeeper wherein Austin loses the belt if he touches McMahon, later altered to a no disqualification, falls count anywhere match
The Build-Up: Any wrestling fan worth their salt will be fully aware of the ratings war between the World Wrestling Federation (WWF) and World Championship Wrestling (WCW), which became must-watch television thanks to one ofthe greatest feuds of the WWF’s “Attitude Era”: the rivalry between abrasive anti-hero “Stone Cold” Steve Austin and WWF Chairman Vince McMahon. After the infamous “Montreal Screwjob”, Bret “The Hitman” Hart left the WWF and McMahon’s evil “Mr. McMahon” character clashed with Austin, who had captured the WWF Championship at WrestleMania XIV and refused to conform to McMahon’s vision for the company. After wrapping up his first feud with the Undertaker, the sadistic Mankind debuted a new, carefree persona, Dude Love, with whom Austin briefly held the WWF Tag Team Championships before Dude randomly attacked both Austin and McMahon on weekly TV. This led to McMahon forcing the two to face each other for the WWF Championship at Unforgiven: In Your House, but Dude Love came up short thanks to Austin getting himself disqualified. McMahon punished Dude Love by forcing him to fight his long-time friend and mentor, Terry Funk (who was operating under the “Chainsaw Charlie” gimmick), wherein Dude Love dismantled his friend and forged an alliance with the WWF Chairman in order to curry favour with the boss and capture the elusive championship. McMahon further stacked the deck by not only installing his stooges, Pat Patterson and Gerald Brisco, at ringside but also by naming himself the special guest referee in a bid to get the belt off his hated rival.
The Match: I became a wrestling fan at the end of the nineties, pretty much in the year 1999. Around then, my friends and I were playing the games on Nintendo 64 and PlayStation, and I would occasionally catch the odd episode or segment whenever I was at the house of my one friend with a Sky subscription. All this is to say that I came in at around the time of the Cactus Jack/Triple H feud and that, as much as my friend being a big Mick Foley fan, was enough to make Foley one of my favourite wrestlers at the time. As the years passed and I got my hands on more WWF content, I marvelled at his early matches in Japan and his bizarre promos as Mankind and his later Hell in a Cell antics, but it was his character work that really won me over and, to this day, I can’t help but watch the “Three Faces of Foley” segment from 1997 without chuckling. However, Dude Love is probably my least favourite of Foley’s three personas, simply because I enjoy his more extreme and surreal antics, but it’s definitely one of the most complex and peculiar since this is the façade he adopted to try and get in McMahon’s good graces, and which McMahon happily manipulated simply to try and get the WWF Championship off Steve Austin. Much of this is expressed at the start of this match, where Pat Patterson spent a couple of minutes bigging up both McMahon and Dude Love as they entered the ring and Foley (blue blazer and all) happily shook hands with the boss and his stooges, although their jovial mood was immediately soured right before the match started as the Undertaker came down to ringside to level the playing field.
The brawl quickly became extreme as McMahon changed the rules to favour Dude Love.
Austin and Dude Love kicked things off with a bit of a tie-up and Austin immediately showed the boss exactly what he thought of him by flipping him off after McMahon physically separated the two. Dude Love won the second tie-up and scored a two count off a clunky-looking shoulder block, which raised Austin’s ire as he accused the WWF Chairman of counting too fast on the pinfall. Austin and Dude Love tangled again and again the Dudester got the upper hand with a knee to the gut and a series of side headlock takedowns that earned him a couple of one counts, before Austin knocked him down with a back elbow and gave him a taste of his own medicine with a ground headlock of own. Austin brought Dude Love to his knees off an awkward Irish whip exchange and knocked Foley’s false teeth out; Austin then crushed them under his heel, but this distraction was enough for Foley to start beating on the champion in the corner. Austin exploded back into action with his patented Lou Thesz Press and then sent Dude Love tumbling over the top rope and to the outside with a clothesline, however Foley quickly regained the upper hand by tossing Austin into the steel steps at ringside. After rolling back into the ring, Austin fell victim to a Russian leg sweep, kicked out at two, and then found himself being choked and even chewed on in the ring corner! Despite Dude Love’s tenacity, Austin continued to kick out and even countered an Irish whip into a neckbreaker, which finally allowed him to build some momentum with a series of clotheslines. Austin even tied Foley up in the ring ropes after countering his signature nerve hold, the Mandible Claw (or should I say the “Love Handle”?) When the two resumed brawling around the announce tables, J.R. just about blew a gasket when Patterson announced that McMahon had changed the rules from a simple one-on-one contest to a no disqualification bout so that Dude Love could choke Austin with a piece of cable.
Austin and Dude Love battled on the outside, crashing into cars and concrete alike.
However, as much as Mick Foley thrived in a no disqualification environment, this stipulation also greatly favoured Austin; he launched Dude Love into the timekeeper’s table and hammered on his forehead with closed fists, bashed his head off the steel barricade, and then clotheslined him into the braying crowd. Back in the ring, Austin choked Dude Love on the bottom ropes but missed his trademark running rope knee attack, which allowed Foley to kick him to the outside with a baseball slide and then deliver a neckbreaker on the entrance ramp. Sensing the tide turning in favour of his flunky, McMahon frantically had Patterson announce that the match was falls count anywhere and dove in to count the pin, only for Austin to twice kick out at two. Austin answered back with another clothesline, kicking off a brawl around the cars dotted around the entrance ramp; Austin was launched into a windshield and had his head bashed off a car hood, but returned the favour with a flapjack into another car for a couple of close two counts. Austin then forced Dude Love onto a car roof and ended up taking a nasty tumble to the floor before Foley performed a sunset flip (which had to hurt him more as his tailbone bounced right on the concrete) for another near fall. Dude Love’s attempts to assault Austin with a metal pipe were thwarted by another flurry of punches from the champion, though Foley was able to counter a piledriver attempt into a back body drop. With Austin down and bloody from the challenger’s assault, Dude Love clambered onto a car and went for a diving elbow but ate nothing but concrete when the champion rolled out of harm’s way (though Foley was still able to get his shoulder up off the pin fall).
Thanks to a stray chair shot and the Undertaker’s assistance, Austin triumphed over the odds.
Austin battered Dude Love back into the ring, where Patterson tripped Austin off an Irish whip, allowing Dude Love to get back in control and further split open Austin’s head wound by driving him head-first into the exposed steel ring bolt. Defenceless, Austin was easy prey for Dude’s stomps and patented running knee strike in the corner; Austin tried valiantly to rally against Foley’s assault but ate two more shots into the exposed bolt. However, when the champion still kicked out, McMahon ordered Patterson to hand the challenger a steel chair and Dude Love wasted no time putting it to good use, driving it into Austin’s gut, cracking him across the spine, and then planting him head-first into the chair with his signature Double-Arm DDT. Incredibly, inexplicably, Austin still kicked out; he then booted the steel chair back into Foley’s face, grabbed it for himself, accidentally smacked himself in the face with it, and then damn near caved Foley’s skull in with a massive shot to the head! However, McMahon refused to make the count, enraging the Texas Rattlesnake, who barely kept himself from lashing out at his hated enemy. He did get a measure of revenge, however, when he dodged Dude Love’s sneak attack, resulting in McMahon getting brained by a chair shot, but this backfired on him as there was no one to make the count when Austin nailed Dude Love with a Stone Cold Stunner! Referee Mike Chioda tried to step in but he got taken out by Patterson; when the stooges tried to interject their own officiating to count a pin fall off the Mandible Claw, the Undertaker finally stepped in and sent Patterson and Briscoe crashing through the announce tables with a couple of chokeslams! Dude Love tried to reapply the Mandible Claw but ate another Stunner; Austin then made the cover and grabbed McMahon’s lifeless hand to count the pin fall, thereby awarding himself the match. The crowd were very happy with this ending, and on their feet for most of the match, but it was a bit overbooked and plodding at times; I don’t know if Foley was wrestling hurt (but it’s a safe bet he probably was) or if it was just his purposely subdued in-ring style as Dude Love but he seemed a bit ungainly and a step or two behind here. The brawling out by the cars was quite fun, but it does bug me when a falls count anywhere match ends in the ring like normal and I think Austin was booked a little too strongly here as he kicked out of so much stuff, like hitting the ring bolts and being walloped by a steel chair, when the story of him overcoming the odds was strong enough, I think.
The Aftermath: This would be Dude Love’s last shot at the WWF Championship; the very next night on Raw is War, Austin pivoted into a feud with Kane, who defeated his brother, the Undertaker, to become the number one contender and McMahon’s newest weapon in his war against the champion. Austin’s rivalry with Kane quickly escalated, with the Big Red Machine showcasing supernatural powers and even vowing to set himself on fire if he lost his first-blood championship match at the King of the Ring. Since this presented quite the quandary as the WWF overdelivered on the stipulation for this match, Kane would defeat Austin for the WWF Championship only to stupidly drop the belt back to Austin the very next night! Dude Love was disgraced by his loss here and reverted back to his Mankind persona, now sporting a dishevelled corporate appearance that would become his most iconic look. He rekindled his feud with the Undertaker, which resulted in their infamous Hell in a Cell match at that same King of the Ring. This match would cement Foley as a hardcore icon, facilitating not only him becoming a beloved babyface but also another shot at the main event, where he was far more successful in realising his championship dreams in bouts against the Rock. Although the Over the Edge branding returned the following year, Over the Edge 1998 would be the last time the WWF used the In Your House moniker for over twenty years, though the Over the Edge pay-per-view itself would be discontinued after the tragic events of the 1999 event.
My Rating:
⭐⭐⭐
Rating: 3 out of 5.
Pretty Good
What did you think to the bout between Steve Austin and Dude Love at Over the Edge: In Your House? Which of Foley’s personas is your favourite? What did you think to the brawling and the innovative ending? How are you celebrating 3:16 Day this year, what are some of your favourite matches and moments from Austin’s illustrious career? What dream match would you have liked to see him involved in? Whatever your thoughts, share them below or drop a comment on my social media to let me know what you think about “Stone Cold” Steve Austin and check out my other wrestling content across the site!
So, for no better reason than “Mar.10” resembling Mario’s name, March 10th is widely regarded as being “Mario Day”, a day to celebrate Nintendo’s portly plumber, an overalls-wearing mascot who literally changed the videogame industry forever and shaped the home console market of the nineties.
Released: 10 April 2019 Originally Released: 3 June 1986 Developer: Nintendo Original Developer: Nintendo R&D4 Also Available For: Famicom Disk System, Game & Watch, Game Boy Advance, Game Boy Color, Nintendo 3DS, Nintendo Wii, Nintendo Wii U, Super Nintendo Entertainment System (SNES) Classic Edition, SNES
The Background: After the videogame industry crumbled following an influx of overpriced consoles and mediocre titles, Nintendo effectively saved the industry with the blockbuster success ofSuper Mario Bros. (Nintendo EAD, 1985). However, despite that game’s success, the development of its sequel is one of the most bizarre stories in all of gaming; Super Mario Bros. 2(Nintendo R&D4, 1986) released in Japan a year later and was basically a remixed version of the first game, one that was much harder and therefore ran the risk of alienating Western gamers. Thus, Nintendo of America thought it more prudent to reskin whimsical Mario clone Yume Kōjō: Doki Doki Panic into an official Super Mario Bros. videogame and were rewarded with a critically acclaimedbest-seller. As for the original Super Mario Bros. 2, it also proved a best-seller in Japan, one that became notorious for its high level of difficulty and obscurity as the “black sheep” of the franchise. It would be some seven years before Western gamers got to officially experience the game when it was re-branded as The Lost Levels and given a 16-bit makeover for Super Mario All-Stars (Nintendo EAD, 1993). Since then, the game as been included in subsequent ports and re-releases (including the Nintendo Switch Online service, which I’m reviewing here), but has never lost the stigma as being one of the most difficult games of its era.
The Plot: The Mushroom Kingdom has been invaded by Bowser, King of the Koopas, and his Koopa Troopa army. After Bowser transforms the citizens into inanimate objects and kidnaps Princess Toadstool, Mario and Luigi set out across the hazardous Mushroom Kingdom to rescue the princess from his clutches!
Gameplay: If you’ve played the original Super Mario Bros. then you’ll know exactly what to expect from The Lost Levels. Players are given four save files, two control schemes, and two characters to pick from, Mario and Luigi. You can’t swap between the two after picking one and their basic controls are what you’d expect: I chose control scheme “Type B”, which mapped jump to the A and Y buttons and the dash function to B and X. You can hold down the dash button to run faster, which enables you to clear greater gaps and even jump higher, something that’s absolutely necessary in this game since large, bottomless, instant death gaps are plentiful and you’ll need to make precise jumps with very little room to manoeuvre to blocks that are just out of reach. As ever in 2D Super Mario games, traction can be an issue; it’s not uncommon for Mario to simply slip off platforms and blocks to his doom because of his momentum and this issue is exacerbated when playing as Luigi, who slips all about the place but can also jump higher and further and fall slower than his big brother. Your basic goal is also exactly the same as in Super Mario Bros.: race against a timer towards a flagpole at the end of each World and battle against one of Bowser’s fakes in a suitably ominous and hazardous castle before having a final showdown with the Koopa King.
A greater level of challenge awaits in this glorified expansion.
So far, everything’s very familiar but you’ll notice the enhanced difficulty and skill required from the moment you start World 1-1; obstacles and enemies are far more plentiful compared to the first game and you’ll be required to perform all manner of frustrating actions, such as perfectly timing running jumps across death pits, ducking to slide under narrow passages, and avoiding a myriad of hazards, including fire bars (including much longer variants and ones crammed into cramped corridors), leaping Cheep-Cheeps, and the game’s newest hazards on the block, the Poison Mushroom and upside-down pipes containing hungry Piranha Plants. Platforms and blocks are often hovering over death pits and bodies of water, with many either collapsing beneath you, being much smaller than you’d expect, or tricky to jump to. You can make use of springs to rocket out of frame and cross larger gaps, and a wind gimmick for the same effect, but it’s incredibly difficult to judge how to use and control these mechanics, especially with all the enemies onscreen. You’ll also have to make use of Koopa Paratroopers and Bullet Bills to gain an extra boost to higher or further areas, navigate coral reefs full of enemies (including fire bars), and make use of shortcuts using vines and pipes to pick up Coins for extra lives that you most definitely will require to succeed. By far the worst aspect of much of the game’s platforming is how precise you need to be; you often need to dash and jump across multiple blocks and platforms, sometimes from a complete standstill, to progress, or awkwardly drop down to lower platforms or pipes, which is incredibly frustrating as you’re just continuously falling to your death over and over. Not only that but invisible blocks will often box you in or drop you to your death and many of the castle stages loop around, requiring you to somehow intuit (or guess through trial and error, or just use a guide like I did) that correct path, all while desperately trying to not get hit or killed before reaching the boss.
It’s going to take all of your skill (and patience) to overcome this frustrating game.
You’ll often be riding small platforms across wider gaps, bopping on enemies or hopping over blocks to continue onwards, or making use of weighted platforms to gain a bit of extra height for a tricky jump. Some Worlds contain a long stretch of broken bridges, with Cheep-Cheeps flying in all over the place to hurt or indirectly aid you with an extra boost. You’ll need to run and jump beneath Piranha Plants, duck at the last second and in tight corners to avoid being hit by fire bars, and even encounter enemies and hazards in bizarre places (like Bloopers being outside of the water and Koopa Troopas being in the water!) If you found Super Mario Bros. too easy, then The Lost Levels is the game for you! Almost every World plays like some kind of nightmarish debug mode or test stage, with every hazard and enemy in Mario’s then-limited library dotted haphazardly around every screen to sap you back to your base form or steal another of your lives. Mario can only take one hit before reverting to his small form, whether he has a Fire Flower or not, and extra lives aren’t exactly plentiful; because of the Poison Mushroom’s threat, you’re better off relying on Coins for extra tries but I am honestly astounded that anyone was able to play through this game back in the day without the benefit of the Switch’s save states and rewind features. Since you can’t go back (unless you’re in a looping level), you’re often stuck with very little room to charge up a jump and the sheer amount of trial and error required to beat even the earlier stages is almost laughably frustrating. You’ll need to hop from spring to spring, barely being able to judge where you’ll land and often just bouncing pathetically or slipping to your doom, get smacked in the face by a Hammer Bro or a Bullet Bill if you run too far ahead, and the amount of times I got stuck, the timer racing down, trying to hop up to blocks just out of reach was endlessly annoying. You really need to flawless with your jumps and the way you bounce off enemies; underwater, things are generally a lot easier as you just have to swim past hazards but even then you have to be careful not to get sucked below the screen, meaning The Lost Levels offers a challenge beyond what I think even the most hardened NES players were used to back in the day.
Graphics and Sound: Thanks to the 16-bit coat of paint offered by Super Mario All-Stars, The Lost levels looks fantastic; there’s a whimsical, fairytale-like quality to everything and Worlds are bolstered by traditional Super Mario overworld, underground, underwater, and castle themes. Although Mario and Luigi can’t look up, their sprites are big and chunky so you never lose track of them and they always stand out against the backgrounds, which is where much of the game’s appeal came from for me. Worlds have been remixed not just in their difficulty and enemy and hazard placement, but their visuals as well; grass sprouts from the ground, snow covers the landscape, many Worlds now take place at night beneath a blanket of blinking stars, and you’ll see smiley faces on hills and clouds scrolling past lazily as you frantically avoid enemies and obstacles. It’s everything you’d expect from this era of Super Mario; flag poles raise as you reach your goal (Mario even throws up a peace sign to celebrate), coral weeds ripple underwater, and you always know when time is about to run out or you’ve picked up a power-up.
While the 16-bit overhaul makes it very nice to look at, many gimmicks and assets are recycled.
The variety on offer in the game’s Worlds is, however, sadly lacking; you’ll see the same handful of environments repeated again and again, just with different configurations of enemies. This means a lot of those night skies and snow, vaguely mushroom-shaped hills, and waterfalls and rapids beneath random assortments of platforms but it does mean you’ll encounter tougher and more annoying enemies like the Hammer Bros. and Bullet Bills in places you might not expect. The best environments, at least visually, are the castles; you’ll see portraits of Bowser, staircases, and big wooden doors in the backgrounds, flashes of lightning through the windows, and be assaulted by lava and other fire hazards. Another great environment is when you head up into the clouds, which is very whimsical, or the few occasions when you spot Goomba columns and looming castles in the background. The game runs nice and smoothly, meaning many of my pratfalls were down to my lack of skill, but is completely devoid of any story. However, to compensate for this, you’ll spot different enemies revealing themselves as posing as Bowser and rescue a bunch of different Toads in each castle, with their animations and skylarkings helping to numb the pain you feel each time you realise the princess is in another castle and you have another gauntlet to endure. When you do finally rescue Princess Toadstool, you’re rewarded with a nice bit of sprite art of Mario getting a kiss and then challenged to continue on to even harder Worlds, where the placement of enemies, platforms, and hazards becomes even more ridiculous!
Enemies and Bosses: Every enemy for Super Mario Bros. returns here, but in new and surprising configurations that can make even basic enemies like Goombas and Koopa Troopas more dangerous. For example, these guys might spawn in on stairs or walk on destructible blocks above you, meaning you can accidentally drop them down to your level, often boxing you in with them, and they can appear near firebars, Bullet Bills, or other hazards and tricky areas to trip you up and act as additional boosts for your jumps. You need to be especially careful with Koopa Troopas as they will right themselves when hit or their shells will come flying back at you, but this is useful for taking out bigger groups of them and other enemies. Way more enemies appear onscreen at any one time here than in Super Mario Bros., as evident in the Worlds where Cheep-Cheeps constantly leap out from water or the void, Koopa Paratroopas fly about, and Lakitu hovers overhead. Lakitu is at his dirt worst here, dropping Spineys and getting in the way of your jumps and springs and you can’t even steal his cloud for an advantage. Buzzy Beetles also cause a problem as they can’t be defeated with your regular jump, Worlds are often littered with Bullet Bills firing both high and low to constantly keep you guessing and on your toes (or to act as a makeshift bridge across gaps, if you’re feeling brave) and I rarely saw a pipe that wasn’t hiding a Pihana Plant!
All the Hammer Bros. and fake Bowsers around can’t stand up to your Fire Flower!
The most prominent enemies you’ll encounter, though, are the excess of Hammer Bros. that now populate many of the Worlds; sometimes there’s just one, sometimes two or three, but they’re always annoying as they hop up and down blocks and toss a whole mess of hammers at you. If you have a Fire Flower or a Super Star then they’re much easier to deal with but, without these, you’ll need to strategically run underneath them and bump the block they’re standing on, risk a hit to just get away, or time your runs or jumps to get past them, which can be tricky. Additionally, you’ll also face Bowser at the end of each castle; however, these are all fakes except for the final boss of Worlds 8-4 and D-4. As ever, there are two ways to defeat Bowser and his fakes: either run under him when he jumps or jump over him when you can to hit the axe and drop him to his doom or plug away with fireballs if you have a Fire Flower. Bowser’s strategies are very predictable and repetitive, but no less dangerous; you’ll see his fireballs long before you encounter him and these can be tricky to avoid when there’s a fire bar, low ceiling, or blocks restricting the arena. Eventually, Bowser will toss hammers at you like a Hammer Bro, making him even tougher without a Fire Flower, and you’ll have to battle his fakes as sub-bosses in Worlds 8-4 and D-4, which can also be quite the challenge without a Fire Flower. Bowser’s sprite is also quite large, and he tends to hop about and move back and forth, meaning you might take a hit trying to get past him, but you can easily do that to defeat him with no trouble at all in almost every encounter.
Power-Ups and Bonuses: Sadly, there’s nothing new on offer here; you can pick up Coins scattered throughout every World and hidden in “bonus” areas and grabbing 100 will grant you an extra life. Occasionally, you’ll find 1-Up Mushrooms in blocks to also get an extra try, but make sure you’re not fooled by the damaging Poison Mushroom. You can also find Super Stars to make yourself temporarily invincible, which is great for barging through waves of enemies, but your most useful power-up to have on hand is the Fire Flower. This makes the Hammer Bros. and bosses a breeze and gives you a much needed edge, but be careful not to accidentally blast a Koopa Paratroopa you need to reach a higher area. I have to say, though, that it’s a bit of a shame that there wasn’t at least one new power-up to go alongside with the Poison Mushroom and add a little more variety to the aggravating gameplay.
Additional Features: At first glance, The Lost Levels is as barebones as Super Mario Bros.; there’s no two-player option here, despite Luigi’s presence, and your main option for experiencing a different game is to switch to the green-clad plumber. However, many Worlds continue hidden paths to bonus areas containing Coins and acting as shortcuts, and there’s even a few Warp Zones you can use to skip ahead to later Worlds. Although I was sometimes able to break through the ceiling and bypass some underground levels, I never actually found any Warp Zones in my playthrough, meaning I was dumped into World 9 after rescuing Princess Toadstool and tasked with taking on an even tougher challenge. What follows are five new Worlds (World 9 and World A to D) that contain even more random, hazardous, and downright despicable enemy and obstacle placements. If you manage to best the main game, these will push you to breaking point as you need to spring-jump over bodies of water, cross small elevator platforms, and make even more insane jumps to reach the flagpole. More Hammer Bros. and fake Bowsers await you here as well to really pile on the challenge and I was surprised by how the game just kept going and going! However, I have to say again that the Switch’s rewind and save state feature is the only reason I pressed forward; the amount of times I had to rewind certain jumps and sections showed me that I wouldn’t have a chance without these features so I honestly have no idea how anyone played this or the NES original back in the day as it’s just excruciating difficult!
The Summary: I was really anxious about playing Super Mario Bros.: The Lost Levels. Of all the 2D Super Mario games, it’s the one I’ve played the least and considering how much I struggle with the gameplay and mechanics of the original Super Mario Bros., I wasn’t exactly relishing tackling a much harder challenge. I can totally understand why The Lost Levels didn’t make it out of Japan as Super Mario Bros. 2; not only is it insanely difficult compared to the first game, there’s just not enough different about it. For me, the game would work much better if it were scaled down a little and incorporated into Super Mario Bros. as the second, harder game mode for experienced players. I can imagine a lot of gamers might’ve been disappointed to find that this version of Super Mario Bros. 2 was just the first game remixed, recycled, and ramped up to be ball-breakingly hard and I’m glad that it’s become more of a curio than a staple of the series. The Lost Levels is a treat to look at; I love the 16-bit overhaul and the little touches here and there, but again I think more could’ve been done to make it a stronger alternative to other 2D Mario games, such as an additional power-up, maybe a bit more variety in the bosses and Worlds other than just re-skins, or just allowing players to swap between Mario and Luigi between Worlds. Ultimately, your enjoyment of The Lost Levels depends entirely on how good you are at Super Mario Bros. but I’d wager even competent players will struggle to beat the game’s maddening levels and hazards. Because of this, I definitely recommend playing a version of the game such as this with the quality of life safety nets they offer, but can’t really recommend it beyond that unless you feel like having your skill as a Mario gamer put to the ultimate test.
My Rating:
⭐⭐
Rating: 2 out of 5.
Could Be Better
Are you a fan of Super Mario Bros. The Lost Levels? Do you prefer it to the US version of Super Mario Bros. 2? What did you think to the difficulty and challenge on offer here? Were you disappointed by the lack of new power-ups? Did you manage to beat the game without rewind or save state features? How are you celebrating Mario’s birthday this year? Whatever your thoughts on Super Mario Bros. The Lost Levels, feel free to share them below or drop a comment on my social media and be sure to check out my other Mario content!
So, for no better reason than “Mar.10” resembling Mario’s name, March 10th is widely regarded as being “Mario Day”, a day to celebrate Nintendo’s portly plumber, an overalls-wearing mascot who literally changed the videogame industry forever and shaped the home console market of the nineties.
Released: 3 September 2020 Originally Released: 14 July 1993 Developer: Nintendo Original Developer: Nintendo R&D4 Also Available For: Arcade, Game Boy Advance, Nintendo Entertainment System (NES), Nintendo Wii, Nintendo Wii U, Satellaview, Super Nintendo Entertainment System (SNES) Classic Edition, SNES
The Background: When the videogame industry crumbled following an influx of overpriced consoles and mediocre titles, Nintendo swooped in and effectively saved the industry with the runaway success ofSuper Mario Bros. (Nintendo EAD, 1985), which marked an early victory in the subsequent “Console Wars” of the mid-nineties. However, as successful and popular as that game was, development of its sequel is one of the most bizarre stories in all of gaming; Super Mario Bros. 2 (Nintendo R&D4, 1986) released in Japan a year later and was, essentially, a remixed version of the first game that included a higher challenge of difficulty. When Nintendo of America saw this, they were wary of alienating their players, especially as videogames were only just recovering from the industry crash of 1982, so they decided it would be better to reskin whimsical Mario clone Yume Kōjō: Doki Doki Panic into an official Super Mario Bros. videogame. Although the gameplay was noticeably changed from its predecessor, Super Mario Bros. 2 was both a best-seller and highly praised; when it came time for Nintendo to release their game-changing SNES, Nintendo not only developed a 16-bit remaster of Super Mario Bros. 2 for the Super Mario All-Stars (Nintendo EAD, 1993) compilation title, they also included a 16-bit version of the original version of the game, though retitled The Lost Levels(ibid). Another remastered version of Super Mario Bros. 2 was later released on the Game Boy Advance, and all versions of the game were made available on the Nintendo Switch Online service, which is the version I am looking at here.
The Plot: While sleeping, Mario dreams of a staircase leading to Subcon, a mysterious dreamland facing invasion from the villainous frog tyrant Wart. When Mario awakens, he recruits his brother, Luigi, Toad, and Princess “Peach” Toadstool to help liberate Subcon from Wart.
Gameplay: Like its predecessor (and the vast majority of the classic Super Mario Bros. videogames), Super Mario Bros. 2 is a 2D, sidescrolling platformer but that’s about where the similarities to Super Mario Bros. end. The game is made up of seven Worlds, each with three different levels (except for World 7, which has only two); the timer is gone, as is the player’s score, but players can still jump with A or B and run by holding either X or Y (these controls can also be slightly tweaked from the game select menu). You can use the dash to jump higher and further, but combat is made far more methodical and clunky by the fact that you can no longer defeat enemies by jumping on them. If you jump on an enemy’s head, you’ll simply stand on them as they wander or fly around or take damage and you can only defeat enemies by holding X or Y to pick them up (or pull up various vegetables, bombs, and other offensive items from grass patches) and then toss them at other enemies. While this is similar to the combat mechanics of one of my favourite Mario spin-offs, Wario Land: Super Mario Land 3 (Nintendo R&D1, 1994), it’s made all the more awkward as you need to time your throws carefully to knock out enemies and enemies respawn the moment the screen scrolls along, meaning it’s usually better to just avoid enemies altogether. Additionally, you can’t climb vines or ladders while holding throwable items, though there are times when the screen loops horizontally like in the original Mario Bros. (Nintendo R&D1, 1983), which can help you avoid enemies and hazards.
Mario and friends have new abilities but rely on tossing objects at their foes.
Another new mechanic is the charged jump ability shared between the four playable characters. By holding down on the directional pad, your character will duck and begin to flash; pressing A or B will then see them jump higher than normal, which is crucial to reaching out of the way platforms. This time around, players can pick from four different characters, each with slightly different gameplay mechanics. Mario is an all-rounder, with average speed and jumping abilities, and is the most familiar and easiest to control; Luigi is taller, has a higher jump, and can also perform a “flutter jump” for extra height and distance but is a bit slower and slipperier than Mario. Toad is the smallest but also the strongest, but his jumping ability is so bad that you’ll be relying on the charged jump to reach higher platforms; Peach is also quite tall and can glide along using her dress, but she’s also the weakest and the slowest of the four. You can pick your character at the start of every stage or after losing a life, and it can help to break up the gameplay to switch them up; you also might find it better to pick Luigi or Peach for stages that require more horizontal traversal or are focused more on platforming as their extra jumping powers can be useful here. There are no flagpoles to reach here; instead, your goal is to go from the left side of the screen to the right (except for one level where you need to ride an albatross to the left), defeat a mini boss (usually a coloured variant of Birdo) and grab a Crystal Ball to open the Mask Gate and complete the level.
While magic doors and vertical areas are common, there’s not much gameplay variety.
Another major change is the incorporation of a heart-based life meter; players start with five lives and can take two hits, though these can both be extended by finding Hearts, uprooting 1-Ups, or winning the bonus stages you play after clearing each level. If you only have two hearts and take a hit, you’ll shrink to a smaller form but will grow again upon replenishing your life bar and your life bar automatically resets to two at the start of every level. Another new mechanic is the use of secret doors; you’ll often uproot a bottle of Magic Potion that, when thrown, creates a door to “Sub-space”, a brief, inverted version of your current location where you can often find 1-Ups and Coins to play the bonus games. You’ll also be charged with retrieving keys to open locked doors; once you grab a key, Phantos will relentlessly chase you until you find and unlock the door, which can be harrowing and frustrating especially when trying to avoid other enemies. Bottomless pits are again commonplace, but you’ll also have to contend with spikes, conveyer belts, destructible walls and platforms, and occasionally have to commandeer an enemy (or a temporary magic carpet) to bypass gaps or quicksand. There are no underwater levels in Super Mario Bros. 2, but you’ll often be hopping across logs to get past waterfalls, digging through dirt while avoiding Shyguys in gameplay similar to Dig Dug (Namco, 1981), stacking up Mushroom Blocks to reach higher platforms, climbing chains, vines, and ladders to progress, and even hopping into the odd rocket ship to travel even higher.
Graphics and Sound: Since this version of Super Mario Bros. 2 was remastered for the more powerful SNES, the graphical upgrade from the first game is immediate and obvious. However, you’ll still see an improvement in the sprite details, colours, and quality even if you play the original 8-bit version, where everything is far more vivid and defined compared to the basic pixel art of Super Mario Bros. However, as impressive as it is that we’re actually able to play as four relatively distinct characters, with their own strengths and weaknesses and detailed sprites, some corners have been cut; none of the characters has an idle animation and they can’t look up, for example, and the intelligence and presentation of the enemies leaves a lot to be desired (many simply wander in predictable patterns, often to their deaths, or constantly spawn in to cause you headaches). Although the game’s soundtrack is still limited to a few tracks, they’re very jaunty and memorable and, in my view, some of the more influential themes and sound effects in the early games. Another new feature here is the inclusion of text that actually explains the (admittedly weak and bizarre) story and the use of large, partially animated pixel art in the ending, which includes a somewhat questionable bestiary rather than developer credits.
Despite the colourful graphics, things disappointingly get very repetitive very quickly.
As disappointing and awkward as I found the combat to be, I was equally disappointed by the level variety on offer in Super Mario Bros. 2; like the first game, locations are limited, recycled, and generally just palette and asset swaps, which really limits the game. While there are many times when you can enter a jar or a door and travel to cave-like areas or enter large stone towers or pyramids to tackle vertical-scrolling platform challenges, you’ll mostly be going from left to right through the same plains, deserts, and waterfalls in every World. Occasionally, you’ll see something different in the background, like the starry night sky or mountaintops or pyramids, or you’ll be in an ice-themed world covered in snow and ice blocks, or venture into a pyramid filled with hieroglyphics, but it all gets very samey very quickly. Things only really get visually interesting in the boss rooms, which feature colourful LEGO-like blocks, and in Worlds 4 and 7, where you have to hop across whales and use their waterspouts to progress across the hazardous water and which takes place amongst the clouds, respectively.
Enemies and Bosses: While Super Mario Bros. 2 features an entirely new set of enemies (the Goombas are completely absent and the only hint of Koopa Troopers is when you unearth shells to toss at enemies), it also introduces some of the most recognisable enemies to the franchise. Right at the forefront are the Shyguys, diminutive, masked baddies who wander to and fro, constantly spawn from pots, or hop up and down and spit projectiles at you. This game also marks the first appearance of the Bob-omb (an anthropomorphic bomb that wanders about until it explodes are can be tossed to defeat enemies or break open certain walls) and Pokey, a wriggly caterpillar-type enemy that you can use to ride over quicksand. Other enemies include the bird-like Tweeters, fireball-spitting Pansers, rideable enemies such as Pidgit and Ostro, Cobrats (snakes the ambush you from jars and spit at you) and you’ll even come across Shyguys rolling around on cannons! The Phantos are easily the most annoying enemy; these mask-like bastards come to life when you grab a key and chase you until you drop the key or unlock the door; they cannot be picked up and can only be defeated if you grab a Starman (and even then another one spawns in!)
There’s a startling lack of variety and challenge in the game’s repetitive bosses.
Although you’ll face a mini boss at the end of every level and each World is guarded by an actual boss, Super Mario Bros. 2 equally fails to impress in both departments. The most common recurring mini boss is Birdo, with a different-coloured variant fought in every first and second level and each one spitting more projectiles at a faster rate or being in a slightly more awkward position, such as on the high ground, on a conveyer belt, or in an enclosed area. Birdos will spit out eggs which you must jump on and toss back at them; occasionally, you’ll have to use Mushroom Blocks instead or even ride their eggs to clear large gaps, but you’ll always have to watch out for their fireballs and can defeat them with three hits. Fighting Birdo is basically preparation for each of the game’s bosses, with the first, Mouser, setting the bar low for the rest of the game. Mouser pops up three times and each time you need to intercept or pick up his bombs and toss them back at him to damage him, which can be tricky as the fuses are quite short and he tends to move about on his platform a lot. The hydra-like Tryclyde also appears twice; both times it spits a bunch of fireballs from its heads and you need to toss Mushroom Blocks at it to be victorious. Thankfully, things get a little more interesting (and challenging) when battling Fryguy, Clawgrip, and the Mask Gate; Fryguy will float about a bit harmlessly enough but splits into four smaller Fry Guys upon defeat, the crab-like Clawgrip throws rocks at you like he’s Donkey Kong in an interesting spin on the Mouser fight, and the sentient Mask Gate caught me completely off-guard as I wasn’t expecting the exit to come alive and start attacking me! Once you’ve bested all of these using the same tactic of grabbing items and throwing them at them until they keel over, you’ll battle Wart to decide the fate of Subcon. Unlike the other bosses, Wart is invulnerable except for when his mouth is open and he’s spitting a spray of bubbles into the arena; this is your brief opening to grab a vegetable from the Dream Machine in the background and toss one at him to score a hit. Successfully dodge his one attack and hit him six times and Wart will be defeated, liberating the land and waking Mario from his slumber.
Power-Ups and Bonuses: Although players are far less reliant on power-ups to stay alive thanks to the new life bar system, some familiar power-ups do exist in Super Mario Bros. 2; you can uproot mushrooms to helpfully increase your maximum heart count, grab a 1-Up mushroom for an extra life, and snag Coins to play the bonus game and win a few more extra tries. As you play, you’ll also spot cherries dotted all over the place; while these appear to have no purpose, if you grab five in a row it’ll cause a Starman to spawn, which will grant you a brief period of invincibility. Similarly, when you defeat eight enemies in a row, a Heart will float up from the bottom of the screen so you can replenish your health. The POW Block also returns and will instantly defeat all onscreen enemies when thrown, and (after plucking four vegetables in a row) you’ll also unearth a stopwatch that will briefly freeze all enemies.
Additional Features: There really isn’t much of anything extra to do or see in Super Mario Bros. 2; there’s no two player mode (though you can still take it in turns to tackle each level, I guess), no hard mode to unlock, and the only real replay value is in tackling different levels with different characters and exploring any areas of Sub-space you might’ve missed. When you finish the game, each character is given a “contributor” tally that I assume displays how often you picked that character, but it’s ultimately meaningless and there isn’t even a high score table for you to work towards. You can save and continue (or save and quit) from the pause menu at any time, but this is somewhat negated by the Switch’s save state ability and life-saving rewind function, which I am not ashamed to say I exploited at every opportunity to cheese past the game’s more frustrating sections or revert back to before I entered a dead end or down the wrong path.
The Summary: I was really on the fence about playing through Super Mario Bros. 2; not only do I notoriously struggle with Mario’s early 2D adventures, but I also wasn’t looking forward to the awkward gameplay mechanics introduced in this game. I really don’t like that enemies suddenly can’t be defeated by jumping on them, which severely limits the game’s action-orientated gameplay and forces you to take things much slower and more cautiously as you pick up enemies or unearth vegetables to toss at foes, only to miss your target and be left either taking a hit or simply rolling your eyes and bypassing the enemy completely. While the visuals are colourful and fun, the lack of variety in the locations and bosses was really disappointing; I got very tired of seeing the same plains and backgrounds repeated over and over and battling Birdo more times than I could count. Similarly, while it seems fun and adds a little spice to have four slightly different characters available to you, I really only noticed a difference in gameplay when playing as slippery, unwieldy Luigi or Peach and I definitely felt the absence of some decent power-ups, like the Fire Flower. Similar to the dramatic left-turn Nintendo took with Zelda II: The Adventure of Link(Nintendo R&D4, 1987), Super Mario Bros. 2 is just too different from its predecessor; the use of a traditional life bar system and hampering Mario’s jumping abilities just makes this another bog-standard platformer and easily one of the most bizarre and forgettable pit stops in the portly plumber’s career, no matter how prominent some of its enemies and characterisations might’ve been for the franchise.
My Rating:
⭐⭐
Rating: 2 out of 5.
Could Be Better
Did you enjoy Super Mario Bros. 2? How do you feel it compares other Mario titles, specifically the first Super Mario Bros.? Which of the playable characters was your favourite and why? Do you prefer this version over the Japanese version of Super Mario Bros. 2? Were you also disappointed by the lack of variety in the environments and boss battles? What did you think to Subcon and would you like to see Wart return to the franchise? How are you celebrating Mario’s birthday this year? Whatever your thoughts on Super Mario Bros. 2, feel free to share them below or drop a comment on my social media and be sure to check out my other Mario content!


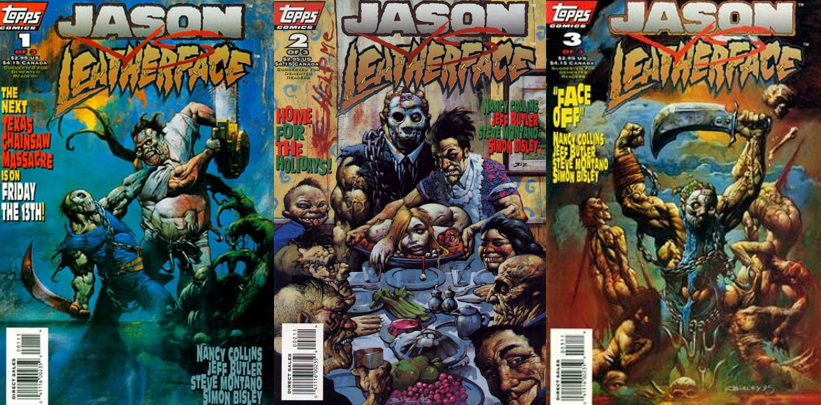


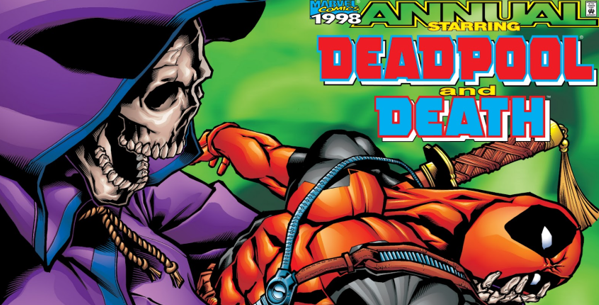
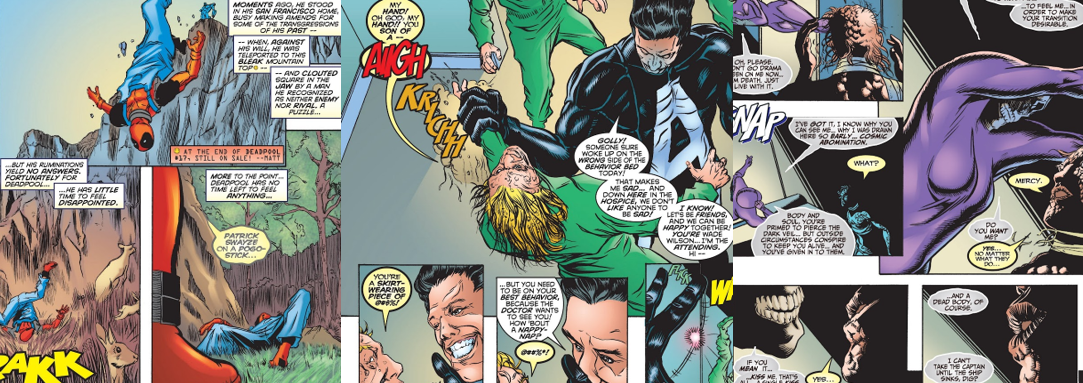
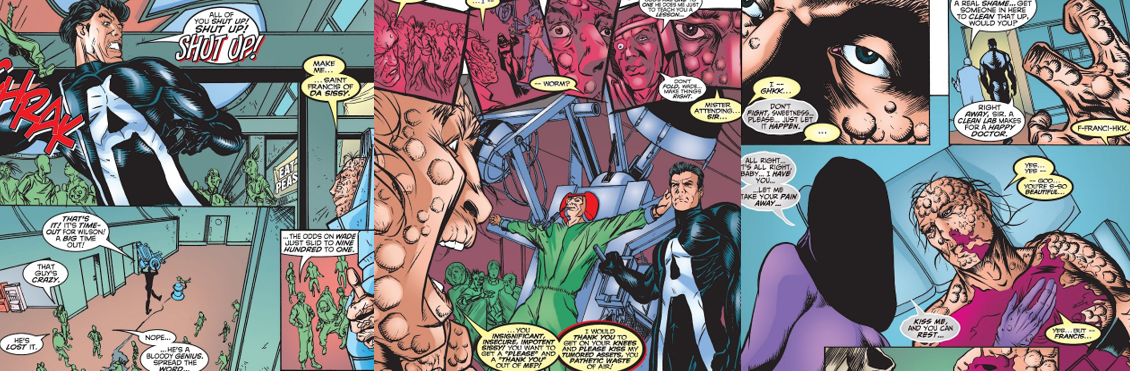
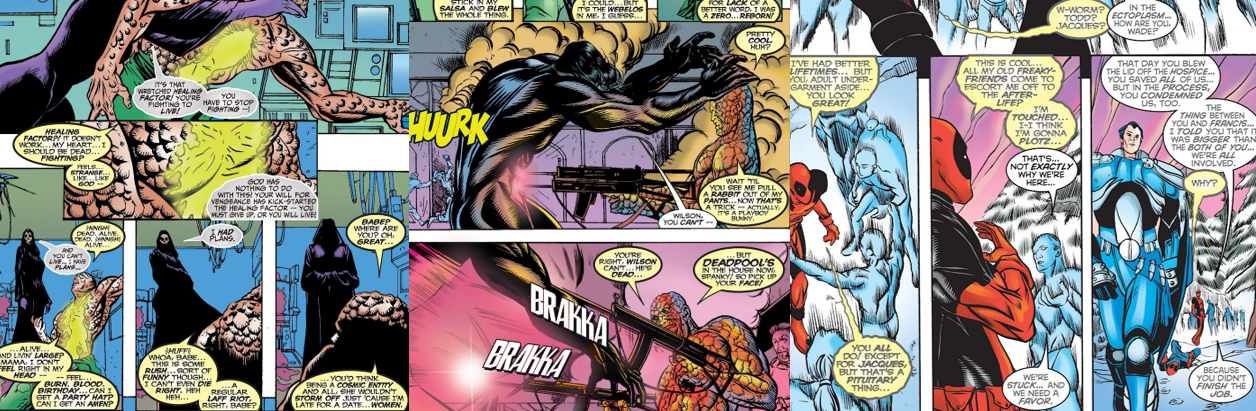
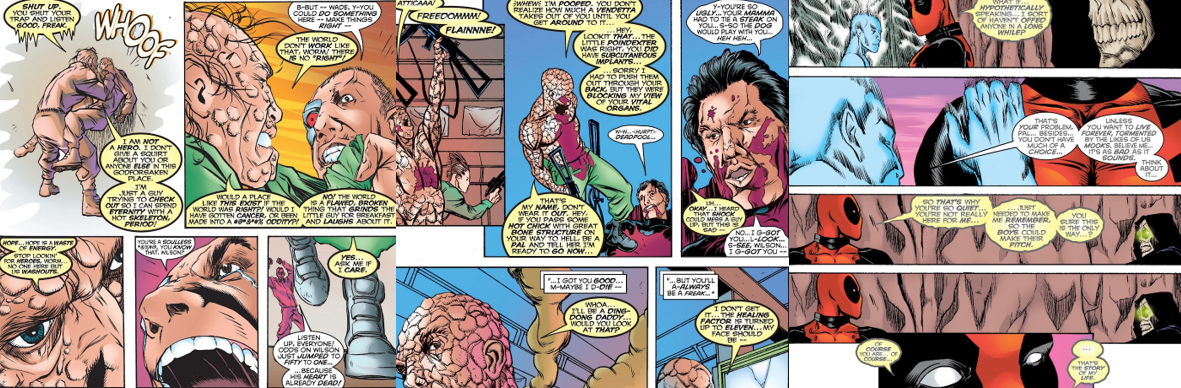


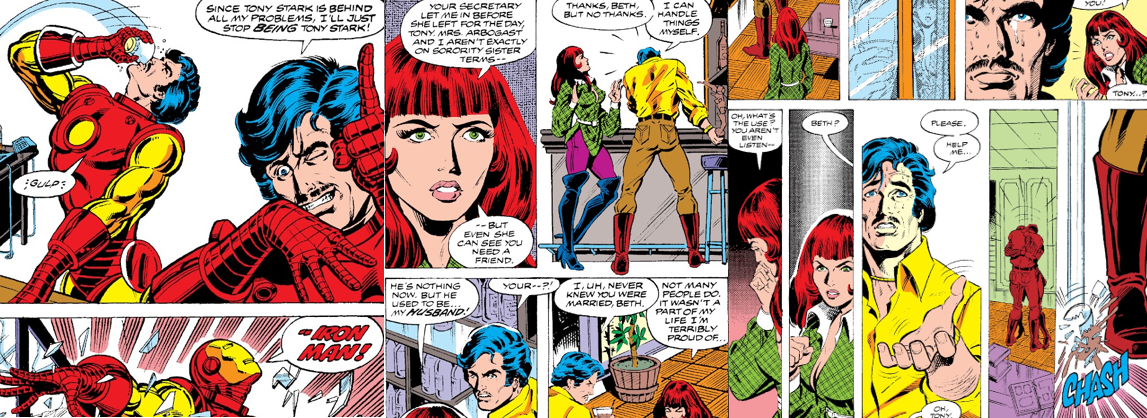

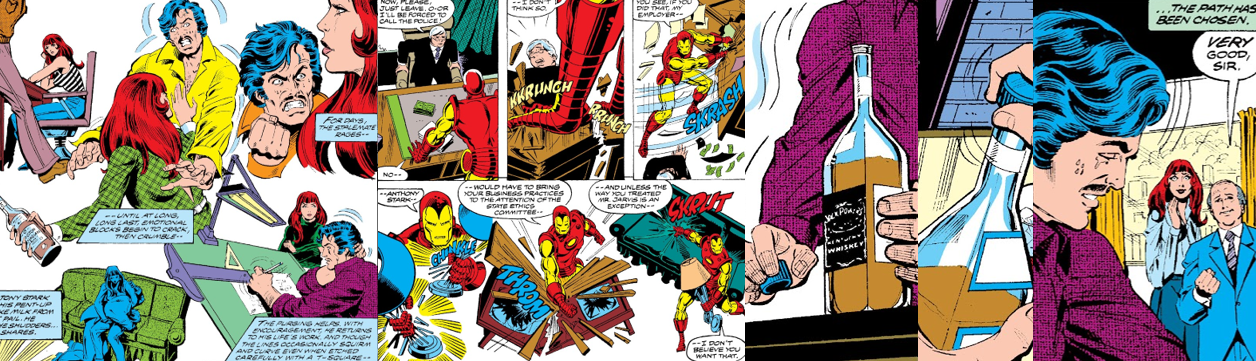


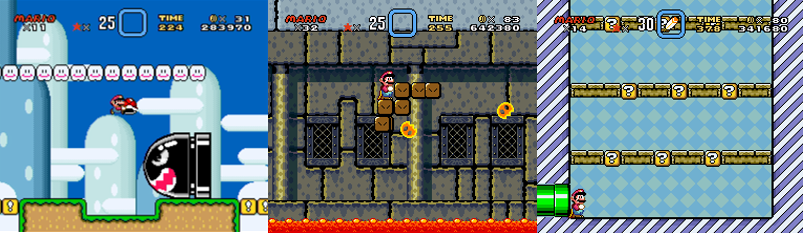

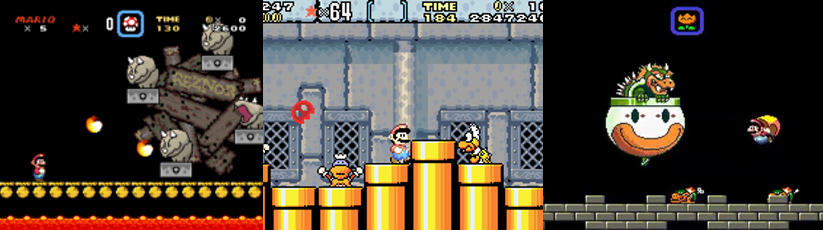


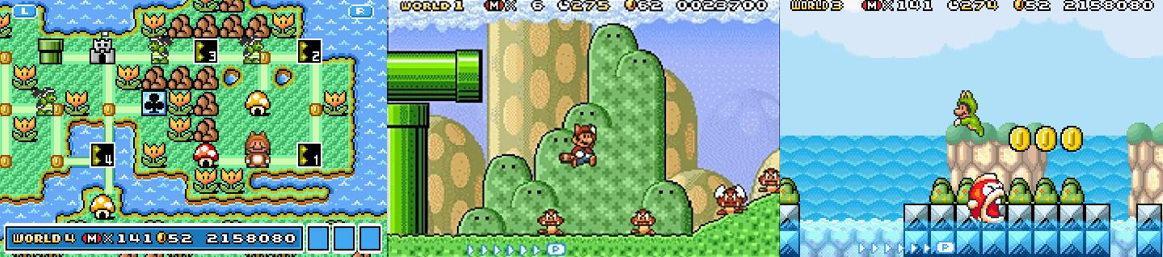
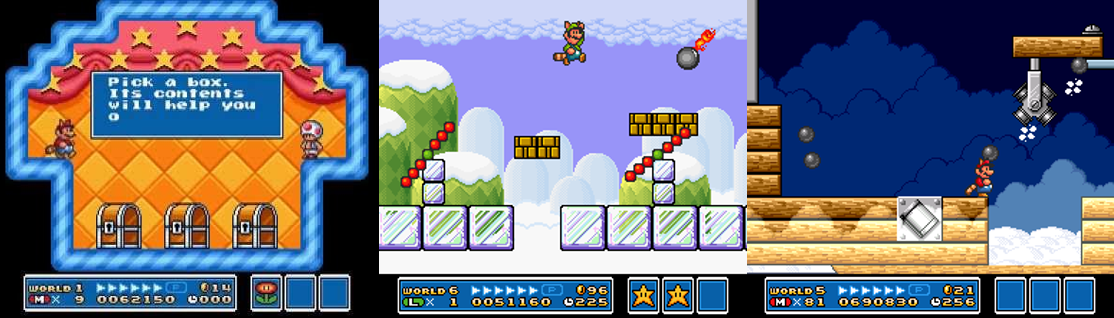


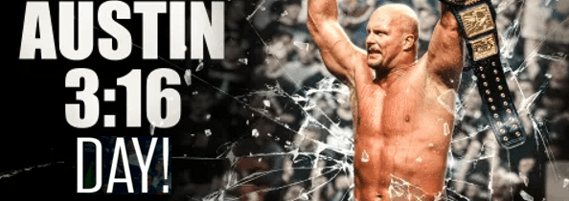
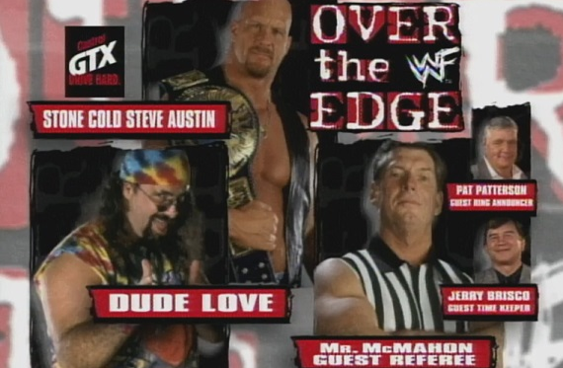


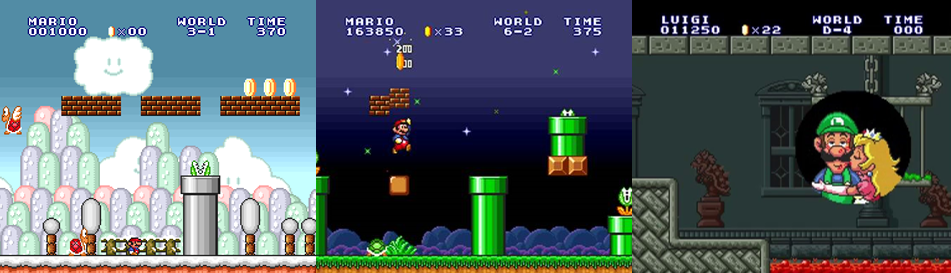


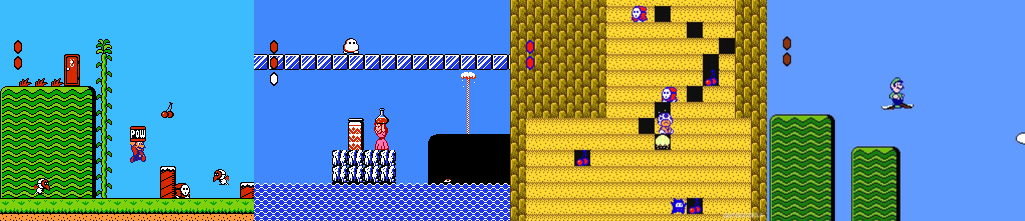


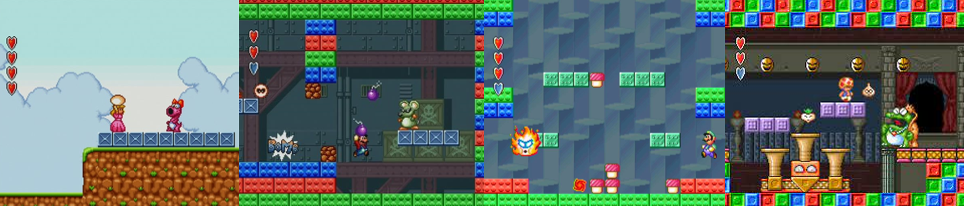


You must be logged in to post a comment.