Game Corner: Grand Theft Auto V: Premium Edition (Xbox One)

Released: 18 November 2014
Originally Released: 17 September 2013
Developer: Rockstar North
Also Available For: PC, PlayStation 3, PlayStation 4, PlayStation 5, Xbox 360, Xbox Series X/S

The Background:
The Grand Theft Auto (GTA) franchise (ibid/Various, 1997 to present) is an incredibly successful and well-regarded series of open world videogames that have the player pulling off a series of heists, robberies, and other illicit activities generally by stealing or making liberal use of vehicles and guns. The series began life as a top-down title on the PC and PlayStation and set the standard for how successful and controversial the series would become over the years thanks to its violent content.

My experience with the GTA series is quite limited as I’m not much of a fan…

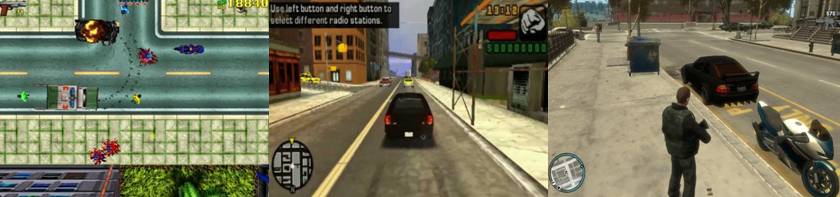
My experience with the Grand Theft Auto series is quite limited; I’ve played the original and dabbled with both Grand Theft Auto: Liberty City Stories (Rockstar Leeds/Rockstar North, 2006) and Grand Theft Auto IV (Rockstar North, 2008) but these experiences were either extremely brief or boiled down to simply messing about with the game’s many infamous cheat codes. However, I was recently gifted GTA V and was determined to see it through to completion despite not really being a fan of the series; GTA V was developed to be the most graphically impressive of the series so far that would give players control of three distinct characters rather than just one and improve upon many of the studio’s gameplay mechanics. GTA V was released to widespread critical acclaim and went on to ship over 140 million copies and is largely regarded as one of the best videogames ever released at the time.

The Plot:
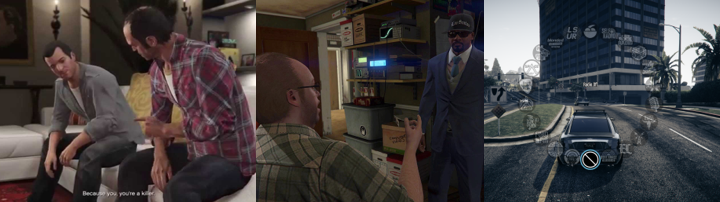
Nine years after faking his death and entering witness protection following a botched robbery, former career criminal Michael Townley has become a shell of his former self and is living a tumultuous life as a family man in Los Santos under the alias Michael De Santa. After crossing paths with the foul-mouthed gangbanger Franklin Clinton, Michael finds himself brought back into his old ways as he helps Franklin pull off more profitable heists and runs afoul not only of the city’s seedy underworld and his handlers at the Federal Investigation Bureau (FIB) but also draws the unwelcome attention of his psychotic former associate, Trevor Philips.

Gameplay:
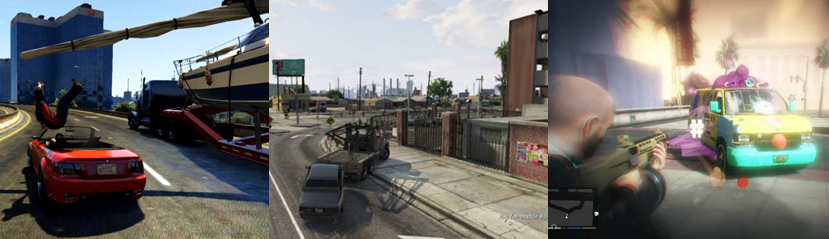
As you might expect, given it’s the norm for the series ever since it jumped to 3D, GTA V is a third-person action/adventure game with a heavy emphasis on story, character interactions, violence, gun fights, and vehicles. The lengthy story and large city of Los Santos and its surrounding area will see you exploring a variety of locations (both seedy and legitimate), encountering many different non-playable characters (NPCs), and taking part in numerous side quests and activities to keep you busy. As you play the story, you’ll eventually gain access to all three playable characters, each of whom controls exactly the same but has a different “Special Ability” and has their strengths rooted in either driving, melee combat, or shooting.

Fight, steal cars, and shoot the place up in true GTA fashion using three different playable characters.

The game’s controls are different depending on your current situation; when on foot, you can use the Left Trigger to aim and lock on to enemies, and fire your weapons or use melee attacks with the Right Trigger. Weapons are selected from a weapon wheel with the Left Bumper while the Right Bumper allows you to duck behind and move away from cover during gun fights. You can also press LT and the X button to dodge or roll out of the way or in conjunction with the left directional pad (D-pad) button to toss a grenade. Pressing in the left analogue stick will have you crouch down to sneak up on enemies, while pressing in the right stick allows you to zoom in and you can also switch between different perspectives (including a first-person view) with the Navigation button. Y is used to enter (illegally or otherwise) and exit vehicles; B reloads your weapon and is also used for melee attacks; X performs a jump and allows you to hop up small walls or ledges; and you can hold down the A button to jog along. If you tap A, you’ll break out into a sprint but be sure to keep an eye on your health and stamina in the heads-up display (HUD) as sprinting for too long will drain both of these.

Cars are slippery and unwieldy at the best of times let alone when you’re trying to shoot as well!

When in a vehicles, the controls alter somewhat: LT is now used to brake, reverse, or descend when flying while RT is used to accelerate or ascend; RB is the handbrake or (in conjunction with LB) controls the rudder and you can switch to a “cinematic” camera angle with B or duck down to avoid incoming fire with A. You can cycle through weapons with X and use them by pressing LB to aim and RB to fire, however the controls for shooting whilst driving are extremely slippery and imprecise. Not only are you travelling at high speeds and having to adapt to the fact that every vehicle handles differently depending on its size and capabilities, but it’s also extremely easy to lose control, spin out, or crash when driving at the best of times, let alone when trying to gun down enemies. Thankfully, some missions will place two characters in the car and will even give you the option of switching between driving and shooting but, in the instances where you have to do both, I found it to be very imprecise, slippery, and needlessly frustrating.

Your phone has many uses to keep you on track and you can (mostly) switch characters at any time.

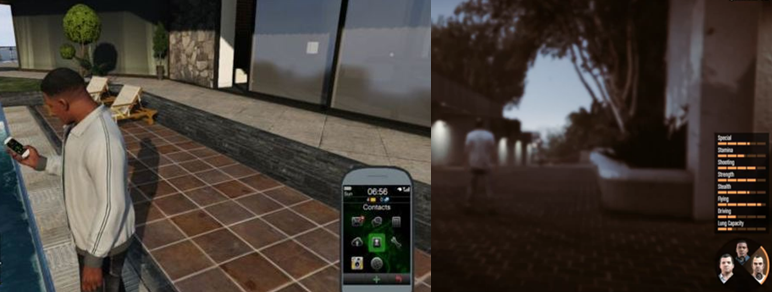
The D-pad also allows for a number of different functions depending on whether or not you’re in a vehicle; pressing up will bring up your character’s phone, which can be customised with backgrounds and ringtones and is where you’ll make and receive calls, texts, and e-mails about missions and such; pressing left allows you to detonate bombs on foot or access the in-game radio when in a vehicle; pressing right toggles the car headlights or folds/unfolds a convertible’s roof when in a vehicle or allows characters to interact when on foot; and holding down accesses the character wheel so you can switch to a different character. Primarily, you’ll be using the D-pad for your phone, though; from here, you can perform a quick save, browse websites, buy stock to earn money, and review your income or additional information about the current plot or missions.

Each character has a Special Ability that slows down time and gives them an edge in different scenarios.

As mentioned, each character comes with a different degree of stats and a Special Ability, which can be activated at any time by pressing both analogue sticks in at the same time and will last as long as the yellow bar in the HUD is full. As you run, drive, shoot, fight, and play, you’ll raise each stat (Stamina, Driving, Stealth, etc) higher; the higher your stats, the better you’ll perform, and each character’s stats are set to different levels to give them different proficiencies that tie into their Special Abilities. Being an up-and-coming car thief, Franklin’s ability allows him to slow time when in a vehicle, which makes it easier for him to avoid oncoming traffic or obstacles, perform better drifts, and make tighter, more precise turns. Michael, meanwhile, is more focused on melee combat and his Special Ability slows time when fighting to give you more time to dodge and land blows. Finally, Trevor is focused on shooting; when his Special Ability is activated, he’ll enter a kind of rage mode and deal additional damage during the slow down, which is great for taking out vehicles or clearing rooms quickly.

The map, and mini map, is super useful for navigation (when you’re on the road, at least…)

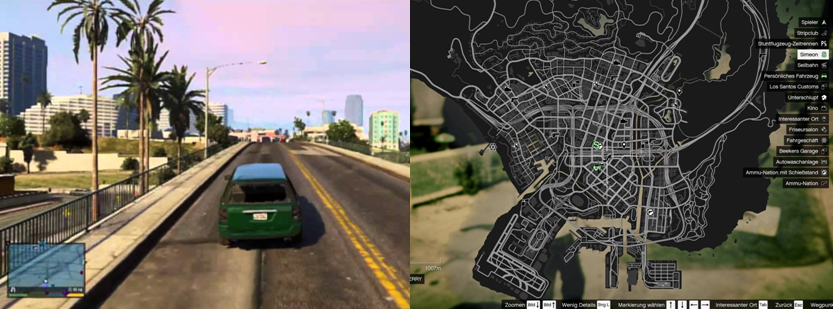
The in-game map and a variety of other game settings can, of course, be accessed using the Xbox’s Menu button; the map is shrouded in fog and will be revealed the more you explore but will also highlight a number of key locations, such as your safe house (where you can store vehicles, change clothes and sleep to save the game, replenish health, and pass time in the game to day or night), weapons shops, and a variety of other points of interest (such as barbers, tennis courts, airports, and other properties, mini games, and areas). From here, you can set a custom waypoint and the onscreen mini map (which you can freely zoom in and out) will show you the most efficient route to take to get to your destination as long as you’re in a road-based vehicle (when in a boat, aircraft, or on foot, you’ll have to make do with a smaller indicator). The mini map also shows you helpful dots that will lead you to objectives, side quests, or identify enemies (represented as red dots). If that wasn’t enough, the game also comes complete with an actual physical map, which is quite useful for finding areas not easily spotted on the in-game map.

Fighting the police is a no-win situation and you’re better off finding a quiet place to hide out.

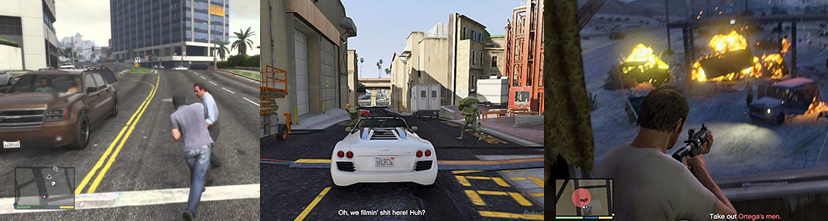
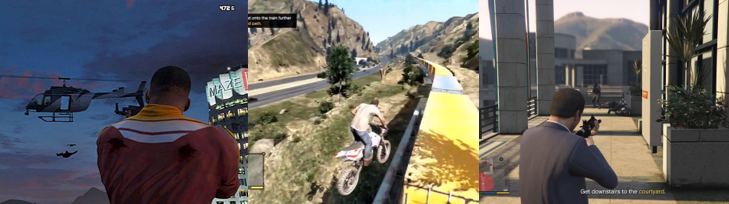
Playing GTA V in a way to not attract attention is incredibly difficult; the streets of Los Santos and the surrounding area are full of drivers and pedestrians who will crash and bump into you at the worst possible moments. As mentioned, driving can be very slippery and difficult so it’s easy to hit pedestrians or go careening off a bridge or collide head-first with an oncoming vehicle but, sometimes, pedestrians and cars will pick a fight with you and you’ll have to decide on the best way to deal with this. Cause too much carnage or enter restricted areas and the cops will start chasing you. This is represented by a star rating in the top-right of the screen and flashing red and blue lights on the mini map; you’ll also pick up chatter from the police band on your radio and see a helpful cone on the mini map that will aid you in giving the cops the slip. Continue to cause trouble, though, and the rating will increase up to five stars; the cops will bust out the helicopters, become much more aggressive, set up roadblocks, try to push you off the road, and shoot at you and it can be very difficult to get past them even on a one star Wanted rating because of how awkward some vehicles are to control.

Take cover to avoid damage and try to not get killed or you’ll lose a chunk of cash.

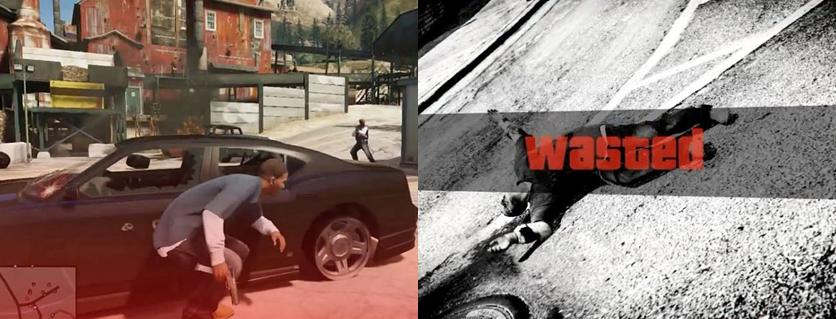
Occasionally, you’ll pick up first-aid kits to restore your health but, if your health drops below halfway, it will regenerate back up to halfway if you manage to avoid damage for a short period of time. If your car flips over, you can right it by holding on the left analogue stick; cars and bikes will incur damage as they get bashed and shot at but you can repair (and upgrade) them at one of the many Los Santos Customs dealerships across town for a fee. However, if you take too much damage, you’ll eventually be killed (or “Wasted”) and find yourself respawning at a hospital and suffering a hefty loss of funds. Thankfully, you can quick save at any time when not on a mission so you can choose to reload to your last save to keep your money but, sometimes, the game will load you clear across town or on the far opposite end of the map, which is often more frustrating than being killed. When on a mission, there are some generous checkpoints in place and, if you die, you’ll respawn at the last checkpoint, which is much less annoying.

Make the plan, execute the plan, expect the plan to go off the rails, throw away the plan.

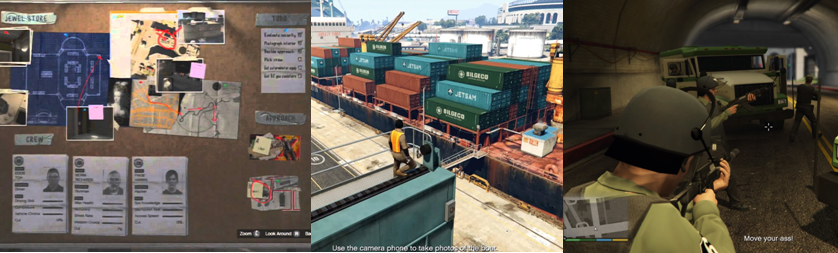
Right off the bat, GTA V gives you full control of where you want to go and what you want to do once you get past a few tutorials that are masquerading as story missions. You’re free to drive anywhere you want and interact with characters to start side quests but, if you want to progress the story, you’ll have to travel either to your character’s safe house or to a predetermined area on the map. Sometimes, it’s not clear when you have to do this or which character you need to be to progress the story but, with a bit of trial and error, it’s not too difficult to pick up. The game’s story primarily involves the planning and execution of a number of heists using Michael, Franklin, Trevor, and other crew members; these heists generally involve some preparation on your part, such as staking out the target area, gauging the police response time, and planning an escape route, all of which is clearly marked for you to do. Once the target is properly researched, the group’s planner, Lester Crest, will talk you through your options and you’ll be given two choices to pull the mission off (one is generally easier and safer and the other is usually louder and more dangerous). You then have to select additional crew to pull the heists off; these NPCs have different abilities (hackers, drivers, gunmen, etc) and different stats that correlate to how much of a cut of the profits they’ll need; if you want the best driver or hacker, for example, you’ll have to give them a higher percentage of the cut. However, the more you use the same crew members, the better their abilities will be and their cut won’t increase.

The heist missions were one of the most enjoyable parts of the game for me.

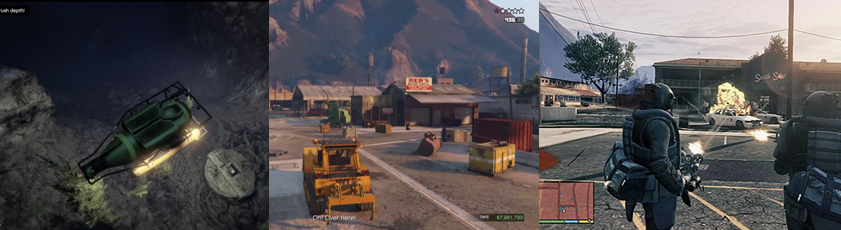
Honestly, these heist missions were the most interesting and entertaining part of the game for me; it’s fun seeing how the job is going to be pulled off and adds a lot of variety to the game as you’ll be posing as a dock worker, stealing fire trucks, knocking off armoured vans, and racing through abandoned tunnels as part of it all. It also adds some replayability to the game; after you complete a mission, you can choose to replay it from the main menu and see how the other options play out, which may see you flying an aircraft or using a drill to break into a bank rather than using subterfuge. The best part of these heists, though, is that they are the best way to earn a chunk of cash; you can earn money by doing side missions or buying properties but you’ll get a good chunk from these bigger heists and they’re generally quite fair and engaging so I definitely enjoyed them the most.

Side missions are a bit hit and miss, ranging from batshit crazy to incredibly mundane.

Of course, there are numerous side missions to undertake as well, many of which are tangentially related to the story or specific to each character. Franklin, for example, has to help out his drug-addled friend by towing cars; Trevor runs across an old British couple with an unhealthy obsession with celebrities; and Michael crosses paths with a cult who keep fleecing him for money. Later, Lester will also give Franklin assassination missions, which are fun to pull off; Trevor can also deliver arms packages in an aircraft; and Michael is forced to repair his damaged relationship with his wife and kids by doing yoga, rescuing his son after he falls in with some dangerous people, and attacking a talent show host who is taking advantage of his daughter. With enough cash, you can also buy properties like an aircraft hanger, docks, restaurants, a taxi firm, and so forth, which will provide you with a weekly income and also ask you to perform tasks like stopping robbers, cleaning up toxic waste, or picking up fares.

Graphics and Sound:
In terms of presentation, it’s hard to really find any fault with GTA V; the game world is huge, massive even, and full of things to do and see. Cars get into crashes or are chased by the cops, street muggings and violence occurs around you, day turns to night turns to day, and there’s even different types of weather and numerous districts and regions to see and visit, all with very, very minimal graphical pop up or load times. This is probably because just loading into the story, or reloading a save, takes forever but that long load time is worth it for a fast in-game experience; I noticed very little slowdown during my playthrough and even less instances of textures failing to load properly. The physics are a bit janky, at times, with characters ragdolling all over the place and vehicles either being extremely heavy or slippery as ice but a lot of this is part of the game’s aesthetic style so I can just about forgive it…it just took me some time to adapt to the vehicle controls.

Los Santos is a vast, bustling cityscape with lots to see and do.

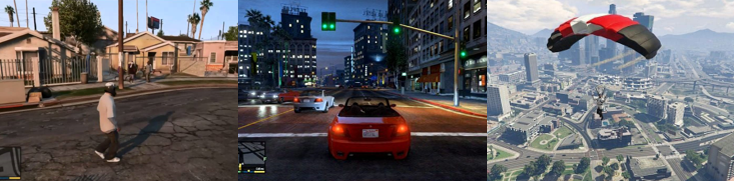
GTA V’s game world is probably the biggest I’ve ever seen; you’ll spend the majority of your playthrough in the bustling metropolitan city of Los Santos, which is basically an exaggerated version of Los Angeles. Here, you’ll find skyscrapers, office buildings, a beach front and fairground, a massive airport, banks, and rundown ghetto-like neighbourhoods like Franklin’s alongside the more luxurious condos like the one Michael lives in. It’s very impressive how varied and alive the city is but, it has to be said, this can be a bit inconsistent; you can’t go into every building, for example, and the lively nature of the streets can cause you to jump to a two star Wanted level without even meaning to just because you ploughed into a bus or police car at an intersection or cut a corner wrong or spun out into a gaggle of pedestrians.

Head on up to Blaine County for a decidedly more…rustic experience.

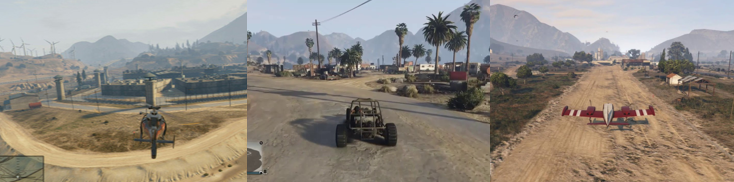
Later in the game, the story switches to the desert-like outskirts of Blaine County where Trevor lives in a rundown trailer park. Out here, things are much less grandiose and far more lawless and you’ll be able to travel across mountains and explore vast, arid dry lands between pockets of civilisation. This effectively doubles the game’s world but also means that travel time is a significant factor in GTA V. You can jump in a taxi to fast travel to a destination, but it’ll cost you money unless you own the taxi firm. Helicopters, boats, and other aircraft make travelling vast distances much faster but can be difficult to control and come by and you have to be careful not to crash into buildings or drift into restricted airspace. Thus, most of the time, you’ll be driving; normally, this isn’t too bad but, sometimes, you’re tasked with driving all the way from Los Santos out to the badlands, which can take a lot of actual, real-world time and if you accidentally attract police attention, crash, or slip off a cliff along the way, you may end up having to reload and do it all over again or be suck on foot desperately waiting for a vehicle to drive past.

Character models hold up really well and the many radio stations allow for a diverse soundtrack.

Character models are surprisingly good for such a big game; the main characters obviously stand out the most but even the random NPCs you come across are all distinct and varied. Voice acting is equally good, with the three main characters all offering constant commentary when driving along and conversing over the phone but I have to say that I was more than a little uncomfortable with the sheer amount of racial slurs spat out by Franklin and his “homies”. Still, you’ll hear a lot of voice work in the game (Kenny Loggins is even a radio DJ, which is great), all of which adds depth to the characters and brings the world to life, and every single cutscene or cinematic is rendered using the in-game graphics, which are impressive. There are also a number of radio shows to switch through when in vehicles that offer a variety of musical styles and genres; sadly, there’s no way to create a custom playlist or radio station and you’ll constantly have to reset the radio to your favourite station when you switch cars but it’s always one of the best parts of these types of games and offers such iconic tracks as Taylor Dayne’s “Tell It to My Heart”, Starship’s “We Built This City”, and the aforementioned Loggins’ “Danger Zone”.

Enemies and Bosses:
As mentioned, your primary enemies in the game will be the police; you can avoid attracting their attention by not driving like a maniac or going on a killing or attacking spree but, sometimes, you can’t avoid this. If you can’t find a place to land, for example, you can skydive out of your aircraft and parachute to the ground, which is great but it’ll cause your craft to crash and attract the cops; if you wander onto the runway or over restricted airspace, the cops will come after you in full force; and if you hit or shoot too many people (sometimes it’s one, sometimes it’s more than three), the cops will start coming after you. You can choose to fight them off but their numbers are infinite so it’s better to race away down side streets and find a quiet place to hide until the heat dies down.

Everyone from rival gangs, mercenaries, and even triad members will be gunning for your blood.

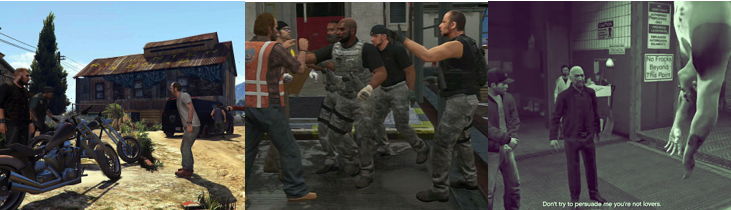
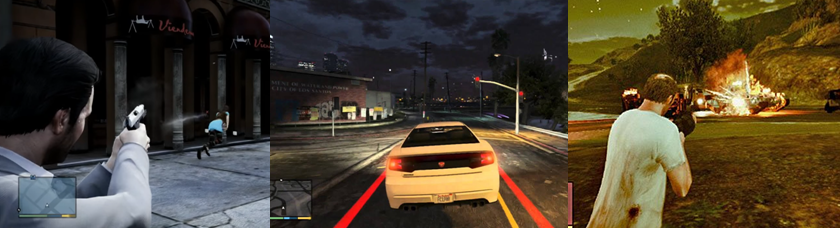
You’ll also attract the attention of some of Los Santos’ undesirables; Franklin and his dumbass friend, Lamar Davis, attract attention from rival gangs in the city; Trevor immediately makes enemies of a local biker gang; and Michael is repeatedly asked to perform “favours” for the FIB once he comes out of retirement. Gangsters, gangbangers, street punks, and even triads will crop up throughout the story as things begin to escalate but one of the more recurring enemy forces is that of Merryweather, a private security firm who you incur the wrath of during your heists and hijinx. Generally, the only things really separating these enemies from each other are the colours they wear and the munitions available to them; Merryweather are far better equipped than the street gangs and will attack in force, forcing you to take cover, use sniping positions, and shoot at them from helicopters but the street gangs usually just chase after you in cars or can be gunned down without anything more elaborate than a pistol or shotgun.

Missions and heists will have you face more challenging enemies and armaments.

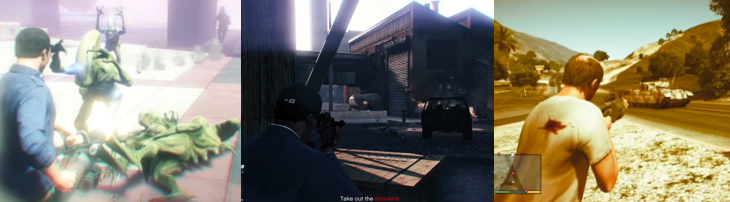
There are no traditional bosses in GTA V since the heists form the primary challenge of the game but you will have to contend with some noticeable enemies at various points throughout the story. A guy who is campaigning to legalise cocaine drugs you up so badly that you start shooting aliens, for example; Trevor has numerous side missions that put him in a state of pure rage and have him gunning down various factions in the streets; you’ll need to chase down motorcyclists to acquire story-specific items; and helicopters and even tanks will need to be shot down with rocket and/or grenade launchers. Later in the game, Michael is left to fend off a hoard of triads in a graveyard in a gruelling gauntlet and one of the game’s final missions sees all of the various forces you have wronged being led into a massive confrontation that requires you to switch between all three characters and take them out.

Choose the right path at the end and you’ll take out all of your enemies.

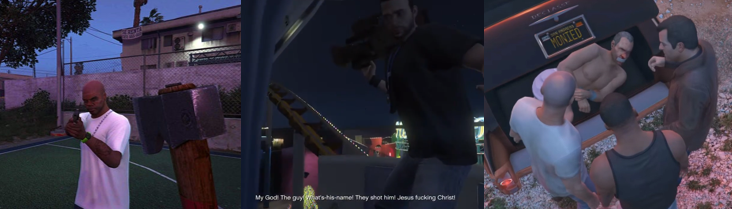
Finally, you’ll hunt down the figureheads behind all of your ills and put them down for good. These assassination missions, however, are mostly pretty easy; one has you gun down an associate of Franklin’s in a public basketball court, which is simple enough, but another has you assassinate an FIB agent who is riding a Ferris wheel. Your final target is protected by Merryweather agents but it’s a simple matter to pick a few off with your sniper rifle and gun down the others to acquire him, certainly a lot easier than some of Franklin’s assassination missions which can have him racing to locations across town against a time limit.

Power-Ups and Bonuses:
While the only literal in-game pickup you will find are the aforementioned first-aid kits, there are a number of weapons made available to you from the Ammu-Nation stores scattered across the game world. From here, you can purchase bulletproof vests (which degrade as you take damage), melee weapons such as knives and knuckle dusters, and, of course, guns. Guns range from pistols to shotguns and machine guns but you’ll also use sniper rifles, grenade launchers, gatling guns, and rocket launchers; many of these can be purchased and upgraded in the shop to improve their capacity and efficiency but some are mainly used during missions.

Upgrade and modify your weapons and cars to customise and enhance them.

You can also acquire a number of vehicles throughout the game; each of the three characters has a default vehicle but you can steal another whenever you like. It’s generally better to steal a vehicle that people are already in as it won’t set off an alarm but sometimes the slighted drivers will attack or chase after you and either option risks attracting police attention, especially if you do it too often. You can hop on bikes and drive a range of cars (from sports cars to trucks and buses), each of which handles differently and can be modified and customised at Los Santos Customs. Here, you can tint the windows and add armour plating and bulletproof tyres, for a fee, and you can stash any vehicles you’ve acquired in garages you can buy across town.

Take to the skies in an aircraft or race along the water in a boat or jet ski.

You can also steal a range of aircraft, from crop dusters to helicopters and military choppers. These can be stored at airfields but can be tricky to control and land properly since a slight error can mean the difference between a safe landing and you crashing in a fiery death. You’ll also get behind the controls of a submarine and various boats (such as water skis and speedboats); these can be quite fun but, again, either heavy or slippery to control. Jumping ship at sea also isn’t advised as, while you can swim, you’ll be at risk of being attacked by sharks but there are definitely a lot of transportation options available to you.

Additional Features:
There are sixty Achievements on offer in GTA V and they are, honestly, some of the more laborious Achievements I’ve ever come across. While you’ll naturally get an Achievement for completing the main story and its heists, many of the others are tied to a lot of busy work, such as finding fifty hidden items or buying expensive properties and performing a number of side missions. You’ll get some for upgrading a gun or modifying a car to the fullest extent, but others are tied to the stock market and arduous tasks that take literally hours of real-world time (such as playing the game in first-person for fifteen hours or one side mission that makes you wait ten real-world days!)

Go head to head against other players online or dick about in the Director Mode.

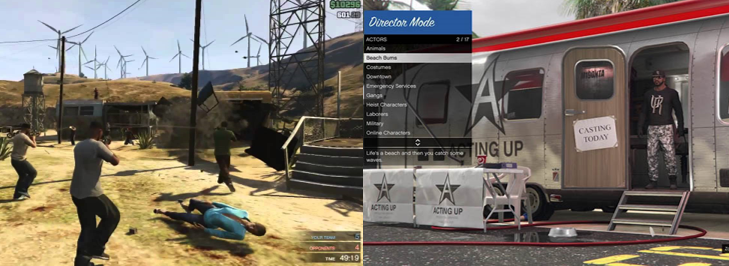
A great deal of the Achievements are also tied to the game’s online mode, which I wasn’t able to experience. However, the game also includes a “Director’s Mode” that lets you play as basically any character in the game (including animals) and freely roam throughout the game’s locations with a number of ridiculous modifiers activated (such as explosive bullets and invincibility). This seems to be tied in to the game’s ability to let you record clips of your gameplay and customise them for others to see but, honestly, I didn’t really spend any time in this mode beyond getting a couple of Achievements tied to it but I’m sure it’s fun to just mess around in.

Visit a strip club, customise your outfit, or play tennis amongst other things.

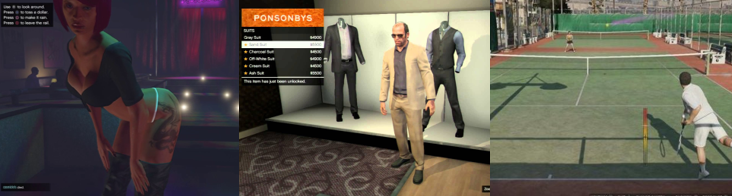
I’m not really sure what about this version of the game makes it the “Premium Edition” but, regardless, there are also a number of cheat codes you can enter to spice up the gameplay (though these will disable Achievements) and the bulk of your replay time will probably come from mopping up side missions or just going mental with your weapons. There are a lot of distractions available in GTA V; you can sit and watch TV, get your hair cut and buy new clothes, visit a strip club, play darts, go to a shooting range, hunt deer, get tattoos, take part in street races, play tennis, and take random NPCs home (or to a cult out in the wilderness if you feel so inclined). Most of these distractions are pretty pointless; you don’t really get anything out of it beyond maybe an Achievement and increasing your stats a bit but it does help to add some variety and liven up the world.

There are lots of side missions to do but many are just a chore to complete.

The game’s final mission gives Franklin three choices between killing Michael or Trevor or joining forces with them against their enemies. I chose this latter option (but, again, you can replay missions whenever you like) and, upon finishing the game, returned to the overworld with all three characters and able to mop up any outstanding side missions and Achievements. Sadly, I don’t really feel inclined to return to any of these loose ends any time soon; many of the side missions are tedious, you need quite a lot of money to buy everything the game requires you to, and my overall experience was so mediocre that I’m not very motivated to clear the map and be left with a vast game world where all that’s left to do is randomly run people over or completely mundane tasks I wouldn’t do in real life. Gameplay is nicely broken up in some missions, such as when you must torture a guy for information as Trevor or molest another guy with a piercing gun as Michael, and it can be fun and thrilling to be in the heat of a race or fire fight but once I’d cleared the story I just felt like my obligation was fulfilled.

The Summary:
For my first real GTA experience, GTA V  was certainly impressive; I can’t deny that the game looks amazing and is one of the biggest open worlds I have ever explored. The game performs incredibly well (once it loads…) considering how much is crammed into it at any one time and I really enjoyed Michael’s character and how batshit crazy Trevor was and the general unfolding of the story. The game gets a bit confounding at times when you’re not on a mission and it both bombards you with text, hints, and notifications while simultaneously leaving it up to you to figure out where you need to go at times but, once you’re on a heist, things really pick up and become focused and enjoyable.

An impressive game but quite underwhelming in a lot of ways.

Sadly, as great as the game looks and how enjoyable it can be, it was lacking in a lot of key areas for me. Driving, for one thing, is mostly horrendous; even with a fully supped up car and a character’s Driving skill at the max cars can be slippery and unwieldy, spinning out or crashing seemingly at random and I spent a lot of time struggling with the driving and flying controls more than anything else. There’s definitely a lot to do in the game and just playing the main story will take a good few days but I can’t say many of the side missions and distractions are that compelling; most are tedious busy work and I didn’t feel like my playtime was being rewarded enough with Achievements or in-game rewards to really want to return to these any time soon. I imagine hardcore GTA fans will absolutely love this game but, for me, it just felt a bit of a chore and not all that engaging or interesting; it was more like work than fun, a lot of the time, which was a real shame.

My Rating:

Rating: 2 out of 5.

Could Be Better

What did you think to Grand Theft Auto V? Are you a fan of the series and, if so, how did you find this one compared to its predecessors? Which of the three playable characters was your favourite and why? What did you think to the game’s driving, controls, and side missions? Which of the many activities was your favourite to be distracted by? What choices did you make in the heist missions, and in the game’s final mission? Did you play the online portion and, if so, what was it like? Have you achieved 100% completion on this game and, if so, how long did it take? Whatever your thoughts on Grand Theft Auto V, drop a comment below.

Game Corner [Sonic Month]: Sonic the Hedgehog (2007; Xbox One)


Sonic the Hedgehog was first introduced to gamers worldwide on 23 June 1991 and, since then, has become not only SEGA’s most enduring and popular character but also a beloved videogame icon. This year, the Blue Blur turns thirty and what better way to celebrate than by dedicating an entire month’s worth of content to SEGA’s supersonic mascot.


Check out my guest spot on The Reviews Brothers

GameCorner

Released: July 2007
Originally Released: June 1991
Developer: Sonic Team
Original Developer: Sonic Team
Also Available For: Arcade, Game Boy Advance, Gamecube, Game.com, iPod, Mega Drive, Mobile, Nintendo 3DS, Nintendo DS, Nintendo Switch, Nintendo Wii, PC, PlayStation 2, PlayStation 3, PlayStation 4, PlayStation Portable, SEGA Saturn, Xbox, Xbox 360, Xbox Series X

The Background:
You know the story by now: there was a time when videogames and home consoles ran rampant and, for a while, it was good. But, inevitably, the market became swamped with lacklustre releases and poorly conceived movie tie-ins; after the collapse of the videogame industry, Nintendo were there to pick up the pieces, dominating the market with the Nintendo Entertainment System (NES) and Super Mario Bros. (Nintendo EAD, 1985). Though they had successfully recaptured the flailing market and seemed unstoppable, one former slot machine developer dared to try and knock Nintendo from their perch. In 1990, SEGA ordered their developers to design a mascot and a title capable of leaving Mario in the dust and showcasing the power of their 16-Bit Mega Drive; after an internal contest produced numerous rejected designs (including a rabbit and an armadillo), SEGA soon settled on Naoto Ohshima’s design of a spiky hedgehog dubbed “Mr. Needlemouse”. With up-and-coming developer Yuji Naka, composer Masato Nakamura, and level designer Hirokazu Yasuhara also onboard, the character’s design was refined and defined, renamed to Sonic, and “Sonic Team” was born. Conceived to be as appealing as possibly, Naka wanted Sonic the Hedgehog to focus on speed and user-friendliness; unlike his rival, Mario, Sonic controlled with only the directional pad and one button and his gameplay was based on physics, momentum, and an emphasis on action and speed. Thanks largely to an aggressive marketing campaign and copies of the game being bundled in with SEGA’s brand new console, Sonic the Hedgehog was an immediate success, selling over 15 million copies in this format alone and kick-starting the “Console War” between SEGA and Nintendo that would dominate the nineties. Since then, Sonic has become an enduring icon; he’s had a slew of critical and commercial hits alongside a number of unfortunate and very disappointing hiccups and yet his character and brand remain strong and he is still an iconic character in both videogames and other media to this day.

The Plot:
South Island is under siege! The maniacal Doctor Eggman (widely known as “Robotnik” during the game’s original release) has been capturing the island’s animals and turning them into robotic Badniks! With Eggman’s machinery and pollution threatening the entire island, only one super-fast, super-cool hedgehog can stop him!

Gameplay:
Sonic the Hedgehog is a 2D, sidescrolling action/platformer in which you control the titular blue hedgehog. Sonic must journey across six stages (known as “Zones”), each split into three “Acts”; at the end of each Zone’s third Act, Sonic must battle Eggman in one of his contraptions and, upon clearing all six Zones, face the diabolical doctor in the game’s Final Zone. Sonic is a smooth and responsive character to play as; slightly weighty, his speed and agility are dependant upon you building momentum and using the game’s level layout and gimmicks to your advantage. When you move Sonic, he quickly breaks from a trot, to a jog, to a run that is so fast his legs appear as little more than a rubber band of red, white, and blue but, in order to reach Sonic’s top speeds, you’ll need to make use of slopes, curves, the game’s signature loop-de-loops, and Sonic’s rolling mechanics.

It’s not all high-speed Badnik bashing; Sonic will also have to pull off some slower platforming.

Any time you press a button, Sonic jumps into a blazing spinning ball of spikes known as the “Super Sonic Spin Attack”. You can use this to destroy Badniks and bounce off of them, springs, and monitors to increase your height, momentum, and speed. Additionally, pressing down whilst running will see Sonic roll along for a similar effect. In the original release of the game, Sonic couldn’t utilise his patented Spin Dash as this wasn’t introduced until the bigger, better sequel but subsequent re-releases and ports have seen this function added in, which can be extremely helpful in moving Sonic along (unfortunately, though, it’s not available in this version of the game). And that’s a noteworthy point as, unlike in the sequels, Sonic is painfully slow in his debut title; the game’s first stage, the iconic and massively over-used Green Hill Zone, is a perfect playground for getting to grips with Sonic’s speed and abilities. You’ll blast through this Zone in no time at all, feeling the rush of adrenaline and action-packed speed, only to literally run into a brick wall with the next stage, Marble Zone, which slows the game down to a crawl so Sonic can navigate precarious platforms, push blocks, activate switches, and simply wait for the game to allow him to continue.

The game’s slower sections betray its marketing as a non-stop action platformer.

That’s not to say that speed doesn’t become a recurring factor in Sonic’s gameplay; both Spring Yard Zone and Starlight Zone give you a chance to stretch your legs again but the pinball mechanics of the former and the obstacle-course-like layout of the latter were definitely refined in the sequel. As a result, most of your time is spent using more traditional platforming skills to progress forward rather than simply blazing through as the game’s marketing would have you believe. This means jumping from platform to platform, navigating maze-like areas, activating switches, and hopping to disappearing, crumbling, or spinning platforms. In Starlight Zone, you’ll also have to use some see-saws to bounce up to higher areas and navigate a bottomless void while Scrap Brain Zone includes teleportation tubes and speed-sapping conveyor belts to screw up your momentum and sense of direction. You’ll also have to watch the in-game timer as well; if you take too long to finish an Act, you’ll lose a life, so it pays to keep moving but, fortunately, none of the game’s Zones or Acts are that long or difficult to get through within the required time limit.

There are many ways to keep Sonic alive and kicking.

Luckily, Sonic is a relatively sturdy videogame character, especially compared to Mario; collecting the many Golden Rings scattered throughout the game’s Zones allows you to survive a single hit. You’ll lose all of your Rings but you won’t lose a life unless you get squashed, fall into one of the game’s many bottomless pits, get hit without a Ring or a shield, or drown. Sonic’s momentum becomes sluggish and awkward when underwater and, unlike his rival, he cannot survive for long in the murky depths of the Labyrinth Zone; linger too long and an ominous, heart-pounding countdown will begin and, if it reaches zero, you’ll drown and lose a life. Fortunately, just as you can collect dropped Rings, you can save yourself from this fate by finding air bubbles. Sonic can also earn an extra life if he collects one hundred Rings or earns a high enough score and you’ll also be given a chance to continue should you lose all of your lives. You can earn extra continues in the game’s Special Stages but you’ll also lose your current accumulated high score if you have to use a continue. Sonic gains points for destroying Badniks, defeating Eggman, and clearing Acts; once you reach the end of Act signpost or break open the prison capsule, you’ll be awarded bonus points for your current score, the time you took to clear the Act, and the amount of Rings you were holding when you did so. As a result, you are actively encouraged to blast through Acts as quickly as possible as this will net you a higher score and more lives and continues.

Labyrinth Zone more than lives up to its name thanks to being far more vertical and maze-like.

Sonic the Hedgehog’s Zones are thus laid out in such a way to allow you to experiment to find the fastest routes; typically, the higher path is the most dangerous but also the fastest compared to the middle and lower paths. This isn’t always the case, however, and this mechanic is not as refined as in later games; some Zones, such as the aforementioned Labyrinth and Spring Yard, are more vertically constructed, meaning that your completion speed will be directly tied to your level of skill and precision with controlling Sonic. For the most part, this isn’t a problem but, unfortunately, Sonic the Hedgehog does suffer from a few noticeable issues that can unfairly impede your progress; early copies of the game featured an infamous glitch whereby, upon landing on a bed of spikes, Sonic would lose his shield, Rings, and then a life all without the usual few seconds of invincibility frames to save him. Other times, especially in Spring Yard Zone, you may find yourself crushed by blocks even though you’re not actually beneath them; Sonic also has a curious animation glitch where he will jump while running in the air if you try to jump to close to obstacles or items, though these issues are, admittedly, rare and minor. Sonic the Hedgehog isn’t an especially difficult game; there are no difficulty settings to choose from so the game’s difficulty is supposed to gradually increase as you progress from Zone to Zone. As you race through Zones, you’ll automatically activate Lampposts as you run past them, which acts as a checkpoint should you die in the Zone, however your skill is tested by the way the game requires you to finish every Act that doesn’t feature a boss battle holding fifty Rings or more in order to try for the game’s six Chaos Emeralds.

Graphics and Sound:
Sonic the Hedgehog is still one of the most impressive and visually appealing games of its kind. Everything from the sprites to the background art pops out in gorgeous colours and the game’s Zones are full of life and character, despite being largely cliché in hindsight. You’ll race through verdant fields, explore lava-filled ruins, slog through the sunken remnants of an ancient civilisation, careen around a bonkers pinball-inspired obstacle course, and face a myriad of deadly hazards in Scrap Brain Zone, the heart of Eggman’s operation on South Island.

As much as I like Starlight Zone, it’s quite empty compared to other Zones in the game.

Just about the only Zone that isn’t interesting or fun is Starlight Zone and I say this with a heavy heart as it’s actually one of my favourite Zones in the game and a welcome return to the more speed-orientated gameplay after the annoyance of Labyrinth Zone. However, Starlight Zone is largely empty and lifeless; the wind-based mechanic is clunky, the bottomless pits are insufferable, and the Badniks are far harder to destroy than in other Zones.

Leave Sonic idle and he’ll grow impatient, something videogame avatars have aped ever since.

What saves Starlight Zone, however, is its music; in fact, Sonic the Hedgehog has some of the best and most memorable music in videogame history. From the catchy title theme to the iconic sounds of Green Hill Zone, every Zone has an excellent, jaunty, and fitting theme to go with it. This is also true of the game’s boss battles, which all feature the same ominous-yet-lively tune that let you know Eggman is inbound. The game doesn’t feature any cutscenes or story-telling elements; this isn’t entirely unexpected as a lot of games released around this time didn’t and, to be fair, the game’s story is pretty simple to pick up either through association (the Zones change from lush and vibrant to polluted and desolate and woodland critters bounce around the Zones after being freed from captivity) or from the game’s manual. One thing that the game does excel at, though, is giving Sonic a distinct personality; if you leave him idle, he’ll turn to the screen and impatiently tap his foot, a quirk that has been aped and emulated but almost every videogame avatar since.

Enemies and Bosses:
In each Zone of the game, Sonic will face opposition from Eggman’s Badniks; these mechanical monsters may look cute and quirky but they can be extremely deadly. Mostly themed after animals, Badniks will fly across the screen shooting fireballs at Sonic, slink along the floor and break into spiked balls upon defeat, toss bombs at his head, and even explode in his face, among other things. Generally, Badniks are exclusive to each Zone but there is some crossover in later stages. While most of these Badniks aren’t too much bother, their placement in the Zones can be frustrating; others, like Roller and Burrobot, can be a pain due to the speed and surprise of their attacks while Badniks like Spike and Orbinaut cause issues due to their spiked defences.

Eggman may have a lot of different attachments for his craft but he’s not much of a challenge.

At the end of each Zone’s third Act, you’ll battle Doctor Eggman in his Egg-O-Matic hovercraft; each time you face him, he has a new, deadly appendage attached to his craft but his attack pattern remains generally the same. He’ll come puttering in, flying from right to left, and trying to attack with his appendage all while remaining a large, open target for Sonic’s Spin Attack. Unfortunately, while Eggman’s wrecking ball is simple to get around, his later appendages become more dangerous thanks to the presence of other hazards; in Marble Zone, he’ll drop fireballs that briefly render the ground too dangerous to stand on but there’s also a pit of lava to watch out for, for example. Attack too fast in Spring Yard Zone and you might drop to your death as Eggman uses his spike to remove parts of the platform you’re standing on. Labyrinth Zone’s boss battle is more of a race than a fight as, no matter how often you hit Eggman, he won’t be defeated; instead, you need to jump up the flooded vertical shaft dodging spikes and fireballs and desperately hoping to reach the top before you drown.

The final boss battle is pretty disappointing and stupidly easy.

Once you’ve cleared all six Zones, you’ll reach the Final Zone; in this final showdown with Eggman, you’re stuck in a room with no escape and no Rings as Eggman tries to crush you with four weights and fry you alive with electrical balls. Fortunately, however, there is always a gap between these sparkling orbs for you to safely jump through and, by simply waiting at the far right of the screen, you can just take your time and ram Eggman whenever he pops up. Compared to the final boss battles of later Sonic games, this one is a bit of a joke, to be honest, and ends the game not with a bang but with a kind of shrug.

Power-Ups and Bonuses:
To help tip the odds in your favour, you’ll find a number of computer monitors scattered throughout the game’s Zones. Breaking these open will award you with such gifts as an instant hit of ten Rings, a shield that protects you from losing Rings or a life for one hit, or even an extra life. You can also find monitors containing Power Sneakers, which immediately increase Sonic’s running speed for a short time, or an invincibility, which coats Sonic in a sparkling protective aura. Combine these two together and you’re basically unstoppable unless you run head-first into a bottomless pit.

Additional Features:
Playing Sonic the Hedgehog on the Xbox One allows you to earn some pretty simple and easy Achievements; if you’ve played Sonic before, it should be no challenge at all to reach the game’s later Zones, collect one hundred Rings, or complete the game. As I mentioned above, finishing every Act except Act 3 with fifty Rings or more allows you to enter a Special Stage (why they’re not called “Special Zones” I don’t know…); these are accessed by Giant Rings that appear when you pass the end of Act signpost, so jump in quickly before you miss your chance!

Collect all six Chaos Emeralds to earn the game’s best ending.

The Special Stages are a psychedelic maze-like area filled with bright colours and weird effects; here, you’ll have to bounce and roll Sonic (who is in a constant spin) around the arena trying to avoid the flashing “Goal” lights. Touch these and you’re instantly ejected from the Special Stage with nothing to show for it but, if you manage to avoid them, you’ll find a Chaos Emerald hidden within each Special Stage. Collect all six of these and you’ll be awarded with the game’s true ending; without them, Eggman will mock you for failing to collect them all but, aside from seeing flowers blooming in Green Hill Zone and an Achievement, there’s little incentive to collect all six as you don’t unlock anything else. Sadly, thanks to the way Sonic the Hedgehog works on the Xbox One, there’s no way to enter the iconic cheat codes from the original game and, while a save state system is included, it only allows you to save to three separate slots. You can, however, access online leaderboards to compare your score, time, and progress with other players, if that’s your thing.

The Summary:
Sonic the Hedgehog will forever be an iconic, classic platformer; its place in the echelon of videogame history was cemented upon its bombastic release and, even to this day, it remains as a solid action/platformer. Unfortunately, years of enjoying the bigger, better, much improved sequels somewhat dampens the appeal of Sonic the Hedgehog. Playing the game in hindsight, you can see how the developers took the very best aspects and elements of this game and improved upon them in the sequel, removing the slower, clunkier elements and focusing more on action and speed. The game’s marketing made Sonic out to be this superfast character with a radical attitude but the actual game is quite slow, for the most part, and elevated above its peers thanks to its eye-catching graphics, distinct personality, and catchy music. It’s still a great game and obviously laid the foundations for even better things to come but is far less impressive than its sequels.

My Rating:

Rating: 3 out of 5.

Pretty Good

What did you think about Sonic the Hedgehog? Where do you rate it against the other games in the franchise? Did you purchase a Mega Drive simply to play Sonic? Which port or re-release of the game is your favourite? Are you as annoyed as I am that the excellent mobile version of the game isn’t available to play on the Xbox One? How are you celebrating Sonic’s thirtieth anniversary? Whatever you think, feel free to share your thoughts and memories regarding Sonic below.

Game Corner: Star Wars Jedi: Fallen Order (Xbox One)

GameCorner

Released: 15 November 2019
Developer: Respawn Entertainment
Also Available For: PC, Playstation 4, PlayStation 5, Stadia, Xbox Series X

The Background:
In 2013, Disney paid a paltry $4 billion for Lucasfilm Ltd and thus added the influential and immensely popular Star Wars franchise (Various, 1977 to present) to their ever-growing itinerary of properties and licenses. In addition to producing numerous films and television projects to expand and continue the franchise, Disney also sought to cash in on their purchase through videogames and quickly struck up a collaboration with Electronic Arts (EA) in order to facilitate this. After their attempts to revive the Star Wars: Battlefront series (Pandemic Studios, 2004 to 2005) were met with criticism and controversy, the pressure was on the studio to repair their damaged reputation with fans and gamers. Thus, in collaboration with Lucasfilm and drawing inspiration from the “Metroidvania” style of exploration and combat, EA turned to Respawn Entertainment to further (and officially) expand on the twenty year gap between the end of Star Wars: Episode III: Revenge of the Sith (Lucas, 2005) and the beginning of Star Wars: Episode IV: A New Hope (ibid, 1977). This approach appears to have paid off as Star Wars Jedi: Fallen Order was largely praised and sold over ten million units by 31 March 2020 and a sequel is rumoured to be in development.

The Plot:
Five years after the Great Jedi Purge, former Jedi apprentice Cal Kestis is hunted by the Galactic Empire’s Inquisitors, led by the mysterious and malevolent Second Sister, and he soon finds himself travelling with a rag-tag crew of misfits to secure a Jedi Holocron that names potential Force-sensitive children.

Gameplay:
Star Wars Jedi: Fallen Order is an action/adventure videogame with a heavy emphasis on backtracking, story, and learning and upgrading Force abilities using Skill Points earned from battle and finding secrets, similar to a role-playing game. Players take control of former Jedi apprentice Cal Kestis, a young man who has suppressed his connection to the Force and must rediscover his abilities through the course of his journey. However, the emphasis on exploration and searching through long-defunct Jedi Temples and the general thrust of the gameplay reminded me much more of the likes of Tomb Raider (Crystal Dynamics, 2013) than the Star Wars: The Force Unleashed videogames (LucasArts/Various, 2008/2010).

Cal’s lightsaber combat is comprised of quick attacks and well-timed parries.

Cal has a range of abilities that are simple to learn but can take some time to master; he can jump with a press of the A button, evade with B, and sprint ahead by pressing in the left analogue stick. Although his Force abilities are quite light to begin with, they can be upgraded with Skill Points and you’ll be using the Force to push, pull, slow down, and freeze enemies and objects with the Right and Left Triggers. The Force also comes into play with your lightsaber attacks, allowing you to press Y to pull off stronger attacks in conjunction with mashing X as long as your Force Meter is full. Similar to the Force Unleashed games, lightsaber combat is pretty simple, for the most part; you simply hit X to unleash a number of combos and mix your attacks up with Force manoeuvres and evades to avoid taking damage and deliver a swift kick or counterattack. Key to lightsaber combat is the game’s block and parry system; you can hold down the Left Bumper to automatically block incoming attacks but, with a well-timed press of LB, you’ll reflect blaster bolts back at your enemies and parry incoming melee attacks. This will leave your foe vulnerable and allow you to follow up with an attack of your own in a system that reminded me of the Batman: Arkham games (Rocksteady Studios/Various, 2009 to 2015) but it’s not quite the same in that, despite being attuned to the Force, there’s much less indication of when to parry and combat can get a bit hectic.

Wall run, slide, and swing your way across the galaxy’s dingiest corridors and environments.

You can target an enemy by pressing in the right analogue stick but this only really helps in one-on-one situations; when groups of enemies attack you, you better be prepared to be attacked from behind and off-camera quite often even after acquiring a double-bladed lightsaber to help deal with multiple enemies. As you cut down enemies, you’ll build up your Force Meter but the only way to restore your health is to press up on the directional pad (D-Pad) to have your cute little droid companion, BD-1, administer you with a Stim Canister or find a special glowing meditation circle. Here, you can save your game, spend Skill Points, and choose to completely refill your health and Stim Canisters (though every enemy you’ve killed will respawn once you leave the circle). Like The Legend of Zelda: Breath of the Wild (Nintendo NPD, 2017), climbing is an important mechanic in Jedi: Fallen Order; however, unlike in that game, Cal isn’t hampered by a stamina meter and you can even set up the option to auto-climb climbable surfaces from the game’s settings. Anytime you see vines or serrated surfaces or a splash of white paint on a ledge, you can usually climb up it with LT, jumping up and across to cover a greater distance (though, thanks to the game’s janky camera and perspective, you’re just as likely to leap into the void). You can also run along walls, slide down…slides…and swing from ropes, chains, and vines, and you will also eventually learn to bring these to you with the Force to swing about like Peter Parker/Spider-Man but, again, the game’s camera and wonky physics often cause you to fly past your target or ragdoll down a bottomless pit. Jedi: Fallen Order takes Cal on a journey back and forth across a whole five planets (not counting the areas you can’t revisit from Cal’s ship, the Stinger Mantis). Once Cal leaves Bracca, the salvage planet he has been hiding out on, he travels to Zeffo and begins his quest to reconnect with the Force and recover a Jedi Holocron from a vault hidden on the planet. This quest takes him to recognisable worlds from the Star Wars saga, such as Dathomir and Kashyyyk, and worlds I’m unfamiliar with, each one with their own visual style and with secrets to uncover and enemies to fight.

Cal’s reawakened Force abilities will allow him to access new shortcuts and paths.

Unfortunately, the game loves to lock areas off from you and to send you all over the place to learn new abilities just to replay through entire sections all over again to progress further. Don’t get me wrong, I get it and I don’t mind a bit of backtracking and the “Metroidvania” style of videogames but Jedi: Fallen Order really takes the piss with it. So, you’ll visit, say, Dathomir and be able to progress to a certain point but you’ll have to come back once you’ve learned the Jedi Flip to jump further. Similarly, the Force Push will allow you to break through certain walls and doors to explore further but the problem is that, despite the planets each looking and feeling different, many of them are occupied by the Empire and have a lot of similar-looking grey corridors and areas and, despite an abundance of meditation rings, there’s no fast travel system on each world so it’s pretty easy to get lost and turned around. You can create shortcuts and are provided with a map but, honestly, it’s not that helpful as I found it really difficult to see how the different levels of each environment connected and could have really done with an onscreen mini map to help with this.

The game slows to a crawl whenever you’re forced to figure out its annoying puzzles.

Gameplay isn’t all combat or exploration; Jedi: Fallen Order is also very heavy on the puzzles, particularly involving giant spheres. Unlike in some Star Wars games, you can’t actually freely manipulate objects with the Force; you simply freeze them in place or push them forwards, which is not helpful at all when you’re moving spheres. At one point, Cal is captured by the bounty hunter Null Chance and stripped of his lightsaber and BD-1, meaning you have to rely on your awkward Force powers to power up generators and rescue your little droid pal. The game often encourages you to ask BD-1 for a hint but these are generally very vague and unhelpful; he does, however, help you out by “splicing” open doors and crates for you to create shortcuts and unlock additional items; you can also use him to travel across zip wires, which is especially useful once you upgrade him with a motor, and have him scan enemies so you can better prepare from future encounters. Occasionally, you’ll be asked to perform a couple of button mashing quick-time events (QTEs), usually in boss battles, but you can helpfully turn these off from the settings if you’re not into that and they’re nowhere near as abundant as in the Force Unleashed games. There are also four different difficulty levels to choose from, with each one altering the aggressiveness of enemies and the parry system, but there are no Achievements tied to them so you may as well play on the easiest mode. Finally, while you spend a lot of time on a ship, there’s no space combat in Jedi: Fallen Order but you do get to take the controls of an All-Terrain Armoured Transport (AT-AT). You might think this would be pretty cool but it’s not that great and all too brief; the controls are a bit clunky (which I guess makes sense given the AT-AT’s size) and all the weapons come with a cooldown period so you can’t just mindlessly blast away.

Graphics and Sound:
Heading into Jedi: Fallen Order, I’d heard that it was a highly detailed and photorealistic game and one of the best games of its generation and, at first, this definitely seemed to be the case; Cal looks startling like his voice actor and likeness, Cameron Monaghan, and all of the game’s worlds and environments are full of little details such as weather effects, ships and monsters in the background, and have that lived-in aesthetic that permeates a lot of Star Wars lore.

Worlds appear vast and full of details but it’s easy to get lost thanks to the bland colour scheme.

Ships, characters, and technology are startlingly close to the source material; the many different Stormtroopers and the new Inquisitors all look exactly as you’d expect and the Stormtroopers even share some amusing dialogue that helps to humanise them beyond being mere cannon fodder. Droids, especially, look fantastic, and the game does a decent job of distinguishing its different worlds…again, until the Empire’s influence creeps into the environment. Grey is the order of the day here and, while each of the Imperial outposts and locations differs, it’s easy to get them mixed up and to get a bit lost when revisiting worlds.

The high quality cutscees are not reflective of the in-game graphics or the game’s stability.

Sadly, outside of the high-quality cinematics, things start to take a bit of a drop; the in-game graphics see a significant dip in quality, resulting in character models becoming noticeably low resolution. The crew of the Mantis ends up being comprised of several different races and characters, each of whom are very distinct and well-rounded in their own way, but they end up just standing around like action figures outside of cutscenes. Worst of all, the game is plagued by long load times, graphical pop up, and a whole bevvy of glitches; characters and enemies will blink in and out of existence, slide along as if on ice, ragdoll all over the place, and I even had the game crash on me on more than one occasion (usually when planning my next hyperspace jump). Honestly, it might be the most bug-filled videogame I’ve ever played; textures sometimes take a long time to load, the frame rate stutters when there’s a lot happening onscreen, voices, music, and sound effects would frequently cut off or out entirely and, honestly, I expected a lot more from a triple-A title such as this and it really lets the game down and makes it almost unplayable at certain points.

Enemies and Bosses:
As is the case in pretty much every Star Wars videogame, your primary enemies will be the Empire’s finest Stormtroopers. Regular ‘Troopers will blast at you from afar and try to bash your head in with the butt of their rifles but are notoriously bad shots and easily offed with a single swing of your lightsaber (but you can’t dismember them, unfortunately). Very soon, you’ll encounter Scout Troopers wielding electrified staffs that will require you to parry their attacks, ‘Troopers with flamethrowers, and ‘Troopers with heavy machine guns and small shields, though it’s pretty simple to reflect their shots back at them despite their rapid fire. You’ll also come up against the much more competent Purge Troopers; these black-clad bastards make Jedi hunting their speciality and wield a variety of lightsaber-rebelling weaponry, including electrostaffs and electrohammers. Faster and much more aggressive, they’re also capable of negating or recovering from your Jedi attacks so you’ll have to weaken them a bit before tossing them off a cliff and breaking through their guard so you can deliver a swift finishing blow. Similarly, the Nightbrothers await you on Dathomir and will attack you with magically-charged clubs and arrows but the strategy remains, largely the same. Later, you’re attack by undead Nightsisters who swarm and grab at you but are easily cut down with your double-blade dlightsaber.

You’ll also have to contend with droids and bounty hunters as the game progresses.

Each world you visit is also home to a number of creatures; Bog Rats headbutt and charge at you, Scazz’s pop out of burrow holes to attack (often shoving you off a cliff in the process), Phillaks bash you with their horned heads and will kick you with their hooves; and Mykals will swoop at you from above. You’ll also encounter some larger, more formidable enemies, with even bigger and more aggressive variants of these popping up from time to time; Oggdos will try to suck you into their jaws with their sticky tongues, Wyyyschokks pounce out of nowhere and try to either bite your face off or tie you up in their webbing, and Nydaks will thrash at you with their powerful claws. With a lot of these creatures, it’s best to wait for them to glow red and dodge out of the way and then follow up with a quick combo or to hang back and let them attack any nearby Stormtroopers to level the playing field somewhat. Compounding matters are the presence of the Empire’s Security Droids; while the astromech droids can be simply sliced in two, you’ll need to dish out quite a bit of lightsaber damage to take out their bigger cousins but, with a later upgrade, you can have BD-01 hack the droids so that they’ll attack enemies on your behalf. You can also do this with the Probe Droids that hover throughout later areas of the game’s worlds; these little buggers float just out of reach until they’re damaged enough and then they’ll charge at you in a suicide run! Later, you’ll also find a number of bounty hunters are suddenly waiting for you when you revisit worlds; these range from jetpack-wearing Boba Fett wannabes, shield-wielding mercenaries, and large battle droids and will often attack in pairs but are, in actual fact, some of the more interesting and entertaining battles in the game.

AT-STs are ridiculously easy to take down compared to Dathomir’s resident giant bat.

Bosses are a bit of a mixed bag, to be honest. You’ll have to contend with a number of large ships and creatures but some are more like underwhelming mini bosses; an attack ship blasts at you at the beginning of the game and forces you to dash between cover to avoid being blasted to pieces and, later, you’ll trade shots with a shuttlecraft while piloting your AT-AT. You’ll also have to fight against All-Terrain Scout Transports (AT-STs) more than once but, unlike in most Star Wars games, these are stupidly easy to take down as you can reflect their blaster bolts, easily jump over or reflect back their electrical bombs, and just hack away at their legs or cockpit until they go down (but remember to kill the pilot afterwards or you’re likely to be shot in the back). On Dathomir, you’ll also have to fight a giant bat, the Gorgara, in the game’s most unique battle; this thing stamps around the arena to produce shockwaves and screeches at you as you attack its wings. It’s also stupidly persistent, cashing you up a wall as you frantically climb away, before you end up having to free fall through the air, cling on to it with LT, and smash it into a series of structures until it finally goes down.

You’ll fight with the Second Sister multiple times but can only defeat her in the finale.

The game’s primary antagonist, the Second Sister, is yet another Darth Vader wannabe, one who draws more than a little inspiration from Kylo Ren, and you’ll battle her on numerous occasions throughout the game’s story. However, in each battle, there’s no point in trying to defeat her as she’s not only more powerful than you and incredibly aggressive, but the game is programmed in such a way where the point is that you’re not supposed to win; you simply have to knock her health down enough until a cutscene plays, which gets really old after a while. Eventually, you will battle her in a proper, no-holds-barred boss battle right at the end of the game; she’s faster and more aggressive than ever, tossing flashbangs and dashing around the arena, but isn’t too difficult to best if you watch her attacks, dodge, and parry properly.

Jedi boss battles are few and far between and not too challenging if you dodge and parry properly.

You’ll also engage with the Ninth Sister, a ridiculous and cartoony-looking member of the Second Sister’s group; after quite an intense chase sequence on Kashyyyk, you’ll fight her one-on-one in a battle that sees you parrying her lightsaber attacks and leaping over the shockwaves she produces. The fight is also split into stages that are separated by QTEs and cutscenes, which can get a bit distracting. Later, on Dathomir, you’ll also have to battle the fallen Jedi, Taron Malicos; Malicos dual-wields his lightsabers, tosses boulders at you, and leaps in to attack. The gorgeous Nightsister Merrin helps even the odds in this battle, however, allowing you to easily break his block and cut him down with your more powerful attacks so neither of these battles are particularly difficult.

Darth Vader makes a surprise and mostly unwelcome appearance to usurp the game’s antagonist.

After defeating the Second Sister, Darth Vader comes in and kills her with absolutely no effort at all and completely robs her of any menace and steals the show for the last part of the game. You can battle with Vader but, again, it’s a fruitless endeavour and basically an interactive cutscene prior to you having to madly escape from the Fortress Inquisitorius as Vader tears it apart with his Force abilities. It’s an intense end to the game, one that sees you having to quickly jump across floating platforms and run across walls as Vader pursues you, but it’s a bit of a shame that the game spends so much time building up the backstory between the Second Sister and Cal’s crewmate, Cere, only to have Vader come in and undo it all with his presence.

Power-Ups and Bonuses:
As you defeat enemies and scan your environment, you’ll acquire Skill Points that can be used to purchase new Force abilities; you’ll unlock more as you play through the game’s story mode and also be able to upgrade existing ones to extend your health, Force Meter, increase the range and power of your push, and learn new combat moves that see you throwing your lightsaber or performing more powerful melee attacks. Be warned, though, as these will expend your Force Meter but you can extend this, and your health, by finding “essences” hidden throughout the game’s environments. Similarly, BD-1 can scan enemies, plants, and other notable parts of the environment to add to your various databases and earn you more Skill Points and Achievements so, if you see him hop off your shoulders, be sure to stop and let him scan whatever’s caught his attention. This will also allow you to grow plants in the Mantis’s terrarium and open up better crates to acquire more Stim Canisters and find new materials for your outfit, lightsaber, BD-1 himself, and ship. Each of these can be customised with a variety of colour schemes; for BD-1 and the Mantis, this is sadly just a series of palette swaps and, unlike the Force Unleashed games, Cal’s wardrobe is depressingly light on options. Cal’s under outfit can be customised with a handful of colours and you can choose to garb him in different poncho designs or a jacket but none of them are that interesting and this feature disappointingly lacks options for other skins or recognisable clothing from the saga. Similarly, the various elements of Cal’s lightsaber can be customised to your liking; you can change the blade’s colour (initially, you can only pick from three colours but you unlock more later, though the options are still surprisingly limited) and equip different materials for the hilt and switch and such but, honestly, you rarely notice these changes when playing the game and they add nothing to your attack power or prowess.

Additional Features:
Star Wars Jedi: Fallen Order has thirty-nine Achievements for you to earn; most of them are tied to the main story campaign and unlocking the Skill Tree and, as a result, are quite time consuming to achieve. You also get Achievements for parrying attacks, taking out certain monsters, offing enemies in certain ways, and scanning everything in sight and opening every chest. Others are slightly more obscure, requiring you to kick a Phillak after it’s kicked you, defeat a Stormtrooper with their own slowed blaster bolt, cut out an Oggdo’s tongue when it grabs you, and recruit an elusive animal on Zeffo to join your crew. After you finish the game, you’ll unlock “New Journey+” mode which, as you might expect, carries over most of your unlocks for your next playthrough; you also unlock a bad-ass Inquistor outfit and red lightsaber for Cal and gain access to “Meditation Training” from save points. These are kind of like the challenge maps in the Arkham games and allow you to take on a pre-set or customised series of challenges against a variety of enemies but, while you can use this as a good excuse to quickly mop up any combat-related Achievements you’re missing, there aren’t any Achievements specifically tied to these modes, which is a bit of a missed opportunity and, while you can return to your save file to mop up anything you’re missing, the New Journey+ cosmetics can’t be used in your old save file.

The Summary:
Star Wars Jedi: Fallen Order has a lot going for it; it may be, on many levels, the best and most impressive Star Wars game I’ve ever played thanks to how large and fitting its scope is compared to the movies. The attention to detail is impressive and the sense of immersion is fantastic; the decision to slowly integrate Cal into the ongoing battle against the Empire helps to keep things grounded and build up towards the more elaborate and intense moments as Cal’s skills in the Force are reawakened. Unfortunately, it’s also a glitchy, bug-filled mess of a game full of graphical errors, instabilities, and frustrating moments that, in just as many ways, place it on exactly the same level as the Force Unleashed games. Add to that the abundance of backtracking and how poor the map and level layouts are and Jedi: Fallen Order is a chore to get through sometimes. When the game shines, it shines brightly but, at the same time, the good moments only serve to highlight how disappointing the game’s flaws are. I feel like a bit more cohesion, a bit more focus on travelling to distinct worlds or ships, and a bit more time testing would have greatly benefitted the game but the lack of unlockables and customisation features, combined with the unpredictability of the game’s performance, result in an underwhelming experience overall.

My Rating:

Rating: 2 out of 5.

Could Be Better

Are you a fan of Star Wars Jedi: Fallen Order? Do you feel EA redeemed themselves or were you also put off by the amount of bugs and glitches in the game? Perhaps you played on an Xbox Series X or PlayStation 5 and never encountered these issues; if so, what are your thoughts on the game’s stability and performance? Were you a fan of the new characters introuced in the game and, if so, which was your favourite and why? What did you think to the Second Sister and Darth Vader’s sudden appearance at the end of the game? Were you also disappointed by the customisation options available or did you enjoy cobbling together your own unique lightsaber? Which Star Wars videogame is your favourite? No matter what you think about Star Wars Jedi: Fallen Order, and Star Wars videogames in general, drop a comment down below and check back in for more Star Wars content in the near future.

Game Corner: Scott Pilgrim vs. The World: The Game: Complete Edition (Xbox One)

Released: 14 January 2021
Originally Released: 10 August 2010
Developers: Ubisoft Montreal and Ubisoft Chengdu
Also Available For: PlayStation 3 and Xbox 360 (Original); Amazon Luna, Nintendo Switch, PC, PlayStation 4, PlayStation 5, Stadia, Xbox Series X (Complete)

The Background:
Like many people, I’m sure, I first became aware of Scott Pilgrim upon the release of the frankly incredible movie adaptation, Scott Pilgrim vs. The World (Wright, 2010), but this unique and surreal concept first began life as a series of graphic novels created by Brain Lee O’Malley and published between August 2004 and July 2010. Inspired by pop culture and, specifically, the Plumtree song “Scott Pilgrim”, O’Malley sought to create a shōnen-style comic book series and was surprised to find that his original run of black-and-white publications became an award-winning series and inspired a critically (if not financially) successful live-action adaptation. Although initially released around the same time as the movie, Scott Pilgrim vs. The World: The Game actually has more in common with the source material than the movie; boasting retro-style graphics, gameplay, and music, the game was developed in close collaboration with both O’Malley and director Edgar Wright and, despite being generally well received and one of my favourite titles on the PlayStation 3, the game was delisted from online stores due to licensing issues. However, to coincide with the game’s tenth anniversary, O’Malley and Wright appealed to Ubisoft to bring the game back and it was finally re-released, alongside all of the downloadable content (DLC) and some additional features, and a limited number of physical copies was even produced for the Switch version.

The Plot:
Scott Pilgrim is the lazy, selfish, and obnoxious bass player of the band Sex Bob-Omb. He’s also in love with a girl, Ramona Flowers. However, Ramona comes with some unique baggage: Her seven evil exes have joined forces and are gunning for Scott, who must team up with Ramona and a host of his other friends to battle their way through the snow-filled streets of Toronto and the surreal world beyond Canada’s borders in order to prove his love for her.

Gameplay:
Scott Pilgrim vs. The World: The Game: Complete Edition is a 2D, sidescrolling beat-‘em-up very much in the style of classic beat-‘em-ups like Double Dragon (Technōs Japan, 1987) and River City Ransom (ibid/Various, 1989). The basic thrust of the game has you picking from one of three different difficulty settings (‘Average Joe’, ‘Rough & Rough’, or ‘Supreme Master’) and six playable characters from the Scott Pilgrim comics (Scott himself, Ramona Flowers, Steven Stills, Kim Pine, Knives Chau, and Wallace Wells (the latter two who were originally only available as DLC)) and making your way from the left side of the screen to the right while beating up a variety of enemies and goons.

Each character shares basic attacks but has their own specials and unique animations.

Accordingly, Scott Pilgrim’s controls are pretty basic: you attack with fast punches with X, stronger kicks with Y, hold B to block, and press RB for a Super Attack and LB to call in a “striker” (one of three other characters who will perform an attack to help level the playing field when things get rough). These attacks and controls are standard across all of the playable characters but each has their own unique attacks and Super Attacks that can be learned by defeating enemies, gaining experience points (XP), and levelling up. This will allow you to perform dash and ground attacks, evade incoming attacks, grapple and throw enemies, and perform more versatile mid-air attacks using directional inputs in conjunction with button presses. You can also pick up weapons and objects (and enemies) with X and defeating enemies concurrently will eventually see your character glow gold and earn both increased speed and the ability to pull off a massive combo attack on multiple enemies by mashing X or Y. The game does include a level cap, however, meaning that I had unlocked the entirety of Scott’s moveset by the time I hit Level 16, but it does allow for two players or more to team up for a combined attack when playing in co-op mode.

Call upon strikers and purchase food to even the playing field and increase your stats.

Each character has set number of Hit Points (HP) and Gut Points (GP); as you take damage, your HP will drain and, when you perform Super Attacks and call in strikers, your GP will drain. When you lose all of your HP, you can mash the A button to trade in your remaining GP for additional HP and stay in the fight a little longer or have another player revive you at the cost of some coins. Every enemy you defeat will drop a number of coins that you can spend in a variety of shops and fast food joints to purchase items that increase your stats (such as your maximum HP and GP, attack and defence power, or provide an XP boost), earn you an extra life, or restore your HP and/or GP. Some food items can even be taken to go and will automatically restore a portion of your health once you’re defeated, which can be extremely useful when tackling the game’s tougher stages and bosses but you can only carry one item in your inventory at a time and some of these items carry a hefty price tag so you may have to replay some of the earlier and easier stages a few times to get the cash you need.

Take a trip through Subspace for a helpful shortcut and to stock up on coins.

Rather than following the plot of the movie, which was a truncated (if admirably faithful) version of the source material, Scott Pilgrim recreates the plot of the graphic novels as closely as is possible for a sidescrolling beat-‘em-up. The game’s stages are quite long and varied and feature at least two distinct sections that you can jump to at any time from the overworld map screen once you clear a stage, which can be easier said than done if you’re under-levelled and underpowered. Keep an eye out for portals to the mysterious Subspace, though; these are usually marked by star graffiti or symbols and will transport you to a weird, glitchy area full of flying piggy banks and curiously familiar blocks that can be smashed to stock up on coins and provide much needed shortcuts around tougher areas of the game. While mindless beat-em-up brawling is largely the aim of the game, there are a number of hazards and obstacles that you’ll have to watch out for as you play Scott Pilgrim: buses and traffic will occasionally pummel you in the streets; you can fall down holes and breakable floor boards; spiked pits and large rolling balls and boulders and bursts of flame are just begging to sap your HP; and you’ll even be asked to take part in a snowball fight or run for your life as a massive robot destroys the fire escape beneath your feet.

Scott Pilgrim‘s difficulty ramps up quite quickly and is notably inconsistent at times.

While you can change the game’s difficulty settings whenever you like and still continue with your existing progress for the character you’re playing as, each character represents a separate playthrough of the main campaign, meaning that if you clear the game with Scott, you have to start right from the beginning when you first select, say, Wallace. And make no mistake about it, Scott Pilgrim is an incredibly tough game even on the easiest setting. Once you’ve managed to level up and purchase all the upgrades to max out your stats, the game becomes much easier (almost too easy, in fact) but, especially in the early going, it can be a bit of a frustrating slog. Enemies dish out and take a fair amount of damage, often blocking or punching through your attacks, and will not only overwhelm you from every angle and pummel you with weapons, they also occasionally dog pile you when you’re knocked down and burst out of the environment for a surprise attack. Luckily, environmental hazards will damage your enemies as much as they do you and you should use this to your advantage but it can get incredibly frustrating when enemies get cheap hits in on you or when the game asks you to avoid seemingly endless waves of cannonballs.

Graphics and Sound:
Scott Pilgrim vs. The World: The Game: Complete Edition utilises a distinctly retro aesthetic that’s not quite 8- or 16-bit as you/we might remember it but is identifiably paying homage to games of that era in its presentation. The game is more concerned with bringing the art style of the graphic novels to life, resulting in some nice, big, cartoony graphics full of lively animations and some colourful, dynamic environments. Sadly, though, I did notice a couple of odd glitches; sometimes, you can’t enter doors and need to backtrack a bit before the game decides to let you enter and, similarly, I sometimes had trouble picking up weapons and, especially, the extra life you get after defeating the second boss.

Scott Pilgrim‘s stages mix the mundane with the surreal, just like the source material.

The game’s locations are ripped straight from the source material and feature such mundane environments as the snow-swept streets of Toronto, the energetic dance floors of a couple of clubs, and a particularly colourful Halloween party. However, Scott Pilgrim’s appeal has always been in its unique blending of the everyday with the surreal and, accordingly, you’ll visit a movie set and encounter both green screen effects and a temple clearly modelled after Indiana Jones and the Temple of Doom (Spielberg, 1984), battle a giant anime-style robot, and visit both a dojo full of ninjas and a graveyard populated by zombies.

The game features numerous references and homages to other videogames and franchises.

The homages don’t end there, either, as the game is full of references to the Super Mario series (Nintendo/Various, 1983 to present): the character select screen is ripped straight out of Super Mario Bros. 2 (Nintendo R&D4, 1988), the overworld is almost exactly like the one in Super Mario Bros. 3 (Nintendo EAD, 1988), and you’ll smash blocks and collect coins just like in the Mario games. There are also references to the Mega Man franchise (Capcom/Various, 1987 to present) in the way you exit each stage, how certain bosses die, and, especially, in the game’s finale. You’re also tasked with destroying a car like in Street Fighter II: The World Warrior (Capcom, 1991) for bonus coins at one point, attacking little gnomes like in Golden Axe (SEGA, 1989), the pause menu music sounds like it was ripped right out of Battletoads (Rare, 1991), and one of the final boss battles is more than a little similar to Safer-Sephiroth from Final Fantasy VII (Square, 1997).

Motion comic-like cutscenes emulate the source material and advance the plot.

Scott Pilgrim’s environments are full of life and little details; you’ll see snow, wind, and rain affect the background, a wide variety of non-playable characters (NPCs) populate each area and even react when you try and attack them, other characters from the graphic novels appear in supporting and background roles (usually in the game’s many different shops), and you’ll see many different animals and little details in the background to distract you. The game also forgoes relying on text or speech bubbles to convey its story and, instead, utilises little partially animated cutscenes modelled after the graphic novel to show story and stage progression. One of the most appealing aspects of the game, though, is its retro-inspired soundtrack; Anamanaguchi, a notable chip-tune pop/rock group, provided the game’s energetic and catchy tunes and they really help to sell the idea of the game being a throwback to retro beat-‘em-ups and arcade games.

Enemies and Bosses:
As you battle your way from the streets of Toronto and across town to defeat each of Ramona’s seven evil exes, you’ll also have to wade through a number of nameless, faceless street thugs. These guys like to attack as a group and are fully capable of grabbing, using, and throwing weapons and many of the bigger or more rotund of their number can absorb a great deal of punishment. Some even have an annoying tendency to burst out from the background or attack you from off-screen and hoards of their number can await you on your journey, making crowd control a key aspect to master when playing Scott Pilgrim.

Enemies quickly escalate to the bizarre, such as men in dinosaur suits, ninjas, zombies, and robots!

When fighting your way to Lucas Lee, you’ll have to content with some of the game’s most annoying enemies: paparazzi can stun you almost into a near-inescapable loop with their camera flashes, guys in alien costumes blast at you, and others dress up in dinosaur outfits to chargrill you and charge at you in a rage. Muggers await you on the tram and will cause you to drop coins when they hit you, ninjas teleport into battle wielding swords and tossing fireballs at you, bats and dogs will swarm you at the most inopportune moments, and you’ll even have to battle zombies and a number of robots as you continue to progress. Generally, it helps to have some kind of weapon (preferably a sword or baton) at hand to help even the odds as Scott Pilgrim’s enemies can be particularly frustrating and cheap at times.

While Matthew Patel can be a bit tricky, Lucas Lee was an absolute joke of a boss battle.

Of course, the aim of the game is to defeat Ramona’s seven evil exes, meaning that at least seven boss battles await you in the game. The first of her evil exes, Matthew Patel, launches fireballs at you and summons little Demon Hipster Chicks to distract you and fire at you, occasionally shielding himself in a beam of light while they rotate around him. Still, he’s not too difficult to defeat if you take the demons out with your jumping attacks, avoid or block his attacks, and keep the pressure on him. Lucas Lee is even easier, though; you can pummel him with almost no resistance for the first part of the fight before he calls in a couple of goons for support and starts attacking you with (and on) his skateboard.

Get past the tag team of Envy and Lynette and you face a tough, multi-stage fight against Todd Ingram.

Things take a dramatic left turn when you battle your way to Todd Ingram, though. Not only do you have to run a gruelling gauntlet through his club (watching out for screaming fans of his band, Clash at Demonhead, while you’re at it), but you’ll also have to fight the tag team of Envy Adams and Lynette Guycott first. While Lynette’s bionic arm and tendency to teleport about make her a pain, it’s Envy that will cause you the most trouble as she launches kicks and dives at you with a frustrating aggression. Defeat either one of them and you’ll be blasted through the walls by the power of Todd’s guitar; you then have to smash through walls before the sound wave hits you (which is really hard to do without being hurt or dying when you’re under-levelled), defeat him in the easiest recreation of Guitar Hero (Harmonix, 2005) ever (you literally just press one button), before battling him one-on-one in the alleyway all with no checkpoints. Todd is able to use his vegan powers to choke you in mid-air, telekinetically throw objects and debris at you, and erect a shield but his most powerful attack sees him transform into a bulging monstrosity like something out of Akira (Otomo, 1982 to 1990; 1988) that sees him stretch one muscular arm across the entire screen. Dodge this, though, and the vegan police will weaken Todd, leaving him vulnerable for your attacks, but this is undoubtedly where the game’s difficulty suddenly ramps up and you’ll probably be desperate for the extra life Todd leaves behind upon defeat.

Roxy and the Twins are easily bested with nearby weapons, though the mech can be troublesome.

The third boss, Roxy Richter, wields a particularly impressive and long-reaching whip-like sword and also favours teleporting about the screen when you battle her but, luckily, you can grab a large mallet right before this fight and pummel her into submission without her even landing a hit if you’re quick enough. Ramona’s fourth evil exes, Kyle and Ken Katayanagi, put up a bit more of a fight purely by being more annoying. First, you have to defeat their little robot minion (which is easy enough); then you have to frantically scale a fire escape while their giant robot attacks you, before battling their gigantic Voltron rip-off on a rooftop. The robot will try to smash and squeeze you with its hands, bombard you with missiles, burn you with flames, and zap you with a huge energy beam but it’s pretty easy to dodge and avoid all of these attacks and take out its hands one at a time. The Twins then flee to the Dragon’s Den, a short stage full of annoying hazards, and battle you two-on-one in the gothic basement of this level. However, if you grab a baton before entering the boss area and attack quickly enough, you can whittle them down before the fight has even begun and dispatch them easily enough before they can deal any real damage.

After overcoming Scott’s shadow, you’ll finally face Gideon Graves, the game’s toughest challenge yet.

After this, you’ll enter the park and fight through a zombie-filled graveyard; zombies are quite difficult to take out as they keep getting up from your attacks and swarm the screen but you can instantly defeat them by tossing or forcing them into the open graves that are dotted throughout the stage. At the end of the level, you’ll battle Nega Scott, a dark doppelgänger of Scott Pilgrim who throws fireballs at you and darts around the screen hitting hard and fast. Thanks to how quick, aggressive, and powerful Nega Scott is, this can be one of the more challenging boss battles as he actually puts up a worthy fight rather than being cheap or unfair. Defeat Nega Scott, and you face the game’s toughest challenge yet; a gruelling fight through the Chaos Theatre that sees you taking on waves of enemies on a descending elevator against a time limit before battling Ramona’s final evil ex and the mastermind behind the game’s events: Gideon Graves. Graves is a three stage boss battle: in his first form, he assumes a muscular form and attacks with punches, rains comets down upon you, or tries to crush you with a huge meteor. He can also become invulnerable for a short period of time but, if you grab a baton or similar weapon, you can easily catch him in a damage loop and whittle his health down.

Graves transforms into a gigantic eldritch horror before finally facing you one-on-one.

In his second form, Gideon transforms into a gigantic, Lovecraftian nightmare that you battle from a small rocky platform. Make sure you grab the Power of Love sword before this fight as it’ll deal heavy damage against Gideon and is instrumental in allowing you to actually overcome this monstrosity. Gideon attacks by punching you, electrocuting you, destroying the platform you’re on, and sending screaming skulls your way but I found the best strategy was to stay down at the bottom of the screen, just far enough away to avoid being electrocuted, and just frantically mash the X button to damage him with the sword’s energy beams. Once he’s defeated, you then have to fight through his underground lab, which is full of robots, turrets, laser traps, and clones of Ramona that wield electrical batons. Make sure you grab one of these before facing Gideon in his final form, which sees him swiping at you with a sword, creating pixelated waves that you must jump over, and dashing about the place in a frenzy. He can take a lot of damage but, again, you can trap him in a cycle with your weapon to help whittle his health down. Once defeated, it’ll turn out that this was merely a robot and you’ll be asked to deliver the final blow to the true Gideon before being treated to your character’s unique ending.

Power-Ups and Bonuses:
Unfortunately, if you want to recover your HP or GP in Scott Pilgrim, you’re going to have to pay for it; there are no health-restoring pick-ups or temporary power-ups to be found in the game’s stages and, instead, you’ll have to spend your hard-earned coins in the game’s money shops to heal up and improve your states. Prices vary across the board but it’s recommended that you save your cash up to pay off Scott’s late fees at the No Account video store in the first stage as this will allow you to buy extra lives much cheaper than in Wallace’s secret shop. You can buy a variety of junk food, drinks, and other food to restore HP, GP, or both; some of these can be taken to go to automatically restore some of your HP upon defeat and it’s definitely worth having at least one in your inventory for the game’s tougher bosses.

Buy items and food to increase your stats and health and wallop enemies with nearby weapons.

You should also take full advantage of the weapons the game has to offer; you can grab baseball bats, snowballs, batons, swords, and other items to even the odds stacked against you but be warned as these will break after a time and, if you throw them at an enemy, you can also be hurt when the weapon bounces back. Each character starts the game with the minimum amount of HP, GP, and some basic attacks and moves; as you earn XP, you’ll automatically unlock new moves to use, which you can view at any time from the pause menu. From here, you can also see your character’s current level and stats and it’s recommended that you purchase items (books, videos, clothes, and such) to boost these stats wherever possible as the game’s difficulty becomes much more manageable when your damage output, defensive abilities, and HP and GP are increased to maximum.

Additional Features:
Disappointingly, Scott Pilgrim vs. The World: The Game: Complete Edition has only nineteen Achievements on offer, all of which are exactly the same as those that were on offer in the original game. It’s a shame that the developers didn’t take the opportunity to add a few more to the game, meaning you’re left with Achievements that demand little from you than clearing it with Scott, Wallace, or on the hardest difficulty, eating every food item, or defeating two-hundred enemies with weapons. Some, such as the online-based Achievements, may cause you a bit of bother but you can make others easier to nab by inputting some cheeky codes to give you the Power of Love sword or award you fifty coins to stockpile coins easily.

There’s a fair amount of extra modes but few (if any) Achievements tied to them.

While you still need to put in a code to access the game’s blood mode and the sound test on the overworld map, you no longer need to do this to unlock the game’s other modes; there’s a boss rush, a survival mode, and you can play a bit of dodge ball and a battle royale if you like (though there are no Achievements tied to these modes). You can also play online with up to three other players, change the colour palette of your character, and even unlock Nega Scott as an additional character after beating the game with the four main characters. After you defeat Lucas Lee, you’ll also see Knives’ father, Mr. Chau, lingering around the world map; select him and you’ll battle him in a particularly annoying fight that sees you lose even if you have extra lives available to you. Defeat him, though, and he’ll be unlocked as a striker for your use, which is necessary to obtain all of the game’s Achievements.

The Summary:
I’m a big fan of Scott Pilgrim; I loved the movie and the graphic novels (particularly the swanky hardback, full colour versions that were released later on) and got a lot of enjoyment out of the game when I played it back on the PlayStation 3 and was very excited to see the game come back to modern consoles. More of these delisted titles need to make a comeback, in my opinion, as there’s some great games out there that are sadly no longer available. Scott Pilgrim vs. The World: The Game: Complete Edition is, without a doubt, the definitive version of the game; featuring all the DLC and much more stable online connectivity, the game continues to impress with its retro-style graphics and music and the versatility of its combat, which helps to keep the game fresh and interesting rather than monotonous. Sadly, it’s brought down somewhat by its more frustrating moments; the difficulty curve is a bit steep and inconsistent, wildly varying from stage to stage and boss to boss. It’s enjoyable and fun to keep playing but, until you level and power up, you may be struggling a bit and be forced to stock up on lives and health-restoring items in order to progress. It may also be a lot easier to get through with other players by your side but, either way, I would highly recommended this game and you should definitely get it before it disappears forever again (just be prepared to fight for your survival on more than one occasion).

My Rating:

Rating: 4 out of 5.

Great Stuff

Did you purchase Scott Pilgrim vs. The World: The Game: Complete Edition? If so, what did you think of it and how do you think it holds up after all this time? Did you ever play the original version of the game and, if so, were you excited to see it re-released? Which of the playable characters, stages, and bosses was your favourite? Did you also struggle a bit with the game’s difficulty curve? Would you have liked to see more content and Achievements included in the Complete Edition? Are you a fan of Scott Pilgrim; if so, what was your introduction to the story and which of the graphic novel’s adaptations do you like the most? Whatever you think about Scott Pilgrim vs. The World: The Game: Complete Edition, or Scott Pilgrim in general, drop a comment down below.

Mini Game Corner: Grim Fandango Remastered (Xbox One)

Released: 29 October 2020
Originally Released: 30 October 1998
Developer: Double Fine Productions
Original Developer: LucasArts
Also Available For: Mobile, Nintendo Switch, PC, PlayStation 4, PlayStation Vita

A Brief Background:
Grim Fandango was the brainchild of noted creator Tim Schafer, whose success with Full Throttle (LucasArts, 1995) allowed him to pitch a surreal, Day of the Dead-inspired concept that LucasArts hoped would revitalise the declining graphic adventure game genre. Despite initially being a PC-excusive title, Grim Fandango received widespread critical acclaim. For my part, I had been aware of the game thanks to gaming magazines and its enduring reputation as a much-loved title but it wasn’t until the Remastered version of the game became available on Xbox One that I actually got the chance to play, and finish, it for myself.

First Impressions:
Grim Fandango Remastered is a truly unique videogame with an equally unique concept; taking place in the Land of the Dead, players control a Grim Reaper, Manuel “Manny” Calavera, who is actually more like a corporate travel agent who inhabits a very film noir­-style version of the afterlife. The game takes a very bare-bones approach to its mechanics and interface; with no heads-up display (HUD) clogging up the screen, the game’s unique graphical style gets a chance to shine front and centre. Like the early Resident Evil titles (Capcom, 1996 to 2000), Grim Fandango utilises 3D models over static, pre-rendered backgrounds that must be interacted with to find objects, acquire clues, or advance the story. Unlike in those games, though, there’s very little in the way of onscreen prompts to point you in the direction you need to go, meaning that you have to interact with non-playable characters (NPCs) to figure out what’s going on.

Dialogue and character interactions are an important part of the game.

The world of Grim Fandango is populated by a wide variety of 1940/1950-inspired clichés, such as molls, femme fatales, gangsters, and the like, all of whom are skeletons within the Land of the Dead. When you talk to them, you are given a wide variety of dialogue options and conversations can drag on (…and on) for some time, fleshing out the world and the characters and delivering important exposition that you need to pay attention to or else you’ll end up wandering in circles. Helpfully, you can skip these dialogue sequences with the push of a button to speed things up, which is very useful on replays or if you make a mistake but can easily mean you miss out on vital information (as I did).

Manny’s scythe is easily his most versatile, if sparingly-used, item.

Perhaps fittingly, there’s no danger of losing, dying, or getting a game over here; there’s only a handful of moments where Manny takes any kind of damage or gets into a fight so you don’t need to worry about searching for health, power-ups, or extra lives. Unfortunately, a great deal of the game’s focus is on obtuse puzzles, which are solved either by acquiring and using certain items and bringing them to NPCs, performing frustrating time-sensitive tasks, and a lot of experimentation and trial-and-error puzzle. Manny can hold a wide variety of objects in his suit or cloak but the most useful and versatile of these is his scythe, which can be used to hook out of reach objects and interact with the environment. However, I found that, a lot of the time, I was holding objects with no idea of how to use them and questioning whether I would actually have been able to figure out how to progress without a guide.

My Progression:
To be fair, I did complete the game but, to be brutally honest, I didn’t enjoy it all that much and I was forced to turn to a guide soon into my play time. I managed to recruit the demon Glottis as my driver, visit the living world (which was a surrealist nightmare), and get into the office of Manny’s boss using the window but then found myself running around in the lobby and the few rooms available to me trying to figure out what to do with the assortment of balloon animals I had on me. As a result, I turned to a guide and, following it, proceeded to skip and rush though all of the game’s dialogue, story, and sequences in order to earn all of its Achievements. When I first started the game and saw that it was much different to what I expected (I thought it was a noir-style murder mystery but it turned out to be much more about Manny’s existential crisis and misadventures), I wasn’t expecting to actually enjoy or finish the game but, thanks to this approach, was able to blast through it in a day or so.

As great as the game looks, its puzzles can be needlessly frustratingly and vague.

Of course, the downside was that I largely missed out on the story and the more immersive aspects of the game but I found that it wasn’t really gripping me from the start, to be honest. As impressive as the game looks and as unique as its aesthetic style and concept is, I found the story a bit more convoluted than I expected and I was incredibly put off by some of the more frustrating puzzles. As I mentioned, there are times when it seems impossible to figure out what to do, like when you’re running around in a desolate forest trying to place a road sign in a pixel-perfect spot, or the puzzles were just needlessly annoying, such as lugging a giant axe around in a bathroom or desperately trying to move locks on a safe door or sing along with some literal worker bees.

BiteSizeGamesContinue

I went into Grim Fandango Remastered excited to experience this cult classic of a game, was impressed by is visuals and unique concept, but quickly became overwhelmed by the lack of direction and confusing elements. I’m all for being given a lot of leeway with exploration and experimentation but Grim Fandango was a little outside of my comfort zone. I can definitely see what people liked about it and I’m sure that fans of this genre of game were probably well in their element but, for all its impressive voice acting, innovation, and imagination, I can’t say that I was inspired to come back to the game after earning all of the Achievements. Are you a fan of Grim Fandango? How do you feel the Remastered version holds up to the original? What did you think to the game’s unique visual style and concept? Did you also struggle with the puzzles and figuring out what to do or were you fully immersed in the experience? Would you recommend that I revisit the game someday and play it properly to actually get a better idea of the story and characters or did you, too, simply blast through it to grab some easy Achievements? Whatever your thoughts on Grim Fandango, feel free to leave a comment down below.  

Game Corner: Battletoads (2020; Xbox One)

Released: 20 August 2020
Developers: Dlala Studios and Rare
Also Available For: PC and Xbox One X

The Background:
Make no mistake about it, the Teenage Mutant Ninja Turtles (TMNT) were hot shit back in the day; though the TMNT first began life as a ridiculous, dark, and gritty comic book, they shot to fame and into the cultural consciousness with the 1987 cartoon series and a line of action figures and the franchise was the hottest kids commodity at that time. That success also, inevitably, brought a slew of knock-offs and imitators, many of which, like the Battletoads, were reasonably popular in their own right. Conceived of as a direct response to the TMNT, the Battletoads (Rash, Zitz, and Pimple) were space-faring adventurers who made their debut in the appropriately-titled Battletoads (Rare, 1991), a sidescrolling beat-‘em-up that is notorious for being one of the hardest titles in the Nintendo Entertainment System (NES) library. Battletoads was fairly well received and a number of follow-ups were produced, including a pretty kick-ass arcade title in 1994, but the franchise quietly died off and remained dormant until Microsoft surprised everyone at the 2018 E3 with the announcement of an all-new entry in the beloved series. Perhaps bolstered by the reception of Rare Replay (ibid, 2015), Rare chose to revive their franchise as an Xbox One and PC exclusive, one not hampered by hardware restrictions, and effectively reintroduced the Battletoads to a whole new generation of gamers.

The Plot:
After being awoken from a fantasy simulation after twenty-six years, the Battletoads are dismayed to find that they are no longer intergalactic heroes. Seeking to reclaim their former glory, they set out to defeat their long-time nemesis, the Dark Queen, but end up joining forces with her to confront a greater threat, the evil alien race known as “Topians”.

Gameplay:
Like its predecessors, Battletoads is a 2D, sidescrolling beat-‘em-up in which up to three players can battle across numerous stages spread between four chapters (referred to as “Acts”). When you begin a new game, you can select from three different difficulty levels (“Tadpole” being the “Easy” mode, “Toad” normal, and “Battletoad” being the hardest). Once you’ve selected a difficulty, you’re locked in to it and will need to create a new, separate save file to play on one of the other modes but you can switch between these save files easily enough by pressing X on the main menu.

Each of the Battletoads handles a little differently, with different strengths and weaknesses.

There are three characters to pick from (Zitz, Rash, and Pimple) and, while each of the titular Battletoads controls the same, you’ll find that each one has their own strengths and weaknesses: Rash is the all-rounder, with decent speed and attack power; Zitz is the weakest but also the fastest, able to string combos together much quicker; and Pimple is the slowest but also the most powerful of the three. Unlike in the previous games, you can freely switch between any of the Battletoads on the fly by pressing left, up, or right on the directional-pad (D-pad) to “tag in”, allowing you to mix and match your attack strategies on the fly. While there is no life system, this effectively gives you (in single player mode, at least) three lives since, if a Battletoad is defeated, you automatically switch to one of the other two and, after a short time, any toad that has been knocked out will regenerate a portion of their health and allow you to tag them back in. This adds another level of strategy to the game as you might want to favour Zitz for the majority of a stage and save Pimple for the boss battles but it’s important to not hog all the health-restoring flies for any one Battletoad as it could leave you at a disadvantage later down the line. Fortunately, the game is extremely generous with checkpoints, which refill and resurrect your team to full health, meaning you can easily jump right back into the action and you are even given the option of skipping ahead if you continuously die.

The Battletoads assume a variety of wild animations and forms when performing their attacks.

Being a sidescrolling beat-‘em-up, combat is obviously at the forefront of Battletoads’ gameplay; each character can unleash a quick combination of strikes with repeated presses of the X button, launch enemies into the air with Y, and charge up a powerful “Morph Attack” (which sees them transform into a variety of outlandish and amusing forms) by holding down the B button. You can also jump with A (revolutionary, I know), hold or press RT to run or evade, respectively, and hold down LT in conjunction with other button presses for different effects (press A and you’ll spit gum to render enemies immobile for a few seconds and press Y to pull enemies, flies, and collectables closer with your tongue). You can also wriggle the right analogue stick to perform a taunt, though I never discovered the point of this move beyond grandstanding.

Gameplay isn’t all punching as you’ll have to do some tricky platforming and puzzle solving, too.

While the majority of the game involves simple, arcade-style fighting, the monotony is broken up in a variety of ways; you can use LT and B to latch on to special hooks and battle in the background and foreground, for instance, and you’ll be required to press switches to open doors or raise and lower lifts at various points. You’ll also have to drag crates around to reach higher levels and use these techniques in lieu of your fighting abilities to solve various puzzles. In the game’s third Act, the Battletoads split up and Pimple is left to perform some rudimentary platforming, dodging spikes and other hazards, and climbing a mountain by pressing switches in the right order to clear a path. Similarly, when controlling the Dark Queen, you’re asked to run as quickly as possible through an all-too-familiar maze-like stage using her dash and unique ability to float to get past the many spiked hazards in your way rather than fighting.

This was easily the hardest and most frustrating part of the game for me.

You’ll also have to complete a couple of different mini games to open up electronic doors either by completing an electronic circuit or hacking your way. The first is relatively simple, involving the rotation of wires to allow a current to travel from one point to another but it gets a little trickier as you progress by introducing dead ends and different directions. The second is quite a unique little mini game that sees you moving an 8-bit Battletoads icon across a horizontal grid while avoiding moving red hazards; this can be tricky when playing with others as one touch of these hazards will reset the grid for all players but, if you struggle and fail enough times, the game gives you the option to automatically hack the door. Other times, you’ll have to complete a number of quirky quick-time events (QTEs), the most prominent of which is an eccentric version of rock/paper/scissors, but you’ll also be completing menial tasks such as massages, sending e-mails, and signing autographs with rotations of the analogue sticks and repeated button presses. Later, you’ll need to use these skills as Pimple to fight off besmirched cult members and be sure to keep your wits about you after defeating the game’s final boss as you’ll need to perform a few QTEs before the battle is officially over. Some of the mini games, however, aren’t as much fun or easy to understand; at one point you have to complete three in a row with hardly any time to register what you actually have to do but by far the worst and most frustrating part of the game was when you have to reboot the systems of your space ship. The mini game displays a number of symbols, each one relating to a different mini game, and you have a very short space of time to find the game you need and complete it, all with the most vague of onscreen prompts to direct you. The worst part is that this section just keeps going and going, is very unforgiving, and it can be really difficult to see where you’re supposed to be looking as the mini games are all quite small by the end.

Gameplay has a surprising amount of variety and just the right amount of challenge.

Finally, gameplay is mixed up further by the return of the Turbo Tunnel, panic-inducing chase sequences, and some overhead shooting stages. Thankfully, the Turbo Tunnel is nowhere near as harrowing as in the NES game; for one thing, your view is from behind, which makes it much easier to see oncoming hazards. Each hit or mistake costs you a Battletoad but checkpoints are generous and, while it goes on for some time, it’s actually more exhilarating than frustrating. The Turbo Tunnel returns at the end of the game but, while it is harder, it’s a much shorter section; the spirit of the old tunnel is evoked in the sledging sequence, though, which has you holding X, Y, or B to grind along different platforms and that can be very difficult when you’re also required to jump with A. One of the most harrowing sequences from the NES game, the rat race, is recreated when you, as the Dark Queen, have to outrun falling stomach acid but, thanks to her dash and barge attacks and, again, many generous checkpoints, it’s nowhere near as impossible or demanding as the original game. Finally, the space shooting sections, while also a lot of fun, see the screen literally fill with enemy ships and projectiles to become one of the most elaborate “bullet hell” shooters I’ve ever played and these stages do tend to drag on a bit and are probably the most “unfair” of the game’s stages at times.

Graphics and Sound:
Battletoads is a fantastic throwback to a simpler time in gaming; like Streets of Rage 4 (Dotemu/Lizardcube/Guard Crush Games, 2020), the game favours brought, vibrant graphics and backgrounds and a rockin’ soundtrack that includes remixes of classic Battletoads tracks. Unlike that game, however, Battletoads is far more over the top and cartoony; the toads themselves are full of life and wacky antics and these is best seen through their zany attacks that see them growing comically enlarged feet, fists, or transforming into sharks, bulls, jackhammers, and even whipping out a Battletoads (Rare, 1994) arcade cabinet to damage enemies.

Stages and graphics are colourful, wacky, and wonderfully enlivened by a cartoony aesthetic.

Stages are varied and have a lot of depth, with some fun things to see in the background; you’ll travel through futuristic neon streets, a disused carnival, and wacky alien landscapes. Sadly, though, there is no “moving elevator” stage and there aren’t many chances to interact with your environment; there are no barrels to smash, no weapons to acquire, and your interactions are generally limited to activating switches or spitting bubblegum at various targets. Still, the simplicity of the interactivity in no way renders the environments lifeless or boring as they’re packed full of little details and things to see and distract you.

It’s a good job the story is so full of mapcap fun as it’s a surprisingly big part of the game.

Battletoads is very big on story and features a number of cutscenes and lots of voice acting; the titular heroes are pretty funny, being out of touch superheroes obsessed with becoming relevant in a world that has passed them by, and everyone has distinct and amusing personalities, from the exasperated Dark Queen to the flamboyant Tobians, Uto and Pia. While I enjoyed these cutscenes, which reminded me a lot of Rick and Morty (2013 to present) and were full of Rare’s signature, quirky sense of humour, it was a bit annoying that you aren’t always given the option of skipping them on subsequent playthroughs.

Enemies and Bosses:
As you make your way through the game’s stages, you’ll come up against a host of weird enemies; many of them, like the different coloured anthropomorphic rats, Topian cops, and disgruntled lumberjacks, are mostly disposable cannon fodder for you to go to town on. Some of their variants, though, will block your attacks with a guard or shield that can only be broken with your charged Morph attack, and will also toss projectiles your way. When in the space shooting sections, you’ll come up against a number of different ships, some which fill the screen with projectiles of all kinds that will truly test your reaction skills and patience. Other enemies can be a bit more troublesome: Kernel will charge up an electrical attack that electrifies nearby water and can cause massive damage; Fewcharge will unleash a laser beam that covers a large portion of the screen; and be sure to dash out of the way of Brucey when its about to charge at you. As you progress, you end up having to face multiple variations of these enemies at once, which can be very difficult and requires a lot of strategy and awareness on your part as your health will be drained quite quickly if you’re not careful.

Porkshank is a big, tough first boss but easily defeated once you master his simple attack patterns.

It’s a good job Battletoads has so much enemy variant and challenge involved in its combat since it’s surprisingly light on boss battles. The first boss you face, Porkshank, is a gigantic pig whom you fight three times in the first stage. The first encounter requires you to evade his combo of attacks, the second sees him try to charge at you head-first, and the third sees him split into two and do both attacks at the same time. While he can absorb a great deal of damage, as long as you dodge out of the way and charge up a Morph attack or quickly switch to Pimple, it’s pretty simple to get past him without any real trouble. The enormous Guardian boss requires a little more strategy on your past; the entire arena continuously fills with Blinkeys, pink eyes (hah!) that try to distract you from dragging the Summoner Eye out of its protective field. Each time you damage the Summoner Eye, the Guardian tries to crush you with its massive fists and then you have to smack a piece of debris into the gargantuan creature; the cycle then repeats twice more but with more Summoner Eyes to attack and more fists to damage.

Axeley is definitely one of the game’s more frustrating and troublesome bosses.

One of the game’s most difficult and frustrating bosses is Axeley, a crazed lumberjack who fills the arena with bombs that are very difficult to avoid before leaping into the arena and causing shockwaves with each impact. When his giant axe gets stuck, you can attack with extreme prejudice but, for his next two phases, he starts rolling logs at you that are extremely hard to jump over, tossing in more bombs, and performing far more jumping attacks to keep you constantly on guard while you wait for your brief window to attack. I would recommend using Zitz for the most part and keeping track of Axeley’s movements so you can switch to Pimple and get the most out of that brief window of opportunity.

Once you get past Dirtbag’s slew of projectiles, you’ll have to avoid the Dark Queen’s “helpful” tornados.

Dirtbag can also be quite the tricky encounter; like with Porkshanks, you’ll encounter him in a couple of different confrontations in the space shooting sections but the difference is that Dirtbag likes to attack with a variety of projectiles that you have to squeeze between and relentlessly fire at his ship while using your shield and evade to escape from harm. What makes this difficult is that you’ll most likely get to this boss with very little health left because of the gauntlet of enemies you have to blast through first and it seems like only parts of Dirtbag’s ship are vulnerable. Although you don’t actually fight against the Dark Queen this time around, she does actually help you in a penultimate battle before the final boss; her version of help, however, involves conjuring tornados that are just as likely to hurt or kill you as they are to toss enemies from the stage so be sure to stay away from them wherever possible.

Uto and Pia might be flamboyant but they’re no joke when you finally have to battle them!

The game’s final bosses are the Topians, Uto and Pia, essentially two intergalactic beings who stole the Dark Queen’s power and are practically Gods. When you fight them, they will take it in turns to launch attacks such as spherical projectiles that bounce across the arena and protect them and a giant laser beam that’s particularly difficult to avoid, turn invisible and intangible, and come crashing down onto the stage, all of which cause massive damage. Once they’re injured enough, they’ll team up for real for their final phase but, luckily, only one of their health bars needs to be whittled down. Still, I recommend taking advantage of the invincibility option that becomes available after a few deaths or when you’re close to failure.

Power-Ups and Bonuses:
I mentioned this earlier but, strangely, there are no power-ups or weapons to pick up in Battletoads; while you can’t grab barrels (…or enemies) to throw around and there’s no score-increasing items, you do accrue a high score as you progress. Each fight that isn’t a boss battle receives a grade; the better your combo and the less hits you take, the higher your score becomes and, at the end of every stage, you receive a grade based on your performance and will earn an extra collectable if you manage to get at least an A ranking for every fight in each stage. When in the shooting stages, the scoring system continues but you can actually pick up power-ups that improve your ships weaponry for a limited time, turning it into a spread shot, a high-powered laser, or bolts of magenta energy to cause massive damage against your relentless enemies.

Additional Features:
Battletoads has sixty-one Achievements for you to earn; many of these are tied to the game’s story and can’t be missed but you’ll also get ones for defeating a number of enemies, breaking through their block attacks, finding collectables, or using your various toad abilities. Others are a little more obscure or challenging, like entering a button code in the credits, finding every collectable, or finishing the game on the highest difficulty. Of course, you can also play Battletoads with up to two friends; in co-op mode, you can revive your team mates when they’re defeated and you can go head-to-head to get the highest score but there’s not really anything on offer once you finish the game. You can play as a couple of different characters in the game’s story but they aren’t added to the roster for replays, there’s no one-on-one fighting mode, and no boss rush or skins to unlock, which is a shame since it would have been a good way to put the points you earn to good use to unlock classic 8- and 16-bit skins. You can, however, unlock a special Battletoads themed ship for Sea of Thieves (ibid, 2018) once you complete all of Act 1…so there’s that, I guess.

The Summary:
I was somewhat apprehensive going into Battletoads; I’ve played the original NES game on Rare Replay and couldn’t get past the Goddamn Clinger-Winger stage but I did have a lot of fun with the arcade version of the game. Thankfully, this version of Battletoads is much, much easier than its NES counterpart; I was worried Rare were going to pull a troll move on us and make a ridiculous frustrating throwback to that era of nigh-impossible videogames but, instead, they delivered an extremely enjoyable beat-‘em-up with just the right level of challenge and variety to keep things interesting. I was genuinely surprised at how much Battletoads had to offer; calling it a simple beat-‘em-up is probably doing the game a disservice and this may go a long way to explaining why many of the clichés and traditions of beat-‘em-ups are missing. It’s more like a combat-heavy action/platformer and it never lets any one mechanic last long enough to become monotonous or repetitive. While a lot of these gameplay mechanics might have been annoying and frustrating at times (that damn system reboot sequence, for example), once you’ve gotten past them you can focus on a different section that more than makes up for those challenging moments. Perhaps best of all, it makes the Turbo Tunnel actually doable and I never ran into a truly game-breaking roadblock; it’s a shame that there’s not more to it in terms on unlockables and stuff but I can forgive that for the more enjoyable aspects of the game.

My Rating:

Rating: 4 out of 5.

Great Stuff

How did you find Battletoads? Which of the three Battletoads was your preferred character? What did you think to the game’s mechanics and presentation and how did you find it as a revival of the franchise? Are you a fan of the franchise and, if so, which game is your favourite? Did you find the original game as difficult as its reputation or were you able to clear it without any real difficulty? Which of the TMNT knock-offs was your favourite and would like to see more revivals of old franchises? Whatever your thoughts on Battletoads, or memories of the franchise, feel free to leave them in the comments below.

Game Corner: Ōkami HD (Xbox One)

GameCorner

Released: 12 December 2017
Originally Released: 20 April 2006
Developer: Capcom/HexaDrive
Original Developer: Clover Studio
Also Available For: Nintendo Switch, PC, PlayStation 3, PlayStation 4 (HD) and Nintendo Wii, PlayStation 2 (Original)

The Background:
Originally released for the Nintendo Wii and PlayStation 2 back in 2006, Ōkami was the result of many combined ideas from the staff at Clover Studio. However, it was Hideki Kamiya, best know for developing Resident Evil (Capcom, 1996), who pushed for the game to focus on nature before the gameplay was eventually refined and the game’s unique visual presentation settled upon. Though sales were considered to be somewhat poor and resulted in the closure of Clover Studios, Ōkami won (and was nominated for) several awards and enjoyed widespread critical acclaim, with critics praising the game’s length, use of the Wii’s motion controls, and attention to detail. However, many of these same reviews also pointed out some flaws in the game’s lengthy dialogue scenes and getting the game to register control inputs. Regardless, a HD remaster was later released, which received equally high praise and is generally considered to be the definitive version of the title.

The Plot:
One hundred years ago, in the land of Nippon, the feared white wolf Shiranui and renowned swordsman Nagi fought and sealed the eight-headed demon Orochi, giving their lives in the process. When Orochi returns, the sun goddess Amaterasu takes Shiranui’s form and, alongside a lewd, fairy-like artist named Issun, travels far and wide to rid the land of Orochi’s curse and the darkness that threatens to devour Nippon and all its inhabitants.

Gameplay:
Ōkami is a narrative-heavy, semi-open-world action/adventure game; while it does have some elements of role-playing games (RPGs), the action and gameplay mechanics are very much like the Legend of Zelda series (Various, 1986 to present), with much of the game’s central concept being very similar to the wolf-based gameplay seen in The Legend of Zelda: Twilight Princess (Nintendo EAD, 2006). I’m obviously not the first to make that comparison but it still rings true, though the difference here is that you play as a wolf from start to finish whereas Link would transform to and from a wolf throughout Twilight Princess, which remained primarily a classic 3D Zelda title that focused on swordplay and other mechanics rather than solely on the wolf.

Amaterasu acts very much like a wolf, often for comedic effect.

In Ōkami, you are (eventually…) put in control of the white wolf Amaterasu who, for all her intelligence and sentience, looks, acts, animates, and controls very close to how a wolf or dog would, generally for comedic effect. This means that she can not only run along on all four paws, leaving a trail of blossoming flowers in her wake as her speed increases, but will also whimper, howl, and curl up into a ball when left idle. Amaterasu’s main form of attack is to tackle enemies head on with a press of the X button (which also functions as a ground and mid-air dash), bark with the B button (which doesn’t really seem to do anything but spook non-playable characters (NPCs)), jump (and wall jump) with A (and automatically jump over small objects as she runs at them, like Link in his 3D adventures, though Amaterasu doesn’t have to worry about taking fall damage), and dig up treasures and other objects with the Y button.

Amaterasu has a bit of trouble swimming but is perfectly happy to bite NPCs…

Amaterasu can also perform a doggy paddle when in water but will, eventually, run out of stamina and be dropped back on the last piece of dry land she stood on, though you can eventually earn techniques and abilities to make traversing water far easier. You can also bite with the Y button, which allows you to pick up objects (such as keys or other key items) to unlock doors or complete side quests; you can also bite NPCs or other animals for a laugh, if you like.

Issun acts as your guide and seeks to learn the thirteen brush techniques alongside you.

Amaterasu is not alone in her quest; she’s joined by the lewd travelling artist and swordsman Issun. Issun functions a lot like Navi from The Legend of Zelda: Ocarina of Time (ibid, 1998) in that he will constantly interrupt your progress and gameplay to spout dialogue and exposition and occasionally point you in the right direction or towards objects of interest but differs not only through his womanising ways and blunt sense of humour but also by actually aiding you in combat somewhat. Amaterasu is in possession of the “Celestial Brush”, an enchanted paint brush that allows players to solve puzzles, gain new combat techniques, and attack enemies by holding down the RB button and drawing with X.

Battles take place within a magically-enclosed arena and mostly boil down to button mashing.

As you explore the various different overworlds of Nippon, you’ll encounter floating, ominous Demon Scrolls; though these can, largely, be easily avoided, they will chase after you if you get to close and, upon touching you, lock you into a magically-enclosed arena to battle a number of enemies. When fighting in these arenas, your controls change slightly; now, you can attack with one of two different equippable weapons (or “Divine Instruments) which allow you to strike, defend, or unleash a ranged or combination attack with a variety of Reflectors, Rosaries, and Glaives and deal either massive damage or a finishing blow with the Celestial Brush (easier said than done thanks to the game’s odd idea of perspective). If you don’t feel like battling, you can attack the mystical barrier to open a hole to allow you to escape, avoid the Demon Scrolls, or slash at them with you Celestial Brush to make it easier to get around them. However, I’d advise battling every enemy at every opportunity as it’s a great way to earn rewards since you’re evaluated after each battle and earn additional Yen for finishing fights quickly and without taking damage.

Stay out of Cursed Zones and dispel them by destroying Devil Gates.

There’s no escaping from boss battles or Devil Gates, though, and, when you enter new areas, you’ll find they’ve been cursed with a life-sapping black fog that can only be cleared by destroying a number of Devil Gates dotted around the area. Passing into one of these Devil Gates forces you to battle a number of enemies that are, generally, a little tougher than the average minions but defeating them is still pretty easy thanks to the breadth of the game’s simple, but effective, combat and victory will restore the land to its natural beauty and allow you to hunt for goodies.

Earn Praise to increase Amaterasu’s health, ink pots, Astral Pouch, and purse.

As a God, Amaterasu can earn Praise by performing a number of tasks and side quests; these range from using the Celestial Brush to blossom and bloom withered trees, freeing areas from the cursed fog, feeding the myriad of wild animals you’ll encounter, helping out NPCs, and defeating bosses. Praise can then be used to upgrade Amaterasu’s maximum health, ink pots (using the Celestial Brush consumes ink, which automatically regenerates over time), Astral Pouch (when filled with the various food you can find throughout Nippon, this allows Amaterasu to resurrect from death if defeated), and her purse. As you upgrade each, the amount of Praise needed to upgrade further will increase so it’s recommended that you do anything and everything you can to gain even a small amount of praise. Honestly, though, the game isn’t really that difficult so you might not need all of these upgrades to succeed; I never died once in my playthrough and never seemed to be in danger of reaching the limit of my purse so I’m not entirely sure why you need to increase its capacity.

Purchase items, weapons, and equip Holy Artefacts to gain additional abilities and power-ups.

Like many RPGs and adventure games, Ōkami, sadly, doesn’t feature an autosave feature; instead, you must manually save at various Origin Mirrors (which also fully restore your health and ink) scattered across Nippon or after clearing the game’s dungeon (be sure to make at least one extra save file in case you get stuck or blunder into the game’s final dungeon with unfinished business still to do as you won’t be able to get back to the overworld otherwise). As you defeat enemies, break pots, dig up treasure chests, and generally play the game, you can collect various items to help you in your quest; ink pots will refill your ink, Solar Energy refills a portion of your health, food fills up your Astral Pouch, various treasures can be sold, items aid you in battle (different sizes of bones for health, Inkfinity tags to grant temporary infinite ink, buffs for your attack and defence and so forth), and Yen to purchase new weapons, items, and to pay to learn new techniques from the Onigiri-Sensei. You can also find Demon Fangs, which can be traded for Holy Artefacts; you can equip up to three of these to walk on water, safely cross lava, keep Demon Scrolls away, or attract collectables, among other things. Stray Beads can also be collected to earn both an Achievement and an extremely powerful Holy Artefact that basically makes you unstoppable. It’s one of those games where there’s a lot to see, do, and collect and many different ways to upgrade your abilities without the traditional use of experience points as you can also find and purchase Gold Dust to strengthen your Divine Instruments.

I struggled a bit with the camera, which made drawing vines far more difficult than necessary.

While you are given full 360-degree camera control, you may find that the camera is still less than helpful at some points as it can stutter, get stuck behind objects, and automatically snaps back to its default position every time you leave or enter an area or finish a cutscene, which is annoying as I much prefer the more zoomed out perspective. You can also hold LB to enter a first-person perspective to get a better view of your surroundings and both Amaterasu and the environment will turn transparent to help you spot platforms, areas, or Konohana Blossoms but, often, I found it awkward to actually direct Amaterasu and her brush, especially in certain boss battles and situations.

The brush techniques are simple to do but the game often struggles to register the correct input.

This is because it’s never entirely clear where your drawing will appear on the screen: sometimes, you’ll draw a straight line to slash open a rock and just bloom some flowers on the ground; other times, you’ll try to bloom a tree only to cause the sun to rise or a wind to pick up. This is because the thirteen different Celestial Brush techniques you acquire are all extremely simple in execution (generally one or more lines or a swirl of ink) but the game sometimes seems to get confused about wheat you’re doing, meaning you can waste ink performing the game’s more costly techniques or be needlessly frustrated by something as simple as drawing a line from point A to point B thanks to the dodgy camera and perspective.

I noticed a bit of pop-up and slowdown at times.

Perhaps as a hold over from its time as a Wii and PlayStation 2 game, Ōkami features a fair amount of pop-up; Demon Scrolls, pots, boulders, and certain other landmarks will fade in and out of existence as you explore and I, personally, encountered a lot of annoying slowdown upon loading up my save file or when battling large groups of enemies. There are some benefits to this, though; Demon Scrolls don’t respawn until you leave the area you are in, for one thing, but pots do so it’s pretty easy to stock up on health, ink, and Yen as long as you can be bothered to keep breaking these items open.

There’s a lot to see and do in Ōkami so you’ll always be kept busy, at least.

Ōkami is a pretty exhausting experience, to be honest; I was expecting maybe a ten to twelve hour game but my final playthrough clocked in at more like fifty hours. There is a lot to see and do and a fair amount of backtracking required once you learn new techniques, as well as many side quests and distractions to keep you busy. The game features numerous towns spread across a wide, open field, with new areas (such as a swamp, bustling city, beach front, and frozen region) being equally large and full of things to do, as well as ten dungeons that vary in length and difficulty. Many of these dungeons revolve around a specific gimmick (the vine or wind technique, for example) and might be as simple as collecting a key from one area to unlock a door, learning a new technique, and then battling a boss to manipulating the game’s day/night cycle to raise or lower water levels.

Objectives and puzzles are generally simple but can be a bit vague at times.

Thankfully, the game has an extensive menu on offer that allows you to view, use, and equip items, review your objectives, read up on enemies and bosses you’ve faced, and keep track of any pending quests. The downside, however, is that many of these objectives and side quests, like the game’s puzzles, can be annoyingly vague at times; the map, while helpful, doesn’t display the names of everywhere you’ve visited (this only happens when you’re fast travelling, which is annoying) and Issun is more likely to berate you for taking too long to figure stuff out than help you actually solve puzzles, which range from pushing spheres either down a simple, narrow corridor or through a treacherous bit of quicksand and onto weighted switches (which can be tricky as Amaterasu doesn’t have opposable thumbs!), desperately trying to attach vines to a log (against a time limit) as it speeds through a raging stream, gathering ingredients or acquiring a mask to sneak past enemies, draining water, activating lifts, blasting open walls with cannons to reach new areas, or using your various brush techniques to cross chasms or navigate the dungeon.

Graphics and Sound:
Similar to The Legend of Zelda: The Wind Waker (ibid, 2002), Ōkami is presented in a gorgeous cel-shaded style that causes everything, from NPCs to environmental objects to Amaterasu, to pop out at you. Unlike that game, though, where everything kind of blended together to resemble a cartoon, Ōkami draws its inspiration more from the Ukiyo-e style of Japanese watercolour and wood carving art. Indeed, the game is heavily (and unapologetically) steeped in both Japanese cultural, mythology, and folklore; the result is a game with a distinct visual, artistic, and narrative identity and, while the Zelda comparisons are many, I found myself more reminded of Mystical Ninja Starring Goemon (Konami Computer Entertainment Osaka, 1997), a similarly bonkers action/adventure title full of weirdly hilarious and crude humour, eccentricities, and heavily influenced Japanese cultural and folklore.

Ōkami has many beautiful locations, each distinct from each other.

Functionally, there’s not much here you haven’t seen before, particularly if you’ve played any of the 3D Zelda titles; Amaterasu travels to little towns and across wide, open plains, visiting dank dungeons, sunken ships, bustling cities, frozen wastelands, and even shrinking down to meet the pixie-like Poncles. Thanks to the game’s unique visual presentation, though, every area feels like a fresh and distinct take on clichés such as the water- or wind-based temples. The miniature village of Ponc’tan stood out for me quite a bit as it was a surreal, magical little mushroom kingdom that was a far cry from the ostentatious reality of Sei’an City or the quiet simplicity of Sasa Sanctuary.

The cel-shaded graphics really add to the game’s character and help it stand out.

Each place you visit has something new to see and a distinct flavour to it; the aforementioned Sasa Sanctuary is populated exclusively by the Sparrow Clan, for example, while frozen village of Wep’keer is home to the shape-shifting Oina tribe. Even the lands that surround these areas are teeming with life and NPCs, from merchants and blacksmiths to deities and talking dogs, moles who want to play hide and seek, the lethargic Susano, a bear who is particularly fond of balancing on spheres, the unfriendly and demonic Mr and Mrs Cutter, and Yoichi, who professes to Nippon’s greatest archer. Each of these NPCs, and others, needs Amaterasu’s help in some way and is given a little introduction so you know who they are and brought to life through the game’s unique visual style and a number of quirky characteristics.

Cutscenes are a mixture of in-game graphics and motion comic cinematics.

Being an action/adventure game in the spiritual style of a 3D Zelda title, Ōkami features an abundance of cutscenes and dialogue; thankfully, you can skip these, though you’ll miss out on a lot of the game’s lore and information vital to your progression if you do. These cutscenes are rendered using both the in-game graphics and, at times, a kind of motion comic presentation where the narrator explains what’s going on as images are drawn onto a scroll. When characters do speak in the game, it’s largely through a combination of text boxes, pantomime, and a Banjo-Kazooie-like (Rare, 1998) gibberish, which I find endlessly charming, though it can be laborious having to constantly press A to advance the text. Worst of all is that, all-too-often, NPCs will waffle on and then finish talking, only for the game to indicate (though the presence of a green triangle over the NPC’s head) that the NPC has more to say; because of this, I’d advise pressing B rather than A so you don’t have to worry about accidentally jumping rather than continuing the conversation.

The game mixes charming gibberish with a suitably Japanese soundtrack and aesthetic.

In keeping with its heavily Japanese presentation, Ōkami also features a soundtrack that is distinctly Japanese; inspired by classical Japanese works, the game features a blending of traditional and modern Japanese musical sensibilities to create a suitably whimsical and magical sense of awe and scope to the game’s proceedings. However, while it’s functional enough and serves to bring life to the various areas and situations you find yourself in, I can’t say that it was particularly catchy or memorable.

Enemies and Bosses:
In keeping with the game’s off the wall visual style and influence from Japanese folklore and mythology, Ōkami is populated by a wide variety of demonic creatures and weird and wacky monsters for you to fight. While their appearances may change as you progress, and their attacks and ability to absorb damage may become more aggressive and formidable, respectively, you are pretty much taught the fundamentals of how to handle the majority of the game’s enemies in the first few hours of gameplay.

Battling the different Imps will teach you the basics of tackling the majority of Ōkami’s enemies.

The first types of enemies you’ll encounter are the Imps, which can either be Green, Red, Blue, Yellow, or Black; each one is slightly different, with the Blue Imps gliding in the air and needing to be slashed down, the Yellow Imps burrowing underground, and the Black Imps attack using the skulls of their victims. When you later encounter the Guardians, Namahage and Clay Army, you’ll find that these enemies are, essentially, stronger variants of the Imps and the same tactics can be used to defeat them regardless of how much tougher these later enemies are.

The game’s tougher enemies will require a more strategic approach on your part.

That’s not to say that the game doesn’t feature some pretty tough enemies; flying enemies like the Crow Tengu and Dead Fish can be troublesome since they like to block your attacks, the Wheel enemies require you to use your elemental brush techniques to make them vulnerable to attack (which can be difficult if you’re low on ink), and many of the larger enemies, such as the Ogres, are completely resistant to your attacks until you knock off their giant stone masks. Similarly, the Bud Ogre and Igloo Turtle will require your elemental brush techniques to get through their defences and, often (especially later in the game), you’ll be tasked with fighting a number of different types of enemies all at once, which requires a surprising amount of strategy at times.

Get used to battling these bastard giant spiders!

As you enter new areas and explore Nippon and the game’s dungeons, you’ll encounter new enemies and many of the bigger/tougher ones could be classed as sub-bosses. Each of Ōkami’s dungeons is, of course, capped off by a boss battle, each of which is unique in its execution. The first boss of the game, the Spider Queen, is actually one of the most annoying and frustrating bosses you’ll encounter as the only way to damage her is to use the vine technique to attach three vines from nearby Konohana Blossoms to the hooks on her butt. This will fell her and cause her abdomen to open up like a flower, allowing you a short window of time to attack the eye-like globs that act as her sole weak point. You better get used to this piece of shit battle, though, since you’ll fight three Bandit Spiders in the game’s hidden Devil Gate Trials and the Spider Queen as part of the Ark of Yamato’s boss rush.

You’ll need to snuff out the Crimson Helm’s flames to deal actual damage.

In comparison, the Crimson Helm is a veritable walk in the park, especially later when you have even more elemental powers at your disposal. This minotaur-like oaf charges at you wielding giant swords and covered in armour but you can lure him into crashing into pillars and attack him to break his armour off, and then use the wind technique to put out his flames and deal actual damage. Since you don’t need to worry about fighting the damn camera to expose the Crimson Helm’s weak point, this boss battle is actually enjoyable.

Stun Orochi with Sake to destroy its bell and leave its heads vulnerable.

After reaching the Moon Cave, you’ll battle the resurrected Orochi, the eight-headed dragon that has cursed the land and is the subject of such terror and legend. Though large and imposing, Orochi is pretty simple to put down as long as you’re patient and clever about it; to start with, Orochi is invulnerable thanks to his golden armour so you have to use Amaterasu’s water-bending technique to direct some Sake-infused water into three of Orochi’s heads until it collapses, which allows you to attack a bell on its back. Once you whittle the bell’s health down, Orochi will be vulnerable and you must contend with the different elemental and physical attacks of each head, stunning them with the same Sake-tainted water and destroying each in turn. Though tedious, it’s stupidly easy to avoid Orochi’s attacks, so the battle’s difficulty comes from having the patience to destroy Orochi’s heads and the skill and timing to complete an annoying quick-time event (QTE) that follows the main fight, which sees Susano deliver the final blow to Orochi.

True Orochi is supposed to be Orochi’s peak form but it’s defeated just as easily as before.

This isn’t, however, where the game ends; nor is it the last time you fight Orochi. When you briefly take a trip to a hundred years in the past, you’ll battle “True” Orochi, which is supposed to be Orochi at the peak of his powers…but it’s exactly the same as the previous battle, with the same level of difficulty and the same tactics, with the only difference being that the legendary warrior Nagi delivers the killing blow. You’ll also have to defeat Orochi one last time in the Ark of Yamato’s boss rush but you don’t have to complete the QTE that time, which is great since the game has a bit of trouble recognising that you’ve cut Orochi’s heads during these sequences.

Blight’s speed is easily neutralised to leave it vulnerable to your charged attacks.

After besting Orochi, the game’s bigger, far more expansive second half begins. The first boss of this next stage of the game is Blight, a possessed sword and suit of armour that is quite possibly the easiest boss in the game. Thanks to Amaterasu’s time-slowing “Veil of Mist” technique, you can slow Blight to a crawl for a few seconds, allowing you to dodge its attacks and attack it until its weak point, the possessed blade Goldnail, which can be easily dispatched using charged Glaive attacks.

Some bosses can drain your ink or both block and counter your attacks.

When you explore the sunken ship and the waters around Ryoshima Coast, you’ll encounter the gigantic Water Dragon, which cannot be defeated and must be fled from and then entered to retrieve a key item. While inside of the Water Dragon, you’ll battle the Tube Foxes and an evil form of one of your allies, Rao; the Tube Foxes exhibit a decent amount of agility and can drain your ink, which can be bothersome, while you’ll need to reflect Evil Rao’s daggers back at her and attack when she’s vulnerable on the ground. Neither are particularly difficult though Evil Rao reappears in one of the game’s more frustrating Devil Gate Trials where you have to not only fight multiple versions of Evil Rao but also the similarly-sword-wielding Wakka.

You’ll need to direct lightning to Ninetails’ sword and destroy its spirits to deefat it.

The final boss of the game’s second portion is Ninetails, a large, nine-tailed kitsune who can only be harmed by directing lightning to its sword; this splits Ninetails into nine ghostly humanoids who attack Amaterasu incessantly. As you weather their attacks and destroy them, you’ll reduce Ninetails’ tails; do this enough times and Ninetails will be reduced to a normal, one-tailed fox and be vulnerable to your attacks but it’s still best to deliver massive damage with Amaterasu’s Thunderstrike technique. Though big and able to copy many of Amaterasu’s, and even cancel out any brush techniques you use, the hardest thing about this boss is dealing with all of the spirits that Ninetails splits into since they don’t flinch after being attacked.

Amaterasu battles Nechku and Lechku alongside other wolf allies.

When you reach the conclusion of the Waku Shrine, the game’s final (and biggest) dungeon, you’ll battle the giant mechanical owl Nechku; this fight is relatively simple since Shiranui, Amaterasu’s past self who is significantly more powerful, does the majority of the leg work for you. After defeating Nechku, you travel deeper into the dungeon and battle it again, this time as Amaterasu and alongside another of her friendly rivals, the shape-changing Oki, and Nechku is joined by its twin, Lechku. In this case, you need to use your Celestial Brush to interact with one of the many different items the two whip out in order to stun them and then grab Oki and fire him like an arrow to deal greater damage. Having two bosses to contend with makes this one of the more challenging boss battles but it’s still far from difficult, especially since you can slow things down with the Veil of Mists, and neither Nechku or Lechku appear in the Ark of Yamato’s boss rush.

Yami’s design is a bit underwhelming after all the mental shit we’ve seen up to this point…

Speaking of which, be sure to save before you board the Ark of Yamato as you won’t be able to return once you enter. Inside, you’ll have to battle the Spider Queen, the Crimson Helm, Blight, Ninetails, and Orochi again one after the other (though you can rest up and save between each battle) in order to confront the game’s true final boss, Yami. Yami (which is just a giant, glowing sphere, which is a bit underwhelming after everything you’ve seen and fought up to that point) strips you of all of your abilities and you must attack it, dealing with its five different forms to regain your abilities. In its first form, it tries to smash you with either a hammer of its spherical body, causing holes to form in the floor of the arena (if you fall down them, you respawn in the arena but take damage) and attacking it restores your Rejuvenation, Power Slash, and Greensporout techniques, which allow you to crack open the sphere at deal actual damage to Yami’s core.

Yami has multiple forms and attacks, each of which require your restored brush techniques.

Yami’s second form sees it engulf itself in fire and split into platforms, launching flaming parts of itself at you and forcing you to do some tricky platforming or jumping to damage the core and restore your Cherry Bomb, Waterspout, and Crescent techniques. Its third form sees it launch fireballs and freezing ice blocks at you and forces you to attack a slot machine to conjure these attacks, missiles, and even health and ink pots. Its fourth form sees Yami sprout legs and tentacles, which whip at you and form into swords for you to use Thunderstrike on, and is the toughest of Yami’s base forms since it takes a little more to expose the core, which can absorb quite a lot of damage.

Yami’s final form doesn’t hold back but it’s still not much of a challenge for your many abilities.

For its final form, Yami sprouts a claw hand to protect its core, which constantly shields itself from your brush techniques. The only way to damage this final form is to use Sunrise to dispel the darkness in the arena, reflect missiles back at it, and attack the core when it busts out its massive laser. You can also deal damage by attacking Yami’s hand, which is easy enough to dodge, and its spherical shell to, eventually, stun it and expose the core to your more powerful attacks. This was the first time in the entire game I actually bothered to use items to increase my attack power as Yami can take quite a beating but, otherwise, this boss is tedious and long-winded but far from difficult.

Power-Ups and Bonuses:
Amaterasu has many options available to her to power-up her attacks and abilities; as mentioned, Gold Dust can increase the power of each of the Divine Instruments, which you can acquire after beating bosses, from weapons shops, or in treasure chests hidden throughout Nippon. You can also find and buy various Steel Fist Sake or Steel Soul Sake to increase your attack and defence, respectively.

The Onigiri-Sensei will teach you all kinds of new attacks, like shitting to annoy your enemies…

As you explore, you’ll be able to pay an extortionate amount of money to the Onigiri-Sensei to upgrade and learn new attacks and techniques. This allows you to add additional attacks and build greater combos, dodge (and counter attack after a dodge), double jump, increase your attack power by equipping two of the same type of Divine Instrument and, of course, piss or shit in the middle of battle to insult enemies and force them to drop Demon Fangs!

Use your elemental brush techniques to solve puzzles and damage enemies.

One of the main objectives Amaterasu has, beyond restoring peace to Nippon, is the awakening of the thirteen Celestrial Brush Gods and re-learning their brush techniques. Most of these are elemental based, allowing you to conjure and manipulate fire, water, and wind, while others are tied to nature, allowing you to blossom withered trees. You can use the different brush techniques to open doors, repair broken bridges, cause platforms and paths to appear, and to attack enemies, with certain enemies being vulnerable to certain elements.

Slow down time, conjure bombs, and then spend a whole bunch of Yen upgrading your techniques.

You can also use these techniques to slow down time, blow open cracked walls and floors with bombs, scale walls using cat statues, and freeze objects. You can perform multiple brush attacks at once but not in the same moment; so, if you want to do a Power Slash, draw a Cherry Bomb, and direct lightning to an enemy, you need to press and hold RB and draw with X in three separate instances rather than in one. By tossing an exorbitant amount of Yen into three Divine Springs, you can upgrade some of these abilities to make them stronger or allow you to draw more objects on screen at once.

Additional Features:
Ōkami has fifty-one Achievements for you to earn, the majority of which are worth a mere 10G each, even some of the more time-consuming and long-winded ones, and are directly tied to story-based events so they can’t be missed. Technically, the only ones you can potentially miss are the “No Furball on the Menu” Achievement (which requires you to quickly draw yourself a lily pad and then use an Inkfinity Stone to relentlessly conjure wind to quickly carry you safely to shore before the Water Dragon can eat you) and the “From Imps to Demons” Achievement since the Fire Doom Mirror can only be fought during one mission in the game. The others can be achieved with enough patience by earning loads of Praise and Yen to max out all of your abilities and attacks and making sure that you defeat every enemy you see and don’t die (which is pretty easy to do).

Hunt down monsters and compete in races to earn Praise and Achievements.

As you might imagine, there are a whole host of side quests to keep you busy as you play, with many of them resulting in you earning Praise, Yen, and an Achievement. One has four NPCs ask you to hunt down and destroy certain monsters, which is easy enough to do (simply interact with every Demon Scroll in the surrounding area and they’ll eventually crop up), while another has you winning races against three different opponents (well, I see “win” but you only really need to win one of these races; the others just require you to catch up to your opponent and tackle them in three separate, increasingly-difficult challenges).

I can’t say that I was a fan of either of these mini games…

There are also a few mini games to eat up your play time; one has you tackling moles for rewards and is optional but the other two, the digging and fishing mini games, are required to complete to progress the story and to earn all of the game’s Achievements. I struggled a bit with the fishing mini games at first since the game didn’t seem to want to register my brush strokes but then I must have either gotten better or the game decided to play along and let me draw the line and slash the fish without much issue. The digging mini games are a lot of trial and error that have you digging, bashing, slashing, and exploding rocks against a time limit while an NPC follows along, walking into spikes and needing to be guided to a specific point to unearth a treasure.

The Kusa 5 are, apparently, even tougher than Orochi and must be fought in waves.

There are also a couple of optional boss battles, of sorts; as part of the story, you have to find and recruit the five Canine Warriors and, after finishing Oni Island, you can return to the Gale Shrine to battle these five dogs once more. Known as the Kusa 5, you must fight them in both groups and waves. As in the initial battles against the dogs, they like to dash, jump, and tackle you, dig holes to bury you and hurt you with the dirt, and leave explosive turds to damage you. In this battle, they are said to be more powerful than Orochi and, while that’s certainly true, they’re actually slightly less bothersome to fight since they can be damaged without jumping through a bunch of hoops and you can always use the Veil of Mist technique for an advantage.

You won’t last long in the Devil Gate Trials if you come unprepared.

You can also learn a more powerful dig move to unearth three secret Devil Gate Trials; at first, these chasms are guarded by three Bandit Spiders but, when you return, you’ll have to pass through ten Devil Gates in succession, defeating wave upon wave of the game’s toughest and most annoying enemies. If you leave the area at any point, you’ll have to start all over again, so it’s best to stock up on items and equip the Wood Mat (which restores your health, at the cost of some Yen, when you leave Amaterasu idle) to heal up between gates. This, and the Kusa 5, are easily the most challenging parts of the game but challenging in a way that is tedious and annoying rather than necessarily difficult as, as long as you spam the Veil of Mist and equip the right Divine Instruments, you should be able to best each trial with the skills you’ve mastered.

Upon completion, you’ll unlock a gallery and some skins to use in New Game+.

After you defeat Yami and complete the game, you receive both a final evaluation and a number of awards, unlocking a gallery and such from the main menu and some skins to utilise in the game’s “New Game+” mode. When you play New Game+, you retain all of the progress you made in your first playthrough except for the brush techniques, some weapons, and a few Holy Artefacts and other items. This means that it’s pretty easy to finish upgrading any of Amaterasu’s abilities you missed the first time around and to make short work of the game’s earlier enemies but I’d recommend creating a save point before you enter the Ark of Yamato so you don’t have to play through the entirety of the game from the start to finish your Bestiary or treasure tome.

The Summary:
Ōkami is certainly a beautiful game to look at and play through and I can see why many praise its visual presentation and narrative; it’s a long, sprawling adventure that sees you exploring a unique and quirky fictional land, meeting and battling all kinds of characters and monsters, and certainly stands out against other games of its type. However, as lovely as it is to look at and as fun as it can be to play, I was often frustrated by a lot of little annoyances; the day/night cycle, for one thing, the camera’s jerkiness and clumsiness (especially in boss battles), for another, and the game’s unreliable nature when it comes to registering brush strokes. The platforming and jumping aspects can also be needlessly annoying and, at times, the hints and directions you get are far too vague. While this opens the game up to exploration and experimentation, it can be annoying to be stuck in a room or area with no idea of how to proceed and the map is less than helpful in this regard. Still, overall, it’s a solid title with some intense and engaging boss battles, a rich and intriguing lore, and plenty of side quests and distractions to constantly keep you busy.

My Rating:

Rating: 3 out of 5.

Pretty Good

Have you ever played Ōkami? If so, did you play the original version or, like me, have you only experienced the HD version of the game? If you’ve played both, how do you find the HD version holds up compared to the original? What did you think to Ōkami’s unique world, characters, and lore? Did you find the game to be a bit too long and convoluted and the brush and camera to be less than reliable or were you engrossed in the game’s complex story and pleased with the game’s controls and mechanics? Which of the game’s areas, dungeons, bosses, and/or characters was your favourite and why? Would you like to see more from Ōkami or do you feel its best that it was one and done and how would you compare the game to others in its genre, like the Zelda series? Whatever your thoughts on Ōkami, feel free to leave a comment below.

Game Corner: Burnout Paradise: Remastered (Xbox One)

Released: 16 March 2014
Originally Released: 22 January 2008
Developer: Criterion Games
Also Available For: PC, PlayStation 3, Xbox 360 (Original Version); Nintendo Switch, PC, PlayStation 4 (Remaster)

The Background:
The Burnout franchise is a series of racing games developed by Criterion Games that began with the appropriately-titled Burnout (ibid, 2001) and is best known for its fast-paced, arcade style racing and its innovative crash mechanics and physics. Now, traditionally, I’m not really one for racing games; it’s not really my thing and I tend to stay away from anything that isn’t a mascot racer. In 2011, though, you may remember that millions of PlayStation Network accounts were compromised; as a means of compensation, players were offered a number of free games, one of which was Burnout Paradise, a title I ended up enjoying so much that I bought a physical copy some time later.

Unlike is predecessors, Burnout Paradise was more of an open world racing game.

Unlike the other games in the Burnout series, Burnout Paradise is an open world game designed around exploration, online play, and racing without predefined tracks. Though the developers had to work hard to justify these new elements with the game’s sceptical publisher, Electronic Arts, Burnout Paradise was met with a generally positive response from critics and was supported by lots of downloadable content (DLC) that included additional cars, gameplay modes, and a whole new island to explore. The vast majority of this content was included in the Remastered version of the game, which also included support for higher-resolution monitors and ran at sixty frames a second. Considering how much fun I had with the original version of the game, I was delighted when a friend of mine gifted me the Remastered version so I could get back to racing through the streets, taking down cars with reckless abandon, and bopping along to the game’s awesome soundtrack.

The Plot:
Welcome to Paradise City, a large, urban environment where racing is the aim of the game. With guidance from DJ Atomika, you are shown the basics of how to race in Paradise City with the ultimate aim to upgrade your driving licence and earn a whole collection of top quality motors.

Gameplay:
Burnout Paradise: Remastered is an open world racing game in which you drive around the fictional Paradise City taking part in a series of races and other challenges to upgrade your driving license, unlock some cool cars, and be the most respected driver in the entire city. There isn’t really a “story” to speak of or a character to play as; all of the cars are empty, the streets are completely devoid of pedestrians, and while the motorbikes do have a rider, they disappear if you get into one of the game’s signature wreck sequences. As a result, the vehicles take centre stage and the only character the game really has is DK Atomika, a radio DJ who acts as your guide and talks you through the basics of the game’s controls, objectives, and offers advice as you’re driving around.

Build up your Boost meter to blast ahead in a burst of nitrous!

There are a variety of vehicles on offer in Burnout Paradise: Remastered, each with their own unique statistics and abilities, though all control largely similar: you press and hold in the Right Trigger to accelerate, use the Left Trigger to brake and reverse, glance behind you with the Left Bumper and switch camera positions with the Y button, and press X to use your emergency brake (or “E brake”) to perform drifts and power slides and such. As you drive, you’ll also build up a Boost meter in the bottom left of the screen; once it’s full, you can initiate a nitrous boost with the X button to blast ahead and dramatically increase your speed and odds in races. The type of car you have determines how long your Boost meter is and how effective it is; while “Speed” orientated cars have the smallest meter that drains once you press and hold A, heavier vehicles allowing for a three-tiered Boost meter, and “Stunt” orientated cars build their meter by performing special tricks and jumps.

Take part in a number of events, my favourite of which involve smashing up other cars!

Choosing the right type of vehicle is the key to completing all of the game’s various racing challenges (known as “Events”); you may have to sacrifice speed for strength to survive “Marked Man” challenges but heavier cars won’t serve you too well in the longer races. In Burnout Paradise: Remastered, you can pull up and stop at multiple sets of traffic lights throughout the city and initiate an Event by pressing LT and RT together and there are multiple types of Events on offer. Each vehicle has their own unique Burning Route, a timed event that awards you an alternative version of the vehicle you use (with Burning and Midnight Rides substituting for the bikes); Marked Man has you race to a specific point on the map while a number of cars try to take you down; a Race is simply that: you start at one point and race to another, generally against more opponents and across a longer, more difficult distance as the game progresses; Road Rage has you perform a set number of takedowns within a time limit; and Stunt Run has you performing power slides, jumps, and a variety of other tricks to build up a required amount of points.

Use the mini map and landmarks to help navigate the city as fast as possible.

There are a couple of other Events on offer as well, such as Road Rules, Time Road Rules, and Showtime Road Rules, which see you setting speed and damage runs within a time limit for the benefit of the online leaderboards. You can use the directional pad (D-pad) to restart an Event if you mess up or are about to lose and the D-pad also accesses a separate menu for online functionality. Navigating Paradise City is pretty simple thanks to the mini map in the bottom right of the screen, which clearly shows the main road through the city and the many twisting, turning side roads and country lanes; it also highlights your opponents and nearby points of interest, like the Auto Repair shops that repair your car when it has taken damage and the Junk Yards where you can switch vehicles. If you need a better view, you can access a larger, more detailed map from the pause screen and filter it to show these landmarks, and others, which are added to your map as you pass by them while driving. Sadly, though, there’s no way to set a route to follow and no fast travel features but there are plenty of recognisable landmarks (such as the airfield, the football stadium, and the country club) and, as you’re racing towards a destination, street signs appear at the top of the screen and blink left or right so you always know when to turn…just be prepared to apply a little E-brake for tight corners.

Smash your car up to your heart’s content but don’t be surprised if it affects your racing performance.

Of course, the biggest selling point of the game, and the franchise, are the elaborate crashes; as you’re driving along at high speeds, you’ll have to dodge other vehicles and obstacles such as walls and bollards. If you clip or crash head-first into these, you’ll be treated to a stunning visual of your vehicle crumpling like paper or flipping over and over. If the crash is only minor, you might get lucky enough to simply drive away from it but, if it’s more serious, your car will get wrecked and you’ll need to visit an Auto Repair to fix it up. There is no game over, though, so you don’t need to worry about the game ending because of damage but if you get too smashed up you won’t last long in Events so it’s best to either repair the damage or switch to a tougher vehicle.

Graphics and Sound:
As a racing title, the main thing Burnout Paradise: Remastered needs to worry about is performing consistently well at high speeds and rendering its large, multifaceted city. Thankfully, the game excels at both as I experienced no slowdown at all even when racing against multiple opponents and the city flies past at breakneck speed, never glitching or suffering from pop up or loads times, which are effectively masked by the city’s vast size and various areas. The only times I found the game slowed down was when you were in the Junk Yard, especially when you visit after unlocking a number of new vehicles, as each one has to load in and there’s no way to skip past these sequences.

Each vehicle has its own strengths, weakness, and capabilities that affect your driving experience.

Burnout Paradise: Remastered features a wide variety of cars, bikes, and other vehicles, all of which are based heavily on real-world vehicles but changed for legal purposes. You’ll get to drive sports cars, muscle cars, racing cars, jeeps, coupes, and even massively impractical piston engines on wheels. There are also a selection of motorcycles on offer, cop cars and other emergency vehicles, vehicles based on iconic cars from television shows and movies, and even miniature toy cars. I’m no really a “car guy” but I was impressed by the game’s wide selection and the detail on offer; each vehicle controls a little differently and even crashes a little differently so you can mix and match and experiment to see what’s best for you in any given situation. It’s not easy to do this, though, since you have to travel to a Junk Yard to switch cars, which can take a while if you’re stuck in the mountains, but the majority of the cars can also be customised with paint jobs in the Junk Yard are by driving through a Paint Shop.

The game performs really well; it’s super fast and smooth and has lots of detail packed in.

Paradise City itself is the game’s most impressive feature; it’s a massive city, with lots to do and see, and it’s just fun to simply drive around aimlessly listening to some tunes and looking for things to smash through. Numerous tracks will play from the in-game radio; these can be skipped using RB and customised from the main menu and include classic music, original tracks from the previous Burnout games, and some kick-ass tunes from the likes of Sense Fail, Alice in Chains, Twisted Sister, and, of course, the game’s title track: “Paradise City” by Guns N’ Roses. The game also features a day/night cycle that you can customise the length of from the pause menu, which is a neat feature, and there are numerous landmarks to see all over the place. You’ll also stumble across fun little side areas to mess around in, such as a number of parking lots for big jumps, a quarry pit, and a railroad track and the game’s size and scope is further expanded with a visit across the bridge to Big Surf Island, where a host of additional challenges await.

Enemies and Bosses:
As it’s a racing game, there’s no real “enemies” in the traditional sense; one of the main things you’ll need to worry about as you race around the city are the many hazards that can wreck your car, from small stuff like walls and bollards to major things like oncoming traffic or rocky cliffs. When racing in Events, your main enemy will, of course, be the other racers; these start off pretty simple, with one or two cars putting up a little bit of competition, but as your license upgrades you’ll find the opponents start taking multiple different routes to the end goal and are much tougher to beat. One thing that is helpful, though, is that you can take the other drivers down to give yourself an edge in a race; they’ll return to the fray but it can be enough to buy you some time to pull ahead.

Be sure to take down other drivers and pick a tough vehicle to keep from being wrecked.

You’ll face far more aggressive opposition in Marked Man and Road Rage Events; in the former, black cars will try to ram you off the road and wreck your car and, in the latter, you’ll be doing this to a certain number of vehicles. Again, at first, this isn’t so hard; you can race up behind and alongside the cars to shove them into oncoming traffic, walls, and other opponents to build up a multiplier bonus which is always fun but, as the game progresses, the opponents get faster and much more aggressive so it’s worth switching to a car with more strength and durability than a flimsy sports car.

Shut down cars racing around the city to add them to your collection.

Similarly, there are no “bosses” as such but, as you win Events and upgrade your licence, new vehicles will appear throughout Paradise City. When these race past you, you have to chase after them and take them down in order to add that vehicle to your Junk Yard. Again, chasing down cars and smashing them up makes for some of the most entertaining aspects of the game but it’s a bit random when they’ll appear and fly past you and, as the map doesn’t highlight them, you’ll have to keep your eyes open when there’s a few out in the wild.

Power-Ups and Bonuses:
There’s only really one power-up available to you in the game and that’s the aforementioned Boost function. The Boost meter is built up by performing takedowns, stunts, and racing along, and really is the most valuable tool in your arsenal as it allows you to quickly catch up to cars to take them down or blast past them to the finish line. The downside, though, comes when you drive a vehicle that blows through its Boost meter in one go and the boost you receive can make certain cars careen out of control and into incredible crashes.

Repair your car or refill your Boost mid-race to gain a significant advantage.

Otherwise, your power-ups are tied towards the type of vehicle you use; faster cars with a decent Boost meter are good for most of the game’s Events but can cause you to be easily smashed up. As a result, it’s best to keep an eye out for the Auto Repair Shops to repair any damage and refill your boost at other drive-throughs, both of which are super handy mid-race to give you an edge.

Smash through billboards and gates and tackle Super Jumps to earn Achievements.

As you explore Paradise City, you’ll find numerous gates and giant billboards to crash through; if you spot these, make sure you crash into them at every opportunity as you’ll learn a handy shortcut and take one step towards earning the game’s numerous Achievements. In addition, scattered throughout the city are a number of jumps and Super Jumps, many of which will have you crashing through one of the 120 billboards and are guaranteed to be found atop the parking lots. You’ll want to reverse up a bit, though, and get a good run up and time your boost to really fly through the Super Jumps and make sure you stick the landing or you might fail the jump.

Additional Features:
As mentioned above, the game features a number of Achievements; fifty-six, in fact. From what I can tell from my memory of the PlayStation 3 version’s Trophies, these are actually a little different than those seen in the original game and include such things as upgrading your licence, landing a certain number of Super Jumps, getting a takedown multiplier, winning Events, and so forth. You can easily burn through a whole bunch in just an hour or so of play but you’ll need to hunt high and low to find all the billboards and gates to smash through.

Take on a variety of online modes or drive the famous Delorean in hover mode!

Thanks to being the most complete version of the game, Burnout Paradise: Remastered includes all of the DLC from the original game; this means you can jump in a variety of police cars (each of which comes with a siren you can toggle on and off) to race around in. These cop cars are also used in the game’s online mode as a “Capture the Flag” style game where four players, as the cops, must chase four others as the robbers. You can also challenge online players to ranked and unranked races, Freeburn Challenges, and variations of the usual in-game Events, as well as have your best times and scores uploaded to the online leaderboards. Toy versions of certain cars are also freely available as are the “Legendary Cars”, which offer vehicles based on the Knight Industries Three Thousand (K.I.T.T.), ECTO-1, and the DeLorean time machine, amongst others. I found myself drawn towards these simply for their speed and iconography and the fact that you can put the DeLorean into hover mode!

Hop on over to Big Surf Island to take on a whole new bunch of challenges.

Finally, there’s Big Surf Island, a massive extra area to explore that is accessed via a bridge. Big Surf Island is smaller than Paradise City but pretty big in its own right and is home to a whole new load of billboards, gates, and jumps (here called “Mega Jumps”) as well as new cars (most of which you’ll have access to from the start) and Events that see you having to race to specific checkpoints across the island. One thing to keep in mind about Big Surf Island, though, is that nothing you do there contributes to upgrading your driving licence; instead, the points go towards building up your “Big Surf Island License”, which is levelled up to 100% by completing everything the island has to offer.

The Summary:
Now, I’m not really a fan of cars or racing, much less racing games; all of my car knowledge comes from Top Gear (specifically from 2002 to 2015) and my experience with racing games is limited to a few arcade titles and kart/mascot racers. Yet, I really enjoyed Burnout Paradise and, as such, found this Remastered version just as enjoyable, if not more so thanks to the inclusion of all of the DLC right off the bat so you have everything the game has to offer available to you. If you enjoy racing, the game has you covered. Stunts and such? It’s not for me but it’s in there. Maybe you’re more like me and you prefer the high speed crashes and taking down other cars by shoving them into the path of an oncoming bus without mercy. If so, this is the game for you. Simple to play, with loads to do and see, and fun to just drive around aimlessly, Burnout Paradise: Remastered is a great game to just throw on for an hour or so and unwind after a stressful day, taking part in some super fast races, ridiculous crashes, and listening to some great tunes while you do it.

My Rating:

Rating: 5 out of 5.

Fantastic

Are you a fan of Burnout Paradise and the Burnout franchise? If so, which game is your favourite and what is it about the games that you like? Did you pick up this Remastered version of the game; if so, how do you think it compares to the original? What is your favourite racing game franchise? Whatever your thoughts, drop a comment below and let me know.

Game Corner: Rocket Knight (Xbox 360)

RocketKnightLogo

Released: May 2010
Developer: Climax Studios
Also Available For: PC, PlayStation 3, Xbox One

The Background:
Mate, how absolutely brilliant was Rocket Knight Adventures (Konami, 1993) back in the day? Back when cute, anthropomorphic mascots were all the rage, Sparkster (the titular “Rocket Knight”) really stood out thanks to some absolutely gorgeous graphics, kick-ass music, and fast-paced, rocket-based combat. I used to play that game so much as a kid but never actually managed to finish it (maybe one day); the game did well enough to receive two sequels, one for the Mega Drive and one for the Super Nintendo, but Konami’s long-forgotten and short-lived little franchise went dormant for far too long after these releases. Then, out of nowhere, a revival of the franchise was thankfully put into production thanks to producer Tomm Hulett. A 2,5D, digital-only title, I first played Rocket Knight on the PlayStation 3 but I didn’t hesitate to snap it up once it went on sale on Xbox One so I could get into it again. It’s not an especially long or difficult game but, as one of my favourite franchises that has been sadly lost to the mists of time, I could never not jump at the opportunity to charge up Sparkster’s signature rocket pack once more.

The Plot:
Fifteen years after bringing peace to the Kingdom of Zephyrus, Sparkster has been living a quiet life as a family possum. His peaceful life is shattered when the Wolf Army suddenly invades the Kingdom; heeding the call to adventure, Sparkster dons his trademark armour and rocket pack and returns to the fight to defend his home once more.

Gameplay:
Rocket Knight is a 2.5D action/platformer in which players take control of Sparkster, a “rocket knight” who seeks to defend his land from invasion. All of Sparkster’s moves and abilities from his debut game return here, meaning he is armed with a large sword for some basic close-quarters action and which is also capable of blasting enemies from a distance as well. Sparkster’s unique selling point was his rocket pack; by holding the B button and pointing Sparkster in a direction, players can blast ahead, mowing down enemies and ricocheting off walls to reach higher areas. Sparkster can also drill through certain breakable elements by tapping B again and briefly hover with a tap of the A button to aid with tricky platforming sections. However, Sparkster’s rocket pack isn’t finite in most stages; you’ll have to keep an eye on the energy bar in the top-left of the screen as you won’t be able to blast away if it’s empty. Luckily, this bar refills quite quickly, meaning you never have to wait too long to burst into action and Sparkster can also blow his energy reserves on a cartwheel-like attack that is super handy for bouncing dynamite back at enemies. Sparkster can also clamber across vines and bars with his tail; sliding down these will allow you to jump higher and further and you can also attack enemies by whirling around in a rocket-powered swing. Stages are generally a simply case of moving Sparkster from point A to point B, with a smattering of enemies and platforming segments to contend with, but every so often you’ll be thrust into a sidescrolling auto-flying stage where you can fly indefinitely.

Blast through enemies with Sparkster’s trademark rocket pack and sword.

In these stages, enemies, obstacles, and mines will try to slow your progress but you can blast at them with Sparkster’s energy shot. You can also hold X to charge up your shot and unleash a screen-clearing beam of energy that is perfect to taking out tricky enemies. Eventually, stages introduce more complex elements, such as when Sparkster finds his rocket pack affected by extreme cold. Your rocket fuel won’t regenerate in these stages unless you pick up a fuel icon or find a burning torch to defrost Sparkster. Other stages have you dodging and ducking fireballs, blasting from airship to airship while massive cannons try to knock you from the sky, hitting switches to open doors or lower energy fields, jumping from precarious moving platforms or navigating short, simple mazes to progress further, or outrunning a massive explosion. Rocket Knight is not an especially long or complex game but it’s simple, easy to play fun that challenges you by increasing the difficulty of its enemies and stage hazards over time. Fortunately, checkpoints are plentiful throughout the game’s stages; Sparkster can replenish his health by collecting hearts, which are sporadically found throughout each stage, and earn extra lives by collecting 1-ups and earning enough points. Points are accumulated by collecting blue and red gems, finding power-ups, and building a combo by defeating enemies in quick succession. Each time you clear a stage, you’ll earn additional points for how fast you completed a stage, encouraging speedrunning and a degree of exploration as you hunt down hidden gems.

Graphics and Sound:
Rocket Knight is not an especially ground-breaking game in terms of its graphics but it has a simple, adorable charm; favouring a 2.5D aesthetic over the gorgeous sprite art of its original games, the game resembles a cel-shaded cartoon more than anything. Characters pop out from the background and are lively enough (though Sparkster could be a little more animated when left idle), appearing big and chunky and almost anime-like in their appearance.

Colourful cel-shaded graphics and pantomime-like cutscenes add to the charm.

The game’s simple plot is told through pantomime-like cutscenes, as in the original game, with a brief synopsis greeting the player as each stage loads. These cutscenes are amusing and quaint, getting the point of the game’s uncomplicated narrative across easily enough and are thankfully not bogged down by copious amounts of voice acting (they are also entirely skippable if you prefer to just jump right into the action). The game’s music is just as good; Rocket Knight wisely opens with a remix of the memorable and catchy “Stage 1” music from the first game (still one of the greatest videogame tracks of all time, in my opinion) and takes its cue from there, punctuating each stage with plucky tunes that could maybe have a bit more oomph behind them but are nevertheless enjoyable.

Enemies and Bosses:
For the first portion of the game, Sparkster will have to contend with the Wolf Army; these are generally little more than cannon fodder, running head-first into your sword and attacks and easily dispatched of. Soon, they start tossing dynamite at your head (though these are easily knocked back with a swipe of your sword) or clinging from walls and ceilings to toss throwing stars at you. They’ll also pop out of the background or try to overwhelm you with sheer numbers, attack with bazookas, or drop bombs on you but are, for the most part, pretty easy to deal with. However, after taking out Ulfgar the Merciless, the King and leader of the Wolf Army, Sparkster is betrayed by former-enemy-turned-ally General Sweinhart and must contend with a renewed invasion from Sweinhart’s Pig Empire. These swines are far more dangerous enemies, taking multiple hits to defeat and blasting at Sparkster with energy pistols, hiding behind shields, erecting electrical force fields, and piloting intimidating mechs to try and squash Sparkster flat. Since Rocket Knight is only a short game (it’ll probably take about an hour to finish on the “Normal” difficulty), you only have to contend with three bosses and two sub-bosses. The sub-boss battles are a one-on-one duel against Axel Gear, Sparkster’s hated rival; Axel has many of Sparkster’s abilities, including his energy beam and rocket pack-based attacks, but also circles the screen leaving damaging clouds in his wake and tosses grenades Sparkster’s way at any opportunity. These are some of the most fun bouts in the game, though, as it’s thrilling to go against Sparkster’s dark opposite; however, they can be frustrating when playing on “Hard” mode.

Sparkster’s rival, Axel Gear, and general Sweinhart’s gigantic minions offer a significant challenge.

The first true boss you’ll encounter is a giant mechanical forest shredder that tries to stamp, swipe, skewer, and explode you at every opportunity. The boss’s weak spot is the big, red metal “mask” on its head and you can choose to either rocket yourself into this or try to reflect the dynamite it tosses your way back at it but you’ll have to dodge its rockets and giant, scenery-destroying buzz saws as the fight progresses. Ulfgar the Merciless is a slightly less straight-forward opponent; impervious to your attacks, you must instead bait Ulfgar into charging head-first into blocks, knock dynamite back at him, or destroy the platforms he is standing on to damage him all while dodging his charging and melee attacks and the debris he causes to come crashing down from the ceiling. The final boss is a battle against General Sweinhart himself and is also, fittingly, the toughest and most frustrating battle of the game. Sweinhart hides inside a titanic mech shaped in his image for most of the battle, randomly trying to squash you (or cause bottomless spits to emerge) or fry you alive with his laser eyes. When comes close, you must quickly attack on his metal nostrils; take too long and he’ll spawn an enemy or three into the arena, which causes more headaches. Land three hits and the mech goes down, spitting Sweinhart out. Here’s where it gets really tricky; you have to dodge Sweinhart’s laser and bombs all while trying not to touch the electrified parts of his downed mech and using Sparkster’s rocket pack to knock Sweinhart from the sky in such a way that he gets fried instead. If you’re quick about this, you can significantly knock a lot of Sweinhart’s health off but it’s so fiddly and tricky to dodge his attacks and get him to land in the right place that you’ll have to contend with his giant mech at least two times in a standard battle. To make things worse, the game is really stingy with health in this battle; when fighting the other bosses, a couple of health power-ups are available in the arena but, here, it seems completely random when one will drop from the mech’s nostrils, making this far more frustrating than it needs to be at times.

Power-Ups and Bonuses:
In keeping with the first game, there’s not much on offer to help boost Sparkster’s performance throughout Rocket Knight; gems will add to your score to help you towards earning extra lives, 1-ups are occasionally found in stages, and certain stages will see you get an instant refill of your rocket fuel but that’s about it. There’s no invincibility or speed up, no shields or damage increasers, and no upgrades to get or worry about; it’s just you, your sword, your rocket pack, and your wits.

Additional Features:
As you might expect, Rocket Knight comes with a handful of Achievements for you to earn; sadly, there’s not very many and they’re not especially varied in their content. However, while clearing every stage and beating the game on “Normal” might be easy enough to get, others, like beating every stage below the par time or finishing the game on “Hard” mode, can be a mite trickier. You can select “Hard” mode at any time; however, staying in “Hard” mode is easier said than done. The only way to stop the game from automatically dropping the difficulty back to “Normal” is to land a special attack on each of the game’s bosses (such as damaging the forest shredder with dynamite or causing Axel to fly into his own bombs). Once you manage it, though, you unlock two additional skins: one that lets you play as Axel Gear (which is awesome) and the other is Gold Sparkster, which is also an even more challenging gameplay mode. You can input the famous Konami code on the title screen to unlock these at your leisure but I don’t think that allows you to earn the Achievements associated with them.

The Summary:
Rocket Knight is an extremely enjoyable, if all-too-brief, return to form for one of Konami’s more forgotten franchises. Fast paced and simple to play, there’s not much here to really test your skills or have you pulling your hair out as even the game’s trickier moments are fun to play through thanks to the appealing aesthetics of the game’s graphics and soundtrack. The controls are tight and responsive, stages are short bursts of action and enjoyment, and the gameplay is simple yet easy to get to grips with. It would have been nice to see the three original games included as unlockables or bonus content but maybe one day Konami will remember Sparkster and give all four of his titles a bit of a spruce up for a new generation.

My Rating:

Rating: 3 out of 5.

Pretty Good

What did you think of Rocket Knight? Were you happy to see Sparkster randomly return from obscurity or did you have issues with the game’s length and presentation? Did you ever play Rocket Knight Adventures on the Mega Drive or either of its sequels? If so, what did you think of them and would you like to see more games in the franchise? Either way, whatever your thoughts on Rocket Knight, leave a comment below.

Game Corner: Streets of Rage 4 (Xbox One)

GameCorner
SOR4Logo

Released: April 2020
Developer: Dotemu/Lizardcube/Guard Crush Games
Also Available For: Nintendo Switch, PC, PlayStation 4

The Background:
Back in the good old days of the mid-nineties, one of the most prominent genres in arcades was the sidescrolling beat-‘em-up. Simple, mind-numbing arcade action, these titles demanded little more from players than to hold right and mash buttons to take down waves of generic enemies and eat away at your hard-earned pocket money. Beat-‘em-ups were also quite prominent on home consoles; however, while these were mostly ports of arcade titles such as Final Fight (Capcom, 1989) or licensed titles such as Alien vs Predator (Jorudan, 1993) and Teenage Mutant Ninja Turtles IV: Turtles in Time (Konami, 1992), SEGA developed their own exclusive series of beat-‘em-up titles for their consoles and it was called Bare Knuckle Streets of Rage (SEGA, 1991 to 1994). The Streets of Rage trilogy was, functionally, a rip-off of the Final Fight series; players controlled a group of ex-cops and street wise vigilantes who patrolled the mean streets and defeated the many various henchmen of the Syndicate and its figurehead, Mr. X. The brainchild of Noriyoshi Ohba and Yuzo Koshiro, the Streets of Rage trilogy has subsequently been ported and re-released to other consoles through compilations and digital only services but has been largely absent from SEGA’s library for the better part of twenty-five years! The game’s characters didn’t even appear in SEGA’s crossover racing titles, for God’s sake! Streets of Rage 4 changed that, however. Developed by the same team who resurrected Wonder Boy from the depths of obscurity, the game boasts nearly a thousand different frames of animation for each of its characters, all of whom have been redesigned to resemble a comic book come to life. The return of Streets of Rage was a highly anticipated event for me, largely thanks to my love for the series, genre, and SEGA properties in general; for too long, SEGA have allowed their original properties to stagnate in obscurity and I can only hope that the overly positive reception of Streets of Rage 4 prompts them to dust off some of their other franchises and bring them back into prominence.

The Plot:
Ten years after defeating Mr. X and his criminal Syndicate in Streets of Rage 3 (SEGA, 1994), Wood Oak City falls under the control Mr. X’s children, the Y Twins, who use hypnotic sound waves to brainwash its citizens and only one team of ex-cop vigilantes are tough enough to stop their nefarious plans!

Gameplay:
Streets of Rage 4 is a sidescrolling beat-‘em-up that controls almost exactly as its predecessors; when taking on the game’s story campaign, you have four characters to select and unlock more as you progress through the story and earn Lifetime Points. Initially, your choices are limited to series staples Axel Stone and Blaze Fielding and newcomers Cherry Hunter and Floyd Iraia, Essentially, each character controls the same: X executes a fast attack that becomes a mini combo the more you mash it, Y unleashes a special attack at the cost of some health (though you can replenish your health by attacking enemies after unleashing this attack), A jumps (and you can jump attack), and you can attack enemies who try to flank you from behind by tapping the shoulder buttons. Get close to an enemy and you’ll grab them, which allows you to deal a grapple attack for massive damage or toss them at enemies as a ranged attack, which is always super satisfying. You can also pick up weapons, health, and other items with B and press Y and B together to unleash a screen-clearing special move if you have enough Stars.

SOR4Stats
Different characters have different stats and special moves that affect gameplay.

However, your character choice does affect gameplay quite a bit; Axel, for example, is an all-rounder but Blaze is much faster in her attacks and Floyd is the slower, more powerful of the four main characters. One thing you’ll immediately notice, and probably by annoyed by, is the lack of a dash function for a lot of the characters; the ability to dash is reserved for the likes of Cherry and the returning Adam Hunter, but every character can perform a rushing attack by tapping forwards twice and then hitting X. As you attack enemies, you’ll begin a combo chain; the longer you can maintain your combo without being hit, the higher your score will be. Thanks to the ability to attack enemies from behind, maintaining a good combo has never been easier (though I still find myself relying on the old jump attack approach) and raking up a high score is imperative to earning all of the game’s Achievements, receiving the higher ranks, and unlocking additional characters as your points are accumulated over time specifically to this end.

SOR4Combo
Keep attacking enemies to rack up an awesome combo and earn more points.

Streets of Rage 4 has multiple difficulty settings to choose from; if you pick “Easy”, you’ll start with more lives and enemies will be much less aggressive but, when you select harder difficulties, you’ll have less lives and have to contend with tougher enemies. As you make your way through the game’s missions, you can break open various crates or destroy objects in the environment to uncover food and cash; food replenishes your health and cash adds to your score. When you reach 10,000 points, you’ll earn an extra life but, if you lose all of your lives, you can retry the stage with some Assists, which grant you additional lives and Stars, to help you clear difficult stages.

Graphics and Sound:
Streets of Rage 4 is rendered with a fantastic comic book-like aesthetic; characters are large and full of life, sporting lots of little animations that add to their charm and personality. The game contains twelve stages, each one either lovingly recreated from the original games or heavily inspired by the first three games and other common beat-‘em-up tropes (yes, there is an elevator stage here; two, in fact!) You’ll begin on the mean streets of Wood Oak City and progress through a prison, the sewers, a pier, a biker bar, a dojo, and even battle on the roof of a train and in an airplane all before you reach Y Island, the game’s final stage, which naturally contains an elaborate castle.

SOR4Details
Stages are filled with character, cameos, and variety.

Stages are full of little details, elements, cameos, and intractable elements; you can break open doors, smash apart parts of the environment, and toss enemies into damaging hazards in almost every single one of the game’s stages and each stage is generally broken up into distinct areas to help keep things interesting. The Skytrain stage is the exception to this as you spend the entirety of the stage on top of the titular train, battling waves of enemies and jumping over obstacles as they speed at you.

SOR4Graphics
The game’s story is told through comic book-like cutscenes.

The game’s story is told through simple, partially animated comic book panels; there’s no voice acting to worry about here and all of the game’s cutscenes can be skipped but they are brief and appealing enough to sit through when you do feel like taking in the game’s simple, but effective, story. The game’s soundtrack, composed by Olivier Deriviere and other notable composers is suitably fitting, featuring a mixture of rock and techno, among others, to give each stage a rhythm and a theme. Even better, the game features the option to switch to a retro soundtrack that features music and sound effects from the first two Streets of Rage games, which is perfect when playing as the unlockable 16-bit style characters.

Enemies and Bosses:
As a mindless beat-‘em-up, Streets of Rage 4 features a number of enemies that get progressively harder as you advance through the game’s stages; enemies are recycled throughout the game, taking on different colour palettes and slightly tweaked attacks as you can, but are generally assorted enough to keep things interesting. You start off taking out generic, denim-clad street thugs like Galsia (who sometimes charge at you with knives and stabbing weapons) and Y. Signal (who sometimes charge at you with a slide tackle) but soon encounter Donovan (a skinhead who has an annoying tendency to uppercut you out of the air), Raven (a Muay Thai martial artists who leaps at you with knees and kicks), and the lackadaisical Francis (who always has his hands in his pockets but flies at you with whirlwind-like kicks) and their many rainbow-coloured variants. You’ll also take on charging biker girls, emo chicks who lob grenades, toxic sludge, and other items at you, and more rotund enemies like Big Ben who breathe fire or belly flop on to you. Some of the game’s more annoying enemies include Goro (not, not that Goro), a martial artist who can reduce your health to nothing by parrying your attacks and bashing you across the screen, suit-wearing bodyguard types who shoot at you with pistols, the whip-wielding girls, and the Goddamn cops! Cops can actually assist you in stages as they’ll attack your enemies, which is helpful, but they have a tendency to grab you so others can hit you and one particular variant loves to rush you and hit you with a taser which is extremely aggravating. You’ll also fight with riot cops who must have their energy shields broken before you can actually damage them, which can be tricky as you can’t rack up a combo of attacks at they can easily swat you away with their batons.

SOR4Bosses
These boss variants can affect a wide area with their attacks.

The game’s bosses are just as varied and interesting and each one has multiple attacks, phases, and issues to watch out for; like some enemies, bosses often have several invincibility frames and nigh-unavoidable rushing attacks and combos so it’s best to keep your distance, bring a weapon if you can, and make good, strategic use of any health items. The first boss you’ll encounter, Diva, isn’t too difficult as long as you get away when she’s charging her primary attack as it has a lot of range. Later on, you’ll have to fight two similarly-themed variants of Diva at the same time, which can be extremely annoying and difficult as, unlike other enemies and bosses, they don’t appear to be susceptible to their partner’s attacks. In this battle, I found it best to eliminate the flame-wielding Riha first as her attacks do more immediate damage.

SOR4Commish
The Commissioner doesn’t get any easier when he shows up as a support boss later on!

Stage two really ramps up the difficulty though as not only does it introduce those damnable taser-wielding cops, it also has you battling the Police Commissioner himself. The Commissioner dashes across the screen and charges up a brutal combo and grab attack that can deal heavy damage and he’s just as annoying when he is brought in as support for another of the game’s bosses, Estel, in the Skytrain stage. You’ll battle Estel twice throughout the course of the game and she’s no pushover either as she attacks with bicycle-like kicks, calls in air support, and tosses grenades at you; the key is to attack and then jump away to avoid her attacks and throw her grenades right back at her and try to avoid the Commissioner in the Skytrain fight as the stage will be complete as soon as Estel goes down.

SOR4Bosses2
Shiva and Max also make welcome returns.

You’ll also battle Shiva, a boss from the original games, who likes to teleport around the stage and conjure shadow versions of himself, a particularly annoying martial artist at the biker bar, and even a brainwashed version of series protagonist Max Thunder. This latter battle can be particularly gruelling thanks to Max’s invincibility frames, dangerous wrestling moves, and the fact that he doesn’t really get stunned by your attacks. DJ K-Washi can also be a trying boss battle as you must not only avoid his many and varied projectiles and goons but also break through his protective shield before you can whittle down his health bar.

SOR4YTwins
After besting the Y Twins individually, and together, you’ll have to contend with their giant mech!

The game’s primary antagonists, the Y Twins, are fought multiple times; you’ll face Mr. Y in the Airplane stage (where he attacks with an Uzi (similar to his father), a bazooka, and grenades) and Ms. Y (who attacks with a rapier-like sword) on Y Island. Of the two individual fights, Mr. Y is easily the more troublesome thanks to his ranged attacks but, once you defeat Ms. Y, you’ll then have to face both bosses at the same time. Once you whittle one of them down to about half of their health bar, they’ll leap into a massive spider-like mech and try to crush you while their sibling continues to press the attack. In this final battle, I find it easier to take out Mr. Y first as his bullets are much harder to avoid; take him down to half health and then attack the mech as and when you can but be sure to also attack the remaining Y twin as, if you deplete the health of the sibling in the mech to nothing, the remaining twin will jump in the mech so it’s much easier to take the remaining sibling out of the equation so you can concentrate on disposing of the mech.

Power-Ups and Bonuses:
The only real power-up you can find in Streets of Rage 4 is the odd Star hidden throughout the game’s stages; otherwise, you’ll mostly be picking up cash for points, health, or a number of weapons throughout the course of the game. These weapons are finite, meaning they will break or disappear after a few hits, but are great for wiping out groups of enemies or throwing as a ranged attack. These weapons range from things such as knives and baseball bats to sledgehammers, swords, and even a razor-sharp boomerang. Often, enemies will be wielding these weapons and can pick them up to use them against you, as well, but you can catch weapons that are thrown at you with a well-timed press of the B button and using an enemy’s weapons against them is imperative to surviving against some of the game’s tougher enemies. Additionally, there are various intractable parts of the environment that you can use to your advantage; you can attack a massive wrecking ball to take out enemies, cause barrels to explode, and toss enemies down pits or cause them to walk into toxic fumes or exposed electrical wires. As helpful as all of these elements are, however, these environmental hazards can also damage you as well so it’s best to keep your distance.

Additional Features:
Streets of Rage 4 features a number of Achievements for you to earn; you’ll get these for clearing the Story mode as each of the available characters, completing modes on different difficulty settings, and for performing certain actions (such as killing three enemies with one explosive barrel or causing a chandelier to kill an enemy). When you first play Streets of Rage 4, your gameplay options are surprisingly limited; you can only choose to play Story or Battle mode and must unlock the Stage Select and Boss Rush mode by clearing the Arcade mode once. I actually like this; so often these days, games come with everything either automatically available or hidden behind downloadable content so it’s nice to actually unlock modes and characters through good, old-fashioned gameplay. Earn enough points across each of the game’s modes and you’ll unlock 16-bit versions of the game’s characters who look and play exactly as they did in the original videogames (sadly, Roo is not playable this time around, though). There are also a lot of options available to you in Streets of Rage 4, ranging from the usual (difficulty selection, brightness and volume customisation and the like) and the unique as you can customise how health-restoring food appears onscreen and switch to the retro soundtrack if you wish. If you explore your environments well enough (or, more specifically, attack arcade machines with a taser), you’ll also find some hidden levels ripped straight from the original Streets of Rage trilogy that pit you against a classic boss character from the first three games and net you some bonus points. If you bought the physical version of the game, as I did, you also get a nifty little artbook and a keyring, which is a nice touch, and Streets of Rage 4 can also be played with friends; the game allows couch co-op for up to four players but online play is limited to just two. However, you need to keep a safe distance when playing with a friend in co-op as you can damage each other in true old school beat-‘em-up fashion, necessitating the need to pick to an area or section of the screen and stick to it.

SOR4Banner

The Summary:
Streets of Rage 4 is a fantastic love letter to everything that was so great about sidescrolling beat-‘em-ups. The genre has sadly fallen out of favour in recent years and I really don’t know why; it’s simple, fast-paced, arcade-style fun that is easy to pick up and play and waste a few fun-filled hours on. Arguably, Streets of Rage has never looked or played better; the game’s cartoony aesthetic, multiple nods and cameos and call-backs to the original games, and myriad of features make the game extremely accessible and fun to play. Some of the enemies and bosses can be annoying and cheap at times but, once you play through the game a few times, it’s easy to see their patterns and avoid their attacks. Hopefully, the release of Streets of Rage 4 will inspire SEGA to outsource some of their other franchises so we can see the same love, care, and attention afforded to this once long-dead series applied to other dormant SEGA franchises.

My Rating:

Rating: 5 out of 5.

Fantastic

What are your thoughts on Streets of Rage 4? Do you feel it lives up to the legacy of its predecessors and old school, arcade-style, sidescrolling beat-‘em-ups? Which Streets of Rage game or character is your favourite? What SEGA property would you like to see get brought back in glorious HD on modern consoles? Whatever you think about Streets of Rage 4, or the series in general, drop a comment below.