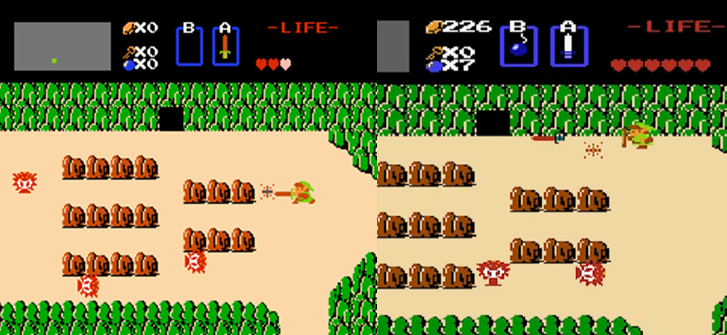
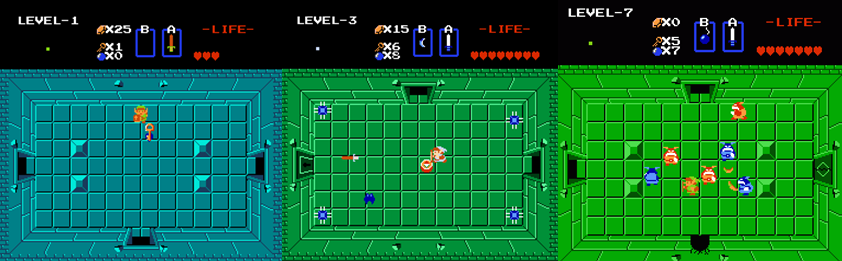
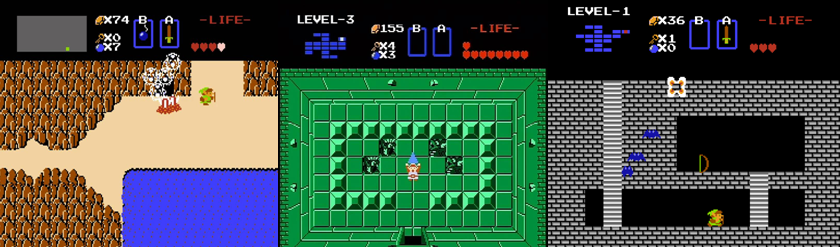
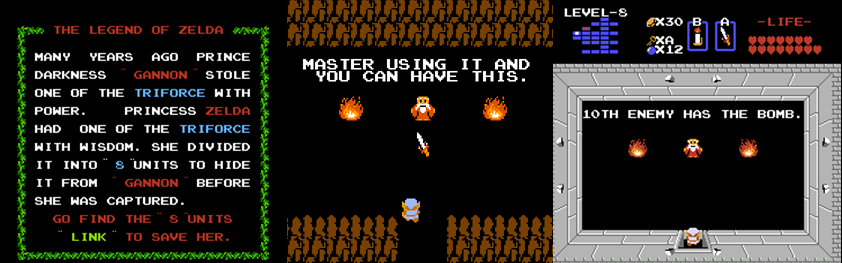
On 21 February 1986, The Legend of Zelda (Nintendo EAD, 1986) was first released in Japan. The creation of legendary game designer Shigeru Miyamoto and Takashi Tezuka, The Legend of Zelda launched one of Nintendo’s most popular franchises, with its silent protagonist, Link, and his vast fantasy world of sword and sorcery not only enduring over time but constantly evolving and improving as the series progressed.


Released: 20 September 2019
Originally Released: 6 June 1993
Developer: Grezzo
Original Developer: Nintendo EAD
Also Available For: Game Boy, Game Boy Color, Nintendo 3DS Virtual Console (Original/DX release)
The Background:
As some of you may be aware, my very first introduction to the Legend of Zelda series (Nintendo EAD/Various, 1986) was with The Legend of Zelda: Link’s Awakening (ibid, 1993) on the original Game Boy. Beginning as an unsanctioned side project of programmer Kazuaki Morita and evolving from a desire to port the incredibly successful Legend of Zelda: A Link to the Past (ibid, 1991), it was genuinely impressive how the developers were able to cram so much into such a small cartridge. Link’s Awakening was critically acclaimed and is widely considered to be one of the best Game Boy titles ever released. The game received a slightly enhanced colour upgrade on the Game Boy Color in 1998, which was also received very well, but I was stunned when Nintendo announced an all-new, high definition remake for the Switch in 2019 as the game always felt like more of a cult favourite compared to other mainstream Zelda titles. The Switch remake of Link’s Awakening was spearheaded by Grezzo, the development team who had ported and enhanced Zelda’s Nintendo 64 efforts to the Nintendo 3DS, and the team immediately sought to separate the game from other Zelda titles by not only returning to the classic top-down perspective but adopting a quasi-isometric, diorama-inspired look that made the entire game appear to be constructed out of plasticine figures. Upon release, Link’s Awakening was met with glowing reviews as critics praised the visual presentation, music, and quality of life improvements; it was also the fastest-selling Switch game of 2019 and scored very highly across the board, assuring that Link’s Awakening was finally recognised as one of the best Zelda titles out there.
The Plot:
After defeating the dark wizard Ganon and rescuing Princess Zelda, Link embarks on a quest across the sea in search of enlightenment and ends up caught in a terrible storm and washing up on the shores of the mysterious Koholint Island. Link finds the island tormented by monsters who are the creation of the malevolent “Shadow Nightmares”, a dark entity who will do anything to keep the legendary Wind Fish from waking. However, Link takes up his sword and shield to oppose Nightmare, only to discover that not everything is as it seems on the all-too-familiar Koholint Island…
Gameplay:
The Legend of Zelda: Link’s Awakening is a top-down (well, more like a slightly isometric) action/adventure role-playing title in which players are placed into the familiar green hat and tunic of Link, the long-running protagonist of the series. As is the case in many Zelda titles, you can customise Link’s name at the file select screen; you get three save files (and a temporary autosave file) that you can personalise, and characters will refer to you by that name throughout the story. For those keeping track, this is the same Link who starred in A Link to the Past, making Link’s Awakening one of the rare Zelda titles to feature the same Link, and which possibly explains the many similarities between the two titles. Link begins the game with three hearts representing his health and stripped of his sword, shield, and all of his recognisable weapons but is quickly provided with his trusty shield, with is mapped to the ZR button and allows him to block incoming attacks and push through certain enemies. You’re then tasked with using the shield to head down to the beach and retrieve your sword, which is mapped to the B button; you can tap B to swipe at enemies or hold the button to charge up Link’s trademark Spin Attack, which sees him spin around in a circle and damage any nearby enemies once the button is released. Link can also pick up and throw certain items and objects (such as Cukkos and, later, pots), using the A button but he’ll need to journey to a whopping nine dungeons to retrieve the rest of his gear and further explore the mysterious Koholint Island.

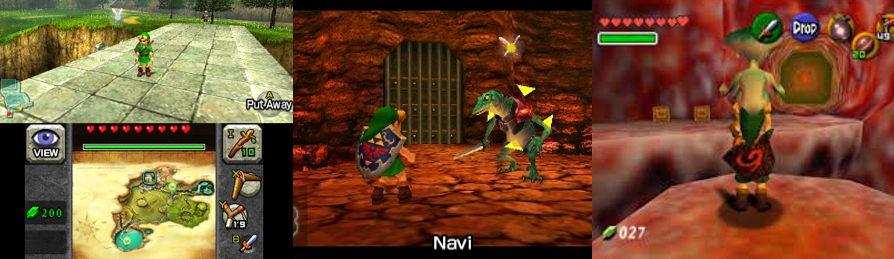
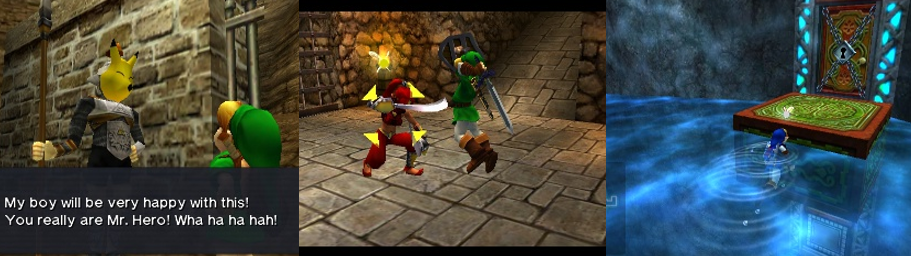
Along the way, Link will encounter a number of non-playable characters (NPCs), most of whom offer hints about where to go next, ask for specific items to be brought to them as part of the elaborate trading sequence, or comment on the events happening in the game or on the island in general. Some will actually follow you around, which becomes necessary to enter specific dungeons; a blue-hued rooster will follow you and allow you to fly over gaps to reach the Eagle’s Tower, for example, a ghost will start to follow you and eventually gift you an empty bottle, and Link’s saviour, Marin, will accompany him to move a walrus out of the way and let him access Yarna Desert. Not all NPCs are entirely harmless, though; attack Cukkos or dogs and they’ll hit you back, you’ll need to use a Chain Chomp to navigate through the Gopongo Swamp, and the shopkeeper will electrocute you to death and you’ll be branded a “THIEF” for the rest of the game if you steal from him. As mentioned, Link’s health is measured in hearts; as you explore, you may find Heart Pieces hidden in caves, buried underground, under water, or generally strewn around the environment. Collect four of these, and your maximum health will be refilled, and you’ll automatically gain an extra heart after defeating each dungeon’s Nightmare boss. Unlike a number of other Zelda games, players don’t need to worry about a magic gauge in Link’s Awakening; instead, there’s a greater emphasis on collecting Rupees, the currency in the Zelda franchise, in order to purchase additional items, objects for the trading sequence, and even collectibles such as Heart Pieces. Rupees are primarily found by slashing grass, defeating enemies, digging in the ground, and opening treasure chests and Link appears to be able to hold 9999 Rupees, so you don’t need to worry about upgrading his wallet or anything. I tend to spend my time in Zelda games furiously swiping at grass and defeating onscreen enemies, so I’m used to collecting as many Rupees as possible, but other players may find it a bit tedious, though it’s absolutely necessary if you want to progress because you need the shovel and the bow in order to access later areas and you’ll never collect everything the game has to offer without paying money for some of them first.
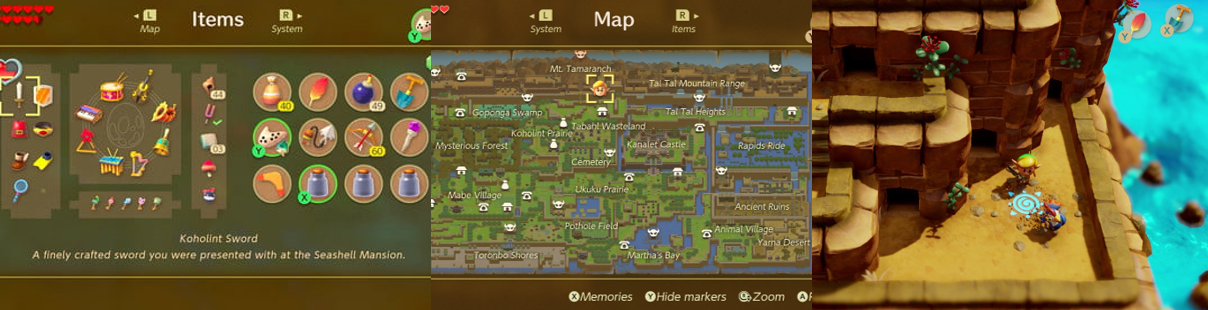
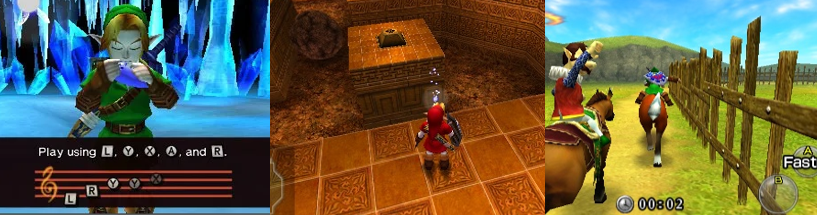
You can jump to the equipment subscreen at any time with the + button; here, you can view key items you’ve collected and assign two items from your inventory to the X and Y buttons, save or load your game, or flick over to the map screen (which can also be accessed with -) to plot a route to your next destination. The map is initially shrouded in fog but more of it is revealed as you explore, and you can use pins in to set reminders for yourself; Link can also review “memories” from this screen, which allow you to re-read advice from the mysterious Owl and certain previous conversations so you know where you’ve been and get some idea of where to go next. The Owl will appear in key areas across the overworld offering hints and encouragement, and you can call Ulrira in Mabe Village for further hints, but you’re basically free to explore at your leisure. You won’t be able to access certain areas without weapons or items from dungeons, though, and generally you need to tackle the dungeons in a specific order so that you can access the next, but your journey across Koholint Island eventually gets easier as you defeat the Nightmare bosses. Initially, you won’t be able to lift rocks, clear gaps, or swim, for example, but you’ll acquire the tools necessary to overcome these obstacles in the dungeons; similarly, you can activate fast travel warp points and, later, learn a song for your ocarina that will enable you to use these freely.
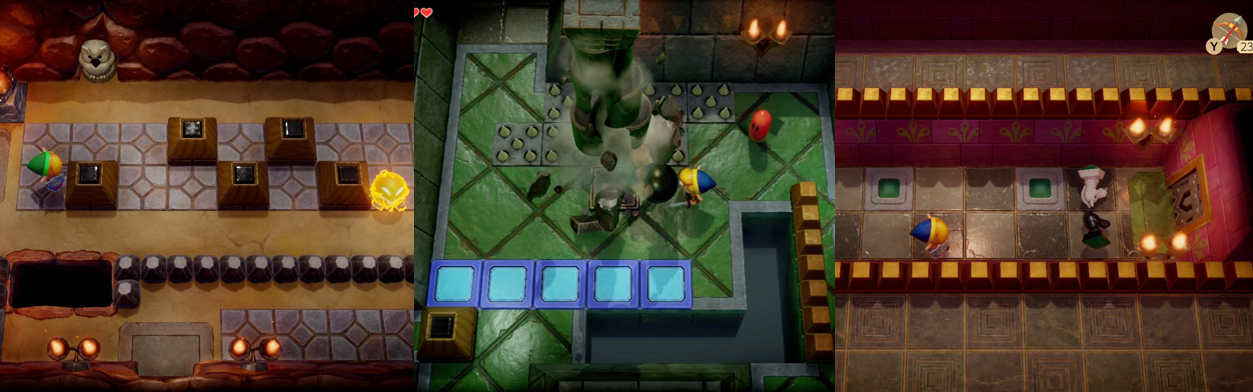
Still, the game doesn’t make too much of an effort to hold your hand and it can be tricky to figure out where to go next, meaning that you have to be a little proactive to figure things out and experiment a bit. This is especially true in the game’s dungeons, which can be quite labyrinthine and see you travelling between different floors and acquiring small keys to unlock doors. Each dungeon has a compass and a map that will greatly assist with your progress; these allow you to see all possible routes and even indicate when there’s a chest or item in a room, but they’re often locked behind a series of puzzles. These may be as simple as stepping or pushing a block on a switch, pulling a pulley, pushing blocks together, or defeating all onscreen enemies but they get tougher as the game progresses. Sometimes you’ll have to defeat enemies in a specific order, or guide a pathmaker around to create temporary paths, or pick up and throw a weighted ball into columns, or toss some chess pieces in just the right way so they land in specific spots (a very frustrating mechanic, for sure). Sometimes, rooms and hidden passageways are hidden behind breakable walls (which must be exploded with bombs) or rocks (which must be lifted up) both in dungeons and on the overworld; other times, you’ll need to hunt down specific items or work through a looping maze in the right order, and you can even increase the game’s challenge by playing in “Hero” mode from the file select screen (which sees you taking twice as much damage and losing the benefit of enemies dropping hearts).
Graphics and Sound:
Honestly, screenshots do not do this game justice; the plastic figurine look used to bring this world to life is absolutely amazing and I find it such an adorable, whimsical stylistic choice that really makes everything vivid and charming to behold. The soundtrack is equally imaginative, composed primarily of woodwind instruments and flutes and such, and adds a lot of appeal to the game and even features a bit of the classic chip-tune music in the credits, which was a nice touch. You know things are kicking up a notch after Link acquires his sword and Koji Kondo’s iconic Zelda theme kicks in, but each area is brought to life as much by the music as the attractive visual style of the game and all of the characters and models are full of visual quirks and charming little animations that just make the game a joy to play and look at.
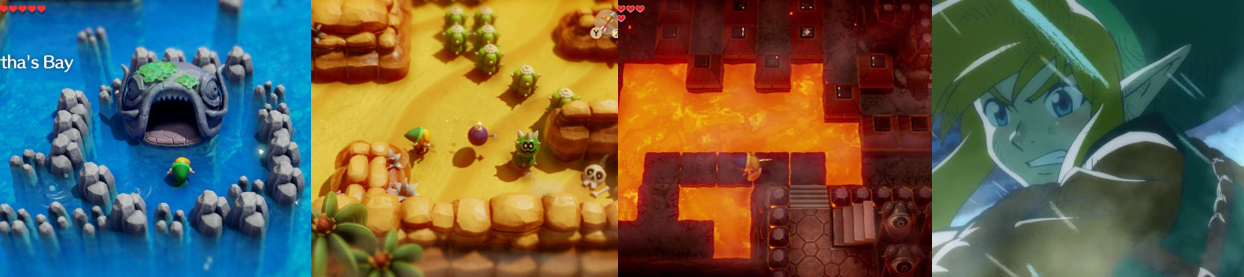
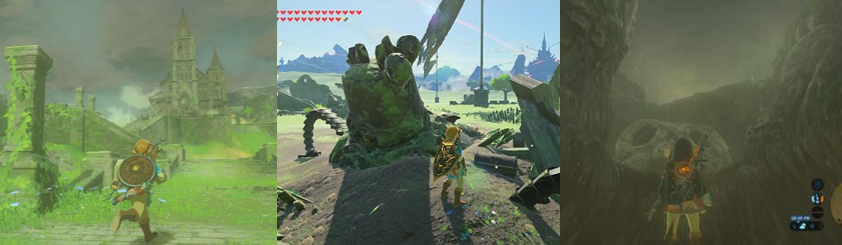
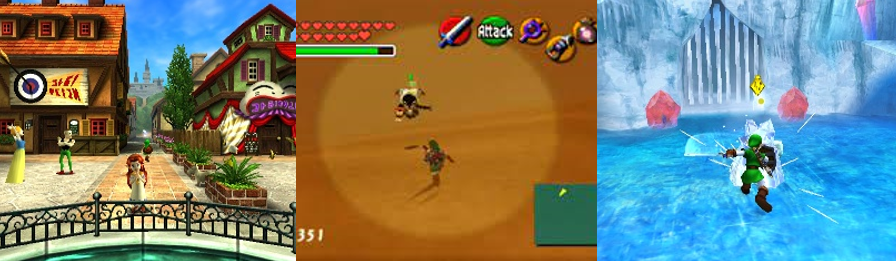
Koholint Island is quite a large area for Link to explore and full of many of the usual Zelda environments and trappings; he begins in a quiet little village and journeys to a desert, a crumbling tower, a boulder-strewn mountain top, and a desolate swamp while traversing a vast field peppered with enemies, obstacles, and such sights as a graveyard, bridges, a castle, and a foggy forest. Contrary to the original title, and other top-down Zelda titles at the time, the entire overworld is connected without any screen transitions unless you enter a building or cave, which really helps speed traversal up and makes the world feel interconnected and alive. Some NPCs will relocate as the story progresses, which is fun, and you’ll often be required to take the long way around to reach some of the dungeons (especially in the first instance), though the interiors of the dungeons are often somewhat interchangeable. This isn’t always the case, of course; Bottle Grotto (fittingly) contains a lot of bottles), Catfish’s Maw and Angler’s Tunnel veer more towards water elements and puzzles, and Turtle Rock features and abundance of lava, and you’ll notice more and more maze-like elements as the difficulty of the dungeons progresses. Every dungeon also features at least one 2.5D sidescrolling area that sees you using ladders, moving platforms, and the Roc’s Feather to hop around in short platforming sections and the game is opened and ended by some beautiful (if very brief) anime cutscenes, and while there is no voice acting, sound bites and voice clips accompany both Link’s attacks and reactions and the in-game text boxes.
Enemies and Bosses:
Koholint Island is inhabited by a number of recognisable Zelda enemies and traps that will constantly try to impede Link’s quest; you’ll encounter stone-spitting Octorocs, spider-like Tektites, and annoying Zora’s will pop out of water to fire projectiles at you. Zols often appear in dungeons, with the red variants multiplying with each hit, bat-like Keese and the snake-like Ropes often appear in caves, and you’ll even encounter a number of enemies that can’t be traditionally bested. Most of your enemies can be dispatched with just one swipe of your sword, but others require a bit more strategy: the Moblins and Darknuts will defend against your attacks with their shields and must be stunned by deflecting their sword swipes, Spiny Beetles and Helmasaurs must have their rocks and masks removed to better attack them, and the Pols Voice can’t be damaged by your sword at all. Oddly, Link’s Awakening contains a number of enemies from the Super Mario franchise (Various, 1983 to present): Thwomps, Bob-ombs, Goombas, and Shy Guys are all over the place, and you’ll even come across an evil version of Kirby!

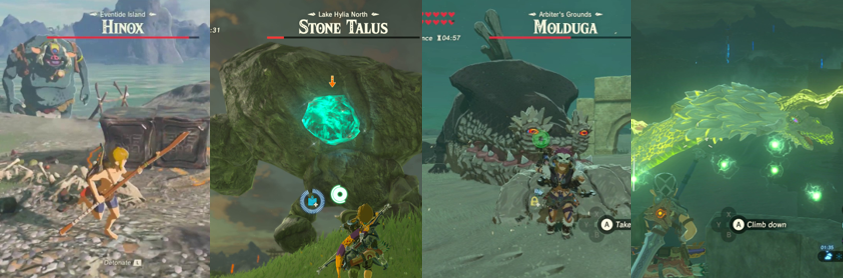
Each dungeon, and certain other areas in the game, features at least one mini boss; defeating these will activate a warp point in the dungeon and often leads to you acquiring the weapon or item necessary to defeating the Nightmare boss. These range from larger versions of regular enemies, such as the Moblin Chief and Armos Knight, and familiar Zelda enemies like the Master Stalfos (who must be damaged with bombs when reduced to a pile of bones) and Gohma (who can only be damaged by firing arrows into their open eyes. The most recurring of these is the golem-like Hinox, which will grapple you or throw bombs your way, but are easily defeated with your trusty sword, and you’ll sometimes have to battle more than one in the later dungeons. Often, these require a little more strategy than the average enemy; you need to jump over the Spike Roller’s spiked pole to get to him, toss bombs into the Dodongo Snakes’ mouths, and can only defeat Rover by throwing its weighted ball back at it, but you’re usually rewarded with a life-restoring fairy for your efforts (to say nothing of the extra weapons).

Each dungeon contains a magical instrument that is guarded by one of eight Nightmares; often, the key to defeating the Nightmare will lie in the weapon you acquire in that dungeon, and each one gets progressively difficult as you journey on. The first boss, Moldorm, is a walk in the park: this worm-like creature randomly pulsates around the enclosed arena and can only be hurt by hitting the glowing weak spot on its tail, which will send it into a frenzy and cause it to become more and more aggressive as the fight progresses. In the Bottle Grotto, you’ll battle the clown-like Genie, who tosses fireballs at you and hides in his bottle to avoid your attacks. You’ll need to grab the bottle and throw it against the wall to crack and, eventually break it, then swipe at Genie when it becomes corporeal to finish it off. The Slime Eye at the end of Key Cavern requires use of the Pegasus Boots to split it in two so you can swipe at its eye, but the two gooey monsters will drop down from the ceiling to either land on you or stun you with a shockwave, making them tricky to land a hit on at times. The fearsome Angler Fish is fought in a 2.5D perspective and underwater, meaning that your movements are as limited as your attack options; you’ll need to swim your way past the debris it drops from the ceiling, fending off its smaller minions as you try and swipe at the glowing tendril on its head.

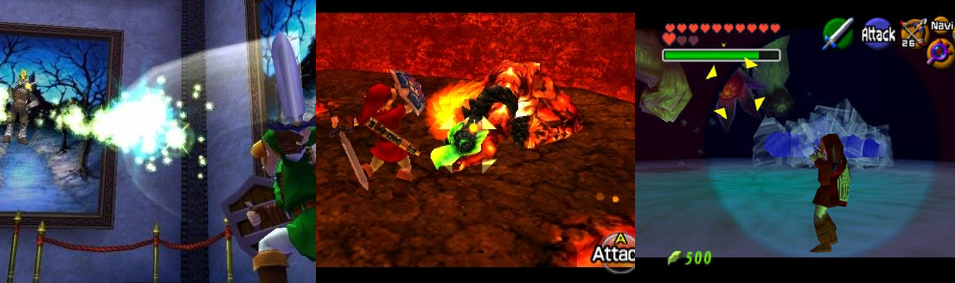
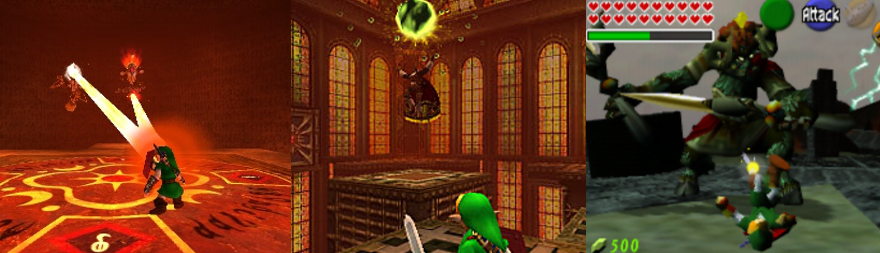
Probably one of the more difficult bosses for me was the Slime Eel; this fight is complicated by a mace-like tentacle in the middle of the stage that you must jump over as you try and snag the boss’s head with your hookshot and expose its weak spot. Facade can also be a bit tricky; this gigantic face leers at you from the floor and causes tiles and pots to fly at you from all around the room and can only be damaged by placing bombs on it while watching for the holes it causes to form in the arena. When you finally manage to reach the top of Eagle’s Tower (easily one of the game’s more obtuse and annoying dungeons), you’ll battle the Evil Eagle; this giant bird hovers just out of reach and tries to skewer you with feathers, charges at you with its beak, and flaps its wings to try and force you from the platform and to the spikes below. Thankfully, it’s easy enough to shield against his attacks and toss your boomerang up at him, or fire off arrows and swipe at him as he flies past trying to attack you. The final dungeon is guarded by Hot Head, an anthropomorphic fireball that emerges from a lava pit to blast molten rock at you, and which can only be damaged with the Magic Rod. Once you’ve blasted away its outer shell, it’ll bounce all around the arena trying to pummel you to death, but is easily finished off if you keep your wits about you.

Once you’ve acquired all of the magical instruments, you can scale Mount Tamaranch to play the “Ballad of the Wind Fish” on your ocarina and gain access to the Wind Fish’s Egg; however, this final dungeon is a looping maze that you’ll never be able to navigate without completing the trading sequence and acquiring the magnifying glass to read a book in the Mabe Village library that has directions to the final boss. Shadow Nightmares is easily, and fittingly, the toughest boss in the game and boasts six distinct forms: the first is a giant Zol that bounces and materialises around the arena and can only be damaged by sprinkling Magic Powder on it. Next, the boss assumes the form of Araghim from A Link to the Past and is battled in very much the same way; Araghim teleports around and fires two types of projectiles at you, one that explodes in your face and one a fireball that can be smacked back to damage him. Afterwards, the boss becomes a shadow version of Moldorm, which is a bit of a let-down, but it more than makes up for it by assuming the form of Ganon! Hands down the hardest fight in the game, Ganon twirls his trident and fires flaming bats at you before tossing his trident your way, giving you a very limited window to loop around behind him or charge into him with your sword. The next form is simply a Lanmola that cannot be damaged by your sword but only needs to be hit once with another weapon to force the boss into its final, truest form: Dethl. A large, shadow, pulsating mass sporting two mace-like tentacles, Dethl isn’t really too difficult to defeat; simply jump over its arms and fire arrows into its big green eye when it opens and the Shadow Nightmares will finally be destroyed, the Wind Fish will awaken, and Koholint Island will disappear forever.
Power-Ups and Bonuses:
As mentioned, it doesn’t take too long for Link to reacquire his traditional sword and shield, and as you progress through the game’s dungeons you’ll acquire a number of recognisable weapons and items to add to Link’s arsenal, such as the Power Bracelet to lift items (and the Powerful Bracelet to lift even larger items), the hookshot to stun enemies from a distance and cross certain gaps using stones and other specific parts of the environment, bombs to blast open walls and defeat groups of enemies, bottles to store life-restoring fairies, and an ocarina that is useful for accessing certain areas, warping across the map, and accessing the final boss.

Other pivotal items include the shovel (which is necessary for digging up collectibles), the traditional boomerang (which can only be acquired through the trading sequence), and the bow (which must be purchased). Magic Powder allows you to damage certain enemies and light fires (but becomes completely redundant once you acquire the Magic Rod), you can fire bomb arrows by equipping the bow and the bombs at the same times, the Mirror Shield lets you reflect lasers and certain projectiles, and the Roc’s Feather allows you to jump. The Pegasus Boots let you charge ahead (and can be used in conjunction with the Roc’s Feather to clear longer gaps), the flippers let you swim and dive under water, and you can sometimes find Secret Medicine to restore your health upon death. Additionally, you’ll sometimes come across temporary power-ups: the Guardian Acorn and Piece of Power will temporarily reduce the amount of damage you take and increase your attack power, respectively, which can be super useful in certain situations.
Additional Features:
There are thirty-two pieces of heart to find scattered throughout Koholint Island’s overworld, which will increase your health up to twenty hearts; sometimes you’ll dig these up or knock them out of trees, other times you can buy or find them in hidden caves or under water and such, and other times you can play for them in mini games. These include a mechanical claw game and a fishing game, both found in Mabe Village and costing you some Rupees to play; manoeuvring the claw and landing a big fish can be a bit tricky, but it’ll grant you an extra bottle, Heart Piece, ammo and Rupees, items for the trading sequence and a number of Secret Seashells. There are fifty Secret Seashells to find, and it’s well worth your time seeking them out with your shovel, lifting rocks, and exploring with your different weapons and items as they can be cashed in at the Seashell Mansion to gift you with a sensor that alerts you when they’re closer and a more powerful sword that fires out an energy beam when your hearts are full. As alluded to, there’s a lengthy trading sequence that’s necessary to acquire the boomerang and navigate to the final boss; this sees you acquiring specific key items (such as bananas, a Yoshi doll, and a magnifying lens) and bringing them to specific NPCs to swap for another item, which is a fun little distraction that gives you an excuse to talk to as many characters as possible.

There are also figurines to collect and place on certain stands in houses (though I was only able to find two) and the Color Dungeon from the GameBoy Color version is also present. This optional, additional dungeon can be missed but it’s well worth your time seeking out as, once you best its enemies and puzzles, and defeat the gigantic Hardhit Beetle, you’ll be able to pick from either a blue or red runic to increase your defence or attack power, respectively (personally, I chose the red tunic as I’m a more offensive player). Finally, there’s a new addition to the game in the form of Chamber Stones; these must be brought to Dampé, who will challenge you to create custom dungeons by mixing and matching rooms, puzzles, sub-bosses, and bosses from the game’s existing dungeons. Each time you beat a regular dungeon, and Dampé’s tutorials, you’ll gain additional Chamber Stones, +Effect Panels, and collectibles and it’s quite a fun little addition since you can create your own dungeons to play through and challenge others to complete.

The Summary:
Even after all this time, I still adore The Legend of Zelda: Link’s Awakening; it was the first Zelda game I ever played and owned, and I used to enjoy playing through it on the old GameBoy brick even before I picked up the Virtual Console version of the GameBoy Color deluxe version, so I was super excited to hear that it was being completely rebuilt for the Nintendo Switch. This new version is everything the original game was but rendered in such gorgeous detail that it’s so much more than just a throwback to a simpler time of Zelda videogames; the plastic figurine aesthetic is charming and whimsical and I’d love to see it evoked for future recreations of older Zelda titles, and it may very well be the most visually appealing game I’ve played on the Nintendo Switch so far (and yes, that includes it’s bigger and more expansive cousin). It’s amazing how big Link’s Awakening is; it definitely feels like there’s more in this version of the game, but the developers didn’t add any new dungeons or areas or anything (which is a bit of a shame, to be honest). It’s just that big of a game, which just makes the original seem even more impressive in hindsight. There’s loads to do and keep you busy here, from backtracking to previous areas, to hunting down collectibles, to completing the trading sequence and, of course, tackling the game’s dungeons, and the game is just the right level of challenge; some puzzles and dungeons are trickier and tougher than others, but that’s par for the course of a Zelda title. Honestly, it’s worth picking up for the gorgeous graphical style and music as much as the engaging, classic Zelda gameplay and I can only hope that Nintendo revisit some of Link’s earlier adventures in the same way going forward.
My Rating:
Fantastic
Have you played this new version of The Legend of Zelda: Link’s Awakening? How do you feel it compares to the original and its colourised counterpart and where would you rank it amongst all the other Zelda titles, specifically the 2D adventures? Were you a fan of the more surreal narrative elements in the game, and the difficulty and challenge it offered? Which of the dungeons and Nightmares was your most, or least, favourite? Were you able to navigate the Wind Fish’s Egg without directions? Did you ever steal from the shopkeeper? Were you able to find all of the Secret Seashells? Which Zelda game is your favourite and how are you celebrating the franchise today? Whatever your thoughts on Link’s Awakening, sign up to leave a comment below, or let me know on my social media.


You must be logged in to post a comment.