
On 21 February 1986, The Legend of Zelda (Nintendo EAD, 1986) was first released in Japan. The creation of legendary game designer Shigeru Miyamoto and Takashi Tezuka, The Legend of Zelda launched one of Nintendo’s most popular franchises. This year, I’ve been dedicating every Friday to Nintendo’s most famous silent protagonist, Link and his vast and enduring fantasy world of sword and sorcery.


Released: 18 May 2018
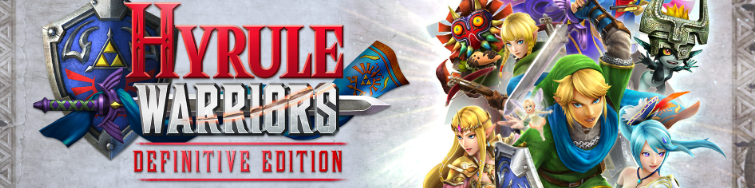
Originally Released: 14 August 2014
Developer: Omega Force / Team Ninja
Also Available For: Nintendo Wii U (Original Version), Nintendo 3DS (Legends Version)
The Background:
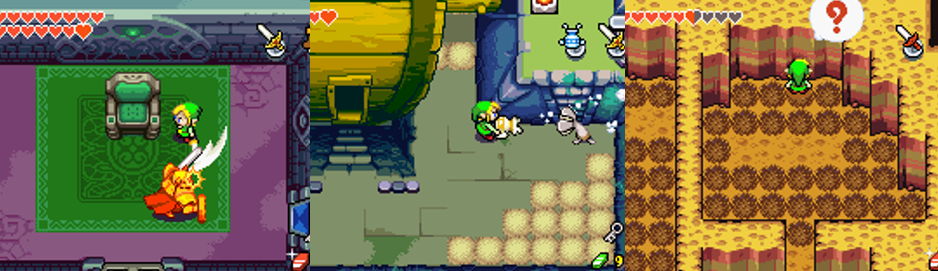
The Legend of Zelda has consistently been one of Nintendo’s most popular, celebrated, and successful franchises and one of the reasons for this is the consistent quality of its games. While Zelda titles have often included unique gimmicks to separate them from each other, the tried-and-true sword and sorcery formula has remained present throughout the series. Indeed, Nintendo’s few attempts at veering away from this formula have resulted in mediocrity, at best, and ridicule, at worst. It was therefore surprisingly (to me, at least) when Nintendo joined forces with Koei Tecmo to produce a spin-off game, one that incorporated the chaotic hack-and-slash action of Koei Tecmo’s popular Dynasty Warriors series (Omega Force, 1997 to 2018). Long-time Zelda producer, Eiji Aonuma jumped at the chance to do something new with the franchise and the game pulled inspirations from across the entire Zelda series and eventually achieved Koei Tecmo’s president Yoichi Erikawa’s dream of selling of a million copies. Initially released on the Wii U and bolstered by a slew of downloadable content (including a previously cut female version of Link), Hyrule Warriors garnered positive reviews, with critics praising the merging of the two franchises while criticising the repetitive gameplay. In 2016, the game was ported to the Nintendo 3DS as Hyrule Warriors Legends; it included all previous downloadable content, a new Fairy system, and new gear for existing characters as well as a code to upload these additions to the Wii U version. Although reviews still praised the port, the limitations of the 3DS hardware (even when playing on the more powerful New Nintendo 3DS) were highlighted as negatives. Regardless, a newer port later came to the Nintendo Switch; billed as the Definitive Edition, this version included everything from the previous games alongside some new costumes. It was also received much more favourably, perhaps contributing to the release of a sequel title in 2020.
The Plot:
In an alternative timeline, the sorceress Cia seeks to resurrect the King of Evil, Ganon, by waging war against the kingdom of Hyrule. To defend her kingdom, Princess Zelda recruits lowly knight Link, the bearer of the Triforce of Courage, to amass an army of familiar faces against Ganon’s dark forces.
Gameplay and Power-Ups:
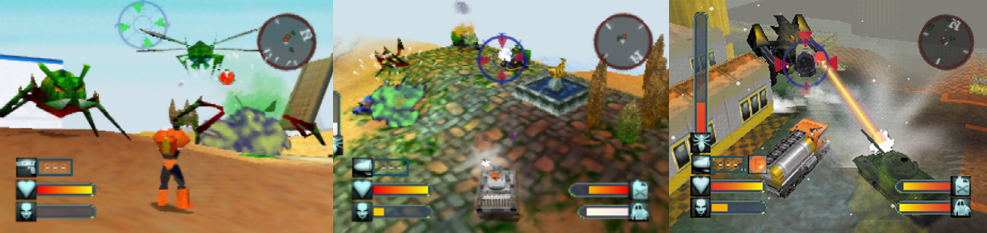
This is the Definitive Edition of Hyrule Warriors, a third-person hack-and-slash action//adventure in which players take control of Link (and many other new and familiar faces from across the Legend of Zelda franchise) to plough their way through seemingly endless hordes of enemies, many of them also series staples. Although each character has their own strengths and weaknesses, they share similar attributes, abilities, and control methods, with a couple of exceptions. Players can fully customise their control scheme but, by default, you’ll throw a regular attack with Y, a combo attack with X, a special attack (when your Special Attack Gauge is full) with A, and dodge with B. You can string together presses of Y and end them with X to pull off combos and character-specific special attacks (such as Link’s trademark sword spin), with more being unlocked as you defeat enemies, earn Materials, and level-up. I preferred to mix these buttons up, assigning B to the regular attack, special to Y, combo to X, and dodge to A but it’s entirely up to you. L targets nearby enemies (an occasionally finnicky system that can keep you from targeting the right enemy if larger bosses are around), ZL guards, R unleashes a powerful “Focus Spirit” attack when the Magic Power meter is full, and ZR lets you use sub-items, such as bombs, arrows, or bottles to restore or buff your character. Later on, if you have a Fairy in a bottle, you can press in the right stick to activate Fairy Magic. You can also switch items by pressing left and right on the directional buttons, or switch characters by pressing up and down. Characters are largely differentiated by their stats; Darunia and Impa, for example, are slower but more powerful characters compared to Sheik and Ruto. Their weapons are also a factor, with Wizzro favouring blasts of dark energy, Midna riding and attacking with Link’s wolf form and her malleable hand, and Young Link having a unique Focus Spirit ability that allows him to potentially retain an empowered state indefinitely.
As you defeat the game’s near-infinite enemies, your Special Attack gauge will fill; you can also collect Force Fragments from enemies or pots to fill it faster, and increase its length by levelling-up. Similarly, the Magic Power meter fills by collecting Magic Jars, with these collectibles being as abundant as the hearts and Rupees that enemies, pots, and chests drop all over the map. When these meters are full, you can pull off more powerful special, character-specific attacks that change depending on which weapon you have equipped and any elemental effects associated with that weapon. For example, Lana can equip a spell book or a spear and Link can equip both a Magic Rod with fire properties and swords (including the legendary Master Sword), with each weapon unleashing different special attacks (often with cameos by other Zelda staples, such as Dark Link or the Great Deku Tree). Focus Spirit is a little different and more universal; activating it empowers you for a short time, negating any knockback and instantly exposing an enemy’s “Weak Point Gauge” if you perform a special attack. The Weak Point Gauge appears on tougher enemies and bosses; draining this lets you perform a bigger, more devastating attack to dramatically reduce or completely destroy your target. Other enemies, mini boss types like enemy commanders and such, are susceptible to specific sub-weapons. Bombs against shield Moblins, arrows against the Deku Babas, the hammer against the Blins; whatever the case, an onscreen indicator shows which sub-weapon is most effective against your target. Sub-weapons can also be temporarily powered up from random pick-ups and to activate switches, cross gaps, or stun giant bosses. When equipped with a bottle, your character can drink various potions for buffs and restorative effects, or utilise Fairy Magic in much the same way. Finally, activating Owl Statues across each map sets up warp points so you can quickly teleport to different areas using the ocarina.
The game’s onscreen map shows the locations of allies, enemies, bosses, and other notable objectives and items. It’ll display which of your allies are talking, flash when Keeps are in danger, and show the many different objectives that pop up throughout each mission. Pressing + pauses the action and accesses a more comprehensive map. From here, you can check mission dialogue and objectives, review the controls, create a manual save point (though checkpoints occur during most missions), and issue orders to your allies. This is crucial as the game progresses and more objectives appear in each mission; ideally, you want four playable characters in each mission, each powerful enough to hold their own in battle, and to order them to different objectives. The AI attacks enemies and bosses, with allies reducing a boss’s health and defence, but they do tend to wander about or stay in place and I often found it difficult to select a specific target from the map. Ideally, you want to play Hyrule Warriors with a friend as the game can get very chaotic; tutorials, dialogue, objectives, and notifications swamp the already messy battlefield. While you can turn some of these and other onscreen effects off to clear things up, it can make it easy to fail missions if you miss an objective. Luckily, mission success is often malleable; you can lose a Keep or have captains and commanders flee and not fail the mission, and you can fail side missions (usually escorting an ally, defending a Mama Cucco, or defeating Messenger enemies) and still continue. However, if a primary ally (usually Princess Zelda) or your main Allied Base falls, you’ll restart from the last save, checkpoint, or the start of the mission.
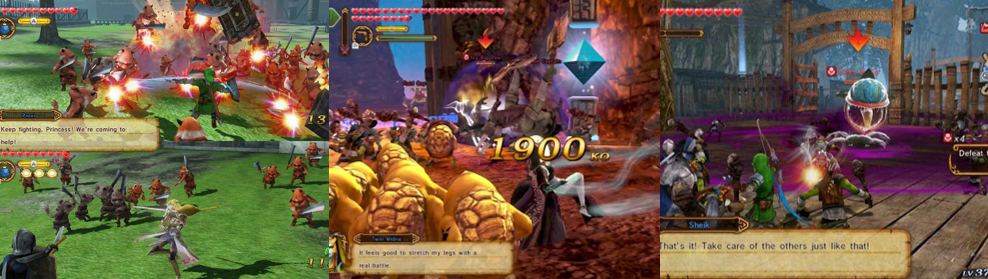
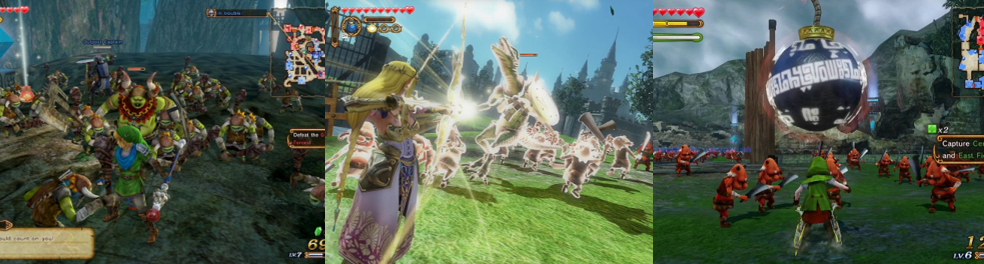
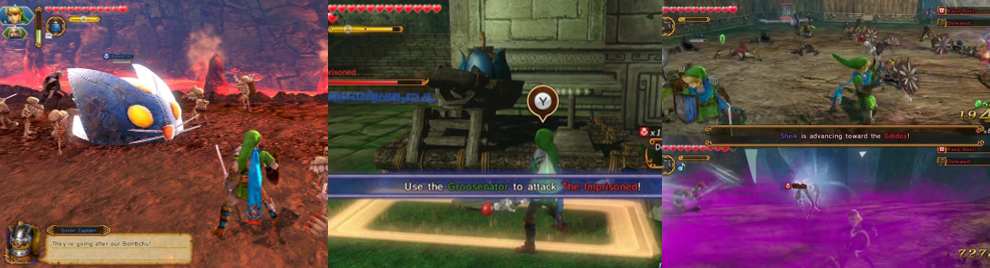
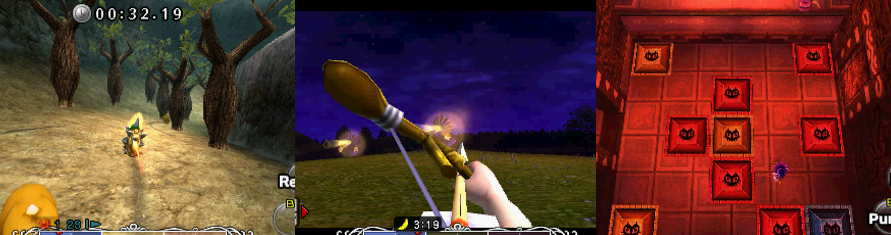
“Chaotic” is definitely the best word to describe Hyrule Warriors; enemies spawn (or pop) in constantly, swarming from Outposts and Keeps that must be captured to secure your position on each map. Mission objectives usually always boil down to capturing as many as four Keeps or strategic locations, such as the Fairy Fountain (which you activate with B to weaken bosses or otherwise aid your allies). Sometimes, you’ll intercept giant Bombchus to keep them from damaging or destroying Keeps. Other times, you’ll defend against enemy commanders, searching for allies or the correct enemy in a swarm of doubles, or taking out Transport troops and Keep Saboteurs. Generally, it’s not a massive issue if a Keep falls, but it is inconvenient. To secure a Keep, you must drain its energy bar by defeating the enemies housed there. This spawns the Keep Boss, who’s easily defeated, and secures the Keep for yourself, occasionally spawning a treasure chest containing Rupees, a weapon, a Heart Piece, or other item. If a Keep or Outpost is captured by the enemy, simply retake it in the same manner. Other times, allies will call for aid; you must rush to them and enter the glowing circle around them to rescue them and restore their health, and you must do this for certain allies (again, Zelda, but often Darunia or Impa and the like) for the mission to continue. Often, enemy Keeps are locked, forcing you to find alternative routes or, you guessed it, search for and destroy specific enemies to open the doors. Combat is satisfying and fun; you plough through hundreds and thousands of enemy troops with relative ease when playing on “Easy” mode, especially with a higher level character. However, it can become frustrating and repetitive; when there are four or five different objectives and you’re bombarded by notifications, it can be hard to know what you should prioritise. Things can get very frantic when playing alone as you’re constantly switching characters and warping across the map to put out fires, so to speak.
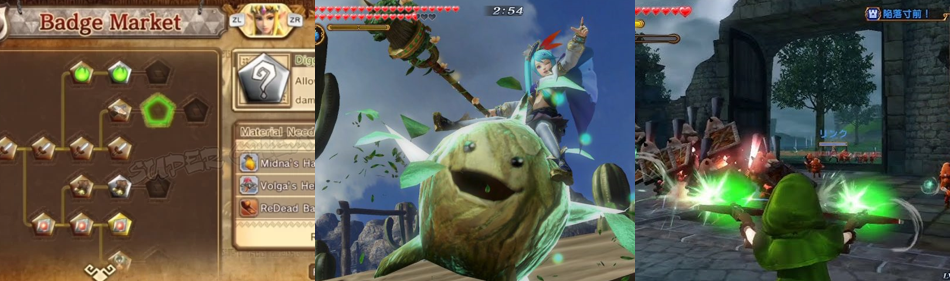
Defeating enemies earns you experience points (EXP), which allow you to level-up and become stronger. It also earns you power-ups, Materials, and Rupees. Outside of battle, Materials and Rupees are used to further improve your character. They unlock “Badges” that gift additional combos, attacks, and increase their stats and meters in the attack skill tree. You can unlock additional bottles and improve their defence against elemental attacks, reduce knockback and stun, and other defensive buffs; or you can speed up how fast your meters fill or how quickly you take Keeps. You can also spend Rupees to quickly level-up any characters you haven’t used much (since AI-controlled characters don’t appear to level-up) or new characters you’ve unlocked, or spend them in the Smithy. Here, you sell or fuse weapons to reduce your inventory and add extra buffs to weapons. Weapons will either have no “slots” or as many as three, allowing them to be empowered to strengthen your regular or special attacks, earn extra EXP, spawn extra Rupees, deal elemental damage, and so forth. Initially, your inventory is quite limited, but it expands as you progress through the story, though I found it easier to stick with the most powerful weapon and sell the weaker ones and rarely saw a benefit of fusing weapons. There’s also an apothecary, where you mix new potions and elixirs, and you’ll gain new items and sub-weapons from treasure chests. After clearing each mission in “Legend Mode”, you can replay it either in this mode or with any character in “Free Mode”. You can play on a harder difficulty to earn more rewards, or search for the elusive and skittish Gold Skulltulas, which add to various portraits and unlocks additional maps and bonuses. On the whole, Hyrule Warriors is quite easy; if you stick to one or two characters as I did (usually Link), you can become very powerful very quickly. However, it’s easy to get caught off-guard when stronger enemies or multiple objectives pop-up. The game obviously gets tougher on harder difficulties as enemies are stronger and deal more damage, and some missions add additional hazards, such as lightning strikes, bombardments, and health-sapping auras.
Presentation:
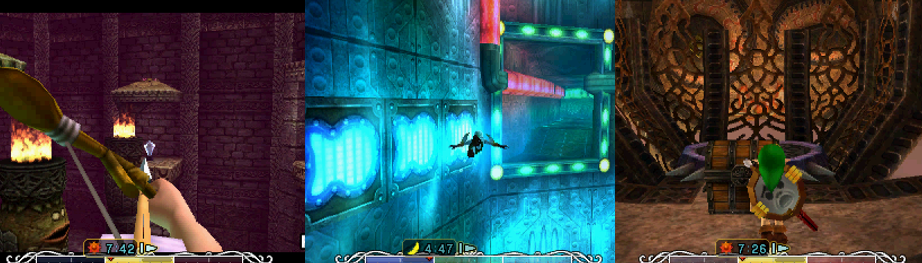
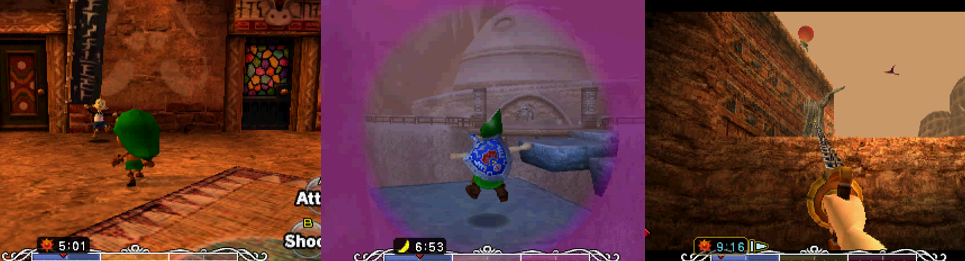
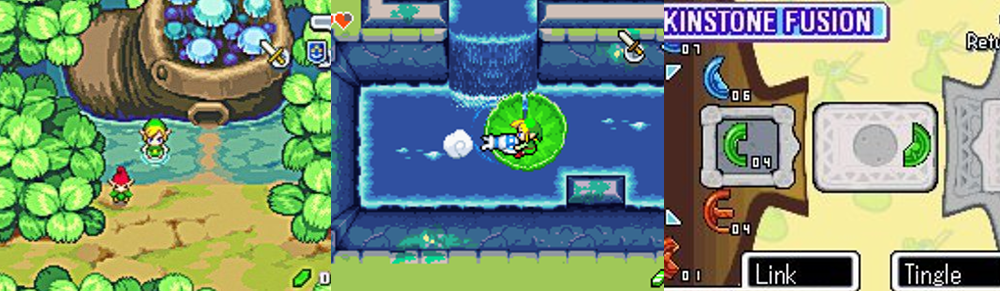
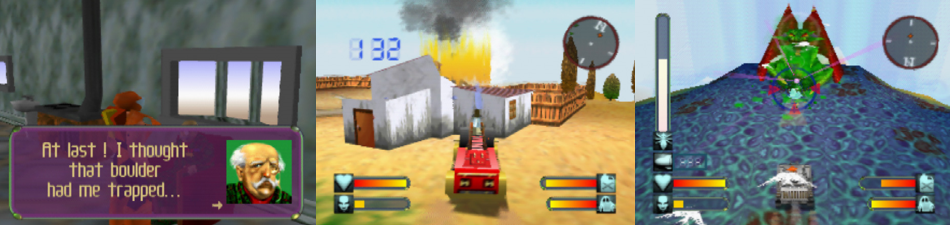
I first played Hyrule Warriors on the 3DS, where the game was serviceable but the hardware struggled with all the enemies and action, causing some slowdown an pop-up. I specifically bought the Definitive Edition to mitigate these issues and, for the most part, the upgrade is immediate and welcome. The game still suffers from a bit of pop-up and occasional slowdown when there’s a lot happening onscreen or when you’ve completed a mission (meaning many battles abruptly end). There are also noticeable loading times between missions (though tips, fun 8-bit graphics, and story dialogue help to speed them up), but the game performs really well otherwise. Hyrule Warriors mostly pulls its locations and characters from Zelda’s 3D adventures, recreating and reimagining areas such as Hyrule Field and Hyrule Castle, the Twilight Realm, and Skyloft as restrictive sandbox battlefields populated by Keeps, pots, and occasional bridges, dips, and alternate paths. These locations are rather hit and miss; later, you’ll battle in cel-shaded arenas like Windfall Island, which are far more vibrant and fun than the dense, confusing forest or the apocalyptic wastelands ruled by Ganon or the relatively sparse Gerudo Desert. One enjoyable exception was Lake Hylia, which includes not just the lakeside area but the labyrinthine catacombs of the Water Temple. Indeed, with the game’s emphasis on fast-paced, chaotic combat, it’s no surprise that the locations are rather bland. Sometimes, bridges will crumble and you’ll hookshot over gaps, or lightning and other bombardments will fall, or there’ll be plumes of lava or some limited scenery to see (fortifications, usually, or ruins). However, the environments are there to contain you, not distract you, and are largely fun, if limited, nostalgia trips to Zelda’s 3D games.
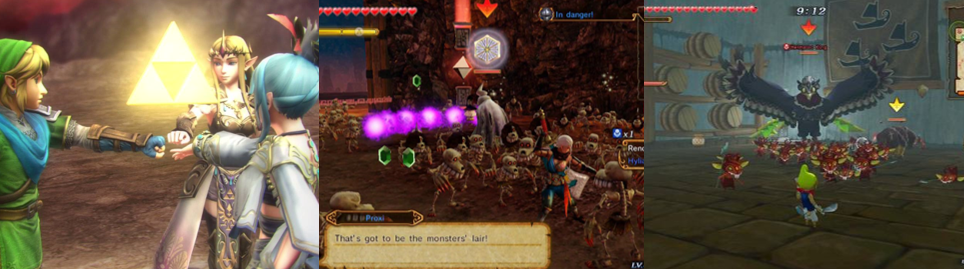
Character models far much better, despite constantly being in motion, attacking, or being bashed about. While I’m not a big fan of Link’s weird scarf, he’s well represented, pulling off all his signature attacks with the same gusto I’d expect from his first 3D adventure. This extends to other playable characters, who all exude their own personalities and fighting styles (helped by intro and outro cutscenes): Darunia is a mighty Goron warrior swinging a giant hammer, Fi gracefully flies and dances about, and Ruto conjures water geysers as she attacks. New characters like Agatha, Volga, and Cia also impress, spawning large magical allies, transforming into dragons, and conjuring dark minions, respectively. Each character has a few costumes to unlock and is fully voiced, with the exception of Link (who talks via a fairy appropriately named “Proxie”) and certain cutscenes, furthering the convoluted plot and alerting you to objectives. Outside of battle, the narrative is told through impressive, high-quality pre-rendered cutscenes that show these heroes coming from across all the Zelda timelines to combat Cia’s threat and Ganon’s return, and they were a joy to watch for how lovingly they recreated the 3D Zelda games. Similarly, the game’s soundtrack includes orchestral remixes of classic Zelda tunes, especially those associated with each of the environments, and collecting Materials and weapons plays a remix of the “Get Item” Zelda jingle. The character selection is impressive, with each having different weapons and attack animations, some more elaborate than others to include cameos and references from across the franchise, and I was really impressed by the stability and options offered, alongside the presentation. Things can get very cluttered and frantic, but Hyrule Warriors is a great homage to the entire Zelda franchise, even with its restrictive environments.
Enemies and Bosses:
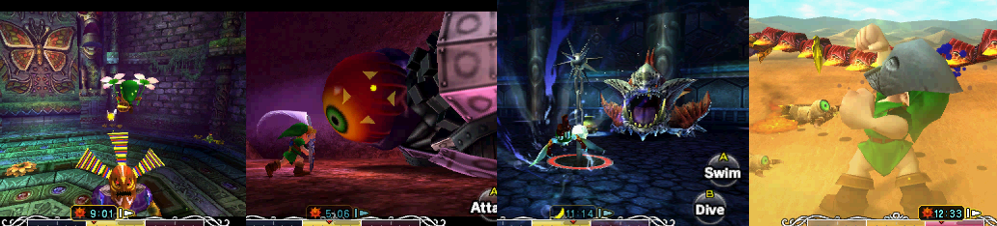
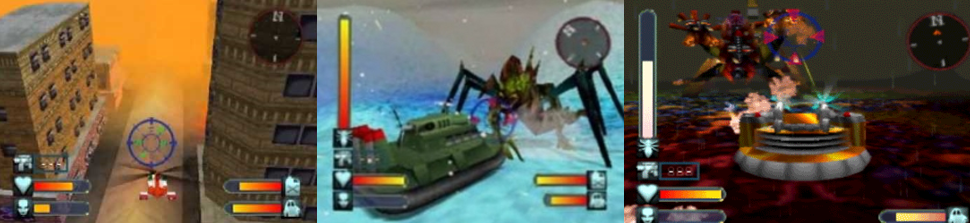
There are seemingly infinite enemies in Hyrule Warriors, technically speaking, with maps being flooded by monstrous beings recognisable to long-time Zelda fans, most of them being simple cannon fodder to up your combo, EXP, Rupee, and KO count. You’ll cut through swarms of relatively harmless Bokoblins, Miniblins, and Stalchilds (and even Gorons and Hyrulian Soldiers when playing as bad guys or they’re turned against you), which offer only a token resistance. Amongst them, you’ll encounter more formidable commanders, captains, summoners (who quickly become a priority to keep enemy forces down), and the like who target your allies or Keeps and must be prioritised. From there, it only escalates: Dinolfos, Lizalfos, and elemental Poes appear spewing fire, welding stronger weapons, or teleporting and firing elemental or dark projectiles, respectively. Darknuts, Shield Moblins, and Big/Stone Blins put up a tougher fight thanks to their greater armour and more powerful attacks, Gibdos and ReDeads can freeze you in your tracks and spew a heart-sapping poisonous aura, and Aeralfos hover overhead, swopping down and spewing fire. Deku Babas also emit a poisonous aura and are only vulnerable to arrows; Beamos status will blast away unless you explode them with bombs; Cuccos will turn against you if their mother is defeated; Manhandla Stalks burst from the ground to take a bite out of you; and elemental Chuchus need a good whack with your hammer. You’ll also contend with traitorous or mind-controlled forces, restless spirits of dead soldiers, and dark doppelgängers of all the game’s playable characters, with Dark Link being especially notable as numerous versions of him spawn in across maps and must be taken down.
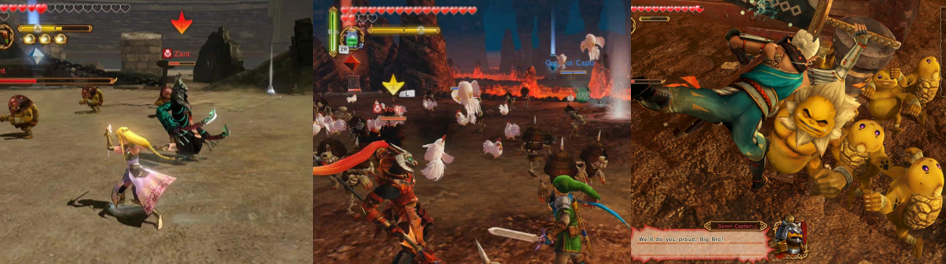
These dark doppelgängers often serve as the primary target of a mission, but you’ll also battle the real versions of these on more than one occasion, especially in “Legend Mode”. You’ll battle the likes of Volga, Wizzro, Ghirahim, and Zant more than once, with boss encounters against these often taking place multiple times across a mission. Often, you encounter the boss early on, causing them to flee to the fortified Keep. Defeating enemies or activating a Fairy Fountain draws them out or weakens them, kicking off a rematch, though sometimes you’ll battle two at once or at different times in a mission. One may appear as an ally and then turn against you, adding more enemies to your path, or they’ll summon a Giant Boss to distract you so they can increase their power and send more troops against you, your allies, and your Allied Base. Often, you’ll also battle traditionally heroic characters like Lana, Impa, and Darunia, either because they’ve been corrupted or you’re playing one of Cia’s missions. Either way, these battles aren’t much different than facing regular enemies or their commanders: simply lock on and pummel away, dodging and blocking as needed and unleashing your special attacks whenever possible. Sure, Ghirahim is pretty swift, Volga becomes a gigantic fire-breathing dragon, Wizzro can be a pain in the ass, and Zant can crush you with totem poles, but I never had any issues battling the playable characters when they appeared as bosses. Cia and Ganondorf put up a bit more of a fight, but this was mainly due to them being invulnerable, magically empowered, or hidden behind dark forcefields or fortified Keeps. In these instances, you must cut off the dark power protecting them by, you guessed it, capturing Keeps, defeating enemies, and activating Fairy Fountains. It’s advisable to order your allies to target these bosses to whittle them down and reduce their defences, but I actually had more trouble against Phantom Ganon than regular Ganondorf since the phantom conjured duplicates and did a bit more than aggressively swipe with his swords.
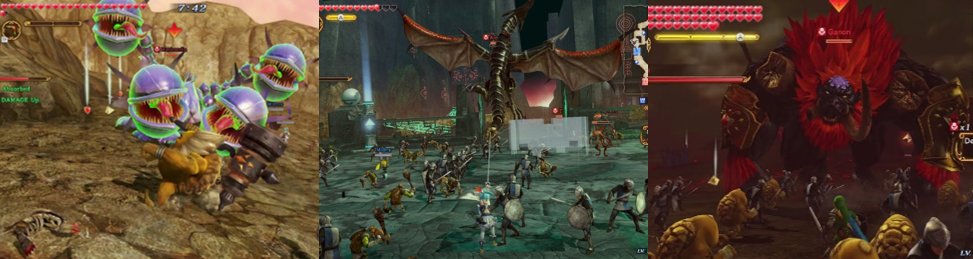
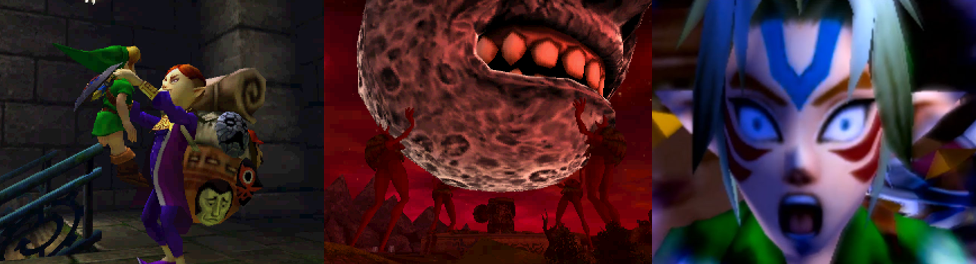
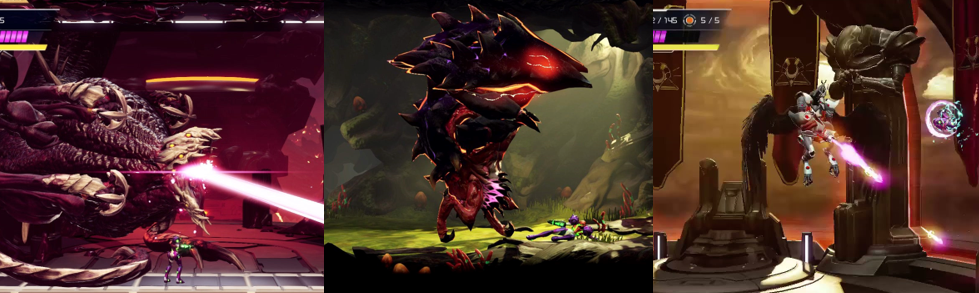
As mentioned, these bosses are often joined by Giant Bosses, with multiple sometimes spawning across the map and causing a real headache on the harder missions. These include series staples such as the massive, armoured spider queen Gohma, the fire-breathing dragon King Dodongo, and the monstrous plant-creature Manhandla. These can be some of the most annoying encounters due to having to whittle down their Weak Point Gauge, their high health pool, and the ways you must attack them. Gohma, for example, shields itself from all regular attacks and is only vulnerable when you shoot its laser-blasting eye with an arrow. Similarly, the rolling, rampaging King Dodongo can only be stunned by tossing bombs into its mouth, the Argorok can only be brought down by hookshotting its tail when it glows blue, and you’ll only get to go nuts on the Helmaroc King after whacking its head with your hammer. By far the worst of these for me was the Manhandla, which can only be stunned with the boomerang and, even then, there’s a small window where you can do this. The rest of the time, it spits seeds and bombs about the place completely impervious, making it the most aggravating of the Giant Bosses, especially when it teams up with the others! Another Giant Boss you face (and even control in one mode) is Ganondorf’s true form: the Dark Beast, Ganon. Accompanied by a perpetual lightning storm and attacking with claw and tail swipes, Ganon incorporates the attacks and the associated weaknesses of the other Giant Bosses, meaning you toss bombs when he’s charging a fireball, fire arrows when he charges a laser blast, hookshot his tail when it glows blue, and throw your boomerang after a seed bombardment. You must gather all your allies around Ganon to weaken him, but you’ll only defeat him once Zelda gifts you the Light Arrows in a cutscene. When playing as Ganon in “Ganon’s Fury”, you’ll battle the other Giant Bosses in kaiju fights. However, despite Ganon’s vast size and incredible power, he struggles against these (and, strangely, even regular enemies and commanders) in a straight up fight. Finally, you’ll also contend with the Imprisoned and its smaller minions; this aggravating walking slug can only be brought down by attacking its toes and can send you flying or stun you with paralyzing stomps and a big slam.
Additional Features:
There are 100 Gold Skulltulas to find in Hyrule Warriors, with one appearing for a short time in each mission. Collecting them uncovers a picture; there are thirteen of these to uncover, and completing them adds to the game’s options and maps. Completing each mission in “Legend Mode” unlocks it in “Free Play” mode, allowing you to tackle any mission with any character and grind up their level. Since this is the Definitive Edition of Hyrule Warriors, the DLC missions are available as you play through “Legend Mode”. These see you playing a side mission as Linkle, utilising her unique dual crossbows to prove her worth in recycled maps against recycled enemies and bosses, and secondary side missions as Cia and Ganondorf. These act as a prequel and midquel to the main story and see you cutting down Gorons and Hyrule’s finest and recruiting (or outright controlling) dark allies like Wizzro, Volga, and Ghirahim. Finally, there’s an epilogue to the main story where the cel-shaded world of The Legend of Zelda: The Wind Waker (Nintendo EAD, 2002) bleeds into that of Hyrule Warriors, resulting in you teaming up with Tetra and battling the Helmaroc King and Phantom Ganon to stave off the incursion. As mentioned, there are three difficulty settings (“Easy”, “Normal”, and “Hard”), with the even harder “Hero Mode” unlocked after beating “Legend Mode”. The game can be played with another player as well, which I think I would recommend given how chaotic battles can get, and you can test your mettle in the game’s “Challenge Mode”. Here, you’ll be tasked with defeating set numbers of enemies against a time limit, though this is easier said than done as not only are the enemies far stronger, but you also often have to content with multiple, far tougher Giant Bosses stomping about the place. You can also customise your fairy setup in “My Fairy” mode, but I couldn’t access this despite acquiring fairies in “Adventure Mode” (I think you may need an empty bottle on hand for this to activate).

There’s also the aforementioned “Ganon’s Fury” mode, where you rampage as Ganon, wiping out hordes of enemies and battling other Giant Bosses, sometimes without the ability to restore your health or against a time limit. Sadly, I found this mode wasn’t as enjoyable as it could’ve been as Ganon is surprisingly weak. The major source of replayability in Hyrule Warriors, though is “Adventure Mode”. Unlocked after you clear “Legend Mode”, “Adventure Mode” is a series of additional maps and challenges all themed around different games from the Zelda series. There are two maps based on the first game, one for Link’s first Game Boy adventure, a Wind Waker map, and others themed around his other 3D adventures. Generally, these boil down to the same gameplay loop of taking Keeps and defeating enemies, but they carry a few more modifiers. Manual saves appear to be deactivated, for example, as the missions are much shorter. You’re more likely to be fighting against a time limit, for example, or encountering heart-sapping Keeps. Fun new additions include competing with other forces for KOs or Rupees or taking quizzes where you must defeat the right enemy. Map items acquired in this mode allow you to search for and uncover secrets using bombs, candles, and the like, unlocking new Heart Pieces, costumes, and even characters like the Skull Kid and Marin. These maps can get very difficult thanks to additional concerns: the “Master Quest” map includes stronger enemies, for example; the Wind Waker map includes wind elements, the Majora’s Mask (Nintendo EAD, 2000) map resets with a devastating moon strike after you’ve exhausted your turns; and you must watch out for Nightmare’s influence and portals to Lorule on the Link’s Awakening (ibid, 1993) and A Link Between Worlds (ibid, 2013) maps, respectively. As fun as these maps are, though, it’s the same repetitive gameplay loop over and over and you’ll need a decent guide to unlock all the extras, and even need to find all the Skulltulas to unlock all the maps!
The Summary:
I knew that Hyrule Warriors wasn’t optimised for the 3DS when I bought it, but I got it anyway as I’m a big fan of the Zelda series and the gameplay looked fast-paced and hectic. Given I didn’t own a Wii U, this was my only way of playing the game and I remember enjoying it at the time as a bit of mindless fun, so I jumped at the chance to upgrade to this Definitive Edition of the game. The upgrade is readily apparent; the game shines on the Nintendo Switch, performing leagues better and packing all the extra content into one convenient package but still leaving plenty of stuff for you to unlock and discover. The character roster is great, as are the references to the franchise in their appearances, moves, and interactions. While the locations aren’t as impressive, they do what they’re made to do, which is provide a limited, recognisable sandbox for you to plough through thousands of disposable pawns with ease, and the music is absolutely on point. Sadly, the gameplay loop can be very mind-numbing and, at times, aggravating. As the game progresses, the action becomes a chaotic assault on your senses as you desperately try to spread yourself across the map and solve every problem to reap the best regards. This means Hyrule Warriors is probably best played with a friend so you can share the anxiety of having multiple objectives at once, but it’s perfectly do-able alone as long as you know what missions can be prioritised over others. This also means that Hyrule Warriors is probably best enjoyed in short bursts rather than one long session. Missions can get repetitive and annoying as enemies disappear and reappear and the goal posts constantly move, but it’s endlessly satisfying cutting them down with your powered-up character, taking out those annoying Giant Bosses, and snagging new rewards. The sheer variety and content packed into the “Adventure Mode” is daunting, to say the least, and I don’t know if I’ll ever 100% even a single map, much less the entire game, but it’s good to know it’s always there to pick up and bash out a few missions when I need to wind down.
My Rating:
Great Stuff
Have you ever played Hyrule Warriors? If so, what did you think to this definitive Edition of the game? Which character was your favourite? What did you think to the chaotic gameplay and playable roster? Have you ever played the Dynasty Warriors games and, if so, do you think the formula translated well into the Zelda series? Did you ever find all the Gold Skulltulas? Which of the “Adventure Mode” maps was your favourite? Would you like to see more Zelda spin-off titles? How are you celebrating the Zelda franchise today? Whatever your thoughts on Hyrule Warriors and the Zelda games, feel free to leave them below or on my social media, and be sure to check out my other Zelda content across the site!


You must be logged in to post a comment.