Game Corner: Banjo-Kazooie: Grunty’s Revenge (Game Boy Advance)

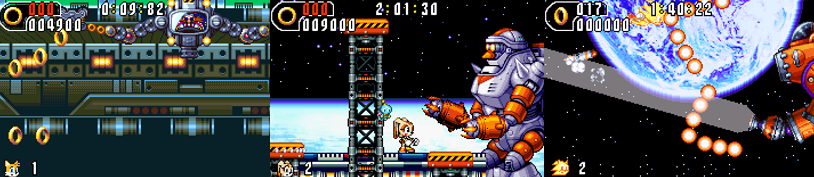
Released: 15 September 2003
Developer: Rare
Also Available For: Mobile

The Background:
After establishing themselves as one of the biggest UK-based videogame developers, Rare built a strong working relationship with Nintendo after revitalising their Donkey Kong franchise on the Super Nintendo Entertainment System (SNES). Rare sought to capitalise on this success with “Project Dream”, a tumultuous concept that eventually evolved into Banjo-Kazooie (Rare, 1998), one of the greatest Nintendo 64 titles. Although we didn’t get a long-running franchise, a similarly successful sequel followed in 2000 and the quirky duo also appeared in this oft-forgotten mid-quel for the Game Boy Advance. When development started, Rare was still a third party developer for Nintendo and the game was initially planned to release on the Game Boy Color. Development continued even after Rare was purchased by Microsoft since Microsoft didn’t have a handheld competitor and the story was originally a bit different, revolving around Banjo curing Kazooie of a curse. It also would’ve been a sidescroller, with more levels than the final game, and there were plans to incorporate a multiplayer feature, though all of this was cut. Banjo-Kazooie: Grunty’s Revenge received mixed reviews that criticised a lack of innovation and a lacklustre experience while praising its gameplay and visuals.

The Plot:
Two months after defeating the evil Gruntilda “Grunty” Winkybunion, Banjo embarks on a time travel adventure to rescue his bird friend, Kazooie, when Grunty returns in a robotic body and tries to keep the bear and bird duo from meeting!

Gameplay and Power-Ups:
Unlike its predecessor and its sequel, Banjo-Kazooie: Grunty’s Revenge is a kind of pseudo-isometric platformer that uses an odd, almost top-down perspective to follow Banjo and Kazooie’s latest collectathon. Interestingly, the game has more in common with Banjo-Tooie (Rare, 2000) than Banjo-Kazooie, acting as a side story between the two games and an alternative sequel. Many of Banjo and Kazooie’s basic actions return from Banjo-Tooie, though flying has been removed and there are some restrictions due to the limited hardware. You begin as Banjo alone and learn the basics: B sees Banjo whack enemies with his backpack while A is used to jump and swim. You’ll tackle the game’s first world alone but soon rescue Kazooie in the second world, adding additional, familiar moves to your arsenal through Bottles’ ancestor, Bozzeyes (as long as you have enough Musical Notes). Kazooie adds a airtime to your standard jump if you press A in mid-air, allows Banjo to backflip to higher areas by holding the Left trigger and pressing A, and performs a roll if you press B when running. Tapping L sees Kazooie carry Banjo up steep hills, and holding L and pressing B sees Banjo hold Kazooie like a shotgun and fire eggs with B. You switch between the different eggs with the Right trigger and fire regular eggs, special eggs that power up generators, ice eggs that put out fires, and fire eggs that melt ice blocks. If you jump and press B, Kazooie attacks with her beak and pressing L in mid-air sees her drill into the ground to defeat enemies and knock Jinjos, Jiggies, and other objects loose when drilling into special cracked areas. When in water, you press R to dive, tapping A to swim to avoid obstacles and grab air bubbles, while Honeycombs restore your health. You can grab a single one, one that restores two, and a randomiser that you must stop to refill more health. Finally, if you find the two Extra Honeycombs hidden in each world, you can bring them to Honey B.’s hive to extend your health bar.

Many of the duo’s familiar moves and abilities return, now skewed by the odd perspective.

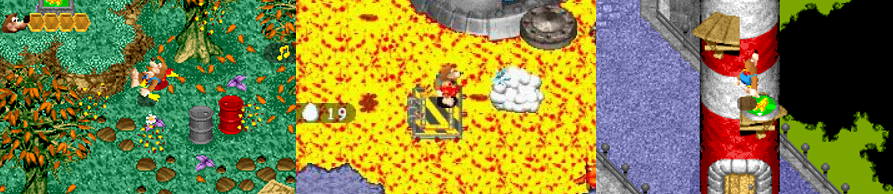
As in the Nintendo 64 games, players collect Musical Notes, though they’re used to learn new moves rather than unlock doors. There are 100 Notes in each world and your total carries over if you leave or die in the stage. Like in Banjo-Tooie, Grunty’s Revenge doesn’t use a life system. When you’re defeated, you can choose to continue, respawning at the last doorway you used, which takes a lot of the pressure off but can make trial and error aggravating. Players collect ammo from egg nests and nab Gold Feathers to become invincible for as long as your stock lasts if you press A on a Wonderwing pad, an arbitrary restriction that severely limits the ability. You can again use Shock Spring Pads to rocket higher, though landing can be tricky due to the game’s odd perspective. Every area hides ten Jiggies: some are out in the open, some are awarded after defeating bosses, and others are dislodged with the Bill Drill. You’ll clamber up ladders and vines, cross lava, ice-cold water, and poisonous mists, fire the eggs into toll booth holes to activate platforms, and race down more than a few spiral slides to collect Jiggies. You’ll also get a Jiggy if you find the five Jinjos scattered throughout each location, with the piece spawning by a large Jinjo statue that’ll also give you a tip for every Jinjo you find. Many are awarded by finding objects in the worlds, from blue shells to coins to pieces of gold to be smelted into a Jiggy or ice cream and other treats to reunite a mother with her wayward children. There are also a handful of timed challenges to test you. These see you whacking special pads to spawn Jiggies and/or Shock Jump Pads and give you a few seconds to race to the prize before they disappear. These are easily the game’s toughest challenge prior to the final boss as you barely have time to reach the pad or the Jiggy and the enemies, who respawn as soon as you scroll the screen, certainly don’t help. The game’s worlds are surprisingly large and tricky to navigate as, unlike in Banjo-Tooie, there’s no fast travel system (though some worlds have shortcuts for the duo’s temporary other forms).

Sadly, the transformations are painfully underutilised and the mini games are recycled.

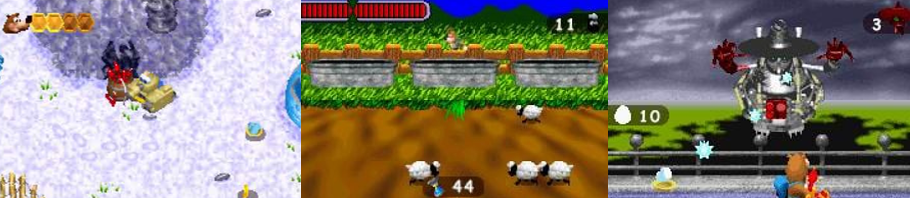
Yes, players still transform into different forms by bringing Mumbo Tokens (here awarded by beating certain bosses) to Mumbo Jumbo. There are four forms to turn into, with players able to use any form in any world (though you’ll be warped back to Mumbo’s Pad if you stray too far and must manually transform back to exit the world). You’ll become a mouse to pass through small holes and chew on wires with B, a candle that lights up a dark cave and performs a flaming somersault with B to light other candles and a TNT barrel, a cute little octopus that passes through water without harm and spits water projectiles with B, and a tank that can’t jump but braves toxic environments and fires its cannon with B. The tank enters special doors and crosses dropping panels to spawn Jiggies while the octopus is washed away through sewer pipes to blast enemies and obstacle and reach yet more Jiggies. Though these are fun, there aren’t any opportunities to explore previous worlds with new transformations and only some worlds require multiple transformations to find all their Jiggies. Each world does contain a mini game that mixes up the gameplay, but there’s only a few and they simply get reskinned. The various slides see you grabbing a set number of collectibles or racing a non-playable character (NPC) using boost pads to speed up and avoiding sticky oil slicks to get a Jiggy. There’s also a fishing mini game (which you first play snagging sheep) that can be pretty tricky; you must move left and right and cast by holding or tapping B to snag a set number. You only have a short time to do this and, later, you can’t see what you’re hooking as they’re underwater and you run the risk of being hurt by Snippets (though you can immediately retry if you fail). There are also two top-down driving challenges, one where you’re in a motorboat and one where you’re on a sled. In the first, you must snag the treasure chest and be holding it when the timer runs out; in the second, you must collect Snowies before the enemies get them. In both, you accelerate with A and fire with R though the craft can be very slippery and you’ll spin out when hit, so these can be problematic. Finally, there are shooting sections where you move back and forth and fire eggs at the Ghost Pirate or Mecha-Grunty, taking advantage of the egg nests and lamenting the lack of Honeycombs.

Presentation:
I was hesitant about Grunty’s Revenge for years simply because of the odd, top-down/isometric perspective and pre-rendered graphics…and I’m still torn after playing it. At times, the game looks great; it’s bright and cartoony and has a lot of visual charm. Other times, jumps are incredibly tricky to judge because of the slanted perspective and it’s not always clear where a wall starts and the ground ends, meaning I often ended up running against cliffs. Banjo and Kazooie look decent, if understandably limited. Banjo simply sways when idle, but all the returning moves look and sound exactly like the Nintendo 64 games. Characters still talk in gibberish, communicating via speech bubbles, and Banjo makes the same grunts and noises as he jumps and gets hurt. Grunty still talks in rhyme and taunts you, though collectibles are no longer anthropomorphic so most of the exposition is related through Bozzeyes, which can interrupt the gameplay. Grunty’s Revenge does a decent job of recreating familiar tunes from its bigger cousin, with Jamie Hughes remixing and sampling Grant Kirkhope’s memorable Nintendo 64 tunes, though these are obviously limited by the hardware and at times sound grating as a result. Enemy sprites and animations are disappointingly limited, however, and the game doesn’t do much with its time travel plot. You journey to each world from Spiral Mountain, which is closer to Banjo-Tooie’s Wooded Hollow since it houses Jiggywiggy’s Temple, though the area doesn’t look that different to what you’re used to. Sure, Grunty’s lair appears to be under construction, but the giant witch’s head is still there, and the inside is still an ominous castle. It might’ve been nice to see the landscape more dramatically changed as I legitimately forgot I was supposed to be in the past as it barely has any relevance beyond it being mentioned in dialogue. Sure, Mumbo’s younger but he still fulfils the same role and Bottles might not be born yet or too young to help, but Bozzeyes isn’t that different. Perhaps if the game had been changed a bit to have the duo flung into the distant past, or numerous time periods, the visuals could’ve been changed more.

While the game tries to capture the franchise’s colourful spirit, the perspective makes gameplay tricky.

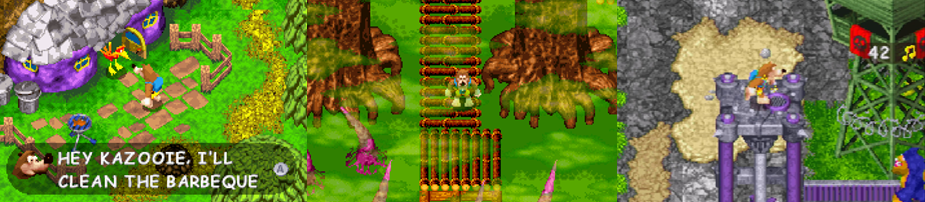
This extends to the game’s worlds, too. Cliff Farm was an interesting idea but…it’s still just a farm, which isn’t an interesting location. Sure, there are haybales to jump on, tractors to see, a big barn to venture into, and a mill to explore but you can’t expect much from such a bland setting. Things then venture into the overly familiar with Breegull Beach, which isn’t a million miles away from Treasure Trove Cove and Jolly Roger’s Lagoon, featuring a beach, a sandcastle, a quarry and cliffs. Considering it’s Kazooie’s birthplace, it definitely feels like a wasted opportunity not to do more with that, perhaps include her family or siblings or something. Bad Magic Bayou was like Bubblegloop Swamp, with its poisonous water, broken wooden bridges and platforms, and murky swamp that’ll choke you if you linger too long. You hop to tyres to reach isolated islands and climb a tree using log platforms (taking full advantage of the lack of fall damage if you slip). Spiller’s Harbor is essentially a downgraded Rusty Bucket Bay, featuring polluted water thanks to oil leaking from pipes, a lighthouse (that you never go inside), and a nearby village where you hop onto rooftops like in Jolly Roger’s Lagoon. Freezing Furnace isn’t too dissimilar from Hailfire Peaks in that it’s a wide, frozen landscape of slippery platforms, narrow walkways, and ice-cold water that saps your health (unless you’re an octopus). You must scale mountains, venture into igloos, and enter a cave to reach Grunty Industries. This is a lava-filled industrial factory full of pipes, boilers, and toxic gunk that decimates your health unless you return as a tank. When you collect enough Jiggies to enter Grunty’s lair, it’s simply two screens: a stone arena where her minions watch you battle the final gauntlet and a claustrophobic rooftop where an ominous storm rages in the background. Grunty’s Revenge definitely captures the spirit of the Nintendo 64 games but plays things a little too safe, seemingly afraid to think outside the box and barely utilising the Game Boy Advance’s power to the best of its ability with its fitting, if simplistic, 2.5D aesthetic.

Enemies and Bosses:
Anyone who’s played the Nintendo 64 Banjo games will recognise most of Grunty’s Revenge’s enemies. There two most common baddies are the various Gruntlings and the thrashing tentacles that appear everywhere, even on the overworld. Gruntlings simply lumber about, stomping after you if they spot you, and take more hits to defeat the further you progress and the more their colour scheme changes. They’re echoed in the Bogfoot and Biggyfoot enemies, who take even more hits to defeat and often patrol on narrow walkways and above you on cliffs, which can cause you to fall into hazardous water if you’re not careful. Beehives are soon protected by bee swarms that fly at you, Tee-Hees pass through walls and, like the multi-coloured Spookos, are invulnerable unless you use the Wonderwing or certain eggs, and Gruntweeds burst from the ground, camouflaged by the Game Boy Advance’s limited palette, to slam on you. Chombas leap from portraits to take a bite out of you, Boom Boxes bounce around and explode on contact, Stinglashes block the way or pop from the ground like weeds, and sentient mines often patrol the waters. Most of these enemies are merely a nuisance; they’re defeated in one or two hits and often drop Honeycombs. The drop rate lessens as you progress and they become more formidable, but their biggest threat is that they respawn once you scroll away, even if it’s just for a moment. Sometimes, you’ll battle waves of them for a Jiggy; other times, bosses spawn them in, or they swarm claustrophobic interiors. By far the worst enemies, for me anyway, are the Germuloids, who latch onto you and won’t let go until they’ve drained your health, or you’ve wiggled the directional pad enough to destroy them.

Sadly, there’s a painful lack of variety and innovation in the game’s handful of recycled boss battles.

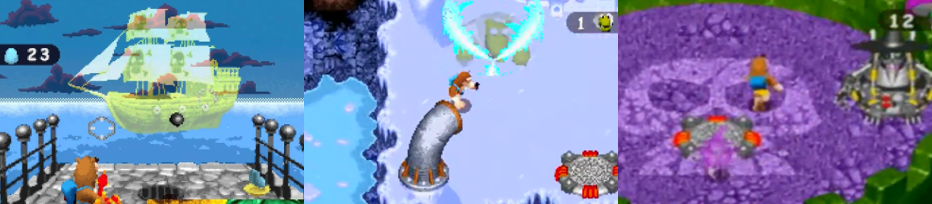
Grunty’s Revenge is extremely limited with its boss battles, recycling the same encounters with Mecha-Grunty or her chief minion, Klungo, three times each and then forcing you into a gauntlet in the endgame. The Ghost Pirate offers as a unique battle, framed as a limited third-person shooter where you must dodge his cannonballs and fire at his grinning visage when it appears, but even this is recycled for a Mecha-Grunty battle. This is a bit tougher as you must target her hands, hat, and panels on her torso, but the strategy is still the same. Similarly, though the battles against Klungo and Mecha-Grunty get progressively difficult, what works the first time will work the last. Klungo tosses vials and stalks you, only being vulnerable when his shield’s down. He’ll add in temporary invisibility, minions, and a slippery arena as you progress, with the window to attack getting smaller each time. This is echoed in the Mecha-Grunty fights as she also hides behind a shield, though she fires a projectile spread and also tries to crush you. In the endgame, you battle Mecha-Grunty in her arena, watching for her aerial bombardment, then take on Klungo again, with a quiz appearing between each fight. Best these and you’ll face a multi-phase battle against Mecha-Grunty on the castle roof, one where your room to avoid her homing projectiles and other attacks is extremely limited. To make matters worse, you can’t just hit her mech in this final fight like in the others; instead, you must strike her robot body and also attack her spirit when it appears. Additionally, you’re very unlikely to get Honeycombs during these battles and there are no checkpoints between each fight so, if you die at any point, you must not only start all over again but also complete the time switch task to enter Grunty’s lair! This was a difficulty spike I wasn’t expecting; just replenishing your health and eggs for the quiz would’ve helped. Ideally, there would be a doorway in the first arena to return to the overworld, with the entrance remaining unlocked but, as is, this was a gruelling final challenge that I couldn’t get past.

Additional Features:
There are two Extra Honeycombs in every area of Grunty’s Revenge, requiring all your abilities to uncover them to fully extend your health bar, and 600 Musical Notes and ten Jiggies in each as well. You won’t need all of them to learn every move or unlock every world, but you will need at least fifty Jiggies to reach the final boss gauntlet. However, if you want to see the best ending, you’ll need 100% of these collectibles, something that’s a tall order thanks to Breegull Beach’s timed challenge, let alone the final boss. When you finish the game, you play one last sliding game as the credits roll, collecting gold coins as you go. These are spent at an arcade machine in Breegull Beach, where you can replay the mini games at will.

The Summary:
I’ve been on the fence about Banjo-Kazooie: Grunty’s Revenge for years. There was something about the odd, quasi-isometric perspective that always put me off but, in the end, the game isn’t too expensive, and I felt the itch for more of the bear and bird duo. The game makes a good first impression, emulating the bright, cartoony visuals and quirky humour of the Nintendo 64 games and doing a decent job of recreating the characters, locations, and music from its counterparts. It is, in many ways, a 2.5D demake of Banjo-Tooie, featuring relatively large worlds and some fun mechanics with the different forms. However, these transformations are painfully underutilised and the Jiggies were, by and large, easy to collect as long as you weren’t racing against a ridiculously limited timer. There’s nothing here in terms of moves and abilities that you won’t find in the superior Nintendo 64 games…in fact, there’s less since you can’t fly or use the Wonderwing at will. While I enjoyed the visual fidelity to the other games, the worlds and environments are horrible limited and lack innovation. Each world has similar tropes (find stuff, play a mini game, fight a boss, a platforming challenge, etc), with none of the nuance and interconnectivity (or, at times, challenge) of the Nintendo 64 games. These issues are only compounded by Grunty’s Revenge recycling the same mini games and boss battles, forcing you into an unfair final gauntlet, and completely wasting its time travel plot. There was an opportunity to present something a little different and, instead, the developers played things far too safe and tried to give Game Boy Advance players a truncated version of the Nintendo 64 games rather than something that takes advantage of the system’s strengths. As a big, lifelong fan of the franchise, I was left disappointed and, though I don’t regret buying Grunty’s Revenge, I’m not surprised it’s largely been forgotten to the mists of time.

My Rating:

Rating: 2 out of 5.

Could Be Better

What did you think to Banjo-Kazooie: Grunty’s Revenge? Were you impressed by how closely it emulated the Nintendo 64 games, or do you agree that it wasted its potential? What did you think to the semi-isometric perspective and the time travel plot? Which of the new worlds and transformations was your favourite? Were you also disappointed by the recycled mini games and bosses? Did you ever get the best ending, and would you like to see this game more widely available? Whatever you think about Banjo-Kazooie: Grunty’s Revenge, drop your thoughts in the comments, support me on Ko-Fi, and check out my other retrogaming content.

Game Corner [Sonic Month]: Sonic Advance 2 (Game Boy Advance)


Sonic the Hedgehog was first introduced to gamers worldwide on June 23 1991 and, since then, has become not only SEGA’s most enduring and popular character but also a beloved videogame icon. Thus, in keeping with tradition, I’m dedicating some time to celebrate SEGA’s supersonic mascot.


Released: 19 December 2002
Developer: Dimps / Sonic Team
Also Available For: Nintendo Wii U (Virtual Console, Japan only)

The Background:
After a lengthy development process and a conscious effort to create a mascot iconic enough to challenge Super Mario, SEGA’s initial success with Sonic the Hedgehog exploded into mainstream popularity with Sonic the Hedgehog 2 (SEGA Technical Institute, 1992). This was followed by the spectacular Sonic 3 & Knuckles (ibid, 1994) a game too big for one cartridge, but, oddly, one of the best Sonic games led only to many disappointing spin-offs. Following Sonic’s well received jump to 3D, numerous delays, blunders, and costly decisions saw SEGA withdraw from the “Console War”. Alongside ports of their games for other manufacturers, SEGA teamed with Dimps for Sonic Advance (2001), 2D throwback to the classic games that became a best-seller for the Game Boy Advance renowned for its visuals and gameplay. Having solidified SEGA ’s new relationship with Nintendo, development of a sequel was said to have started immediately following the first game. Sonic Advance 2 built upon the existing engine and sought to make a more action-orientated, faster title. The game saw the debut of a brand new character, Cream the Rabbit, who was specifically designed for younger players, and it also went a long way to popularising the “Boost” mechanics of later games. A commercial success, Sonic Advance 2 was praised for its cartoonish sprites, catchy soundtrack, and replay value. While its difficulty deterred some players, Sonic Advance 2 is largely regarded as one of the best Sonic titles and it was followed by a third game just two years later.

The Plot:
When Doctor Eggman vies for the legendary Chaos Emeralds and tricks Knuckles the Echidna into helping him, Sonic the Hedgehog and his friends – Miles “Tails” Prower, Amy Rose, and newcomer Cream the Rabbit – race to end his latest scheme for world domination.

Gameplay and Power-Ups:
Sonic Advance 2 takes the basic engine and core mechanics of the first game, which was already an interesting mash-up of the 2D and 3D gameplay, and expands upon them to create a high-octane, action-packed 2D sidescroller that puts a great deal of emphasis on blasting along at high speeds while holding right on the directional pad. The controls, already heavily borrowed from the 2D games, thus remain relatively unchanged: you can still jump with A, performing a Spin Attack in the process to bust Badniks and power-up pods, perform your character’s signature moves with B, and execute various mid-air “tricks” by pressing B or the Right trigger in mid-air off springs and ramps. Pressing up or down scrolls the screen vertically and pressing down and A charges a Spin Dash, allowing you to blast ahead (even as Amy this time). Although there are five playable characters to pick, each with their own special moves to slightly alter their gameplay, only Sonic is available at the start. The others are unlocked by playing the story mode and, in Amy’s case, by collecting all seven Chaos Emeralds with the four main characters. You play through seven main levels (referred to as “Zones”), each with two stages (or “Acts”) and a dedicated “Boss Attack” stage, with two additional Zones unlocked when certain criteria are met. As ever, Golden Rings are your lifeline; as long as you have at least one, you’ll survive enemy attacks. Every Act is played against a ten-minute time limit, with you losing a life once this expires, though you can disable this from the “Options” menu. You can also switch between “Easy” or “Normal” mode from this menu, though this simply reduces the hits that bosses take to defeat, and select different language options, something far more relevant this time since there are more cutscenes and text dialogue than before. As you might expect, you can also grab various power-ups as you play: you’ll get a 1-up (also from collecting 100 Rings), 5, 10, or a random number of Rings, a shield (and a magnetic variant to attract Rings), a temporary invincibility, and a new power-up that instantly puts you at maximum speed (though is, essentially, a variation on the classic speed up power-up).

Cream lends her game-breaking cuteness to the increased emphasis on speed and tricks.

Much of this is carried over from Sonic Advance and the same is true of your character’s abilities. Each one plays a little differently, which can alter how difficult the game is. Tails and Cream, for example, can fly, easily avoiding the many pits that spell Sonic’s doom. Every returning character sports the same special moves as in Sonic Advance, with Sonic performing his Insta-Shield by pressing A twice, sliding ahead with B, and executing a fairly useless mid-air dash and Homing Attack when in mid-air. Sonic can also now bounce to the ground by pressing B in mid-air, similar to his bounce ability from Sonic Adventure 2 (Sonic Team USA, 2001) and almost as a precursor to the Drop Dash. Tails flies, as normal, and takes out enemies with a tail swipe with B, Knuckles glides and climbs walls and executes a three-punch combo with B and also now drills downwards when you press B in mid-air. Previously the most unique and difficult character to use, Amy now has a Spin Attack and Spin Dash just like her friends, meaning she’s a far more viable character this time (if you can unlock her!) She still swings her Piko-Piko Hammer with B, dives ahead, and uses it to attack aerial enemies. Every character can also grind on various rails, grab overhead poles, swing from vines and such, and blast ahead at break-neck speeds after building momentum. Flying off ramps sees you pull off mid-air tricks, which are essential to clear bottomless pits and reach higher areas and can spell your doom if you fail them. Since every character essentially adopts Sonic’s super-fast gameplay, there are far less opportunities to use their unique special moves beyond flying and gliding and each one loses a lot of their appeal as a result. There is a mild saving grace in newcomer Cream, however. Essentially the “Easy” mode character, Cream can fly like Tails (though seemingly for less time) and, crucially, fire her Chao companion, Cheese, like a homing shot with B. This absolutely decimates bosses and even surrounds her with a protective barrier when used on the ground, making Cheese the go-to choice for the game’s tougher Zones and bosses.

The fast-paced, action-orientated gameplay means bottomless pits and cheap deaths and commonplace.

Sonic Advance 2 structures its Zones like high-speed races and obstacle courses; the “rollercoaster” aesthetic has never been truer than in this game as rails, ramps, loops, springs, and boost pads litter every environment. There is still the occasional instance of water, putting you at risk of drowning, though you’re far more likely to run across the water than sink into it. Moving and temporary platforms also still appear, often placed at the end of solid ground to screw up your jumps, as do slopes, poles, destructible elements, and bouncy surfaces. This latter gimmick is most prevalent in Music Plant, which has you bouncing around on keyboards and cymbals, while Hot Crater is more about overhead rails and annoying spikes. While things start familiar enough in Leaf Forest (functionally an amalgamation of the classic Green Hill Zone and Green Forest) and Ice Paradise is like a fancy do-over of the previous game’s Ice Mountain, things take a turn for the worst in Sky Canyon. Bottomless pits, poor hazard placement, and tricky jumps appear before this point, but Sky Canyon really ramps them up, hiding ramps and springs and platforms behind clouds and forcing you to make split-second decisions at high-speeds that will quickly drain your pathetic stock of lives. It’s very easy to miss jumps or overshoot your landing, or to plummet to your death since you often drop through rails rather than landing on them. This continues in Techno Base and Egg Utopia, which borrows gimmicks like the light-based bridges and topsy-turvy gravity from Sonic 3 & Knuckles’ Death Egg Zone and marries them with rails and pits, pits, pits! Sonic Advance 2 quickly conditions you to “hold right to win” with its emphasis on speed; Badniks are few and far between and everything is geared towards propelling you ahead at incredible speeds. It’s thus incredibly frustrating to settle into this mindless gameplay loop and fall down an endless chasm, get skewered by spikes, or miss a ramp or a rail and drop to your death.

Presentation:
If there’s one area where Sonic Advance 2 truly excels, it’s the visuals. Again, there’s a reason I used these sprites and backgrounds when made sprite comics; they’re so vivid and detailed and really bring the characters to life like never before in 2D. While Sonic Advance 2 features some recycled animations from the last game, every character has loads more frames of animation either in their poses, tricks, or when performing basic functions. Every main Act starts with your character taking their marks and getting ready to race ahead as a countdown ticks place, they’re followed by shadowy afterimages when at top speed, and their run cycles are vastly improved as the game ditches the classic “rubber band legs” animation to more closely emulate the 3D games of the time. This racing aesthetic continues when you finish an Act as you’re no longer passing a signpost or reaching a Goal Ring; instead, you run through a finish line and your character poses while running and your score is tallied. While the introductory cutscene is nothing special (and is actually worse than in Sonic Advance since it just focuses on the island, Sonic Advance 2 utilises a map screen for its stage select that’s almost an exact copy of Sonic Adventure 2’s, and includes bigger, more detailed and cartoonish sprite art for its cutscenes. As you clear Zones, Sonic rescues his friends, chatting with them and unlocking them to be played, though these cutscenes only appear when playing as Sonic and only once. Once you’ve cleared the game, you can’t view them again and the game is irrevocably changed. Cream is no longer held hostage when you fight the EggHammerTankII and Dr. Eggman pilots the Egg Saucer on subsequent playthroughs, as opposed to Knuckles. While the Game Boy Advance sound system is still grating, Sonic Advance 2 features far catchier tunes and more musical variety than its predecessor. Bosses and Acts have differing tracks and game’s more frustrating moments are somewhat alleviated by the jaunty music, with Ice Paradise being a particular highlight.

More story and detailed animations contrast with some garish environments.

Although Sonic Advance 2 doesn’t exactly break the mould with its Zone aesthetics, the presentation is far better than its predecessor. Sonic Advance had a rather blurry, pixelated, bland look that’s been completely overhauled into a smooth, sleek, almost plasticine-like aesthetic. Admittedly, this can make some of the foregrounds more generic and the Zones do suffer from being far more linear, with ramps and long raceways being predominant, but there’s no denying the graphical upgrade. Sonic Advance 2 also borrows more from Sonic Adventure 2 for its overall presentation, especially in Zones like Leaf Forest and Sky Canyon, with the latter basically being a 2D version of Rail Canyon. Given the game’s emphasis on speed, ramps, springs, loops, and boost pads are common gimmicks in each Zone, somewhat robbing them of their individuality, though unique gimmicks can still be found (however sporadically) amidst the cheap-ass pits and hazards. Hot Crater, a mechanical base built into a volcano, features overhead rails, a heat effect to the background, and hooks to fling yourself upwards. Music Plant is a garish slice of ridiculousness that looks like it’d fit right in in Zool: Ninja of the Nth Dimension (Gremlin Graphics, 1992) and begins an annoying trend in Sonic games of this era of featuring an overly kiddified level. Ice Paradise has a Christmas theme to its soundtrack, features a bustling city in the background, flurries of snow, and big neon signs, giving the impression of a ski slope. Sky Canyon is a mess of pits and vertical columns, featuring windmills, those fans from Starlight Zone, and balloons to carry you up. Techno Base is a mess of hexagons, lights, lines, and vulgar colours; it’s essentially a new version of Cosmic Angel Zone from Sonic Advance, though with digitized spikes and some pinball mechanics. Egg Utopia is essentially a 2D version of Final Rush/Final Chase mixed with the Death Egg Zone, featuring rails between different areas of the space station set against the background of space, a gravity gimmick that has you running on the ceiling, cannons, and spiked balls. This aesthetic is carried over to XX, which is simply an autorunner (like all the game’s bosses) gauntlet before the final showdown, while True Area 53 takes place in the void of space with the Earth in the background.

Enemies and Bosses:
No doubt due to the game’s focus on fast-paced action, Badniks are few and far between in Sonic Advance 2. The game would rather surprise you with spikes or bottomless pits than have you free critters from robotic shells, something further emphasised by the lack of capsules at the end of each Act. When Badniks do appear, they’re generally awfully placed to screw up your jumps or tricks and send you plummeting to your death, and they’re largely recycled throughout each Zone. Some of their designs may be familiar to long-time Sonic fans, though: the Geji-Geji aren’t too dissimilar from Caterkillers, the Circues are reminiscent of the monkey-like Kikis, Flickey is literally a robotic version of Flicky, and the Buzzers return wholesale from Sonic Advance. Kikis hide in trees and toss coconuts like in the 3D games and like their predecessor, Coconuts; Spinners return from the 3D games and can be bounced on to cross gaps; and little robot mice scurry about on the ground. Mechanical penguins launch themselves across the snow like Penguinators, clown-like robots swing their own Piko-Piko hammers, and large robotic hammerheads await in the waters at times. Each one releases a woodland critter and adds to your score tally, but they’re mainly there to get in your way and are such a non-factor that it’s easy to be blindsided by them. The E-100 “ZERO”-like Robot Guard also appears, relentlessly pursuing you in Special Stages, sapping your Rings and kicking you out of the stage if it touches you. Having somehow been tricked by Dr. Eggman, Knuckles is battles you in your first playthrough, piloting the Egg Saucer at the end of Sky Canyon, though his presence doesn’t change anything except the cockpit sprite.

The autorunning mechanic used in boss battles makes them needlessly annoying at times.

Therefore, you’ll be battling Dr. Eggman’s newest machines at the end of each Zone. Unlike in Sonic Advance, every single boss battle is an autoscroller that sees you constantly running on an endless loop, snagging Rings and timing attacks and compensating for the knockback and the tougher “pinch” mode, which can get so aggravating that it’s often easier just to cheese the bosses with Cream. Things start off familiar enough with the EggHammerTankII, an upgrade from Sonic Advance that also attacks with a giant hammer but this time it can extend its reach. While the hammer is a large hazard to avoid, this isn’t too tricky. The Egg Bomber Tank is a bit trickier as you can only attack its cannon in the first phase; the main body can only be attacked in the second phase, and both see you avoiding bouncing, explosive cannonballs. Though functionally simple, the autoscrolling gimmick makes the Egg Totem a bit difficult since it’s hard to get up to speed and hop to its spiked platforms to hit the cockpit. Each platform sprouts turrets that must be destroyed to clear the field of projectiles and they also move quiet erratically to screw up your jumps. The Aero Egg also causes problems as its bombs have wide splash damage and you can only attack it by bouncing off its tail platform (unless you just aggressively fire Cheese). Things can get very frustrating against the Egg Saucer as the laser cannon has a wide range and the robotic hand can instantly kill you with its slap attack! Your best bet is to take out the cannon and hang back, way back, running in whenever the cockpit spins into view.

You’ll need to overcome all the bosses again and get the Chaos Emeralds to fight the true final boss.

The Egg-Go-Round was much easier in comparison. This machine flies along on a rail and is protected by four platforms, two that sprout spikes and two that fire projectiles. It can be tricky avoiding these but it’s a hell of a lot easier to ram the cockpit than the Egg Saucer. The Egg Frog is a different matter entirely, though. This boss incorporates the Egg Utopia’s gravity gimmick, hopping to the floor and ceiling and dropping carpet bombs that are very difficult to avoid. While you can switch to the floor and ceiling by holding up and down, the Egg Frog’s hit box is so large and the window of opportunity so small to hit it that it’s better to just give up and use Cheese to decimate it. Similar to the last game, XX features a boss rush…but this time its against all the bosses you previously fought! Though they take less hits to defeat, the only checkpoint occurs after defeating the EggHammerTankII and this gruelling prospect means you’ll likely be low on lives and/or Rings by the time you reach the Super Eggrobo Z, a modified version of Sonic Advance’s true final boss. This giant mech takes up the entire right-side of the screen and fires its claw arms (which can be destroyed) and a sweeping laser from its eyes. Platforms will raise, allowing you to attack its main weak spot (the head) but also putting you at risk of being skewered or crushed against the ceiling spikes. After a few hits, the mech’s attacks increase but, again, you can make a joke of it by using Cream, destroying Dr. Eggman’s newest space station and treating you to a character-specific ending. However, this isn’t the true final boss. Collect all seven Chaos Emeralds with the four main characters and you’ll be taken to true Area 53 where, as Super Sonic, you battle perhaps Dr. Eggman’s most visually disappointing final mech ever, an unnamed, worm-like cannon. I’ve never battled this boss, but you’re limited, as ever, by your Ring count and must bash its missiles back at it, watching for the mech’s freeze ray and suck attack while also avoiding projectiles and dealing with its invisibility gimmick.

Additional Features:
Just like in the classic games, you can challenge Special Stages to collect the seven legendary Chaos Emeralds, which unlocks the game’s true final boss and ending. Unfortunately, if you thought Sonic Advance’s hidden springs were a pain in the ass, let me introduce you to the “Special Rings”. Seven of these are hidden in each of the main Acts and all seven must be collected to enter the Special Stage. If you lose a life in the Act, you’ll lose all the Special Rings you collected and you probably won’t be able to backtrack to get them, especially as Sonic, since many are hidden in hard-to-reach areas. If you somehow find them all, you’re taken to a large, pseudo-3D checkerboard arena and must race around collecting Rings, gaining multipliers and utilising boost pads, all while the Robot Guard chases after you. Because of how difficult the Special Rings are, I’ve never entered a single Special Stage and have therefore never collected even one Chaos Emerald, which is extremely frustrating as a life-long Sonic player. To make matters worse, you must beat every Special Stage with the four main characters to unlock Amy Rose, a needlessly obtuse criteria for a character who was available by default in the last game. Sonic Advance 2 also includes a time attack mode and a Tiny Chao Garden, where you raise and play with Chao and even transfer them to and from the 3D games, though you’ll only unlock this after collecting the seven Chaos Emeralds with a single character. Similarly, you can unlock a boss rush by beating the game with three characters and all seven Chaos Emeralds, which you’d think would invite replayability but instead makes me want to tear my hair out since entering the Special Stages is so ridiculously difficult. You can also play a single- or multi-pack multiplayer mode, racing to the finish or collecting Rings against other players and utilising the additional Attack, Brake, Confusion, and Warp power-ups to gain an advantage.

The Summary:
The visual upgrade between Sonic Advance and Sonic Advance 2 is as startling as the differences between the first two Sonic games. Where one was colourful and fun but handicapped by a slow, meandering pace, the sequel is both brighter, slicker, and much faster and more action-packed in its design. Sonic Advance 2 brings its characters to life like never before with some truly incredible, amusing, and charming sprite work. The animations are great, making the game resemble its 3D counterparts and a cartoon, and the upgrade to the environments makes everything pop so much more. Things are a little tame at times and the Zones can be annoyingly linear, but this ties into the focus on high-speed gameplay. Unfortunately, this approach does hamper the gameplay somewhat since everyone blasts ahead at full speed like Sonic, meaning their individual playstyles fall further to the wayside. This wouldn’t be so bad if the game didn’t throw bottomless pits, annoyingly placed enemies and hazards, and cheap deaths at you in a paper-thin attempt at increasing the game’s challenge. Pits definitely should appear in Sky Canyon and difficult sections should definitely appear by the end, but scattering them throughout every Zone really stunts my enjoyment as you must either memorise the Act layouts or have split-second reactions to make unfair jumps. While I enjoyed the bosses, the autoscrolling mechanic got old fast and I didn’t appreciate the boss gantlet in XX. I think the autoscrollers would’ve worked better if it had only be used, say, three times. I did like the emphasis on story and how the bosses changed because of it, but not that these changes were undone upon beating the game. It’s also maddening that the Special Stages, Amy Rose, and true final boss are all-but inaccessible thanks to the irritating Special Ring mechanic and the fact you need to get the Chaos Emeralds with every character. I liked Cream, she was cute and fun and made the bosses a joke, and the visuals still blow me away, but the difficulty curve is a nightmare. Because of all this, I can’t rate Sonic Advance 2 higher than the original, even if it is technically and visually a better game since my enjoyment is constantly soured by my inability to experience everything it has to offer.

My Rating:

Rating: 3 out of 5.

Pretty Good

Are you a fan of Sonic Advance 2? How do think it compares to the original and the third game? What did you think to Cream and her boss-breaking powers? Were you a fan of the increased emphasis on speed? What did you think to the reliance on bottomless pits and boost pads? Did you ever collect the Chaos Emeralds and unlock Amy…and, if so, how? Which of Sonic’s Game Boy Advance titles is your favourite and how are you celebrating Sonic’s anniversary this year? Whatever your thoughts on Sonic Advance 2, leave a comment below and go check out my other Sonic content!

Mini Game Corner [Sci-Fanuary]: Metroid: Zero Mission (Nintendo Switch)


January celebrates two notable dates in science-fiction history, “National Science Fiction Day” on January 2 and Arthur C. Clarke’s HAL 9000’s birthday on January 12. Accordingly, I’m dedicating January to celebrating sci-fi in an event I call “Sci-Fanuary”.


Released: 19 June 2024
Originally Released: 9 February 2004
Developer: Nintendo R&D1
Also Available For: Game Boy Advance (Original); Nintendo 3DS, and Nintendo Wii (Virtual Console)

A Brief Background:
Metroid (Nintendo R&D1/Intelligent Systems, 1986) owes its creation to Nintendo’s success with their industry-saving Nintendo Entertainment System (NES), producer Gunpei Yokoi and directors Satoru Okada and Masao Yamamoto collaborated on the title, and Alien (Scott, 1979). Alongside Castlevania (Konami, 1986), the game birthed a videogame subgenre dubbed “Metroidvania” and Metroid was praised for its challenging gameplay. Since being recognised as one of the greatest games ever made, Metroid spawned numerous sequels and spin-offs and was ported to many subsequent Nintendo consoles. Nintendo (and Metroid) veteran Yoshio Sakamoto oversaw the development of this Game Boy Advance remake, which came about when someone working on Metroid Fusion (Nintendo R&D1, 2002) suggested porting Super Metroid (Nintendo R&D1/Intelligent Systems, 1994) to the console. The developers fittingly sought to return to the franchise’s roots, while still adding new elements to make the game feel fresh and modern. Principally, this involved placing greater emphasis on the story, allowing players to pick between difficulty settings, providing Samus with a new form-fitting suit, and adding an epilogue to the story. Reviews for the enhanced remake were largely positive; its content and features and refined controls were praised, though many complained of its short length and that newcomers would get more from it. Still, Zero Mission was said to be one of the best Game Boy Advance titles and it finally found a life outside of its system once Nintendo made it available through their online consoles.

The Review:
Metroid: Zero Mission is a Game Boy Advance remake of the original game, following essentially the same narrative structure (bounty hunter Samus Aran explores Zebes, conquering monstrous bosses to confront Mother Brain, leader of the Space Pirates) and offering the same power-ups, but with a decidedly 16-bit glow up that basically reimagines the original game as though it were a 16-bit title. Consequently, the game looks, sounds, and plays almost exactly like Super Metroid and Metroid Fusion, enhancing Samus’s abilities with moves like the Speed Boost, Spineshark, and ledge grab and allowing her to better dispatch her enemies with an expanded move set, one ripped entirely from those aforementioned games. You fire her trademark blaster arm with B or X (eventually acquiring power-ups that allow you to charge a shot, temporarily freeze enemies, and fire through enemies and obstacles), jump with A (again upgrading this to the iconic Screw Attack and Hi Jump Boots), hold the Left trigger to stand in place and aim in multiple directions, and quickly acquire the Morph Ball to squeeze through tunnels. As you’d expect, you can acquire upgrades that let Samus jump and lay bombs in this form and upgrade her suit to reduce the damage she takes or resist extreme heat and acid pools. Zero Mission adds not only a mini map to the main screen but a large, detailed map for each area of Zebes, expanded whenever you find a Map Room and easily allowing you to see where you need to go (thanks to Chozo Statues highlighting your next objective) and any hidden secrets to find or bosses to confront. Pausing the game lets you review this map, see Samus’s currently available weapons and upgrades, and enter sleep mode. From the main menu, you can select up to three save slots (manually saving in various save rooms) and choose to play on either “Easy” or “Normal” mode.

Alongside the 16-bit glow up, Samus sports some returning and new abilities.

Thanks to the graphical upgrade, Zero Mission is almost completely indistinguishable from the original Metroid and aesthetically has much more in common with Super Metroid and Metroid Fusion as a result. The basic layout is still there (go left at the start of the game and you’ll still find the Morph Ball, for example), with you still ploughing through hallways, dropping down vertical shafts, and riding elevators to explore Brinstar, Norfair, Kraid’s Lair, Ridley’s Lair, and Tourian, but each area is far more visually interesting compared to its 8-bit predecessor. Lava and acid bubbles beneath you, platforms crumble, enemies constantly spawn, and you’ll be backtracking and finding alternate routes as your abilities expand, as always, all while traversing various rocky, mechanical, and ominous environments. Backgrounds are given far more depth and detail, rain effects sweep across the terrain, volcanic caverns smoulder, and enemies are far more detailed (and much bigger) this time around. The game’s story is also given an upgrade with partially animated sequences, Samus’s inner monologue, and in-game graphics providing suitably dramatic cutscenes. The soundtrack has also been upgraded, featuring 16-bit versions of Metroid’s tracks and various remixes that work in tandem with the graphical improvements to again allow the game to stand side-by-side with its 16-bit counterparts. Areas also have new gimmicks, such as the Morph Ball Launcher (which blasts you to new areas), overhead zip liners, and power generators and Chozo Statues that require your Morph Ball and recharge your health and missiles. The Speed Boost is incorporated to break through walls and reach new areas, some doors are barred by grotesque eyes, you’ll occasionally have to unleash small bugs to clear out vine blockages, dead bodies, discarded carcasses, and creeping vegetation are commonplace. Indeed, the entire world seems much bigger and more alive and dangerous than ever thanks to the updated visuals and ominous soundtrack.

New bosses and Super Metroid inclusions basically make this an entirely new game.

Those familiar with Metroid may also be surprised to find a few new enemies here: the hopping Barisutes act almost as mini bosses with their tough armour plated hides, larva-like Kiru Giru fill narrow tunnels and must be baited in to attack their underside with bombs (or shot from below), and Space Pirates shrug off even your strongest missiles. These appear alongside improved versions of the original enemies and Samus will have to hunt down, freeze, and explode every energy-draining Metroid in Tourian if she hopes to escape. Zero Mission also boasts five new bosses in the main portion of the game: two of these are gigantic, spiked, worm-like creatures that burst through the environment or up through acid, lunging at Samus and firing spores or spikes. The first, the Deorem, uses its spiked body to box you in and must be shot in its eye when it appears. The second, the Mua, lunges from an acid pit, giving you a small window to target its pulsating weak spot. Norfair itself later attacks by ensnaring a Kiru Giru in vines and unleashing spores. You must freeze the Rippers in the arena to hop to and attack the vines to send the enslaved creature crashing down. This monster lands in Ridley’s Lair, sheds its skin, and mutates into a grotesque wasp, the Imago, that flies around its nest, charging about and firing spikes from its stinger. You must use yourself as bait and then pelt the stinger with missiles to finally end it. Metroid’s classic bosses also appear in their respective areas, but they’re now reimagined duplicates of Super Metroid. Kraid is a gigantic, bulbous beast you must shoot in the head and mouth while hopping to temporary platforms, while Ridley flies about breathing fire, striking with his spiked tail, and trying to get his claws on you. Samus still braves a nightmare of projectiles and lava hazards when confronting Mother Brain, whose glass case must be shattered with missiles before you can attack her single eye, but her eye blast and the knockback from the swarming projectiles makes this a tricky affair.

A tense stealth section and all-new bosses await in the extended finale.

After making a desperate escape from Zebes, Samus’s ship is attacked and crash lands in the all-new Chozodia sector. Robbed of her armour and abilities, Samus has only her form-fitting Zero Suit and a crappy pistol on hand, meaning players must sneak past Space Pirates, laser traps, and spotlights, desperately running to safety when they inevitably trigger the alarm and only being able to briefly stun enemies. This is quite a tense and frustrating section; when you’re spotted, an alarm sounds, all doors lock, and Space Pirates chase you relentlessly. You can hide behind pillars or in dark corners, but it can be tough to find these when you’re in a panic and the Space Pirates sometime crawl through alternate paths or blast through destructible blocks to find you. Eventually, Samus makes it to the main bridges and the Chozo Ruins, where her mettle is tested by a holographic, lighting-casting projection. Make sure you don’t attack when the mirror of Samus is in the sphere as you’ll take damage. Instead, target the central sphere when images appear and you’ll regain all your abilities, and more. Previously, you’ll have explored different Chozo Ruins and acquired “unknown items” that were incompatible with your suit; these are enabled here. This allows you to plough through Space Pirates with ease with the Plasma Beam, continuously jump with finnicky Space Jump, and freely move through liquid with the Gravity Suit. You’ll also acquire the Power Bombs here and it’s advisable to backtrack to use these new abilities to uncover previously hidden expansions to your health and ammo. When you’re ready, you challenge Mecha Ridley which, though intimidating and powerful, is actually a pretty anti-climactic final boss. You can simply jump over its claw swipes, fireballs, and lasers and pummel the glowing core on its chest to defeat it with much less trouble than its biological counterpart. Samus then has five minutes to make it to an escape shuttle to finish the game, and players are of course treated to different ending images depending on how fast they made it to the end and how many power-ups they acquired. Completing the game also unlocks an additional gallery mode and, impressively, a fully playable port of the original Metroid.

The Summary:
Given I much prefer Samus’s 16-bit adventures to her original game, I was pleasantly surprised by Metroid: Zero Mission. The game is similar enough, but different, featuring a far more visually appealing graphical style that perfectly matches its 16-bit counterparts and updates the original game to be comparable to its successors. If anything, I feel like more could’ve been changed; the Chozodia was a fun addition, but it was more of an unexpectedly epilogue that served as padding. Perhaps if each area featured stealth sections where Samus was reduced to her Zero Suit as part of a Chozo test it might’ve helped with the game’s pacing. The new bosses could’ve been fought at the end of these sections, with the “unknown item” power-ups being rewarded and allowing Samus to get progressively more powerful, as usual. It was a tense and surprising inclusion, though, one that fundamentally changed how you play. I just wonder if more could’ve been done with it, perhaps allowing players to try the whole game with the Zero Suit? The other changes were very welcome (except for the Spineshark; I’ll never enjoy that ability), especially to the returning bosses. Sure, seasoned Metroid players will have a distinct advantage but recreating the Super Metroid battles made these bosses far more intimidating and epic. It’s a shame Samus didn’t get any new abilities beyond the standard Super Metroid ones, which again I feel could’ve been addressed by emphasising the Zero Suit more, but Zero Mission does a fantastic job of bringing the original Metroid up to par with its successors. As if that isn’t enough, you unlock the original game, so anyone who doesn’t like the changes can just play the original game after!

My Rating:

Rating: 3 out of 5.

Pretty Good

Have you ever played Metroid: Zero Mission? How do you think it compares to the original game? Did you like the graphical upgrade and the changes to the bosses? What did you think to the Chozodia section, and do you agree the pacing was a little off? Did you ever get the best ending and play through the original Metroid? Which Metroid game is your favourite? Whatever your thoughts, feel free to leave a comment below and be sure to check out my other Metroid reviews.

Game Corner [Sci-Fanuary]: Metroid Fusion (Nintendo Switch)


January celebrates two notable dates in science-fiction history, “National Science Fiction Day” on January 2 and Arthur C. Clarke’s HAL 9000’s birthday on January 12. Accordingly, I’m dedicating January to celebrating sci-fi with an event I call “Sci-Fanuary”.


Released: 8 March 2023
Originally Released: 18 November 2002
Developer: Nintendo R&D1
Also Available For: Game Boy Advance (Original); Nintendo 3DS, and Nintendo Wii (Virtual Console)

The Background:
Nintendo introduced gamers to Samus Aran in August 1986. Her debut title was celebrated for its challenging gameplay, is now regarded as one of the greatest games ever, and helped popularise the action/explorationMetroidvania” subgenre. Nintendo followed Metroid with the Game Boy-exclusive Metroid II: Return of Samus (Nintendo R&D1, 1994), a contentious and divisive title whose narrative nevertheless directly influenced Samus’s jump to Nintendo’s ground-breaking 16-bit console. After two years in development, Super Metroid (Nintendo R&D1/Intelligent Systems, 1994) was universally praised for its impressive visuals and tight gameplay, becoming a must-have title for any Super Nintendo owner. Despite this, it would take over ten years for Samus to receive another solo title, with the first footage of “Metroid IV” being shown at the 2001 E3 convention. The team behind Super Metroid returned for Metroid Fusion, introducing a mission-based structure to the gameplay to guide players towards objectives rather than them having to figure things out blindly as before. The developers also took the opportunity to revamp Samus’s appearance and the way she replenished her health and missiles, as well as simplify the controls compared to Super Metroid. Like Super Metroid, Metroid Fusion received critical acclaim; the gameplay, graphics, and mechanics were praised, though many were disappointed by its short length. While Metroid ventured into the 3D arena after Fusion, a sequel came less than ten years later, and the game eventually became available outside the Game Boy Advance (albeit digitally) as Nintendo branched out into virtual consoles.

The Plot:
While exploring planet SR388, bounty hunter Samus Aran is attacked by the parasitic “X” organisms. Though saved by a Metroid-based vaccine, Samus is physically altered. Despite this, she investigates a Biologic Space Laboratories (BSL) space station overrun by the X, now led by “SA-X”, an X parasite mimicking Samus at full power!

Gameplay and Power-Ups:
Metroid Fusion is a 2D, action-orientated exploration title that takes a lot of inspiration from Super Metroid. As in that game, you (as Samus Aran) will be exploring a vast space station home to numerous elevators and hidden tunnels to various high-tech laboratories, caverns, flooded and lava-filled areas, and other regions, all infested by the X parasite. This time around, Samus’s abilities are restricted by her superiors, represented by a station computer that gives the player objectives, points you in the right direction, and offers advice about how to tackle each area. In this regard, Metroid Fusion is the most linear Metroid game so far; the station computer warns you of nearby hazards, says what weapon or upgrade you need to overcome them, and highlights your objective on the game’s map screen. That’s not to say you won’t be backtracking and searching high and low for secret passages and hidden power-ups, but it definitely helps to have an in-game system guiding you along. This, in conjunction with the helpful mini map and the larger full map (accessed with the + button), means it’s easier than ever to navigate the station’s different environments, at least at the start of the game. The + menu also allows you to review Samus’s current suit, abilities, and weapons, refresh yourself on your current objective, and enter sleep mode if you ever need a break. As always, Samus can only save at designated Save Stations (though you can make liberal use of the Switch’s save state and rewind feature to compensate for this) and she can replenish her health, and missile and bomb ammo, at various Recharge Stations. Defeated enemies will also replenish these, but things are a little different this time around. When defeated, enemies release an X parasite that must be collected to refill your health or ammo. If you linger too long, it’ll spawn another enemy, or a tougher variant, adding a level of anxiety that was missing from the previous games.

All of Samus’s abilities return, though she’s strangely light on new tricks.

Samus’s abilities are limited at the start of the game, narratively explained by her being fragile following her encounter with the X. To begin with, you can fire her trademark arm cannon with B or Y, holding the button to charge it and aiming in all directions. A allows her to jump, and she’ll jump higher the longer you hold the button, and you can enable precision aiming while holding down the Left trigger. As you explore the game’s locations and defeat bosses, you’ll gradually regain all her signature abilities. Samus will gain missile upgrades that deal additional damage, open different doors, and even freeze enemies, eventually allowing you to charge up a wider shot by holding the R trigger. She can also morph into a spherical ball to pass through vents and narrow tunnels, eventually dropping bombs and hopping to higher tunnels. Her arm cannon can be upgraded to increase her rate of fire and pass through enemies and walls, shredding enemies who normally take multiple shots to defeat. Her jumping ability can also be enhanced, allowing her to jump higher and continuously and adding her signature “Screw Attack”, though abilities like the Space Jump can be difficult to master due to the finnicky timing required to sustain her jumps. This is equally true of Samus’s aggravating wall jump, which is just as frustrating as in Super Metroid, though thankfully I found it wasn’t necessary to clear the game. Samus’s suit can also be upgraded to withstand extreme temperatures, allowing her to enter frozen areas, freely move through water, and even endure lava. While Samus’s suit will change with each upgrade, she doesn’t showcase anything new her with two exceptions: Samus can grab ledges, making platforming and entering tunnels much easier, and absorbs the different coloured X parasites to refill health and ammo. However, her maximum health, missile, and bomb count can still be expanded by searching around. While you’re told how to use all these abilities and the map even highlights when there’s something in each area, you’ll get no direction on how to use her wall jump or her “Shinespark” ability. The Speed Boster lets Samus crash through certain blocks, but you can press down when she’s at full speed to store that energy and then direct her to smash through higher blocks, which I found extremely aggravating and difficult. I still don’t know why simply jumping while running and pressing A at a wall isn’t enough to pull off these manoeuvres.

Activate consoles, clear areas of hazards, and stay far away from the SA-X!

The level layout of Metroid Fusion again owes a lot to Super Metroid, with long vertical shafts, bio-organic areas, and ominous facilities being the order of the day. Puzzles are generally solved using Samus’s abilities; you can uncover destructible blocks by blasting the environment or laying a Power Bomb, though sometimes you need to find an alternative route to access them. Lifts, doors and tunnels will take you to new areas, with the game’s bosses often wrecking the environment and forcing you to take a longer path around blockades or hazards. Samus will be constantly searching for Data Rooms, Navigation Rooms, security consoles, and the like to discover her objective, restore power to an area, or unlock coloured doors. Sometimes, these will remove obstacles such as water or encroaching darkness from an area, though her suit upgrades often circumvent these. Sometimes, you’ll need to drop Power Bombs to break open tubes; often, you’ll be climbing ladders or clinging to overhead rails; occasionally you have to race against a timer to solve overloads or escape areas; and you can again freeze enemies to make temporary platforms. Enemies respawn after you leave a screen, as ever, but the unique X parasites revive corpses or spawn new enemies while you’re on the screen. Some doors are barricaded by disgusting, energy-shooting eye growths that need to be destroyed, some blocks and platforms crumble under your feet, and some areas are veritable mazes that have their pathways hidden within the foreground. Easily the biggest edition to the game is the nigh-unstoppable SA-X, a twisted doppelgänger of Samus that occasionally stalks the corridors or wrecks the background. When the SA-X appears, take the computer’s advice and stay out of sight or run as it can drain your health in seconds with its advanced abilities. On the few occasions when you’re chased by the SA-X, you can use your Ice Missiles to (very) briefly freeze it, adding a great deal of tension to the game in these instances.

Presentation:
Visually, the game also owes a lot to Super Metroid and its Aliens (Cameron, 1986) inspirations. The BSL space station is ominously empty, often devoid of music, and home to a huge docking bay (where Samus’s ship is parked), a series of large ventilation shafts, and elevators that take you to the station’s other areas. As you progress, you’ll return here a few times and explore new areas, such as the Sub-Zero Containment area that houses Ridley’s frozen husk, a teeming Habitation Deck (where Samus frees the friendly Dachoras and Etecoons from confinement), and the sprawling Reactor Silo, with Samus exploring each to tackle various issues with the space station. There are six “Sectors” to explore, all accessed by a main elevator system (though you can take alternative paths when this system fails or is inaccessible) and each with new areas to uncover as you expand Samus’s repertoire. You won’t explore these in numerical order, and you’ll also have to backtrack to them both as part of the story and to find all of Samus’s upgrades and power-ups. Sector 1 is a cavernous area, featuring rocky platforms spotted with vegetation, not unlike SR388, where Samus initially has to find and destroy atmospheric stabilisers to dispel the mist filling the area. Later, she ventures into mechanical hallways similar to Tourian, discovers Metroid husks in lava-filled caves, and battles Neo-Ripley in a large, cargo hold-like room. Sector 2 is like a Mayan temple, full of ancient ruins completely overtaken by foliage. Plants, vines, and flowers swarm the environment, creating a jungle-like feel and masking pathways, and these are married with a coral reef-like subsection. Sector 3 is both a sweltering laboratory and an arid desert, featuring a desolate, muddy aesthetic and a baking boiler room that threatens to destroy the entire station.

The surprisingly chatty Samus visits some interesting, if familiar, locations.

Sector 4 is basically an aquarium; it features a blue theme, lots of water, exposed power nodes that’ll sap your health, and beautifully detailed underwater sections full of anemones and a tranquil water effect. Sector 5 is a frozen laboratory filled with glass panels in the background and that’s eventually wrecked when an X-infused creature, the Nightmare, escapes captivity. Sector 6 is another cavern, but this time dank and dark, save for areas sporting vivid mushrooms. It’s also home to a restricted laboratory; Samus needs a beam upgrade to enter, where she’ll find various Metroids held captive. These are then unleashed when the SA-X arrives and blasts the environment, forcing Samus to make a desperate escape up a shaft while avoiding the panicked jellyfish. The SA-X and other bosses are prone to affecting the game’s environments; they’ll crash through walls, block off doors, and seal off some areas, forcing you to either escape, find alternative paths, or battle them in enclosed areas. Metroid Fusion focuses on story more than any previous game, featuring lovely cutscenes at the start and at various points throughout the story that showcase the SA-X’s power and Samus’s reaction to the events happening around her. This is further reinforced through various cutaways that detail Samus’s inner thoughts as she thinks of her former commander and ponders her newfound physiology. The game’s soundtrack is a further extension of Super Metroid; remixes of classic Metroid themes are featured, as are ambient sounds and suitably ominous tracks, but nothing really stood out to me as particularly new or memorable. Everything looks and sounds and plays really well, but the game owes so much to Super Metroid that it almost feels like a remake at times. I would’ve liked to see more variety in the locations and more effort put into the soundtrack, rather than playing it so safe.

Enemies and Bosses:
The BSL space station and its six Sectors and various areas are teeming with all kinds of alien lifeforms that are all hostile to some degree thanks to the X. The theme here is bugs and vegetation, as every enemy is some kind of insect or mollusc or plant-life turned monstrous, with only a few exceptions. We’ve got scuttling bug-like Gemmers, slug-like Choots that spring up from the ground and lazily float down, crab-like Dessgeegas that jump at you sideways, weird coloured balls floating around pumping out toxic gas, the Xenomorph-like Genesis creatures pouncing from above and below, and the armoured Gerubus crabs that need missiles to be dispatched. Piranha-like fish, tiny snails, and even zombified corpses are all infected by the X and, occasionally, stronger versions will be spawned upon defeat or you’ll need to defeat enemies a certain way to open up doors. Some enemies will be more than familiar to players of Super Metroid: the crustacean-like Evirs swim about firing projectiles from their tails, worm-like Funes snap at you from walls, and the Space Pirates even make an appearance. Kind of. The Zebesians are functionally the same, clambering up walls, firing shots from their claws, and even resisting your shots unless you charge up a beam or blast them from behind with missiles. Each defeated enemy releases an X parasite that must be collected, but you’ll also encounter blue X parasites that damage you until you upgrade your suit. Metroids also make a brief appearance, though they’re more of an annoyance than a threat as they simply knock you back rather than causing damage.

The X parasites assume some monstrous forms to keep you from your full arsenal.

There are twelve bosses to battle in Metroid Fusion, though one is encountered twice. Many of the bosses will not only be familiar to Super Metroid players but are simply super-powered X parasites. Defeating them reveals their true form, the eye-like Core X, which floats around firing lasers or protecting itself with spikes or electricity. Defeating this restores your health and ammo and bestows a new ability, but their inclusion essentially means every boss fight is a two-stage affair. The first you encounter, the Arachnus X, is an armadillo-like creature that stomps around, rolls at you, slashes with its pinchers, or unleashes an energy wave attack. Luckily, there are small tunnels you can retreat into to avoid these, though you’ll need to be wary of its widespread fireball attack, and it’s only vulnerable from the front and to your missiles. Next, you’ll battle the weird, plant-like Zazabi X, a strange jellyfish-like tentacle that hops around and tries to squash you. While it’s overhead, you can shoot up to bombard it with missiles but be sure to move as it saps your energy if it envelops you. Serris X presents quite the challenge. This serpentine beast bursts from the ground and circles the screen, taking up a lot of real estate and getting faster the more damage you deal to its head. You’ll then have your first encounter with the Security Robot B.O.X., a crab-like walker that charges you and spits bombs that spew fire plumes. Luckily, there’s a rail overhead you can grab to fire missiles into its opening from above, which eventually causes it to flee. When you battle it again later, these overhead rails are essential to avoid the electrified water in the arena, and it now sports a missile barrage in its arsenal!

Gigantic, disgusting bosses will test you patience and skill.

Since you get a lot of experience battling Core X’s, targeting their eyes and dodging them as they float about, the Barrier Core X doesn’t pose much of a problem beyond being bigger, surrounded by smaller variants, and retreating to the water. The giant spider, Gedo X, is much more formidable; if this thing gets you in its mandibles, you’re in for a bad time! Luckily, you can retreat to the corners of the cargo bay in your Morph Ball to leave it bouncing around aimlessly. Gedo X also spits a spew of fireballs you’ll need to avoid and eventually starts dropping garbage on you, so you’ll need to dodge this as well as you frantically target its head with Super Missiles. Plant Core X reminded me of the Mother Brain battles from the first two games. This tangled mess of vines and thorns has infested a Chozo Statue and is protected by spore-spitting flowers and carnivorous plants. Pieces of the boss fall off and become hazards as you pepper it with Super Missiles and, while the spores eventually stop, the creature rears to life and blasts you with Plasma Beams! Like SA-X, Nightmare X’s threat is foreshadowed as soon as you venture into Sector 5 and see its shadow flying about it. Later, it wrecks the area and you’re forced to confront it, where it’s revealed to be this gigantic, bio-mechanical…thing that takes up most of the screen! Nightmare X hovers around erratically, fires a barrage of lasers from its arm/wing/things, and is only vulnerable to Super Missiles and the Charge Beam, and only in its mewling face. You must lure it to one side of the room and clamber up the ladders to attack it, marvelling as its face bleeds and degenerates as it takes damage, but your missiles will be useless when it engages it gravity-warping abilities so make sure to switch to the Charge Beam.

Some familiar faces, a formidable doppelgänger, and a ghastly Metroid beast await in the finale.

After a tense, manic escape from the Restricted Zone that sees you blast the SA-X into space, you’ll come face-to-face with an X masquerading as Samus’s archenemy, Ridley. Another gigantic sprite, Ridley flies about the place and charges at you, testing your reaction time and agility. It also breathes fire and tries to grab you. While this drains your energy, you can pummel it with Super Missiles to deal big damage, though it’s also recommended to use the Charge Beam. Eventually, the shrieking creature crumbles and you defeat one more Core X before finally facing SA-X. This X is a perfect copy of Samus in her classic suit and with all her abilities; it pops up throughout the game searching for you or chasing you down, decimating you with its Screw Attack and Ice Beam. You can finally settle the score in this fight but the SA-X is fast and powerful and you can only damage it with a fully charged Plasma Beam. Your Ice Missiles briefly freeze it but the window of opportunity is very small so be ready to Screw Attack to safety. After enough hits, it mutates into a monstrous form, one much easier as it simply tries to crush you, but it surprisingly saves you in the final fight when it sacrifices itself to empower you in the battle against the Omega Metroid. This gargantuan, insectile, alien monstrosity rips through the docking bay and is fought against a time limit. Initially, it’s invulnerable, but the SA-X’s Ice Beam lets you to damage it. However, you need to hit hard and fast and escape to safety. If its slashes land, you’ll be stun locked and killed in seconds or waste valuable time, so rush in, blast its head, and quickly retreat to end it. With the timer ticking down and the Omega Metroid’s huge hit box, this can be a frustrating test of patience and sadly lacks much strategy beyond shooting and retreating.

Additional Features:
Scattered all around the space station and its Sectors are numerous power-ups that will increase your maximum health and the number of missiles and Power Bombs you can carry. These are invaluable as the game progresses and tougher enemies and specialised hidden blocks become more prominent. You’ll gain all of Samus’s weapon and suit upgrades by defeating bosses, Core Xs, or from the odd Chozo Statue, so you don’t have to worry about missing anything. Maps are automatically provided when you interact with the Navigation Room or activate consoles as well, and as ever you can utilise the Nintendo Switch’s save state and rewind feature to drastically reduce the game’s difficulty. You get three save slots with Metroid Fusion and each one tracks your completion percentage, which is tied to how many power-ups you’ve found as well as how quickly you’ve played through the game. These factors also impact the ending you get upon finishing the game, with five on offer in the North American and European versions and eleven in the Japanese version, ranging from seeing Samus pose in her suit to showing off her form-fitting blue suit. If this is incentive enough for you to challenge the game again and finish it faster, then by all means go ahead, but there is nothing else on offer here, which is a bit of a shame as it would’ve been nice to see an SA-X skin or Samus’s blue suit form unlocked.

The Summary:
Although I’ve played a few Metroid games now, I still feel unaccustomed to the franchise. Nostalgia and a longing for Super Nintendo games means Super Metroid is probably my favourite of the series, so I was naturally very pleased with Metroid Fusion. As mentioned, the game has so much in common with Super Metroid that it’s basically a remake, with Samus’s abilities copied wholesale alongside many familiar locations and bosses. I didn’t expect the call-backs to Metroid II though, that was pretty neat, and I enjoyed seeing the game’s environments change as you explore the space station. There’s always something happening, be it an overload or a power drain or an escaped monster, and it’s a fun reason to backtrack and try out Samus’s new abilities. Pitting you against a ticking clock was a great way to break up the action, and adding an element of danger to defeating enemies with the X parasites was a neat touch, too. I also enjoyed the threat of the SA-X; this formidable double increases the tension and causes nothing but trouble throughout your adventure. Unfortunately, I don’t think it was utilised enough. There were some areas where the SA-X was entirely absent, and I think running from it, sneaking around it, or engaging with it multiple times would’ve helped the game stand out more from Super Metroid. Like, one of Samus’s power-ups could’ve been left lying in the open and be stolen by the SA-X and maybe you have to sneak around to retrieve it. Or you’d see it in the background or something. I would’ve liked to see more done to each area, too, to properly embrace each theme. All of them share similar high-tech features, just with different colours, which was a bit disappointing. Still, I imagine this was a great Metroid experience upon release as Super Metroid wasn’t available on the go like it is now and it still holds up really well as a companion piece to Super Metroid that does just enough to make it unique.

My Rating:

Rating: 4 out of 5.

Great Stuff

Did you enjoy Metroid Fusion? Did you like how similar it was to Super Metroid or would you have liked to see it stand out a bit more? What did you think to the SA-X and do you think more could have been done with the concept? Which of the areas was your favourite? Did you ever achieve 100% completion and Samus’s true form? Which Metroid game is your favourite? Whatever your thoughts, feel free to leave a comment below, and be sure to check out my other Metroid reviews across the site.

Game Corner [Sonic Month]: Sonic Advance (Game Boy Advance)


Sonic the Hedgehog was first introduced to gamers worldwide on June 23 1991 and, since then, has become not only SEGA’s most enduring and popular character but also a beloved videogame icon and, in keeping with tradition, I have been dedicating the entire month to celebrating SEGA’s supersonic mascot.


Released: 20 December 2001
Developer: Dimps / Sonic Team
Also Available For: Android, Nintendo Wii U (Virtual Console, Japan only), J2ME, and N-Gage

The Background:
After a long development process and strategic planning to create a mascot iconic enough to rival Super Mario, SEGA’s initial success with Sonic the Hedgehog expanded into mainstream popularity with Sonic the Hedgehog 2 (SEGA Technical Institute, 1992). Sonic was on a serious roll at this time; the spectacular Sonic 3 & Knuckles (ibid, 1994) was too big for one cartridge, became one of the best classic Sonic games, and was naturally followed by…numerous disappointing spin-offs before making the jump to 3D in 1999. As well received as Sonic Adventure (Sonic Team, 1999) and Sonic Adventure 2 (Sonic Team USA, 2001) were, however, SEGA was in dire straights; numerous delays, blunders, and over spending saw them lose their foothold in the home console market, bringing the “Console War” of the nineties to an anti-climatic end. Now focusing on software development, the unthinkable happened when SEGA produced ports of the Sonic Adventure games for Nintendo’s often-underappreciated GameCube console and, to commemorate the tenth anniversary of the franchise, SEGA turned to Dimps to create a 2D throwback to the classic games that also incorporated the art style and some mechanics from the 3D games. The result was Sonic Advance, which became a best-selling Game Boy Advance title and was met with largely positive reviews. Critics lauded the presentation and tight gameplay mechanics, though elements like the Special Stages and an overreliance on nostalgia were criticised. Still, Sonic Advance was regarded as one of the best Nintendo games and helped solidify SEGA ’s new relationship with Nintendo; it was followed not just by two sequels, but numerous handheld spin-offs and spiritual successors that further refined the gameplay and mechanics for Sonic’s portable adventures.

The Plot:
Doctor Eggman has returned, with his sights once again set on enslaving woodland creatures into metallic Badniks, gathering the legendary Chaos Emeralds, and constructing an elaborate space base! Luckily, Sonic the Hedgehog and his friends – Miles “Tails” Prower, Knuckles the Echidna, and Amy Rose – are on hand to oppose his evil schemes once more.

Gameplay:
When Sonic Advance released, the Sonic franchise was firmly in the midst of its 3D era. 2D, sidescrolling action-based platformers were out for the Blue Blur and elaborate, action-packed 3D rollercoasters with varying gameplay were in, so Sonic Advance was a bit of a throwback to Sonic’s classic 2D roots, and in many ways the long awaited fourth entry in the classic series. In addition to the plot being as basic as the classics, the control scheme is immediately familiar to anyone who’s played Sonic 3 & Knuckles: A lets you jump, pressing it again initiates a jump attack or move, you use up and down to scroll the screen and duck under obstacles, and press down and A to charge up a Spin Dash for a speed boost. You can pick from four characters – with Amy Rose making her playable debut in a sidescrolling game – and journey through seven levels (known as “Zones”), with two final Zones awaiting after clearing certain objectives, with each Zone split into two parts (known as “Acts”) and featuring a boss battle in each Act 2. Players must collect Golden Rings to stay alive, with the glittering Rings scattering when you’re hit so you can collect them again, and race against a ten-minute time limit, which can thankfully be disabled in the “Options” menu. This menu also allows you to pick between “Easy” or “Normal” mode (with the differences I believe boiling down to how many lives you start with and the amount of hits bosses take), configure the control scheme, and select different language options, though there is no story text to worry about here as everything’s taking its cue more from the 2D games than the 3D ones when it comes to storytelling.

Each character’s unique abilities changes the way you play and the game’s difficulty.

So far, so familiar. However, gameplay changes depending on which character you pick, with Tails effectively being the easy mode thanks to his propeller-like twin tails and Amy being the hard mode since she doesn’t curl into a ball. Each character has different abilities to traverse Zones and take out enemies; you can perform Sonic’s Insta-Shield by pressing A twice, pressing B sees him perform a sliding ground somersault, and you can perform a back jump by pressing B and then A (though I found little use for this). Sonic can also pull off a limited and frankly useless mid-air dash by pressing right and A twice and is somewhat limited in his options since he can’t fly or climb, so his gameplay is more about speed and ploughing head-first through obstacles. Tails can, of course, fly for a short time by pressing A twice, and his tails will often inflict damage on whatever’s underneath him. When in water, Tails can doggy paddle indefinitely by tapping A and pressing B on solid ground sees him whip his twin tails in a melee attack. Knuckles has a shorter jump height but makes up for it by being able to glide with a double tap of A and cling to and climb most walls. He can also swim by tapping A and perform a standing three-punch combo with A, though I didn’t have much use for this as the regular spinning and rolling methods work fine. Amy, however, is all about mele attacks; she can’t curl into a ball or Spin Dash, making her much more vulnerable, but she is armed with her signature Piko-Piko Hammer. You can smash enemies with B, use down and B to spring into the air with a hammer-assisted jump, and hold down and B when jumping to spin with the hammer, all of which is quite slow and clunky and makes battling bosses quite a chore for Amy. Amy can also take a giant leap by pressing down and A and can slide ahead by pressing right and B, but she sure does present a significant challenge even for seasoned players since she lacks all the basic Sonic abilities. Sonic and Amy can also hop on rails to do a bit of grinding and each character can grab overhead poles to shimmy along, bounce to higher areas using springs, run through loops, smash boulders or ice to occasionally reveal item capsules or springs, and must grab air bubbles to keep from drowning when underwater.

Gimmicks old and new are far more fun than the annoying enemy and hazard placement.

In terms of gameplay and stage design, Sonic Advance keeps things quite safe: Zones start off pretty simple, utilising recycled gimmicks and certain aesthetic themes from the classic games, but things become very cheap, frustrating, and difficult as the game progresses. You’ll be hopping to moving and temporary platforms, avoiding spikes, and trying to stick to the higher, faster path in most Acts but you’ll also be forced into the sluggish water, have to ride zip-wires, be blown into the air by fans, and pinball all over the place on bumpers. At first, enemies and hazards aren’t too difficult to avoid; the Game Boy Advance screen does limit your view a lot of the time, meaning it’s easy to jump or spring head-first into a projectile or unseen Badnik, but later Zones like Angel Island Zone and Egg Rocket Zone can easily see you jump, fall, or be blasted into a bottomless pit for a cheap death. Boost pads are used sparingly, thankfully, but are present, as are tunnels, air cannons, spinning spiked platforms, conveyer belts, bouncy platforms (and clouds), and lava pits. Ice Mountain Zone sees you riding iceberg floats, Angel Island Zone incorporates rolling boulders and sand gimmicks from Sandopolis Zone, and Egg Rocket Zone splits apart as you traverse higher, taking you further into the atmosphere, and briefly utilises the Death Egg Zone’s gravity mechanic. Claws will carry you across gaps, you’ll need to run on spheres to reach higher platforms, you’ll be jumping to swinging chained hooks, riding jets and streams of water, and dodging crushing hazards and warping across Zones. A lot of it is immediately familiar to long-time Sonic gamers, with just enough of a twist to make it more unique, but much of the game relies on slower, strategic platforming, blind jumps, or cheap deaths and enemy placements. Luckily, you can still hit lampposts to create a checkpoint if you die; collecting 100 Rings grants you an extra life, and there are 1-Up capsules hidden about the place. However, I actually found myself playing on zero lives at one point, which rarely, if ever, happens to me when playing 2D Sonic games and speaks to how challenging the later Zones can be largely due to placing Badniks, spikes, and bottomless pits just out of view to mess up your run.

Graphics and Sound:
There’s a reason I used the Sonic Advance sprites and backgrounds back when I used to make sprite comics; they are absolutely gorgeous and really capture the feel of the Sonic Adventure games and artwork. Sonic and his friends are full of life and personality, more than ever before; not only to they perform idle poses when left alone, urging you to get moving, but that also jig about with enthusiasm whenever you leave them standing. Although the introduction cutscene is extremely basic and focuses on the characters rather than delivering any kind of ground-breaking story, the in-game sprites more than make up for this; each character has lots of frames of animation, always pops against the background no matter how busy it gets, and performs a little victory pose when clearing Acts and bosses. Sadly, the music doesn’t fair as well; outside of some fun, if underutilised, remixes from the classic games, I found myself largely forgetting the themes for each Zone and the Game Boy Advance’s sound chip seems poorly suited to bringing the kind of energy I expect from a Sonic title. The stage select screen is also very basic and, while the ending makes up for this by featuring some fun sprite art and big victory poses, it’s simply a rehash of Sonic 2’s ending and doesn’t really offer anything new.

Despite some impressive sprites, some Zones are needlessly cluttered and unsightly.

The same can also be said of the Zones; while it’s great to start off in a beach location for a change, Neo Green Hill Zone owes a lot to Green Hill Zone and Emerald Coast. Casino Paradise Zone is simply Casino Night Zone, though lacking a few of its gimmicks; Ice Mountain is basically Ice Cap Zone, Angel Island is an ancient ruins retread of Sky Sanctuary, and Egg Rocket Zone is a mish-mash of Launch Base Zone, Wing Fortress Zone, Flying Battery Zone, and Death Egg Zone. This continues in Cosmic Angel Zone and X-Zone, which are basically Death Egg Zone all over again, and even the final area, Moon Zone, is a reskin of Doomsday Zone. However, for the most part, the recycled gimmicks and aesthetics are presented just differently enough to make them unique: Neo Green Hill Zone has sandy beaches, wooden piers, and a thick overgrowth; Secret Base Zone is an industrial hell-hole full of lava, girders, and swamped by searchlights; you can see fireworks in the background of Casino Paradise, which incorporates balloons to reach higher areas; snow falls in Ice Mountain Zone, where snow and ice cover the trees and rails and ground, there’s a hell of a view of what I assume is the Mystic Ruins in Angel Island Zone, and I enjoyed seeing the big rocket boosters and the separating sections of Egg Rocket Zone. Unfortunately, many areas are also quite loud and cluttered; Secret Base Zone is a mess of conflicting oranges and browns, for example, and Cosmic Angel Zone is a nauseating kaleidoscope of purple and grey that is distracting to look at. For the most part, the game runs really well; it can be slow at times, but mostly you’ll be blasted along at breakneck speed, outrunning the camera and most likely smashing into an obstacle or to your death. Had the game been a little more zoomed out, featured some catchier tunes, and rethought its colour palette and layout, it might’ve improved my experience. As is, though, these elements make the later Zones a chore to play and the homages to the classics more annoying than endearing.

Enemies and Bosses:
Dr. Eggman’s Badniks are all heavily inspired by the mechanical enemies seen in the classic Sonic games and Sonic Adventure; we’ve got the Crabmeat-like GamiGami, the Rhinobot-like Rhinotank, the Coconuts-like Kiki, the Jaws-like Drisame that burst out of walls at the worst possible moments, and the Burrobot-like Mogu that are also placed in the most annoying areas, like right when you need to jump or dash through. Lizard- and frog-like Badniks Hanabii and KeroKero roll or hop about spitting projectiles, Stingers do their best Buzzer and Buzz Bomber impression by blasting projectiles at you right as you’re making a tricky jump, bat-like Slots swoop in from offscreen, and the jellyfish-like Kuraa add to their annoyance by briefly erecting an electrifying shield. As is tradition for a Sonic title, smashing Badniks releases a cute little woodland critter and nets you some points, and they’re often placed at the apex of jumps, right in your path, or near spikes. Speaking of which, spikes can be on the floor, walls, and ceilings, sometimes shoot up from the ground to ruin your day, and are occasionally on spinning platforms. You’ll also need to avoid being roasted by fireballs in Secret Base Zone, watch for crushing cubes in Casino Paradise Zone, hop to small rising stone platforms (often while avoiding spikes) in Angel Island Zone, and trust your fate to the will of the gaming gods when making blind jumps over the constant death pit in Egg Rocket Zone.

While bosses start off easily enough, later game encounters can be quite tricky, especially with Amy.

Naturally, every Zone culminates in a boss battle; you’ll face off against Dr. Eggman eight times in a regular playthrough, and a final time after finding all seven Chaos Emeralds, with each encounter seeing him man a new contraption and featuring two phases to the battle. The Egg Hammer Tank awaits in Neo Gren Hill Zone; a strange combination of the Egg Wrecker and Egg Mobile from Sonic 1 and 2, this fight sees Dr. Eggman driving from left to right and right to left trying to smash you with a massive hammer, and erratically bouncing about when near defeat. Dr. Eggman mans the Egg Press machine in Secret Base Zone for a boss not a million miles away from the first phase of the final boss of Sonic the Hedgehog: Triple Trouble (Aspect, 1994); Dr. Eggman hops around trying to squash you, then does a big jump off screen that you need to anticipate to finish him off. Casino Paradise Zone features one of the easiest boss battles; Dr. Eggman emerges from one of several pipes, while his spiked Egg Ball tries to hurt you. Simply duck down in the middle and ram him when he appears; not even the two speeding up near the end present much challenge here. Ice Mountain Zone’s Egg Spider ramps up the difficulty, however, as the fight takes place underwater and Dr. Eggman is completely out of reach. You need to use the icicle hazards he drops to reach him, and take a breath of air, but this can be tricky as they fall randomly, in greater numbers near the end, and your movements are super sluggish underwater. Dr. Eggman isn’t fought in Angel Island Zone or Egg Rocket Zone, but returns in the Egg Snake in Cosmic Angel Zone, a boss that’s considerably difficult for Amy. Dr. Eggman’s pod is protected by spikes so you and to wait for him to flip over to hit him, all while dodging his projectiles and his craft as it slides back and forth, which is particularly hard to do with Amy since she can’t Spin Attack.

Despite a fun fight with Mecha Knuckles, the final battles with Dr. Eggman are disappointing affairs.

In Angel Island Zone, you’ll battle Mecha Knuckles; at first, this fight is very similar to the one against regular Knuckles from Sonic 3 & Knuckles and sees Mecha Knuckles glide about, throw punches, and try to Spin Dash into you. A few hits destroys its outer shell and reveals its true metallic self, which now spits missiles at you! When you reach the X-Zone, you’ll first endure a fun gauntlet against two classic boss battles, the Egg Wrecker and the Egg Mobile, not unlike in Sky Sanctuary Zone and with nothing changed about your attack strategy. Sadly, this is followed by an underwhelming battle against Dr. Eggman’s Egg X, a spinning cannon-like mech that spits bouncy explosive balls, tries to ram you, and grabs and shakes you with a mechanical pincer. While this appendage can be tricky to avoid and jump over, it’s ridiculously easy to bash Dr. Eggman as he flies past or stops to fire a projectile, making for a really disappointing final boss to the main portion of the game. Naturally, after collecting all seven Chaos Emeralds with any character, you’ll unlock the true final boss, the Super Egg Robot, a humanoid mech fought by Super Sonic on the surface of the Moon. Unfortunately, as I’ll detail later, I’ve never experienced this boss battle but I can tell you that your time is limited as Super Sonic’s Rings constantly deplete, meaning you’ll need to grab more to stay alive and in the fight, and that you must use the Super Sonic Boost with the B button to dodge or destroy incoming lunar rocks spewed up by Dr. Eggman. The Super Egg Robot also blasts you with a sweeping eye laser, causes energy pillars to erupt from the ground, and spews out orbs that will either incapacitate you for a few seconds or yield Rings when destroyed. The Super Egg Robot can also block your attacks with its drill-like arms, is constantly flying away from you, and can only be damaged by hitting its head. Although the music and presentation seem quite epic, it does seem a relatively simple encounter, and defeating Dr. Eggman awards you with the true ending…which honestly isn’t really all that different to the regular ending, just with more of that impressive sprite art and animation.

Power-Ups and Bonuses:
All the classic Sonic power-ups are on offer in Sonic Advance, this time in capsules like in Sonic Adventure. You can snag five, ten, or a random number of Rings, grab a temporary speed-up or invincibility, and occasionally gift yourself an extra life. You can also find a shield (or “Barrier”) that will protect you from damage for one hit, though it looks really unsightly here, or grab the Magnet Barrier for the same benefit with the added bonus of attracting any nearby Rings. That’s it, though; there are no other elemental shields, no new power-ups to find, and very little reason to explore your environment. As mentioned, each character boasts a mele attack, which is a fun alternative, but you can just as easily use the classic Spin Attack to defeat Badniks so there’s not much us for these attacks…unless you’re playing as Amy, who is entirely reliant upon them.

Additional Features:
As in the classic 2D Sonic titles, you can enter Special Stages to try and collect one of the seven Chaos Emeralds, however the way you get to these Special Stages is a bit different to what we’ve seen before. You need to find a Special Spring hidden in each Act, something Sonic and Amy will struggle to do, which grants you one try at easily one of the worst designed Special Stages in the franchise. You’re on a snowboard and constantly falling down a ringed shaft full of Rings, obstacles, and bombs. You can speed up your descent with A or perform a trick with B, which increases your Ring count, and can boost along paths of Rings, though it’s extremely difficult to actually collect Rings due to the odd angle. The perspective is all out of whack, meaning you often pass over or right by Rings, and in all my years of owning and playing this game, I’ve never completed a single Special Stage; hell, I’m lucky to even find a Special Spring, let along snag a Chaos Emerald! Collecting all seven unlocks the Moon Zone and the final battle against the Super Egg Robot, though this is the only way you get to play as Super Sonic. Beyond that, there’s a sound test in the “Options” menu, a Vs. mode that allows players to battle against each other or compete in races to collect the most Rings or find hidden Chao, even if you only have one cartridge between you, and a Time Attack mode for those who want to impress with their best clear times. If you enter a button code on the character select screen, you can play as Sonic with a computer-controlled Tails following him like in Sonic 2, and you can even visit the Tiny Chao Garden. In here. you can raise and pet a Chao, feeding it fruit or giving it toys to play with using Rings you collect in the main game and in the mini games within the garden that see you matching cards or playing rock/paper/scissors. You can also transfer this Chao to and from the GameCube Sonic Adventure games, which you’ll probably want to do as the Tiny Chao Garden’s features are far more limited than its bigger brothers.

The Summary:
I have a lot of nostalgia for Sonic Advance. It was still a novelty to see Sonic games released for Nintendo consoles at the time and I liked that it was a throwback to the classic 2D games, capturing the spirit of what made them so enjoyable, recontextualising a lot of the gameplay and gimmicks in new locations, and giving it that Yuji Uekawa aesthetic I enjoyed so much at the time (and even now). Technically, the game is solid enough; the physics work, Act layouts aren’t too dissimilar from the classics, and it offers a decent level of challenge, with some unfair moments peppered in the late-game Zones. I really liked that you could pick from four playable characters right from the start, and that Amy was included, and that their different abilities correlated with how difficult the game can be. I enjoyed most of the new Zones, despite how much they borrowed from the previous games, and really liked how this game bridged the gap between Sonic 3 & Knuckles and Sonic Adventure by incorporating elements from both. Unfortunately, it’s not perfect; and when it’s bad, Sonic Advance is quite a chore. First of all, it’s quite slow and is restricted by the Game Boy Advance’s screen size; Act layouts can be aggravating at times, with enemies and hazards placed just offscreen for maximum frustration, and I really didn’t like the way you access and play Special Stages. It’s rare that I fail to collect the Chaos Emeralds in a Sonic game and I’m still frustrated that I can’t do it over twenty years later. The bosses were quite fun, if a little easy, but the X-Zone boss was pathetic and the soundtrack was pretty forgettable. I liked the addition of the Tiny Chao Garden, though more could’ve been done with this, and it’s safe to say that Sonic Advance just plays things a bit too safe, something its sequels would address and improve upon with new mechanics and unique features. Still, there’s a lot to like in Sonic Advance; it really was the closest thing we had to a Sonic 4 at the time, and it was surprising to me that later 2.5D throwbacks didn’t take more inspiration from it and its sequels, but it’s hard to deny that it’s a sub-par experience compared to its successors and even Sonic 3 & Knuckles.

My Rating:

Rating: 3 out of 5.

Pretty Good

Did you own Sonic Advance back in the day? If so, did you enjoy it and how do think it’s aged, especially compared to its sequels? Which character was your favourite and did you like their expanded move sets? What did you think to the Zones on offer and the recycling of previous gimmicks? Do you think the game played it too safe or do you consider this the true Sonic 4? Did you ever collect the Chaos Emeralds and, if so, how and what did you think to the Special Stages? Which of Sonic’s Game Boy Advance titles is your favourite and how are you celebrating Sonic’s anniversary this year? Whatever your thoughts on Sonic Advance, leave a comment below or on my social media and go check out my other Sonic content!