
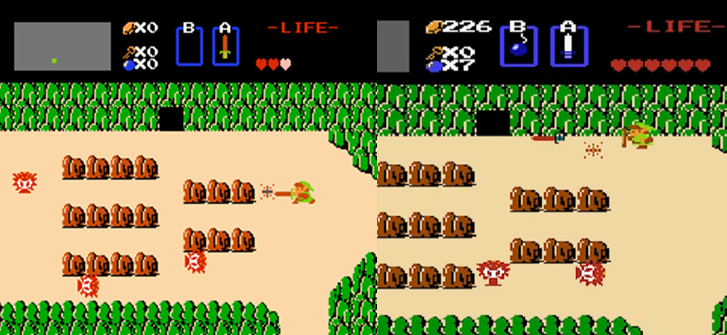
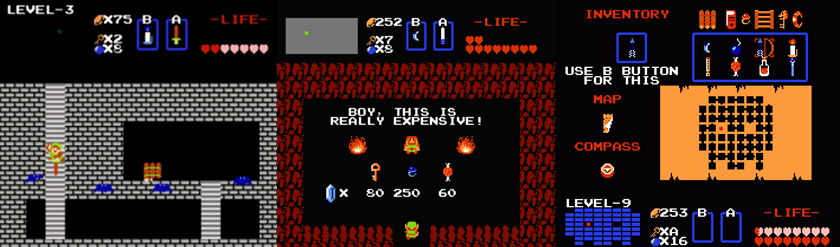
On 21 February 1986, The Legend of Zelda (Nintendo EAD, 1986) was first released in Japan. The creation of legendary game designer Shigeru Miyamoto and Takashi Tezuka, The Legend of Zelda launched one of Nintendo’s most popular franchises. This year, I’m dedicating every Wednesday to Nintendo’s most famous silent protagonist, Link and his vast and enduring fantasy world of sword and sorcery.

Released: 27 July 2023
Originally Released: 27 February 2001
Developer: Nintendo
Original Developer: Flagship
Also Available For: Game Boy Color, Nintendo 3DS (Virtual Console)
The Background:
My very first introduction to the Legend of Zelda series (Nintendo EAD/Various, 1986) was The Legend of Zelda: Link’s Awakening (ibid, 1993) on the original Game Boy, which began life as an unsanctioned side project of programmer Kazuaki Morita and became a critically acclaimed best-seller for the system, a success that Nintendo duplicated with its Game Boy Color upgrade in 1998. Link’s Awakening was followed by two relatively obscure and hard to come by Zelda titles that initially came from Yoshiki Okamoto’s desire to remake the original game for the Game Boy Color. Zelda creator Shigeru Miyamoto suggested making a trilogy of interconnected games that would directly communicate with each other through the use of shared assets and passwords, but the logistical challenge of this forced the developers to scale the project down to two games. The technical limitations of the Game Boy Color also caused the developers significant issues, but they were bought more time to refine the concept when the release of the Game Boy Advance was pushed back, giving them that chance to incorporate elements from the 3D Zelda titles. The games sold over 3.96 million copies, making them a commercial success, and they were met with rave reviews that praised their visuals and the replay value offered by the password system. However, many gamers (like myself) were unable to legitimately play the games for an affordable price for some seventeen years, when they were finally added to the Nintendo 3DS Virtual Console, but a whole new generation of gamers were able to experience these often-forgotten games when they were added to the Nintendo Switch Online service in 2023.
The Plot:
In Oracle of Ages, Link finds himself in Labrynna and charged with rescuing Nayru, the Oracle of Ages, from the evil clutches of Veran by travelling through time to collect the eight Essences of Time. In Oracle of Seasons, Link must rescue Din, the Oracle of Seasons, from the evil Onox, questing for the eight Essences of Nature and battling wild elements. Defeating these evil forces brings Link into a final confrontation with Twinrova, who wish to sacrifice Princess Zelda to resurrect the dark lord Ganon!
Gameplay:
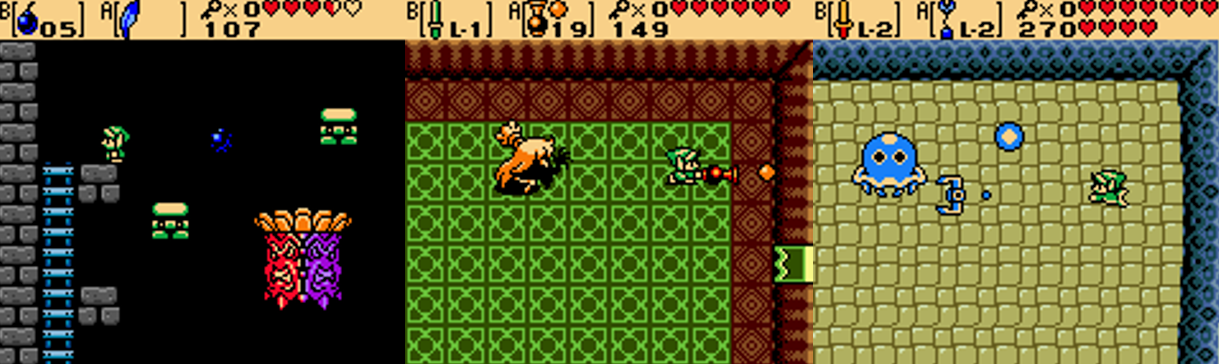
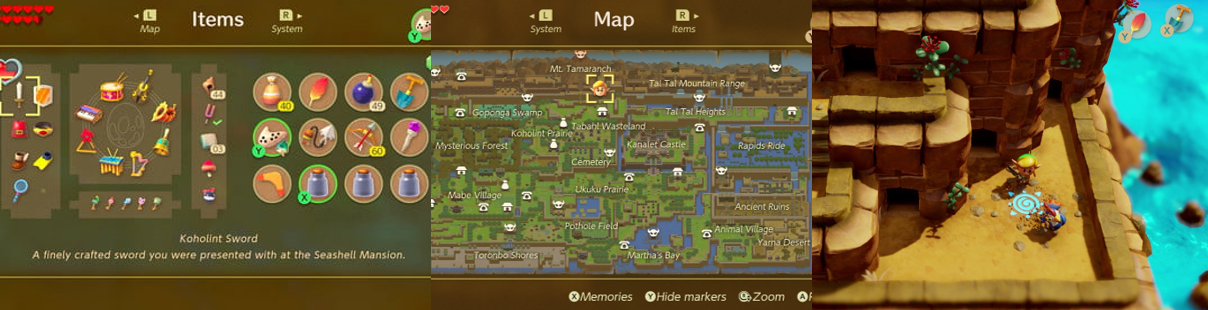
If you’ve played the original Link’s Awakening, or any of the top-down Zelda titles, then the Oracles games will be immediately familiar to you. You’re given three save slots, the ability to rename your character, and dropped into one of two fantasy worlds, Labrynna or Holodrum, and tasked with questing to retrieve eight mystical items to rescue each game’s Oracle and restore the lands from evil. Since these were Game Boy Color titles, the Oracles games operate on a very simple two-button setup; players can enter the inventory menu by pressing ‘Start’ and equip two items, one to A and one to B, to use to defeat enemies, solve puzzles, and open new paths. Primarily, this will be your sword and shield; Link can attack in four directions or charge up his trademark Spin Attack to attack in a circle and can defend himself from incoming attacks by holding down the shield button. As you progress through both games, you’ll acquire these weapons, and other items either by finding them in one of the dungeons, buying them from one of the many shops, or being gifted them by a friendly non-playable character (NPC). Initially, you can’t access anything, not even the pause menu, and you later must equip two specific items in conjunction to get past obstacles, such as using the Pegasus Seeds and Roc’s Feather to clear longer gaps.

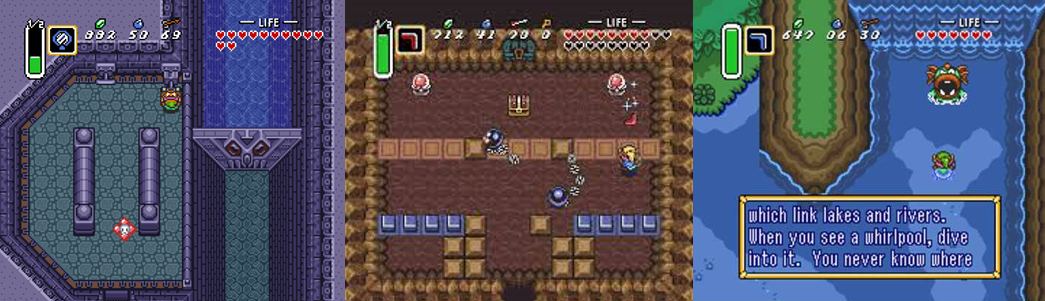
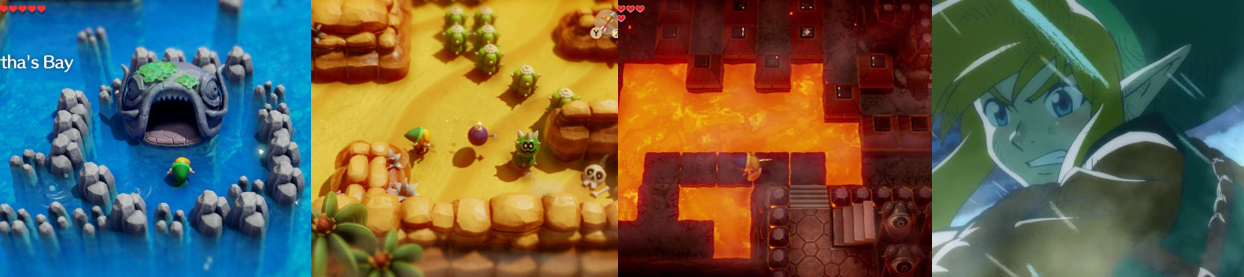
Link’s journey takes him all over each land and both are filled with enemies and hazards; some are easily overcome with your basic sword, others require more tactical use of your weapons (such as directing the Magical Boomerang to hit switches or dropping bombs to blow open cracks in walls), and it’s worth attacking most enemies, cutting grass, and digging up dirt to unearth hearts, Rupees, and ammo to keep yourself well stocked. Link begins with three hearts (or four, it seems, in a “Linked Game”) and can replenish them with hearts or extend his life bar by finding Heart Containers, but you’ll need Rupees and Ore Chunks to purchase items from shops. All of this is very familiar to any Zelda fan, exposing hidden paths and even switching to a sidescroller perspective in certain areas, but there are a couple of gimmicks that make each game stand out. First, each game contains two overworld maps; in Oracle of Ages, you’ll travel hundreds of years into the past and in Oracle of Seasons you’ll travel back and forth to the underground realm of Subrosia. Travelling to the past alters the landscape somewhat, allowing you to access new areas by warping to dead ends in one era, and changing events in the past will affect the future as well. In addition, Link’s swimming abilities are greatly expanded upon in Ages; you’ll get to dive deep underwater and explore coral-filled areas to progress, and not just in the overworld, where you’ll visit Zora’s Domain, but in dungeons, too. In comparison, Subrosia is a more fragmented landscape; here, you’ll find your way blocked by rivers of magma, the environment beset by exploding volcanos, and inhabited by cloaked, dwarf-like people obsessed with ore and mining. Subrosia is also home to the Temple of Seasons, which you gain additional access to as you conquer dungeons and acquire new gear, which in turn powers up the Rod of Seasons and allows you to change the seasons in Holodrum.
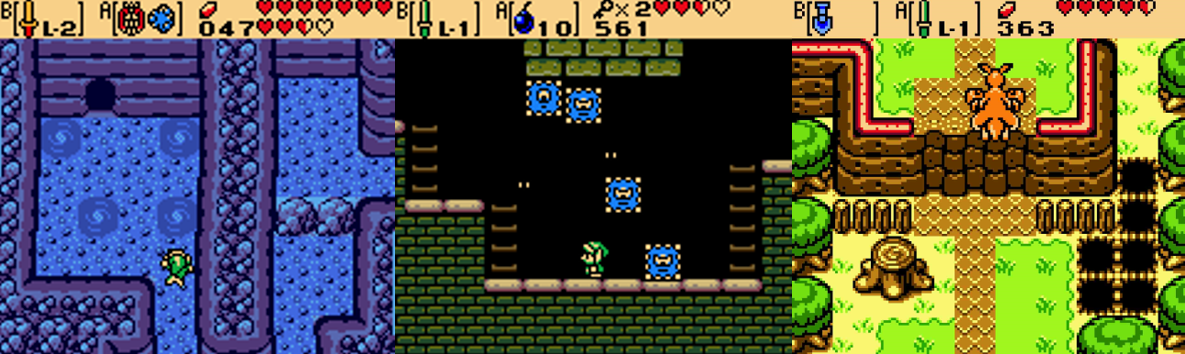
You’ll find tree stumps all around Holodrum and, from these, you can wield the Rod of Seasons to cycle between spring, summer, autumn, and winter, with each season altering the landscape in some way. Winter sees snow pile up, for example creating higher paths and snow piles that need digging up; autumn sees mushrooms bloom, allowing you to pick them up to access new paths, spring activates flowers that boost you to higher levels, and summer sees climbable vines appear on the overworld. You’ll often need to switch seasons regularly to access different areas and then backtrack to reach a new path, and the seasons change sporadically as you explore, creating new obstacles and requiring you to switch weapons. Eventually, Link also gains the ability to fast travel around the map with Warp Seeds, to swim and dive in water, and to call an animal companion to help get past specific obstacles, though you won’t be using magic in either game. In Ages, time travel is initially quite limited as you need to use the Harp of Ages at specific points, but eventually you gain the ability to freely travel back and forth through time to solve puzzles, complete fetch quests, and access new dungeons and regions. Almost every task in Ages is some kind of convoluted puzzle or fetch quest requiring you to talk to numerous NPCs and travel between eras multiple times just to access a Dungeon Key. Easily the most frustrating example of this is when Link visits Tokay Island and has all his equipment stolen by the lizard-like Tokay; you’ll need to track each piece down one at a time and use them, in conjunction with time travel shenanigans (such as pushing seeds next to walls so the sprout into climbable vines), to retrieve everything so you can continue on your quest.
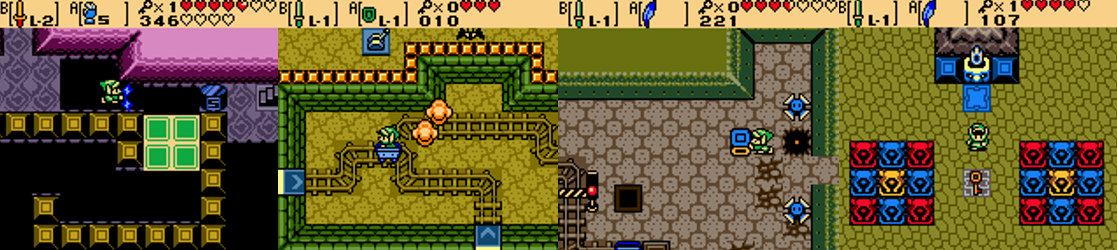
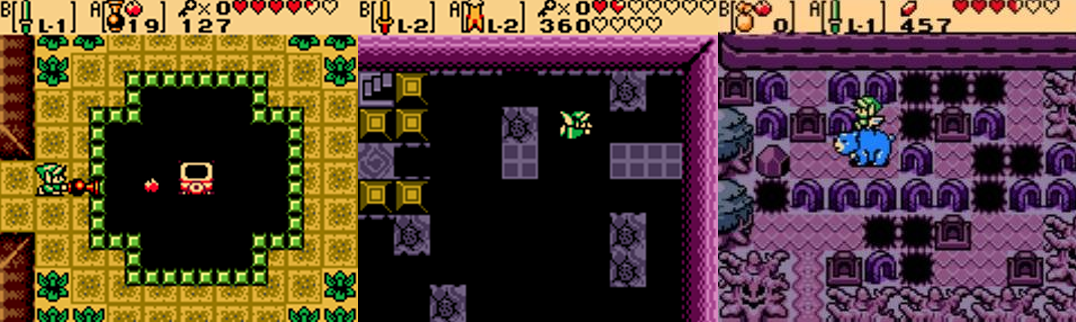
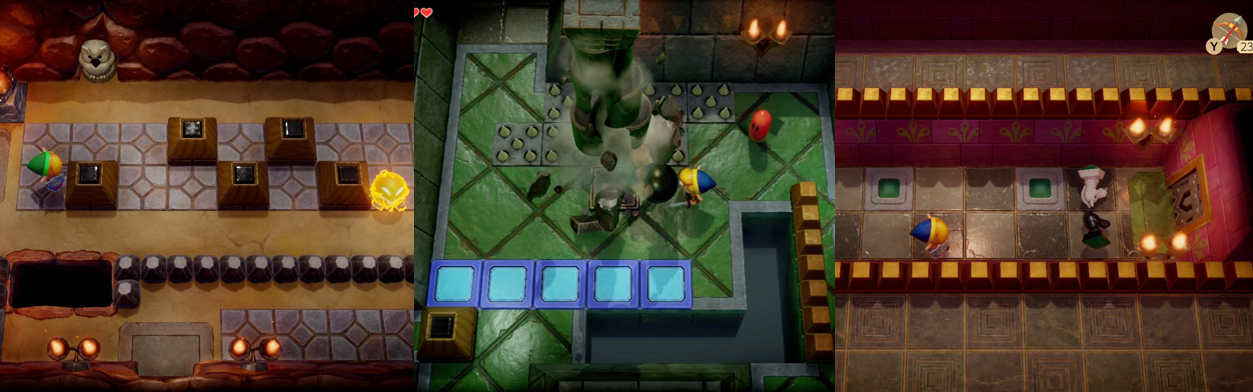
Like Link’s Awakening, Link is tasked with visiting eight dungeons in each game to acquire new items, conquer the bosses within, and claim the eight mystical objects needed to confront each game’s big bad. Although Ages focuses more on puzzles and Seasons is more action-orientated, many familiar Zelda puzzles are found in each game. You’ll be stepping on or pushing pots or statues onto switches, defeating groups of enemies, pushing blocks (either in a specific way or onto certain tiles), lighting torches, and taking stairs or dropping through holes to access new areas, open doors, or acquire keys to progress further. Like in Link’s Awakening, you’ll use sidescrolling sections to hop to moving blocks, Thwomps, climb ladders, or swim past Cheep Cheeps, though both games place great emphasis on mine carts; you’ll ride these to new areas in the dungeons, hitting switches to change their direction or lighting torches as you speed past. Each dungeon hides a Compass and Map to help you navigate and you’ll unlock a warp point after defeating the mini boss, which is useful when you have to backtrack to find or use keys and items. In Seasons, many puzzles are solved by using Link’s Magnetic Gloves to move magnetic balls and hover over gaps on small rotating diamonds, or by dropping blocks down to lower levels, or activating bridges across gaps and you’ll need to be quick on your feet or to hide behind your shield when the floor suddenly collapses or comes to life to attack you. Occasionally, you’ll lose traction in icy areas, navigate maze-like woods, play hide and seek, and be sent to take out fortified areas or rescue animal companions to reach new areas to say nothing of dodging fireballs, floor spikes, crushing weights, and rolling logs. While puzzles appear in Seasons, they’re far more prominent in Ages, with the most infamous being those involving pushing a coloured cube in a specific way so it lands on the right coloured tile, or using the Cane of Somaria to create a block to press multiple switches at once, or rearranging statues. You’ll enter rooms where you need to step on all the tiles in a specific path to access keys, or jump to coloured tiles to make them all match up, or defeat coloured Gels when the room is a specific colour. Sometimes you’ll need to navigate invisible paths (where the Cane of Somaria again comes in handy), bomb walls or blocks in mazes, navigate past bladed obstacles or arrows, and even change the dungeon layout entirely, though oddly the time travel and season gimmicks rarely play a part within the dungeons.
Graphics and Sound:
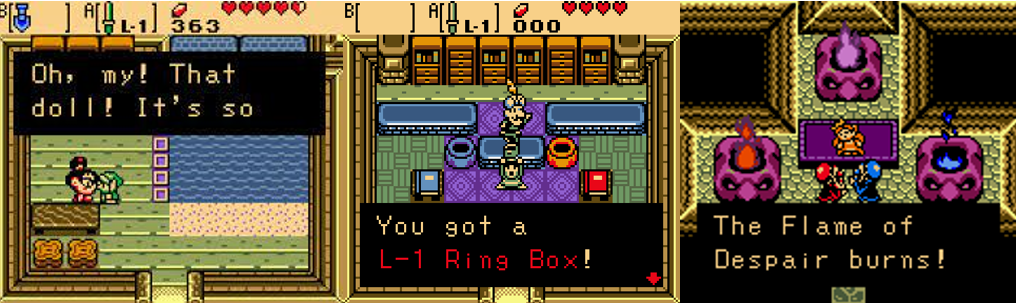
Both Oracles games heavily reuse assets from Link’s Awakening, recycling sprites, environmental details, and certain gimmicks and presenting them in new ways. This could be seen as a negative but something about the presentation makes the games pop in a way that outdoes its predecessor; maybe it’s that the games were purposely built for the Game Boy Color or the influence from The Legend of Zelda: Ocarina of Time (Nintendo EAD, 1998), which sees familiar tunes and species from that game (particularly the Gorons and Zoras) integrated on the small screen. NPCs are much livelier and more integrated into the plot as well; engagements with them carry over between games, changing your interactions with them, and you’ll find all sorts of fun NPCs on offer in both games, from a hyperactive child, to talking animals, to lovesick anthropomorphic trees, lost souls, and skeletal pirates. Each game may visually resemble the other and Link’s Awakening but they’re noticeably different; the changing seasons mean you effectively have four different overworld maps in Seasons and the past of Ages is far less vibrant and more a work in progress, with each time period (and Holodrum and Subrosia) having their own overworld themes or variations on the classic Zelda theme. Link directly changes each area in various ways, from altering the seasons to unlocking gates, flooding areas with water or lava, to allowing a pirate ship stuck between worlds to venture from the sands of Subrosia to the docks of Holodrum. Travelling through time lets you explore ancient Labrynna, where towns are still being built, Queen Ambi and her palace are prominent, and the towering and dangerous Restoration Wall leads to the decimated Symmetry Village, a location you directly improve by travelling through time.

One area where both games shine is the incorporation of large sprite art for various cutscenes, such as the opening and when Link meets the Oracles. These are rendered in an anime style that recalls the artwork of The Legend of Zelda: A Link to the Past (Nintendo EAD, 1991) and are partially animated. These are used sparingly, however, and the in-game sprites are once again relied on to convey the bulk of each game’s story, with dialogue boxes and input from the Maku Tree (or consultation with an Owl Statue or some chatty birds) guiding you or offering hints. Perhaps as a consequence, the games include some new and updated sprites; while Link is largely unchanged and many of the enemies are recycled from Link’s Awakening, NPCs are more varied than ever and there are some large and detailed boss sprites. The overworld greatly benefits from this newfound attention to detail; Goron City, Zora’s Domain, and the various towns and castles are bustling and varied, with both games including fun elements from Ocarina of Time (like Jabu-Jabu) alongside guessing games, target practise, and aggravating dancing mini games (which are especially prominent in Ages). Sadly, the same can’t be said about the dungeons; many are largely interchangeable and contain the same recycled elements, though they naturally get bigger, more maze-like, and more complex to reflect a rise in difficulty. These means that, while some have different colour palettes and may feature greater emphasis on water, gaps, or other hazards, there’s not much to differentiate them as you’ll see the same gimmicks recycled, though they are used in ways that continually tax you. Of the two, Oracle of Ages has the better, more varied dungeons; Jabu-Jabu’s Belly is largely flooded, requiring you to dive to access new areas, Crown Dungeon makes better use of the coloured block gimmick, and generally there is a lot more to do in Ages’ dungeons, even though this can be frustrating as you need to do a lot of wandering around, backtracking, and trial and error to access keys and doors.
Enemies and Bosses:
As near as I can tell, every enemy in the Oracles games is recycled from Link’s Awakening with the exception of the Lynel, a tough centaur-like wolf that deals as much damage as it can absorb. Otherwise, you’ll be encountering various Moblins and Darknuts (who wield spears, swords, and spiked maces), Octoroks, shield-eating Like Likes, snake-like Ropes, bat-like Keese, and electrifying Buzz Blobs. Some will attack when you cut down grass or fall from the sky, like the Floor- and Wallmasters that spawn in to drag you back to a dungeon entrance or the ghost-like Ghinis that haunt various graveyards. Anti-Fairies will bounce around, similar to Bubbles, chipping away at your hearts; Arm-Mimics copy your every move, mummy-like Gibdos shrug off your shots, Wizzrobes constantly teleport in and out shooting energy waves at you, the Mini Masks must be attacked from behind (or have their metal masks removed), and you’ll need to take cover behind the environment to avoid being blasted by Beamos statues and be quick on your feet to outrun the many small and large blade traps. Some enemies are hiding in plain sight, such as the Old Men who will rob you, the wandering witch who steals items from you if you bump into her, or the guards fastidiously overseeing Queen Ambi’s grounds. While enemies are shared across both games, a couple are unique to each; you’ll only encounter Candleheads in Ages and Magnites in Seasons, for example, though this element could’ve been expanded upon to give each game their own unique enemies.
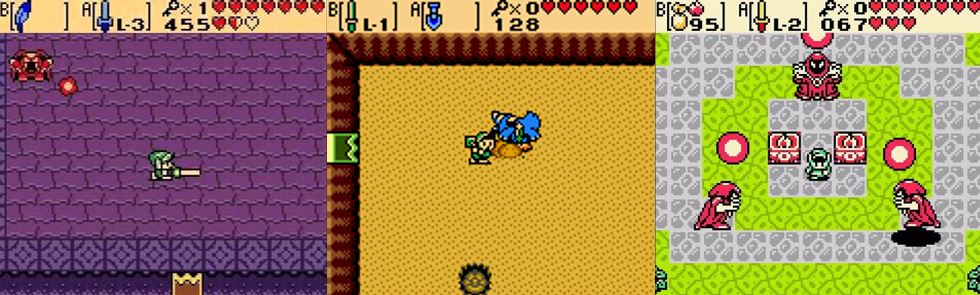
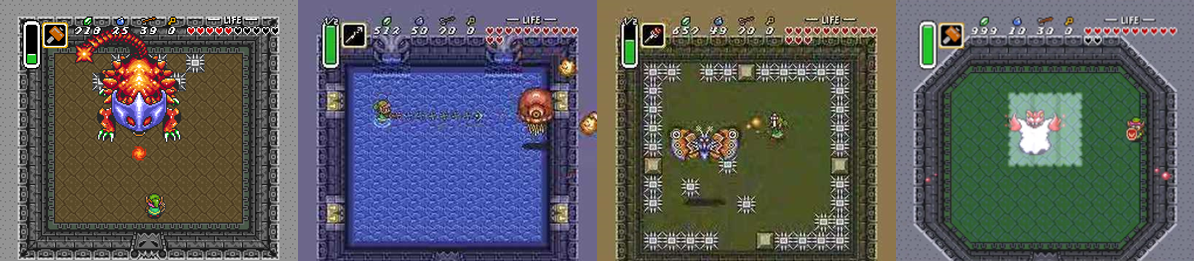
Each game features nine mini bosses, with two being shared between the games; the Great Moblin and Vire, who you’ll have to battle in a fortified keep and the Ancient Ruins, respectively. While Vire attacks exactly as in Link’s Awakening, flying about and shooting coloured projectiles and splitting into smaller parts and only being vulnerable when charging, the Great Moblin is fought after avoiding his fortress cannons with your animal companion then tossing his own bombs back at him. Some of Ages’ mini bosses will be readily familiar to players of Link’s Awakening as Smasher and the Angler Fish return, and even the Giant Ghini can be traced back to that game, though their attack patterns are altered; you still need to throw Smasher’s balls back at it but they now disappear after a short time, the Angler Fish is fought on the ground (though still from a side-on perspective) and has additional bubble attacks, and the Giant Ghini is now a more formidable foe accompanied by smaller minions and capable of charging you. Ages also has three unique mini bosses; Subterror is a mole-like monster you dig up with your shovel, the Armos Warrior is a giant Armos whose shield can only be destroyed by tossing its huge sword back at it, and the Blue Stalfos is a Grim Reaper-like foe whose energy balls must be reflected back at it. Another returning boss from Link’s Awakening is Façade, who’s fought twice in Seasons but defeated in the same way as ever (simply bomb its face when it appears on the ground and watch for falling rocks). Seasons also has you fight the Brother Goriyas (who toss a boomerang between each other), three Omuais (who you must yank out of the water to attack), the Agahnim-like Agunima (who, like Agahnim, splits into copies and fires magical bolts at you and can only be defeated when all the torches are lit), the sabretoothed ball of teeth known as Syger (who’s only weak spot is the red ball on his tail), the two mischievous Poe Sisters, and the elemental spirit Frypolar, who can only be defeated by tossing its own icicle constructs back at it.
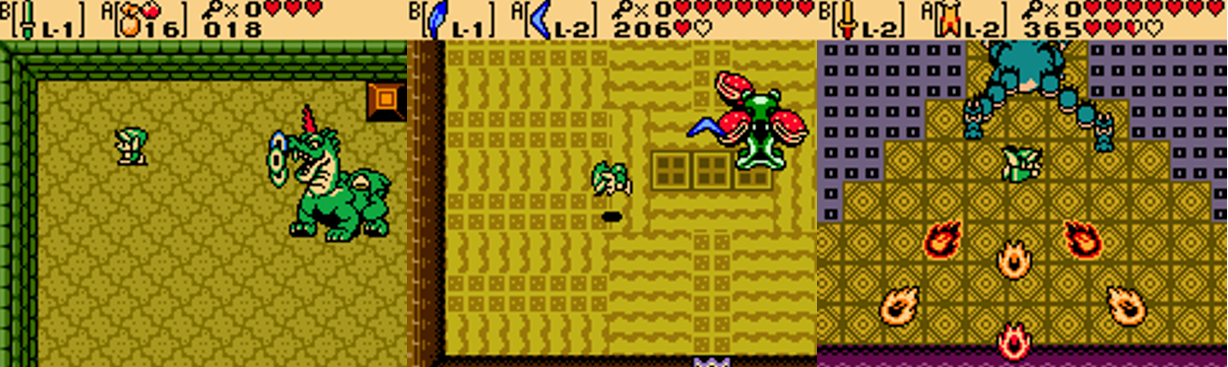
There are also eight primary bosses in each game, with a final boss to be conquered at the end. Although each game has unique bosses, six of Seasons’ bosses return from the first Legend of Zelda game. Aquamentus, Dodongo, Gohma, Digdogger, Manhandla, and Gleeok all return here, with Manhandla and Gleeok being two of the toughest. Manhandla can only be damaged by attacking its beak-like mouths when they’re open; unfortunately, this is also when they spit projectiles, and its attacks only increase as each “head” is knocked off, exposing its vulnerable insides. The two-headed dragon Gleeok again remains stationary and spits fireballs from its heads, one of which will fly about after being severed, but it’s actually easier to battle than in the original game. Mothula returns from A Link to the Past, with a similar attack strategy of circling the room and firing at you; though the moving floor is gone, you’ll need to watch for holes and jump over gaps to attack Mothula when it lands. This means that Seasons’ sole unique boss is the Medusa Head, which teleports about, turns you to stone, and fires a massive laser beam from its eyes but is easily stunned with your Pegasus Seeds. Aquamentus still spits fireballs, but now also has a charge attack; you must first force the Dodongo to swallow a bomb and then toss it onto the spikes surrounding the arena with the Power Bracelet; you’ll need to avoid being grabbed and tossed by Gohma’s claw, sever it, and then shoot its eye; and finally make use of the spiked magnetic ball to smash Digdogger and its mini doubles into the ground.
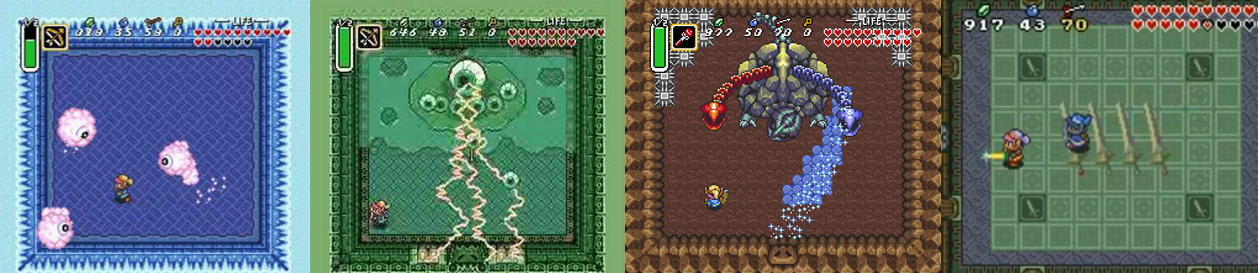
In comparison, Ages’ bosses are exclusive to that game, which helps to make it more unique, though some are reminiscent of previous Zelda bosses (Ramrock, for example, resembles King Bongo Bongo, though you defeat it by timing bomb throws into its giant stone hands). The first boss you’ll face is Pumpkin Head, who wanders around shooting a spread of fireballs; his only weak spot is his torso, which you attacked to grab and toss his jack-o’-lantern head to reveal its true form. The Head Thwomp is pretty unique as it’s fought from the side-on perspective and sees Link hopping around avoiding projectiles and falling rocks and dropping bombs into the boss’s head to make its expression change to red, causing damage and dropping hearts or bombs. The Shadow Hag also requires a unique strategy to defeat; she splits into multiple shadow forms and protects herself with moths, meaning you must fire a seed so it ricochets back into her. Eyesoar also requires the use of one of Link’s other weapons to damage; it protects itself with smaller eyes and relentlessly moves towards Link, so you need to clear them away and snag it with your Switch Hook to stun it and whack it with your sword. Smog is probably Ages’ most aggravating boss; it is fought in four rounds, each with a different arrangement of blocks, and its smaller form charges around tossing fireballs. You need to strategically place blocks with the Cane of Somaria to get the smaller parts to converge into one, which you can then attack, which each stage getting more difficult as Smog adds lightning attacks to its arsenal. The Octogon constantly swims around Link spitting projectiles at him; you need to angle your seed shooter to attack its weak spot on the back, and dive underwater to smack it with your sword, which can get quite chaotic. You’ll need to use these same seeds when battling the Veran-possessed Queen Ambi as this is the only way to drive Veran’s spirit from her body so you can stun her with the Switch Hook and attack with your sword. The Switch Hook’s upgraded form, the Long Hook, is also the only way you’ll defeat Palsmarine, two jellyfish-like enemies who can only be damaged by causing them to run into each other’s attacks.

Once you’ve collected the eight mystical artifacts in each game, you break the spell keeping you from the big bads. In Ages, you battle the evil witch Veran at the Black Tower, a maze-like castle filled with Lynels and Wizzrobes, and whose battle consists of two phases. First, Veran summons Dark Links to distract you, dashes about, and throws a variety of fireballs. Once defeated, she transforms into three monstrous forms: a large beetle that crashes to the ground to temporarily cause acidic hazards to appear, a large bee that quickly flies around and slows your movements with its barrage of stingers, and a horrific spider that stuns and slams you with its web. These forms are random (I never actually saw the bee form) and require different strategies, such as attacking the beetle’s face, firing a seed at the bee, and tossing bombs at the spider. In Seasons, the antagonist is the formidable, heavily armoured General Onox whose castle is a labyrinth filled with some of the game’s toughest enemies and a rematch with Façade. When you reach Onox, he first swings and hurls a massive, spiked mace, causes boulders to rain down, and stuns you with whirlwinds and the only way to damage him is with your Spin Attack and swipe the Rod of Seasons when he uses Din to shield himself. Afterwards, you drop down a hole and face Onox’s dragon form! You need to avoid his flaming projectiles and being squashed by his claws and hop onto his hands to slash at the crystal on his head, which can be tricky if you cheese your jump. If you’ve cleared a Linked Game, you’ll be dropped into the Room of Rites to rescue Princess Zelda. This means battling Koume and Kotake, first separately (reflecting their elemental attacks back at each other) and then in their fused state as Twinrova (which conjures flaming pits or turns the floor to ice and must be stunned with Mystery Seeds) not unlike in Ocarina of Time. Defeat the witches and they’ll sacrifice themselves to resurrect Ganon, forcing you to fight an unhinged version of the Gerudo King in a battle not unlike A Link to the Past. Ganon teleports around the room and unleashes some devastating attacks, such as a charged swipe of his trident, stunning you with a ground-quaking drop, or charging up a huge energy ball. Ganon can only be damaged with a Spin Attack so you need to unleash it and quickly jump or dash away to avoid being hit, the timing of which can be tricky but I actually found this an easier bout than in A Link to the Past as there’s less to worry about onscreen.
Power-Ups and Bonuses:
One aspect not carried over from Link’s Awakening are the temporary power-up Acorns; Link also won’t be getting new tunics either, which is a shame, but in their place is the Ring system. As you explore, you’ll find Gasha Seeds that can be planted in soil patches; these blossom into acorns that gift you Rings, or you can find them in chests or buy them from shops. Take them to Vasu the jeweller to appraise them for 20 Rupees and you can equip a Ring to enable certain effects, such as doubling your attack power, sensing secrets, increasing your throw distance, and even turning Link into an Octorok! Some Rings have negative effects as well, such as upping your attack power at the cost of you taking more damage, or no effect at all and simply being keepsakes. You can eventually hold multiple Rings in your Ring Box, but you can only equip one at a time so it’s best to think about what benefits you might need in the long-term. Another new aspect are the animal companions; Ricky the boxing kangaroo, Moosh the flying bear, and Dimitri the friendly Dodongo will help you throughout your quest, ploughing through hazards, flying you over gaps, and scaling waterfalls, respectively, when you call for their help but you’ll eventually have to settle on one as your primary companion, which is then reflected in the Linked Game.
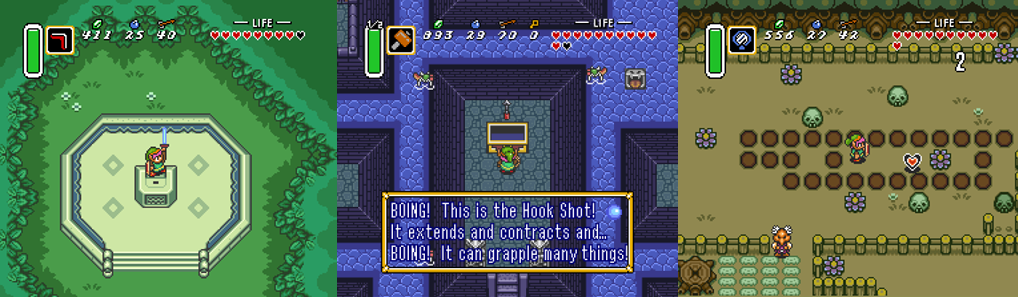
Another new aspect here is that Link utilises a slingshot or a seed shooter rather than his traditional bow and arrows; the slingshot can fire a variety of seeds, from Ember Seeds to Mystery Seeds. The slingshot can even be upgraded to fire three shots at once, a luxury not afforded to the seed shooter (though you can aim your shots to ricochet to their target). Link’s seeds are very useful as well; the Gale Seeds allow him to warp, and the Pegasus Seed awkwardly take the place of the Pegasus Boots, allowing Link to run fast for a short period of time. Otherwise, weapons and items are very familiar; Link can toss bombs or a boomerang, pick up rocks with the Power Bracelet, and jump gaps with the Roc’s Feather. Many of his weapons can be upgraded, such as Link’s sword powering up to shoot a beam when he’s at full health and his shield deflecting incoming attacks, but two of the most useful upgrades are Age’s upgraded Mermaid Suit, which lets you dive and attack underwater, and Seasons’ upgraded Roc’s Cape, which lets you glide over gaps. Ages’ Cane of Somaria is required to press multiple switches at once to solve puzzles, as is the Switch and Long Hook, which let you switch places with diamonds, jars, and other objects to clear gaps, defeat or damage certain enemies, and press switches. Link will also make good use of the Harp of Ages and Rod of Seasons to travel through time and change up the seasons on the overworld, respectively, and playing a Linked Game allows you to access additional weapons, such as homing Bombchus, the Biggoron’s Sword, and the Mirror Shield.
Additional Features:
As ever, Link can extend his health by collecting Heart Containers; you’ll be granted an extension for every four you find or after beating a dungeon boss, allowing you to extend Link’s health to sixteen hearts. Link’s weapons can also be upgraded, though some are optional and require you to explore or perform certain tasks. As you explore the overworlds, you’ll come across hidden caves containing Rupees or fairy fountains to replenish your health, and find Maku Seeds which must be planted to acquire new Rings. Both games include a lengthy trading sequence where you exchange key items between NPCs, fleshing out the world, your relationships with the characters, and earning the Noble Sword in the process. Almost every area requires some kind of fetch quest in Ages, such as finding Mystery Seeds to meet Queen Ambi to get the bombs you need to enter the Wing Dungeon, travelling back and forth between time to placate the Gorons, or acquiring a sea chart and talking to Tingle to reach Crescent Island. There are some stronger golden variants of enemies to find and defeat in Seasons that will net you the powerful Red Ring, and you can transfer elements from one game to another after completing them and earning a password. This begins a Linked Game, where you start with four hearts instead of three and with a weapon in your inventory; certain NPC interactions will change, the Hero’s Cave will be considerably more challenging and reward special Rings, Rings and other special items can also be transferred via passwords, and each game includes additional features (such as a familiar 2D rescue of Princess Zelda in Ages and a rematch with the Great Moblin in Seasons) that are only accessible this way and thus encourage multiple playthroughs.
Once you’ve cleared one game and then completed a Linked Game, you can experience the “Hero’s Game” to experience the other game as intended and also access the true final challenge of both games. If you play each game normally, you’ll receive a code to use in the other game; playing a Linked Game sees NPCs reference your heroics and actions from the other game, as well as providing you with additional passwords you can use to access extra items and bonuses. If you play a Linked Game through to the end, you’ll automatically be taken to the Room of Rites to battle Twinrova and Ganon; defeating them gifts you the “Hero’s Secret”, which essentially allows you to play the original, unlinked version of the other game but with more hearts and being able to transfer over your Rings. It’s a pretty unique feature and invites multiple playthroughs, though it does lock some traditional Zelda elements (such as the Mirror Shield and Master Sword) off from you as these can only be accessed with the codes. Back in the day, you could automatically play a Linked Game using a Game Boy link cable; the Nintendo Switch Online version doesn’t currently allow you to jump straight into a Linked Game, but you can choose between the NTSC and PAL versions (though I’m not sure what the difference is between the two) and make use of save states and the rewind feature to make the experience a lot less difficult.

The Summary:
For the longest time, the Oracles games were inaccessible to me; as prices soared and I upgraded past the original Game Boy, they became unplayable outside of emulation until they were finally released digitally. I’ve played through both before on the Nintendo 3DS but that was ages ago and I’ve hesitated to revisit them due to the playtime needed to properly experience both, and that’s a mistake on my part as they really are some fun, challenging, and vibrant Zelda adventures. While it’s fun warping between different time periods in Ages, I feel this mechanic wasn’t as prominent as it could’ve been; rarely do your actions in the past impact the future (these events are more noticeable in cutscenes) and I would’ve liked to see more visual differences between the past and present, like a decimated present that gets fixed as you visit the past. In comparison, I really enjoyed the season mechanic in Seasons; being able to manually cause snow or a blazing summer is fun and opens new opportunities for exploration, even if it’s not utilised outside of the overworld. I do have some gripes, but they’re mainly due to limitations of the hardware; for example, it’s annoying having to equip the Power Bracelet every time you need to use it and as good as the map is when you’re warping, it’s not always clear where you’re going. Although the weapons and items aren’t much to shout about and the bland dungeons disappointed me, I enjoyed how much the overworld popped and the boss battles presented; I liked all the returning battles, but the original ones were even better, but I quickly became frustrated with Ages’ focus on repeating puzzles and forcing you to run all over the place for the most mundane tasks. Although the linking system is a little clunky and it’s a shame we didn’t get a third game (and I feel a modern remake would be better served packing all two-and-a-bit games together), I liked the increased emphasis on interactions with NPCs and the incorporation of the animal companions, however brief they are. Including aspects from Ocarina of Time was also a great idea, and the epilogue offered by the Linked Game made for a satisfying conclusion, though again I think more could’ve been done with this feature. In the end, this was like one big Zelda experience spread over two titles…mainly because that’s exactly what it was! Seasons was more my speed overall, but there were elements I liked from Ages like the more varied overworld. Play both back-to-back for the complete experience and you can’t go wrong, though it can’t be denied that there’s a little lacking from each due to them having different mechanics and equipment.
My Rating:
Great Stuff
Have you ever played the Oracles games? Which one did you prefer? Did you like that they incorporated elements from the 3D Zelda titles? What did you think to the different overworlds and gameplay mechanics? Did you prefer travelling through time or altering nature? What did you think to the recycled bosses from previous Zelda games? Did you ever link both games and see the true ending? Would you like to see these games remade like Link’s Awakening was? How are you celebrating The Legend of Zelda this month? Leave your thoughts and comments below or on my social made and go read some of my other Zelda reviews on the site!


You must be logged in to post a comment.