Game Corner [Zelda Month]: The Legend of Zelda: Oracle of Ages / Oracle of Seasons (Nintendo Switch)


On 21 February 1986, The Legend of Zelda (Nintendo EAD, 1986) was first released in Japan. The creation of legendary game designer Shigeru Miyamoto and Takashi Tezuka, The Legend of Zelda launched one of Nintendo’s most popular franchises. This year, I’m dedicating every Wednesday to Nintendo’s most famous silent protagonist, Link and his vast and enduring fantasy world of sword and sorcery.

Released: 27 July 2023
Originally Released: 27 February 2001
Developer: Nintendo
Original Developer: Flagship
Also Available For: Game Boy Color, Nintendo 3DS (Virtual Console)

The Background:
My very first introduction to the Legend of Zelda series (Nintendo EAD/Various, 1986) was The Legend of Zelda: Link’s Awakening (ibid, 1993) on the original Game Boy, which began life as an unsanctioned side project of programmer Kazuaki Morita and became a critically acclaimed best-seller for the system, a success that Nintendo duplicated with its Game Boy Color upgrade in 1998. Link’s Awakening was followed by two relatively obscure and hard to come by Zelda titles that initially came from Yoshiki Okamoto’s desire to remake the original game for the Game Boy Color. Zelda creator Shigeru Miyamoto suggested making a trilogy of interconnected games that would directly communicate with each other through the use of shared assets and passwords, but the logistical challenge of this forced the developers to scale the project down to two games. The technical limitations of the Game Boy Color also caused the developers significant issues, but they were bought more time to refine the concept when the release of the Game Boy Advance was pushed back, giving them that chance to incorporate elements from the 3D Zelda titles. The games sold over 3.96 million copies, making them a commercial success, and they were met with rave reviews that praised their visuals and the replay value offered by the password system. However, many gamers (like myself) were unable to legitimately play the games for an affordable price for some seventeen years, when they were finally added to the Nintendo 3DS Virtual Console, but a whole new generation of gamers were able to experience these often-forgotten games when they were added to the Nintendo Switch Online service in 2023.

The Plot:
In Oracle of Ages, Link finds himself in Labrynna and charged with rescuing Nayru, the Oracle of Ages, from the evil clutches of Veran by travelling through time to collect the eight Essences of Time. In Oracle of Seasons, Link must rescue Din, the Oracle of Seasons, from the evil Onox, questing for the eight Essences of Nature and battling wild elements. Defeating these evil forces brings Link into a final confrontation with Twinrova, who wish to sacrifice Princess Zelda to resurrect the dark lord Ganon!

Gameplay: 
If you’ve played the original Link’s Awakening, or any of the top-down Zelda titles, then the Oracles games will be immediately familiar to you. You’re given three save slots, the ability to rename your character, and dropped into one of two fantasy worlds, Labrynna or Holodrum, and tasked with questing to retrieve eight mystical items to rescue each game’s Oracle and restore the lands from evil. Since these were Game Boy Color titles, the Oracles games operate on a very simple two-button setup; players can enter the inventory menu by pressing ‘Start’ and equip two items, one to A and one to B, to use to defeat enemies, solve puzzles, and open new paths. Primarily, this will be your sword and shield; Link can attack in four directions or charge up his trademark Spin Attack to attack in a circle and can defend himself from incoming attacks by holding down the shield button. As you progress through both games, you’ll acquire these weapons, and other items either by finding them in one of the dungeons, buying them from one of the many shops, or being gifted them by a friendly non-playable character (NPC). Initially, you can’t access anything, not even the pause menu, and you later must equip two specific items in conjunction to get past obstacles, such as using the Pegasus Seeds and Roc’s Feather to clear longer gaps. 

Link must channel the seasons and time itself to save these chaotic lands.

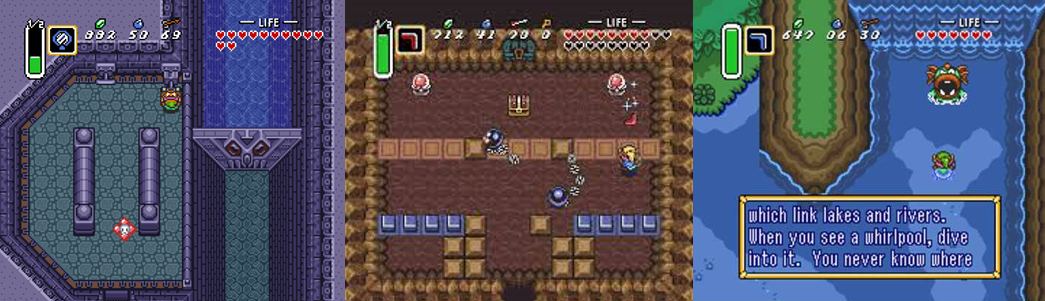
Link’s journey takes him all over each land and both are filled with enemies and hazards; some are easily overcome with your basic sword, others require more tactical use of your weapons (such as directing the Magical Boomerang to hit switches or dropping bombs to blow open cracks in walls), and it’s worth attacking most enemies, cutting grass, and digging up dirt to unearth hearts, Rupees, and ammo to keep yourself well stocked. Link begins with three hearts (or four, it seems, in a “Linked Game”) and can replenish them with hearts or extend his life bar by finding Heart Containers, but you’ll need Rupees and Ore Chunks to purchase items from shops. All of this is very familiar to any Zelda fan, exposing hidden paths and even switching to a sidescroller perspective in certain areas, but there are a couple of gimmicks that make each game stand out. First, each game contains two overworld maps; in Oracle of Ages, you’ll travel hundreds of years into the past and in Oracle of Seasons you’ll travel back and forth to the underground realm of Subrosia. Travelling to the past alters the landscape somewhat, allowing you to access new areas by warping to dead ends in one era, and changing events in the past will affect the future as well. In addition, Link’s swimming abilities are greatly expanded upon in Ages; you’ll get to dive deep underwater and explore coral-filled areas to progress, and not just in the overworld, where you’ll visit Zora’s Domain, but in dungeons, too. In comparison, Subrosia is a more fragmented landscape; here, you’ll find your way blocked by rivers of magma, the environment beset by exploding volcanos, and inhabited by cloaked, dwarf-like people obsessed with ore and mining. Subrosia is also home to the Temple of Seasons, which you gain additional access to as you conquer dungeons and acquire new gear, which in turn powers up the Rod of Seasons and allows you to change the seasons in Holodrum. 
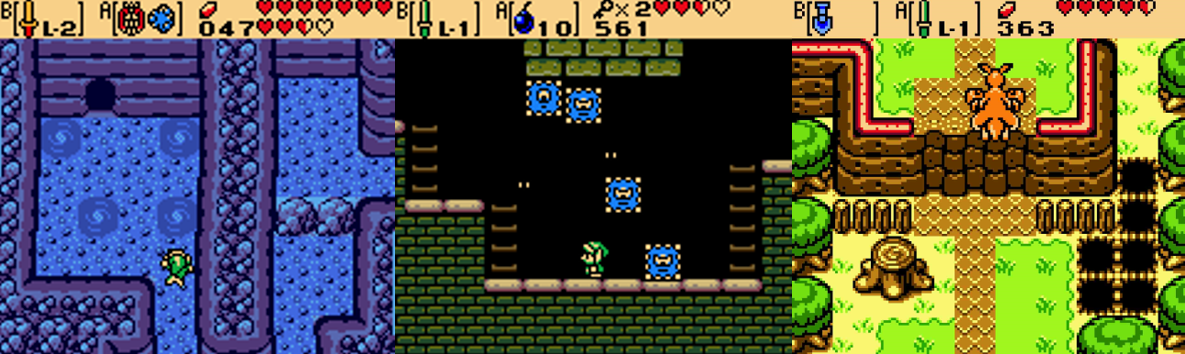
In addition to underwater and sidescrolling sections, Link has animal friends to help him out.

You’ll find tree stumps all around Holodrum and, from these, you can wield the Rod of Seasons to cycle between spring, summer, autumn, and winter, with each season altering the landscape in some way. Winter sees snow pile up, for example creating higher paths and snow piles that need digging up; autumn sees mushrooms bloom, allowing you to pick them up to access new paths, spring activates flowers that boost you to higher levels, and summer sees climbable vines appear on the overworld. You’ll often need to switch seasons regularly to access different areas and then backtrack to reach a new path, and the seasons change sporadically as you explore, creating new obstacles and requiring you to switch weapons. Eventually, Link also gains the ability to fast travel around the map with Warp Seeds, to swim and dive in water, and to call an animal companion to help get past specific obstacles, though you won’t be using magic in either game. In Ages, time travel is initially quite limited as you need to use the Harp of Ages at specific points, but eventually you gain the ability to freely travel back and forth through time to solve puzzles, complete fetch quests, and access new dungeons and regions. Almost every task in Ages is some kind of convoluted puzzle or fetch quest requiring you to talk to numerous NPCs and travel between eras multiple times just to access a Dungeon Key. Easily the most frustrating example of this is when Link visits Tokay Island and has all his equipment stolen by the lizard-like Tokay; you’ll need to track each piece down one at a time and use them, in conjunction with time travel shenanigans (such as pushing seeds next to walls so the sprout into climbable vines), to retrieve everything so you can continue on your quest.
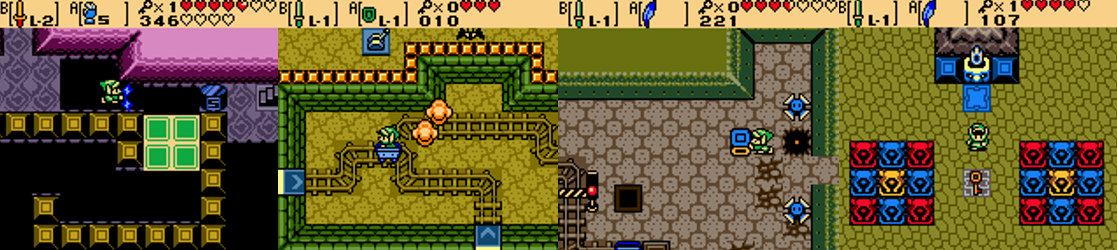
Puzzles are a huge aspect of Ages, including some annoying coloured-based puzzles.

Like Link’s Awakening, Link is tasked with visiting eight dungeons in each game to acquire new items, conquer the bosses within, and claim the eight mystical objects needed to confront each game’s big bad. Although Ages focuses more on puzzles and Seasons is more action-orientated, many familiar Zelda puzzles are found in each game. You’ll be stepping on or pushing pots or statues onto switches, defeating groups of enemies, pushing blocks (either in a specific way or onto certain tiles), lighting torches, and taking stairs or dropping through holes to access new areas, open doors, or acquire keys to progress further. Like in Link’s Awakening, you’ll use sidescrolling sections to hop to moving blocks, Thwomps, climb ladders, or swim past Cheep Cheeps, though both games place great emphasis on mine carts; you’ll ride these to new areas in the dungeons, hitting switches to change their direction or lighting torches as you speed past. Each dungeon hides a Compass and Map to help you navigate and you’ll unlock a warp point after defeating the mini boss, which is useful when you have to backtrack to find or use keys and items. In Seasons, many puzzles are solved by using Link’s Magnetic Gloves to move magnetic balls and hover over gaps on small rotating diamonds, or by dropping blocks down to lower levels, or activating bridges across gaps and you’ll need to be quick on your feet or to hide behind your shield when the floor suddenly collapses or comes to life to attack you. Occasionally, you’ll lose traction in icy areas, navigate maze-like woods, play hide and seek, and be sent to take out fortified areas or rescue animal companions to reach new areas to say nothing of dodging fireballs, floor spikes, crushing weights, and rolling logs. While puzzles appear in Seasons, they’re far more prominent in Ages, with the most infamous being those involving pushing a coloured cube in a specific way so it lands on the right coloured tile, or using the Cane of Somaria to create a block to press multiple switches at once, or rearranging statues. You’ll enter rooms where you need to step on all the tiles in a specific path to access keys, or jump to coloured tiles to make them all match up, or defeat coloured Gels when the room is a specific colour. Sometimes you’ll need to navigate invisible paths (where the Cane of Somaria again comes in handy), bomb walls or blocks in mazes, navigate past bladed obstacles or arrows, and even change the dungeon layout entirely, though oddly the time travel and season gimmicks rarely play a part within the dungeons.

Graphics and Sound: 
Both Oracles games heavily reuse assets from Link’s Awakening, recycling sprites, environmental details, and certain gimmicks and presenting them in new ways. This could be seen as a negative but something about the presentation makes the games pop in a way that outdoes its predecessor; maybe it’s that the games were purposely built for the Game Boy Color or the influence from The Legend of Zelda: Ocarina of Time (Nintendo EAD, 1998), which sees familiar tunes and species from that game (particularly the Gorons and Zoras) integrated on the small screen. NPCs are much livelier and more integrated into the plot as well; engagements with them carry over between games, changing your interactions with them, and you’ll find all sorts of fun NPCs on offer in both games, from a hyperactive child, to talking animals, to lovesick anthropomorphic trees, lost souls, and skeletal pirates. Each game may visually resemble the other and Link’s Awakening but they’re noticeably different; the changing seasons mean you effectively have four different overworld maps in Seasons and the past of Ages is far less vibrant and more a work in progress, with each time period (and Holodrum and Subrosia) having their own overworld themes or variations on the classic Zelda theme. Link directly changes each area in various ways, from altering the seasons to unlocking gates, flooding areas with water or lava, to allowing a pirate ship stuck between worlds to venture from the sands of Subrosia to the docks of Holodrum. Travelling through time lets you explore ancient Labrynna, where towns are still being built, Queen Ambi and her palace are prominent, and the towering and dangerous Restoration Wall leads to the decimated Symmetry Village, a location you directly improve by travelling through time.

The anime aesthetic and visual borrowings from the 3D games add to the colourful variety.

One area where both games shine is the incorporation of large sprite art for various cutscenes, such as the opening and when Link meets the Oracles. These are rendered in an anime style that recalls the artwork of The Legend of Zelda: A Link to the Past (Nintendo EAD, 1991) and are partially animated. These are used sparingly, however, and the in-game sprites are once again relied on to convey the bulk of each game’s story, with dialogue boxes and input from the Maku Tree (or consultation with an Owl Statue or some chatty birds) guiding you or offering hints. Perhaps as a consequence, the games include some new and updated sprites; while Link is largely unchanged and many of the enemies are recycled from Link’s Awakening, NPCs are more varied than ever and there are some large and detailed boss sprites. The overworld greatly benefits from this newfound attention to detail; Goron City, Zora’s Domain, and the various towns and castles are bustling and varied, with both games including fun elements from Ocarina of Time (like Jabu-Jabu) alongside guessing games, target practise, and aggravating dancing mini games (which are especially prominent in Ages). Sadly, the same can’t be said about the dungeons; many are largely interchangeable and contain the same recycled elements, though they naturally get bigger, more maze-like, and more complex to reflect a rise in difficulty. These means that, while some have different colour palettes and may feature greater emphasis on water, gaps, or other hazards, there’s not much to differentiate them as you’ll see the same gimmicks recycled, though they are used in ways that continually tax you. Of the two, Oracle of Ages has the better, more varied dungeons; Jabu-Jabu’s Belly is largely flooded, requiring you to dive to access new areas, Crown Dungeon makes better use of the coloured block gimmick, and generally there is a lot more to do in Ages’ dungeons, even though this can be frustrating as you need to do a lot of wandering around, backtracking, and trial and error to access keys and doors.

Enemies and Bosses: 
As near as I can tell, every enemy in the Oracles games is recycled from Link’s Awakening with the exception of the Lynel, a tough centaur-like wolf that deals as much damage as it can absorb. Otherwise, you’ll be encountering various Moblins and Darknuts (who wield spears, swords, and spiked maces), Octoroks, shield-eating Like Likes, snake-like Ropes, bat-like Keese, and electrifying Buzz Blobs. Some will attack when you cut down grass or fall from the sky, like the Floor- and Wallmasters that spawn in to drag you back to a dungeon entrance or the ghost-like Ghinis that haunt various graveyards. Anti-Fairies will bounce around, similar to Bubbles, chipping away at your hearts; Arm-Mimics copy your every move, mummy-like Gibdos shrug off your shots, Wizzrobes constantly teleport in and out shooting energy waves at you, the Mini Masks must be attacked from behind (or have their metal masks removed), and you’ll need to take cover behind the environment to avoid being blasted by Beamos statues and be quick on your feet to outrun the many small and large blade traps. Some enemies are hiding in plain sight, such as the Old Men who will rob you, the wandering witch who steals items from you if you bump into her, or the guards fastidiously overseeing Queen Ambi’s grounds. While enemies are shared across both games, a couple are unique to each; you’ll only encounter Candleheads in Ages and Magnites in Seasons, for example, though this element could’ve been expanded upon to give each game their own unique enemies.
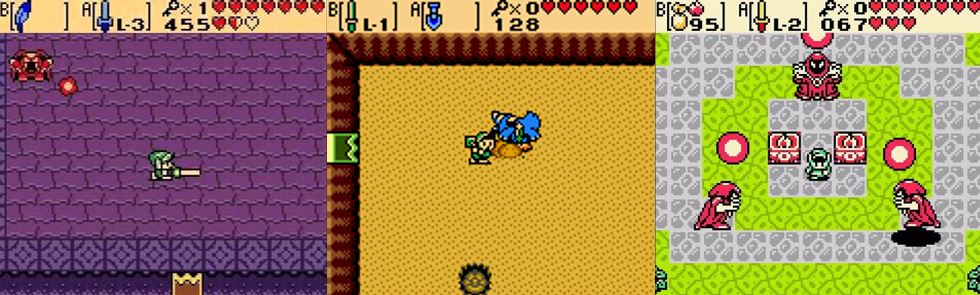
When bosses aren’t being recycled from previous games, they require your various sub weapons.

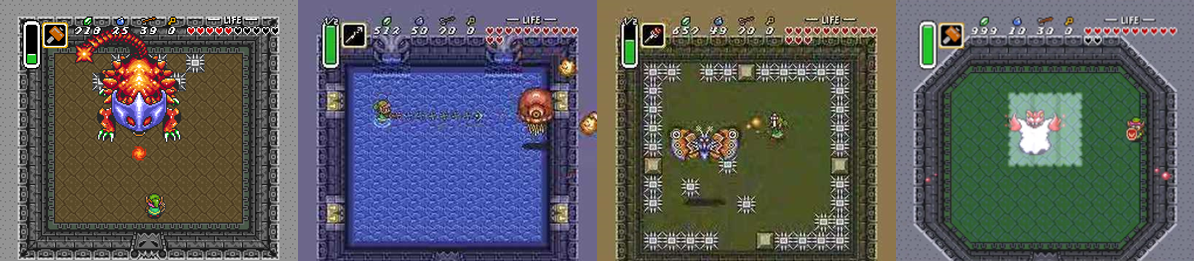
Each game features nine mini bosses, with two being shared between the games; the Great Moblin and Vire, who you’ll have to battle in a fortified keep and the Ancient Ruins, respectively. While Vire attacks exactly as in Link’s Awakening, flying about and shooting coloured projectiles and splitting into smaller parts and only being vulnerable when charging, the Great Moblin is fought after avoiding his fortress cannons with your animal companion then tossing his own bombs back at him. Some of Ages’ mini bosses will be readily familiar to players of Link’s Awakening as Smasher and the Angler Fish return, and even the Giant Ghini can be traced back to that game, though their attack patterns are altered; you still need to throw Smasher’s balls back at it but they now disappear after a short time, the Angler Fish is fought on the ground (though still from a side-on perspective) and has additional bubble attacks, and the Giant Ghini is now a more formidable foe accompanied by smaller minions and capable of charging you. Ages also has three unique mini bosses; Subterror is a mole-like monster you dig up with your shovel, the Armos Warrior is a giant Armos whose shield can only be destroyed by tossing its huge sword back at it, and the Blue Stalfos is a Grim Reaper-like foe whose energy balls must be reflected back at it. Another returning boss from Link’s Awakening is Façade, who’s fought twice in Seasons but defeated in the same way as ever (simply bomb its face when it appears on the ground and watch for falling rocks). Seasons also has you fight the Brother Goriyas (who toss a boomerang between each other), three Omuais (who you must yank out of the water to attack), the Agahnim-like Agunima (who, like Agahnim, splits into copies and fires magical bolts at you and can only be defeated when all the torches are lit), the sabretoothed ball of teeth known as Syger (who’s only weak spot is the red ball on his tail), the two mischievous Poe Sisters, and the elemental spirit Frypolar, who can only be defeated by tossing its own icicle constructs back at it. 
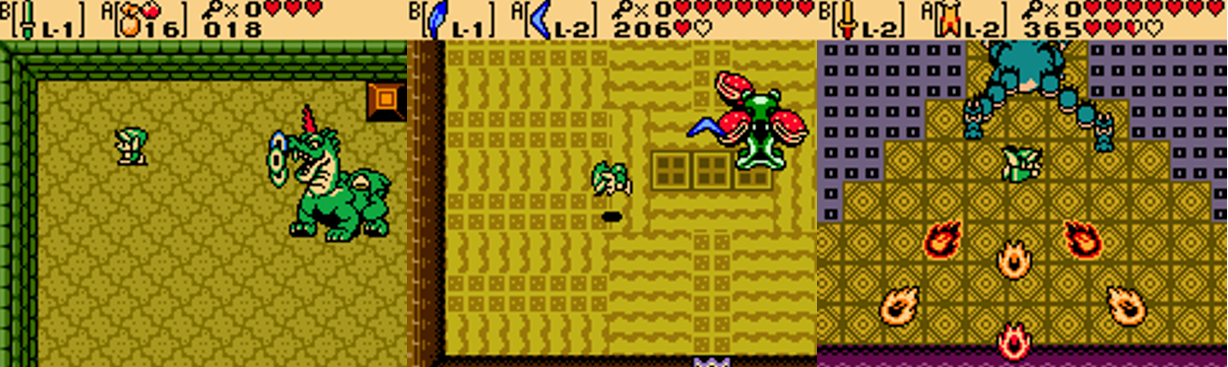
Returning bosses are given new life and made more dangerous than ever,

There are also eight primary bosses in each game, with a final boss to be conquered at the end. Although each game has unique bosses, six of Seasons’ bosses return from the first Legend of Zelda game. Aquamentus, Dodongo, Gohma, Digdogger, Manhandla, and Gleeok all return here, with Manhandla and Gleeok being two of the toughest. Manhandla can only be damaged by attacking its beak-like mouths when they’re open; unfortunately, this is also when they spit projectiles, and its attacks only increase as each “head” is knocked off, exposing its vulnerable insides. The two-headed dragon Gleeok again remains stationary and spits fireballs from its heads, one of which will fly about after being severed, but it’s actually easier to battle than in the original game. Mothula returns from A Link to the Past, with a similar attack strategy of circling the room and firing at you; though the moving floor is gone, you’ll need to watch for holes and jump over gaps to attack Mothula when it lands. This means that Seasons’ sole unique boss is the Medusa Head, which teleports about, turns you to stone, and fires a massive laser beam from its eyes but is easily stunned with your Pegasus Seeds. Aquamentus still spits fireballs, but now also has a charge attack; you must first force the Dodongo to swallow a bomb and then toss it onto the spikes surrounding the arena with the Power Bracelet; you’ll need to avoid being grabbed and tossed by Gohma’s claw, sever it, and then shoot its eye; and finally make use of the spiked magnetic ball to smash Digdogger and its mini doubles into the ground. 
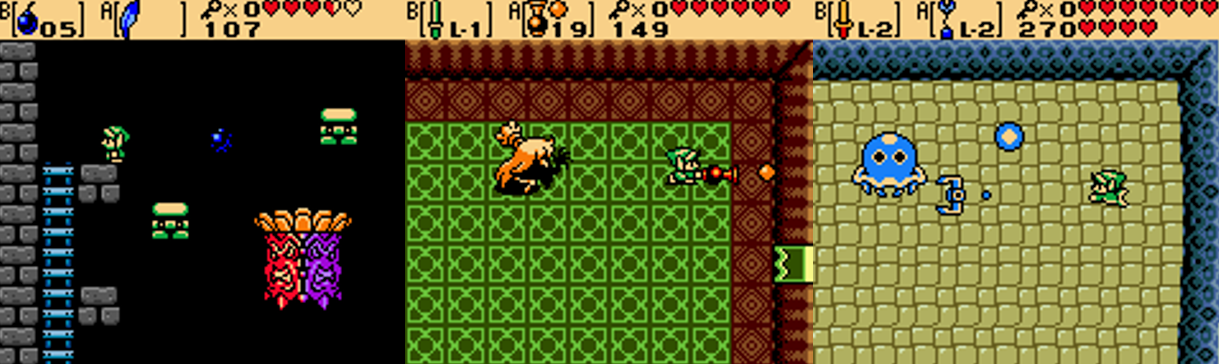
Unique perspectives and methods are required to topple many of the game’s tougher bosses.

In comparison, Ages’ bosses are exclusive to that game, which helps to make it more unique, though some are reminiscent of previous Zelda bosses (Ramrock, for example, resembles King Bongo Bongo, though you defeat it by timing bomb throws into its giant stone hands). The first boss you’ll face is Pumpkin Head, who wanders around shooting a spread of fireballs; his only weak spot is his torso, which you attacked to grab and toss his jack-o’-lantern head to reveal its true form. The Head Thwomp is pretty unique as it’s fought from the side-on perspective and sees Link hopping around avoiding projectiles and falling rocks and dropping bombs into the boss’s head to make its expression change to red, causing damage and dropping hearts or bombs. The Shadow Hag also requires a unique strategy to defeat; she splits into multiple shadow forms and protects herself with moths, meaning you must fire a seed so it ricochets back into her. Eyesoar also requires the use of one of Link’s other weapons to damage; it protects itself with smaller eyes and relentlessly moves towards Link, so you need to clear them away and snag it with your Switch Hook to stun it and whack it with your sword. Smog is probably Ages’ most aggravating boss; it is fought in four rounds, each with a different arrangement of blocks, and its smaller form charges around tossing fireballs. You need to strategically place blocks with the Cane of Somaria to get the smaller parts to converge into one, which you can then attack, which each stage getting more difficult as Smog adds lightning attacks to its arsenal. The Octogon constantly swims around Link spitting projectiles at him; you need to angle your seed shooter to attack its weak spot on the back, and dive underwater to smack it with your sword, which can get quite chaotic. You’ll need to use these same seeds when battling the Veran-possessed Queen Ambi as this is the only way to drive Veran’s spirit from her body so you can stun her with the Switch Hook and attack with your sword. The Switch Hook’s upgraded form, the Long Hook, is also the only way you’ll defeat Palsmarine, two jellyfish-like enemies who can only be damaged by causing them to run into each other’s attacks.
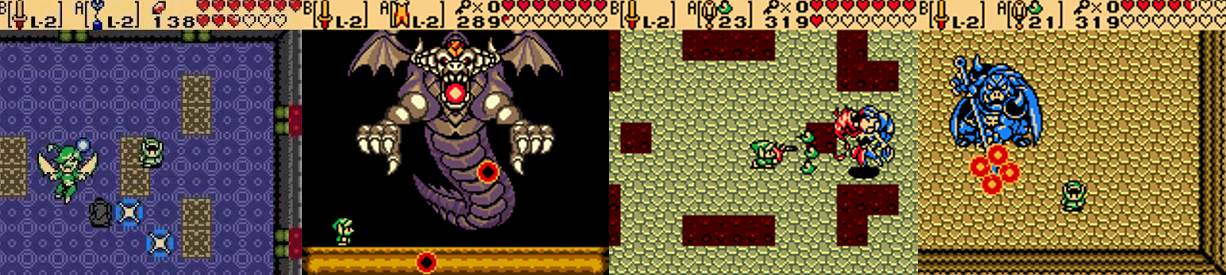
As if the monstrous final bosses weren’t bad enough, a deranged version of Ganon also appears.

Once you’ve collected the eight mystical artifacts in each game, you break the spell keeping you from the big bads. In Ages, you battle the evil witch Veran at the Black Tower, a maze-like castle filled with Lynels and Wizzrobes, and whose battle consists of two phases. First, Veran summons Dark Links to distract you, dashes about, and throws a variety of fireballs. Once defeated, she transforms into three monstrous forms: a large beetle that crashes to the ground to temporarily cause acidic hazards to appear, a large bee that quickly flies around and slows your movements with its barrage of stingers, and a horrific spider that stuns and slams you with its web. These forms are random (I never actually saw the bee form) and require different strategies, such as attacking the beetle’s face, firing a seed at the bee, and tossing bombs at the spider. In Seasons, the antagonist is the formidable, heavily armoured General Onox whose castle is a labyrinth filled with some of the game’s toughest enemies and a rematch with Façade. When you reach Onox, he first swings and hurls a massive, spiked mace, causes boulders to rain down, and stuns you with whirlwinds and the only way to damage him is with your Spin Attack and swipe the Rod of Seasons when he uses Din to shield himself. Afterwards, you drop down a hole and face Onox’s dragon form! You need to avoid his flaming projectiles and being squashed by his claws and hop onto his hands to slash at the crystal on his head, which can be tricky if you cheese your jump. If you’ve cleared a Linked Game, you’ll be dropped into the Room of Rites to rescue Princess Zelda. This means battling Koume and Kotake, first separately (reflecting their elemental attacks back at each other) and then in their fused state as Twinrova (which conjures flaming pits or turns the floor to ice and must be stunned with Mystery Seeds) not unlike in Ocarina of Time. Defeat the witches and they’ll sacrifice themselves to resurrect Ganon, forcing you to fight an unhinged version of the Gerudo King in a battle not unlike A Link to the Past. Ganon teleports around the room and unleashes some devastating attacks, such as a charged swipe of his trident, stunning you with a ground-quaking drop, or charging up a huge energy ball. Ganon can only be damaged with a Spin Attack so you need to unleash it and quickly jump or dash away to avoid being hit, the timing of which can be tricky but I actually found this an easier bout than in A Link to the Past as there’s less to worry about onscreen.

Power-Ups and Bonuses: 
One aspect not carried over from Link’s Awakening are the temporary power-up Acorns; Link also won’t be getting new tunics either, which is a shame, but in their place is the Ring system. As you explore, you’ll find Gasha Seeds that can be planted in soil patches; these blossom into acorns that gift you Rings, or you can find them in chests or buy them from shops. Take them to Vasu the jeweller to appraise them for 20 Rupees and you can equip a Ring to enable certain effects, such as doubling your attack power, sensing secrets, increasing your throw distance, and even turning Link into an Octorok! Some Rings have negative effects as well, such as upping your attack power at the cost of you taking more damage, or no effect at all and simply being keepsakes. You can eventually hold multiple Rings in your Ring Box, but you can only equip one at a time so it’s best to think about what benefits you might need in the long-term. Another new aspect are the animal companions; Ricky the boxing kangaroo, Moosh the flying bear, and Dimitri the friendly Dodongo will help you throughout your quest, ploughing through hazards, flying you over gaps, and scaling waterfalls, respectively, when you call for their help but you’ll eventually have to settle on one as your primary companion, which is then reflected in the Linked Game. 
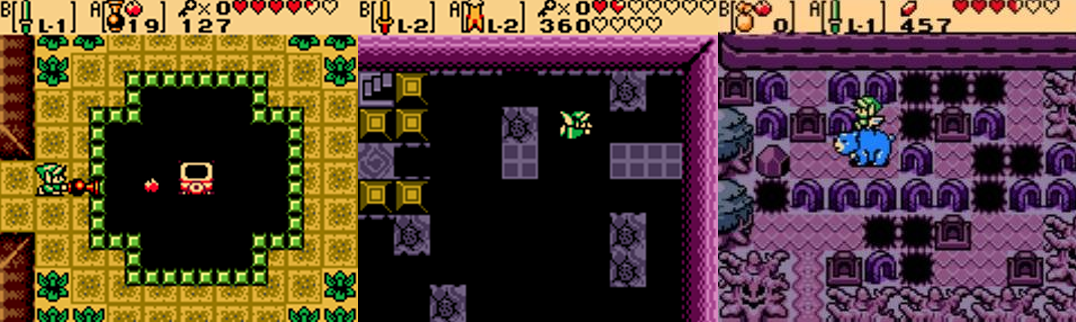
Link’s new weapons and companions provide new ways to traverse and solve puzzles.

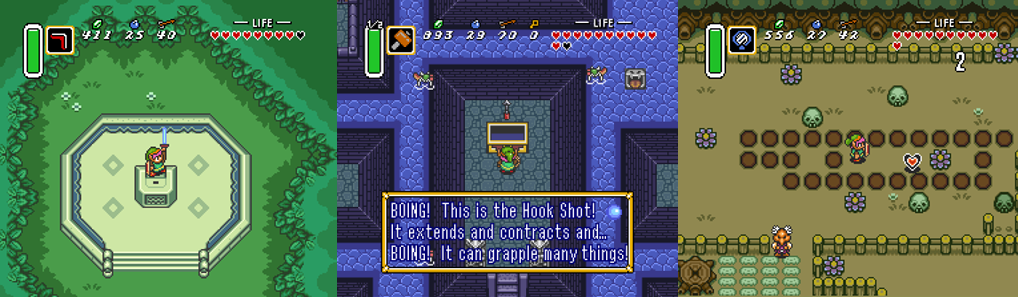
Another new aspect here is that Link utilises a slingshot or a seed shooter rather than his traditional bow and arrows; the slingshot can fire a variety of seeds, from Ember Seeds to Mystery Seeds. The slingshot can even be upgraded to fire three shots at once, a luxury not afforded to the seed shooter (though you can aim your shots to ricochet to their target). Link’s seeds are very useful as well; the Gale Seeds allow him to warp, and the Pegasus Seed awkwardly take the place of the Pegasus Boots, allowing Link to run fast for a short period of time. Otherwise, weapons and items are very familiar; Link can toss bombs or a boomerang, pick up rocks with the Power Bracelet, and jump gaps with the Roc’s Feather. Many of his weapons can be upgraded, such as Link’s sword powering up to shoot a beam when he’s at full health and his shield deflecting incoming attacks, but two of the most useful upgrades are Age’s upgraded Mermaid Suit, which lets you dive and attack underwater, and Seasons’ upgraded Roc’s Cape, which lets you glide over gaps. Ages’ Cane of Somaria is required to press multiple switches at once to solve puzzles, as is the Switch and Long Hook, which let you switch places with diamonds, jars, and other objects to clear gaps, defeat or damage certain enemies, and press switches. Link will also make good use of the Harp of Ages and Rod of Seasons to travel through time and change up the seasons on the overworld, respectively, and playing a Linked Game allows you to access additional weapons, such as homing Bombchus, the Biggoron’s Sword, and the Mirror Shield.

Additional Features: 
As ever, Link can extend his health by collecting Heart Containers; you’ll be granted an extension for every four you find or after beating a dungeon boss, allowing you to extend Link’s health to sixteen hearts. Link’s weapons can also be upgraded, though some are optional and require you to explore or perform certain tasks. As you explore the overworlds, you’ll come across hidden caves containing Rupees or fairy fountains to replenish your health, and find Maku Seeds which must be planted to acquire new Rings. Both games include a lengthy trading sequence where you exchange key items between NPCs, fleshing out the world, your relationships with the characters, and earning the Noble Sword in the process. Almost every area requires some kind of fetch quest in Ages, such as finding Mystery Seeds to meet Queen Ambi to get the bombs you need to enter the Wing Dungeon, travelling back and forth between time to placate the Gorons, or acquiring a sea chart and talking to Tingle to reach Crescent Island. There are some stronger golden variants of enemies to find and defeat in Seasons that will net you the powerful Red Ring, and you can transfer elements from one game to another after completing them and earning a password. This begins a Linked Game, where you start with four hearts instead of three and with a weapon in your inventory; certain NPC interactions will change, the Hero’s Cave will be considerably more challenging and reward special Rings, Rings and other special items can also be transferred via passwords, and each game includes additional features (such as a familiar 2D rescue of Princess Zelda in Ages and a rematch with the Great Moblin in Seasons) that are only accessible this way and thus encourage multiple playthroughs. 
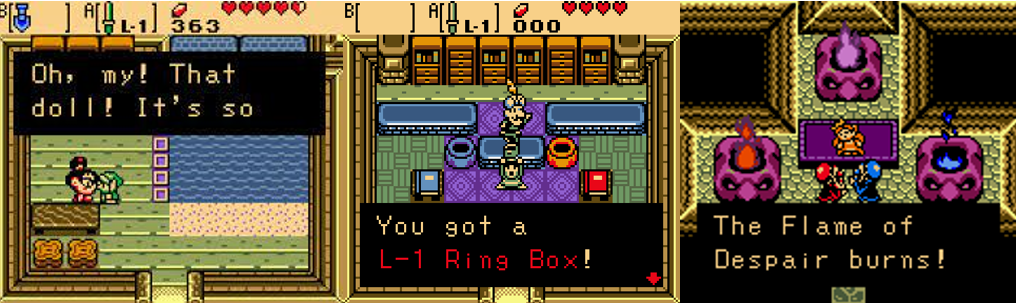
Various side quests and a unique link feature expand the games.

Once you’ve cleared one game and then completed a Linked Game, you can experience the “Hero’s Game” to experience the other game as intended and also access the true final challenge of both games. If you play each game normally, you’ll receive a code to use in the other game; playing a Linked Game sees NPCs reference your heroics and actions from the other game, as well as providing you with additional passwords you can use to access extra items and bonuses. If you play a Linked Game through to the end, you’ll automatically be taken to the Room of Rites to battle Twinrova and Ganon; defeating them gifts you the “Hero’s Secret”, which essentially allows you to play the original, unlinked version of the other game but with more hearts and being able to transfer over your Rings. It’s a pretty unique feature and invites multiple playthroughs, though it does lock some traditional Zelda elements (such as the Mirror Shield and Master Sword) off from you as these can only be accessed with the codes. Back in the day, you could automatically play a Linked Game using a Game Boy link cable; the Nintendo Switch Online version doesn’t currently allow you to jump straight into a Linked Game, but you can choose between the NTSC and PAL versions (though I’m not sure what the difference is between the two) and make use of save states and the rewind feature to make the experience a lot less difficult.
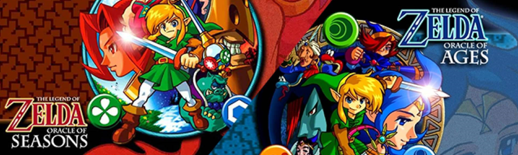
The Summary: 
For the longest time, the Oracles games were inaccessible to me; as prices soared and I upgraded past the original Game Boy, they became unplayable outside of emulation until they were finally released digitally. I’ve played through both before on the Nintendo 3DS but that was ages ago and I’ve hesitated to revisit them due to the playtime needed to properly experience both, and that’s a mistake on my part as they really are some fun, challenging, and vibrant Zelda adventures. While it’s fun warping between different time periods in Ages, I feel this mechanic wasn’t as prominent as it could’ve been; rarely do your actions in the past impact the future (these events are more noticeable in cutscenes) and I would’ve liked to see more visual differences between the past and present, like a decimated present that gets fixed as you visit the past. In comparison, I really enjoyed the season mechanic in Seasons; being able to manually cause snow or a blazing summer is fun and opens new opportunities for exploration, even if it’s not utilised outside of the overworld. I do have some gripes, but they’re mainly due to limitations of the hardware; for example, it’s annoying having to equip the Power Bracelet every time you need to use it and as good as the map is when you’re warping, it’s not always clear where you’re going. Although the weapons and items aren’t much to shout about and the bland dungeons disappointed me, I enjoyed how much the overworld popped and the boss battles presented; I liked all the returning battles, but the original ones were even better, but I quickly became frustrated with Ages’ focus on repeating puzzles and forcing you to run all over the place for the most mundane tasks. Although the linking system is a little clunky and it’s a shame we didn’t get a third game (and I feel a modern remake would be better served packing all two-and-a-bit games together), I liked the increased emphasis on interactions with NPCs and the incorporation of the animal companions, however brief they are. Including aspects from Ocarina of Time was also a great idea, and the epilogue offered by the Linked Game made for a satisfying conclusion, though again I think more could’ve been done with this feature. In the end, this was like one big Zelda experience spread over two titles…mainly because that’s exactly what it was! Seasons was more my speed overall, but there were elements I liked from Ages like the more varied overworld. Play both back-to-back for the complete experience and you can’t go wrong, though it can’t be denied that there’s a little lacking from each due to them having different mechanics and equipment. 

My Rating:

Rating: 4 out of 5.

Great Stuff

Have you ever played the Oracles games? Which one did you prefer? Did you like that they incorporated elements from the 3D Zelda titles? What did you think to the different overworlds and gameplay mechanics? Did you prefer travelling through time or altering nature? What did you think to the recycled bosses from previous Zelda games? Did you ever link both games and see the true ending? Would you like to see these games remade like Link’s Awakening was? How are you celebrating The Legend of Zelda this month? Leave your thoughts and comments below or on my social made and go read some of my other Zelda reviews on the site!

Game Corner [Zelda Month]: The Legend of Zelda: A Link to the Past (Nintendo Switch)


On 21 February 1986, The Legend of Zelda (Nintendo EAD, 1986) was first released in Japan. The creation of legendary game designer Shigeru Miyamoto and Takashi Tezuka, The Legend of Zelda launched one of Nintendo’s most popular franchises. This year, I’m dedicating every Wednesday to Nintendo’s most famous silent protagonist, Link and his vast and enduring fantasy world of sword and sorcery.


Released: 5 September 2019
Originally Released: 21 November 1991
Developer: Nintendo
Original Developer: Nintendo EAD
Also Available For: Game Boy Advance, Nintendo 3DS (Virtual Console), Nintendo Wii, Nintendo Wii U, Satellaview, Super Nintendo Entertainment System (SNES) Classic Edition, SNES

The Background:
Created by designer Shigeru Miyamoto, The Legend of Zelda was purposely designed to emphasise exploration and experimentation, with Miyamoto drawing inspiration from his childhood love of exploring forests and caves. The game was a massive success for Nintendo, selling well over 6.5 million copies and being widely regarded as one of the greatest adventure game of all time. Miyamoto followed this breakout hit with a decidedly different experience; Zelda II: The Adventure of Link (Nintendo R&D4, 1987) remains one of the franchise’s more divisive titles for ditching the top-down perspective in favour of traditional 2D sidescrolling sections, incorporating a level-up mechanic, and its unreasonable difficulty spikes that saw even Miyamoto express regret over the game’s execution, which was simply hampered by the hardware of the time. Though the game sold well and was met with positive reviews, and is often seen as being ahead of its time, Miyamoto returned to the top-down perspective for the third entry, which he initially planned to include a party of protagonists and which was developed to showcase the power of Nintendo’s new 16-bit console. Utilising a 8 Mbit cartridge as opposed to the usual 4 Mbit allowed A Link to the Past to be the largest and most detailed Zelda adventure yet; graphical decompression and clever use of overlays allowed the game to include two worlds, the bright and vibrant Hyrule and its far more desolate (and game-changing) Dark World counterpart, resulting in what many have deemed to be the greatest Legend of Zelda game of all time. This was reflected upon the game’s release, with it becoming a best-selling SNES title and being accompanied by overwhelmingly positive reviews. Not only was A Link to the Past host to one of gaming’s most obscure Easter Eggs, adapted into both a comic book and a manga, and eventually followed by a direct sequel, it was ported to the Game Boy Advance alongside some additional gameplay mechanics and elements and made available on numerous later Nintendo consoles for new generations to play.

The Plot:
A young apprentice named Link takes up his uncle’s sword and shield to rescue Princess Zelda from the clutches to the malevolent sorcerer Agahnim. However, Agahnim is merely a pawn of the King of Evil, Ganon, who imprisons seven maidens in the Dark World, a dimension of evil and chaos, into which Link must venture to restore peace to Hyrule.

Gameplay:
The Legend of Zelda: A Link to the Past is a top-down adventure game in which players once again assume the role of Link, a young boy in a green tunic whom they can now rename from the file selection screen in order to personalise their quest. In many ways, the game is an expanded and enhanced remake of the original Legend of Zelda and follows many of the same gameplay tropes, but also brought them to life in ways that would come to define the franchise for decades. The game employs a simple control scheme, with Link enjoying a greater freedom of movement compared to the Nintendo Entertainment System (NES) releases thanks to the SNES’s hardware; in this version of the game, you can control Link with either the left stick or the directional buttons, which offers even more freedom of movement. There are multiple functions tied to the A button; it allows you to grab and throw objects (bushes, pots, rocks, bombs, and so forth), open chests to acquire new items and keys, advance dialogue boxes and, later, you can hold it down to charge up a running dash when you get your hands on the Pegasus Shoes. Once you acquire your uncle’s sword and shield, B allows you to attack enemies with slashes; holding down B will charge Link’s patented Spin Attack to defeat multiple enemies at once and, when you later upgrade to the fabled Master Sword, your sword will shoot out a swirling energy projectile when you’re at full health. Link’s shield is automatically equipped and will defend against most projectiles, but you’ll need to upgrade it to fend off later energy attacks. The Y button allows you to use an equipped item; you’ll find and acquire many different items from chests and helpful non-playable characters (NPCs) and you can equip them using the ‘Start’ button. These range from familiar weapons like the boomerang, bow and arrows, and bombs, to items that drain your magic meter (including magic powder, the lantern, and the elemental rods) and consumables stored in bottles. As is often the case, Link cannot jump; he can drop down from ledges or through holes and climb up ladders and staircases but you won’t be performing any mid-air attacks here. The Pegasus Shoes do allow you to blast yourself over some gaps, however, but mostly you’ll be relying on the hookshot, magic platforms, and various other means to progress. As Hyrule is bigger than ever, this means a great deal of backtracking, exploration, and trial and error; often, areas will be blocked off by larger rocks, bodies of water, or even ancient texts or the use of powerful magic medallions.

Link embarks on his biggest adventure yet, solving puzzles and acquiring new items to progress.

Link’s quest will take him all across Hyrule, which you can view at any time with the X button; story-specific locations are indicated on this map but you’ll need to converse with NPCs and pay attention to signs and dialogue to work out where you need to go. There’s a degree of freedom here but the game’s dungeons are best conquered in numerical order so you have all the tools you need to progress; there’s nothing worse than venturing all the way to the swamp to find you need the Book of Muldora to read the ancient text and open up the dungeon, or making it all the way to the top of Death Mountain without the Quake Medallion. Thankfully, you can later acquire a flute to fast travel across the map and make use of the Zora Flippers to warp to various points using whirlpools, but it can be difficult figuring out where you need to go and what you need to do. To start with, you’ll need to travel to three dungeons and acquire three magical pendants in order to rescue Princess Zelda. This offers a taste of A Link to the Past’s formula and sees you venturing into hazardous dungeons, acquiring new items in each along with a map and compass to help you navigate via a grid-like map on the menu screen, and defeating a boss. Dungeons are typically maze-like, growing more complex and involved as the game progresses, and contain many puzzles that you’ll soon become familiar with: you’ll be pulling levers, defeating all enemies, and stepping on switches to open doors or spawn chests containing keys, pushing blocks, activating crystal switches to raise and lower coloured blocks, struggling on ice and moving platforms and paths, dodging fireballs, running across narrow paths as they collapse beneath you, lighting torches, and blowing up weak walls to find new areas. When in dungeons, you can find special tiles to converse with the wise Sahasrahla for hints, but mostly you have to figure out what you’re doing on your own, which can quickly become very tough; it’s easy to end up wandering around aimlessly, taking out the respawning enemies and searching every nook and cranny to try and progress. Some dungeons require you to venture outside and change something on the overworld in order to progress, such as opening a dam, navigating a haunted forest, or using your magical medallions. Others see you dropping through or pushing blocks down specific holes to reach chests, warping around on tiles, escorting NPCs, blasting across lava pits through pipes, creating your own platforms with a magic wand, avoiding various spiked hazards, and lighting up dark areas with your lantern or by blowing up cracked floor tiles.

Link travels to the desolate Dark World to free the seven maidens and confront Ganon.

Just reaching the dungeons can be a quest in itself as you venture through caves, guide NPCs to safety, pay a cheeky monkey to open the way, buy a bigger bomb to blow open a wall, and figure out the path through the misty Lost Swords to retrieve the legendary Master Sword. Most prominent, however, is the presence of the Dark World; this ashen, nightmarish dimension is reached through warp tiles found across Hyrule and will render you defenceless without the aid of a special item. When in the Dark World, the map changes in various ways; not only are the enemies tougher, the overall atmosphere more ominous, and the land reduced to an apocalyptic hellscape, but certain paths are now blocked and alternative ones are opened up, and just navigating this hazardous landscape is made all the more difficult as a result (and the fact that you can’t use your flute to warp about). Link can return to Hyrule at any time using a Magic Mirror, which also leaves behind a sparkling warp point to quickly shunt back to the Dark World if necessary, and you’ll be jumping between these two worlds to solve puzzles, access new dungeons, and progress through the story. As the game progresses, things get noticeably tougher for Link; newer, more powerful enemies appear on the map and the dungeons get longer and more complicated, though you can pay a fortune teller to point you in the right direction. You can also find fairy fountains to replenish your health (but not your magic), acquire Heart Pieces and Heart Containers to extend and refill your health, and purchase various useful items from shops or from NPCs using Rupees, Hyrule’s traditional currency. Be sure to save your game often; you’ll be returned to the title screen and won’t restart at full health, but this allows you to pick from various starting points, which can make getting around easier. There are also some distractions on offer to help break things up, such as a time trial race, a shooting gallery, a chest opening game, and numerous hidden rooms; often, these award Rupees and Heart Pieces, but you’ll occasionally encounter NPCs in need of assistance who will bestow you with a new item or upgrade your existing ones (though often at a price).

Graphics and Sound:  
Without a doubt, A Link to the Past is the finest 2D Zelda experience on offer. The first game was ambitious but painfully limited in its visuals, but this isn’t an issue here thanks to the SNES’s greater power. The game absolutely pops with colour and variety; parts of Hyrule are often overcast by raging thunder and rainstorms, each compass point of the map feels distinct from the others while still being logically connected, and there’s an incredible amount of detail packed into every aspect of the game. No longer an obscure mish-mash of green and brown pixels, Link is an expressive and colourful sprite; he doesn’t have any idle animations but he strains with effort when pushing and pulling rocks, sports a mop of red hair, holds up items and his sword in triumph, collapses comically in defeat, flashes his skeleton when he’s electrocuted, and the Game Boy Advance port even includes sound bites from his 3D adventures. The game’s NPCs are also far more varied and lively; inhabitants of Kakariko Village will scream and run into their houses, alerting the guards when you’re near, a lazy thief naps outside the swamp, a mysterious flute boy plays for an audience of cute little woodland critters before vanishing, the blacksmith worries for the fate of his brother, two lumberjacks hack away at a tree at the foot of Death Mountain, and various fairies and sea-dwelling creatures await in caves and bodies of water. When in the Dark World, Link will be able to talk to more monstrous NPCs and is transformed into a strange, bunny-like creature devoid of weapons. When he acquires upgrades to his tunic, sword, and shield, Link’s sprites change colours so you can see this progression and even the game’s enemies exhibit a lot of personality, charging at you the moment they see you and hopping and stomping about the place.

Easily the most beautiful, varied, and detailed 2D Zelda game ever made.

Hyrule is larger, more varied, and more luscious than ever before; at the centre is Zelda’s Castle, a massive structure of stone and regality where Ganon’s forces constantly patrol. To the North looms Death Mountain, identified by its confusing network of dark caves and the constant barrage of falling boulders falling; to the East lies the Desert of Mystery, a scorching desert filled with cacti plants and ancient ruins; South is home to Lake Hylia, with Hyrule’s rivers eventually taking you to the outskirts of Zora’s Domain; and heading West will taking you to the murky swamps, the bustling Kakariko Village, and the misty and mysterious Lost Woods. You’ll be exploring and opening up new areas in each of these locations throughout the game, lifting rocks to discover hidden pathways, blasting open caves, and altering the landscape with your items and magic. Link enters many buildings on his quest, such as the church-like Sanctuary (and its network of rat-infested sewers), shops, and other homesteads, and will explore forests, a haunted graveyard, and caves. There are always enemies, NPCs, and other objects to encounter and interact with in every area but, when you travel to the Dark World, even the friendliest of areas becomes far more ominous as wrecked houses, rotting trees, and bones of titanic animals litter the landscape. Zelda’s Castle is replaced by a gigantic and foreboding Pyramid of Power, the bright and sunny sky replaced by an unsettling dusk (or raging thunderclouds around Death Mountain), and even Kakariko Village is replaced by the post-apocalyptic Village of Outcasts. Both the swamp and the Lost Woods become dangerous and haunted wastelands, Lake Hylia is transformed into a polluted sea home to a frozen temple, Ganon’s magically sealed tower looms atop Death Mountain, and the entire overworld takes on a dark, depressing colour palette to separate it from its livelier counterpart.

While dungeon interiors and gimmicks get recycled, the story is suitably epic and engaging.

Much of this visual variety doesn’t really translate to the game’s interior locations; caves are mostly the same, sometimes being darker, more maze-like, or requiring different items to bypass hazards and pits but mostly utilising the same sprites. The dungeons are generally distinguishable only by their different colour palettes and altered layouts, but there are some exceptions; the Eastern Palace sports bulbous cycloptic statues, the Tower of Hera features more vertical traversal and pits, the Dark Palace has ramps you need to propel yourself off with the Pegasus Shoes, you’ll lose a lot of traction in the Ice Palace and need to open floodgates to traverse the Swamp Palace, find yourself heading outside to reach new areas of the Skull Woods, and will navigate a series of platforms in the cavernous Turtle Rock. All the puzzles, gimmicks, and most of the enemies you’ve encountered will be recycled in each dungeon, especially the final one, Ganon’s Tower, a perverted mirror of Zelda’s Castle that features a veritable gauntlet against everything you’ve encountered previously. As visually impressive as the game is, the music is equally memorable; things start out dark and ominous but the iconic Legend of Zelda theme kicks in triumphantly once you bring Princess Zelda to Sanctuary and will accompany you on the overworld from then on. Dungeons and boss battles are punctuated by suitable menacing overtures, victorious symphonies play whenever you conquer a dungeon or acquire a new item, and more calming, even melancholic melodies play whenever the story is being related through dialogue. The game’s few cutscenes are rendered entirely using the in-game sprites and graphics, with simply dialogue boxes being the order of the day, but there are some impressive instances of layering (paths, bridges, and walkways overlapping with lower areas), weather effects (lightning, rain, clouds, even a brief drought), parallax scrolling (particularly when at the peak of Death Mountain), and even a 3D effect to render the legendary Triforce onscreen.

Enemies and Bosses:
The forces of darkness are many and varied throughout Hyrule; Link will have to fend off smaller, weaker enemies like bat-like Keese, snake-like Ropes, crows, rats, crabs, and even killer bees if he disturbs the wrong tree with his Pegasus Shoes. River Zoras pop up from the various streams around the map to spit projectiles at you, thieves steal your ammo, Rupees, and even your weapons, Buzz Blobs will electrocute you if struck with your sword, and you can’t even attack the chicken-like Cuccos without facing harsh retribution. Hyrule is filled with strange monsters, too, such as the spider-like Tektites, Goomba-like Deadrocks (which turn to stone when struck), annoying Anti-Fairies that bounce around and reduce your magic and your health on contact, Armos Knights that tremble to life and bounce around when you touch them, and helmeted enemies that have an annoying tendency to send you ricocheting down pits. Ganon’s forces are far more dangerous and versatile, however; his knights come in various different colours and sporting various weapons, from swords, spears, bows and arrows, bombs, and even chained maces. Octoroks wander about spitting rocks at you, their balloon-like counterparts explode when hit, Wizzrobes teleport about firing energy waves, Beamos statues blast you with a high-powered laser beam, pig-like Moblins attack with spears, and you’ll find more than a few hulking, bomb-tossing Hinox in the Dark World. Ganon’s Tower is guarded by the tough Lynels, centaur-like creatures that spit fireballs at you and require an upgraded sword to defeat; Pikkus and Goriyas also prove troublesome as they mirror your movements, while Eyegroes are best defeated with your arrows. Stalfos and Gibdos are also quite common, with the former jumping about or throwing bones at you and the latter proving almost as difficult to dispatch as the Freezors and Geldman unless you utilise your elemental rods. You should also watch for Wallmasters dropping from above to return you to the dungeon entrance, indestructible Chain Chomps, and the dragon-like Zazaks.

The first four bosses return in Ganon’s Tower with slight variations to make them tougher.

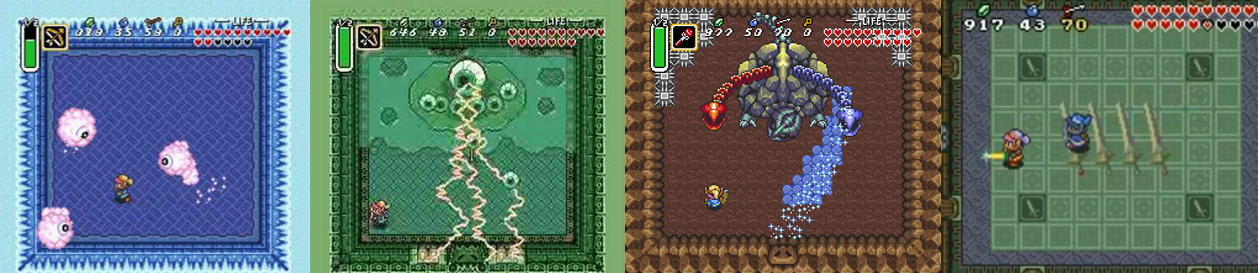
By far the most intimidating of Ganon’s regular enemies, however, are the Stalfos Knights; unlike other Zelda games, A Link to the Past doesn’t contain any mini bosses but these large, sword-wielding skeletons almost fit the bill. However, they’re easily reduced to a pile of bones with a swipe of your sword and dropping a bomb on their remains will finish them off before they can reform to pester you again. Your quest will see you battling twelve mammoth bosses, with four of them being encountered again in the gruelling gauntlet that is Ganon’s Tower. The first boss you’ll face is actually six large Armos Knights; they’ll bounce around in a circle, expanding and constricting and charging at you, but you can make short work of them using the bow and arrows as opposed to even your upgraded Master Sword, though the fight is made tricker in Ganon’s Tower thanks to the ice covering the floor. Next, you’ll face three Lanmola, giant worms that burst from the sand and send small rocks flying your way; as long as you avoid these projectiles, and their writhing bodies, they’re pretty easy to defeat, especially if you use the Ice Rod, though you’ll also need to watch for a fireball-spitting statue when facing them in Ganon’s Tower. The last Pendant is defended by Moldorm, a large, strange worm-like creature that slithers erratically around a small platform. Its only weak point is its tail and Link will bounce back, most likely down to a lower floor, if he attacks any other part of the creature; though the surface area of the rematch against Moldorm is even smaller in Ganon’s Castle, this fight is a joke with the fully powered-up Master Sword. Once you have all three Pendants of Virtue, you can confront the dark wizard Agahnim in Hyrule Castle; Agahnim cannot be attacked directly with any of your weapons, instead you need to deflect his projectiles back at him much like boss battles in later Zelda games. Agahnim will teleport around the enclosed arena and charge up a projectile, but you can only hit the large, flaming ones back at him and these can sometimes go off course; when you face him again in Ganon’s Tower, he duplicates himself to make things tougher, but it can actually speed things up as you potentially get three shots to reflect back at him.

The difficulty of bosses varies wildly, with some being pushovers and others proving more troublesome.

After being sent to the Dark World, Link must defeat seven more bosses before having a final showdown with Ganon. First up is the gigantic Helmasaur King, a dragon-like creature whose weak spot is initially hidden behind a mask. Using the Magic Hammer, Link can break and eventually destroy this mask to target the Helmasaur King’s glowing weak spot with either his sword or arrows, but players will need to watch out for the creature’s extendable spiked tail and the fireballs it spits from its mouth. Though visually less intimidating, Arrghus is a slightly more laborious boss; Link must use his hookshot to extract and destroy the individual Arrgi protecting this jellyfish-like creature until Arrghus is fully exposed, after which it tries to crush Link and moves erratically around the room, being vulnerable only upon landing but causing splash damage if you’re not careful. Mothula awaits in the Skull Woods and is perhaps the most difficult boss so far thanks to its crazed movements making it best to use the magic-consuming Fire Rod, the moving floor sending you into the spiked hazards surrounding the arena (which also move at you), and the creature itself both trying to ram you and firing lasers, though you can make things easier if you have a Golden Bee in a bottle as this will attack the boss and allow you to focus on avoiding damage. You’ll battle Blind the Thief in Gargoyle’s Domain only after exposed an NPC you’ve rescued into the light and revealing her to be this demonic former thief in disguise. Blind hovers about shooting lasers and can only be damaged by hitting his head; eventually, his shroud drops and he sends his head floating around the arena to blast at you independently from his body, which sprouts another head for up to three times the danger, but it’s not especially difficult to avoid these heads and the fight’s all the easier since you don’t need to make use of the dungeon’s weapon to defeat Blind.

Trinexx was the only Dark World boss who caused me trouble, and you’ll only fight Dark Link on the GBA.

This isn’t quite true of Kholdstare, a bulbous eye that you must first free from its block of ice using either the Fire Rod or the Bombos Medallion while avoiding the blocks of ice it drops from above. Once freed, Kholdstare splits into three and just kind of wanders about doing nothing, making it a ridiculously easy boss. Vitreous provides a bit more of a challenge; another eye-themed boss, this glaring monster sits in a puddle of swamp water and is protected by several smaller eyeballs, which it also uses as projectiles. The sword, bow, and hookshot are all useful here but you need to watch out for the erratic bolts of lightning Vitreous will occasionally send your way; once all the smaller eyes are gone, Vitreous resorts to bouncing around in a temper tantrum, leaving it vulnerable. If you venture into Turtle Rock without some green potion or, at the very least, having awoken the Mad Batter to reduce your magic consumption, Trinexx can prove to be especially difficult. This massive rock-like dragon sports three heads: a red one the breathes fire, a blue one that freezes the ground and ruins your traction, and a stone one that extends at you. You need to use the Fire Rod on the red head and the Ice Rod on the blue head, but don’t just fire away willy-nilly; time your attack to hit and stun the head and then switch to you sword because you’ll have no way of damaging either head if you run out of magic. Once these two heads are destroyed, Trinexx dramatically (and explosively) changes into a snake-like form, frantically slithering about but easily finished off by swiping its glowing middle section. If you’re playing the Game Boy Advance version of the game, you can also tackle the optional Palace of the Four Sword dungeon, where four dark variations of Link reside; each one is battled separately and showcases many of the same attacks and abilities as Link, such as his Pegasus Shoes and Magic Cape, while also unleashing their own versions of the Spin Attack and even a jumping strike. Blind, Mothula, the Helmasaur King, and Arrghus are also battled again in this dungeon, which rewards Link with the Four Sword.

Ganon is unquestionably the toughest boss in the game and will put your skills and patience to the limit.

Regardless of which version of A Link to the Past you’re playing, your adventure culminates in the hardest and longest dungeon of the game, Ganon’s Tower. Here, many of the game’s enemies and almost all the hazards and gimmicks you’ve encountered are recycled, with some of the toughest enemies attacking in large groups and you being forced to battle the first four bosses again with slightly different variations to each. It’s absolutely essential that you fully upgrade the Master Sword and your bow and arrows before tackling this dungeon, as it leads directly into the final confrontation with Ganon and you’ll need the Silver Arrows to finish him off. Assuming his monstrous pig form, Ganon awaits in the Pyramid of Power and is easily the game’s hardest and most laborious boss and will put all of your skills to the test. Make sure you’re swiping as soon as you drop into the arena to land a couple of free shots on him while he’s gloating, then avoid his trident when he tosses it at you; Ganon is invulnerable and intangible when teleporting but is open to a few good hits before he throws his trident so make sure you get them in while you can. The second phase greatly increases the difficulty; Ganon will surround himself with tiny flames that he transforms into indestructible bats to use as projectiles, making it very difficult to get close and land a hit. In the third phase, these bats leave a circle of fire around Ganon, who stomps about and destroys the tiles lining the outside of the room. After a few more hits, Ganon will extinguish the two torches and become invisible as well as intangible; you must light both torches to expose his location, hit him with your sword, and then fire a Silver Arrow at him when he turns blue. Do this four times and the King of Evil will finally be defeated, restoring peace to Hyrule, but make no mistake this is a gruelling encounter; you’ll need all four bottles filled with a variety of restorative potions in order to best him, or make liberal use of the Switch’s save and rewind feature to get around his more erratic and frustrating attack patterns.

Power-Ups and Bonuses:
If you’re anything like me, you play your Legend of Zelda games constantly swiping at bushes, breaking pots, and defeating enemies to fill up your health, magic, ammo, and Rupees. Link can carry 999 Rupees, which is an easy enough limit to reach thanks to the many secret Rupee rooms and chests found all over the place, and can spend these on potions, ammo, shields, and other items in various shops. Some prices are higher than others, however; you’ll need to toss an extortionate amount of Rupees into the Lake of Happiness to increase the maximum number of arrows and bombs you can carry, and it’ll cost you a whopping 500 Rupees to acquire the Zora’s Flippers so you can swim, but tempering your sword is surprisingly cheap. Other times, you simply need to find hidden fairies or NPCs who will provide new items or upgrade existing weapons like your sword, bow, and boomerang for free or locate the Big Key and the large chest in each dungeon to acquire some nifty new gear. Link begins his journey with a regular sword but later embarks on a quest to acquire the legendary Master Sword, which boasts a higher attack power and a variation on the Sword Beam; this can then be tempered and finally magically upgraded into the far stronger Golden Sword. Similarly, his shield can be upgraded to defend against small fireballs and is later replaced by the Mirror Shield, which reflects laser bolts.

You’ll need to explore both worlds to uncover all the game’s weapons, items, and upgrades.

Many recognisable Zelda weapons and items are up for grabs here. Link can toss a boomerang as a ranged weapon, blow open walls with bombs, shoot enemies from afar with his bow and arrows, and cross gaps with the hookshot (which, like the boomerang, can also pick up faraway items). Link can dash across the screen and swim when he acquires the Pegasus Shoes and Zora Flippers, respectively, lift heaver objects with the Power Glove and Titan’s Mitt, call a bird to fast travel across Hyrule with the flute (more of an ocarina, really…), dig up items with a shovel, pound down certain blocks with the Magic Hammer, and capture bugs and restorative fairies with the bug-catching net (providing he has one, or all, of the four empty bottles). There are also many magical items available: the Bombos, Ether, and Quake Medallions cause the ground to explode, call down a lightning storm which also illuminates hidden paths, and unleash a shockwave, respectively, while the Cane of Byrna and Cane of Somaria protect Link with a magical barrier and spawn moveable blocks, respectively. The Magic Cape also renders you invisible and invincible for as long as you have it equipped and your magic meter lasts, and you’ll find both a blue and red mail that not only change Link’s sprite but also greatly reduce the amount of damage he takes.

Additional Features:
There’s a fair amount to do in A Link to the Past, though some Zelda staples are noticeably missing; there is no trading sequence here, no fishing game, and no collectibles to trade in for upgrades and other items. You can find items such as a mushroom and NPCs like the blacksmith’s brother to acquire new items, and will receive upgrades from fairy fountains and such, and there are four empty bottles to be discovered. These can be filled with coloured potions to restore your health and magic, fairies to resurrect you, and bugs to attack your enemies so they’re well worth tracking down. There are also twenty-four Heart Pieces scattered throughout Hyrule and the Dark World; every time you collect four, you’ll gain an extra heart of health and you’ll also get a whole new one for every boss you defeat, bringing Link’s health up to a maximum of twenty hearts. You can also reduce the amount of magic you use by half, are required to locate the Moon Pearl to freely move about in the Dark World, and can find hidden rooms (usually behind destructible walls) that yield Rupees and other goodies. You get three save files to play on and can take on Ganon as many times as you like after finishing the game, and hunt down any items and Heart Pieces you’ve missed, though there’s no second, harder adventure to unlock here. This version of the game also allows up to four save states and lets you rewind the game if you make a mistake, which is a godsend for some of the tougher areas, and the Game Boy Advance version of the game includes an optional dungeon, two additional quests that yield new items, and a multiplayer mode in which two to four players work together to solve puzzles and defeat bosses.

The Summary:
There’s a reason why The Legend of Zelda: A Link to the Past is so lauded within the Zelda community. It really was the greatest Zelda experience at the time, expanding upon the ambitious but limited first adventure and the aspiring attempt of the second game to be a more elaborate role-playing experience, and delivering the quintessential Legend of Zelda formula that was retained even when the series moved into 3D. A Link to the Past has long eluded me; growing up a SEGA kid, I wouldn’t get the chance to play it until I went out of my way to buy the Game Boy Advance port, which I was able to play through all the way to the final battle but never actually carried through to finish the game. The Nintendo Switch version offers gamers far more options to make this difficult adventure title a little easier thanks to the rewind function and save states, but this is still a title that refuses to hold your hand; the overworld is large and full of secrets, enemies, NPCs, and locations to explore, some of which are relevant and others you’ll have to come back to later when you have the right items. The presentation is absolutely top-notch; it’s a colourful, very detailed title that showcases the power of the SNES, with only a few moments of slowdown caused when there’s a little too much happening on the screen. The inclusion of the Dark World helps to keep things visually interesting, creating a distinct atmospheric vibe between the vibrant Hyrule and its desolate dark counterpart. The dungeons are a little too samey and confusing at times, some of the bosses were a bit disappointing, and it was lacking a few of the more prominent side quests and distractions that made later Zelda games so much fun to revisit, but I loved the sheer amount of detail packed into every aspect of the game. I didn’t grow up with A Link to the Past so I can’t say it’s my favourite of the classic Zelda games, but after finally playing it all the way through and really experiencing everything it has to offer, it definitely belongs in the top five of all-time Zelda greats and it’s obvious to me that this game alone fully justified the purchase of a SNES back in the day as it’s a fantastic showcase of everything that console was capable of.

My Rating:

Rating: 5 out of 5.

Fantastic

Was The Legend of Zelda: A Link to the Past a part of your SNES library back in the day? If not, when did you first play the game and how do you think it compares to other Zelda titles, particularly the two that came before it? What did you think to the introduction of the Dark World and Link’s quest to rescue the seven maidens? Which of the dungeons, bosses, and weapons was your favourite? What did you think to the visual presentation of the game, and would you say that A Link to the Past is the best 2D Zelda title? Did you ever find all of the Heart Pieces and fully upgrade Link’s arsenal? How are you celebrating the franchise today? Whatever your thoughts on A Link to the Past, leave a comment below or share them on my social media.

Game Corner [PokéMonth]: Pokkén Tournament DX (Nintendo Switch)


Upon the release of Pokémon: Blue Version and Pokémon: Red Version (Game Freak, 1996), a new craze swept through playgrounds across the world. Entire generations have grown up with Pokémon as clever marketing saw Nintendo’s newest franchise become a massively lucrative and popular multimedia powerhouse that endures to this day. Accordingly, February 27th is now internationally recognised as “National Pokémon Day”, which I’ve expanded to an entire month of Pokémon every Tuesday in February.


Released: September 2017
Originally Released: 16 July 2015
Developer: Game Freak
Also Available For: Arcade and Nintendo Wii U (Original Release)

The Background:
Ever since it was brought over from Japan, the Pokémon franchise has been all about spin-offs and ancillary media; the first generation of videogames and tie-in merchandise ensured that Pokémon was an instant cultural phenomenon, taking playgrounds by storm through the games themselves, the trading cards, stickers, magazines, and toys galore. It didn’t take long at all for spin-off videogames to be produced alongside the main series; we got a videogame of the aforementioned trading card game, some pinball and puzzle games, and even a much-loved on-rails photography videogame. Although battling is very much at the heart of the Pokémon series, the closest it came to being featured in a one-on-one fighter was the inclusion of Pokémon characters in the Super Smash Bros. series (Various, 1999 to 2018) until Pokémon Company CEO Tsunekazu Ishihara brainstormed new ideas for the franchise with Tekken (Various, 1994 to 2018) producer Katsuhiro Harada and Soulcalibur (Bandai Namco Studios, 1995 to 2018) producer Masaaki Hoshino. While Ishihara wanted mainly Fighting-type Pokémon featured in the game, Hoshino pushed for more variety amongst the playable fighters, and the game was initially released as a somewhat unpopular and unprofitable arcade fighter before being ported to the Wii U, where it was received much more favourably. An enhanced port was then released for the Nintendo Switch a few years later; this new version of the game included all the previous downloadable content (DLC) and was also met with largely positive reviews.

The Plot:
The player’s created character aspires to reach the top of the Ferrum League alongside their partner Pokémon. However, the tournament is soon interrupted by a mysterious and violent Shadow Mewtwo, which has been corrupted by a strange phenomenon in which Gaia, the energy that allows Synergy Stones to bond the humans and Pokémon in Ferrum, is draining away.

Gameplay:
Pokkén Tournament DX is a 3D fighter in which players customise a 2D avatar and synch up with one of twenty-one different partner Pokémon using a “Synergy Stone” to not just command them to battle as in the mainline games, but effectively battle as the Pokémon in what basically amounts to a series of never-ending battles in different towns across the Ferrum region in the appropriately named Ferrum League. Unlike in the mainline Pokémon games, you won’t actually be traversing an overworld map; instead, the Ferrum region is represented by a simple map screen where you can navigate to different towns, each of which allow for different options, such as initiating online battles, changing your game settings, customising your avatar and Pokémon, or partaking in the single-player story mode, or single or team-based battles. Before you jump into the story or an actual battle, your guide, Mia, strongly advises you to check out the game’s tutorial and this is heavily advised as well, though the game’s controls actually aren’t as complicated as the tutorials make you think (it doesn’t help that there are a lot of tutorials, with each aspect of battling being broken down into separate categories and sections).

Battles take place on two panes and your attack choices depend on what your opponent’s doing.

Still, the tutorials relate the basics of battle: X unleashes a strong attack while Y sends out a weaker or ranged attack, and mixing and matching these inputs (along with movements of the analogue stick or control buttons) will allow you to string together combo attacks to deal additional damage. B allows you to jump, and you can also attack in mid-air, while A performs one of a series of Pokémon-specific attacks, some of which can drain your hit points (HP) or inflict status ailments on your opponent. You can bring up your Pokémon’s attacks, special moves, and combos from the pause menu at any time, and even alter the controls to suit your specifications, but there really isn’t that much depth to the combat; I got along pretty well just using a standard series of combos and heavier attacks, but the tutorial also details how you can hold the R trigger to block, roll and dash out of harm’s way, and initiate a switch between the “Field Phase” and the “Duel Phase” using certain attacks, charging a “Piercing Attack”, or grabbing your opponent for a throw by pressing Y and B together. When in the Field Phase, you’re free to navigate the fighting arena, restricted only by the energy fields that surround you, and easily able to jump over, counter, or charge right through attacks. The Duel Phase switches to a 2.5D sideways perspective like a classic Tekken game and slightly alters the controls to accommodate this, allowing for low attacks and high-stance attacks to knock your opponent’s feet from under them or intercept an aerial attack. This makes fights more about getting up close and personal with your opponent, and you’ll quickly find yourself pummelled unless you counter incoming attacks with X and A or block against hem (though beware as you’ll get staggered if the opponent breaks your guard). Although Pokkén Tournament DX doesn’t include the usual Type-advantage where Water-types trump Fire-types and so forth (despite Mai claiming attacks to be “Super effective!” during battle), each Pokémon favours either power, speed, long-ranged attacks, or is a slightly more well-balanced fighter, and it also features variation of this in the “Attack Triangle” feature. This allows counter moves to trump normal attacks, grabs to win over counters, and normal attacks to fend off grabs, and successfully timing each attack based on what your opponent is doing will not only deal damage and potentially change the battle field, but also refill a small amount of your HP and fill up your “Synergy Gauge” and “Support Gauge”.

Burst Attacks and Support Pokémon can fundamentally change the course of a battle.

When your Synergy Gauge is full, you can press L and R together to enter “Burst Mode”, which will change your Pokémon’s appearance (generally to a Mega Evolution) and not only power-up their attacks but also allow you to pull off a devastating “Burst Attack” which unleashes their most powerful move against your opponent, though this can be blocked and even countered. Filling up the Support Gauge allows you to call in a temporary Support Pokémon; you’ll pick from a whole bunch of these before each battle, and they come in groups of two. While you unfortunately can’t mix and match these to create a customised support team for yourself, each Support Pokémon has their benefits; Support Pokémon will either attack your foe, disrupt them in some way (usually with status effects), or enhance your fighter, meaning you could get a temporary speed, power, or health buff or your opponent may become stunned or disorientated, and timing the use of a Support Pokémon is key to turning the tide in a battle. Battles are fought in a best-of-three format and, between rounds, you must switch to a different Support Pokémon, though you can assign “Cheers” to Mia that will boost your gauges in different ways and potentially allow you to summon a Support Pokémon automatically in the next round. While the Support Gauge fills over time, and you can pick up “Synergy Power” across the arena to boost both gauges, Pokkén Tournament DX definitely emphasises fast-paced, arcade-style action over any kind of patience as your battles are timed and your opponents quickly become very aggressive, though you can alter some of these settings in the options menu. While the tutorials make it seem like battles are quite complicated, they’re really not; I barely even used the block button, and found it annoying that the counter option wasn’t mapped to it as well. Consequently, I found it much easier to spam some ranged attacks at the start of a fight, hit a grab, and charge a Piercing Attack to pummel my opponents, landing a few character-specific attacks here and there (this was risky as I fought with Shadow Mewtwo, and a lot of its special attacks drained its HP) before finishing them off with a Burst Attack.

You’ll find yourself battling endlessly to clear the Ferrum League and complete the optional missions.

Mia claims that you need to learn about the different opponents and arenas but, again, you really don’t; you can best most opponents by attacking aggressively and, while Synergy Energy does spawn differently in each arena and they are either bigger or more enclosed, the fights quickly became very monotonous for me. This wasn’t helped by the success criteria for the single-player story, which sees you battling through the Ferrum League over a series of battles. You start at Rank D and must win a certain number of fights, either in single battles or by tackling five opponents in a row in League Matches, to increasing your standing in the rank. Once you’ve won enough fights, you’ll enter an eight-man tournament, which you must win to face the League Master in a “Promotion Test”. Win that battle and you’ll move on to the next rank to do it all over again, battling more and more opponents to qualify for more fights and finding your foes becoming faster and more aggressive with each Rank. After every fight, win or lose, you’ll receive a star grading based on your performance; varying your attacks and ending with a Burst Attack flourish will score you more points and earn you more PokéGold, which buys clothing and outfits for your avatar and Mia. You’ll also earn experience points (XP) from each victory and loss; when you earn enough XP your Partner Pokémon will level-up and you’ll earn Skill Points that you can use to upgrade their attack, defence, the speed their gauges charge, and how long their gauge effects will last when triggered. Each Rank also comes with some missions for you to complete; these generally involve winning a certain number of battles, winning in a certain way or using a certain number of specific attacks, and summoning specific Support Pokémon a set number of times. With enough victories, you’ll be given one Bonus Key per mission board to automatically complete a mission, and successfully completing them all will complete a picture puzzle, net you additional PokéGold and titles and clothing for your avatar, and will load up another board with more missions to complete. If single battles start to wear thin for you (and, trust me, they will), you can take part in team battles from the main map. This sees you pick a team of three Pokémon to battle against another team of three in an elimination battle; the damage you take and the amount your gauge is full carries over between rounds, but you can still set your Support Pokémon between each round. Sadly, these battles don’t ever appear in the main story, meaning there’s little incentive to deviate from your chosen Partner Pokémon as that’s the easiest way to stay strong enough to compete with the higher Ranked matches.

Graphics and Sound:
While it lacks some of the more memorable tunes seen in the mainline games, Pokkén Tournament DX makes a great first impression with a spectacular CG opening sequence; sadly, such cinematics are few and far between during the bulk of the game. They’ll pop up here and there, but the majority of the game’s story is told using 2D avatars that barely move and using text and dialogue boxes rather than cutscenes. This, as much as the pretty generic battle music, really lets the game down; I get that it’s just a standard arcade fighter, but a little bit more effort could’ve gone into the story and the presentation of the game outside of the main battles. Instead, the story is very secondary; occasionally, your opponents will talk smack to you before and after battles, Mia will chime in with some story-specific spiel to advance the narrative, and you’ll have to move to areas outside of the main overworld map to meet story objectives, but it’s all very cheap and not very becoming of a game that carries such a hefty price tag. Additionally, the map screen is as basic as it gets, and you’ll be absolutely bombarded with Mia’s “helpful” advice during battles unless you shut her off in the main settings.

The opening cutscene and in-battle graphics are where the game’s presentation really shines.

Once you actually get into a battle, things noticeably improve; all the game’s Pokémon are beautifully rendered in just the right balance between realistic and fantastical, very much in the same style as seen in Pokémon: Detective Pikachu (Letterman 2019). Pokémon have a number of different intro and outro animations, and these change depending on whether you’re in Burst Mode or not, and will take on different colours in mirror matches. Attacks are big, colourful, and eye-catching, with Pokémon like Sceptile, Gengar, and Charizard impressive with twisting vines, portal-based spectral fists, and plumes of fire, respectively. Also impactful are the Burst Attacks, which basically amount to a short cutscene when your Pokémon will unleash their most powerful attack, and this really helps to sell the danger of these moves so you definitely want to make sure that you unleash yours before your opponent does. Unfortunately, the arenas don’t fare anywhere near as well as the fighter’s character models; I barely even noticed any difference between each arena, even when inside a haunted house or on the deck of a ship with Magikarp flailing about. You can see buildings and other Pokémon in the background in almost every arena, but there’s really nothing much there to make them all that interesting; there are no stage hazards to worry about, no weapons to pick up, and the only things that really change between them are how restrictive they are and where the Synergy Energy spawns in. Thankfully, battles are generally too fast to really make this much of an issue but you’re forced to have so many fights that it’s hard not to notice that the areas are pretty bland and almost interchangeable.

Enemies and Bosses:
In true fighting game fashion, every single Pokémon you can select from will be your opponent at some point in the game. I would say that it pays to get to know what each Pokémon is capable of, but that’s not really that true; sure, Machamp is bigger and slower than, say, Lucario and will buff itself up rather than striking fast and using ranged attacks, and Croagunk is a sprightly little bastard who can whittle down your health pretty quickly with its lightning-fast attacks, but what works against one will generally work against all. There’s a decent array of Pokémon on offer here; while the absence of guys like Hitmonlee and Hitmanchan is questionable (and I don’t really get why we needed two Pikachu…), the inclusion of Suicune, Chandelure, and Darkrai helps to make the available roster very varied so it’s not all focused on Fighting-Type Pokémon. As mentioned, it is useful to take note of what your Pokémon can do; I stuck with Shadow Mewtwo the entire time, whose special attacks drained its HP, but some Pokémon are better attacking from a distance, so you need to be more aware of the field and where you are, while others need to be up close and personal to deal heavy damage. When battling them, though, a simple strategy of dodging, jumping, and keeping up the aggression until you can call in a Support Pokémon or hit your Burst Attack will win you the day more often than not, and the only time I really struggled with anything other than this was when I was trying to complete the different missions and had to hold back on my attacks as a result.

Alongside challenging the Ferrum League, you’ll also contend with the super powerful Shadow Mewtwo.

To advance up to the next Rank, you’ll need to best the League Master. While you’d think that these battles offer something different, they really don’t; League Masters will use Pokémon you’ve probably fought five or six times up to that point, and the only real difference is that they might be at a higher level, and thus have more HP or be more aggressive. After you best each League Master, however, the story will kick back in and you’ll have to battle Shadow Mewtwo; this thing is pretty much well beyond you for the majority of the story, boasting HP in the thousands and making short work of you. I think it might be possible to beat it early on, but I sure as hell couldn’t; in fact, I was barely able to eek out a victory when the story culminated in battling it head-on since it’s easily the toughest fight you’ll have in the story mode. Before you battle it, you’ll have to face three trainers in three new areas a bid to try and cure Mewtwo of its corruption, and these fights actually offer something different as you’re denied the use of Support Pokémon and/or your Synergy Gauge. When you finally battle Shadow Mewtwo for the last time, you must endure the first round without your Synergy Gauge and your Support Gauge will only fill up once Shadow Mewtwo is constantly in Burst Mode in this fight and you’re also denied the buffs Mia provides between rounds. In the second round, you’ll also enter a permanent Burst Mode but will only be able to use your Burst Attack once and there’s no Synergy Power to collect, meaning that these battles can be extremely gruelling as Shadow Mewtwo is a very fast, very aggressive foe who’s constantly coming at you and looking to land his Burst Attack.

Power-Ups and Bonuses:
Your primary power-up during a fight will by the Synergy Power that spawns in across the arenas; you’ll need to get in their quickly as your opponent can pick these up as well, and it means the difference between filling your gauges or being on the receiving end of their Burst Attacks. It’s a good job the game subjects you to endless battles as you’ll quickly see the benefits of applying Skill Points to your Partner Pokémon; I’m much more focused on attacking so I tended to boost the attack stat above the others, but lengthening the duration of your burst and speeding up your gauges can really help make the tougher battles a lot easier. Unfortunately, though, that’s about it; you don’t learn any new moves, you can’t assign different items or power-ups to your Pokémon, and just about the only other thing you have at your disposal are the Burst Attacks and Support Pokémon. Support Pokémon are a mixed bag; each one charges up at a different speed, and they each have positives and negatives, but it sucks that you can’t customise your own little support team and are stuck with what the game gives you.

Additional Features:
You might think battling through the main leagues will be the end of your journey here, but sadly it’s not. After you purge Shadow Mewtwo, two more unlock, with the last one full of the game’s toughest challenges. You can also revisit the Shadow Mewtwo stages from the story mode whenever you like to take on those unique gauge-less battles, return to each of the leagues you’ve already cleared to mop up any outstanding missions you have left, and you’ll even unlock a new arena to battle in after clearing the story. Throughout the course of the game, you’ll amass a great deal of PokéGold; unfortunately this is all spent on clothing and gear for your avatar and Mia rather than interesting stuff like new arenas or fighters. The clothing options are kind of limited, despite there being a decent variety and colour options, since you can’t mix and match them. New items unlock when you hit certain milestones or complete missions, and you’ll also unlock titles for your avatar and can assign them taunts. There’s an online battle mode, and daily challenges to complete as well, but there really isn’t anything all that fun to unlock. As if that wasn’t bad enough, this “DX” version of the game isn’t even complete as you need to shell out to purchase two more fighters, which also come with two more sets of Support Pokémon and outfits for Mia, which really soured me on the game as I expect a “DX” version to include everything available from the game.

The Summary:
I was really excited to get my hands on Pokkén Tournament DX; I’m not a big Tekken fan but the game looked and seemed really unique and exciting and I was hoping for a really fun brawler that did new things with the franchise. Technically, I got that: Pokkén Tournament DX is very similar to other 3D fighters you might find available as online-exclusive releases in that it has a minimalist approach to its interface and story and focuses on frantic, hard-hitting action with just enough bells and whistles to keep you interested. Unfortunately, it’s lacking in a lot of depth; the customisation, battle, and story options are extremely limited and it’s ultimately pointless earning all that PokéGold and those titles once you’re satisfied with your avatar. There’s also very little incentive to try out the other Pokémon as this actually puts you at a disadvantage due to the level-up mechanic; if the emphasis on the different fighting styles had been more prominent, and the story mode different depending on which Partner Pokémon you chose like other fighters, this might have encouraged experimentation but, for me, it really didn’t. Also, the game becomes very laborious very quickly; after about an hour, you’ve pretty much seen everything it has to offer and there’s very little to keep you engaged as it’s just battle after battle, with the same tactics triumphing 99% of the time, in bland arenas with an excitable girl bellowing annoying statements at you. While the game’s fighters look great and the presentation is pretty impressive at times (in battles and the rare CG cutscenes), the whole package feels very cheap and like it should have just been a budget digital-only title, making for an overall lacklustre experience that left me disappointed since I was expected a little but more (and definitely not expecting to have to pay for additional content!)

My Rating:

Rating: 2 out of 5.

Could Be Better

Have you ever played Pokkén Tournament DX? If so, did you enjoy and where did you first play it? Which Pokémon was your go-to fighter, who was your favourite support duo, and which Pokémon was your least favourite? Did you enjoy the focus on continuous battling or did it grow tiresome for you, as well? What did you think to the plot involving Shadow Mewtwo and did you ever conquer all of the leagues? Would you like to see another game in this style sometime, and if so what improvements would you make? Which Pokémon spin-off is your favourite and why? How are you celebrating National Pokémon Day this month? Whatever your thoughts on Pokkén Tournament DX, share them below or comment on my social media and be sure to check out my other Pokémon content.

Game Corner [Zelda Month]: Zelda II: The Adventure of Link (Nintendo Switch)


On 21 February 1986, The Legend of Zelda (Nintendo EAD, 1986) was first released in Japan. The creation of legendary game designer Shigeru Miyamoto and Takashi Tezuka, The Legend of Zelda launched one of Nintendo’s most popular franchises. This year, I’m dedicating every Wednesday to Nintendo’s most famous silent protagonist, Link and his vast and enduring fantasy world of sword and sorcery.


Released: 16 January 2019
Originally Released: 14 January 1987
Developer: Nintendo
Original Developer: Nintendo R&D4
Also Available For: Famicom Disk System, Game Boy Advance, GameCube, Nintendo 3DS (Virtual Console), Nintendo Entertainment System (NES), NES Classic Edition, Nintendo Wii, Nintendo Wii U

The Background:
The brainchild of designer Shigeru Miyamoto, The Legend of Zelda purposely emphasised exploration and experimentation based on Miyamoto’s childhood love of exploring forests and caves. Selling well over 6.5 million copies, the game was a massive success and has been widely recognised as one of the greatest adventure games ever made. A sequel was released the very next year, one that proved to be one of the more divisive titles in the franchise for abandoning almost all of the original’s gameplay mechanics, This, however, was Miyamoto’s intention all along; he assembled an all-new team for Zelda II and infused traditional role-playing game (RPG) mechanics with both the adventuring gameplay of the first game and the sidescrolling action of the likes of Super Mario Bros. (Nintendo R&D4, 1985) and CastleVania (Konami, 1986). Emphasising tactical combat, obscure dialogue, and levelling-up to improve your abilities, Zelda II was a stark contrast to the first game but, surprisingly, this didn’t impact its sales or reception at the time. The game sold nearly 4.40 million copies worldwide and was apparently met with positive reviews for its unique presentation, expansion of the formula, and challenging gameplay. However, while many consider it a hidden and underappreciated gem in the series, Zelda II retains a largely negative reception; interestingly, while Miyamoto returned to the familiar top-down formula for the far more successful sequel, Zelda II went on to influence the franchise’s larger narrative and jump to 3D. The game has been re-released multiple times, though never with any enhancements beyond save states and rewinds, to allow new generations of players to form their own opinions of this black sheep of the franchise,

The Plot:
After saving the kingdom of Hyrule, fated hero Link must embark on a new quest to awaken Princess Zelda’s slumbering ancestor by placing six crystals in six temples, all while contending with monstrous forces seeking to revive the Dark Lord, Ganon, using Link’s blood!

Gameplay:
Zelda II: The Adventure of Link is a 2D action/adventure game in which players assume the role of the titular green tunic-clad protagonist and journey across the fantasy land of Hyrule, which is divided into forests, deserts, caves, and towns, searching for six crystals to revive a sleeping princess. At first glance, things are somewhat similar to the last game; you’re given three save files which you can name (though this name isn’t reflected in the in-game dialogue) and dropped into the game world after a bit of story text for context. However, as soon as you take control of Link, the differences between the first and second games become immediately apparent; firstly, Link begins in Zelda’s throne room in a traditional sidescrolling format like Super Mario Bros. This comparison becomes increasingly apt as you play with the controls and progress through the game; pressing B or X will see Link swipe with his sword, unleashing his patented Sword Beam when at full health, while A jumps! Jumping?! In a Zelda game? Outrageous! Link can also crouch (though less to duck beneath projectiles and more to perform a low attack) and holds a shield that will defend against some incoming ranged and melee attacks, but that’s it for his options at the start of the game. As soon as you leave the throne room, the game suddenly switches to a top-down view, but one markedly different to that of the first game; rather than presenting an action-oriented overworld, Zelda II takes more inspiration from traditional RPGs like Final Fantasy (Square, 1987) this time, with a few interactable elements and swarms of random battles appearing on the map. 

Gameplay is now infused with RPG elements, placing more emphasis on interaction and combat.

Yes, as you move around the overworld, little black monsters will randomly appear and make a beeline for you; if you come into contact with them, you’ll be warped to a sidescrolling section where you’ll either have to battle past enemies, simply walk offscreen, hop between platforms and over hazards, or collect special items to exit to the overworld. The enemies you face are determined by the sprite that touches you, the area you’re in, and how far into the game you are; touching a Bot-like enemy usually puts simpler enemies in your path, but touching a larger monster will spawn a greater challenge. Sometimes, these sidescrolling sections are mandatory to progress; you’ll randomly be deposited into a lava-filled cave, onto a bridge swarming with Bago-Bagos, or into a haunted graveyard and will have to fight your way out to move on. Defeating enemies will usually (but, annoyingly, not always) award experience points (EXP); yes, like other RPGS, Link must now gain EXP to level-up and increase his attack, health, and magic, all of which is essential for overcoming the game’s more challenging enemies and bosses. Occasionally, you’ll find Point Bags (either out in the open or dropped by defeated enemies) which will give you an EXP boost, and conquering each of the game’s Palaces will automatically award you with a free level. Link can level-up to a maximum level of eight and you’ll be able to select whether its your health, magic, or attack that’s increased each time you level-up, but the amount of EXP you need to level-up increases each time so it’s definitely worth defeating as many enemies as you can and grabbing all the Point Bags you see to get stronger faster. If you were paying attention there, you’ll have seen I mentioned magic; Zelda II introduced magic to the franchise, though it’s used a little differently than you might think. Each town Link visits shelters a wise old man who will freely teach you a spell (though sometimes you need to perform tasks, such as talking to specific non-playable characters (NPCs) or jumping down chimneys, to reach the old man). Pressing + brings up your list of spells and displays how many points they cost to use; you can then press – to perform the spell, though you can only perform them in sidescrolling sections, and the effects will only last for as long as the screen you’re on. Spells range from reducing the damage you take to changing your Sword Beam into a fireball and increasing your jump height and they’re absolutely essential for clearing the game’s Palaces. 

Zelda II is frustratingly obtuse at times and features an inconsistent difficulty level.

The first game is notoriously obtuse, rarely giving you much guidance about where to go and what to do, and Zelda II tries to address this by placing more emphasis on interacting with NPCs but, unfortunately, mistranslations muddy the water and leave you either with nonsense vagaries or out-right lies. In each of the game’s towns, Link can talk to NPCs for “hints” or have his health and magic restored, though some NPCS are actually enemies in disguise! There are also times when you need to perform fetch quests or talk to specific NPCs to gain new items or access to new areas; it’s again all annoyingly vague so I’d recommend just cutting out the middleman and using a guide right from the start. All the walkthroughs and level-ups in the world can’t help you when it comes to the game’s difficulty, though; while Zelda II is light on puzzles, requiring little more than the acquisition of keys and the use of certain items on the overworld, its Palaces are often sprawling mazes filled with instant-death lava or water and frustrating enemies, many of whom either take multiple hits to defeat or can resist your Sword Beam, making it useless a lot of the time. While enemies won’t respawn screen to screen, some come in seemingly endless swarms, others are invisible or invincible without certain items or spells, and others are placed in cramped hallways, making attacking and avoiding their attacks extremely aggravating. Perhaps because he’s not used to hopping over platforms, Link’s momentum is a bit janky here, meaning it’s easy to slip or bounce into death pits, and he also flies back upon taking damage, easily costing you a life. Yes, Zelda II also uses a life system; you start with three lives and, when they’re drained, you’re given the option to save your game or continue, which will return you to North Castle or the start of the current Palace, respectively, reducing your current accumulated EXP to zero in the process. While I can just about forgive a lot of the game’s oddities, the combat is awful here; since many enemies block your Sword Beam, you’ll be relying on jumping slashes to attack them, and Link’s range of attacks is sadly limited even after he gains new sword abilities, meaning combat is often as much of a chore as the tricky platforming and insane difficulty spikes peppered throughout the game. 
Graphics and Sound:
Fundamentally, Zelda II is graphically superior to the last game; the sidescrolling sections allow for greater detail in the sprites, particularly Link, and more detailed backgrounds than in the last game. Depending on where you are, you’ll load into various different areas on the overworld, from swamps that restrict your walking speed, to forests and traditional caves. The game’s Palaces share the same Roman-inspired aesthetic, featuring bricks and columns and statues and elevators, but each has a different colour palette and utilises its labyrinthine nature in different ways, such as incorporating crumbling platforms, destructible or falling blocks, lava pits, hidden drops, or pits that lead to lower areas. While Link looks more impressive than in the last game, he has no idle poses and his animation frames are severely limited; his sprites change when you acquire new moves or utilise certain spells, but he’s still limited by the NES hardware so he’s little more than a clunky lug here. Indeed, Zelda II may have been a little too ambitious for the time as the game’s performance struggles noticeably when enemies swarm on the overworld and when there are multiple sprites onscreen in the sidescrolling sections. Sprite flickering, slowdown, and even some glitches are surprisingly commonplace, which is odd considering how well made the first game was and how simplistic so much of the game is. Zelda II even struggles in the various towns, when NPCs wander around, going in and out of houses, to say nothing of the haunted graveyards and hazardous bridges, and you’ll see a lot of sprite tearing and performance issues when battling against the game’s bosses, too. 

While the game is a graphical improvement, it’s perhaps too ambitious for the NES hardware.

On the plus side, Zelda II includes some chirpy and memorable tunes; the main Zelda theme is here, of course, and the main Palace and boss themes are fun little earworms (which is good as you’ll be hearing them again and again). Sound effects like Link’s Sword Beam and blocking projectiles and nice and clear, too, and there’s a decent amount of variety in the game’s locations, if not in the Palaces, which are very copy/paste even with their different colour schemes. Occasionally, you’ll find areas on the overworld where you need to use certain items, either manually (like the hammer and flute) or automatically (like the raft), and there are even some hidden paths and tiles that lead to Point Bags, Magic Jars, or upgrades to your health or magic bar.  Although Zelda II emphasises interacting with NPC, dialogue is extremely limited and littered with mistranslations; thankfully, you can simply hit B to skip dialogue without missing out on the benefits, such as having your health restored. Cutscenes are basically non-existent here; there’s a little animation on the title screen, some story text, and some flashing visuals when you defeat a boss, but that’s basically it until you reach the final Palace. Zelda II is one of the few Zelda games where series antagonist Ganon doesn’t appear at all (unless you lose all your lives and then he’ll taunt you from the Game Over screen) and it also doesn’t feature Link’s iconic secondary weapons like the boomerang or bow and arrow, meaning things get very basic and repetitive very quickly. 

Enemies and Bosses:
A wide variety of monstrous beings will dog Link’s progress in the game’s sidescrolling sections and Palaces, many of them new and unique to this game (as far as I can tell). We’ve got the standard bat-, bird-, snake-, spider-, and jelly-like cannon fodder that swoop, spit, and pounce about, annoying skeletal fish that leap out from water and spit projectiles, and ghostly eyeballs and floating heads that swarm the screen endlessly, bobbing about and decimating your health bar in seconds. It’s not long before you’re challenged by more frustrating enemies; Moblins, Iron Knuckles, Lizalfos, and Stalfos quickly become commonplace, defending against your Sword Beam and attacking with daggers, swords, maces, tridents, and even jump attacks. It can be difficult to land hits on them since you’re reliant on your jumping attacks and their projectiles can be incessant, making them frustrating encounters even when you’re at a higher level. This threat is escalated by the likes of the Doomknockers, Fokkas, Fokkerus, and various teleporting wizards; these guys will hop about, toss a barrage of axes or flames, and need the use of a spell in the latter’s case to even defeat. Toss in the barrage of damage sponge Bubbles, expendable Wosus, fireball-spitting statues, and worm-like creatures and it quickly becomes an uphill battle getting past even the simplest of areas as you have to avoid attacks or switch up your playstyle to overcome the enemies before you.  

The game’s enemies and bosses can be aggravating due to the clunky combat mechanics.

Seven crystals in seven Palaces means, you guessed it, eight bosses to overcome in Zelda II, including the game’s true final boss. This time around, the bosses all have a life bar, similar to the Mega Man series (Capcom, 1987 to present), and drop a key after being defeated, which unlocks the Palace exit. The first boss you encounter is the horse-headed Mazura, whose armour protects him from all your attacks and whose swinging mace will decimate you if it makes contact. Your best bet here is to avoid being backed into a corner and activate your Shield spell to reduce the damage you take since you’ll need to use jumping slashes to hit his only weak point, his head. You’ll use these same tactics against the second boss, Jermafenser, a massive armour-clad knight whose head will detach after a few hits! However, Jermafenser is a bit of a joke; your shield will block his projectiles and, by this point, you should have the downward thrust, which makes short work of him, meaning the journey through Death Mountain and battles against the aggravating Dairas is more of a challenge! The third boss you encounter, Rebonack, is essentially a blue Iron Knuckle on a mechanical horse. He’ll charge across the screen and try to skewer you with his lance, meaning you need to time a downward thrust to rob him of his steed, after which you simply need to block, jump, or duck to defend against his barrage of daggers and attack his head as you would a normal Iron Knuckle. What makes Rebonack unique, though, is that you battle him again later in the game as he appears twice more as a mini boss in Three-Rock Palace, though he’s even easier in these encounters since you’re more powerful at that point. When you reach the Great Palace, you’ll also encounter another mini boss-like enemy, a Giant Bot that splits into several regular Bots upon being hit and slows the game to a crawl as a result. 
Many bosses are surprisingly disappointing and nowhere as challenging as the journey to them.

Journeying through Maze Island Palace will see Link clash with the wizard-like Carock, which is essentially a larger Wizzrobe variant. Because of this, battling it is extremely easy as you can simply activate the Reflect spell and crouch down in a corner; Carock will teleport about firing energy waves at you, but Reflect will send them right back, killing it in seconds. In comparison, the hulking Gooma is more of a challenge; slow and lumbering and wielding a spiked, chained ball, this monster requires a lot of patience as you use the Jump, Shield, and Life spells to avoid and endure his attacks and land hits to his torso. The dragon-like Barba was probably a lot harder in the original game but is made a lot easier with the Nintendo Switch’s rewind feature; it randomly rises from one of three lava pits to spew easily-voidable flame breath at you, so you need to be in the right spot to attack its head when it appears, which is easy to do when you can rewind the game on the fly! The penultimate boss, Thunderbird, poses the most significant challenge; not only must you reach it with a full magic bar since you need to cast Thunder to make it vulnerable, but it floats about spitting endless fireballs and can only be damaged by hitting its face. Once you defeat it, you’ll go straight to the final room and boss, with the damage and magic you lost fighting Thunderbird carrying over. Thankfully, the final boss, Dark Link, can be a bit of a let down; while Link’s shadow copies all his sword attacks and blocks yours with his shield, you can crouch or stand in the corner and easily cheese him, making the final challenge extremely anti-climactic considering how tough the rest of the game is. 

Power-Ups and Bonuses:
Unlike most Zelda games, Zelda II doesn’t include Rupees or shops and defeated enemies will not drop hearts to refill your life meter. The only way to restore Link’s health is to find a fairy on the overworld or in a sidescrolling section, level-up, visit an NPC at a town, or find a Heart Container, meaning you’ll mostly be relying on spells like Shield and Life to help reduce damage and restore your health. On the plus side, NPCs will aid you for free, though you’ll sometimes have to jump through some hoops to reach the old man and helpful knights who provide new spells and attacks. Although Link doesn’t get to use iconic sub-weapons like the bombs or hookshot, he can acquire items in each Palace to aid his quest; many of these are passive, automatically activating once you acquire them, such as the candle, raft, boots, key, and magic cross. These automatically light up dark areas, reveal hidden enemies, allow you to traverse streams or bodies of water, and open every door in the game unlike items like the hammer, flute, handy glove, which are activated on the overworld in the case of the former and powerup your sword attacks in the case of the latter to let you smash blocks. 

In place of his usual weapons, Link utilises spells and new sword attacks to progress.

Link is taught eight spells throughout the game that are required to conquer the Palaces. Some are more tactical than others; for example, you don’t have to cast Shield or Life if you’re skilled enough to defeat enemies and bosses with little to no damage, and I only cast Spell a few times in dungeons swarming with Girubokkus and Moas since it turns them (and many other enemies) into harmless Bots. However, you absolutely will need to cast Jump to increase your jump height and reach new areas, you’ll need Fairy to transform into a tiny fairy and bypass larger gaps, and Fire and Reflect are both necessary to defeat certain enemies. Thunder, the most powerful spell in the game, will obliterate all onscreen enemies but it costs so much to use that I only employed it against Thunderbird since that’s the only time it’s unavoidable. Link can also learn two additional sword attacks, the downward and upward thrust, which are super useful for defeating enemies beneath and above him, though it’s not going to help you against Iron Knuckles and other similar enemies, which is annoying. Finally, in addition to finding Point Bags and magic jars, you’ll occasionally come across Link Dolls that will grant you an extra life, though this is sometimes detrimental as it means wasting more time just trying to save the game. 

Additional Features:
As is tradition for the Zelda franchise, numerous Heart Containers can be found all across Hyrule; acquiring these will refill and extend your health bar, and you only need to find one to do this rather than four or five like in other games. Additionally, Magic Containers will do the same thing for your magic bar, so it’s worth exploring a bit to find these, even if it means battling more enemies. As alluded to earlier, some NPCs will only help you after you’ve performed certain tasks or spoken to certain characters; there’s a mirror, water, and kidnapped child to find in order to learn certain spells, Link will need to use Jump and Spell to reach certain houses or unearth areas, and you’ll need to use the flute and hammer on the overworld to eliminate otherwise impassable monsters or reveal hidden areas. Finishing the game allows you to save and alters your save file; selecting it will begin the game anew, with all your spells and level-ups intact, though you’ll have to find all the items and beat all the Palaces again. You can skip to this game by selecting the “SP” version from the Nintendo Switch Online menu, and of course you can abuse the rewind and save state feature to make the game a bit less challenging, but it’s still a tough experience even with these quality-of-life features. 

The Summary:
I put off playing Zelda II: The Adventure of Link for years; I purposely downloaded it for the Nintendo Wii just to play it years ago but never actually sat down with it until this playthrough, and even then I was very reluctant after all the negativity surrounding it. Unfortunately, I have to say that the criticism this game often gets is entirely justified; it’s such a radical departure from the first game that it’s almost like a completely different game, and the challenge it offers is neither fun or rewarding. Things start out okay enough, but the difficulty spikes dramatically once you reach Death Mountain (the second area of the game, I might add!) and then becomes wildly inconsistent after that. Sometimes you’ll be bombarded with small, annoying enemies and projectiles or forced to fight tricky enemies like Iron Knuckles in narrow hallways, and other times rooms will be largely empty or contain simple platforming sections. I wasn’t a fan of the basic overworld, the aggressive random battle system, or the switch to a sidescrolling perspective; this only works in small doses in Zelda games and the NES just isn’t capable of giving Link the range of movement or attack options required to best utilise this perspective. I didn’t mind the level-up mechanics, or the use of spells, and grinding wasn’t too much of a slog for me unless I was battling Iron Knuckles, but the spells were quite mundane and circumstantial, and I missed using other weapons and solving puzzles. Instead, the game relies on mazes, vague hints, and trial and error to nudge you along, making for a confusing and aggravating experience as I don’t like referring to a walkthrough when I’m playing games. I liked the music, and aspects of the graphics, and the bosses were visually quite impressive, if mostly ridiculously easy compared to what you go through to reach them. Ultimately, I don’t think you’re missing out if you’ve never played this one; it’s a curious oddity in the franchise, one that’s easily skipped over in favour of the more enjoyable sequels, but it could provide some enjoyment for nostalgic gamers seeking to relive the days when videogames were unnecessarily difficult.

My Rating:

Rating: 2 out of 5.

Could Be Better

Have you ever played Zelda II: The Adventure of Link? Were you put off by the changes to the gameplay and mechanics, or did you enjoy that it mixed up the formula? What did you think to the game’s difficulty and use of RPG mechanics? Did you struggle to work out where to go and what to do? Which of the game’s spells and bosses was your favourite? What did you think to the final boss? Would you like to see Zelda II remade or a return to this style of game for the franchise? How are you celebrated The Legend of Zelda this month and where games are your favourite? Whatever your thoughts, leave a comment below and maybe check out my other Zelda content. 

Game Corner [Sci-Fanuary]: Metroid Prime Remastered (Nintendo Switch)


January sees the celebration of two notable dates in science-fiction history, with January 2 christened “National Science Fiction Day” to coincide with the birth date of the world renowned sci-fi writer Isaac Asimov, and HAL 9000, the sophisticated artificial intelligence of Arthur C. Clarke’s seminal 2001: A Space Odyssey (1968), being created on 12 January.


Released: 8 February 2023
Originally Released: 18 November 2002
Developer: Retro Studios, Iron Galaxy Studios, et al
Original Developer: Retro Studios
Also Available For: GameCube, Nintendo Wii, Nintendo Wii U

The Background:
In August 1986, Nintendo introduced gamers to Samus Aran, the kick-ass bounty hunter protagonist of their Metroid series (Various, 1986 to present). Praised for its challenging gameplay and eventually lauded as one of the greatest games ever, Metroid helped popularise the “Metroidvania” sub-genre. Following the largely divisive Game Boy-exclusive sequel, Metroid made a universally acclaimed comeback on Nintendo’s ground-breaking 16-bit console and then strangely disappeared for over ten years save for being represented in the Super Smash Bros. franchise (Various, 1999 to present) despite rumours of a Nintendo 64 title. In 2000, legendary videogame producer Shigeru Miyamoto visited Retro Studios and, impressed by their first-person shooter engine, tasked them with creating a new Metroid title for the GameCube, which Retro Studios developer John Whitmore believed was due to Miyamoto not caring if the game succeeded or not. Still, the developers threw themselves into the task, working up to 100 hours a week to transition the Metroid formula to a 3D shooter as Miyamoto desired. The developers aimed to make exploration fun, putting more emphasis on challenging boss battles so as not to deter players from wanting to explore, though time constraints saw certain series staples cut from the title. Upon release, Metroid Prime became one of the best-selling GameCube games and was universally praised for its detailed environments, engaging atmosphere, and complex level design. It was followed by two equally successful sequels, making a highly regarded trilogy that breathed new life into the long-dormant franchise, but was stuck on obsolete hardware for over twenty years before this highly praised and successful remastered version was released for the Nintendo Switch in 2023.

The Plot:
After intercepting a distress call, bounty hunter Samus Aran is attacked by Meta Ridley and crash-lands on Tallon IV, whose Chozo inhabitants have been eradicated by an infestation of Phazon, a substance that Ridley’s Space Pirates seek to control to breed more powerful and aggressive Metroids.

Gameplay:
Metroid Prime Remastered is a first-person shooter in which players take on a far more intimate role as the famous bounty hunter, Samus Aran, and explore the various futuristic hallways, Phazon mines, frigid cliffs, and lava-hot caves of Tallon IV. Essentially a 3D, first-person remake of Super Metroid, including many of the same mechanics and elements of that classic 2D adventure, Metroid Prime Remastered emphasises exploration and backtracking as much as varied, frantic gun combat and will have you jumping, rolling, and scanning high and low for new upgrades and ways to progress.The game offers a variety of settings to fine-tune and tailor your experience, from removing Samus’s helmet display, to customising the heads-up display, to choosing different control styles to recreate the original Wii experience, if that’s your jam. Like Super Metroid, Samus begins the game with her full arsenal and abilities, but these are lost after Meta Ridley’s attack, and you’ll have to reacquire them (and more) on your journey. However, you still have your trusty arm cannon, which lets you lock onto enemies with ZR and blast them with A or ZR (charging up a shot for additional damage). Samus can also jump with B or the L trigger, eventually learning a double jump technique, or squeeze through tight gaps by turning into a ball with Y, switching the camera to a third-person perspective in the process. While in your Morph Ball form, you can also hop, drop bombs, and eventually attach yourself to magnetised rails with the Spider Ball upgrade.

Samus’s various beams and visors are crucial to battling and navigating through Tallon IV.

Samus can also upgrade her arm cannon to fire various additional blasts, missiles, and streams of elemental energy; these are required to open certain doors, destroy certain objects, and defeat certain enemies, all of which are usually colour-coded so you know which weapon to switch to using the X button in conjunction with the directional pad (D-pad). Samus can fire regular missiles and, eventually, unleash a barrage of Super Missiles in addition to a flamethrower, freezing stream, and a burst of electrical energy, all of which require missile ammo to utilise. Thankfully, defeated enemies and destroyed crates will drop orbs to replenish your health and ammo for these weapons, both of which can also be upgraded to increase your maximum health and ammo capacity. Samus also has a high-tech visor that allows her to scan her enemies and the environment, adding them to her Log Book (essentially unlocking character models and other goodies in the ‘Extras’ menu) to help you combat enemies or traverse the environment. Later, Samus acquires upgrades to her visor that allow her to see in infrared and utilise an x-ray vision, exposing hidden platforms and heat signatures to find new paths. You can switch between these with the D-pad, a system I found rather cumbersome as there was a noticeable delay when switching visions and I often accidentally changed my vision when I was trying to change my weapon, temporarily disorientating and blinding me. Samus’s abilities only increase as you explore, adding a grapple beam to her arsenal that allows you to swing across gaps with ZL when prompted, drop more powerful bombs to open new passageways, and freely move when underwater or survive the intense heat put out by the Magmoor Caverns and Phazon Mines.

You’ll need the Morph Ball and the intricate 3D map to properly explore your enviroment.

Samus’s helmet also comes equipped with a radar to highlight nearby threats and a 3D mini map, which you can expand by finding various Map Stations in each area. This allows you to view and rotate the complete 3D map from the + pause screen, where you can also read up on your weapons, abilities, and review your in-game progress. The map can also be a bit cumbersome to navigate; there’s no onscreen compass pointing you to your next objective, no way to set waypoints, and no fast travel system, so you’ll need to constantly pause and review the map to find your way to where you need to go. Tallon IV has many lifts to its various locations, some of which need activating with your visor and others which require upgrades to access, all of which are easily identifiable on the map even if finding the exact route can be difficult. Unfortunately, despite being a modern version of the game, Metroid Prime Remastered still utilises an archaic manual save system; you’ll only be able to save at specific Save Sections, which will also restore your health, so you’ll have to proceed with caution lest you die and have to reload from a save point some ways back. Finally, missile charging stations will fully replenish your missile ammunition and you’ll get regular updates on planetary disturbances that point you towards where you’re supposed to go next. Naturally, as a Metroid title, Metroid Prime Remastered involves a great deal of backtracking; you’ll revisit the same areas many times over, with new sections opening up the more you upgrade Samus’s abilities and new, tougher enemies popping up in previous sections. This means you’ll quickly become accustomed to Tallon IV’s various areas, but also means slogging through the same pitch-black, underwater, or aggravating maze-like sections multiple times thanks to a lack of a fast travel system.

Exploration, platforming, and puzzle solving are as important as the gun combat.

Initially, Metroid Prime Remastered has two difficulty settings (“Casual” and “Normal”) with a third “Hard” mode unlocked after your first playthrough on either setting, but the game gets progressively difficult as you play. In addition to the tougher enemies spawning in across the planet, you’ll contend with a variety of hazards, from acid pits, flame bursts, auto turrets, and radioactive Phazon. The more abilities you possess, the more options become available to you to solve puzzles and open new areas; this can mean charging up Morph Ball spinners, destroying coloured lights or defeating all enemies in an area to unlock doors, hacking laser cannons or blowing up obstructions with your more powerful bombs, hopping and dropping to magnetic rails, activating switches and lifts, and taking claustrophobic tunnels in your Morph Ball form. In these 2.5D sections, you’ll need to drop bombs to destroy obstructions or hop to higher platforms, use the boost ability to awkwardly gain enough momentum to fling yourself higher, or dodge pistons and temporary surfaces. Samus will also explore murky underwater areas, hop to a variety of platforms (some of which must be created by blasting stalactites or large, rock-like enemies), melting ice, and charging up electrical nodes to power up doors. Although you’re free to explore at your leisure, your way will inevitably be barred if you don’t have the right equipment, which can be frustrating; it’s doubly difficult remembering these areas when you do have the right equipment, especially as areas can change between visits, seeping them in darkness, flooding them, or spawning in tougher enemies. Compounding matters is the fact that enemies respawn each time you leave and enter an area or save, the need to switch between your visor and weapons quickly to take out groups of enemies, and annoying puzzles that have you blasting runic symbols, activating Morph Ball ports, and rotating magnetic paths to progress.

Graphics and Sound:
Graphically, Metroid Prime Remastered is very impressive; I’ve never played the Metroid Prime games before and am always a bit wary of first-person shooters, but the game looks amazing, including some striking atmospheric effects to add to the immersion. Samus’s visor mists up, rain splatters against it, her reflection appears when lightning flashes, and you’ll hear here grunt in pain whenever she takes damage. Although many of the environments can become stale, especially those set in futuristic labs or comprised of metallic hallways and rooms, Tallon IV is a very diverse alien world, including rainswept ruins, dark caverns, frigid cliffs, and volcanic caves. Each area is connected to each other by a series of lifts, meaning you’ll have to pass through the Chozo Ruins to reach the Magmoor Caverns to access the Phendrana Drifts and explore a submerged ship to reach the fungus-infested Phazon Mines. Environmental hazards are rife in each area, as are the relics of the Chozo civilisation, with statues and runes left behind to guide you as much as the literal ghosts of the past appear to test you. As you upgrade your abilities, you’ll be able to access new areas of each environment, traversing tunnels, platforms, and Space Pirate facilities built into each. Here, you’ll find computer stations and biological experiments housed in glass chambers that will break free to attack you.

The game looks incredible, with some diverse environments and impressive graphical touches.

Although you rarely see Samus in full form, she appears sporadically as you play and in cutscenes; here, she’s entirely mute, dictating her intentions through her body language and leaving the bulk of the game’s story to be told through the optional narration and various texts you scan and log throughout the game. It’s a bit of a shame as Samus looks great; she’s sleek, powerful, and sexy and her suit noticeably changes as you acquire upgrades, but you will see her adopting various poses as you switch weapons or stay stationary. Enemies also exude a lot of menace and personality, particularly Meta Ridley and the squealing, annoying Metroids that fly at your face and drain your energy. Still, the very nature of the first-person perspective means the graphical emphasis is on the environments, which all do a fantastic job of recreating and updating similar elemental and runic areas from Super Metroid. You’ll be hopping across crumbling, frozen buildings, decaying walkways, and traversing pitch-black, luminous caverns with your thermal vision, to say nothing of exploring the dank depths and accessing new (or secret) paths by utilising your abilities in unique ways. Metroid Prime Remastered also features an immersive soundtrack; not only are some classic Metroid tracks included and updated to keep the adrenaline up when enemies and bosses appear, but the game also makes great use of silence and ambient sounds to build tenson or establish a sense of calm following a frantic gunfight.

Enemies and Bosses:
Tallon IV is home to several insectile enemies that will chip away at your energy or exist primarily to annoy you or be farmed for health and ammo; wasp-like bugs, swarms of insects, plant-like enemies, and literal balls of plasma are commonplace, with even some of the smaller enemies being impervious to your standard cannon and requiring upgrades to finally take them out. Some, like the Reaper Vines, are virtually indestructible and simply disappear for a bit before whipping back out at you; others, like the Stone Toads, exited solely to aggravate you as you struggle to build enough momentum to reach higher levels. Some enemies, like the Baby Sheegoths, Jelzaps, and Plated Beetles are heavily armoured and can only be damaged from behind or when they expose their weak spots; others, like the various burrowing insects and the dragon-like Magmoor, burst up from the ground, ice, or lava to attack you. As you progress, you’ll encounter several different Space Pirates (known as “Troopers”); these slash at you up close or fire at you from a distance and come in different colours, rendering them weak to your different cannons but also allowing them to appear invisible, cling to ceilings and walls, and afford them greater mobility in the air and underwater thanks to their jetpacks. By far the worst and most annoying regular enemies are the Chozo Ghosts (which do become easier once you gain additional visors, but the reduced visibility meant I often just ran past them) and the various Metroids. These jelly-like bastards attach themselves to you to drain your energy, can multiply when damaged, and even take on coloured forms to force you to switch weapons and appear in more aggressive octopus-like variants. They can also absorb a great deal of damage, meaning it’s often easier just to try and avoid them and rush to the exit.

The game’s monstrous bosses require a bit of strategy to bring them down.

Samus will have to overcome some monstrous alien enemies to rid Tallon IV of the Space Pirates’ influence, only one of which I recognise from the previous games, that being recurring antagonist Ridley. The game begins with Samus exploring the Space Pirate frigate Orpheon and encountering the Parasite Queen, a massive insectile creature shielded behind a rotating energy barrier. The Parasite Queen swipes its scythe-like claws and spits acid at you and forces you to stay on the move and fire between the gaps in the barrier, and then you’re given seven minutes to flee before the Orpheon explodes. After navigating the intense heat and acid pits of the Magmoor Caverns, Samus is confronted by Flaahgra, a horrific amalgamation of snake, bug, and plant that pollutes the water supply and spews acid at you. To damage Flaahgra, you need to blast up to four nearby dishes with your Charge Beam to stun it, giving you just enough time to roll up the narrow tunnel and drop a bomb at its base and set it ablaze until it finally dies. You’ll also get to put your thermal vision (and your patience) to the test against Thardus, a rock monster that guards the Spider Ball upgrade; the only way to damage Thardus is to locate the glowing weak spots with your thermal vision and unload with Super Missiles, a task compounded by its shockwave attack, the rocks it throws at you, it rolling into a nigh-impenetrable ball, and the weak spots constantly moving and disappearing. The Ice Ruins of Phendrana Drifts are home not just to the annoying Chozo Ghosts but also the gigantic Adult Sheegoth, both of which become semi-regular enemies but the latter of which proves particularly problematic since your regular beam attacks will simply be absorbed by the ice crystals on its back and turned into electrical shockwaves. Luckily Super Missiles and your flammable Plasma Beam can turn the tide, and you can simply ignore the later ones that appear.

Unlike the Elite Troopers, Meta Ridley represents the game’s toughest challenge yet.

As Samus explores the laboratories and facilities hidden on Tallon IV, she will also be attacked by larger, more aggressive Space Pirates. The Phazon Elite is a Space Pirate empowered by Phazon and, like the Elite and Omega Pirates, wields a massive energy cannon on its shoulder. All three of these can absorb your Charge Beams and unleash a shockwave attack, but sporadically prove vulnerable to your Super Missiles; the Omega Pirate variant also sports a cloaking ability, plasma cannons, and limited regenerative capabilities, but all three are surprisingly easy to take down thanks to you being able to target their cannons with your thermal vision. In comparison, their leader, Meta Ridley, is quite the foe; after collecting twelve Chozo Artifacts, you’ll engage in an intense battle with Ridley that sees him flying overheard and far out of range, raining fireballs and breathing fire at you and charging at you to deal massive damage. You can take cover behind the stone columns, but Meta Ridley’s ranged and melee attacks will destroy these, and the only way to damage him is to fire Super Missiles right before he unleashes his flame breath. A huge hurdle here is your ammo; if you run out of missiles, your primary charge beams will only chip away at Meta Ridley’s health bar, so it definitely pays to upgrade your energy and maximum ammo.

Metroid Prime is an aggressive, tricky final boss who will have you constantly on edge.

This is also true of the game’s final boss, the titular Metroid Prime. Before you can even reach this spider-like grotesque, you’ll have to endure an aggravating obstacle course through lava and caustic Phazon, dodging Metroids and hopping to platforms and magnetic rails with only one save station right at the start of the endurance round. Metroid Prime is fought in two phases; in the first, it is protected by a hard outer shell that sporadically cycles between different colours, meaning you’ll have to quickly switch your weapons to deal damage. Again, your charged beams won’t do much so you’ll be relying on your Super Missiles and more powerful attacks like the Wavebuster and Flamethrower but, luckily, Metroid Prime’s projectiles can be destroyed to replenish these (and, occasionally, your health). Metroid Prime is a hell of a challenge, drawing you in with a tractor beam, raining explosive plasma, firing a sustained, powerful laser, spitting toxic balls, and scuttling at you, meaning your only way to avoid damage is to use the clunky dodge move and Morph Ball. After battling it down several layers to the planet’s core, it’s outer shell will shatter for the second phase, exposing Metroid Prime’s luminous, Lovecraftian, octopus-like true form. In this state, it charges up a shockwave attack that can be tricky to jump over and spawns various Metroids to distract you. It also cycles through different stages of invisibility depending on which visor you have, meaning you need to frantically change your vision mode to find it, though it’ll remain completely immune to your attacks until it starts leaking Phazon. You can temporarily use these pools to enter “Hyper Mode”, allowing you to finally deal some damage, but you’ll need to repeat this process a few times to finally end it, which can be an aggravating task thanks to the Metroids, the great range of attacks, and the clunkiness of switching between your vision modes.

Power-Ups and Bonuses:
As mentioned, Samus can replenish her health and ammo by destroying enemies and finding Save and Mission Stations; her maximum health and ammo can also be enhanced with various hidden upgrades so it pays to explore, cycle through your vision modes, and blast open columns and rocks to see what you can find. Samus starts out with a regular arm cannon that’s serviceable enough but soon gains the Wave, Ice, and (eventually) the Plasma Cannon; these fire bursts of electrical, ice, and fire energy that are crucial for solving later puzzles, opening doors, and defeating enemies but I found it annoying switching between them using a button combination. Similarly, Samus’s visor can be tricky to cycle between, though it does allow you to navigate pitch-black areas and locate hidden platforms and such. Samus’s Morph Ball also gets upgraded to allow her to drop bombs, boost along, and drop limited Power Bombs for greater damage; her grapple beam lets her swing across gaps; and her various suit upgrades allow her to withstand intense heat (though not lava) and no longer be damaged by Phazon deposits, changing her appearance and giving her greater range of movement. As you explore, it pays to scan everything in sight to expand upon the game’s lore and learn secrets, and you’ll even uncover optional upgrades like the Wavebuster and Flamethrower this way. Sadly, there’s no way to pilot or utilises Samus’s ship, but it does fully replenish your health and ammo so it’s worth returning to when you get the chance.

Additional Features:
Tallon IV is a sprawling, interconnected landscape with many secrets to find; many of these increase your maximum health and ammo or award you with upgrades to your arsenal, while others hide Chozo Artifacts. There are twelve to find and you’ll need to locate them all to reach the final section of the game, which is a bit annoying as it unnecessarily pads the game out and basically forces you to use a guide since the hints given are quite obtuse. Finally, you’re encouraged to scan everything in sight; the more you scan, the more lore you unlock, and the more extras are accessible from the main menu, including music tracks, concept art, and character models for both the original and Remastered version of the game. Beating the game on any difficulty setting unlocks “Hard” mode; it’s recommended that you make a copy of your save file ahead of venturing into the final area, though, as trying to start a new game on “Hard” mode will erase your existing save file. Finally, you’re awarded with a different ending, and a different view of Samus in her suit, depending on how fast you beat the game and how close to 100% completion you are when you defeat Metroid Prime.

The Summary:
I was very anxious heading into Metroid Prime Remastered; I always am when tackling an FPS as I don’t like being shot in the back, and especially when taking on a Metroidvania title, but I’d heard nothing but good things about the game (and the entire trilogy) so it was exciting to play this enhanced version on the Nintendo Switch. Technically speaking, Metroid Prime Remastered delivered; the game is beautiful, the locations detailed and varied, ever-changing and interactive, and I had fun blasting enemies, exploring, and upgrading Samus’s suit and abilities. The bosses, especially, were a highlight, being big and monstrous and asking more of you than simply blasting away, and it was amazing seeing how well the developers took the gameplay and mechanics of Super Metroid and translated it into a 3D first-person shooter. Unfortunately, I quickly grew annoyed with the backtracking; the locations might be amazing, but it gets aggravating having to revisit them time and again and being forced to rely on a guide. A fast travel system allowing you to teleport between Save Stations would’ve been greatly appreciated here as it was very frustrating playing long sections of the game or ploughing through lava to reach a save point. I was also annoyed by the vision and weapon selection system, which proved unintuitive and clunky at times, making the colour-coded combat a chore in the endgame sections. It was equally irritating having to scan everything around you to unlock extras, a gameplay mechanic that cropped up all-too-often around this era, and first-person platforming will always be the bane of my life. Still, there’s a lot to enjoy here; I managed a good 70% of the game before I required a guide and had a lot of fun blasting enemies and exploring, but there’s definite room for improvement here; thankfully, I enjoyed enough of Metroid Prime Remastered to be motivated to try out the sequels and see how the gameplay was refined, if at all.

My Rating:

Rating: 3 out of 5.

Pretty Good

What did you think to the remaster of Metroid Prime? Did you enjoy the technical enhancements on offer? Were you impressed by the franchise’s transition to 3D or were you also annoyed by some of the mechanics on offer here? Which of the bosses and upgrades was your favourite? Did you ever hit 100% completion on the game? Which of the Metroid Prime games is your favourite? Whatever your thoughts, feel free to leave a comment below or on my social media, and be sure to check out my other Metroid content across the site.

Game Corner [Sci-Fanuary]: Super Metroid (Nintendo Switch)


January sees the celebration of two notable dates in science-fiction history, with January 2 christened “National Science Fiction Day” to coincide with the birth date of the world renowned sci-fi writer Isaac Asimov, and HAL 9000, the sophisticated artificial intelligence of Arthur C. Clarke’s seminal 2001: A Space Odyssey (1968), being created on 12 January.


Released: 5 September 2019
Originally Released: 19 March 1994
Developer: Nintendo
Original Developer: Nintendo R&D1 Intelligent Systems
Also Available For: Nintendo 3DS, Nintendo Wii, Nintendo Wii U, Super Nintendo Entertainment System (SNES)

The Background:
In August 1986, Nintendo fans were introduced to Samus Aran, the bad-ass bounty hunter protagonist of the Metroid series (Various, 1986 to present). Well-received upon release for its challenging gameplay and now heralded as one of the greatest games ever made, Metroid helped popularise an entire sub-genre of gaming; “Metroidvania” titles became known for being action-orientated games that emphasised exploration and the acquisition of power-ups to progress. Metroid was followed by the Game Boy-exclusive Metroid II: Return of Samus (Nintendo R&D1, 1991), which was both my first experience of the franchise and a largely divisive title that nonetheless directly influenced, at least narratively, the franchise’s jump to Nintendo’s ground-breaking 16-bit console. Producer Gunpei Yokoi and much of the original team returned for Super Metroid, which took two years to develop and took advantage of the SNES’s greater processing power to allow Samus to fire in all directions and explore a far larger, interconnected environment with a detailed map system. This also allowed the team to pull off more diverse visual effects, including more cinematic cutscenes that allowed them to pay greater homage to the Alien franchise (Various, 1979 to present), alongside a team of young, hungry developers. The result was a game met with universal critical acclaim; despite disappointing sales in the United States due to a poorly-timed release, Super Metroid was lauded for its impressive visuals, tight gameplay, and balancing combat with exploration and a steep challenge. A quintessential title in any SNES library, Super Metroid was accompanied by a Nintendo Power comic and ported to numerous consoles, including the Nintendo Switch Online service soon after it launched, allowing new generations of gamers (and myself) to experience it for the first time.

The Plot:
After a Metroid larva is stolen from the Ceres space colony by the monstrous Ridley, bounty hunter Samus Aran returns to the planet Zebes to retrieve the sample and exterminate Ridley and his Space Pirates once and for all!

Gameplay:
Super Metroid is a 2D action-adventure game in which the player once again assumes the role of Samus Aran, a highly capable bounty hunter, and sets off on a quest full of jumping, running, and backtracking (oh, so much backtracking) in order to eradicate the Space Pirates. Essentially, it’s a remake of Metroid in very much the same way Super Castlevania IV (Konami, 1991) is a remake of Castlevania (ibid, 1986); it takes many of the same mechanics, locations, and bosses of the first game and gives them a whole new, super sexy 16-bit makeover. Right away, the player can select between English and Japanese text and has access to three save files (though the Nintendo Switch’s save states and rewind functions negate a lot of this); the player can also customise the game’s controls and choose to turn Samus’s new “Moonwalk” ability (where she effortlessly slides backwards while shooting forwards) on or off. By default, Samus shoots her currently-equipped shot with X, jumps with A (the button can be held for a longer and higher jump), dashes ahead by holding B, and can switch weapons with the ‘Select’ button. Items can be cancelled with Y (though I found no use for this) and Samus can aim diagonally up and down using the L and R triggers. I found the default controls a little clunky so I swapped the jump to B, the shot to Y, and the dash to A, and even then I sometimes still got a little confused about whether I was shooting or jumping and found it annoying that there wasn’t an easier way to cycle between Samus’s different ammo.

Explore and upgrade Samus’s arsenal and skills to reach new areas.

Samus is gifted with infinite ammo for her basic arm cannon; the player can hold down the fire button for a rapid shot, but this later gets swapped out for a charged attack. However, the player can further customise Samus from the pause menu; here, you can equip and unequip the various weapon and armour power-ups Samus obtains, though I preferred to keep them equipped at all times. Unlike the previous games, a small, grid-based map appears onscreen at all times which makes exploration so much easier this time around. Using the pause menu, you can view the full map and better figure out your route, though you’ll need to access map terminals to unlock each location’s map. Pressing down on the control stick or directional buttons will see Samus curl up into a Morph Ball when she acquires the relevant power-up; this allows her to squeeze through small gaps and access areas that aren’t readily apparently. It’s worth shooting, placing bombs, and jumping to find hidden areas and alternative routes, too; the game gets very big and complicated very quickly so any shortcuts or additional resources are always a welcome bonus. Planet Zebes is a veritable maze of doors that must be shot open; they’re colour-coded so you always know which weapon to switch to, but you’ll also be asked to perform a fair amount of horizontal and vertical jumping. While Samus’s later techniques help with this, her wall jumping ability is absolutely nerfed; rather than simply jumping at a wall and hitting jump again, you need to awkwardly hold back and press jump with frame-perfect timing to actually execute the move, which can be needlessly frustrating at times.

Although Samus controls well, her wall jumping and vertical abilities can be frustrating.

Similarly, Samus later acquires the Space Jump power-up; with perfect timing, this allows her to infinitely jump, cross wider gaps and reach higher areas, but the timing required is just too finnicky and random at times (it would’ve been so much easier to just keep hitting jump for a sustained effect). To make matters worse, enemies again respawn when you leave the screen; sometimes, smaller enemies will constantly spawn in certain screens, allowing you to “farm” health and ammo. You’ll also sometimes need to hop into the hands of a Chozo Statue while in your Morph Ball form to clear the path and you’ll find numerous helpful areas where you can catch your breath; save rooms, restore points to refill your health and ammo, and Chozo Statues gifting either new gear or upgrades to your existing equipment, total health, and total ammo. It’s well worth hunting these down as you’ll need your more powerful weapons to defeat the game’s bosses and more formidable enemies; both drop health and ammo when defeated but things are much easier if your maximum level is increased. Although well-equipped, Samus struggles against hazards like water, lava, acid and spike pits; suit upgrades allow her to negate some of these, and her Grapple Beam allows her to swing over hazards but, again, the timing required can be difficult to master. Super Metroid starts out fairly linear but you very quickly become restricted in where you can go, necessitating the acquisition of new power-ups; the more you obtain, the more you’ll need to remember cervices, destructible walls, and unreachable areas. You’ll be constantly backtracking, searching for new paths to the main four bosses, which may mean you’re over or under-equipped for certain encounters. Thankfully, the game is usually quite helpful and won’t leave you trapped in a room because you don’t have the High Jump Boots, but it can be a pain trying to figure out where you need to go and what you need to do.

Graphics and Sound:  
As a SEGA kid, I’ve long been envious of Super Metroid; for me, it’s one of the premier SNES titles and its visual appeal is a huge part of that. In fact, I admit that I was more excited to experience the game than I was to play it because of the difficulty involved in the constant exploration and the frustration of having to use a guide to find my way. Obviously, the game is a quantum leap ahead of its predecessors; Samus had never looked more colourful and lively before (and wouldn’t for many years aftwards), despite lacking much in the way of idle animations. She moves with a fluid grace that is both clunky when it needs to be and slick when she’s showing off her new abilities, spinning and curling and Moonwalking about as she blasts apart Space Pirates. The game’s story is told through text and simple to understand, cinematic cutscenes that utilise both the in-game graphics and a sprinkling of “Mode 7” for extra flair, with much of the ambiance and visual style influenced by the classic sci-fi action/horror Aliens (Cameron, 1986). Space colony Ceres and some levels of Zebes featured dead bodies scattered about, flickering lights at times, and rising bodies of water of varying danger, while the surface is rocked by a constant storm of acid rain not unlike the surface of LV-426.

The game is visually stunning, with a fantastic soundtrack and a strong aesthetic appeal.

While the game’s action is confined to Zebes, Super Metroid isn’t short on visual variety; this is used somewhat sparingly, and to great effect, so the rocky vegetation of Brinstar contrasts nicely with the sunken depths of Maridia and the lava-infested Norfair despite each location sharing similar layouts. Generally, Samus travels left to right from room to room but you’ll also be met by long vertical corridors and have to blast through the environment to progress. It’s not always clear which weapons or abilities you need to progress but there are some visual hints; blasting blocks or walls can reveal the symbol of certain weapons or arrows, indicating how to blow them open or to use your dash, or helpful little gremlins or dangerous digging machines can open new paths. Samus will discover a derelict ship that is plunged into darkness and lifeless until she restores the power; she can also break open glass tubes to further explore the depths of Maridia, blast and pass through certain blocks to drop into hidden areas, and even sink into sand to find new rooms. While there’s not always a lot happening onscreen, this allows each area to stand out all the more and the game to perform consistently, and each location expands and changes with your increased abilities, allowing you to make jumps you couldn’t before to navigate past hazards more effectively. The game also sounds fantastic; there’s a beautiful balance between silence, ominous ambient sounds, creepy tunes, and bolder, more blood-pumping music. Super Metroid ramps up the tension and adrenaline with its boss themes, especially when fighting Ridley and Draygon (who both sport Anguirus’ signature cry). Finally, the game is quite graphic at times; there’s the aforementioned dead bodies, Samus explodes in a similar fashion to Mega Man when killed, and Crocomire’s flesh melts from its bones upon being forced into a lava pit!

Enemies and Bosses:
Samus must blast her way through a slew of alien baddies to win the day, with many of them being variations of the standard, mantis-like Space Pirates. These insectoid aliens clamber on walls, march along the floor, and even hop overhead, firing jagged projectiles and often shielding themselves from your attacks with their claws, necessitating a weapon upgrade or a more convoluted attack pattern. Smaller enemies also pepper the game’s environments, ranging from wasp-like Zebbos, crab-like Scisers, and bat-like Skree, all of which are easy prey for you to farm some resources. Rippers can be temporarily frozen to act as platforms, Kilhunters will buzz about on their insectile wings, spiked Geemers slither about on small platforms, clunky Workrobots stamp about shrugging off your beams, and Evirs emerge from acid to fire projectiles at you. Enemies like the Beetoms and Metroids are a real headache as they can shrug off your regular shot and will latch onto you to drain your health, while Namihes and Funes spit fireballs from walls and guys like the Alcoon and Oum tend to burst out of nowhere for a surprise attack!

Samus faces some mammoth, formidable bosses, including long-standing nemesis Ridley.

As if that wasn’t bad enough, there are eleven bosses to battle here, with a couple being very similar battles fought in different circumstances. You’ll encounter Samus’s archenemy, Ridley, early on; confined to an enclosed arena, Ridley will swoop at you, spit fireballs, and swipe with his Xenomorph Queen-like tail, but you don’t actually need to defeat him here, just survive until he flies off with the Metroid larva. Ridley, returns, far more formidable, as the penultimate boss; this time, you’re confined to a small platform with health-sapping lava underneath and Ridley hides high above, swooping in to grab and squeeze the life out of you. He also breathes fire and becomes extremely aggressive as the fight goes on, though he is vulnerable to all of your weapons, with the charged Plasma Beam and Super Missiles being the most effective, but he’s certainly no pushover even with all your upgrades. Similarly, you’ll battle two malevolent Torizo Statues, one just after acquiring the Morph Bomb and one later on. You’ll need to make use of the Morph Ball in the first encounter to dodge its projectiles; both stomp about to smash into you and swipe with their claws, but the golden one will sidestep missiles and catch and toss your own Super Missiles back at you and was, honestly, one of the toughest bosses in the game for me! Another early boss encounter is against the Spore Spawn, a gigantic, genetically-engineered plant that bobs about, launching itself at Samus and causing small spores to rain across the screen. These can be blasted for ammo and health, which you’ll need as this alien plant can only be defeated by shooting its central core, which only opens up for a brief window. Defeating it earns Samus the Super Missile power-up and sees the environment wither and decay.

The game’s bosses are monstrous and require a bit of strategy on your part to best.

The first major boss of the game is against Kraid, now much bigger and even more imposing than before (though a smaller version is again encountered beforehand). Now taking up a good chunk of the screen, with the bottom littered with spikes, Kraid lunges at you, spits rocks, and causes boulders to rain from above. Kraid’s only weak spot is his eyes and, when you’ve dished out enough damage, he raises up and you need to make use of small platforms to avoid his projectiles and fire at his head whenever he roars. In the lava-soaked depths of Norfair, you’ll battle the all-but-invincible Crocomire; immune to all of your attacks, you need to force Crocomire   into a lava pit before it skewers you on a wall of spikes! Watch for its projectiles and its skeletal remains, which will burst through said wall in a last gasp attack! Whilst exploring the wrecked ship, you’ll be attacked by ghost-like aliens and eventually face off against their master, Phantoon, a giant, squid-like alien wraith that hovers around the room dropping blue flames, though you can dispense them with your shot to grab some resources. This guy also disappears and reappears about the arena and can only be damaged by shooting at its single, ugly eye, though neither it nor the worm-like Botwoon should cause you too much trouble if you keep your beam charged and have plenty of missiles on hand.

After besting her minions, Samus must do battle with the fearsome Mother Brain!

The same can’t be said of Draygon, which acts as something of a teaser for the later Ridley fight. Draygon will swoop down and grab you, slamming you against the wall if you’re not careful, requiring a unique strategy beyond just dodging and shooting. If you let it grab you, you can shoot your Grapple Beam at an electrified wall panel; you’ll take damage, but you’ll also toast Draygon in the process, leaving her insectoid children to mourn her corpse. I wouldn’t underestimate the Silver Space Pirates, either; this duo is fought in Ridley’s lair and are only vulnerable when they flash gold, making them an exercise in frustration as they flip and slice and kick to whittle you down. Once you’ve defeated the main bosses, you’ll be able to access Tourian, a metallic landscape where Metroids wander freely. Here, you’ll encounter the titular Super Metroid, which proves invulnerable and will drain your health to almost nothing before fleeing. Eventually, you’ll battle Mother Brain once more; like before, this massive brain sits in a jar and is protected by laser walls, a constant spread of projectiles, and a lava floor. Once you shatter her protective casing, she rears up into this monstrous bipedal monstrosity that stomps about in a claustrophobic area, spitting explosive breath and blasting you with laser beams from her eyes! When you deal enough damage, she’ll decimate you with an unavoidable rainbow laser; luckily the Super Metroid comes to your aid, sacrificing itself to restore your health and gift the Hyper Beam, which cuts down Mother Brain. Once she’s defeated, the whole planet crumbles around you and you have three minutes to escape to the surface, whereupon you’ll be granted a special image of Samus depending on how well you played.

Power-Ups and Bonuses:
Samus starts with ninety-nine units of energy and her regular arm cannon but it’s not long before you’re increasing her exploration abilities with the Morph Ball and upping her arsenal with the missile and Super Missile, which both deal far greater damage than her regular shot, and increasing her maximum energy with the fourteen Energy Tanks. You can also find four Reserve Tanks to have some health restored after death, can use the X-Ray Scope to search for these, and hidden paths, in the environment, and grab the Speed Booster to run through walls and enemies alike and the Grapple Beam to latch on to overhead blocks and certain walls (if you can get to grips with the controls). In addition to finding numerous energy recharge stations, you can also fully refill your ammo at similar stations, usually located near a save room, and you’ll find loads of power-ups to increase your maximum ammo for each bomb. Samus can also upgrade her suit to allow her to freely move underwater, increase her defence, and allow her to resist certain types of lava, all of which is essentially for exploring the entirety of Zebes, Samus’s main cannon can also be upgraded to allow her to charge a more powerful attack that’s great for inflicting big damage against bosses, temporarily freezes enemies to create extra platforms, and allows her to fire three beams at once that go through walls and enemies alike. You’ll also acquire the ability to drop balls when morphed (clearing obstructions in tighter spaces and boosting you over small ledges), a screen clearing Power Bomb, and the Spring Ball that lets you jump while morphed. The High Jump boots increase your jump height, the aforementioned Space Jump allows you to clunkily continuously jump, and the Screw Attack adds an electrical crackle to your jump spin to damage enemies.

Additional Features:
Upon finishing Super Metroid, you’re given a percentage showing how many of the game’s secrets you found. You can freely load up your save file to backtrack and hunt down anything you missed if you like, but the game’s endings are based on how much time you took not how much you found. You’ll only get to see Samus in her skin-tight under garments if you beat the game in under three hours; playing between three and ten will see her remove her helmet, and playing for more than ten hours sees her preserve her modesty behind her suit and you settling for a thumbs-up. In the final escape sequence, you apparently have the option of saving the trapped Dachoras and Etecoons, though I didn’t notice them in my playthrough and it appears to add nothing to the ending but personal pride. This version of the game naturally allows you to create a save state at any time and make use of the Nintendo Switch’s rewind function, which is perfect for the game’s many aggravating sections, and you can also take advantage of a special save state version of the game that lets you skip right to the end with all of Samus’s upgrades.

The Summary:
Of all the Metroid games I’ve played, I’ve played Super Metroid the most but I never managed to finish it before this playthrough. The game is absolutely gorgeous, with a visual appeal that’s matched by its soundtrack and massive, action-packed bosses and the appeal of its main character. However, the large-scale nature of the game and the copious backtracking were always intimidating for me as I really didn’t want to have to keep referring to a guide; luckily, I was able to get through Super Metroid without too much help in this regard, but it can be frustrating when you seem to have exhausted all your options only to have missed a destructible block tucked away. While Super Metroid is impressively put together, with some fantastic detail, variety, and challenge on offer, playing the game from start to finish has made me see flaws in the game’s controls; wall jumping is absolutely atrocious and techniques like the Space Jump are needlessly finicky, ruining a lot of the platforming sections and making me wonder how anyone ever managed to succeed at the game without the aid of save states. The bosses are equally challenging, even when Samus is fully armed and powered up, making for a tough but ultimately very rewarding gameplay experience. Had these control issues been tweaked to be simple button presses, it would’ve been a perfect five out of five but Super Metroid is still one of the quintessential SNES titles and is well worth investing your time and patience.

My Rating:

Rating: 4 out of 5.

Great Stuff

Did you enjoy Super Metroid? Would you agree that it’s one of the titles that defined the SNES era of gaming? Did you struggle with the controls at all and what did you think to the large, inter-connected game world? Which of the bosses and upgrades was your favourite? What did you think to the graphical upgrade and the level of detail on offer? Which Metroid game is your favourite? Whatever your thoughts, feel free to leave a comment below or on my social media, and be sure to check out my other sci-fi content across the site.

Game Corner [Sci-Fanuary]: Metroid II: Return of Samus (Nintendo Switch)


January sees the celebration of two notable dates in science-fiction history, with January 2 christened “National Science Fiction Day” to coincide with the birth date of the world renowned sci-fi writer Isaac Asimov, and HAL 9000, the sophisticated artificial intelligence of Arthur C. Clarke’s seminal 2001: A Space Odyssey (1968), being created on 12 January.


Released: February 2023
Originally Released: November 1991
Developer: Nintendo
Original Developer: Nintendo R&D1 Intelligent Systems
Also Available For: Game Boy, Nintendo 3DS, Nintendo Wii, Nintendo Wii U

The Background:
Brain-blasting bounty hunter Samus Aran shocked the gaming world when she was revealed to be a woman in the challenging Nintendo classic, Metroid (Nintendo R&D1 Intelligent Systems, 1986). Although highly praised and crucial to the popularisation of the “Metroidvania” sub-genre, Metroid’s sequel came not on the Nintendo Entertainment System (NES) like Nintendo’s other franchise characters, but on their revolutionary (and incredibly popular) handheld system, the Game Boy. Many of Metroid’s developers returned for the sequel, which separated itself from other Game Boy titles with graphics comparable to its 8-bit counterparts and expanding upon Samus’s abilities and narrative in ways that would influence future games. Not only was Metroid II my first experience of the franchise, but it also included a unique palette for when played on the Game Boy Color, though it largely divided critics upon release. Reviews praised the quality of life improvements and expansion upon the gameplay of its predecessor, while also criticising the music and limitations of the Game Boy hardware. Yet, Metroid II endured; a fangame remake was scuppered by Nintendo prior to them remaking the game for the Nintendo 3DS in 2017, with Metroid: Samus Returns (MercurySteam, Nintendo EPD) being largely well received. The original version of the game also found a home on Nintendo’s online services, including this Nintendo Switch Online version, to help keep this cult classic alive for new gamers.

The Plot:
Following her encounter with the Metroids, bounty hunter Samus Aran is sent to the Metroid home world, SR388, to destroy the entire species.

Gameplay:
Metroid II: Return of Samus is a run-and-gun adventure game with an emphasis on exploring the various alien landscapes of SR388, upgrading Samus’s suit and abilities, and hunting down forty Metroid variants to curb the malicious species. Players once again assume the role of the intergalactic bounty hunter Samus Aran, who sports the same abilities from the first game and more, most notably the ability to shoot upwards and while crouching, simple additions that make blasting aliens and destructible blocks so much easier. You’re given three save files to play with, which can be switched to or deleted from the main menu, though there are no options to reconfigure any game settings, like the controls or difficulty. However, since it was originally a Game Boy title, you’ll only make use of two buttons during gameplay: A lets you jump (and you can hold it to jump a little higher) and B lets you shoot (and you can hold it to continually fire at foes). Samus will compress into a spherical Morph Ball if you press down on the directional pad twice, and you can switch from her infinite gun arm to her finite supply of missiles by pressing the – button. The + button pauses the game, but you again won’t find a map screen, here, meaning exploration is still a chore, despite Metroid II being a slightly more forgiving and straightforward title.

Run, shoot, and roll your way through a confusing alien world hunting Metroids.

Unlike in the last game, players can make use of save stations to save their progress and sporadic refill pods for their health and ammunition, reducing how often you’ll blast away at enemies to farm for resources. As before, enemies will respawn whenever you enter an area, though this time around to you must alter the environment, clearing lava and other hazards so you can progress further. Puzzle solving isn’t really a thing in Metroid II; the closest you get are blasting certain doors with your missiles to open them and navigating deep chasms, some of which are somewhat maze-like and have hidden holes that drop you to lower levels, though you’ll sometimes have to use Samus’s Bomb power-up to blast away boulders. This game debuts the Spider Ball, which allows Samus to slowly crawl up walls and ceilings, and you’ll be using this a lot to scale cliffs and ruins, especially as the game progresses. However, your primary objective is to hunt down the forty Metroid variants hidden around SR388; you can keep track of how many remain using the game’s limited heads-up display, but you won’t be given any hints or direction about where to find them beyond hitting dead ends until you’ve acquired new power-ups. Occasionally, Samus will dive into water or must traverse sticky goop; spikes and lava pits are commonplace, as are destructible elements like weeds and sandstone, and you’ll also have to navigate a pitch-black area later in the game that’s incredibly frustrating as there’s no way to light your path. Mostly, though, you’ll be exploring long corridors, deep shafts, and crawling up walls and through narrow tunnels, blasting enemies and hoping the path leads to an upgrade or another Metroid.

Graphics and Sound:
Releasing a couple of years after the debut of the Game Boy, Metroid II is quite a bland looking game, especially as far as the backgrounds are concerned. Backgrounds are largely completely blank, either white, black, or that weird green colour the Game Boy favoured, with very little in the way of foreground details, for the most part. Some areas are the exception to this rule, of course, with an abundance of overgrown stone ruins, rocky caves, and biomechanical areas peppered throughout the game so you know when you’ve transitioned from what could loosely be called the overworld to an area of some significance. Many areas contain lethal lava, dank water, or gloopy muck that restricts your movements but are largely indistinguishable from each other; sometimes the rocks look more like peanuts, sometimes they’re metallic, and sometimes they’re almost like bubbles, but the game becomes disappointingly and confusingly uniform very quickly. Caverns, ruins, and mechanical trappings signpost areas containing Metroids and power-ups, but it’s easy to think you’ve accidentally backtracked as SR388 isn’t exactly divided into elemental sections. Having the overworld be rocky and the main sections be distinctly water-, metal-, botanical-, or lava-themed would’ve helped to distinguish them but, as is, there’s only a handful of areas that impress when it comes to their aesthetics. While this is commonplace on the Game Boy, it’s not as if there weren’t games that were able to do a little more with the hardware, so it’s pretty disappointing here, especially as the game lacks a map.

As impressive as many of the sprites are, the backgrounds, locations, and music suffer.

On the plus side, Samus looks great, far better than she did on the NES and showcasing a surprising level of detail. While she doesn’t have any idle poses, her suit changes to reflect her upgrades and she has more poses to assume thanks to her expanded moveset. In addition to her iconic ship sat in the opening section, you’ll always know when a Metroid is nearby by the presence of a hatched Metroid egg, there are a couple of cutscenes showing the Metroids evolving into new, more powerful forms, the Chozo Statues are nice and big (with one even being destroyed), and there are usually some fun hidden paths to take towards goodies. Sadly, the music isn’t all that impressive, aiming for claustrophobic and ominous but being limited by the Game Boy hardware. However, the biggest disappointment for me was the complete lack of any story; there’s no story text, the title screen is incredibly bland, there’s no introductory cutscene, and the game just…ends, albeit with an impressive large sprite of Samus running alongside the credits that changes depending on how fast you beat the game.

Enemies and Bosses:
In addition to the indigenous Metroid population, SR388 is home to a whole host of alien lifeforms, from bug-like creatures to robotic forces and defences that I have assume were left behind by the Space Pirates. All of these will respawn after you exit an area and, while most can be defeated in one or two shots, others will be almost invulnerable until you acquire new power-ups or continually spawn and chase after you to bash you into spikes or lava. We’ve got floating slug-like enemies, laser turrets, hopping toad-like creatures, tiny bugs that drop from ceilings, weird flying proboscis-type things that drop you towards hazards, bat-like drones, and slug-like fish that slither around platforms. Speaking of which, the bone-armoured Motos resist your blaster and can only be taken out from behind or with the Screw Attack (though they often drop larger health orbs); they’re often found alongside Ramulken, who are similarly armoured but jump about the place, though most enemies can simply be blasted or outright avoided, especially if you’re close to a health point. The only boss-type enemy you’ll encounter that isn’t a Metroid variant is the armadillo-like Arachnus, which disguises itself as a Chozo Sphere and not only spits projectiles at you but completely resists your attacks when rolled up. However, it’s vulnerable to your bombs, so you can lay a bunch of those to take it out and pry the Spring Ball from its remains.

You’ll need plenty of missiles (and patience) to snuff out the various monstrous Metroids.

As in many Metroid games, the titular, jellyfish-like aliens will appear near the end of the game, latching onto you and draining your health and only being vulnerable when frozen by the Ice Beam and peppered with missiles. The forty other Metroids you battle in several mini boss encounters are evolved Metroids that take on an insectile, ant- or wasp-like form that allows them to fly. The most common of these are the “Alpha” variant, which are largely harmless and simply float about the place, meaning the “Gamma” variant is quite the sharp difficulty curve with its more monstrous appearance and lightning bolt appendages. They’re a joy compared to the “Zeta” Metroids, though, which frustratingly badger you from behind, spit fireballs, and can only be damaged when blasted in the face with missiles. Similarly, while the “Omega” Metroids are far slower, they spit electrical sparks that produce splash damage and float about the place, making them a difficult target despite their size. Each of these may also be fought in enclosed arenas, above spikes or lava, within sandstone, or in areas with small platforms or blocks to make avoiding damage even more troublesome. Once you’ve destroyed thirty-nine of them, nine more regular Metroids need to be dispatched before you face off with their monstrous, dragon-like queen. While technically a simple battle, requiring only that you use the Screw Attack to escape damage and blast the queen with missiles (you can even Morph Ball to safety to refill your health and ammo using a convenient tunnel), this is a laborious and dull fight thanks to the restricted area, the aggressiveness of the queen, and the fact that you need to hit her with 100 missiles! Apparently, there’s a way to Morph Ball into her mouth and lay a bunch of bombs in her, but I couldn’t manage that so it was a lot of tedious evading, blasting (missing), and rewinding when I took too much damage.

Power-Ups and Bonuses:
As ever, enemies will drop health orbs and missiles to refuel you but, this time around, you can also find larger, dedicated, and inexhaustible refuel stations to top these up in a pinch, and they’re not always hidden away either. Similarly, you can find Energy and Missile Tanks to expand your health bar and maximum ammo (though these are often hidden away or at the end of winding tunnels). As is often (if not always) the case, Samus mysteriously loses all the upgrades she got in the last game and needs to reacquire them from Chozo Statues hidden throughout SR388. You can upgrade her arm cannon to the Wave Beam (which increases accuracy), the Ice Beam (which temporarily freezes enemies), the Spazer Laser Beam (which fires a triple shot), and the Plasma Beam (the most powerful, which passes through objects and enemies), and will even get the chance to switch back to them at one point (with the Ice Beam being required for the final section). Samus’s jump can be extended with the High Jump Boots before allowing her to reach higher, further areas (through carefully timed taps of A) with the Space Jump, before becoming an offensive move with the iconic Screw Attack. Her Morph Ball can also be upgraded to drop bombs, bounce, and cling to walls, which, while slow, is basically a requirement in some areas.

Additional Features:
Sadly, there’s not much to Metroid II. Like I said, there are Energy and Missile Tanks to find that you could conceivably miss but that’s about it. The only reason you’d replay the game beyond enjoying wandering around a confusing handheld landscape is to try and beat the game in under three hours so you’ll be treated to seeing Samus in a bikini; otherwise, there are no bonus or extra features to speak of here. As ever, you can make liberal use of the Nintendo Switch’s rewind and save state features to make the game a lot easier, though it’s still a challenge at times.

The Summary:
I’m glad I finally played through Metroid II: Return of Samus; when I was a kid, I had the original cartridge for my Game Boy, but I remember getting stuck fairly soon into the game. Low and behold, I hit the same dead end here and quickly became reliant upon an online guide, which is not my preferred way of playing any game. Sadly, it’s basically required here as there’s no map system, which is weird as I definitely think a rudimentary map could’ve been inserted whenever you pause the game. Ultimately, this was a tough one for me; I liked how much the gameplay mechanics of the original were improved, even if only in basic ways, but I don’t think this kind of game works on the Game Boy; Metroid is all about exploration and backtracking and, while Metroid II is a bit more linear than others in the series, it still requires more than the Game Boy is capable of delivering. Yes, the sprite work looks good, but every area is too constricted and repetitive to stand out like they would on even the NES and it gets a bit boring facing the same batch of Metroids over and over again. There is a lot to like here, with some fun encounters and areas and the thrill of upgrading Samus’s suit and abilities, but I think Metroid II was trying to be a little too ambitious for the Game Boy. I’m tempted to see what the Nintendo 3DS remake is like to compare it but, sadly, it’s ridiculously expensive to get hold off so I’m left with this paradoxically technically impressive and technically limited entry in the series that felt too much like a chore to play through for mee to properly enjoy.

My Rating:

Rating: 2 out of 5.

Could Be Better

Are you a fan of Metroid II: Return of Samus? Did you own it on the Game Boy and, if so, how did you cope without a guide or the rewind features? Were you impressed with Samus’s new abilities and combat options? What did you think to the more linear mission and Metroid-hunting gameplay? If you’ve played the Nintendo 3DS remake, how does it compare to the original? Which Metroid game is your favourite? Whatever your thoughts, feel free to leave a comment below or on my social media, and be sure to check out my other Metroid reviews.

Game Corner [Sci-Fanuary]: Metroid (Nintendo Switch)


January sees the celebration of two notable dates in science-fiction history, with January 2 christened “National Science Fiction Day” to coincide with the birth date of the world renowned sci-fi writer Isaac Asimov, and HAL 9000, the sophisticated artificial intelligence of Arthur C. Clarke’s seminal 2001: A Space Odyssey (1968), being created on 12 January.


Released: 14 November 2018
Originally Released: 6 August 1986
Developer: Nintendo
Original Developer: Nintendo R&D1 Intelligent Systems
Also Available For: GameBoy Advance, GameCube, Nintendo Entertainment System (NES), Nintendo Wii, Nintendo Wii U

The Background:
It’s probably fair to say that, compared to Nintendo’s other heavy-hitters like Super Mario and The Legend of Zelda (Various, 1986 to present), the Metroid franchise (Various, 1986 to present) is maybe one of the company’s more under-rated properties. I actually have had very little experience with the series outside of the Super Smash Bros. series (Various, 1999 to 2018) and brief experiences with Metroid II: Return of Samus (Nintendo R&D1, 1991) and Super Metroid (Nintendo R&D1 Intelligent Systems, 1994), though this is mainly due to growing up as a SEGA guy. Metroid came about after Nintendo had seen success with their early titles for their industry-saving console, the NES. Producer Gunpei Yokoi and directors Satoru Okada and Masao Yamamoto collaborated on the title, which was heavily influenced by Alien (Scott, 1979). The developers sought to create an action-orientated game in which power-ups would be not only permanent, but necessary to completion, and with a strong emphasis on non-linear exploration. Metroid ended up being so successful in this regard that it, and Castlevania (Konami, 1986), spawned an entire videogame subgenre dubbed “Metroidvania”. Metroid was well-received upon release; reviews praised its challenging gameplay and it has since been recognised as one of the greatest games ever made. Metroid would spawn a number of sequels and spin-offs, and was ported to many subsequent Nintendo consoles either as an unlockable bonus or as a full-blown remake. Considering how popular and influential the series, and this first game, have become over the years, it’s no surprise that Metroid was included in the Nintendo Switch Online service soon after it launched, which also allowed me the chance to play it for the first time.

The Plot:
Bounty hunter Samus Aran journeys to the planet Zebes to retrieve the parasitic Metroid organisms from the malicious Space Pirates, who plan to replicate the Metroids by exposing them to beta rays and then use them as biological weapons in their mad plot for galactic conquest.

Gameplay:
Metroid is a 2D, sidescrolling, action/platformer with a strong emphasis on run-and-gun action, horizontal and vertical jumps, backtracking, and exploration. Players take on the role of Samus Aran, an armoured bounty hunter with a blaster for an arm, and must explore the planet Zebes, which is comprised of five relatively distinct areas all joined together in a huge game map. Samus begins the game able to shoot directly ahead or above and to jump, and you’ll quickly find that ground-based enemies are beyond your ability to destroy in the early going as Samus can’t shoot downwards or defeat enemies by jumping on them. You’ll also, literally, run face-first into a wall if you give into your gamer’s instinct and head to the right; instead, you should go left from the starting area, where you’ll find your first Chozo Statue and your first power-up, the Morph Ball, which lets you curl up into a ball by pressing down and thus slip into small tunnels and areas. From there, the sheer scope of your mission quickly becomes very daunting; not only do enemies respawn when you leave the immediate area (not the immediate screen, as you can scroll to the left and then go back to the right and your enemies will be back) but you’re missing the most crucial aspect a game like this needs: an onscreen map. I have absolutely no idea how gamers managed to play Metroid without this simple convenience, and have heard that they either drew their own maps or consulted magazines at the time just to get an idea of where the hell you’re meant to go. Since you acquire different upgrades along the way that help you access new areas, and a lot of the areas look very similar save for some different colours and flourishes, you’ll need a good memory and a lot of experimentation to figure out where you’re going and what you’re doing.

Explore a large, interconnected map finding upgrades to reach new areas.

Thankfully, you can at least hold down B or X for a rapid fire function and hold A to jump a little higher, and Samus is relatively durable; her health is measured in numerical units, and her default weapon has unlimited ammo, but you will have to deal with some difficult jumps (made all the more frustrating by some horrendous enemy placement and movements) and knockback damage that can send you dropping into lava or spikes, where your health will whittle away to nothing in no time at all. Metroid gives you just one chance to finish the game; if (well, when, really) you die, the game is over and you’re given a ludicrously long password to continue but, thankfully, the Nintendo Switch version allows for both save states and a rewind function if (again…when) you make a mistake. Health and ammo is dropped by enemies and there are numerous points where you can simply stand there, blasting at constantly respawning enemies to farm health or missiles, but take care as enemies can pounce from behind and more spawn in the moment you pick up your item. Your primary goal in Metroid is to find and defeat two bosses to create a bridge that leads to the final area, Tourian, to confront Mother Brain but, to reach these bosses, you’ll need to find new upgrades to open doors or reach new areas with a higher jump, temporary platforms, or dropping down through destructible blocks. Although areas start out pretty simple, it’s not long before you need to blast at stone blocks to create pathways and platforms (though you need to be careful as the blocks will damage you if you’re standing there when they spawn back in), hopping over tiny rocky platforms floating over lava, and dodging past tougher enemies. Luckily, there are no instant death hazards here, but you can easily get trapped in a dangerous position where enemies and hazards drain your health, or you’re left with such little health that you’ll die soon after anyway. All of this means that Metroid is a pretty touch experience, even with the quality of life features offered by the Nintendo Switch; it doesn’t take much for a simple mistake to lead to disaster, enemies can take quite a few hits before being dispatched, and it’s ridiculously easy to get turned around and completely lost. Luckily, there’s no time limit to worry about, and the game is much more enjoyable with a detailed map to help you out.

Graphics and Sound:
Given that it’s an 8-bit title, Metroid is quite the pixelated adventure; Samus, especially, stands out against all of the game’s dark backgrounds thanks to her orange armour but, as you might expect, doesn’t really have many frames of imagination. She ambles along at a decent pace, even able to shoot and run at the same time, but you’ll notice that the game suffers from severe slowdown when too many enemies or items are onscreen at the same time. Each area of Zebes is accompanied by a funky little tune, with the now-recognisable Metroid theme being the catchiest of them, but you won’t encounter any context or story-related text until the final moments of the game, meaning you’ll need the instruction manual to have any idea of what the hell’s going on.

While areas can be distinctive, there are many screens and sections that are confusingly similar.

Planet Zebes is split into five areas: Brinstar, Kraid’s Lair, Norfair, Ridley’s Lair, and Tourian, with each one connected by stone or mechanical tunnels and lifts that you can descend and ascend. Each area has a different colour scheme to help differentiate them a little (blue, green, grey, purple, etc) but they’re also very similar and feature nearly identical tunnels and screens in each area, meaning that it’s very easy to lose track of where you are. Some areas feature cloud platforms, stone columns, lava, bubble or monstrous platforms and ceilings, while others are long vertical shafts you need to make your way up. These long shafts can be safer spaces where you can restock on your supplies, but you’ll also need to make use of your Bomb to blow up blocks and descend downwards to give your Morph Ball a little boost to enter into seemingly impassable walls. While lava pits are best avoided, some are actually fake and lead to new areas; other times, you’ll need to navigate through tubes, avoiding or blowing up enemies and hoping you don’t end up being boiled alive. Little touches like moss, different types of stones or foreground elements, and minor visuals help to make some screens a little more distinct but it’s very easy to get confused as some screens are literally identical but at different points on the map and you’ll no doubt be driven made by the constant beeping when your health is low.

Enemies and Bosses:
Planet Zebes is host to all manner of alien baddies who will hop, swoop, and fly right at you without a second’s hesitation. While some of the smaller, weaker enemies can be destroyed in one shot, others take multiple shots and even the simplest of enemies can cause a major problem as they respawn constantly from all angles and it’s easy to get hit by one (and knocked into lava…) Spiked Zoomers are the easiest and most frequent enemy, though you’ll probably be farming pick-ups from Zebs quite often as well. Skree drop from the ceiling and will explode if you don’t destroy them quickly, Wavers, Rios, Multivolas, and Sidehoppers bounce around the screen erratically, Dragons spit fireballs at you in an arc from lava, and Rippers travel back and forth and make for useful temporary platforms oney you acquire the Ice Beam. In Tourian, you’ll encounter the titular Metroids, bug-like parasites that float around and home in on you to suck your energy away and which can only be destroyed with your limited supply of missiles.

After besting Ridley and Kraid, you’ll face your toughest challenge yet in Mother Brain’s defenses.

Considering the size of its map, Metroid only features three bosses; I assume you can theoretically tackle Kraid and Ridley in whatever order you like (assuming you take the right paths using a guide) but I fought Ridley first. This stubby little purple dragon hops up and down in the middle of the arena shooting projectiles at you. These also form a kind of protective shield that will block your shots, but can be destroyed with your weapons. Ridley doesn’t really need to do much else as he can absorb a huge amount of punishment before finally exploding, and the same can also be said about Kraid. Kraid is a little more formidable; he meanders back and forth across a platform surrounded by acid and constantly fires missiles and throws bladed projectiles at you, all of which you must dodge and shoot through in order to land the necessary multiple hits on the bulbous monster. There’s also a fake version of Kraid hiding in his lair, which will respawn upon defeat, and only by destroying the real Kraid can you complete the bridge and enter the game’s toughest and most unfair area by far. Mother Brain is a stationary brain inside a glass jar but is protected by an intricate and unrelenting arsenal of wall-mounted lasers, bubble-like projectiles, and barriers which you must blast through with your missiles. As if that isn’t bad enough, you’re given precarious platforms to stand on to shoot at her and must battle over a lava pit, constantly dodging and being pummelled by projectiles as you desperately try to fire your missiles at her through the narrowest of openings. Once she’s defeated, you’re then given about 999 in-game seconds to navigate up one final shaft and get to safety before the whole place explodes, making for a heart-poundingly tense and massively frustrating finale to an already challenging game.

Power-Ups and Bonuses:
Samus will find a wide variety of useful, permanent power-ups to gradually make her journey a little easier. It’s well worth taking the time to explore (or use a map…) to seek these out as you can increase her health by finding Energy Tanks (which will add another block of 99 health units to your total) and increase her maximum supply of missiles up to 255 with Missile Tanks. Since you need missiles to open doors and deal the maximum amount of damage to enemies, and will find yourself absolutely crucified in Tourian without these, these are both well worth seeking out. As mentioned, you’ll need the Morph Ball to progress past the first few screens, and soon acquire the Bomb to use in this form to destroy ground-based enemies or propel Samus into tunnels. The Long Beam will extend the range of Samus’s default weapon, which can also be upgraded to the Ice Beam (which, naturally, freezes enemies and turns them into temporary platforms but be warned as a subsequent shot will unfreeze them) and, eventually, the Wave Beam (which increases the firing range of your main attack). Samus can also find the High Jump Boots to extend her vertical jump, the Screw Attack to damage enemies with a spinning jump attack, and the Varia Suit to reduce the amount of damage she takes from enemies and hazards.

Additional Features:
As mentioned, the Nintendo Switch version allows for up to three save states and includes a rewind feature, both of which are incredibly useful for when you land in a sticky situation or want to take a break. If you fancy jumping ahead, you can also play an “SP” version of the game that bestows you with all the available equipment and upgrades and drops you right outside of the battle with Ridley. Unlike many videogames of its era, Metroid doesn’t feature a high score system but it does include multiple endings; the faster you finish the game, the more of Samus’s true form will be revealed in the ending. Additionally, after finishing the game, you’ll automatically start over in a new game with all of your power-ups (though without the additional Energy and Missile Tanks you acquired) or even garbed in a skin-tight outfit rather than armour.

The Summary:
I may not have ever properly played a Metroid game before, but I was fully aware of the franchise and its emphasis on backtracking and exploration. Consequently, I was a little intimidated to play through Metroid, especially as my limited experience with the series had left me struggling to find my way around. Although it is a real problem that Metroid doesn’t feature any kind of map (which is weird, as The Legend of Zelda (Nintendo R&D4, 1986) released earlier that same year and featured a rudimentary map system), it’s nothing you can’t solve with a quick Google search, meaning your only remaining hurdle is the challenge offered by the gameplay. While the controls are tight enough, Samus is a bit slippery and floaty at times, and her inability to fire in all directions makes things problematic, but nowhere near as annoying as the respawning, erratic enemies and tricky platforming sections. The various upgrades definitely help with this, and once you have a bit more health and a more powerful main attack and have gotten used to the repeating rooms and enemies, the game becomes a lot of fun. It’s definitely rough around the edges, though; when playing retro games on modern consoles, I always try to imagine how gamers coped back in the day and, in the case of Metroid, I can only assume they got through it with a great deal of patience and trial and error. Still, this was a decent experience and I’m glad that I finally played through it; it’s maybe a little too challenging and confusing at times for just a casual playthrough, though, so I’m interested to see if I find the later releases more appealing with their improved graphics and controls.

My Rating:

Rating: 3 out of 5.

Pretty Good

Have you ever played Metroid? If so, what did you think to it and how do you think it holds up today, both against its subsequent titles and other games from that era? Did you struggle to navigate the inter-connected game map? Which of the bosses and upgrades was your favorite? Have you ever finished the game without using modern enhancements, and what’s the best ending you’ve achieved? Which Metroid game is your favourite? Whatever your thoughts, feel free to leave a comment below or leave a reply on my social media, and be sure to check out my other Metroid reviews.

Game Corner [DK Day]: Donkey Kong Country (Nintendo Switch)


In 1981, Shigeru Miyamoto and his team at Nintendo R&D1 created Donkey Kong, an arcade title that was not only one of the earliest examples of the platform genre but also introduced gamers everywhere to two of Nintendo’s most recognisable characters: Mario and Donkey Kong. Mario, of course, shot to super stardom but today’s a day to celebrate everyone’s favourite King Kong knock-off and to say: Happy birthday, Donkey Kong!


Released: 15 July 2020
Originally Released: 18 November 1994
Developer: Nintendo
Original Developer: Rare
Also Available For: Game Boy Advance, Game Boy Color, Nintendo 3DS, Nintendo Wii, Nintendo Wii U, Super Nintendo Entertainment System (SNES), Super Nintendo Entertainment System (SNES), SNES Classic Edition

The Background:
After establishing themselves in the United States with the financial and critical success of Donkey Kong (Nintendo R&D1, 1981), Nintendo then captured the home console market with the Nintendo Entertainment System (NES) and their moustachioed mascot, Super Mario. Although Donkey Kong wasn’t completely forgotten during this time, featuring in sequels and spin-offs during the NES’s lifecycle, it was legendary British developers Rare who breathed new life into the cantankerous ape with their Donkey Kong Country series (Rare, 1994 to 1996) that pushed the SNES hardware to its limits with their revolutionary pre-rendered graphics. Rare impressed Nintendo back in the day with their ability to reverse-engineering the NES and publishing over sixty titles for the console, and by utilising Nintendo 64 workstations to produce SNES titles. Wishing to compete with SEGA’s Aladdin (Virgin Games USA, 1993), and seeing the long-dormant Donkey Kong franchise as low risk, Nintendo handed the character to Rare and they assembled a team of twelve developers (their biggest yet) to develop the title. Inspired by the level design of Super Mario Bros. 3 (Nintendo R&D4, 1988), Rare sought to make the game’s levels short bursts of challenging fun that tailoured to a player’s increasing skill level. Kevin Bayliss redesigned Donkey Kong to be more muscular and cartoonish to aid with animation and Rare were given license to completely redesign Donkey Kong Jr. into a brand-new character, Diddy Kong, to act as DK’s physical opposite. Donkey Kong Country was one of the first videogames to utilise pre-rendered 3D graphics; their computers ran night and day to decompile the 3D models into traditional 2D sprites and, although physically taxing for the team, the result was the third-bestselling game on the SNES. Reviews were overwhelmingly positive, with the game seen as a significant benchmark in the presentation of videogames; the visuals and soundtrack have stood the test of time and the game is still heralded as a classic. Donkey Kong Country re-established the popularity of the brand was followed by a couple of equally well-regarded sequels but has only been sporadically released on other hardware due to legal issues. Thankfully, it was later included in the SNES Classic Edition and to Nintendo Switch Online subscribers in 2020 and developers Retro Studios made the franchise relevant again with their 2.5D rebranding of this influential title.

The Plot:
When the greedy King K. Rool steals his beloved banana hoard, Donkey Kong and his nephew, Diddy Kong, set out to recover them from the king’s Kremling army.

Gameplay:
Donkey Kong Country is a 2D, sidescrolling action/platformer that, thanks to the benefit of its pre-rendered sprites and backgrounds, takes on a bit of a 2.5D aesthetic at times. Players take control of the titular ape, now reimagined as a tie-wearing, banana-obsessed scamp more likely to bop on a lizard’s head than toss a barrel at a plumber, but the game does support two players and offers two characters to control. You can go it alone, tagging between the brutish Donkey Kong and his nimbler nephew Diddy Kong with the A button, or play with a friend in simultaneous co-op not unlike Sonic the Hedgehog 2 (SEGA Technical Institute, 1992), or take it in turns to clear levels in a competitive contest mode. Both Donkey and Diddy Kong share many of the same abilities but are physically distinct in a number of ways: B allows your Kong to jump, Y sees Donkey roll into enemies and Diddy cartwheel into them and also allows both Kongs to pick up and throw a variety of barrels. Donkey Kong is slower, a far larger target, and has a bit of a stunted jump compared to his more agile nephew, though he can slap the ground by pressing down and Y, but you’ll probably want to switch to Diddy to make getting past larger obstacles a little easier or have more control when making jumps. Both Kongs can also squeeze through small gaps and act as the game’s health system; if you have both Kongs onscreen, a hit from an enemy or obstacle won’t kill you, but it will send your partner running off, though you can call them back by finding and tossing one of the many DK barrels scattered across the game’s environments.

The Kongs can use their allies, jumping abilities, and barrels to progress through levels.

For the most part, Donkey Kong Country has you hopping across gaps (often with the aid of swinging ropes), bopping on enemies and collecting bananas. It’s not long before you’re jumping into barrels to clear greater distances and progress forwards; some of these rotate or move side to side and up and down, some automatically fire you and some are activated by a button press, with timing being key to avoiding a fall down a bottomless pit or damage from a spiky Zinger. Platforming quickly becomes trickier as the game progresses, with gaps becoming longer, requiring a roll or cartwheel into a jump for a longer jump, slanted platforms and greater hazards all testing your reaction times. Some stages require you to jump at special Stop & Go barrels to briefly light up the area or deactivate Rockkrocs so you can progress, others are set underwater and see you swimming about with no means of defending yourself unless you find one of the Kongs’ many animal friends, Enguarde. One of the most prominent stage designs are those set in the mines where you’re stuck in a runaway mine cart and must make split second decisions to jump over gaps, hazards, and from mine cart to mine cart to progress, which can be difficult with the low lighting and oncoming enemies. Level hazards soon play their part in the platforming as well, with snowy stages robbing you of your traction, Gnawties trying to crush you in giant wooden wheels, and flaming oil drums not only spitting out an endless supply of baddies but also charbroiling you when you hop to them as temporary platforms. As if falling and moving platforms didn’t make things difficult enough, there’s also a time where you’re forced to jump from a moving conveyor belt to grab fuel drums; you can’t afford to miss a single one or else your platform will fall and won’t come back so you need to make quick decisions about when to jump.

Use lighting, runaway mine carts, and animal buddies to progress and rack up those extra lives.

The game features forty levels, all accessed via a word map; between levels, you’ll automatically progress onwards into new areas, including jungles, rainforests, temples, mines, and caverns, and interact with the Kongs’ allies. Funky Kong allows you to fast travel across the island once you’ve visited at least two areas, Cranky Kong offers fourth-wall breaking advice that comes across more like bitter criticism, and Candy Kong allows you to save your progress (though you can obviously create a save state at any time using the Nintendo Switch’s menu options). The Kongs are also aided by allies within levels as well; they can ride Rambi, Enguarde, Expresso, and Winky to bash through enemies, charge through water, temporarily fly, and spring up even higher, respectively, while Squawks will light your way with a useful lantern. These buddies also act as another hit point and, if you’re hit or jump off them, you can often hop back onto them as they run around the environment, and you can use their abilities to find secret areas in each level. These lead to hordes of more bananas, balloons, or K-O-N-G letters. Collecting a hundred bananas, all four K-O-N-G letters, or a balloon awards an extra life and you’ll be stockpiling a fair amount of these without even trying, but you’ll also find golden buddy statues that will take you to bonus games where you control that animal and must collect as many bananas as possible within a time limit. This all adds to your completion percentage and injects a little gameplay variety to the title, but also encourages exploration as sometimes bananas floating just out of the way indicate a hidden barrel or tossing an explosive barrel at a wall will open up a new bonus area.

Graphics and Sound:  
If I’m being brutally honest, I never really thought too much of Donkey Kong Country’s visual presentation; even as a kid, seeing these pre-rendered 3D models pixelated down to 2D sprites looked a little messy and not quite as crisp as other 2D platformers of the time. However, having said that, I rarely had the chance to be hands-on with the game as a kid, or in the years since, so this is my first time actually playing it from start to finish and the visuals work really well when in motion. Donkey and Diddy Kong are full of life and personality, sporting idle animations and having distinctive movements and quirks when performing the same or similar moves. Their enemies are equally charming, sporting that exaggerated anthropomorphic quirkiness that Rare did so well back in the day, though their animations are noticeably less varied than the two protagonists. One thing I did enjoy was how clean the screen is; the heads-up display is absent until it’s actually required (appearing when you grab pick-ups or earn or lose a life), allowing you to really appreciate the variety of visuals on offer here. While you’re not going to see anything you’ve not seen in a hundred other platformers from Donkey Kong Country’s environments, the game presents them in a wholly unique way with its pre-rendered aesthetic. You’ll be swinging through jungles, jump to broken mine cart tracks in dank mines, and hopping to conveyer belts in a rusted factory all while some absolutely jamming tunes play throughout the game.

The pre-rendered graphics, while a little fuzzy, definitely add to the game’s visual appeal.

There are some opportunities for exploration and experimentation (try charging walls when on Rambi or jumping to bananas up above on Winky) and the game does a fairly decent job of recycling its level tropes with new hazards and such, like having Croctopi chase after you in later underwater sections rather than just spinning around or having you bounce on tyres on moving platforms to cross gaps and gain the extra height needed to avoiding enemies and obstacles. Even better, the game’s locations are bolstered by some environment effects; day turns to night, jungles are battered by thunder, lightning and rain, the frozen mountains become swamped by blizzards, and the mines and caves are seeped in low lighting. Often, there’s no lighting at all, with your sprites being the only things being visible onscreen until you free Squawks or activate a light-up barrel, and the use of lighting and foreground objects really helps to add to the tension when trying to avoid slipping off the edge of a platform and jump to another. Although the game is light on cutscenes, they story is effectively told using dialogue strings between the Kongs and their allies, though the focus here is very much on dropping you into the next action-orientated area to take on an ever-escalating challenge rather than trying to overcomplicate the simple plot. All you need to know is that the banana hoard has been stolen and Cranky is better than you.

Enemies and Bosses:
Donkey and Diddy Kong will face a number of King K. Rool’s most disposable pawns in their quest, from regular Kremlings like the Kritters to their more jumper variants, to voracious little crocodiles, sharks, and slippery snakes. Wasp-like Zingers will often be found hovering around in mid-air, usually surrounding a platform or a barrel you need to blast to; larger enemies will prove difficult for Diddy to take out without a barrel so you might want to switch to Donkey Kong if you’re having trouble, and orangutans will incessantly throw barrels at you in a fun call-back to the original Donkey Kong. Spiked wheels, hungry fish, and vultures will also cause a headache, especially the latter as you’re often asked to fire your Kong/s at a flock of vultures to bounce off them and reach out of the way platforms, which can be tricky to do as if you hold the directional pad for too long you could overshoot and if you don’t hold it long enough then you’ll undershoot.

While Queen B. stands out, the repeats of Gnawty and Necky were disappointing to see.

Each area of Donkey Kong Country houses a boss battle; victory against one of King K. Rool’s elite earns the Kongs a large, Nintendo-branded banana and allows them to progress onwards to the next area but, while you’ll fight seven bosses in the game, only three of them are unique and the others are, disappointingly, reskins and repeats of each other. The first boss you’ll take on is Very Gnawty, a giant beaver who hops about in a cavern full of the Kongs’ bananas; with each hit he takes, his jumps get a little faster, but it doesn’t take much at all to put him down. It’s thus disappointing when this same boss is repeated for the fourth battle, even though Really Gnawty jumps much higher and is noticeably much more aggressive in his attack patterns. The second boss you’ll fight is the Master Necky, a huge vulture who pops his head in from the left or right side of the screen to spit bouncy coconuts at you; thankfully, there’s a tyre conveniently placed in the centre of the boss room that you can use to avoid his projectiles and hop onto his head. This boss is recycled for the penultimate boss battle as well; again, Master Necky Snr. might have a different colour palette and be a bit more aggressive, but he’s essentially the same boss battle, which I can’t help but be a little let down by considering how good the game is otherwise. Thankfully, Queen B. mixes things up a little bit; this gigantic Zinger flies around the arena in a specific pattern, immune to all attacks except a barrel to the face. However, she becomes temporarily invulnerable and hyper aggressive after each hit, so you’ll need to position yourself in the right place to avoid her erratic swoops.

While Dumb Dum destroys itself, King K. Rool tricks you into thinking you’ve won…

Dumb Drum also stands out as a unique boss battle; a giant, sentient drum, this guy tries to crush you from above and spits out a number of enemies into the area that you’ll need to take out. You can’t damage Dumb Drum no matter how hard you try; you simply have to outlast it and it’ll take itself out from ramming the ground once too often. Finally, you’ll confront the Kongs’ mortal enemy, King K. Rool, onboard his pirate ship, which stands as the final area of the game. King K. Rool has two methods of attack; first, he’ll run from one side of the screen to the other and try to charge into you, then he stands on one side and tosses his crown at you as a projectile. When he does this, it leaves him vulnerable to attack so you can jump on his head and, after a few hits, he’ll fold like paper and the credits will roll. Well, the “kredits”, at least, and it turns out that this is a fake-out as King K. Rool pops back up for another round. This time, his charge is much faster, and he also causes bouncing cannonballs to rain down from above, which can be difficult to avoid unless you make use of Diddy’s smaller hit box. Otherwise, your strategy remains the same; jump over him, avoid his projectiles and hazards, and hop on his head until he’s done in for good and you get to enjoy the real credits sequence (and Cranky’s embittered criticism of your performance).

Power-Ups and Bonuses:
Your primary power-up in Donkey Kong Country will be those DK barrels; you’ll want to break these open every chance you get to have both Kongs at your disposal and stave off a death from your next hit but be sure to not accidentally break them if you don’t need them. Star-branded barrels acts as checkpoints and a number of other barrels (wooden, metal, and TNT ones) can be thrown as projectiles to take out one or a whole group of baddies in single throw. Otherwise, you’ll want to collect every banana you see and hunt down those K-O-N-G letters and red balloons to rack up some extra lives and keep an eye out for golden buddy statues or hidden rooms where you can earn more of them to access bonus stages. Finally, of course, there are the buddies themselves, with Enguarde being especially useful to making navigating those maze-like coral reefs that much easier.

Additional Features:
The ending you get (or, at least, the feedback you get from Cranky Kong) is directly tied to how many of the game’s secrets you uncover; this includes finding all of the K-O-N-G letters, hidden rooms, and bonus areas, all of which adds to the completion percentage seen on your save file. However, while you’re free to revisit and replay every level in the game and try to find every secret, it’s not actually necessary and you don’t get anything for it except for bragging rights. Thankfully, the Nintendo Switch Online version of the game allows you to make use of the save state and rewind features to make playing this game a breeze; now, if you make a mistake, you can just rewind or reload your game and try again, which is a God send in some of the game’s trickier sections.

The Summary:
It’s always exciting for me, a childhood SEGA boy, to finally play classic Nintendo titles. I’ve always had a fascination with the SNES and love to get my hands on the system’s most famous games whenever I can, and a full playthrough of Donkey Kong Country has been a long time coming for me. Despite my apprehension concerning the graphical style, the game holds up really well; environments pop through some fun and unexpected weather and lighting effects and Donkey and Diddy Kong never fail to impress when they’re onscreen, controlling and animating beautifully. Enemy and hazard placement becomes increasingly challenging, but not impossible, and I liked how many of the levels were short, sharp bursts of action that tested your reaction times. I can’t imagine playing the game on the original hardware without the aid of save states or the rewind feature, however, as I think it would’ve become quite frustrating quite quickly even though the game dishes out the extra lives like they’re going out of business. It’s a little disappointing that the game didn’t do more with its levels and bosses; repeating boss battles is always as much of a let down for me as a boss gauntlet, but I enjoyed the addition of ridable animal buddies, the hidden secrets and bonus rooms, and that trademark Rare humour that pushes you to find everything. In the end, I can see why Donkey Kong Country is so beloved; I’ve definitely played better 2D platformers but there’s so much more happening here than the unique visual style and it’s easily one of the best, basic platforming adventures of the 16-bit era.

My Rating:

Rating: 4 out of 5.

Great Stuff

What did you think to Donkey Kong Country? Did you own the game for the SNES as a kid and, if so, were you surprised by Donkey Kong’s dramatic visual overhaul? Did you find all of the game’s secrets and bonus rooms? Which of the animal buddies was your favourite to control and did you favour Donkey or Diddy Kong when playing? Were you disappointed that the boss battles weren’t more diverse and what did you think to the fake-out ending? Which of the Donkey Kong Country games is your favourite and why? How are you celebrating Donkey Kong’s anniversary this year? Whatever your thoughts on Donkey Kong Country, leave them below or share them on my social media.

Game Corner [Mario Month]: New Super Mario Bros. U Deluxe (Nintendo Switch)


So, for no better reason than “Mar.10” resembling Mario’s name, March 10th is widely regarded as being “Mario Day”, a day to celebrate Nintendo’s portly plumber, an overalls-wearing mascot who literally changed the videogame industry forever and shaped the home console market of the nineties.


Released: 11 January 2019
Originally Released: 18 November 2012
Developer: Nintendo EPD
Original Developer: Nintendo EAD
Also Available For: Nintendo Wii U (Standard Edition)

The Background:
After the videogame industry crumbled following an influx of numerous overpriced consoles and mediocre titles, Nintendo pretty much single-handedly saved the industry with the runaway success of Super Mario Bros. (Nintendo EAD, 1985) and, following the “Console Wars” of the mid-nineties, Nintendo and their famous mascot continued to be an innovative and reliable staple of the videogame industry. After a successful venture into the third dimension resulted in some of Mario’s most beloved titles, Nintendo decided to return Mario to his roots with the release of New Super Mario Bros. (Nintendo EAD, 2006) on the Nintendo DS, a 2.5D title that spruced up the platformer’s classic sidescrolling gameplay with new features and modes and which proved to be a hit. Two follow-ups soon followed, one for the Nintendo Wii and one for the 3DS, with both receiving high praise for their multiplayer functionality and addictive gameplay mechanics, and the development of a further follow-up for Nintendo’s unfortunate Wii U console soon began. The first Super Mario title to feature high-definition graphics, New Super Mario Bros. U was designed specifically with the Wii U GamePad in mind and emphasised single-player vertical exploration. The game was highly praised and sold over 4.8 million units; as part of the 2013 to 2014 “Year of Luigi” campaign, an expansion pack was created as both a separate physical release and downloadable content which featured shorter, tougher levels and focused on Luigi’s unique playstyle. After Nintendo bounced back in the home console market with the Nintendo Switch and achieved great success with Super Mario Odyssey (Nintendo EPD, 2017), this enhanced port of the game was developed for the console; containing all previously released material, and some additional features, New Super Mario Bros. U Deluxe was also met with positive reviews and become one of the best-selling games for the Switch.

The Plot:
Bowser, King of the Koopas, and his children (Bowser Jr. and the Koopalings) invade Princess Peach’s castle and hold her hostage, flinging Mario, Luigi, and two Toads far away. The portly plumber and his friends then resolve to travel across the land, defeating Bowser’s minions along the way, in order to rescue Peach and restore her castle to normal.

Gameplay:
Like the classic Super Mario games of the bygone 8- and 16-bit days, New Super Mario Bros. U Deluxe is a sidescrolling platformer but, in the style of the New Super Mario Bros. subseries, it’s a 2.5D title. The game allows up to four players to team up and travel across eight colourful, whimsical Worlds, hopping across platforms and on enemy’s heads in their quest to defeat Bowser’s minions. Each of the five playable characters controls a little differently and has slightly different power-ups and mechanics tied to them, meaning that the game’s difficulty is directly tied to which character you pick (Mario is an all-rounder, for example, while Luigi has poor traction, and Nabbit cannot be harmed by any enemies, making him the default “Very Easy” mode of the game). Each character has their own set of lives, but shares any collectibles they find along the way, and you can easily revisit and replay previous Worlds with whichever character you like from the overworld screen and the submenu. As is also the style of these kinds of Super Mario games, the controls are as simple as you could want: by default, the A and B buttons allow you to jump and you can hold the X and Y buttons to run, though you can swap these two sets of controls around if you like. Jumping three times in succession, especially while running, will allow you to pull off a triple jump to reach higher areas. When jumping, you can kick off walls to wall jump higher or potentially save yourself from falling down a pit (though you’re just as likely to accidentally wall jump off a platform or block and die if you’re not careful), press down to perform a block-smashing butt stomp, or press A, B, L, or R to perform a little twirl for a bit of extra height. You can also climb up and down ladders, press down when on a slope to slide down and kick any enemies out of your path, and tap the jump buttons when underwater to swim along. X and Y can also be used to hold certain items or characters, such as a Koopa shell or a Baby Yoshi, and you can release the button to throw these at enemies or to collect out of reach Coins.

Play alongside your friends with five different playable characters, each with slightly different mechanics.

Jumping, however, remains your primary method of attacking enemies; with well-timed jumps, you can clear gaps and entire sections of the game using the triple jump and gaining extra height by bouncing off an enemy’s head, but it pays to not be too complacent as some enemies either can’t be defeated by jumping on them or will hurt you if you try. Similarly, other enemies can only be dispatched by jumping at the blocks or platforms beneath them to either knock them off or tip them over, and you’ll also want to make use of the game’s many different power-ups and suits to help take out enemies faster. By default, each character begins the game with five lives and in their base form; this means that one hit will kill you, so be sure to search out a Super Mushroom or similar power-up as soon as possible to gain an extra hit point. When playing as Toadette, the Super Crown will transform her into “Peachette”, allowing her to float and double jump just like Princess Peach is known to do, while Nabbit doesn’t actually power-up from any of the items (but is immune to damage to compensate). When playing, you’re battling against a time limit, which alerts you when it counts down to the last 100 seconds and speeds the game’s music up accordingly to help push you forward. As if this, and the high number of hazards and projectiles you’ll eventually face, wasn’t bad enough, you also have to keep an eye out for the bevy of bottomless pits, which eventually expand to cover the majority of the ground in later Worlds. Handy checkpoints placed within Worlds will power you up and allow for a respawn point, but you still get kicked out of the World and have to manually re-enter, in your base form, to try again. Fail enough times and a “Super Guide” block will appear to help show you how to succeed, but the World will be flagged as incomplete until you finally reach that flagpole unassisted by this mechanic. Your main objective, unsurprisingly, is to head to the right of the screen, jumping over pits, hopping to platforms and blocks, and taking out any enemies in your way to reach the flagpole. Along the way, you’ll contend with such hazards as fog-spewing clouds, rising and falling platforms, swaying mushrooms, giant toppling heads, cannons, temporary platforms, and plumes of both water and sand.

There’s plenty of variety, and challenge, awaiting in the game’s different Worlds.

While gameplay is, by the nature of its presentation, quite linear, there are opportunities for exploration; paths are hidden behind the background, leading to Coins and blocks, you can spawn vines to reach upper platforms, and you can enter pipes to explore underground areas, again usually for Coins or to find one of the three Star Coins hidden in each World. Sometimes, you can wall jump beyond the boundaries of the screen to take shortcuts or reach Secret Exits, which create new paths (or bypass Worlds entirely) on the overworld map so you can reach the Koopaling’s castle for that World. Some Worlds feature autoscrolling sections, either horizontally or vertically, that force you to stay on the move to keep from being crushed or boiled by rising lava, and, after clearing World 2, the game will ask you to choose a path to tackle either World 3 or World 4 (though you can, and absolutely should, backtrack to play both of these Worlds regardless). These Worlds add a new wrinkle to the overworld map in the form of the haunted locations (usually mansions, but there’s a shipwreck, too) infested with Boos. Boos will only advance towards you when your back is turned, and these stages tend to feature confusing door mazes, temporary platforms formed by hitting P Switches to turn Coins into blocks, and light-based mechanics where you need to carry a Baby Yoshi to light the way and scare off Boos. Other Worlds favour tilting platforms, slippery ground, an abundance of pits and crushing hazards, and you’ll even find yourself jumping to and swimming in bubbles when progressing vertically through World 7. You’ll also have to watch out for bigger enemy variants, instant-death lava and poison, and weighted platforms that either require you to jump to keep them moving or will stop if too many enemies and items drift onto them. There’s a lot of fun, colourful variety on offer and your platforming and jumping skills will be progressively put to the test as you clear each World, with more and more hazards and gimmicks being thrown in your path; thankfully, the controls are tight and responsive enough to manage these, but it’s true that the jumping can tend to be a bit spotty at times and you can easily find yourself slipping off a platform or falling to your death when you didn’t mean to.

Graphics and Sound:
I’d played New Super Mario Bros. before, so I was well aware of how great Mario and his Worlds look in 2.5D but New Super Mario Bros. U Deluxe is absolutely gorgeous to behold; Mario, Luigi, and their friends have never looked better in 2.5D thanks to the Switch’s high-definition graphics, with each of them sporting cute idle animations and victory poses when finishing a World. This emphasis on adorable character models and animations even carries through to the enemies, who still hop and dance to the jaunty themes playing in the Worlds to not only give you an opening to attack but also to allow you to better time your jumps or anticipate enemy movements. As is often the case, there’s no spoken dialogue in the game and the characters largely rely on gibberish and pantomime and simple cries of “Yahoo!” and “Oh, no!” to make their point, which is fine by me, though you will encounter non-playable Toads who will offer encouragement, power-ups, and challenge you to mini games in their houses. There can often be a lot happening on the screen at any one time, between the enemies, moving platforms, obscured paths, and projectiles, but everything pops out and has a discernible pattern and it’s simply a matter of skill and timing to overcome the obstacles in your way.

The game shines in its visuals, making for probably the best looking 2.5D Super Mario title yet.

Similarly, the Worlds on offer here are just as vibrant and visually interesting as the character models; there’s a lot to see in the background and foreground, often to tease you into taking a risk on a hidden path or entice you into trying a different power-up to make a tricky jump. While the Worlds are pretty standard Super Mario fare, ranging from colourful fields to snowy landscapes and lava-ridden castles, there’s also some fun throwbacks to previous Mario games, like Soda Jungle (which features retracting vines, rotating logs over poisonous water, and enlarged enemies and blocks), and the haunted houses. You’ll also traverse a desert full of quicksand, shifting sand, and statues to jump from, a beach-front and coral reef where jets of water blast you along underwater, tricky jumps to chains and up and across the rocky landscape of the mines, and a whimsical but taxing trip through the clouds. Every World also features two castles, which adopt an ominous stone-and-magma aesthetic and feature crushing blocks, buzzsaws, and rotating platforms, and you’ll also have to endure a cannonball and Bob-omb filled obstacle course when whisked onto Bowser’s battleship.

Enemies and Bosses:
The vast majority of the enemies you’ll encounter in New Super Mario Bros. U Deluxe are returning baddies from previous other Super Mario videogames, such as the mushroom-like Goombas, green and red Koopas, Boos, Thwomps, Chain Chomps, Bullet and Banzai Bills (which are frequently invulnerable), Piranha Plants, and Monty Moles. Most of these are pretty harmless, wandering back and forth or in easily recognisable patterns, but they quickly fill up the screen in larger numbers and some of the more annoying enemies, like the Hammer Bros (and their fire, ice, and boomerang variants) and Dry Bones, can cause headaches with their arching projectiles and ability to respawn, respectively. Naturally, there are also some new enemies in the game as well, such as the squirrel-like Waddlewings (which often carry Super Acorns for your consumption), walrus-like Flipruses, the screen-filling Dragoneel, homing Targeting Teds, and the mischievous Nabbit, who steals Toad’s items and must be captured in a race against the clock in previous Worlds.

A number of mini bosses will constantly return to oppose you, changing size and tactics each time.

In addition to the seven bosses you’ll encounter, you’ll also have to contend with a couple of mini bosses along the way. Not only will your platforming skills be tested if you choose to go back and capture Nabbit (and you really should, if only to get him off the overworld and get his items), but six of the Worlds include a tower guarded by Boom Boom, a muscular Koopa who is afforded new abilities by Kamek as the game progresses. Primarily, Boom Boom will attack by flailing his pythons at you, either in a charge or a jumping, spinning attack, but he also grows in size and sprouts wings to dive down at you. While the arena you battle him in is often altered by cosmetic changes befitting the World (such as water and lava), the area you fight him in is never really a hazard and it’s actually beneficial to use the walls to get better height and bop him on the head three times, which is usually easier to do than with the Koopalings since Boom Boom doesn’t attack while protected by his shell. In World 6, the tower is defended by a Sumo Bro who is enlarged by Kamek; this hulking brute can’t be attacked from above and causes electrical shockwaves by stomping his feet, and can stun you with his jumps. To defeat him, you need to jump into the platform he’s standing on while beneath him to tip him onto his shell and then jump on his exposed belly three times to put him away. World 7’s tower is guarded by Kamek himself, who magically spawns in blocks containing enemies. You can hop around on these to try and jump on his head when he teleports in, but he’ll cause them to rain down and hurt you, or release their captives, and he also flings magical bolts at you that cause the ground to become temporarily unstable. Sticking to a set pattern and staying off the floor is your best chance at winning this battle, and it’s not too difficult to jump on his head when he teleports in nearby. You’ll also battle Bowser Jr. one-on-one twice in the game, once after clearing World 5 and then again after World 7. You need to traverse the cannons of Bowser’s battleship to reach him, and both battles are a little different. In the first, you’re underwater and must lure the Targeting Teds into his craft while avoiding the Bullet Bills that fire horizontally and vertically through the arena. The second battle is much tougher; you’re on a precarious metal-blocked platform and Bowser Jr. floats just out of reach, occasionally tossing Bob-ombs at you. His craft sports boxing gloves which can wreck and temporarily destroy the ground beneath you, or extend to shove you right off edge, but you can quickly hop on his head as he passes by or run up them to bonk him if you’re fast enough. Bowser Jr. also causes trouble in World 8, ramming into you, blocks, and platforms to try and hurt, kill, and force you into lava and also joins his father for the finale.

The Koopaling’s each guard a castle filled with death traps and have some tricks of their own to slow you down.

Before you can reach that climatic battle, however, you have to contend with the seven Koopalings, each of whom awaits after clearing a castle filled with death traps and hazards, and each of them will erratically spin at you in their spiked shells after you land a hit, which can be tricky to avoid. First up is Lemmy Koopa, who tosses progressively larger bombs at you, though you can hop onto these for an extra bit of hang time. Morton Koopa Jr. awaits in World 2 and knocks segments of a giant, caterpillar-like Pokey at you from across the arena that you need to jump over or duck under. This battle’s made a little tougher thanks to Morton shaking the ground with his stomps and the two gaping holes to a bottomless pit at either side of the platform, though you can use the walls to help avoid the Pokey projectiles. After this, you have a choice of your next destination; I chose to visit World 3 first so I battled Larry Koopa next; this pint-sized sucker fires bolts from his magic wand and can be tricky to hit thanks to the three water jets that burst up from the arena floor. The arena is similarly against you when you visit World 4, as Wendy Koopa skates about on the slippery ice and causes icicles to drop from the ceiling. The only way to reach Iggy Koopa is to find the Secret Exit in World 5; this leads you to one of the more troublesome boss battles as Iggy constantly runs away through the pipes, appearing on the floor and the ceiling, and fires bolts at you that can also cause up to two large Magmaarghs to pop up. His shell attack is also a pain as he’ll reverse direction, which can catch you off-guard and result in a hit, but once you figure out which pipe leads him to where you can anticipate his movements and hit him accordingly. Roy Koopa is a pretty simple and enjoyable fight; he fires Bullet Bills from a bazooka and hops up onto the stream of floating platforms to evade you, which means there’s a fall hazard in play here, but I found this the easiest boss of them all as you can just hop on his head, take the high ground, and instantly repeat without him getting off another shot. Finally, there’s Ludwig von Koopa, who hovers at the top of the arena, duplicating himself and filling the screen with diagonal projectiles that can be tough to avoid. Naturally, you need to hop on the head of the real Ludwig to score a hit, and the projectiles only increase with each successful blow.

After making it through the lava-filled final World, you’ll have a face off against a gigantic version of Bowser.

Finally, after beating all the other Worlds and crashing Bower’s airship, you’ll dispel the dark cloud surrounding Peach’s Castle and tackle the final, most aggravating World of the game. The once lush and verdant castle has been transformed into a stony, lava-filled hellhole; flaming meteors fall from the sky, lava rises and falls beneath your feet, and you must not only cross the sea of burning magma on a raft but also watch out for Bowser Jr.’s attempts to crush and boil you alive. Succeed, and you’ll reach the final battle, which begins familiarly enough with you ducking under and jumping over fireballs spat by the Koopa King himself. When faced with Bowser, you’ll need to jump over or duck under his fireballs and quickly run underneath him to hit the switch and cause the bridge beneath him to collapse, but this is only the appetiser to the game’s true finale. Enlarged by Kamek’s magic and joined by Bowser Jr., Bowser battles you to the end on the castle rooftop, again spitting high and low fireballs and jumping about the place. To defeat him, you need to dodge Bowser Jr.’s Bob-ombs and hop on his head after avoiding his craft slam; you can then commandeer the Junior Clown Car with B, tapping B to hover over Bowser’s head, and then hit R to crash onto him. Like his kids, Bowser becomes a spinning dervish after he’s hurt and you’ll need to run under his shell when you get the chance to avoid being hurt or killed, and then dodge the rain of fireballs he spits into the air to repeat the same cycle over, dodging more Bob-ombs and fireballs as you go but, as long as you have at least a Super Mushroom and are mindful of your jumps and hit box, this shouldn’t be too difficult to do.

Power-Ups and Bonuses:
Many of Mario’s most famous power-ups are here for the taking, including the Super Mushroom, 1-Up Mushroom (with extra lives also awarded with every 100 Coins you collect), Super Stars, and Fire and Ice Flowers. Super Stars are rare in the Worlds themselves but endlessly helpful as they make you invincible for a short time (and speed you up and add a nifty somersault to your jump) and successfully defeating a bunch of enemies in a row in this state will net you an extra life, but it won’t protect you from instant death hazards, unfortunately. The Fire and Ice Flowers let you shoot off a bouncing projectile with X or Y, with the iceballs temporarily freezing enemies to create platforms or allow you to throw them. Other power-ups include the Mini Mushroom, which grants you a moon jump, the ability to run up walls and enter tiny pipes, but costs you your ability to actually defeat enemies. POW Blocks will defeat all onscreen enemies, the aforementioned Super Crown lets Toadette become Peachette, and you can also hover through the sky with the Propeller Mushroom or slide along the ground or water (and fire off iceballs) with the Penguin Suit.

There are plenty of fun power-ups, old and new, to help you in your whimsical journey.

If you can knock Lakitu out of the sky, you can briefly take control of his cloud to fly over stages, and you’ll also come across the new Super Acorn power-up, which transforms you into a flying squirrel and allows you to glide, cling to walls, and perform an arch to gain a little extra height. You can also win P-Acorns from the various mini games which allow you to mid-air jump indefinitely, and you’ll find Yoshi eggs hidden in blocks throughout the game. Yoshis come in four styles, the regular green (which you ride as normal, using his tongue to eat and spit out enemies, chow down fruit for power-ups, and make use of his flutter jump to reach higher areas), and three Baby Yoshis: magenta (which swells up into a balloon to help you bypass hazards), blue (which spits out bubbles), and yellow (which can light up dark and/or haunted areas). Each of these baby Yoshis will also automatically eat up any enemies or projectiles that come your way and can be throw, but it’s usually better to keep them in hand. Every now and then, a Toad will offer you a power-up at the end of a World, and you can play mini games in their houses to collect Coins and earn more power-ups (though you’ll lose out if you get a Bowser tile), and you’ll also find power-ups on the overworld on occasion, too.

Additional Features:
There are 246 Star Coins to find in New Super Mario Bros. U Deluxe, three in every World, and collecting them will really test your patience and platforming skills as they can be well hidden or hanging in precarious positions. When you finish the game as any character, you’ll unlock the ability to save at any time on the overworld (previously, the game saved after towers and castles and you could only create a one-time save point), the Secret Island (a kind of pointless overworld inclusion that lets you view the credits and various other in-game records, and the Superstar Road. This is where those Star Coins will come into play as you can unlock eight new challenge stages by collecting every Star Coin in each of the game’s other worlds, which is easier said than done. Accomplishing all this adds another Star Stamp to your save file, which allows you to brag that you’ve finished the game to 100%, though finishing the game as the other characters doesn’t factor into this achievement. There are also some alternative paths on the overworld beyond the Secret Exits where moving to certain points causes you to collide with enemies and be warped to a special challenge (usually involving the Super Star) or be automatically taken to different Worlds.

New Super Luigi U adds a whole new level of challenge and difficulty to the game.

Being as it’s the most complete version of the game available, New Super Mario Bros. U Deluxe also features the New Super Luigi U content, which excises Mario from the playable roster, expands upon Luigi’s controls and physics to make him slippery and light as all hell, and reduces both the length and time limit of each World. Worlds are also full of references to Luigi, from statues to sprite work and silhouettes and an abundance of green, as well as being restructured into bite-size obstacle courses that will offer the greatest challenge of the game by far. With checkpoints gone and hazards everywhere, it’ll take every bit of skill and precision jumping to best this mode, which pushes you to use your triple jump, loose physics, and the game’s power-ups in new ways to bop off enemies, avoid death traps and hazards, and reach the goal flag. The game also offers a few additional challenge modes, including time trials and speed runs, Coin collections, and 1-Up collections, all of which deny you the use of power-ups, put you against a tough time limit and meeting criteria (like not touching the floor), and award you either a Bronze, Silver, or Gold Medal depending how well you do. Boost Rush allows you to take on rejigged versions of the World’s according to certain criteria (such as focusing on the balloon Yoshi, Penguin Suit, or Squirrel Suit) to nab Coins and speed up the tempo of the game and the enemies. Finally, you can go head-to-head against other players in Coin Battle, or put together your own courses using Coin Edit to challenge your friends, and all of the game’s modes can be played with other players, who will respawn in bubbles after losing lives.

The Summary:
Although I’ve never had the greatest relationship with Super Mario titles since I notoriously struggle with his classic titles and only really got into the franchise once it moved into 3D, I really enjoy these 2.5D throwback games and New Super Mario Bros. U Deluxe truly is an exemplary title that showcases the very best of this side of the franchise. Colourful, visually appealing, and bolstered by jaunty music and cute, cartoony attention to detail, the game impresses with its tight controls and a fantastic implementation of some of Mario’s 3D skills (such as the triple jump and wall jump). While it can be frustrating at times because of the precise nature of its platforming and how inconsistent the physics and wall jumps can be with some characters, this is purposely implemented as part of the game’s difficulty curve and, more often than not, any mistakes you make will be because of you rather than the game being unfair. Every enemy, challenge, and obstacle can be overcome with skill and patience, and you’ll find yourself using Mario’s power-ups (especially the new Squirrel Suit) to take risks that invariably pay off to launch you off enemies and towards the coveted flagpole. The inclusion of four additional playable characters, each with their own strengths and weaknesses, really helps to add some variety to the gameplay (though I would’ve preferred there only being one Toad and to have Peach be playable by default, no matter how little sense that makes) so that anyone of any skill level can pick this up and enjoy it, and the boss battles, while simple, were pretty fun thanks to the challenging castles you have to go through beforehand. Super Luigi U was a much-appreciated additional feature, if one I found far more harrowing and frustrating, and I enjoyed all the extra challenges and features to help extend the game beyond the main story. Overall, this is easily my favourite 2.5D Super Mario adventure by far; it takes everything that worked so well in Mario’s better 16-bit titles and infuses them with the Switch’s high-definition graphics and mechanics, and it was an extremely fun and challenging gameplay experience from start to finish.

My Rating:

Rating: 5 out of 5.

Fantastic

Did you enjoy Super Mario Bros. U Deluxe? How do you feel it compares other Mario titles, specifically the previous Super Mario Bros. games? Which of the playable characters was your favourite and why? Did you enjoy the new power-ups and the challenge offered by collecting the Star Coins? Which of the boss battles did you struggle with, and did you ever get all of the Star Stamps on your save file? What did you think to Super Luigi U? Which of Mario’s Switch games was your favourite and how are you celebrating Mario’s birthday this year? Whatever your thoughts on Super Mario Bros. U Deluxe, feel free to share them below or drop a comment on my social media and be sure to check back in for more Mario content throughout March!