Game Corner: Final Fantasy VIII Remastered (Xbox One)

GameCorner
FF8RLogo

Released: September 2019
Originally Released: February 1999
Developer: Square Enix
Original Developer: Square
Also Available For: Nintendo Switch, PC, PlayStation, PlayStation 3, PlayStation 4. PlayStation Portable, and PlayStation Vita

The Background:
So, everyone knows about Final Fantasy VII (Square, 1997); it’s one of the definitive role-playing games (RPGs) and one of, if not the, most popular titles in he Final Fantasy series, selling over twelve million copies worldwide and making its way onto many “top ten” lists over the years. But what about the inevitable sequel? Where does Final Fantasy VIII land in the grand scheme of things? Developed during the localisation of its predecessor, Final Fantasy VIII marked the first time that the Japanese and American teams collaborated on a Final Fantasy title. Like pretty much every single numbered Final Fantasy title, Final Fantasy VIII wasn’t a sequel to Final Fantasy VII but, rather, an entirely new title, set in a new world, with new characters and events taking place, which may have been jarring for those whose only experience with the franchise was Final Fantasy VII. I first played Final Fantasy VIII on the PlayStation 3, immediately after finishing Final Fantasy VII on the same system, and found it to be a dramatic step up in terms of graphics, gameplay mechanics, and features. Where Final Fantasy VII felt like Square where just dipping their toes into the world of 3D and polygonal graphics, Final Fantasy VIII featured far more detailed character models, environments, and graphics overall, resembling titles like Resident Evil 2 (Capcom, 19998) and Parasite Eve (Square, 1999). It also helps that I really like the design and characterisation of the game’s protagonist, the stoic loner Squall Leonhart, and enjoy the game’s more science-fiction-inspired aesthetic. Yet, Final Fantasy VIII is often the subject of criticism, whether due to the dramatic visual and gameplay alterations I takes or simply because of how influential Final Fantasy VII was, but is this a fair assessment of the game or is there more on offer in this under-rated classic?

The Plot:
When the time-travelling sorceress Ultimecia plots to possess the gorgeous Rinoa Heartilly in a quest to “compress time, Squall Leonhart must team up with his fellow SeeD graduates and reconcile his fractured memories and feelings for Rinoa, all while butting heads with his rival, Seifer Almasy.

Gameplay:
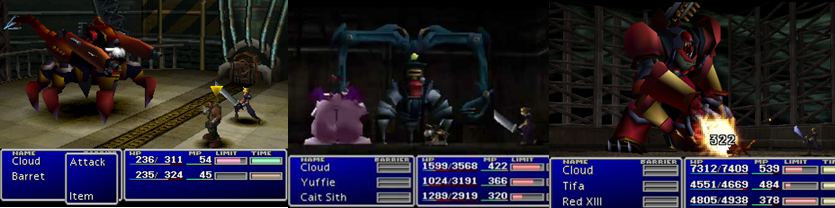
Essentially, Final Fantasy VIII plays very similar to its predecessor and other Final Fantasy titles from this time, being a turn-based RPG with a large overworld populated by innumerable non-playable characters (NPCs) and littered with a varied of monsters to battle to gain experience points (EXP). Players take on the role of Squall, who one of only two party members you can rename this time around, and journey across the world map battling enemies, recruiting Guardian Forces (GFs) to his cause, and engaging in a number of side quests and mini games as he goes. When you’re not in one of the game’s towns, many of which incorporate a lot of futuristic technology, you’re travelling across the world map and every other step puts you at risk of being sucked into a random battle encounter. Like Final Fantasy VII, Final Fantasy VIII uses an Active-Time Battle (ATB) system that, unless switched off in the menu, means you’ll take damage from your foes while you select your move. If you choose to attack, you’ll run forwards and deliver a blow, whittling your opponents health points (HP) down until they are defeated and earning you some EXP, items, and Gil (the in-game currency).

FF8RDraw
Draw magic from enemies and either stock it for later or cast it right away.

One of the most controversial aspects of Final Fantasy VIII is the way it complex way it handles magic and Summons; the only way to learn new magic and to restore your magic points (MP) outside of resting at an inn or with items is to use the games “Draw” system. Selecting “Draw” (or visiting a “Draw” point) will have your character literally draw magic and MP from their foe and you’ll be given the choice to either cast that magic or stock it for later use. This effectively means that you can never run out of MP as you can keep sucking it out of your enemies, meaning that you’re never running around looking for an inn or shop to buy Ethers and Elixirs to restore your MP. Personally, I love this system because it eliminates this stress; you can have different characters “Draw” and specialise in different magic, effectively allowing you to customise your party as you see fit. Final Fantasy VIII calls its Summons “Guardian Forces” (or “GFs”); you can use “Draw” to acquire new GFs but, for the most part, you’ll have to battle and defeat GFs in order to recruit them and Squall’s first mission is to do just that with Final Fantasy mainstay, Ifrit. Once you have a GF, you have to “Junction” it to a character; this allows you to summon the GF in battle to deal powerful attacks, buff your character’s stats, and gives you access to other magic and benefits.

FF8RJunction
Use the “Junction” mechanic to increase your stats and abilities in battle.

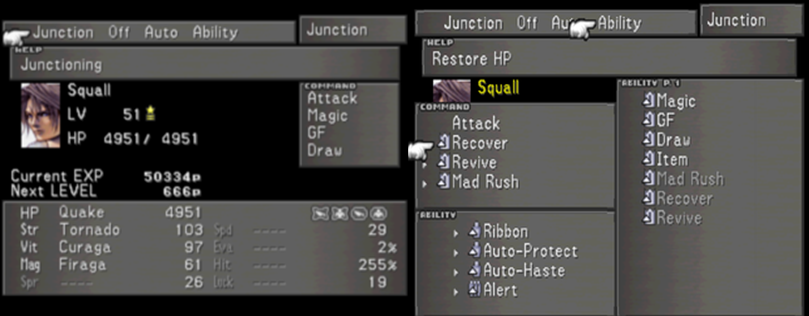
Effectively, this system is very similar to the Materia system used in Final Fantasy VII; each GF allows you to increase your character’s stats and inflict or resist certain status effects and they even level-up, unlocking new attacks, attributes, and increasing in power, just like Materia. This is pretty much a mandatory mechanic in Final Fantasy VIII since can’t even use your magic or even items without Junctioning a GF as these are commands you can only assign once a GF has been Junctioned to a character. Furthermore, if you want to gain buffs to your stats (like increased HP, strength, speed, or whatever), you need to win battles to earn AP so that your GFs can learn these techniques; similarly, if you want to gain HP whilst walking, reduce (or eliminate) random battles, or even haggle with the game’s various shops to receive a discount, you’ll need that AP. Some of these techniques take less AP than others but, to access the best abilities, you’ll need to earn a lot of AP and, once you have them, you’ll be switching on the fly between different commands depending on what you’re doing. Now, don’t get me wrong, all these gameplay mechanics are very confusing; it doesn’t help that, for the first hour or so of the game, you’re constantly lectured about each new mechanic, how to use it, what it means, and the best way to get the most out of the “Junction” system. In comparison, it seemed like information abut Materia and levelling up and Summons was spread out much more effectively in Final Fantasy VII but, despite that, it’s not that difficult to wrap your head around the “Junction” system…as long as you think of it as being an altered form of Materia and the “Draw” mechanic means you never have to worry about running out of MP, so don’t stress over nothing.

FF8RLimitBreak
Unleash your Limit Break to deal massive damage.

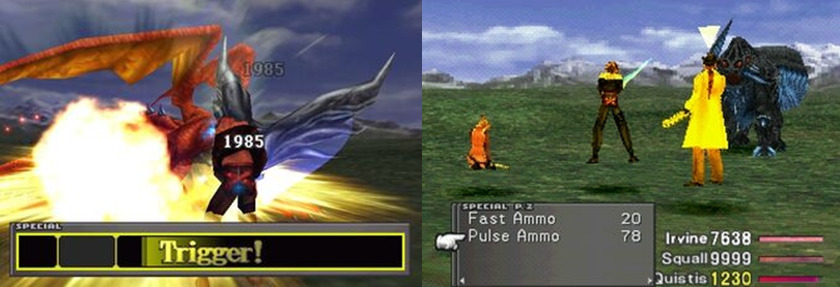
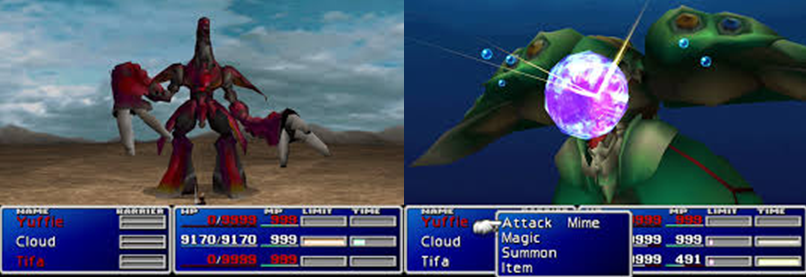
The “Limit Break” system returns, albeit in a slightly altered form; rather than triggering as your party takes damage and a meter builds up, you potentially gain access to your Limit Break when your character’s health drops low enough, making it more of a last-ditch desperation attack. Whereas the Limit Breaks in Final Fantasy VII were largely automatic, here you can choose to interact with the Limit Breaks if you wish; for example, pressing R1 at the right time as Squall attacks with his “Renzokuken” Limit Break delivers additional damage and you’ll be required to press different button combinations to perform different attacks when performing Zell Dincht’s “Duel” Limit Break. You can perform additional, more powerful blows and flourishes when performing a Limit Break by equipping different weapons, reading documents, or acquiring certain items. Interestingly, Final Fantasy VIII features a unique twist on the random battle formula in that the enemies you encounter dynamically increase in strength and difficulty as your party levels-up. in addition, you’ll also level-up every time you time you acquire 1000 EXP points, meaning that you can, effectively become massively overpowered in the early portions of the game with very little effort at all. I prefer to play the game as I play every Final Fantasy and RPG, however, progressing the plot and grinding levels in-between towns and around new areas, meaning I never experienced any advantages or issues with this system.

FF8RMiniGames
A few awkward, button-mashing mini games appear during the course of the game’s story.

You can use magic or items to heal your characters or remove status effects; you also have to heal your GFs as they can also take damage from enemies. Once again, you can only save on the overworld or at specific save points; if you die, you get a game over and have to reload your last save file, so it’s recommended that you save often and heal up at inns whenever you can. You’ll also be tasked with completing a series of awkward mini games; I don’t know what it is about the 3D Final Fantasy titles and having these odd button-mashing sequences shoe-horned in but they can be pretty annoying simply because of how vague the game is about how you’re actually supposed to complete these mini games. Rather than purchasing new weapons, Final Fantasy VIII features a crafting system, of sorts; as you explore the world, you’ll find copies of Weapons Monthly magazine, which contains blueprints that detail the items and gear you’ll need to craft stronger weapons for each character. In order to obtain each character’s most powerful weapon, you’ll need to travel all over the world battling specific monsters and enemies to acquire these items; you can use your GFs abilities to steal these items or increase the odds of them appearing and, once you have them, you can visit a weapon shop to get your upgrade. It’s worth noting, however, that you don’t actually need to read the Weapons Monthly magazines to acquire these upgrades and, with the right amount of patience and a lot of grinding, you can actually acquire Squall’s ultimate weapon, the Lion Heart, on the game’s first disc.

FF8RSquallRinoa
Squall and Rinoa’s relationship forms the core of the game’s story.

As in every Final Fantasy game, narrative and characterisation are the driving force of the game’s complex story. While every main character has an arc of some kind and their own unique characteristics, at its core, Final Fantasy VIII is a love story first and foremost and a battle against a malignant time-travelling sorceress second and it is therefore Squall who undergoes to most dramatic changes as the plot unfolds. Beginning as a stoic loner, he learns to not only emote and open himself up more, but the bulk of the game’s main theme is centred around his growing affection for Rinoa and his acceptance of his love for her and the friendships he has formed. Unfortunately, though, the other playable characters don’t get quite the same focus; none of them have sub-plots or explicit character arcs and, thanks to the game’s emphasis on more realistic character models, the six main playable characters lack a lot of the same aesthetic appeal as those seen in Final Fantasy VII; Squall has a bad-ass look and Zell resembles an anime character but, even though characters like Quistis Trepe have recognisable traits (she struggles with her failure as a teacher), they don’t make an impact in the same way as the likes of Barret Wallace or Vincent Valentine and I struggled to settle on my preferred team. I ended up going with Squall, Irvine, and Rinoa but there were aspects about this line-up that continued to irk me; Irvine’s Limit Break, for example, requires you to buy or craft ammo and Rinoa’s “Angel Wing” Limit Break is useful but only if your swap around her magic and can deal with losing control of her once you select it. Final Fantasy VIII expands upon its world, characters, and narrative by including an entire sub-plot with three additional, playable characters. At various points throughout the game, your party will mysteriously fall asleep and assume to roles of Laguna Loire, Kiros Seagill, and Ward Zabac. These older, more seasoned characters are a battle-tested team and contrast with Squall and his relatively young and untested group. Through their side story, which takes place about seventeen years in the past, we learn about a lot of the events that factor into Squall’s characterisation and the way this world works.

FF8RLaguna
Laguna’s side story fleshes out the game’s world and lore.

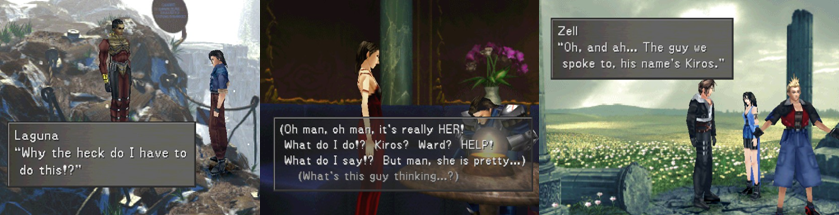
The SeeDs are mercenaries trained to perform a wide variety of jobs but, first and foremost, their goal is to assassinate sorceresses before they can become too powerful; this is directly related to the main plot of the game, as the dark sorceress Ultimecia projects her consciousness and manipulates events….completely unaware that she is actually creating her own undoing. Laguna’s side plot serves to further drive the game’s main themes of love and loss; though initially dismissive of Laguna for his foibles and the concept of friendship and relying on others, Squall comes to realise that he is part of a team and a family and progresses from only expressing himself trough his inner monologue to actually opening up to his friends and team mates. Unlike Final Fantasy VII, which gave each of its characters a clear arc and developed them as the story progressed, Final Fantasy VIII pretty much hedges all of its bets on you relating to, and growing to love, Squall, Rinoa, and their relationship and, if you don’t really connect with these characters or their love story, you might struggle to connect with Final Fantasy VIII. Additionally, Final Fantasy VIII is a very complex experience, even for a Final Fantasy title; it’s a slow, atmospheric experience; you can’t skip the cutscenes but, thankfully, you can fast travel in the towns and around the map this time. Luckily, though, the game’s map is a dramatic improvement on Final Fantasy VII’s; areas are actually named and highlighted, making it much easier to know where you have to go…assuming that you paid attention to the dialogue boxes and cutscenes. If you didn’t, you’ll probably have to consult a guide or risk wandering around in circles desperately trying to figure out who to talk to or where to go. As always, I recommend consulting a guide if you need to, over-levelling your party, saving as often as possible, and doing everything you can to simplify the game’s complex mechanics as best you can. It seems daunting but it is possible and, once you have your party set up as you like, all you have to worry about it surviving battles and bosses rather than trying to wrap your head around the intricacies of the “Junction” system.

Graphics and Sound:
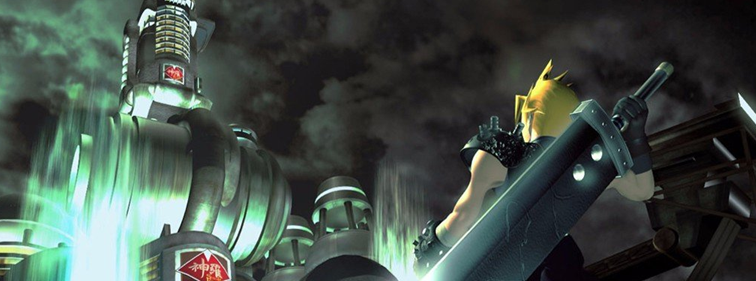
There’s no denying that Final Fantasy VIII is a massive step up on it predecessor both in terms of its in-game graphics and cutscenes; rather than replicating Final Fantasy VII’s chibi, anime-style aesthetic, Final Fantasy VIII renders its characters as realistically as possible and the character models remain on model instead of there being several wildly different character models across the overworld, battle screens, and cutscenes.

FF8RGraphics
In-game cutscenes, models, and backgrounds are vastly improved.

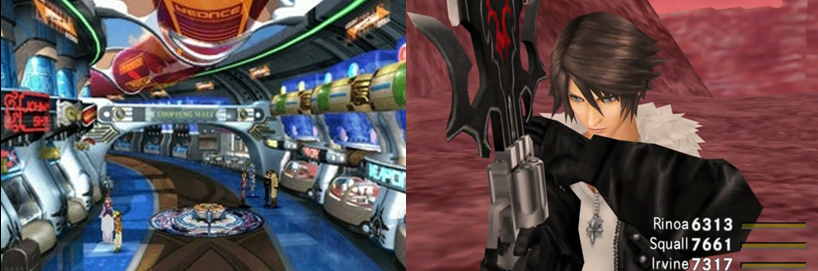
This means that Final Fantasy VIII more closely resembles other 3D, polygonal videogames of the time, like the two Resident Evil (Capcom, 1996) sequels rather than a mish-mash of pre-redendered backgrounds and chubby 3D polygons. While I actually really liked Final Fantasy VII’s artistic style and blend of anime cute and bio-organic sci-fi, and it is annoying that Squall pulls his gunblade out of thin air in cutscenes, Final Fantasy VIII is a clear graphical improvement over its predecessor in every way. You’ll travel to many diverse environments, from caves to towns to ornately-decorated castles and sprawling towns, all of which are an impressive blend of natural landscape, a marriage of steampunk and 1950s technology and aesthetics, and elaborate, futuristic sci-fit. Even the battle screen is cleaner, forgoing the traditional battle dialogue box and incorporating more dynamic camera angles and detailed backgrounds and the Xbox One remaster only emphasises this further by applying a crisp, fresh coat of paint to the original.

FF8RGraphics2
CG cutscenes have dramatically increased in number and quality.

Final Fantasy VIII also features a lot more CG cutscenes and, honestly, every one of these is leaps and bounds beyond its predecessor; the action and camera and character movements is slick and fluid and, while they’re still obviously not on par with today’s graphics and cutscenes, they’re far beyond the limited and stilted cutscenes seen in Final Fantasy VII. Final Fantasy VIII also improves on the placement and use of dialogue boxes for in-game cutscenes; dialogue boxes are now much smaller and clearer and appear in various places around the screen like speech bubbles rather and being a large box that obstructs a sizeable portion of the screen. Final Fantasy VII also includes more of long-time Final Fantasy composer Nobuo Uematsu’s greatest work; while none of the game’s tracks are as iconic as “One-Wing Angel”, Final Fantasy VIII still features some fantastic tracks such as “The Man with the Machine Gun”, “The Extreme”, and the awesome “Maybe I’m A Lion”. The game forgoes traditional character themes in favour of its influential main theme ballad, “Eyes On Me”, a pop song performed by Chinese singer Faye Wong that perfectly encapsulates the game’s main themes of love and loss; “Eyes On Me” was so influential that it not only sold over 400,000 copies but it was also the first piece of videogame music to ever win “Song of the Year” at the Japan Gold Disc Awards.

Enemies and Bosses:
As you explore the world of Final Fantasy VIII and resolve Squall’s complex social issues, you’ll take part in a whole bunch of random battles against enemies of all shapes and sizes. Your party will often butt heads with the military force of Galbadia, who are under the influence of Ultimecia’s magic; these battles are generally pretty easy, even when the Galbadian’s attack with magic or in larger groups, and only really become a challenge once you come up against their mechs and robots. Final Fantasy VIII is, of course, absolutely infested with monsters. These range from the dinosaur-like T-Rexaur (one of the most difficult enemies you’ll battle against in the game’s early moments), gigantic dragons, demonic shadows, poison-spewing, man-eating plants, monstrous turtles, weird-ass, floaty face…things, and even these horrific alien creatures who have overrun the game’s Airship and will continually regenerate if you don’t destroy them in coloured pairs. The majority of these monsters fall to the planet in a constant cycle based on the correct alignment of the Moon and even originate from the surface of the Moon; later in the game, you get to see this in motion which, as far as I know, is the first time a Final Fantasy game directly explained where all these weird and wacky monsters actually come from.

FF8RGFBosses
GFs act as the majority of the game’s boss encounters.

It took me a little while to realise that Final Fantasy VIII seems to be lacking in boss battles; most of the time, you’ll fight against a GF as a boss (or mini boss), which doesn’t really feel like a boss battle as it’s more like proving you’re worthy enough to use the GFs power. By that logic, Ifrit acts as the game’s first boss and, as you progress, you’ll come across other GFs in various areas; most of the time, like with Cerberus, you can choose not to engage with these GFs but, if you do, you’ll have to go out of your way to “Draw” the GF from a later, more challenging boss in Ultimecia’s Castle.

FF8RSFRBosses
You’ll battle Seifer, Fujin, and Rajin a few times during the game’s story.

When you’re not fighting GFs, you’ll battle against Galbadia’s finest giant robots; the first one you face, the spider-like X-ATM092, can’t actually be defeated and, instead, must be damaged enough so you can make your escape and then either avoided or disabled long enough for you to run. Other times, you’ll butt heads with the main character’s rivals, Seifer and his buddies, Fujin and Raijin. Although Seifer eventually upgrades to becoming a penultimate mini boss as he is manipulated to act as Ultimecia’s “Knight”, you never battle all three at once, which is a bit of a missed opportunity but, essentially, they’re very similar to the battles against the Turks from Final Fantasy VII.

FF8RCastleBosses
Ultimecia’s Castle is full of powerful superbosses.

Once you reach Ultimecia’s Castle, you’ll be stripped of your abilities and forced to take on the enemies within without your GFs and magic…that is until you defeat one of her eight superbosses. Fittingly, these creatures represent the game’s toughest challenge yet (although the Ruby Dragon can be a pain in the ass thanks to its high HP and “Breath” attack) but, by this point, you should be well levelled-up and full at ease with the game’s various mechanics and controls. Nevertheless, each of these superbosses has a unique design, character traits, and requires specific strategies; Sphinxaur takes on a second form after enough damage is done, the Red Giant can absorb a huge amount of punishment (and spouts a crazed response every time he’s attacked), and Trauma can only be spawned after solving a puzzle and is protected by smaller machines, for example.

FF8RCastleSuperbosses
Tiamat and Omega Weapon offer perhaps the game’s greatest challenge.

Easily the most challenging bosses in Ultimecia’s castle are Tiamat and Omega Weapon, both of which are optional battles (though Omega Weapon involves splitting into two teams, ringing a bell, and running to a specific point to trigger the battle). Like many of the superbosses in Ultimecia’s Castle, you can “Draw” GFs from these bosses if you missed them earlier in the game but you’ll be more concerned with setting up your party to endue their powerful attacks. Both of which can deal massive damage, absorb elemental attacks, and have huge amounts of HP but it is Omega Weapon that offers the greatest challenge. With HP in the millions and capable of casting both “Death” and ending your party with “Light Pillar” (which deals 9999 damage and thus results in a one-hit KO), Omega Weapon offers such a tough challenge that, upon defeat, you’ll earn a special “Proof of Omega” award so you can prove to your friends that you got past this absolute tank of a superboss.

FF8RSorceresses
As a SeeD, it’s your duty to destroy sorceresses.

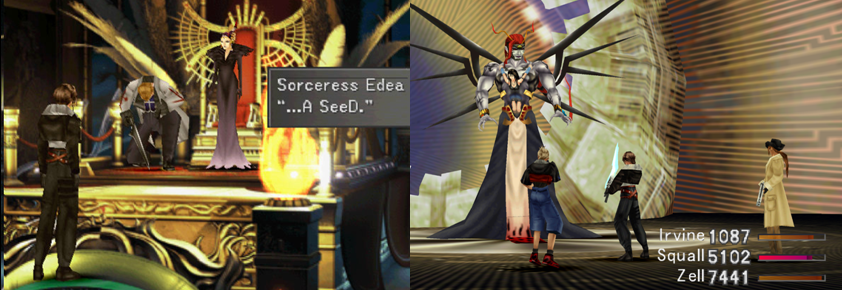
In addition, you’ll have to face-off with a few sorceresses during a playthrough of Final Fantasy VIII; being as she prefers to possess and manipulate sorceresses from the far future, Ultimecia doesn’t actually physically appear until right at the final parts of the game meaning that, before you confront her in her ominous castle, you’ll mostly be battling the current-day sorceress, Edea, who has been possessed by Ultimecia. As her chosen “knight”, you’ll usually have to dispose of Seifer before you can properly get your hands on Edea, which can make these battles a bit tougher. Later, when the malevolent sorceress Adel literally falls from the sky, she/he/it is leeching off of Rinoa so you have to be sure to target only Adel and not use attacks that hit more than one target or else you’ll risk injuring or killing Rinoa and losing the battle.

FF8RGriever
Griever’s ability to blast away your magic and GFs is a serious threat.

Once you finally fight your way through Ultimecia’s Castle and unlock all of your abilities, your party falls victim to Ultimecia’s “Time Compression” ability and ends up stranded in the far future, where Ultimecia rules unopposed. This final battle has multiple stages, each with their own concerns; initially, you battle Ultimecia one-on-one but she randomly decides which of your three party members she wants to battle against and, during the battle, will erratically KO or remove one of your party from the battle screen. This means that, if you don’t revive your strongest party members, you could be stuck facing Ultimecia with characters you’ve chosen to ignore up until this point. Once she is defeated, Ultimecia summons the most powerful GF in the Final Fantasy VIII world, Griever, a monstrous lion-like creature inspired by Squall’s lion iconography. Griever’s threat mainly comes from its ability to completely drain your MP, blast away entire stocks of your magic, and one-shot your GFs with “Lethal Strike”. However, once defeated, Ultimecia “Junctions” herself to Griever and the two form a monstrous combined form that can do everything both previous bosses could, meaning the longer the battle lasts, the more likely it is you’re going to lose your magic stocks, GFs, or party members and also deal massive damage through your defences with “Great Attractor”.

FF8RUltimeciaFinal
Ultimecia’s final form shows her on the cusp of immortality!

Once you manage to defeat this monstrosity, Ultimecia will ascend to her God-like final form; rather than the resplendent grandeur of Safer∙Sephiroth. Ultimecia’s final form is a grotesque eyesore that is halfway between human, monster, and eldritch horror. In this form, she can again destroy your magic stocks, remove any positive buffs you cast on your party, one-shot your GFs, reduce your HP to one point, and cast “Apocalypse” on the party for up to 8000 points of damage. Destroying different halves of Ultimecia’s body results in her using different spells and attacks but, once she starts narrating, it means she’s all out of HP and all you have to do is keep attacking her until the battle ends and Ultimecia is finally defeated. When I first fought Ultimecia when playing Final Fantasy VIII on the PlayStation 3, I found this battle to be particularly difficult; unlike Sephiroth’s final forms, which increase in difficulty depending on your level, characters, and tactics, Ultimecia can completely ruin any strategy you have by wiping away your most powerful party members or dispelling your magic. It’s hard to revive characters if Griever wipes out your stock of “Life” and your GFs won’t be much use if Ultimecia kills them in one move, meaning you’re constantly having to think on your feet and adapt to the battle; add to that the multiple forms that you must face one after the other and you’re left with a far more challenging final boss than in the previous game.

Power-Ups and Bonuses:
Just like in the Xbox One port of Final Fantasy VII, the remastered version of Final Fantasy VIII allows you to alter the game’s mechanics and difficult by pressing in the analogue sticks: press them both in and you’ll turn off the random battles, press in the left stick and you’ll increase the game’s speed by three times, while the right stick powers up your party, giving them constant access to their Limit Breaks and effectively granting them infinite HP and MP. As I only found out about these latter two options right at the end of Final Fantasy VII, I decided to activate them right from the start for the sequel, dramatically speeding up my playtime. It’s worth noting that, even with these activated, your party is still susceptible to status effects (confusion, poison, etc) and can still be killed by the likes of Omega and Ultima Weapon but, still, activating these boosters basically means you never have to worry about wasting Gil in inns or expending MP healing during battle and makes reaching level 100 an absolute breeze. Not only that, if you switch the battle style to “Wait”, you can end up completely obliterating every enemy and superboss you face by spamming your character’s Limit Breaks and ensuring that they never even get the chance to land a single hit!

FF8RRoaming GFs
A few roaming GFs may randomly appear to aid you in battle.

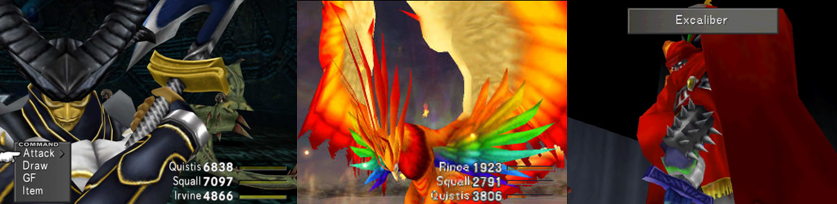
While you’ll gain access to most of the game’s GFs by Drawing them from certain bosses or battling them head-on in specific areas, some are only accessible by using certain items. Additionally, you can complete a side quest (made difficult thanks to the presence of the deadly Tonberry enemies) to battle Odin; upon defeat, Odin will randomly appear during any of your battles and deliver a one-shot KO to your opposition, which can be an extremely useful feature. That is until Odin tries this against Seifer and is cut cleanly in two; luckily, Gilgamesh fills very much the same role but his attacks cause a random amount of damage to your enemies, meaning he’s often more of a hindrance. Similarly, you can acquire the Phoenix Pinion after a side quest which, upon use, calls forth the Phoenix GF, which will randomly arrive to resurrect your entire party if you’re lucky.

FF8RTransport
There’s a few means of transportation on offer in Final Fantasy VIII.

As usual, you are afforded a few vehicles and means to explore Final Fantasy VIII’s expansive world; if you manage to call forth a Chocobo in one of the game’s many Chocobo forests, you can ride one of the birds across the land but you’ll lose it as soon as you dismount. In a change of pace, you can hire out a car to traverse the map but this costs you Gil and the car’s can run out of fuel. You even get to control the Balamb Garden itself for a while as it conveniently has a mobile form that allows it to float across the sea and land when you’re able to come ashore at a beach front. Eventually, you’ll gain control of the Airship, the Ragnarok, which allows you to travel pretty much anywhere but, as good and diverse as all these options are, the game’s camera when on the overworld is needlessly obtrusive and I struggled to find an angle that actually allowed me to properly see where I was going and enough of my surroundings.

Additional Features:
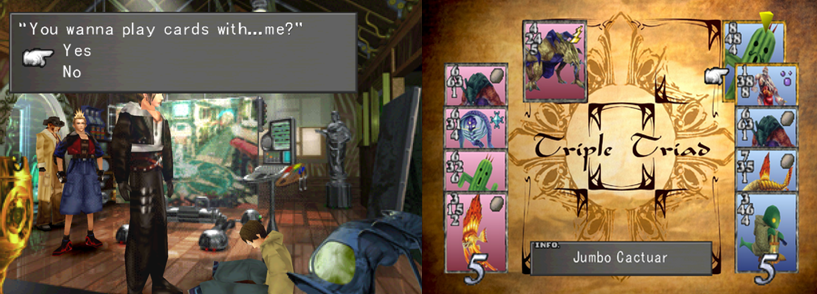
Whereas a great deal of your time and energy was devoted to the capturing, breeding, and racing of Chocobos in Final Fantasy VII, Final Fantasy VIII instead features the card game Triple Triad as its primary mini game. While you can acquire and ride Chocobos to reach new areas and speed up your traversal across the world map, Triple Triad is a feature in pretty much every town of the game and involves most of the game’s NPCs. The game takes place on a 3x3x3 grid, with each player having at least five cards; ten cards are played, each with a different number and element associated with it, and the goal is to capture all of the opponent’s cards. At least, that’s how I understand it; I’m not very good at card games at the best of times and rushing through the dense, seemingly never-ending tutorial, so I never really had much interest in Triple Triad.

FF8RTripleTriad
Triple Triad is everywhere but I couldn’t really get on with it.

You can acquire new cards after defeating enemies or using the GF Quezacotl’s “Card” ability to turn certain enemies into cards but, outside of acquiring every card and a few Achievements, I never saw any real need to get too involved in Triple Triad and played through Final Fantasy VIII perfectly fine without playing more than one game (though, if you want to earn every Achievement, you’ll have to play at least one game and complete a whole side quest involving challenging NPCs to a game of cards so…good luck with that). While it’s not a requirement to play Triple Triad to access the best weapons and items, it is one of two time-consuming options available to you; the other is to battle specific enemies in the hopes that they drop the item you require or use Quezacotl’s “Card” ability to transform the monster into a card and then use the “Card Mod” ability to transform the card into that item. This can be a bit of a hassle as these enemies are rare, meaning you’ll have to wade through a great deal of random battles to track them down and, to use the “Card” ability, you need to deal enough damage to the monster first, which can be difficult when you’re at a higher level. Once you acquire the Ragnarok, travel across the overworld is much easier than before, allowing you to better access some difficult-to-reach areas of the map and acquire more GFs. The Airship is also the only way to access the unmarked Island Closest to Heaven and Island Closest to Hell, which are teeming with tough enemies and hidden “Draw” points to help you level-up and gain more AP, and the Deep Sea Research Center. Here, you’ll have to walk slowly towards a pulsating piece of machinery to avoid being thrown into random battles and then you’ll be forced to battle two Ruby Dragons back-to-back before you can take on Bahamut.

FF8RDeepSea
Explore the Deep Sea Research Center and you’ll eventually battle another superboss!

After defeating Bahamut (which is easier said than done), you’ll be acquire it as a GF and, when you leave and return, you can access a new area of the Deep Sea Research Center. After diverting power to open a series of doors, you can then travel down several floors filled with the game’s most powerful enemies on your way to confronting the game’s option superboss, Ultima Weapon. You can “Draw” the GF Eden from Ultima Weapon, as well as the powerful “Ultima” magic, but you’ll have to endure the same problems as when fighting Omega Weapon (meaning your party can be decimated in one hit it you aren’t properly prepared for the battle). As you travel around, winning battles, completing quests, and taking steps, you’ll be awarded with a SeeD salary. To increase your SeeD rank and, thus, your salary, you can enter the “Tutorial” menu and take a written test. There are thirty tests, each with ten questions and, every time you complete a test, you’ll gain a rank and earn more Gil to spend on items and upgrades. Luckily, you don’t need to worry about actually knowing the answers as you can just consult an online guide and cheese it, ensuring that you earn the associated Achievement and the maximum amount of Gil. Speaking of Achievements, there’s quite a few on offer here and they’re pretty easy to achieve. You get an Achievement every time to acquire a new GF, ensuring you’ll get the majority of the Achievements even without a guide, one for finishing the game, and one for completing certain side quests. These can be trickier to unlock considering how complex and time-consuming the side quests can be (such as the PuPu side quest that sees you tracking down UFOs and aliens) but they’re generally far easier than the ones seen in Final Fantasy VII. Like in Final Fantasy VII, though, I did encounter some issues in getting the Achievements to pop or my Xbox One to acknowledge that I had completed the Achievement; the only advice I can really give if this happens to make sure you save beforehand and try it again, perhaps after logging out or performing a hard restart on your machine.

FF8RBanner

The Summary:
For me, trying to pick between Final Fantasy VII and Final Fantasy VIII is like trying to pick between The Legend of Zelda: Ocarina of Time (Nintendo EAD, 1998) and The Legend of Zelda: Majora’s Mask (ibid, 2000); in fact, this analogy is strikingly fitting as one is generally universally revered and the other is usually divisive, at the very least. However, I really don’t feel like the game deserves the hate or disdain it often unfairly attracts; the “Junction” system is functionally no different to the Materia system, the “Draw” mechanic means you never have to worry about running out of MP and are free to customise your party as you see fit, and the game as a really slick presentation. Seriously, it blows my mind how much of an improvement Final Fantasy VIII is compared to Final Fantasy VII in terms of graphics and you have to believe that, if Final Fantasy VII had been rendered in the same style as its sequel, no one would have anything bad to say about Final Fantasy VII ever again.

FF8RRemaster
The Remaster only highlights Final Fantasy VIII‘s aesthetic quality.

It’s not just the aesthetics that make Final Fantasy VIII an enjoyable experience in and of itself; the game’s pacing is far better than its predecessor meaning that, while you miss out on truly fleshing out and exploring each party member like in Final Fantasy VII, it’s far easier to stay on track and focused on the game’s core narrative. Plus, Final Fantasy VIII doubles down on Squall’s characterisation and development to have him evolve from a stoic, closed-off loner to a confident, inspiring leader. Not only that, the game puts full focus on his love story with Rinoa, making their relationship the central focus of the game and crucial to squall’s development as a character. Is it perfect? Well…no, but (and here’s a controversial statement) no game is; even Final Fantasy VII had some issues! Newcomers may struggle to come to grips with the game’s new mechanics thanks to the influx of obtrusive tutorials and the unintuitive menus and gameplay mechanics, the overworld camera is disappointingly janky, and game goes way overboard with its random encounters (seriously, these happen almost every other step!) but there’s still a lot to like about this game. Once you simplify the “Junction” system and get your party setup how you want, it’s simple to concentrate on “Drawing” magic, winning battles, and levelling-up your party and their GFs; the map is easy to navigate thanks to the much-appreciated fast travel system and areas being clearly marked; the game’s system of increasing enemy levels as your own level increases means you’re always able to earn the EXP and AP you need to grow stronger; and the game’s story is very engaging. Beyond the exploration and development of Squall and Rinoa’s relationship, we’ve got a story that not only transcends time and space and leads you to battling a truly mental multi-form final boss but also questioning concepts such as life, death, love, and loss, making for a truly enjoyable and unique experience.

My Rating:

Rating: 5 out of 5.

Fantastic

And breathe! So, what did you think about Final Fantasy VIII? Did you struggle with the Junction, Draw, and GF system or, like me, do you find it to not bad as bad as people make it out to be? Where does Final Fantasy VIII rank in your hierarchy or Final Fantasy titles? Who was in your party in Final Fantasy VIII and how did you set up your GFs? Did you like the more science-fiction-orientated approach that the game took or do think that the series strayed too far from the traditional fantasy-inspired aesthetics of the franchise? Do you subscribe to the theory that Squall died at the end of disc one? Did you use the boosters implemented into this Remaster or did you go it old school? Whatever your thoughts on Final Fantasy VIII, and the Final Fantasy series, drop a comment below.

Game Corner: Strider (2014; Xbox One)

GameCorner
Strider2K14Logo

Released: February 2014
Developer: Double Helix Games and Capcom Osaka Studio
Also Available For: PC, PlayStation 3, PlayStation 4, and Xbox 360

The Background:
Capcom’s fast-paced, slash-‘em-up Strider (Capcom, 1989) first debuted as an arcade game; notable for its frenetic hack-and-slash action, the series saw numerous ports and sequels released to home consoles throughout the years, with main protagonist Strider Hiryu often cropping up in other Capcom titles. Thanks to Strider’s popularity, Capcom decided to produce a reboot of the series back in 2014. Rather than being a linear experience, this Strider expanded on the length of the game through “Metroidvania” elements such as backtracking and upgrades to Strider’s abilities. I’ve known about Strider Hiryu for a long time, primarily due to his inclusion in Marvel vs. Capcom 2: New Age of Heroes (Capcom/Backbone Entertainment, 2000), and this version of Strider caught my eye back in the day on the PlayStation 3 thanks to its futuristic, neon aesthetic and frenzied action but it’s only recently that I actually got around to playing the title.

The Plot:
Ostensibly a remake and reimagining of the original arcade game, its ports, and its sequels, top assassin Strider Hiryu is sent to Kazakh City to assassinate Grandmaster Meio, who has established a dictatorial rule over the city and its inhabitants with his robots and cyborg operatives.

Gameplay:
Strider is a 2.5D action/platformer with minor role-playing elements. Players control Strider Hiryu, a visually stunning character who dashes at high speeds through a dystopian city, leaping across rooftops, sliding through air ducts, and attacking Grandmaster Meio’s robotic minions with his plasma sword, Cypher. As Strider barges ahead at full speed, he can slash away at his foes with quick swipes of the Cypher; he can also charge an attack to break through enemy shields and, in time, gains the ability to throw kunai blades at his enemies and activate switches from a distance. Strider also uses these blades to clamber up walls and across ceilings and can acquire additional technology (known as “Options) to reach previously-inaccessible areas of the game. This means that, as you acquire new abilities and upgrade Strider’s arsenal, you’ll have to do a fair amount of backtracking not just to fulfil new objectives but also to find the game’s many hidden power-ups, unlockables, and upgrades to Strider’s health, energy, and weapons.

Strider2K14Combat
Strider slashes enemies apart with his plasma sword.

However, the amount of backtracking is actually quite limited if you just want to finish the game’s primary story mode; you’re mainly tasked with using Strider’s new abilities to take the long way round to your next objective, after which you’ll be able to take a shorter route back to the next objective. Wash, rinse, repeat. As Strider dispatches his enemies, he powers up the meter for his Cypher blade and the abilities offered by the “Option” power-ups. There are numerous checkpoints and save points scattered throughout the game’s large and inter-connected map, which is broken down into different areas and environments, but Strider can also replenish his health by breaking capsules that are generously scattered in each area.

Strider2K14Options
The “Options” allow Strider to perform more powerful attacks.

It pays to use the game’s simple-but-effective mini map to explore a bit, though, to find upgrades to Strider’s health bar as, while the common foot soldiers you encounter are dispatched easily enough, you’ll soon come up against more troublesome enemies, mechs, robots, bosses, and hazards that will drain your health to nothing in no time flat. By the time you storm Grandmaster Meio’s citadel, you’ll be required to make full use of all of Strider’s abilities to overcome the enemies and environments you come across. This often requires you to cycle through the different Cypher plasmas with a press of the directional pad in order to combat certain enemies and get past certain obstacles. While, at its core, the game is extremely fun, fast-paced hack-and-slash action, there’s quite a bit of platforming involved; luckily, you’ll soon upgrade to a double jump and a mid-air dash which makes these much easier but, while I found falling to my death a common occurrence (generally thanks to being blasted out of the air), there’s nothing too taxing or unfair here thanks to Strider’s superhuman flexibility and the range of options available to him.

Graphics and Sound:
Strider is a bit of an oxymoron; it’s a visually stunning and appealing videogame thanks to its largely anime-inspired, Blade Runner (Scott, 1982) aesthetic; the game’s dystopian city is rugged, lived in, and interspersed with neon lights and dynamic lightning choices that often bathe environments in darkness broken only by flashing lights. Yet, at the same time, the majority of the areas you visit are largely uninspired; the majority of the game is spent exploring and traversing Kazakh City, which means a lot of rooftops and street-level action which, while impressive, gets old pretty quickly. The game moves at a fast pace, though, so you’ll soon be making your way through seemingly endless, nearly identical high-tech corridors and buildings, then fighting through the semi-steampunk sewers and industrial areas of the city, before the game finally breaks up the monotony of its environments with an all-too-brief section that takes place in the skies above the city.

Strider2K14Variety
While Strider looks great, most of his enemies are quite bland.

Similarly, while Strider looks absolutely fantastic and moves and animates like greased lightning, most of the enemies he encounters are a massively uninspiring lot. Once the bigger mechs and robots start becoming more commonplace, things get a bit more interesting but fighting these enemies can be a chore as you’ll have to cycle through all of Strider’s different abilities and weapons to take them down. I was likewise unimpressed with the game’s soundtrack; Strider mostly uses ambiant sound and subdued melodies when you’re playing the game and these are often drowned out by the sound effects of Strider’s attacks, so I can’t say the soundtrack really left much of an impression on me. The game features a few cutscenes to relate its story and, while they’re not especially impressive in the way they’re animated, the voice acting is fantastically over the top and cheesy, which really works with the game’s tech-noir aesthetic.

Enemies and Bosses:
Strider will cut his way through a whole slew of Grandmaster Meio’s cyborg minions in his quest to liberate Kazakh City. Most of these will be dispatched in just a few swings of Strider’s Cypher blade but, eventually, even these will become more troublesome as you progress further through the city. All too soon, enemies start holding up shields to block your attacks, take pot shots at you with sniper rifles, and bust out the heavier machinery (such as explosive bolts that stick to you and energy staffs). Some of the more annoying enemies include ones that incessantly teleport across the area and ones that can freeze Strider in energy-draining blocks of ice. Strider will also dismantle a wide variety of robots and mechs as he explores Kazakh City; some simply float about and shoot at you, others are turrets attached to walls and ceilings, but the more troublesome robots are the larger variants that cause massive damage to Strider and take a lot of his skills to put down.

Strider2K14Gorilla
Yeah, a mechanical gorilla. Perfectly normal.

You’ll also come up against a decent variety of bosses in this game; you’ll battle Ouroboros, a large mechanical dragon, a couple of times (the first sees Strider running across the machine’s back amidst high winds, electrical blasts, and a slew of enemies, while the second sees Strider confined to some city ruins and contending with the Ouroboros’ ice attacks), Mecha Pon (a gigantic mechanical gorilla) in one of the game’s penultimate battles, and take part in series of faster-paced battles against the Wind Sisters. Just as you’ll be tested against gauntlets of enemies later in the game, so to will you eventually have to engage all of the Wind Sisters at once but, by that point, your abilities should be more than up to the challenge.

Strider2K14FinalBoss
The final boss is an eldritch nightmare…and in space…

At the end of the game, Strider faces off with Grandmaster Meio in a two-stage final boss battle. The first is a relatively run of the mill affair against the Grandmaster as he teleports around the arena firing energy bolts and lighting at you but, once he is defeated, you’ll be transported into the upper atmosphere to battler Meio’s true final form, Meio Prime, a gigantic Biblical monstrosity that would make Sephiroth blush in its pretentiousness. Yet, for all its bluster, Meio Prime is easily dispatched provided you can avoid its flailing tentacles and dodge its electrical bolts, which are easily its more annoying and hard-hitting attacks.

Power-Ups and Bonuses:
As mentioned, Strider can upgrade his Cypher Blade after defeating certain bosses. He begins the game with the standard red plasma, which allows him to hack-and-slash his enemies, but this is eventually upgraded to deal a downward blow, reflect blaster bolts, set enemies on fire, encase them in ice, or toss out homing blades, each time giving the plasma a new hue (blue, yellow, and purple). Strider can also charged his kunai with these different plasma types of the Cypher blade to also set enemies ablaze or freeze them on the spot. The “Options” Strider gains not only allow him to reach new areas of the game but also allow him to perform more powerful techniques in battle; performing these drains Strider’s power meter but, as this automatically replenishes with time and when you defeat enemies, it’s not often you have to worry about running out of energy (and this bar can be increased when you find hidden upgrades). The most useful of these techniques is easily Option C, which sees a robotic hawk deal massive damage to enemies and was super useful for whittling down the health bar of troublesome bosses. As you explore your environment, you’ll find further upgrade pods to increase Strider’s health and energy bars, throw more kunai, unlock additional costumes for Strider, and unlock concept art and levels for the game’s “Challenge” mode. These aren’t too difficult to stumble across but the game’s map will let you know if there are any in the immediate vicinity; the one downside, however, is that if you fail to find them all before you enter Meio’s citadel, you will have to start a new save file from the beginning to find them as you’re unable to replay a completed save file.

Additional Features:
Strider has three difficulty levels to choose from and, if you want to unlock all of the game’s Achievements, you’ll have to take on and best the game’s highest difficulty. Speaking of Achievements, there are a handful of relatively easy ones to unlock here; mostly, these are unmissable but there are a few that require a bit more effort from you (such as defeating twenty consecutive enemies without being hit, or twenty enemies with Strider’s Panther ability). In addition, the game features two “Challenge” modes: “Beacon Run”, which sees Strider racing to checkpoints as quickly as possible, and “Survival”, in which Strider must survive against wave-upon-wave of enemies. As you pick up secret items in the game, you’ll unlock these modes and additional maps for each mode and, upon successful completion, you can upload your score and time to the online leaderboards.

Strider2K14Conclusion

The Summary:
Strider is simple, fast-paced fun; Strider controls like a dream and the game’s hack-and-slash combat is smooth as silk. The environments and common enemies may be bland but the game is still, visually, very appealing; Strider’s world feels very lived in and layered rather than just being a typical, desolate dystopian future and, while he’s not especially layered in terms of his personality, at least Strider looks and plays very well. Unfortunately, there’s not a lot here to come back to; the game feels long when you’re playing it, mainly due to the fact that you’re largely navigating a bustling, multi-layered city, but it’s hard to get a sense of progression when a lot of the areas look the same. Even with some of Strider’s later time-saving abilities, it definitely feels as though the developers chose to artificially extend the game’s playtime by having you run from one area to the next and always take the longest route to your next objective. Additionally, while some boss battles are grandiose, others are not; some are frustratingly annoying, while others are over in an instant. The lack of consistency drags the game down a bit and not being able to replay a completed save to find everything you missed was a real annoyance for me but, despite some of its flaws, it was a fun, entertaining sprint to play through and I could see myself revisiting Strider in the near future to find everything I missed the first time through.

My Rating:

Rating: 3 out of 5.

Pretty Good

Did you ever play this version of Strider? What did you think of the game’s unique aesthetic and attempt to reboot the Strider franchise? What is your favourite Strider videogame, or appearance of Strider Hiryu? Whatever you think about Strider, feel free to drop a comment below.

Game Corner: RoboCop Versus The Terminator (Mega Drive)

GameCorner
RCvTLogo

Released: May 1994
Developer: Virgin Games USA
Also Available For: Game Gear, Master System, Super Nintendo Entertainment System, and Game Boy

The Background:
One of the greatest things about comic books published in the nineties was that the sky was, seemingly, the limit for plots, crossovers, and all kinds of stories to be told. Thanks to Dark Horse Comics snapping up the rights to some of the biggest science-fiction/horror franchises of the time, we got to see not only the likes of Aliens vs. Predator but also the cybernetic clash you always wanted to see in a movie but never got, RoboCop Versus The Terminator (Miller, et al, 1992). Given that the comic was written some time before Frank Miller flushed his reputation down the toilet with The Dark Knight Strikes Back (2001 to 2002), the RoboCop Versus The Terminator was relatively well-written, action-packed fun. The general premise was that RoboCop’s artificial intelligence (A.I.) formed the basis of the world-killing Skynet, which sent Terminators back through time to protect him and ensure its survival. Cue a time-line hopping, reality-bending story that sees RoboCop reduced to his digital consciousness, construct a fully robotic body, and travel back in time to destroy Skynet once and for all. It’s a pretty mental comic but, like Aliens vs. Predator, a fantastic concept that, apparently, had enough legs to warrant a videogame released on a number of consoles. I had owned and played the Master System version for years but, once I set my literal come corner up in my cabin, I knew that I had to track down the superior Mega Drive version.

The Plot:
Unwittingly responsible for the creation of Skynet, RoboCop must battle from the streets of Detroit, to the offices of Cyberdyne, to a war-ravaged future eradicating the Terminator threat and freeing hostages as he goes to ensure a future free from Skynet’s influence.

Gameplay:
Like the majority of videogames based on the RoboCop (Various, 1987 to present) and Terminator (Various, 1984 to present) movies, RoboCop Versus The Terminator is a side-scrolling action shooter with light platforming elements. Unlike the Alien vs. Predator (Capcom, 1994) arcade game, this is a strictly one-player experience that sees the player control RoboCop, who must blast his way through about ten levels taking out the likes of regular street thugs and Terminator alike. As much as I love RoboCop, he’s always a terrible character to control and play as; even in the excellent RoboCop (Data East, 1987) arcade game he was a slow, plodding hunk of metal and it’s more of the same here. RoboCop lumbers his way through levels at a steady pace, hopping half-heartedly to platforms (and, amusingly, monkeying his way across lines and pipes) and struggling to dodge incoming fire. While this is obviously a realistic way to portray RoboCop (who, despite being a massive efficient combat shooter, has never been the most versatile of sci-fi cyborgs), it does mean you can’t just plough ahead guns blazing.

RCvTJump
RoboCop has a real weight to him.

Instead, it’s best to hang back and keep an eye on enemy projectiles, ducking and hopping out of the way as best you can considering RoboCop’s massive hit box. Thankfully, many of the game’s environments are destructible and will yield all kinds of goodies, from baby food that will restore Robo’s health to extra lives and weapons. There are also loads of secret rooms to be found that hold similar rewards, encouraging exploration. RoboCop is armed with his trademark Auto-9 handgun and can fire in multiple directions; this alone is more than enough to take out most of the enemies he’ll come up against but, if you get up close to enemies, you can also punch them, and you can acquire bigger, better weapons as you make your way through the game’s levels. You can switch between these with a button press but, once your health is drained and you lose a life, you’ll lose one of your weapons until you return to the default Auto-9. the good news is that RoboCop can take a fair amount of damage and will return to action right on the spot where he fell, but the bad news is that it doesn’t take much to drain Robo’s health and there are a few occasions where environmental hazards (like vats of toxic waste or flaming pits) will instantly kill RoboCop.

RCvTHostages
Rescue hostages to refill health and score points.

While RoboCop is generally given simple objectives (like cleaning up the streets or destroying the Terminator threat), some levels will see him having to rescue a number of hostages. Upon being rescued, a portion of Robo’s health will be restored, which is helpful; also helpful is that it doesn’t appear to be a requirement to clearing the level to rescue these hostages; when you see them, you can touch them to rescue them but I never reached the end of a level and was told I’d failed or was forced to go back and save any hostages I’d missed, so it’s more about gaining health and points than a level-clearing obligation. Yes, like pretty much every videogame ever made, there’s a nice little score tally at the bottom of the screen that’ll increase as you take out enemies, rescue hostages, and collect items. Earn enough points and you’ll gain an extra life, which you’ll need as the game ramps up in difficulty as you progress from the thug-infested streets of Detroit to the robot-infested headquarters of the killer A.I. known as Skynet. It’s around this point that you’ll struggle a bit with RoboCop’s controls, hit box, and clunkiness; Terminators of all shapes and sizes (from the traditional T-800s, to the robotic endoskeletons, to spider-like drones and wall-and-ceiling-mounted cannons) will unleash a hailstorm of projectiles your way and you’ll need all of your best weapons and skills to make it through the game’s bullet sponge of a final boss.

Graphics and Sound:
Coming off of the Master System version (which, honestly, isn’t too and compared to some Master System ports), RoboCop Versus The Terminator boasts some gorgeous in-game graphics. RoboCop and his various enemies are big, fantastically-detailed sprites; while this does mean they have large hit boxes, it makes for some impressive, arcade-quality graphics.

RCvTBlood
Come for the cyborgs, stay for the gore!

One of the most enjoyable things about RoboCop Versus The Terminator is the copious amounts of gore it contains; when you blast away thugs, they explode in a bloody mess and it’s absolutely glorious. You’ll miss these effects once the Terminators begin to take precedence as the game’s primary enemies but, even then, you’ll see the T-800’s skin degenerate until only the endoskeleton is left, which is a nice addition. Alongside a few choice sound bites from the first RoboCop movie, the game features a techno-inspired soundtrack with a lot of beats and rocking bass; there’s some odd choices, like a sultry voice blurting out “Terminator!” every ten seconds or so but, while the game doesn’t feature either of the iconic themes from the two franchises, its techno-inspired beats seem heavily inspired by both.

Enemies and Bosses:
RoboCop will initially face little resistance from the street thugs of Detroit; they’ll shoot at him, sometimes from behind windows, and get in his way but they’re small fry and easily dispatched with a single shot.

RCvTRCvT
The T-800’s façade can be destroyed, revealing the robotic endoskeleton.

At the end of the second level, though, RoboCop comes face-to-face with a T-800 Terminator modelled closely on Arnold Schwarzenegger’s appearance from the end of the first film and the majority of the second. As a boss, this guy obviously takes more hits, degenerating from a fully clothed and skinned appearance to the iconic Terminator endoskeleton as the battle progresses. After this, similar Terminators will begin to appear as regular enemies; the Arnold models will take around three hits to put down (one to blast away the façade and two to destroy the endoskeleton) while the endoskeletons will take around two. Smaller Terminator drones also show up to spew projectiles at you as you journey deeper into the future and Skynet, but you’ll also encounter red Terminators, which are endoskeletons that take even more hits to put down.

You’ll also battle some classic RoboCop enemies, though Skynet is a giant floating skull…

You’ll also battle some iconic RoboCop bosses, such as ED-209 and (rather inexplicably) RoboCop 2 (or “RoboCain”), each of which are guarding the facilities and offices or RoboCop’s megalomaniacal creators, Omni Consumer Products (OCP). Once RoboCop travels to the war-torn future, he’ll battle bosses such as Terminator-controlled gatling guns, super-powered endoskeletons, and Skynet itself. Skynet is represented as a giant floating endoskeleton head that tosses small drones and projectiles at you while endoskeletons march in from either the left or the right side of the screen. This final battle is, honestly, a little underwhelming (though, honestly, most of the game’s bosses are after the first few and you’ve finished with RoboCain and Ed-209); you’ll have your work cut out for you to dodge all of the projectiles it throws at you and to unload enough bullets to finally do it in but I can’t help but feel the game missed out by not including a T-1000 battle or a final boss more reminiscent of the giant liquid metal T-1000000 spider from T2-3D: Battle Across Time (Cameron, Bruno, and Winston, 1996).

Power-Ups and Bonuses:
As mentioned, there are a variety of power-ups RoboCop can collect as he explores (and destroys) each level; baby food will replenish his health, little RoboCop heads will grant an extra life, and shields will grant RoboCop a generous period of invincibility. Most notably, though, RoboCop can acquire a variety of bigger, better guns which will dramatically increase his odds of survival; we’ve got everything from a traditional three-way spread to a grenade launcher, to homing missiles and a laser pistol. You can also grab one of ED-209’s arm cannons from a rapid fire burst, which is a pretty great little bonus; you can grab one of these during the boss battle with ED-209 but they do crop up in secret rooms and other areas of the game, too,

Additional Features:
There are three difficulty settings to pick from, each one carries a different set of lives, continues, and affects the amount of damage RoboCop can take. If you play on the hardest setting, enemies will be much more aggressive and the arrows that show you the way to go will also be missing. Aside from that, the only real incentive to replay again is to find all the secret rooms. As with all great old school games like this, there are a variety of cheats you can input that will grant you a whole bunch of lives and let you pick from all the available weapons. Unfortunately, though, you can only play as RoboCop; the narrative is geared in a way where Robo is the hero and the Terminators are the enemy but it might have been nice to see a mode where you play as a reprogrammed T-800.

RCvTBanner

The Summary:
RoboCop Versus The Terminator is a blast to play; while RoboCop is a clunky and cumbersome videogame protagonist at the best of times, you really get the sense that you’re playing as RoboCop and his quick-firing weapon and variety of additional armaments more than makes up for his heavy, stilted control. It also helps that there’s not many cheap deaths here; projectiles can come at you quickly but each enemy has a specific pattern that you can learn and exploit and, given the generous amount of health and power-ups on offer, there are instances when it’s okay to plough ahead guns blazing. Some levels can be a bit of a maze but, other than that, it’s worth it for the gore and the joy of seeing RoboCop punch a Terminator right in the face.

My Rating:

Rating: 3 out of 5.

Pretty Good

What did you think of RoboCop Versus The Terminator? What is your favourite RoboCop or Terminator videogame? What did you think of Frank Miller’s comic book? Do you think we missed out on seeing these two sci-fi icons clash on the big screen? Whatever you think, feel free to leave a comment below.

Game Corner: Bloodstained: Ritual of the Night (Xbox One)

GameCorner
BloodstainedLogo

Released: June 2019
Developer: ArtOkay
Also Available For: PlayStation 4, PC, and Nintendo Switch

The Background:
Developed by Koji Igarashi, famous for his role in producing the Castlevania (Konami/Various, 1986 to present), Bloodstained was funded by Igarashi through Kickstarter with the intention to make a spiritual successor to his popular gothic/horror series, specifically Castlevania: Symphony of the Night (Konami Computer Entertainment Tokyo, 1997). After raising over $5 million, Igarashi also developed an 8-bit style companion game, Bloodstained: Curse of the Moon (Inti Creates, 2018), which was more a spiritual successor to another popular Castlevania title, Castlevania III: Dracula’s Curse (Konami, 1989). While my experience and exposure to Castlevania is a bit limited, I had a good time with both Symphony of the Night and Curse of the Moon; both games required a lot of skill and patience to master their mechanics and, once Ritual of the Night was available on Xbox Game Pass, I decided to give it a whirl.

The Plot:
Back in the 18th century, the Alchemy Guild began summoning demons by forcibly infusing humans with demonic crystals to create Shardbinders. One such Shardbinder, Gebel, has begun summoning demons to destroy England and it’s up to another Shardbinder, Miriam, to confront him and put a stop to his efforts.

Gameplay:
Ritual of the Night plays pretty much exactly like Symphony of the Night in that it is a 2.5D action/adventure game in which the player guides Miriam through a number of gothic, Victorian locations making copious use of backtracking, exploration, and item management to uncover new areas, confront new enemies, and upgrade her weapons and equipment.

BloodstainedWeapons
Miriam can attack with a variety of weapons.

When you start the game, Miriam is capable of dodging enemy attacks with a backstep, jumping, attacking with a slide kick, and dispatching monsters with her sword. As you progress, you can expand upon these moves and also acquire and equip other weapons, like a pistol and, of course, the classic Castlevania whip. Miriam is also capable of using magic to move objects and attack enemies; her magic meter slowly replenishes over time but can be refilled faster by smashing candle sticks and similar background item as you explore the massive, maze-like castle and collecting magic orbs. When you destroy enemies, you may also absorb a magic Shard, which will allow you to assign a new ability to Miriam, allowing her to make use of Familiars, throw axes or spears, teleport short distances, or increase her stats.

BloodstainedUpgrades
Use magic books and boss Shards to obtain new abilities.

These Shards make up an essential component to Ritual of the Night’s gameplay as you will need to acquire certain abilities in order to progress further through the castle; they will enable you to backtrack to previous areas and access new locations, overcome certain environmental hazards, and increase your ability to dispatch enemies and bosses. However, you can only equip four different types of Shards at a time; luckily, you cans witch these on the fly by assigning shortcuts but you’ll still find yourself jumping back and forth between menus to equip the right Shard. Miriam will level up as she destroys enemies and gains experience points but, while she is tough, she will die if she takes too much damage. You won’t find any chicken or meat in the walls of this castle, unfortunately; instead, you replenish health by drinking Potions, eating certain foods, or using various Shards.

BloodstainedSaveWarp
Save or warp around the map using special rooms.

The game also uses exactly the same save and fast travel system as Symphony of the Night in that you’ll find save rooms (which will fully replenish your health and magic) and mirrors (which allow you to fast travel across the map) dotted throughout the game; but this system is maybe something I could have seen dropped as it creates a massive amount of undue tension when you’re in desperate need of a save room, with no Potions, and die at a critical part and have to replay a difficult section all over again. Also coming over from Symphony of the Night, and Castlevania in general, is the ability to smash through walls to reach new areas or pick up items that increase Miriam’s health or magic bar. You can also chat to non-playable characters in a nearby village; they will sell you goods and wears, ask you to perform tasks (generally just destroying certain monsters) for additional items, and, of course, give you access to the game’s crafting system. You can craft better items, increase the power and ability of your Shards, cook up new foods to increase your stats, or dismantle weapons for extra gear. On the whole, Ritual of the Night controls extremely well; Miriam can’t dash forwards or dodge through enemy attacks (or, at least, I was never able to get her to) but she can utilise special moves with each of her weapons to parry or counterattack enemies. There are a lot of options available for players to change Miriam’s look, upgrade her abilities, and equip gear and weapons and these are all reflected in Miriam’s appearance. In addition, while there are some platforming elements involved, Ritual of the Night is more about exploration but if you wander too far too fast you may jump right into an environment you aren’t ready for and be set upon by enemies you’re too weak to properly battle, which can result in some frustrating deaths. The only way to properly navigate through the game is to master Miriam’s abilities, equip the best gear, and learn the best ways of taking out monsters and crossing the game’s various environments.

Graphics and Sound:
Ritual of the Night closely apes the graphical presentation of Symphony of the Night but expands upon it greatly; the game has a number of environments, each one packed with details and impressive effects in the background. Miriam will scale a massive spiralling tower, wade through underground passageways, battle through both a hellish landscape and a frozen tomb, and trudge through a desert as well as explore a dilapidated ship, among other areas. Each section of the game has new enemies and obstacles to overcome, new secret areas to find, and can be connected to other areas through the warp mirrors or hidden passageways.

BloodstainedCutscenes
The game doesn’t completely avoid cliché dialogue.

Miriam and other characters and enemies are rendered using smooth 2.5D graphics; the game’s cutscenes use a mixture of static images and text with voice acting to fully-animated movies, though these are used sparingly. Voice acting is suitable enough; all the characters have an English accent or an exotic twang to their speech and do a serviceable job; there’s nothing quite as over the top as in Symphony of the Night, but Igarashi, thankfully, doesn’t completely shy away from the corny dialogue that made Symphony of the Night so enjoyable. As for music, there are a lot of tunes here that will be more than familiar with Castlevania/Symphony of the Night fans; there’s also some remixed and upgraded versions of tunes from Curse of the Moon, which was an inspired move considering how fitting and catchy those tracks were. Each one conveys the ominous presence of the area you’re in and brings yet more life to this gothic, nightmarish world.

Enemies and Bosses:
Miriam will battle a myriad of enemies more than familiar with any Castlevania fan: we’ve got everything from globby monsters, floating heads, possessed portraits, shrieking spirits, deadly toads, annoying bats, and fire-breathing dragons! Enemies increase in number and danger as you progress through the castle; go from beheading monsters with relative ease to dodging over bigger, armour-plated knights with spiked shields, drill-like swords, or familiar-looking shovels as well as giant werewolves, magic-spewing demons, and skeletal dragons.

BloodstainedBoss
There’s some massive bosses here!

The game not only beautifully renders its environments but produces some impressive bosses; you’ll battle titanic beasts such as a two-headed dragon that covers the entire background, a spider-like creature comprised of stained glass, and a giant, demonic mermaid creature. These massive bosses will test your endurance but they’re nothing compared to the more spritely, human-like bosses you’ll encounter; you’ll duel with a blood-spewing vampire, go sword-to-sword with the rogue swordsman Zangetsu, and battle against sorcerers in encounters that will test you reaction times, skill, and patience as you dodge their attacks, learn their patterns, and unleash your most powerful attacks to attain victory.

BloodstainedFinalBoss
The two-stage final bosses was a pain in the ass.

The game’s final boss combines both of these elements, pitting you against a demented sorceress who leaps about he screen attacking with her whip-like hair and various elemental magic attacks. Once you finally overcome her, she’ll spawn in a screen-covered, three-headed demon and launch a variety of energy and elemental attacks at you while you leap and dodge around the screen desperately trying to attack her and whittle down her insane health bar.

Power-Ups and Bonuses:
While you’ll upgrade your stats when you level up, as you explore your environment, you may uncover goblets that will increase your health bar, potions that increase your magic bar, and special pistols that increase how many bullets your guns can carry and fire. You’ll also obtain items and weapons from downed enemies and bosses and from a variety of chests hidden throughout the castle; when you equip a weapon or gear, it will have positive and negative effects on Miriam’s stats. You might increase her attack power, for example, but lose your resistance to fire damage, so you will have to use trial and error and a combination of gear to keep her stats in optimal condition. You can also check out magic books from a shady librarian, which will increase your stats further but the game’s main source of empowering Miriam come from the Shards you will obtain from enemies and bosses. These will eventually allow Miriam to move obstacles out of the way, use a double jump, teleport through narrow gaps or walls, and to breathe and manoeuvre underwater in order to reach new areas.

Additional Features:
The game has three different endings, two of which are considered bad endings. To reach the game’s true ending, you’ll have to backtrack to old areas, visit new areas, and battle through the game’s toughest enemies to acquire the items and weapons necessary to confront the true final boss of the game. Whichever ending you get, you’ll gain access to a Boss Rush mode to test you skills against each of the game’s bosses in turn. If you pursue the game’s true, good ending, you’ll eventually find hidden keys to battle three optional bosses and visit an 8-bit area for some classic Castlevania action. Obtaining the game’s true, good ending open up a Sound Test and allows you to play through again on New Game+, where you keep all your weapons and upgrades. If you’re a sadist and in need of an additional challenge, you can try the game in “Nightmare” mode to face much tougher enemies; there’s also a few codes you can enter when naming your game file to access different accessories, weapons, and amusing gameplay modes (like big head mode). To keep you playing and give you an incentive to playthrough the game again, the developers have been planning some free downloadable content that will not only allow access to other game modes and Zangetsu as a playable character, but it doesn’t seem to be available just yet. As you might expect, there are also a fair amount of Achievements available here, ranging from defeating certain bosses and completing a number of side missions, to completing the game’s extensive map and finishing the game on higher difficulties.

BloodstainedConclusion

The Summary:
Bloodstained: Ritual of the Night is an absolutely gorgeous game; for a Kickstarter-funded project, the controls and graphics and features available are impressive, to say the least, and ambitious. This is, in every way, a spiritual successor to Castlevania: Symphony of the Night, offering as much of the same challenge and reward as that game while also birthing an entirely new franchise and offering an entirely new experience for Castlevania fans. I imagine die hard Castlevania fans will get even more enjoyment out of this title but I’d argue that you don’t have to have played those games to enjoy this one, though it would probably help to be somewhat familiar with the concept or else you’ll struggle with the game’s massive amounts of backtracking. There are some aspects that I found frustrating; the save system, for one, the sharp spike in difficulty in certain areas, and the two-stage final boss but, honestly, there is nothing here that cannot be overcome without investing the time to master Miriam’s abilities, find better weapons and gear to increase her stats, and just learning how to overcome the challenges ahead of you.

My Rating:

Rating: 4 out of 5.

Great Stuff

What did you think of Bloodstained: Ritual of the Night? Have you played Castlevania: Symphony of the Night before? What is your favourite Castlevania, or Castlevania-inspired videogame? Leave a comment below and share your thoughts.

Game Corner: Final Fantasy VII (Xbox One)

GameCorner
FF7Logo

Released: March 2019
Originally Released: January 1997
Developer: Square Enix
Original Developer: Square
Also Available For: Mobile, Nintendo Switch, PC, PlayStation, PlayStation 3, and PlayStation 4

The Background:
It’s hard to talk about Sony’s PlayStation without talking about Final Fantasy VII. Traditionally released on Nintendo’s 8-bit and 16-bit titles prior to Square’s move to the PlayStation, Final Fantasy VII was released at a time when every recognisable videogame franchise worth a damn was making the jump from 2D to 3D. For many, Final Fantasy VII was not only their first Final Fantasy videogame but also their first experience of a role-playing game (RPG). Lauded upon release, the game went on to not only win numerous awards but also to sell over ten million copies on the PlayStation alone. So influential was Final Fantasy VII that it inspired a whole host of additional spin-off media from Square Enix, including the fantastic computer-generated movie Final Fantasy VII: Advent Children (Nomura, 2005) and the under-rated RPG/action shooter Dirge of Cerberus: Final Fantasy VII (Square Enix/Monolith Soft, 2006). Ironically, my experiences of Final Fantasy VII were quite limited at the time; I was knee-deep in my Nintendo 64 phase and still playing Mega Drive titles when it released, so I’m pretty sure it passed me by completely at the time. I had dabbled in a few previous Final Fantasy titles, however, thanks to emulators but I didn’t really become aware of the series until Final Fantasy VIII (Square, 1999) and even watched Final Fantasy VII: Advent Children before I first played Final Fantasy VII on PlayStation 3. However, with Xbox One owners like myself unable to play the recently-released Final Fantasy VII Remake (Square Enix, 2020) thanks to Sony’s current stranglehold on that title, I was fortunate enough to be gifted the Xbox One port of the PlayStation original which, thanks to the coronavirus lockdown, I was able to play through quite recently.

The Plot:
The Shinra Electric Power Company harvests Mako energy, draining the Lifestream of the Planet, and making life miserable for the lower classes. Cloud Strife, a former member of Shinra’s military branch, SOLDIER, reluctantly joins forces with the eco-terrorist group AVALANCHE to oppose Shinra, only to end up defending the world when legendary SOLDIER Sephiroth enacts  a mad plot to absorb the Lifestream and become a God.

Gameplay:
Final Fantasy VII is a traditional, turn-based RPG that emphasises exploration, strategic combat, item and party management, and has a heavy prominence placed on its complex and dense narrative. Players primarily take control of Cloud and form a party of up to three members (each of whom you can re-name, if you want) to engage in random battles across the game’s extensive overworld and many dungeons and locales, encountering a variety of non-playable characters (NPCs), enemies, obstacles, and mini games along the way. Players navigate numerous fantastically varied, pre-rendered environments in their quest; as you explore, you’ll find chests to open, items to pick up, buildings to enter, and innumerable numbers of NPCs to talk to. It’s through conversations with NPCs and your party members that you’ll learn more about Final Fantasy VII’s world, its dense lore, and the different cultures and societies that dwell within it. As a Final Fantasy title, you’ll easily sink over eighty hours of playtime into Final Fantasy VII, most of it watching cutscenes and engaging with the complex narrative. The rest of the time, you’ll most likely be battling and levelling up. As you explore the overworld, you’ll walk over fields, through forests, explore caves, dungeons, high-tech facilities, and even journey to the centre of the Planet itself. When not in a town, every step you take puts you at risk of entering into a random battle against a number of enemies; when a random battle occurs, you can try to run if you wish but, if you turn and fight, you’ll be presented with a number of options. Each character has strengths and weaknesses; some have higher hit points (HP) or magic points (MP); some can take more damage, or deal out more attack power, or are faster or slower. Having a diverse party is the first step towards winning battles, which take place using the game’s Active Time Battle (ATB) system. When a battle begins, the enemy and the player’s party exchange moves until the battle is ended in a constant cycle; take too long selecting your next move and you’ll leave yourself open to an attack.

FF7LimitBreak
Unleash your Limit Break to deal massive damage.

You can, however, alter this system in the game’s “Config” menu, which allows you to both increase the speed of in-game battles and reduce them to a more manageable, turn-based structure. Either way, when battling, you can choose to defend yourself to reduce incoming damage, select which enemy to target, or use an item to heal a character or otherwise turn the tide in your favourite. When battling, once the “Time” meter is full, you can choose how to engage the enemy. If you choose to attack, your character will rush forwards and deliver an attack to deal damage. When hit with an opposing attack, your party’s “Limit” meter will fill; once full, you can perform a powerful Limit Break, which will deal greater damage to your opponents and sometimes provide beneficial aids to your party. When using magic, keep in mind that some enemies will have their HP restored if you use elemental magic against them. Characters use magic when you assign them Materia, which is a kind of crystallised form of Mako energy; Materia allows characters to heal or revive each other, erect protective barriers, cast elemental spells (Fire, Thunder, etc), poison foes, turn them to frogs, and a whole slew of other benefits.

FF7Summons
Summon powerful beasts to aid you in battle.

The most powerful and useful Materia you can acquire allows you to call upon the powers of a Summon to aid you in battle; these bestial creatures can deliver heavy damage to bosses and groups of enemies and even resurrect your fallen comrades, but Summons drain a lot of your MP to use and some of them can only be used once per battle unless you link their Materia to another Materia to allow consecutive use or added effects upon their summoning. If all of your party is defeated in battle, the game is over and you must reload from your last save point; if you win, though, you’ll earn experience points (EXP). When you earn enough EXP, your characters will level up, increasing their stats and learning new, more powerful Limit Breaks. You also earn Ability Points (AP), which allow your Materia to level up as well and allow access to more powerful spells (Cure 2, Quake 3, etc); sometimes you’ll get items from victories as well and, of course, you’ll earn Gil.

FF7MiniGames
There are numerous mini games to distract you.

Gil is the currency of Final Fantasy VII; with this, you can purchase items and weapons and pay to restore your HP and MP at the various inns located in the game’s many towns and cities. Each character can be equipped a weapon, an arm band, and an accessory; these have slots that allow them to use Materia, protect them from certain attacks (or types of attack), and raise their stats. To obtain the most powerful weapons and Materia, you’ll have to not only battle some of the game’s toughest enemies and bosses but you’ll also have to complete a number of mini games and side quests. As you explore Final Fantasy VII, you’ll come across numerous side quests, mini games, and distractions from your main quest; there’s a side quest where Cloud most pose as a girl, for example, or a section where you must chase weird creatures through an ancient, maze-like city, defend a mountain from invading forces, snowboard down a mountain, and explore the depths of the ocean in a submarine. Visit the Gold Saucer and you’ll be provided with a wealth of mini games for you to waste your time on while the Planet looms moments from destruction. You can visit the arcade and throw basketballs into hoops, replay the somewhat-clunky motorcycle pursuit (wherein Cloud makes a dramatic escape, swiping at pursuers with his hefty Buster Sword), take on progressively difficult enemies one after another in the Battle Square in hopes of purchasing rare items and upgrades, or take a member of your party on a date.

FF7Chocobos
Capture, race, and breed Chocobos.

Additionally, if you choose to acquire the game’s two extra characters, you’ll get sucked into their side stories and side quests, one of which sees you first forced to do battle without your Materia and, later, battle progressively-difficult enemies in a pagoda, while the other involves a tough boss battle and a lot of dialogue. After Sephiroth summons Meteor and the Planet edges closer and closer to destruction, you’ll travel the world without Cloud to acquire the Huge Materia; getting this involves a lot of mini games, like button mashing in perfect harmony to speed up and slow down a train, chasing down and destroying an enemy submarine, or strategically placing troops to defend a giant condor egg. One of the game’s biggest side quests involves the capturing, breeding, and racing of Chocobos. These ostrich-like creatures can be found on the overworld when you have a Chocobo Lure Materia equipped and walk over their tracks but, unless your powerful enough to one-shot the enemies they are often accompanied by, you’ll need to shell out for some “greens” to distract them. Once you’ve caught a Chocobo, you can ride them around the overworld but, eventually, you’ll get the chance to buy up to six stables to keep your Chocobos in. You can then feed them to raise their stats and attributes and race them at the Gold Saucer; even when you allow the computer to race for you, though, this can be a time-consuming task as, to breed better, different-coloured Chocobos, you’ll need to win a lot of races and take part in a few battle sin the interim, all to breed the ultimate Chocobo, a Gold Chocobo, which can run over land, sea, and mountains to reach the game’s most powerful Materia. None of this is especially difficult but it is very time-consuming and I can’t say I was happy to have to do it all over again after doing it on the PlayStation 3 but, now that I’ve gotten a Gold Chocobo, I can rest easy in the knowledge that I won’t have to do that again.

FF7Distractions
You’re asked to perform a lot of different actions to advance the game’s plot.

Final Fantasy VII loves to throw a curveball at the player; just as you think you’ve mastered the game’s ATB system, you’ll be asked to press buttons at the right moment to perform a march or provide CPR. These little distractions and varieties in the gameplay can be fun when they’re optional but many of them are required to advance the plot, as well as netting you more EXP, more Gil, better items and Materia, and even a couple of extra party members. At times, they can feel like unnecessary padding as it seems like every time the team visits a town, you spend an hour or so running around doing some kind of arbitrary task that seems contradictory to the game’s otherwise ominous plot. Later in the game, such button-mashing sections are crucial to the game’s plot and failing them can cost you an Achievement or two or cause you to either miss certain rewards and Materia or have to earn them some other way through another side quest or at a high Gil cost. Similarly, just when it seems like you’ve gotten a grip on the game’s quirky nature, the entire complexion changes when Sephiroth murders Aerith, forever removing her from your party and as a playable character, summons Meteor to destroy the Planet, and the kaiju-like WEAPON emerge from the ground and go on a rampage. After this point, Cloud leaves the party for a time and you’re forced to fly around in the Airship with different party members collecting the Huge Materia all while a massive glowing sphere hover sin the sky. Even the overworld theme changes at this point, becoming more ominous; different WEAPON wander around the map and must be battled and Cloud is forced to confront the truth about himself and his path before rallying the team to confront Sephiroth.

FF7Characters
Each character has a story arc, a backstory, and nuance to them.

Characterisation is a large part of Final Fantasy VII’s narrative; each party member has a unique backstory and their own personality quirks and, as you progress, you’ll learn more about them and what makes them tick. Characters are surprisingly layered as well; Cloud has a reputation for being an edgy loner but he has some amusing moments, like when he’s forced to act in a play with Aerith (or Aeris, whatever you prefer) Gainsborough, or the way he shrugs dumbfounded whenever talking to Yuffie Kisaragi or Cait Sith. Barret Wallace, too, has a lot of layers to his character; he’s a passionate eco-warrior with a quick temper but also a doting father and carries a dark secret that the game forces him to confront, and this is true of each of the characters, in a way. Final Fantasy VII’s ability to flesh out each of its characters really increases your emotional investment in the game’s plot; even Sephiroth, who kills without a thought and is more than happy to crack the Planet open on a whim, is a tragic figure affected by the machinations of Shinra. Which characters you engage the most with will undoubtedly affect how you arrange and organise your party, though the narrative is structured in such a way that you are forced to have each member of the team in your party at least once (with the obvious exception of the optional characters).

FF7Map
The game’s map isn’t very clear, making navigation tricky at times.

With all that said, Final Fantasy VII can be a stressful experience; like all Final Fantasy titles at that point, Final Fantasy VII is quite a slow, measured experience. Cutscenes can’t be skipped, meaning if you die after a lengthy section of dialogue you have to sit through it all over again; random battles can take place every couple of steps, which can be frustrating when you’re low on HP and/or MP (you can turn them off by pushing in the analogue sticks but then you won’t gain EXP or AP), and there’s no fast travel system. This last is especially annoying thanks to the game’s map; while it’s useful, it’s not very clear. Towns and areas of interest are marked by small dots rather than names and, if you want to travel there, you’ll have to do so manually; I have to say that, once the Highwind upgrades to rocket boosters, it would have been nice to implement a fast travel mechanic. Similarly, as was the tradition at the time, you can only save the game at designated save spots or on the overworld, meaning that if you haven’t saved for a while and make a massive mistake, you’re in for a lot of backtracking. As a result, it’s wise to save often and consult one of the many comprehensive guides to be sure that you haven’t missed anything and are fully prepared for what’s ahead. I favour over-levelling my party so that I don’t have to worry too much about healing during a battle but, even then, you’ll encounter bosses and enemies that decimate your party in just a few hits.

Graphics and Sound:
As the franchise’s first foray into 3D, and being an early PlayStation title, Final Fantasy VII favours pre-rendered backgrounds, sprite work, and polygonal graphics, resulting in a game that, it could be argued, has a contradictory tone. On the one hand, you have these dank, desolate, steampunk-like industrial backgrounds or an apocalyptic calamity hanging overhead but, on the other, you have these super cute, chibi-style character models.

FF7Graphics
No matter the environment, you can always spot your character.

While Square went on to perfect the graphical presentation of the series in subsequent sequels, I actually really like the blocky, polygonal character models. Not only are they full of charm, appeal, and character, they are more than capable of conveying the character’s emotions (whether that is anger, stress, sadness, or confusion). Plus, it helps them to stand out against the game’s myriad of different environments; whether you’re stuck in a sandstorm, infiltrating a Mako Reactor, or exploring an ominous cave, you’ll always be able to spot Cloud and his cohorts.

FF7Cutscenes
The cutscenes often mix the in-game models with higher quality CG elements.

Add to that the fact that the game has some impressive CG cutscenes and, quite often, segues seamlessly from the standard in-game environment to a CG cutscene, incorporating the block characters alongside these striking cinematics. You’ll also be treated to quite a few higher quality CG cutscenes that render the characters in a more visually appealing manner; from the game’s breathtaking introduction, to the awakening of WEAPON, to the tour around the Gold Saucer, Final Fantasy VII is always a visual treat thanks to its distinct visual style. Without question, Final Fantasy VII features some of the best work from long-time series composer Nobuo Uematsu; this game features probably my favourite rendition of the traditional Final Fantasy theme and victory fanfare as well as the super catchy song that plays at the Gold Saucer (I could seriously listen to that all day, every day, and never get sick of it) and what has to be not only the best boss battle theme but also the greatest Final Fantasy theme of all time, “One-Winged Angel”. Even without that, though, that game’s orchestral soundtrack is extremely catchy and diverse, being epic and sombre when required and infusing each area with even more life and character.

Enemies and Bosses:
Final Fantasy VII’s world is filled with all manner of strange creatures; we’ve got weird little cacti, giant snakes, dragons, frogs, sentient masks, ghosts, bugs, horrible little lantern-carrying, hooded amphibians who are more than happy to shiv you to death, biomechanical monstrosities, toxic flytraps, laser-shooting fungi, and even sentient houses! Every new area has new enemies to contend with and I swear they get as incomprehensible as the game’s plot at times. All of these weird, obscure creatures exist side-by-side with more human-looking foes; you’ll battle a slew of Shinra flunkies, mechanical creations, and their covert arm, the Turks. Each battle requires slightly different strategies; even though I prefer to simply plough ahead, dealing as much damage as possible, even I will concede that it’s sometimes better to battle smart and use an enemy’s weakness against them. When you fight Reno and Rude of the Turks, for example, Rude won’t attack Tifa Lockheart because, as a smart man, he is infatuated with her; therefore, it can make battles against them much easier to have her in your party. Other times, it may be best to equip items and accessories that nullify status ailments or absorb elemental attacks, keeping your party safe and healed when they’re being attacked.

FF7MechBosses
Mechs and robots are plentiful in Final Fantasy VII.

You’ll also come up against some powerful mechs, often piloted or commanded by high-ranking Shinra officials. These mechanical monstrosities often have multiple parts to them, some which exclusively deal certain types of damage or cast certain spells. By the time you confront Shinra’s toughest mechs, you’ll most likely be well versed in casting Big Guard, Regen, and the likes of Comet and Ultima, which can vastly improve your odds in these battles as Final Fantasy VII’s biggest and baddest bosses often end up being a test of your endurance thanks to their high HP.

FF7WEAPONBosses
Battle the monstrous WEAPON to save lives and earn rewards.

You’ll also battle some truly monstrous bosses as you progress through the game’s story; some of these are simply creatures that you have disturbed in your travels or unleashed upon you by Shinra but you’ll also have to do battle the Planet’s defenders, the gigantic WEAPON. The story directs you to oppose Diamond WEAPON as it marches against Midgar but, to battle Ultimate WEAPON, you need to chase it down on the world map and survive a number of encounters with it, causing it to flee until you’re finally able to keep it in one place. The effort is worth it to acquire Cloud’s most powerful weapon, though.

FF7JenovaBosses
Whatever form it takes, Jenova means bad news for your party.

And then there’s the extraterrestrial calamity known as Jenova, whose cells are responsible for Sephiroth’s uncanny power and resulting madness. You’ll battle this creature in various different forms over the course of the game; mostly, it’ll be this mass of alien tentacles and amorphous lumps but you’ll also battled a mutated form of Shinra scientist Professor Hojo after he infuses himself with Jenova’s cells. Whatever its form, Jenova is a formidable foe that often requires you to attack its different, regenerating parts in specific ways. This comes to a head when you make it through the Northern Cave and to the planet’s core, where you’ll battle Jenova∙SYNTHESIS; how you battle this boss, and which characters you have, will determine the strength of the subsequent boss, Bizarro-Sephiroth. This chrysalis-like shell can have HP in the 180-thousands and is often battled with two or three parties at once, making for an extremely challenging ordeal, especially as it heals itself quite regularly.

FF7SaferSephiroth
Safer∙Sephiroth’s ultimate attack destroys the solar system!

Once you best it, though, you’ll finally go one-on-one with Sephiroth, who by this point has used the Lifestream to transform into the God-like Safer∙Sephiroth, a multi-winged eyesore whose ultimate attack literally destroys the entire solar system! If you’ve over-levelled, acquired the ultimate weapons for your team, unlocked the most powerful Limit Breaks, and acquired the strongest Summons, this boss isn’t too much of a challenge though. When I battled Safer∙Sephiroth in this playthrough, I cast Regen and Wall so that my party’s health would constantly regenerate and incoming attack and magic damage would be reduced, cast DeBarrier on Safer∙Sephiroth to allow my attacks to hit at full force, and put him down with one use of Knights of the Round. In actuality, Safer∙Sephiroth’s health and difficulty increases depending on the average level of your party and how you fought the bosses immediately prior to him, so you may have more difficult against him depending on the choices you make, but, generally speaking, I had more trouble with Ultimecia’s final form in Final Fantasy VIII. As if to reward you for all your hard work and the trials you have endured, Final Fantasy VII presents you with one final confrontation with Sephiroth. Thankfully, though, this is a battle you absolutely cannot lose and is more of a scripted event. Here, Cloud and Sephiroth go face-to-face within the Lifestream itself and, with a simple press of a button, you unleash Cloud’s ultimate Limit Break, the always-cool Omnislash, finally defeating Sephiroth once and for all with both ease and grace,

Power-Ups and Bonuses:
The only way to truly master Final Fantasy VII is to grind, grind, and grind some more. Winning battles gains that all-important EXP and AP, both of which are required to strengthen your characters and their magic. Some characters won’t even learn their best Limit Breaks unless you defeat a certain amount of enemies with them, all-but-forcing you to use characters like Aerith and Cait Sith if you want to fully power them up and unlock all of the game’s Achievements. The same is true for Materia; levelling it up not only allows access to more powerful magic, it also duplicates the Materia for others to use and leads you towards acquiring the all-powerful Master Materia, items which are essential to taking on the game’s optional bosses. In nearly every town or city you visit, there will be a weapons shop; here, you can purchase new weapons, arm bands, and accessories for your characters. These can be pricey, though, necessitating a lot of grinding or exploration for extra Gil and it’s worth noting that, while you might get a significant buff by buying a new weapon, you can just as easily find a more powerful one in a chest shortly after spending your hard-earned Gil. To acquire a character’s ultimate weapon, you may be required to complete a side quest or specific task; to get Vincent’s, for example, you first need to acquire him by completing a side quest, then either get a hold of the submarine or breed a coloured Chocobo to access a hidden cave behind a waterfall, then read some dialogue, and then you need to win ten random battles before returning to the cave to acquire the Death Penalty…but, to get Cid Highwind’s, you simply talk to the right NPC three times in a row. Sure, this is quite late into the game and you have to first travel to and from space but it’s a lot simpler.

FF7Transport
The game’s map, and modes of transport, open progressively, getting bigger and better as you go.

As mentioned, your Gold Chocobo will allow you to travel anywhere and acquire the most powerful Summon, Knights of the Round, but they’re not the only way to traverse Final Fantasy VII’s extensive overworld. You’ll acquire in a buggy, a little sea-based aeroplane, a submarine, and, eventually, upgrade to the comfort of Cid’s Airship, the Highwind; given how much of your time is spent travelling on foot, you’ll really appreciate the convenience of the Highwind allowing you to heal for free and travel at high speeds. Furthermore, there are two optional characters you can acquire at various points throughout the game; the hyperactive ninja Yuffie will randomly ambush you in forests and only joins you after you defeat her and then pick specific dialogue options, while the stern and stoic Vincent is locked away in a Shinra mansion and can only be acquired by battling a particularly challenging mini boss. There are some benefits to taking the time to get these characters though; not only do you get an Achievement for each, but having Yuffie in your party later on allows you to acquire the Leviathan Materia and Vincent is one of the more useful characters thanks to his powerful Limit Breaks (he also looks awesome).

FF7SecretBosses
You’ll need to be at the top of your game to battle these two.

As if that wasn’t enough, there are also two optional superbosses: Emerald WEAPON at the bottom of the sea and Ruby WEAPON in a sandy region. To fight Emerald WEAPON, you need a special Materia to eliminate the time limit imposed by being underwater and, to fight Ruby WEAPON, you have to be out of your mind! Seriously, these two are no joke; Ruby WEAPON can blast one of your party out of the battle entirely and both deal massive damage while sporting tank-like HP. In all my attempts at battling them the only one I came close to dealing any real damage to was Emerald WEAPON and even then it wiped the floor with me. To best these two, you absolutely have to have top-tier party members, Materia, and Limit Breaks along with a lot of luck and a well-thought-out strategy. Defeat Emerald WEAPON, and you’ll not only earn a whole bunch of EXP, AP, and Gil, you’ll also get the Earth Harp, which you can take a seemingly-innocuous NPC in the town of Kalm to earn three Master Materia: Master Summon, Master Command, and Master Magic. Not only does this net you an Achievement, it means that you have full access to every Summon, spell, and command in the game, which can not only massively overpower your party but also free up your weapon and armour’s Materia slots to add further buffs. If you visit this NPC prior to fighting Emerald WEAPON, you can trade him another item to earn the Underwater Materia, which can make the battle against Emerald WEAPON a bit easier by eliminating the threat of your party drowning. Defeat Ruby WEAPON, and you’ll get the Desert Rose, which Kalm’s generous NPC will trade you a Gold Chocobo for (though, in my experience, it’s far easier to breed your own Gold Chocobo).

Additional Features:
As you might expect, Final Fantasy VII comes with a bunch of Achievements, most of which are tied to some of the game’s more difficult and time-consuming mechanics. There’s one for reaching Level 99, for example, one for acquiring the maximum amount of Gil, one for mastering every Limit Break, one for having Cloud’s drag disguise being more appealing than Aerith or the delectable Tifa, and one each for defeating Emerald and Ruby WEAPON. It’s worth noting that some of the game’s weapons, accessories, and Achievements are dependant on you doing certain actions at various points in the game; you won’t be able to get the “See the Light” Achievement if Aerith is dead, for example, and you’ll have manipulate events early on if you want to take Barret on a date at the Gold Saucer. Similarly, if you don’t properly explore Nibelheim during a flashback, you can’t get Tifa’s last Limit Break. Another thing to note that this game sometimes struggles to register your Achievements; I had to beat the game three times and remove and re-upload my Xbox profile just to get the “A Feat of Meteoric Proportions” and “Wheel of Fortune” Achievements to register and there was a significant delay in the “The Slash to End All Slashes” and “Roundtable Destruction” Achievements popping, too. Apparently, this is a common issue with this game so I’d recommend saving frequently and making sure you have a strong and stable connection to Xbox Live.

FF7Boosters
Activate these boosters to cheese the game in no time at all!

If you’re finding the game difficult and struggling against these superbosses, the Xbox One version of Final Fantasy VII includes a feature that absolute breaks the game in half. I only found out about this feature after defeating Safer∙Sephiroth but it would have really helped to speed up my play time if I’d known about it beforehand. So, if you press in the left and right analogue sticks, two icons appear on the left-hand side of the screen: a fist and a “X3”. The fist grants you super-regenerating HP and MP and fills your “Limit” meter so fast that your Limit Breaks are constantly available; while can still be defeated with this activated, it’s massively unlikely and allows you to absolutely tank any enemies you encounter. This is made even more advantageous when you pair it with the “X3” booster which, as you might guess, speeds the game up to three times its usual speed. It was only by having both of these activated that I finally bested Emerald and Ruby WEAPON but, had I known they were an option, I would have used them the entire time as they’re absolutely game-breaking and would have really sped up all that Chocobo breeding!

FF7Conclusion

The Summary:
Final Fantasy VII is, by no stretch of the imagination, a masterpiece. It is an exhaustive, massively engaging experience filled with action, humour, despair, and hope. While the plot can get side-tracked delving into each character’s backstory, every event is specifically designed to flesh out the lore and characters. It doesn’t take long before you’re hooked on the distinct and charming visual style and the deeply nuanced characters and world-ending plot. Despite a few of the more annoying trappings of the series, the game is pretty much perfect from start to finish; it does a decent job of easing you into its mechanics and eccentricities (unlike Final Fantasy VIII which, as much as I love it, loves to dump information, training, and exposition onto you within the first half an hour) to the point that, after a while, you don’t even realise you’ve gotten the hang of the game’s core gameplay. The mini games and button-mashing sequences don’t last long and you’re often not penalised if you fail them, however if you play smart and save often (making liberal use of the save slots available), you can always better prepare yourself for whatever lies ahead. If you’ve never played an RPG before though, and prefer much more action-orientated titles, than I obviously wouldn’t recommend Final Fantasy VII. When I first played the PlayStation 3 version, I had the official Brady Games guide with me. This time around, I went on memory and instinct for the first chunk and was surprised at how well I did without at guide and how accessible the game can be. Sure, there are moments where you’ll have no idea where to go or what to do but that’s because you probably weren’t paying attention to the dialogue in the cutscenes. However, once I realised I had missed Tifa’s Limit Break (and after Meteor was cast), I went back to a guide to make sure I didn’t miss anything that would improve my chances in the endgame; a guide is also pretty much mandatory to breed a Gold Chocobo, as well. However, if you’re playing the Xbox One version, you can absolute cheese it with the boosters activated, making it more than accessible for casual or first-time players. If you take the time to play at a more appropriate speed, you’ll be required to invest a lot of your time, effort, concentration, and commitment but it’s well worth it. Even characters I don’t really use, like Red XIII and Cait Sith, have layers and nuances to their characters and I found their input to be useful even when the game forces me to deviate from my part of Cloud, Barret, and Vincent. Once you allow yourself to become engrossed in this deep, detailed world with is rich lore of genocide and strife, you’ll find a story rife with themes of alienation, persecution, and betrayal; a story that teaches us to value the life we have now and work with the planet, rather than against it. At the same time, you’ll battle some kick-ass monsters and go toe-to-toe with a literal God…and that’s always cool

My Rating:

Rating: 5 out of 5.

Fantastic

Phew, so…Final Fantasy VII, eh? What did you think of this much-lauded title? Where does it rank in your list of Final Fantasy games, or RPGs? Who was in your party when you played the game? Did you have a favourite section, Summon, or character? Did you know that you could cheese this version of the game of do you prefer to play at the original pace? Is the knowledge of Aerith’s news to you and are you now enraged because I spoiled a game over twenty years old? Have you been playing the recent remake and, if so, how does it hold up compared to the original? Did you enjoy the other Final Fantasy VII games and media released over the years? Whatever you think, whatever your thoughts, feel free to talk about them in the comments below.

Game Corner: Mega Man 11 (Xbox One)

GameCorner
MM11Logo

Released: October 2018
Developer: Capcom
Also Available For: PlayStation 4, Nintendo Switch, and PC

The Background:
Mega Man (or Rockman if you’re in Japan or one of “those” types of fans) is one of Capcom’s longest-running franchises. First debuting in 1987, the Blue Bomber has been blasting robots and navigating some of videogame’s trickiest platforms for decades now. In celebration of Mega Man’s 30th anniversary, Mega Man 11 saw the titular robot-blasting hero move away from the 8-bit-style throwbacks that Capcom had been releasing and back into a 2.5D environment for yet another round against the evil Dr. Wily. This one was a real challenge for me as, growing up as a SEGA kid, I didn’t experience a Mega Man title for quite some time and, while I have played a few of them and given them a fair shot, I’ve never actually played one from start to finish as I struggle with the series’ trademark difficulty spike.

The Plot:
The evil Doctor Albert Wily uses his Double Gear technology to empower eight Robot Masters and usurp his old rival, the kindly Doctor Thomas Light. Ever the hero. Mega Man volunteers to use this technology against Dr. Wily to put an end to his plans for world domination.

Gameplay:
Just like the classic Mega Man titles, Mega Man 11 is a sidescrolling action/platformer that puts players in control of the titular Blue Bomber. Mega Man must jump, slide, and blast his way through eight different stages to take on Dr. Wily’s eight Robo Masters, opposed by Wily’s other robots and a series of tricky platforming sections and traps.

MM11Buster
Blast your enemies with the Mega Buster.

Mega Man can blast enemies with his Mega Buster, which can be charged up to unleash a more powerful blast. As you explore each area, and destroy enemies, you’ll pick up a number of items that will help you on your journey. Yellow capsules will refill your health (and you’ll definitely need these), blue ones will refill Mega Man’s power meter, Bolts can be accumulated to purchase upgrades and buffs from Dr. Light’s lab, and Gears will power-up Mega Man’s Gear gauge.

MM11Gear
The Double Gear system increases Mega Man’s speed or power.

When full, you can press either the R or the L trigger to activate either the Speed Gear or the Power Gear. This is Mega Man 11’s newest gimmick as one will slow down time and enemies to allow you to attack enemies and bosses or navigate difficult areas a bit easier and the other will increase the damage output by Mega Man’s Mega Buster. In addition to this, as always, once Mega Man defeats a Robot Master, he gains their abilities for use in the remainder of the game. This is, once again, a crucial element to succeeding at Mega Man 11 as, if you take on a Robot Master without the necessary ability, the battle will be that much more difficult. Instead, while you can take on the game’s stages in any order, it’s recommended that you tackle them in a specific way so that you can whittle away at your opponent’s health that much easier. Mega Man can also call upon his robotic canine companion, Rush, to reach higher areas or fly across gaps; while this is useful, it can leave you open to attack and at risk of falling to your death.

MM11Spikes
You’ll want to avoid the spikes as they cause instant death.

And this will mostly likely happen a lot. In keeping with the franchise’s tradition, Mega Man 11 is a tough game; there are different difficulty settings to pick from (that restrict how many lives you have, among other things) but, even on the easiest setting, it’s no cakewalk. Mega Man stutters when taking damage, which can be the difference between making a jump or slipping off a ledge, feels very weighty when he jumps 9which can make precision platforming difficult), and has such an aversion to spikes that he will explode the moment he even brushes past one.

MM11Shop
Purchase upgrades and buffs in Dr. Light’s lab.

All of this means that you will need to farm those Bolts and make liberal use of the shop in Dr. Light’s lab. Here, you can buy Tanks to fully refill your health or energy (or both, which can be essential to outlasting some Robot Masters), extra lives, and other items to assist in your adventure. These all carry a weighty price, however, meaning that you’ll have to be able to play through at least one stage in order to farm enough Bolts to help your continued journey.

MM11Tough
Mega Man 11 is no walk in the park.

In the end, Mega Man 11 was exactly the same frustrating experience as every other Mega Man I’ve ever played; Mega Man is quite slow, feels like he has bricks in his boots, and will seemingly take any excuse to fall down a bottomless pit or run face-first into enemies and obstacles. Maybe it’s me; I will be the first to admit that I suck at Mega Man games but, despite how difficult and frustrating the game can be (even with some generous autosave points), it’s still a lot of fun to play thanks to the tight gameplay, gorgeous graphics, and catchy tunes.

Graphics and Sound:
Unlike most Mega Man titles, Mega Man 11 is a 2.5D adventure with 3D polygonal characters and 2D environments. The game reminds me of the Mega Man X (Capcom, 1993 to 2001) series in terms of its presentation, but the characters and graphics are more based on the classic, chibi-aesthetic of the 8-bit Mega Man, meaning everything looks very polished and highly detailed but also cutesy and cuddly.

MM11Cute
Mega Man 11 mixes chibi-cute with an anime-cool.

Mega Man 11 also features numerous tunes, music, and sound effects that will be recognisable to any Mega Man fan; containing remixes and updated version of classic Mega Man tunes, the music and the charming graphical style make even the game’s most frustrating platforming sections enjoyable as you can’t help but marvel at how great the game looks and sounds as Mega Man is exploding into a hundred pieces.

Enemies and Bosses:
Mega Man 11 features  a number of returning Mega Man enemies, such as the hard-hat-wearing Met and the shield-wielding Sniper Joe. Almost all of these can be dispatched with a few well-placed shots from the Mega Buster, but you may need to charge it up or switch to one of Mega Man’s other abilities to make shorter work of them.

MM11Enemie
Some enemies affect the environment.

Some enemies can adversely affect their environment; Lamper will light dark areas of Torch Man’s stage but also drops fireballs on you so you’re probably better off dodging its attacks so you can actually see where you’re going. Pipetto will spew chemicals that turn water into acid and the Mash Burner and Fire Server can cause damage to Mega Man after being defeated. Other enemies, like Mawaru C and the Tank Oven, shield themselves from Mega Man’s attacks and will require a precise shot or another ability to break through their defences.

MM11MiniBoss
Mini bosses can pack quite a punch.

When travelling through the game’s eight stages, Mega Man must contend with a mid-boss that can be just as tricky as Wily’s Robot Masters. You’ll battle against a spinning, spiked totem that will split into pieces, a fire-spewing turkey, and the ridiculous Frog Balloon (which is pretty much exactly what it sounds like). As with other enemies, and the Robot Masters, you’ll have to make use of Mega Man’s Gear abilities and the weapons you acquire from defeating the Masters to overcome these mid-bosses but, on your first playthrough, they can be quite the challenge and annoyance.

MM11Masters
Each Robot Master has a specific weakness.

Then we have the Robot Masters. Mega Man 11 features eight all-new Robot Masters (though their themes and powers are vaguely similar to those of past Mega Man titles) and the key to overcoming them comes from using the right abilities against the right boss. However, when you first start the game, you’ll only have Mega Man’s Mega Buster and Gear abilities, meaning it can be a bit difficult to whittle their health down, especially if you take on Block Man, as I did. Once you defeat one boss though, this pretty much determines which stage you’ll take on next; for example, one I finally defeated Block Man, I then took on Acid Man, who is weak to the Block Dropper, then Impact Man, and so on.

MM11YellowDevil
The classic Yellow Devil returns to plague gamers everywhere.

Once you figure out which boss is weak to which weapon, defeating the Robot Masters isn’t that difficult; getting to them, however, is where the game’s real challenge lies. Once you defeat all eight, you’ll storm Wily’s fortress, where you’ll get to face all eight one after another and also take on the classic Mega Man mini boss, the Yellow Devil. This guy splits himself up into sections to bash Mega Man about and attacks with massive lasers and mini versions of himself, but was actually easier for me to defeat than Block Man!

MM11Wily
Dr. Wily is no pushover but isn’t as tough as other bosses.

Similarly, Dr. Wily himself was actually much easier to defeat than some of his Robot Masters; Wily’s final machine has two forms, both of which are weak to the Acid Barrier and the Chain Blast. By this point, I knew to carry some Tanks with me to refill Mega Man’s health and energy and utilised the Power Gear to make short work of the mad scientist. Nevertheless, each of the game’s bosses are massive and multi-staged and present a significant challenge and encourages players to learn their weaknesses and the best ways of utilising Mega Man’s various abilities.

Power-Ups and Bonuses:
As mentioned, you can pick up capsules to increase your health, energy, and lives as you play. You can also pick up Tanks in stages to use for later but, generally, you’ll be boosting Mega Man’s abilities by defeating Robot Masters or spending Bolts at Dr. Light’s lab. These abilities can also help you navigate stages as well as increase your chances at defeating enemies; Tundra Man’s ice whirlwind can freeze an oncoming wall of lava in Torch Man’s stage and the Acid Barrier allows Mega Man to safely move through acid pools.

MM11Menu
Equip your items in the menu screen.

In Dr. Light’s lab, you can also purchase items that greatly improve your chances at clearing the game’s stages, such as boots that keep you from slipping on ice (pretty much mandatory for Tundra Man’s stage), or items that automatically charge up your weapons. You can also purchase a few one-time use items that will protect you from the instant death of spikes, have Beat recover you when you fall down a hole, or turn onscreen enemies into energy.

Additional Features:
In addition to the main game and its various difficulty settings, Mega Man 11 also features time trials, a challenge mode, character galleries, and online leaderboards. In these modes, you’ll take on the game’s stages under a time limit or with the intention of meeting certain conditions; while you will have access to Mega Man’s other abilities, you won’t get any of the buffs or bonuses you can purchase from Dr. Light’s lab and you’ll have to do it all on one life, so this is mainly recommended for players who are actually good at Mega Man games (so…not me, then).

MM11Extras
There are a number of extra modes to keep you busy.

There’s also a boss rush, where you’ll take on the Robot Masters and bosses one after the other, and whole bunch of Achievements to get; most of these are tied to conditions outside of the time trials and challenges. Some can only be get on your first playthrough as well, which is annoying, but you’ll pick up a fair few just on a casual playthrough. Otherwise, there’s no additional characters to play as or unlock here and it seems like we missed out on an additional skin for Mega Man as well, meaning you’ll mainly come back to the game to beat the higher difficulty settings.

MM11Conclusion

The Summary:
Mega Man 11 is a challenging experience…unless you are able to plan ahead and utilise all of the abilities the game affords you. If you blunder into a stage without thinking about it, or without the right weapon or extra Tanks, you’ll probably struggle with some of the tricky platforming, bottomless pits, and enemy placements to say nothing of battling the Robot Masters). Unfortunately, this was largely how I approached the game: head on and guns blazing. Once I understood how to use the Gear system and the best way to tackle each stage and Robot Master, the game became much easier. I still had to tackle it one stage at a time, rather than continuously playing, but this made it an enjoyable enough experience. Any time you fail or die, it’s because your skills aren’t up to the task so the only way to succeed is to get better and push a little further. There’s plenty of incentive to do that but, honestly, I feel like hardcore Mega Man gamers will get far more out of this one than novices like me.

My Rating:

Rating: 3 out of 5.

Pretty Good

What were your thoughts on Mega Man 11? Do you find the series to be a challenge or have you managed to master the Blue Bomber? What is your favourite Mega Man game? Let me know your thoughts and opinions in the comments.

Game Corner: Star Wars: The Force Unleashed II (Xbox 360)

GameCorner
SWFU2Logo

Released: October 2010
Developer: LucasArts
Also Available For: iOS, Nintendo DS, PlayStation 3, Nintendo Wii, and PC

The Background:
Despite its flaws, Star Wars: The Force Unleashed (ibid, 2008) was a commercial success; as a result, LucasArts rushed into production with a sequel to what was, at the time, the official bridge between the events of Star Wars: Episode III: Revenge of the Sith (Lucas, 2005), and Star Wars: Episode IV: A New Hope (ibid, 1977). My experience with The Force Unleashed was mired by the game’s dodgy camera, wonky physics, and repetitive levels and combat. When the game shined, it shined pretty brightly but even its best moments couldn’t overshadow the flaws in the engine and execution. The story, while interesting, had a few issues as well (even more so considering the games have long since been rendered non-canon by Disney), and was pretty well wrapped up with Darth Vader’s turncoat secret apprentice, Starkiller, dying a martyr to inspire and rabble the Rebel Alliance. But the franchise made money so, armed with the lamest excuse possible, LucasArts came back with this sequel but does it improve on its predecessor’s failings or is it more of the same?

The Plot:
After multiple failures, Darth Vader has finally perfected a clone of his secret apprentice, Starkiller. However, haunted by the memories, feelings, and motivations of his predecessor, the clone sets out to uncover the truth of his identity and reconnect with his lost love, Juno Eclipse.

Gameplay:
Like its predecessor, Star Wars: The Force Unleashed II is a third-person action title in which the player controls a clone of Vader’s secret apprentice, Starkiller. If you thought Starkiller was a damaged, edgy character torn between his divided loyalties, this clone ramps it up to eleven as duplicating Starkiller’s prowess with the Force also meant duplicating his memories and emotions. Nowhere is this more evident in the fact that Starkiller now wields duel lightsabers, holding them both behind him like an absolute bad-ass. As a result, the already frenetic combat of the original is dialled up in this sequel; whereas you could just mash away at the X button in The Force Awakens to cut down foes, it was also encouraged that you time your strikes to unleash an impressive flurry of damaging attacks. Here, though, the combo system is literally as simple as successively hitting X to turn Starkiller into a laser-sword blur of blades and attacks; regular enemies no longer have their own health bars, meaning you’re literally encouraged to just mash away until they’re defeated.

SWFU2Force
Starkiller’s Force powers are back, stronger than ever.

Most of Starkiller’s basic Force abilities make a return; you can fry Stromtroopers with Force Lightning, push or toss them (and objects) with Force Push and Force Grip, or blast them away with Force Repulse. The game also places far more emphasis on pressing Y or O during a lightsaber combo to deal additional damage with Force Lightning or Force Push, which is extremely useful for clearing out waves of enemies or dealing additional lightning damage. While the life-sapping Force Shield is absent, Starkiller can now use a Mind Trick to convince his enemies to turn on their comrades or leap to their deaths which, while handy (and pretty much mandatory in the game’s final battle against Vader), can be clunky; I found it either wore off too fast or enemies just shrugged it off when I applied it. as you cut down enemies, you’ll build up a meter in the bottom left of the screen; once fully charged, pressing down the two analogue sticks will send Starkiller into a “Force Rage”, which increases his attack power and resistance to injure for as long as the meter lasts (which, to be fair, is quite a while). As you cut down enemies, you’ll earn points that can be used to upgrade each of Starkiller’s abilities, similar to the last game but much simpler and more streamlined. Gone are the multiple of combos you had to purchase and you have no need to buy new Force abilities as Starkiller either remembers them or learns them as he progresses, meaning its far easier to power-up Starkiller’s abilities.

SWFU2Grip
The Force Grip is now, thankfully, much easier to pull off.

Also like in the first game, you can acquire crystals to customise the appearance and abilities of Starkiller’s lightsabers; you can mix and match the different blades for added effects and bonuses, though, unfortunately, there’s no way to customise your favourite blade colour with your preferred buff. While Force abilities are still a vital part of the game, and the combat system, I found they were mostly relegated to opening doors (which I still find difficult due to the game’s physics and hit detection) and tossing objects. Thankfully, gripping TIE Fighters and lobbing various bits of the environment at your enemies is much easier here; in the original, it felt like I was always fighting to get a grip on passing TIE Fighters and that they would just go flying wherever they wanted but, here, the system is much improved.

SWFU2Grapple
Grapple enemies to deliver massive damage.

Yet, for the most part, the game’s combat is focused almost exclusively on lightsaber combat. Perhaps because the clone is so emotionally unstable, combat is fast, brutal, and frenetic; Starkiller can grapple his foes to deliver either an instant kill or massive damage; he also lops off Stromtrooper’s heads and limbs this time around and can once again leave enemies open to a devastating parry with a well-timed press of the block button. Starkiller can still hurl his lightsabers at his enemies to cut them down from a distance, too, but I actually found myself using this far less in combat as it leaves Starkiller vulnerable as he waits for his weapons to return; instead, the game mostly focuses on using this ability to cut down platforms.

SWFU2Enemies
Don’t let enemies overwhelm you or you’ll have a bad time.

In addition to attacking with more power and proficiency than before, Starkiller also seems to be noticeably tougher; he can still lose health rapidly when pinned down or subjected to multiple attacks but his new combat style allows him to quickly cut down those before him to refill his health and force meter. You’ll need these skills as well as the game’s enemies seem much tougher and smarter this time around; snipers blast at you from the high ground in the distance or behind waves of regular Stromtroopers, who hunker down behind cover or buzz around on jetpacks. Even the bog-standard Stromtroopers can take a beating as well, meaning you should always go for overkill when engaging with hallways filled with enemies. Speaking of which, while the game is far more linear in its environments and level layout than its predecessor, I find it amusing, then, that the game ditches a traditional map and, instead, allows you to “sense” the way you need to do with the directional-pad as it’s highly unlikely that you’ll get lost in the game’s straight-forward environments. You’ll still be tasked with performing some mandatory platforming; Starkiller can double jump and dash on the ground and in the air to cross gaps but, more often that not, you’ll probably have to use the Force in some way to create makeshift bridges.

SWFU2Freefall
The Force Unleashed II loves these free-fall sections.

While platforming is light, it is mostly okay; Starkiller is nowhere near as slippery and janky as before and the game’s engine doesn’t seem to be struggling to render everything this time around, meaning you’re far less likely to slip or glitch off a ledge. The game does suddenly through a whole mess of tricky platforming at you when you storm Kamino’s cloning facilities in the final chapter, however, so it’s best you work on perfecting those jumps. Also as before, you’ll be tasked with performing a number of quick-time events (QTEs), especially against largely enemies and during boss battles. While these aren’t anything too complex beyond either pressing or mashing a button (or two buttons) at the right time, I found that the QTE indicators were harder to spot on the screen as they often appear at the edges of the display. There are also numerous moments where Starkiller dives through the air at high speed, dodging obstacles or blasting them (or enemies) with his Force abilities; while these are fun and exhilarating, the game maybe uses them a few too many times. Luckily, the poorly-conceived Star Destroyer section of the original is turned on its head here where Starkiller has to clear a path for a ship that is crashing through Kamino’s atmosphere, which is much improved.

SWFU2Glitch
My game glitched out on me, wouldn’t load this boss, and then crashed.

Luckily, the game’s stability has been noticeably improved over its predecessor; enemies no longer turn into stupid ragdolls when you defeat them or toss them around and I encountered far less glitches and issues with jumping or interacting with the environment. However, I did experience a few issues with slowdown, stuttering, and instances where the game didn’t load in the required environment or boss battle. This may have been because of the condition of my game disc, however as, after I cleaned it, the game continued to run fine but it was noticeable.

SWFU2Length
Before you know it, you’re facing off with Darth Vader and the game is over.

What really lets the game down, though, is its length and variety; I was annoyed that you revisited the same levels in The Force Unleashed and that, while the game evoked the spirit and aesthetic of Star Wars, it didn’t really do much to show us more of this sprawling, multi-cultural galaxy. For the sequel, you’ll battle through hallways-upon-hallways in many grey-coloured environments, whether it’s on a starship or the facilities on Kamino. The game tries to mix it up with some puzzle elements involving you powering up doors and visiting Cato Neimoidia (which is little more than a reskinned Geonosis) and briefly stopping by Dagobah but the majority of your time is spent exploring very similar-looking environments. Additionally, the game seems much shorter than its predecessor; I blew through the main story on the “Medium” difficulty and only missed one lightsaber crystal and with only a few Force abilities left to upgrade (easily remedied with a quick replay of some of the game’s other levels). The game’s length is so noticeably short, and its environment so conspicuously limited, that it almost feels like an extended add-on to the first game, like they took an idea for downloadable content (DLC) for The Force Awakens and simply padded it out to fill four to six hours of repetitive combat and gameplay.

Graphics and Sound:
Graphically, The Force Unleashed II isn’t much of an improvement over its predecessor, either; the cutscenes are of about the same quality and the in-game graphics only seem like they have been slightly tweaked and improved. I’ll give it this, though: the game really knows how to render the interior of a starship and the storm-swept landscape of Kamino; while this may mean that the game’s overall stability and quality is noticeably improved as the game isn’t trying to render or process loads of different elements all at once, it does make for a far blander and less interesting aesthetic experience as the game never reaches the heights of the original’s run through the Death Star laser cannon.

SWFU2QTEs
The game looks pretty decent, for the most part.

Once again, one of the best elements of the game is the incorporation of John Williams’ iconic Star Wars tracks. While you don’t get the same exhilaration as cutting down Wookies as Darth Vader while the Imperial March plays, the use of familiar Star Wars tracks once again works extremely well with the game’s visual fidelity to the movies to make it feel as though the game and its characters are deeply entrenched in Star Wars lore.

Enemies and Bosses:
For the majority of The Force Unleashed II, you’ll be cutting your way through swathes of Stromtroopers; we’ve got the generic minions, sniper and jetpack-wearing variants, and staff-wielding Riot Troopers. Despite the ease at which you can cut through these guys (the jetpackers, especially, go down much easier than in the first game), it does feel as though their intelligence, durability, and aggressiveness has been tweaked slightly to make them a bit more of a threat. Thankfully, the annoying Purge Troopers are no longer present; in there place, are a series of robotic enemies. The large variants wield shields that you must wrench off them with the Force and can attack with explosives, flamethrowers, or even carbonite sprays. You’ll also battle AT-MPs and AT-STs, both of which require to you reflect missiles back at them and, like these larger robots, can be destroying using QTEs.

SWFU2Gorog
The battle against the Gorog just keeps going on and on!

The game also brings back Force-sensitive and lightsaber-wielding foes, who are resistant to your lightsaber attacks and Force abilities, respectively, though the new grapple move is very useful for breaking through their guard. You’ll also battle spider-like terror droids (who can swarm you in an instant and must be destroyed en masse with Force Repulse) and enemies who are invisible and intangible until you stun them with Force Lightning, but, beyond Stormtrooper and droid variants, that’s about it for the game’s enemies. The Force Unleashed II is also a little thin on the ground when it comes to its bosses; at one point, it seems like the game is building up to a battle against Boba Fett but this never actually occurs, which is a shame. While the first game had far more boss encounters, though they were generally all variations on the same thing but, here, there are as few bosses as there are levels. The game tries to make up for it by making the few boss battles you do have to contend with last a long time; when battling the gigantic Rancor-eating Gorog, for example, you’ll have to dodge its massive claws, charge up its shackles with Force Lightning before attacking them with your lightsaber, and then mash the B button to Force Push the creature back into its restraints. Once you sap its health, you’ll then have to blast it with Force Lightning and attack it (and a few waves of Stromtroopers) from a higher gantry in order to sever the structure holding it in place and then you’ll dive after it at high speed, zapping and slashing at it before it can crush your ally, all of which can be an extremely exhaustive experience.

SWFU2Vader3
Eventually, the battle is decided by a QTE.

This exhaustion continues with the final bout against Darth Vader; unlike in the first game, where you could choose to battle Vader to the death or take on the Emperor at the end, The Force Unleashed II ends on an annoying multi-stage duel with the Dark Lord himself. Being so thoroughly bested by his apprentice in the first game must have really pissed Vader off, too, as he’s much more of a threat in this sequel; your Force abilities are all but useless against Vader here, requiring you to unleash your best combos against him on the rare occasions when his guard his down. Like the final duel of Star Wars: Episode I: The Phantom Menace (ibid, 1999) and the battle between Yoda (Frank Oz) and Palpatine (Ian McDiarmid) in Revenge of the Sith, this finale takes place on a vertical plane, with Starkiller and Vader having to leap to platforms across a bottomless chasm deep in Kamino’s cloning facilities. As the fight progresses, you’ll have to send debris and objects back at Vader to damage him and then use your Mind Trick to convince flawed Starkiller clones to distract and damage Vader enough for you to really open up on him. Finally, the fight ends out on a rain-soaking landing platform, similar to the fight between Obi-Wan Kenobi (Ewan McGregor) and Jango Fett (Temuera Morrison), where your Force Range will be fully powered and you’ll have to win a few QTEs to finally best Vader in combat and be able to, once again, choose between a Light Side ending and a Dark Side ending.

Power-Ups and Bonuses:
as in the first game, you can pick up Jedi and Sith Holocrons hidden throughout every level; these will either give you a bunch of additional points to upgrade Starkiller’s abilities or provide you with a crystal to customise your lightsaber. These Holocrons are far easier to spot than in the first game and there’s even two additional variants, green and blue, which expand Starkiller’s health and Force meter respectively. While you can no longer acquire in-game buffs that make you invincible or the like, the different lightsaber crystals allow you to drain health from enemies, increase the replenishment of your health or Force meter, or earn more points from combat. You can also customise the lightsaber to deal additional lightning damage, possibly set enemies on fire, or even have a chance to disintegrate them entirely with the mythical Darksaber. As you play through the game, you’ll unlock additional costumes for Starkiller; you can also unlock further costumes by succeeding in the game’s “Challenge” mode and, if you have a save file from The Force Unleashed on your hard drive, you’ll gain access to three additional costumes (including the awesome Sith Stalker costume).

Additional Features:
As in the first game, you can unlock concept art and data files by playing the game; you can also input various cheat codes that allow you to save you having to unlock costumes and skins such as Boba Fett, though most of the game’s best costumes are restricted to DLC. Also present is the aforementioned “Challenge” mode; as you play the game, you’ll unlock new maps and challenges to take on in this mode, which generally require you to survive against waves of enemies while staying on a platform or collecting Holocrons, all against a clock. Depending on how well you do, you’ll receive either a bronze, silver, or gold medal and unlock additional costumes. DLC is far less extensive in this game; unlike the first, there is only one additional mission available in DLC. This non-canon extension of the game’s Dark Side ending sees players assume the role of the dark clone of Starkiller, who is sent to kill Princess Leia (who has become a Jedi in this timeline) during the Battle of Endor and winds up drop-kicking Ewoks and killing both Han Solo and Chewbacca for good measure.

SWFU2Conclusion

The Summary:
For everything Star Wars: The Force Unleashed II improves from its predecessor, it has a near-equal number of failings as well. The game is far simpler; the interfaces are cleaner and easier to navigate, the plot is much more simplifier, and the combat has boiled down to a simply button masher. While this makes the game fast-paced, frenetic fun at times, it comes at the cost of the game’s length, difficulty, and replayability; the environments are even more limited than its predecessor, the plot is paper thin is the bare minimum excuse to produce a sequel, and it largely adds little to the first game or the overall Star Wars lore. Unfortunately, there’s probably less appeal in The Force Unleashed II than in the original; at least in that game, we got to see some familiar characters return and the formation of the Rebel Alliance be fleshed out but, here, we’re not really learning anything new. All this sequel shows us is that it was foolish for players to be emotionally invested in Starkiller and his new allies as even PROXY, who was clearly destroyed in the original, returns here (adding nothing to the narrative) and Juno, for all the importance the game places on her in Starkiller’s life, is little more than a damsel in distress and is never interacted with until the last moments of the game. Overall, The Force Unleashed II is far less frustrating than its predecessor but still an average gameplay experience. The developers definitely tidied up the combat and the physics but it doesn’t change the fact that this sequel is little more than an shameless cash-in n the success of The Force Unleashed. Were this game’s story condensed into a piece of DLC and its improvements and tweaks placed into The Force Unleashed, we could probably have had a really good Star Wars game but, instead, we got two lacklustre titles that, for all their potential, fail to really provide a coherent gameplay experience between them.

My Rating:

Rating: 2 out of 5.

Could Be Better

What did you think abouy Star Wars: The Force Unleashed II? Did you consider it to be superior to its predecessor or were you just as unimpressed with the game’s length and variety as I was? What is your favourite Star Wars videogame (or movie, or show, or book, or whatever), if any? Either way, drop a comment below and let me know.

Game Corner: Star Wars: The Force Unleashed (Xbox 360)

GameCorner
SWTFULogo

Released: September 2008
Developer: LucasArts
Also Available For: iOS, J2ME, N-Gage, Nintendo DS, PlayStation 2, PlayStation 3, PlayStation Portable, Nintendo Wii, PC, and Mac

The Background:
Before Disney bought the entire Star Wars (Various, 1977 to present) franchise and decided to reboot it with a bunch of questionable sequels, George Lucas was still firmly behind the wheel of his signature series. Development of a new Star Wars videogame began in 2004, around the time that Lucas was finishing up Star Wars: Episode III: Revenge of the Sith (ibid, 2005), and, eventually, the developers decided to work in close collaboration with Lucas in bridging the gap between that film and the seminal Star Wars: Episode IV: A New Hope (ibid, 1977). The decision was made to introduce the idea that Darth Vader had secretly been training an apprentice, known as “Starkiller”, to not only hunt down and destroy any remaining Jedi but also to assist him in overthrowing Emperor Palpatine. In service of this, Vader would use Starkiller to form the fledging Rebel Alliance, thereby effectively creating his own downfall. While these events would later be rendered non-canon after the Disney buyout, for a time they stood as the established origins of the Rebel Alliance. Personally, I haven’t really enjoyed a Star Wars videogame since Star Wars: Rogue Squadron (Factor 5/LucasArts, 1998) and have only dipped in and out of subsequent titles as the franchise has dabbled in almost every conceivably genre. I’d heard, however, that The Force Unleashed was a pretty decent title, if mired by some frustrating controls and gameplay elements. Nevertheless, distrustful of Electronic Arts and their shameless loot crates and being unwilling (read: poor) to shell out for Star Wars Jedi: Fallen Order (Respawn Entertainment, 2019) yet having a Star Wars itch, I decided to take the plunge with The Force Unleashed and see if it holds up after all this time.

The Plot:
During his mission to hunt down and destroy the remaining Jedi, Darth Vader stumbles upon the son of a Jedi, whom he takes as a secret apprentice. Trained in the Dark Side of the Force, Vader’s secret assassin, Starkiller, is sent out into the galaxy to purge the Jedi and lay the foundations for Vader’s coup against the Emperor.

Gameplay:
Star Wars: The Force Unleashed is, like many Star Wars videogames, a third-person action title in which the player controls Starkiller, a troubled and damaged young man who is strong with the Force and well-trained in the Sith arts. As a result, Starkiller wields a lightsaber and can use the Force in a variety of ways to strike down those before him. Combat is largely built around the execution of combos that string together successful lightsaber strikes with Force abilities. Starkiller can blast foes with Force Lightning, push or toss them (and objects) with Force Push and Force Grip, blast them away with Force Repulse, or envelop himself in a life-sapping Force Shield. As he cuts down Jedi and Stormtroopers alike, he earns experience points which can be used to unlock additional combos and improves his abilities. Luckily, there’s no crafting system and the skill tree is ridiculously easy; you can acquire crystals that will allow you to customise the look and abilities of Starkiller’s lightsaber and can improve the strength of his various attacks or regenerative abilities by spending Force Points.

SWTFUCrLightsaber
Starkiller holds his lightsaber like an absolute bad-ass.

Speaking of Starkiller’s lightsaber, you know he’s a bad-ass not just because he has a no-nonsense buzzcut or a near-permanent scowl but also because he holds his lightsaber backwards! What a rebel! Holding down L2 will allow Starkiller to block incoming blaster fire and attacks (and pressing it at the right moment will also allow him to parry), though he can also automatically send bolts back to his foes as he runs along. Lightsaber combat is simple and fluid; hitting X at the right moment will initiate a fancy flourish that can be chained with subsequent attacks to deal massive damage, and Starkiller can even hurl his lightsaber like a boomerang to take out ranged foes and charge it with his Force Lightning to electrocute his enemies. It’s not all combat and tossing fools to their death with the Force, though; you’ll have your reaction time tested in more than a few quick-time events (QTEs) and Starkiller generally navigates through a limited number of largely limited, if relatively-well-realised environments, jumping and dashing his way to a series of objectives. There’s some light platforming here that requires the use of a double jump and dash, and a few extremely basic puzzles that pretty much always boil down to using the Force to move something to either cross a gap or open a door (or, sometimes, both!)

SWTFUStarDestroyer
While impressive, this part is a pain in the ass.

While Starkiller controls very well, what will mess you up is the game’s wonky physics engine, unreliable camera, and janky controls; I struggled endlessly with the Force Grip, which either allowed me to suspend objects uselessly in mid air or sent them careening futilely against a wall and, as many have commented. This becomes a massive source of frustration during what should have been the game’s crowning achievement: pulling a Star Destroyer from the sky. While pulling the ship down wasn’t actually that difficult (though it is frustrating having to angle it into the right position), it’s the wave-upon-wave of TIE Fighters that make this so aggravating. Starkiller can’t deflect TIE Fighter fire and the only way to destroy them is to grab them with the Force and, I swear, it’s damn near impossible to get a grip on them.

SWTFULevels
Levels are very Star Wars but not very inspiring.

Compounding the matter is the fact that Starkiller is actually quite weak; you can upgrade his health and Force meter and the damage he can receive and dish out, but he bounces around the place like a puppet when he’s blasted with heavy weaponry and sometimes takes so long to jump back up that he can get blasted to death with very little effort. As a result, you’ll be constantly jumping and dashing about cutting down the regular Stromtroopers to refill your health and allow you to pummel away at the game’s tougher enemies. While the game is a decent length and tells a pretty engaging story about Starkiller’s eventual redemption and sacrifice, the level variety leaves a lot to be desired. Every environment feels very Star Wars and you’ll battle through a TIE Fighter factory, the woodlands of Kashyyyk, and even through the Death Star itself but the problem is that you basically revisit the same environments twice over. You begin the game as a fully-powered Vader slaughtering Wookies on Kashyyyk and later revisit this planet as Starkiller; Starkiller journeys to Raxus Prime to assassinate a Jedi and later returns there to rescue key figures of the Rebellion. Other environments, like Tatooine and Coruscant, appear as downloadable content (DLC) but it would have really helped to increase the game’s visual variety to have these levels be a part of the main story.

Graphics and Sound:
Graphically, the game is…okay. The computer-generated cutscenes are well-produced but, while the in-game graphics do a serviceable enough job of rendering the game’s handful of levels and environments, they don’t make for very attractive in-game cutscenes. It also seems like the developers were desperate to cram as many different physics engines into the game as possible, from Havok to Euphoria, in order to make the game “state of the art”. However, while the enemies have relatively decent levels of intelligence (Stormtroopers just blast away but the Purge Troopers and Felucian’s systematically attack you with blocks and co-ordinated attacks) and the environments are largely intractable and destructible, the game is riddled with rag-doll physics, glitchy platforms (Starkiller is just as likely to slide off a ledge as he is to land on it), and dodgy graphical elements (the backgrounds are teeming with life and action but then some barriers and trees just disintegrate into dust and fade away).

SWTFUMusic
You’ll really feel as though you are Darth Vader…for about ten minutes.

Yet, the game is filled with familiar Star Wars music and compositions based upon the works of the great John Williams. There’s something incredibly empowering about cutting Wookies down as Darth Vader while the iconic Imperial March plays and the music definitely lends a level of professionalism and quality to the game that is, generally, matched by the game’s recognisable environments.

Enemies and Bosses:
The Force Unleashed is filled with all manner of enemies; while you’ll wade through legions of Stormtroopers who go down with relative ease, you’ll also come up against some of the Empire’s more advanced troops who make use of cloaking technology, gatling guns, blast you with concussive bolts from jetpacks, or erect Force-resistant shields. Then there are the enemies who use energy shields or weapons to block and parry your attacks, the likes of the Purge Troopers who grapple Starkiller and want nothing more than to bash his brains in, or the always-annoying Sniper Troopers who pick you off from a distance. Starkiller will also battle Force-sensitive enemies, like the Felucians, or those like the Emperor’s Royal Guard who wield lightsaber-like staffs and weapons and require you to break through their defences to land a combo.

SWTFUBigEnemies
Larger enemies require a bit more strategy.

Sometimes you’ll have to target a specific enemy in order to “demoralise” the other troops; this is essential as, when your enemies are bolstered by these bastards, they can kill you in short order. Starkiller will also frequently come up against AT-STs and Rancors as well; these larger enemies are often flanked by waves of smaller enemies and can whittle your health down to nothing in no time with their powerful attacks so you’ll have to make use of Starkiller’s ranged Force abilities and combos and then win at a QTE to put them down for good.

SWTFUSarlaac
One boss battle takes place right next to a Sarlacc pit!

As for boss battles, these are pretty much all against Jedi, Sith, or similarly-Force-empowered individuals. While each of these encounters is largely the same (block or parry attacks while you wait for an opening, cut down cannon fodder to refill your health, use your Force powers to throw objects at the boss, and win a QTE), each takes place with slightly different environmental and additional hazards. You’ll duel with Shaak Ti beside a Sarlacc pit, for example, have to contend with Maris Brood’s Bull Rancor, and will have to battle simulations of not only the Jedi you’ve defeated before but also a recreation of Darth Maul when facing off with Starkiller’s droid, PROXY.

SWTFUSEmperor
The Emperor will try your patience.

The finale of the game obviously sees you butting heads with Starkiller’s former master, Darth Vader; this is a three (or four, depending on your choice) stage fight that begins in a narrow hallway, progresses to a room where the floor is (almost literally) lava, and ends in the Emperor’s observation deck. Ironically, I found Vader to be less challenging than some of the game’s other bosses as, while he has a powerful Force blast and will choke you out of the air, it’s not actually too difficult to weather his attacks and wail on him with your best combos. After besting Vader, you’re presented with a choice to finish him off in a battle to the death (thus earning the Dark Side ending) or going one-on-one with the Emperor to achieve the Light Side ending. Rather than attacking with a lightsaber, Palpatine uses his Force Lightning to roast you alive, shields himself from your attacks, and throws lightning-charged objects at you (that also explode). This battle is more annoying than difficult as, with careful timing, you can bounce Palpatine’s lightning back at him and whittle him away with your combos as long as you can avoid or block his other attacks.

Power-Ups and Bonuses:
As mentioned, you can acquire, upgrade, and purchase new combos and abilities as you play through the game and level up; by the time you confront the Emperor, you can take quite a bit of punishment, your Force meter will refill faster, and your attacks will dish out far more damage thanks not just to being upgraded but also to the new combos available to you.

SWTFUUpgrades
Upgrade your abilities with Force points.

As you explore your environment, you can also pick up Jedi Holocrons, which will refill your health and Force meter, award Jedi points, and yield other awards (like new lightsaber crystals). With the right lightsaber crystal, your lightsaber can deal more damage or suck health from your opponents, and you’ll also unlock additional artwork, costumes, and other bonuses by finding all of the Holocrons. Starkiller can also increase his odds with one-time buffs by picking up Sith Holocrons; these will grant you with limited invincibility, refill your meters, bestow you with an aura that will drain the health from enemies, or give you an unlimited Force meter for a brief time. Against some of the game’s tougher enemies and mini bosses, these can be essential so make the effort to pick them up and take out the more annoying enemies.

Additional Features:
As mentioned, you can unlock a bunch of concept art and data files by playing the game and collecting Jedi Holocrons. There are also a large number of additional costumes available for use; none of these offer any benefit beyond being cosmetic changes but they do allow you to play as other Star Wars characters, including Obi-Wan Kenobi and even C-3PO! There are three DLC missions you can also play if you bought the extra content (or the Ultimate Sith Edition); one sees Starkiller undergo a series of trials in the Jedi Temple on Coruscant while the other two take place on Tatooine and Hoth and present an alternative scenario where Starkiller replaced Vader as the Emperor’s assassin and battles some familiar faces. As standard, there are a number of Achievements to unlock; most of these are earned through regular play, while other require you to kill a certain number of enemies in different ways or play on higher difficulty settings.

SWTFUConclusion

The Summary:
Star Wars: The Force Unleashed is, ultimately, an average experience; the combat is fast and frenetic and it’s fun to fry Stormtroopers with Force Lightning or cut AT-STs in half but the game quickly runs out of depth and steam and it isn’t long before you’ve experienced everything it has to offer. Starkiller was an interesting protagonist but the story of his redemption is, honestly, nothing we’ve never seen before in Star Wars movies or other media. It doesn’t help that he has to constantly travel through the same environments, fighting variations of the same enemies, and battling against some really dodgy physics and a camera that just loves to get stuck behind objects or jitter about the place at crucial moments. The game’s more frustrating elements really hamper the thrill of fighting through the Death Star laser cannon; battling Jedi and the iconic Sith duo is fun but also a laborious experience that generally comes down to dodging an attack and just mashing away at X like a madman until you win. Despite the fact that the game carries a large degree of sensory fidelity to the Star Wars movies and offers perhaps the best lightsaber combat I’ve experienced so far, it seems to be lacking a real polish to bring together is disparate elements into a cohesive and consistently engaging experience.

My Rating:

Rating: 2 out of 5.

Could Be Better

What were your thoughts on Star Wars: The Force Unleashed? Did you also struggle with the game’s wonky physics, camera, and controls or do you consider it to not actually be that bad? What is your favourite Star Wars videogame (or movie, or show, or book, or whatever), if any? Either way, leave a comment below and let me know.

Game Corner: Doom 64 (Xbox One)

GameCorner
Doom64Logo

Released: March 2020
Originally Released: April 1997
Developer: Nightdive Studios
Original Developer: Midway Games
Also Available For: Nintenfdo 64, Nintendo Switch, PC, and PlayStation 4

The Background:
Everyone knows Doom (id Software, 1993), right? The gory, action-packed first-person shooter (FPS) that has seemingly been ported to every console and format known to man and pretty much thrust the FPS genre into the mainstream? Well, if you don’t, then I envy your naivety. Doom was not only the first in a still-ongoing series of fantastic FPS games, it also kick-started a slew of brilliant FPS titles on the PC and home consoles, as well as popularising online “Deathmatches” against other human players.

Doom64Ports
Doom has been run on nearly every device, including in Doom itself!

In keeping with the fact that Doom has appeared on nearly every piece of hardware available, id Software drafted Midway Games to work on a port for the under-rated Nintendo 64. However, rather than being a straight-up, by-the-numbers conversion of Doom, Doom 64 featured entirely new levels, redesigned weapons, some new enemies, and a greater emphasis on exploration. With the release of Doom: Eternal (ibid, 2020), a game largely inspired by and related to Doom 64, Doom 64 finally saw a wider re-release on modern consoles, bringing this oft-forgotten Doom title back into the spotlight. But does it hold up to the original Doom and its sequel, Doom II: Hell on Earth (ibid, 1994), or was it better left forgotten?

The Plot:
After thwarting Hell’s attempt at invading Mars and Earth, the hard-as-nails Doom Marine (or “Doomguy”) is once again forced to take up arms and journey to space stations and through Hell itself, slaughtering demons in a head-on collision with the Mother Demon herself.

Gameplay:
As you should probably be aware, Doom 64 is a traditional Doom FPS through-and-through; as in the classic Doom, you control the Doomguy, a silent, no-nonsense marine who enjoys nothing more than blasting demons with a shotgun or skewing them into bloody sushi with a chainsaw. Unlike modern FPS games, aiming and precise camera control are not necessary in Doom 64; you can more left, right, straight ahead, and backwards, and those are the only directions you can shoot in. There’s also no crosshair or aiming recital; you simply point your weapon in the direction of your target, shoot, and let the game’s auto aim direct your shot.

Doom64Controls
Combat is generally as simple as: Point and shoot!

This is helpful when faced with swarms of enemies and it keeps the action fast and frantic but it can make picking off demons from a distance a bit trickier; I prefer to clear out rooms and areas first so I can explore unimpeded and this often meant to would blast at enemies hiding above or below the game’s maze-like stages. As the game seems to want you to engage demons at point-blank range, the auto aim doesn’t always shoot at enemies up above or below, making this technique tricky, to say the least. As you explore the game’s massive thirty-odd stages, you’ll be tasked with finding a number of coloured keys to open doors and progress further towards the stage exit. Generally, you’ll need three of these (blue, red, and yellow) to progress, but not always, and you’ll also find secret areas and rooms hidden behind seemingly innocuous walls.

Doom64Maze
Stages can be frustratingly confusing and maze-like at times.

While this is par for the course with Doom videogames, I don’t remember it being this necessary or difficult in Doom or Doom II; it doesn’t help that every one of Doom 64’s stages is labyrinthine in nature. This is fine in small doses but I found myself wandering around in circles in every other stage, desperately trying to figure out where to go next, and was forced to turn to a guide more than once just to find the next key…only to find it seemingly led to a dead-end room. There are a lot of hidden weapons and rooms in Doom 64 and this extends to certain switches and doors; more than once, you’ll have to press a certain switch, or switches in certain combinations, or stand in a certain place or race to a lowered platform or opened passageway before they close. I don’t mind this in principle but, more often than not, I would activate a switch and open a door or lower a platform that is outside of your viewpoint, meaning I would struggle to see where I had to go at the best of times.

Doom64DemonKey
You should definitely make sure you get the three Demon Keys.

Additionally, in certain stages, you can find three Demon Keys; these artefacts can only be acquired after solving some of the game’s trickier puzzles but, with them, you can upgrade the firepower and effectiveness of the game’s ultimate weapon, the “Unmaker”, and will greatly increase your chances at defeating the game’s final boss. Ultimately, Doom 64 offers a classic dose of Doom that will be new for many players, even those more than familiar with the first two games. However, I found my enjoyment of the ripping and tearing soured somewhat by the over-emphasis on exploration and puzzle solving; I find these elements ill-fitting in FPS games at the best of times and they feel especially out of place in a Doom game and incorporated simply to mix things up for those who have played Doom and Doom II to death.

Graphics and Sound:
Graphically, Doom 64 looks and feels like a classic Doom title; stages are build out of three-dimensional polygons and the game’s wide variety of enemies are rendered using 2D sprites. Enemies are largely and diverse but, as always with classic Doom games, they suffer from this 2D rendering; there are very few frames of animation, meaning enemies can appear a bit jerky and pixelated. Thankfully, this doesn’t stop the blood and gore and the game’s creepy, supernatural aesthetic remaining in full force. Pentagrams, fire, and blood are everywhere, lending a creepy ambiance and horror to the game that is punctuated by the ominous (yet rocking) soundtrack that is pure Doom through and through.

Doom64HUD
Doom 64 sadly omits the classic Doom HUD.

Sadly, however, Doom 64 omits Doom’s trademark heads-up display (HUD); rather than seeing a pixelated representation of the Doomguy react in pain when hurt or grin sadistically when acquiring new weapons, you simply have numbers showing your health, armour, and ammo status. However, the game’s weapons did receive a new coat of paint and it’s always nice seeing Doomguy slot a fresh shell into the super shotgun before blasting a Cacodemon to pieces.

Enemies and Bosses:
Doom 64 features all the classic Doom enemies: you’ll battle shotgun-toting zombies, fireball-spewing Imps, and the lumbering Bull Demons. There’s even a new enemy exclusive to this version, the Nightmare Imp, which is just a faster, more translucent version of the regular Imp but it’s nice to see some exclusivity to this version.

Doom64PainElemental
I absolutely hate these bloody things!

Doomguy also battles some more testing enemies, like the big-ass Hell Knight; the worst of which, for me, are the Pain Elementals. These disgusting, blob-like bastards spew the always-annoying flaming skulls known as Lost Souls, which quickly swarm you and drain your health in no time. Seriously, I would rather run in circles like a madman shooting rockets at a slew of Mancubuses or Barons of Hell than take on a handful of these bastards!

Doom64Mother
Before you face the Mother, you’ll endure an army of demons!

Speaking of which, you’ll often have to battle a rocket-firing Baron of Hell, Mancubus, or Arachnotron as bosses as you progress through the game’s stages but, once you’ve bested them, they’ll crop up in later stages, sometimes in twos or massive groups. In the game’s final level, “The Absolution”, you’ll have to battle through a slaughter of an endurance against an entire army of the game’s enemies, including these bosses, before you can face the Mother Demon…unless you have the three Demon Keys.

Doom64Mother2
Even with the fully-powered Unmaker, the Mother is no cake-walk.

With these, you can close up the portals these enemies spew from and battle the Mother Demon with more of your health and ammo. With these artefacts, the Unmaker will be fully powered, allowing you to make short work of this final boss but, even still, she’s no cake-walk and, without the artefacts, it’s next to impossible to reach the Mother Demon with a decent amount of health, armour, or ammo.

Power-Ups and Bonuses:
You begin the game with a simple pistol and the Doomguy’s patented right hand. As you explore your surroundings (or kill certain enemies), you’ll acquire ammo and additional weapons, including the shotgun, super shotgun, the chaingun, a plasma cannon, and a rocket launcher. Doom’s signature weapon, the BFG-9000, can also be found either in secret areas or in later stages of the game; this baby can be charged up and unleash an energy blast that disintegrates all onscreen enemies and makes short work of the game’s bosses. The game’s most powerful weapon, however, is the Unmaker, a demonic weapon that must be powered up with the three Demon Keys in order to cut through enemies and bosses. Ammo for this weapon, and the BFG-9000, is relatively scarce, however, so it’s advisable to only use it when absolutely necessary.

Doom64BFG
Charge up the BFG-9000 to make short work of demon scum!

Thankfully, you can still grab a chainsaw (this time, it has two blades!) to rip and tear demons into bloody pieces, which won’t cost you any ammo at all. As you explore the stages, you’ll find medikits to restore your health, various armours to increase your resistance to attack, increase your maximum and health and armour points with smaller items, and view any unexplored areas on the game’s awkward map screen. You can also grab the Berserk item to be fully healed and enter a state of rage where the damage you deal with your fists is increased exponentially, pick up a radiation shield so you can walk through lava or radioactive waste, or grab the Supercharge and Megasphere to boost your health and/or armour to their fullest, attain partial invisibility or limited invincibility, or grab a backpack to increase the amount of ammo you can hold.

Additional Features:
Doom 64 features four difficulty settings, each of which affects your health, armour, ammo, and the frequency and aggressiveness of the game’s enemies. There are numerous secrets to be found in each stage, one of which is so well hidden that you’ll be destroying certain explosive barrels in a specific order in order to reach the super secret level, “Heretic”. Once you beat either this stage, or the entire game on any difficulty, you’ll unlock “The Lost Levels”, six additional stages that take the Doomguy back to hell to confront the Mother Demon’s sister (and which form the basis of a link to Doom: Eternal). In addition to this, there are a number of pretty simple Achievements to get on the Xbox One version and, as always, some passwords and cheat codes to make the game more interesting or allow you to warp to the challenging “Fun” stages (however, it is notable that you won’t get an Achievement if you have a cheat code activated).

Doom64Conclusion

The Summary:
Doom 64 is a classic Doom experience first and foremost. At its core, its as bloody and action-packed as the classic Doom and its sequel but, because of its additional features and skewed focus, feels like a fresh experience and an entirely new game rather than a straight-up port. Unfortunately, it can’t be denied that the game’s reliance on maze-like stages, exploration, and keys to progress make the game more frustrating than it needed to be. When I’m playing Doom, I like to blast through demons in a largely linear environment; I don’t really play to think, if that makes sense, and I was forced to a guide more often than I would like for a Doom title. Yet, the game is at its best when you’re fully locked and loaded and faced with a hoard of flesh-eating demons just begging to be blown to bloody chunks.

My Rating:

Rating: 2 out of 5.

Could Be Better

What are your thoughts on Doom 64? Did you play the original release on the Nintendo 64 or did you play it as part of Doom: Eternal? Which Doom is your favourite? Whatever your thoughts on Doom, or FPS games in general, leave a comment below.

Game Corner: Wario Land II (Nintendo 3DS)

GameCorner
WarioLand2Logo

Released: 2012
Originally Released: February 1999
Original Developer: Nintendo R&D1
Also Available For: Game Boy Color

The Background:
Super Mario Land 2: 6 Golden Coins (Nintendo R&D1, 1992) didn’t just blow its predecessor out of the water in terms of graphical and gameplay improvements, it also introduced the gaming world to one of my favourite characters of all time Wario, Mario’s evil doppelgänger, for the first time. While it would be some time before Wario made the jump to a main Nintendo console, and before he was relegated to simple mini games and cameo appearances, Mario’s evil twin thrived on Nintendo’s handhelds. First, he usurped the Super Mario Land franchise with Wario Land: Super Mario Land 3 (ibid, 1994), which led to a slew of sequels on Nintendo’s handheld systems.

The Plot:
After besting Captain Syrup and her Black Sugar Pirates, Wario is rudely awakened one day to find his castle has been flooded and ransacked by Syrup and her goons; enraged, he sets off to recover his loot and get his revenge.

Gameplay:
Wario Land II is a sidescrolling, 2D action/platformer; players control Wario as he journeys across a variety of worlds, collecting Yellow Coins and dispatching enemies with Wario’s patented Dash Attack and Ground Pound. Wario controls almost exactly as he did in the last game; he can jump on most enemies to stun them so he can pick them up and throw them, or just barge them with his Dash Attack. However, the knockback from enemy attacks is a considerable frustration; not only do you lose vital Coins, you also bounce back quite a way, which can be extremely annoying and lead you to drop to lower levels. What sets Wario Land II apart from its predecessor, and other Mario videogames, is Wario’s inability to die; when hurt by enemies or traps, Wario will lose some of the Coins he has gathered or be transformed into one of a number of different forms.

WarioLand2Forms
Rather than dying, Wario is transformed, allowing access to new areas.

These transformations are essential to navigating the different worlds Wario travels to and uncovering Wario Land II’s numerous secrets; hidden in every world is a piece of treasure, which Wario must earn by matching panels. As with its predecessor, finding the doors to these treasure rooms is no easy feat and Wario must navigate through some tricky puzzles and traps in order to find every piece. Once a world is completed, the player can also earn a Picture Piece to complete a map to the pirate’s treasure by completing a number-matching game. Wario Land utilised a map hub world similar to Super Mario Land 2 but Wario Land II is far more linear…or so it would seem. In actuality, there are many branching paths the player can take as they play; even inaction at the start of the game will lead Wario to different worlds and treasures. Once you finish the game, you gain access to the Treasure Map, which details all the different paths, allowing you the chance to recover the entirety of Wario’s missing loot and reach the true finale.

Graphics and Sound:
Wario Land II represents a time far removed from the basic, unremarkable presentation of Super Mario Land (ibid, 1989); characters and levels are brought to life through large, charming sprites that are a far cry from the first game’s monochrome offerings.

WarioLand2Graphics
Everything looks and sounds pitch-perfect here.

There are a lot of familiar sounds here that return from Wario Land, all of which add to the quirky, slightly off-kilter nature of Wario and his world. Nintendo walked a fine line between familiar and unique but executed this perfectly so that playing Wario Land II is unlike playing any other Mario title from that era and yet recognisable enough so that anyone who played its predecessor will feel right at home with familiar sights and sounds.

Enemies and Bosses:
Many of Wario Land’s generic enemies return here (such as the boomerang-wielding D.D and the Pirate Gooms) but there’s plenty of new and unique baddies to encounter; there’s a little mole cook who will fatten Wario up, pirate pecans who spit fish at you, zombies, and a fishing penguin who lures you in with fake Coins.

WarioLand2Bosses
Wario Land II has some weird-ass bosses on offer.

As for bosses, Wario Land II doesn’t disappoint and continues the tradition Super Mario Land 2 started with having big, oddball bosses; Wario will face off against the likes of a giant snake, a basketball-throwing rabbit, a giant dinosaur-like bird, and Captain Syrup herself. Though they can usually be defeated with a few well-placed bops to the head, each boss has a specific attack pattern and various phases; many will blast Wario out of the boss room entirely, forcing you to trek back around and start again or require a certain method to injure them (like dunking them through a basketball hoop or blasting lava at them).

Power-Ups and Bonuses:
In Wario Land, Wario controlled very similar to Mario; when hit, he reverted to a smaller form and he collected Power Up Pots to can new abilities. As mentioned above, though, Wario Land II ditches the traditional power-ups in favour of some truly weird transformations.

WarioLand2Conditions
Each transformation has its own benefits.

Certain enemy attacks will trigger a transformation in Wario that is necessary to reach other areas of each world and hidden secrets; Wario transforms into a burning ball of fire when set alight, becomes a zombie to drop to lower levels, or swells up to balloon-like proportions to reach higher levels, amongst other transformations. Part of Wario Land II’s gameplay is figuring out which enemies trigger a transformation and how to use that transformation in each area. It’s only by utilising all the tools at Wario’s disposal that players will be able to conquer each world, all the different branching paths, and access the secret final chapter, which is a time attack challenge through Syrup Castle.

Additional Features:
Collecting all the treasures in the game and completing the Picture Piece map doesn’t just allow you access to Syrup Castle, though; it also unlocks Flagman D-D, a remake of the Game & Watch mini game Flagman (Nintendo, 1980). This inclusion, and Wario Land II’s increased use of mini games compared to its predecessor, could be said to foreshadow Wario’s later preference towards mini games rather than fun little action platformers like this.

WarioLand2Conclusion

The Summary:
Wario Land II takes everything you knew from its predecessor and changes it just enough to deliver a unique gaming experience; appearing far more linear, the game hides many secrets and branching paths in a far more subtle way compared to Wario Land, meaning the no two players will have the same gameplay experience. Fittingly, Wario feels heavy and cumbersome; unlike Mario, he’s not build for precision platforming, which may be why Wario Land II substitutes such gameplay for simple puzzles, mazes, and alternative routes accessed by Wario’s transformations. Yet, at the same time, there seems to be a slight lack of polish to Wario Land II that can make some sections and bosses battles needlessly frustrating. However, the unique aspect of being immortal and changing forms to reach new areas, coupled with the chirpy tunes and big, quirky sprites make this a joy to play as no challenge presented by Wario Land II ever feels game-breaking or impossible.

My Rating:

Rating: 3 out of 5.

Pretty Good

What are your memories of Wario Land II, if any? Do you like Wario and, like me, wish he would return to a more prominent position? What was your favourite of the Super Mario titles on the original Game Boy? Leave a comment below and share your thoughts.