
On 21 February 1986, The Legend of Zelda (Nintendo EAD, 1986) was first released in Japan. The creation of legendary game designer Shigeru Miyamoto and Takashi Tezuka, The Legend of Zelda launched one of Nintendo’s most popular franchises. This year, I’ve been dedicating every Friday to Nintendo’s most famous silent protagonist, Link and his vast and enduring fantasy world of sword and sorcery.

Released: 13 February 2015
Originally Released: 27 April 2000
Developer: Grezzo
Original Developer: Nintendo EAD
Original Version Also Available For: GameCube, Nintendo 64, Nintendo Switch, Nintendo Wii, Nintendo Wii U
The Background:
An instant classic upon release, The Legend of Zelda (mostly) went from strength to strength as the concept was refined and expanded throughout Nintendo’s handheld ventures and 16-bit era. Following a long development period, the franchise made a phenomenally successful jump to 3D with The Legend of Zelda: Ocarina of Time (Nintendo EAD, 1998). Following its success, Nintendo originally sought to create a remixed version for the ill-fated 64DD peripheral, which would eventually become the “Master Quest” version of the game. Designer Eiji Aonuma was unenthusiastic about this, so series creator Shigeru Miyamoto challenged the team to create an entirely new 3D Zelda adventure using Ocarina of Time’s assets in just one year. Aonuma recruited designer Yoshiaki Koizumi to adapt his concept of a time loop gameplay mechanic; Koizumi also (literally) dreamt up the idea of the impending threat of a falling Moon. Realising that Ocarina of Time’s players would be a little older, Aonuma purposely aimed for a bleaker, more melancholy tone for the game, which was bolstered by the Expansion Pak that allowed the game to run much smoother and boast more complex visuals compared to Ocarina of Time. The Legend of Zelda: Majora’s Mask was a critical and commercial success; reviews praised the new gameplay mechanics and it quickly gained a reputation as one of the darker, more sombre entries in the franchise. Following a handful of re-releases, and the success of Ocarina of Time’s 3D remake, Nintendo and Grezzo immediately began work on giving Majora’s Mask the same treatment. Alongside graphical improvements, the team purposely aimed to make Majora’s Mask 3D more accessible and included numerous quality-of-life features that were criticised by some. Despite this, the game received positive reviews praising the updated visuals, mechanics, and new elements and the game retained its status as one of the franchise’s most under-rated entries.
The Plot:
After saving Hyrule and being returned to his childhood, Link is jumped by a Skull Kid and has his horse, Epona, stolen. Pursuing the thief to the bizarre world of Termina, Link must manipulate a three-day cycle to stop the possessed sprite from destroying the land.
Gameplay and Power-Ups:
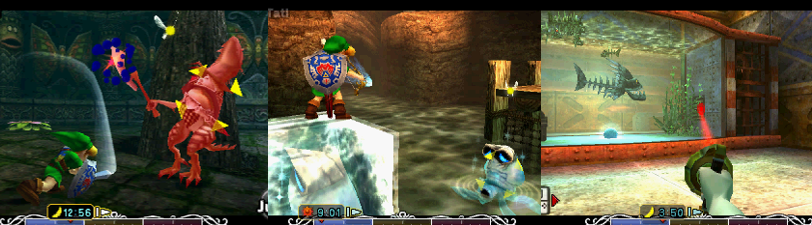
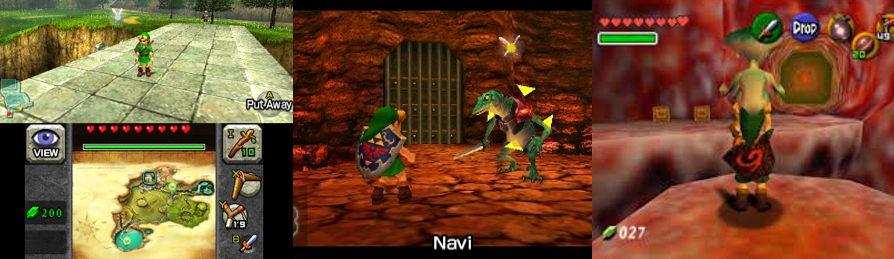
The Legend of Zelda: Majora’s Mask is a 3D action/adventure game that’s built upon the same game engine as its predecessor, Ocarina of Time, and therefore shares many of the same controls, gameplay mechanics, and features. In a rarity for the franchise, players control the same Link is in the previous game, though returned to his child body (and you can change his name when starting a new file) and exploring a bizarre new land filled with many familiar, but noticeably different, characters. Link’s goal is simple: he has three days to stop the possessed Skull Kid from destroying Clock Town and all of Termina with a giant, nightmare-fuelled moon. To do this, players journey to four areas adjacent to Clock Town, tackle the dungeons (or “Temples”) found there, and defeat the bosses within to awaken the Four Giants, the only beings physically capable of pushing back the Moon. However, your mission is compounded by the ever-present time limit, the drama and side quests of the various non-playable characters (NPCS) Link meets, and the numerous magical masks he obtains along the way. Link’s abilities will be immediately familiar to any returning Ocarina of Time players: A sees you talk to NPCs, open chests, and interact with the environment while B lets you attack with your sword, swiping, stabbing, and even jumping when used in conjunction with A. The Left Trigger activates “L-Targeting”, allowing you to lock on to enemies, NPCs, and other targets and expands your attacking options by letting you raise your shield to deflect attacks and projectiles with the Right Trigger, side hop, backflip, and leap into action.
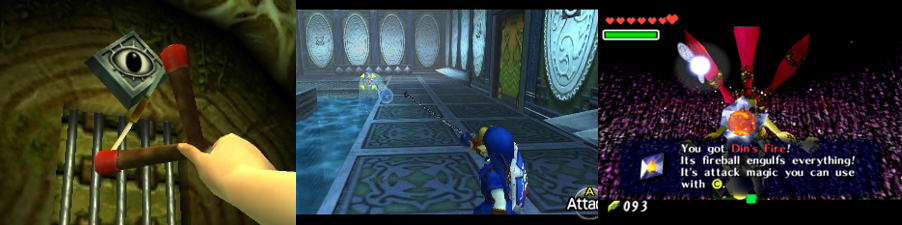
You assign different weapons and items to the X and Y buttons, while other items are assigned to the I and II slot on the touchscreen for easy use. By default, your trusty ocarina and, later, the Pictograph Box are selectable from the top and bottom left of the touchscreen, which is also where you’ll find your map, health (represented as hearts), magic meter, and item and mask menu. Though a child, Link eventually acquires many weapons he utilised as an adult. These are found within the game’s Temples and are often necessary to defeat the mini boss and main boss within, as well as being used to solve various puzzles. You can acquire the Hero’s Bow and a variety of elemental arrows, allowing you to attack enemies from afar, hit switches, burn objects, and create ice platforms where indicated. Bombs and Bombchus are used to blow upon walls and discover secrets, Deku Sticks allow you to light torches, Deku Nuts briefly stun certain enemies, and you can snag on to certain targets and parts of the environment with the Hookshot to cross gaps or bring items to you. Magic Beans can be planted to create platforms to new areas, the Lens of Truth will reveal hidden paths and secrets while draining your magic, and you can capture life-restoring Fairies or store various potions in one of Link’s many bottles. Players can also strengthen their sword by following a specific side quest; though the Razor Sword is only temporary and will eventually dull, it can be further (and permanently) upgraded to the Gilded Sword. Similarly, you can earn yourself the massive Great Fairy’s Sword and obtain the light-reflecting Mirror Shield, and eventually purchase large Powder Kegs to destroy larger boulders. Link can also expand his inventory with bigger quivers, bomb bags, and wallets. Though you lose all your Rupees and ammo stock whenever you travels back in time, you can bank your Rupees in Clock Town and will find plenty of ammo by cutting up grass and defeating enemies.
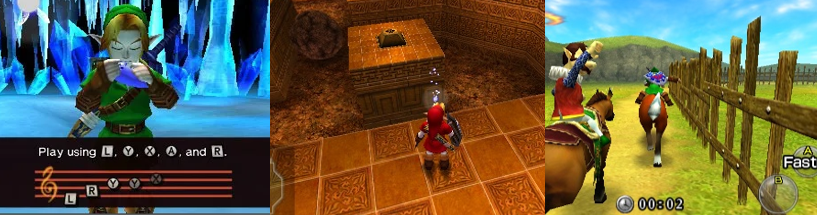
The Ocarina of Time is again used to manipulate the flow of time. You’ll need to travel back in time multiple times as you’ll get a game over once you reach the end of the third day. Luckily, you can speed up and slow down the flow of time to give yourself more time to complete tasks or jump to specific time periods to complete side quests. Other ocarina songs warp you to the various Owl Statues across Termina, where you can also manually save your game, call Link’s trusty steed, Epona, once you rescue her, access certain Temples, and heal disturbed or unquiet spirits to obtain new masks. Majroa’s Mask big gimmick is the mask system; Link will assume three distinct forms (a Deku Scrub, a Goron, and a Zora) throughout the game, each with different playstyles and lacking his traditional weapons. Deku Link is small and spritely, spitting bubbles from his nose and using Deku Flowers to launch into the air and temporarily fly about like a helicopter. Goron Link is big, slow, and powerful, smashing foes with his fists, slamming the ground, and barrelling along in a spiked ball to cross gaps. Zora Link is sleek and agile, easily cutting through water, walking across the seabed, and tossing boomerang-like fins from his arms. Well, I say “easily” but Zora Link can be finicky to control, often ploughing into walls and being a pain. Each of these forms has their own musical instrument in place of the ocarina and is used not just in their main Temple, but to solve other puzzles and complete side quests, such as purchasing Deku deeds, competing in high-speed, aggravating Goron races, and racing against beavers. Link’s other masks all have special abilities, too, such as the Bunny Hood doubling his running speed, the Blast Mask exploding like a bomb, the Great Fairy’s Mask attracting Stray Fairies, and the Captain’s Hat allowing you to command Stalchildren. The Stone Mask renders you functionally invisible, the All-Night Mask keeps you awake, and the Giant’s Mask transforms Link into a hulking giant for a kaiju-esque boss battle. With the exception of the three main masks, all these masks are optional and obtained through side quests, but it pays to acquire them all to make your life (and the endgame) so much easier.
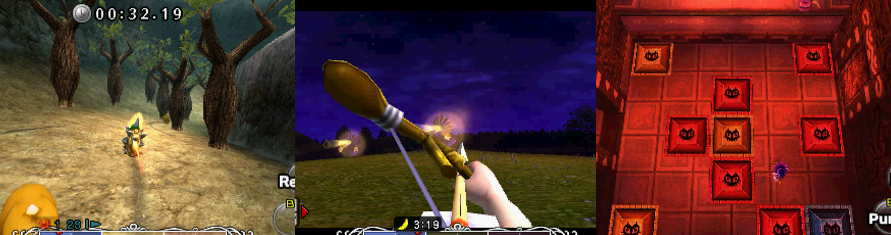
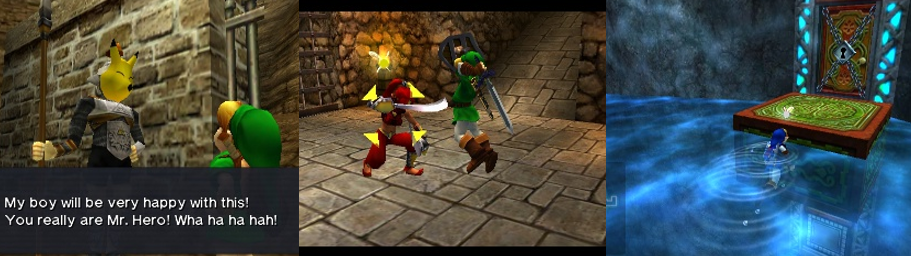
Termina is full of NPCs, all of whom have different thoughts on the current situation and different issues to deal with. Over the course of the three days, you’ll interact with them several times, with key events being recorded in your handy-dandy Bomber’s Notebook so you can keep track of what’s going on and when. This functionality is great for new players and for people like me, who like to efficiently complete the game’s side quests as quickly as possible. Because of the time travel and three-day loop, you’ll repeat certain events and trigger certain cutscenes multiple times, requiring you to rescue old ladies and injured witches, follow shady characters, and retrieve certain items to complete side quests. Many side quests are ongoing, requiring multiple steps (such as reuniting Anju and Kafei, which will take you right up to the last minute of game time and sees Link and Kafei working together to solve switch-based puzzles in Sakon’s hideout) or occur at specific times (such as the surreal defence of Romani Ranch against alien invaders!) Other quests are more low-key, such as using the Bremen Mask to engross little chicks, defending Cremia’s milk delivery from the Gorman Brothers, besting the various shooting galleries and fishing holes, and delivering fish to the Marine Research Lab. Other side quests can be quite involved, such as reuniting the frog choir, using all of Link’s transformations to form a band, digging up treasure with Dampé, and challenging the mini bosses to a rematch. You’ll also be using all your weapons and skills in Gold Skulltula Houses, taking pictures with your Pictograph Box, visiting Gossip Stones, and answering the Keaton’s quizzes. Your reward for these endeavours is either a new mask, a Piece of Heart to extend your maximum health, a bottle, or some Rupees, all key items to assist your adventure.
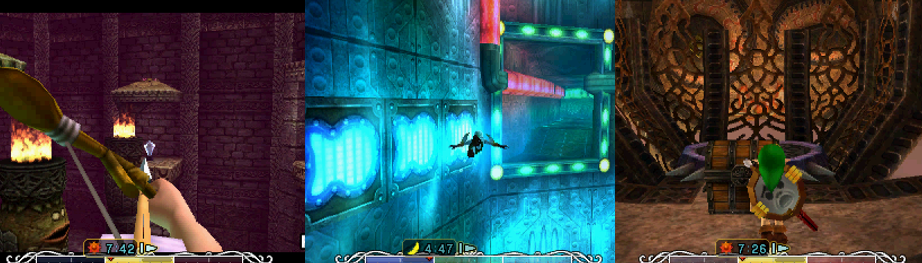
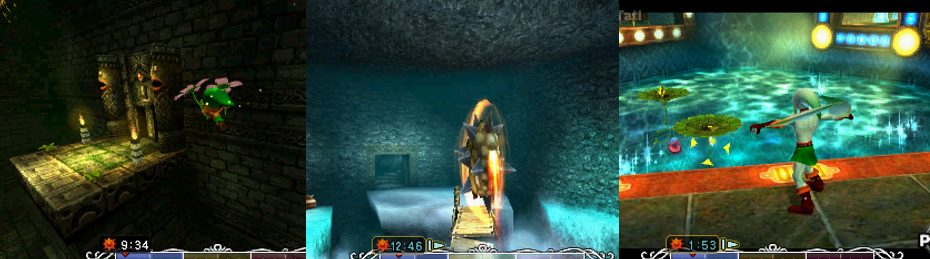
Each Temple houses not just a new weapon and the usual map and compass, but fifteen Stray Fairies which must be freed and collected, usually by enticing them with the Great Fairy’s Mask. Find them all and you’ll earn Link’s patented Super Spin Attack (hold B to charge up a magic-draining spin attack), double your magic meter, increase your defence, and earn the aforementioned powerful (if unwieldy) Great Fairy’s Sword. It’s worth collecting these as you explore the Temples to avoid having to return later. Time is always against you in Majora’s Mask, so be sure to play the Inverted Song of Time to stave off Termina’s inevitable doom. Though the game only has four Temples, getting to them is a task in itself: Link must follow cheeky monkeys and sneak into the Deku Palace, feed and soothe the Goron Elder’s son and then use the Lens of Truth and Goron Lullaby to bypass the Biggorn protecting Snowhead Temple with a blizzard, mess about finding seven Zora Eggs to summon a giant turtle to reach the Great Bay Temple, and battle through the undead minions of Ikana Canyon and scale up a puzzle-landed rockface to reach the Stone Tower Temple. While each contains many recycled elements from Ocarina of Time (torches, switches (timed or otherwise), climbable and destructible walls, etc), each also boasts a maze-like structure and fitting gimmick. Woodfall Temple is full of poisonous water and large gaps you must fly over as Deku Link, Snowhead Temple features both lava and ice, ramps to careen over and weighted switches to pound as Goron Link, and a large central pillar that needs to be brought down to reach the boss. The Great Bay Temple is, obviously, water-based, featuring a maze of rushing currents, jet streams, and propellers. You must use the Ice Arrows to create platforms and solve puzzles and pay attention to the helpful colour-based indicators to know where new paths have opened up. The Stone Tower Temple is two dungeons in one, featuring a gimmick where you flip the area upside down to access new areas, light-based puzzles using the Mirror Shield, and plenty of opportunities to use the Elegy of Emptiness to create a soulless duplicate of Link to press down switches. As you’d expect, each Temple also contains a mini boss, a warp point, numerous small keys to open locked doors, and a big Boss Key to access the Temple guardian.
Presentation:
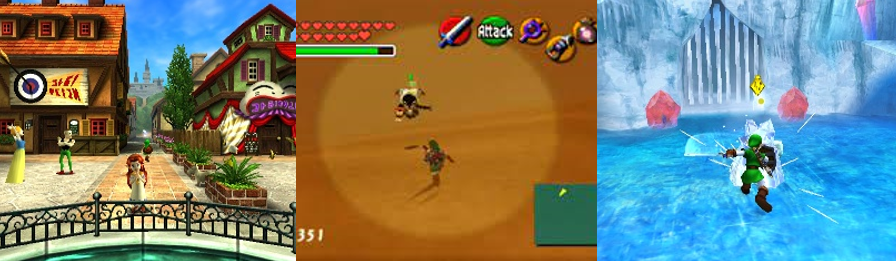
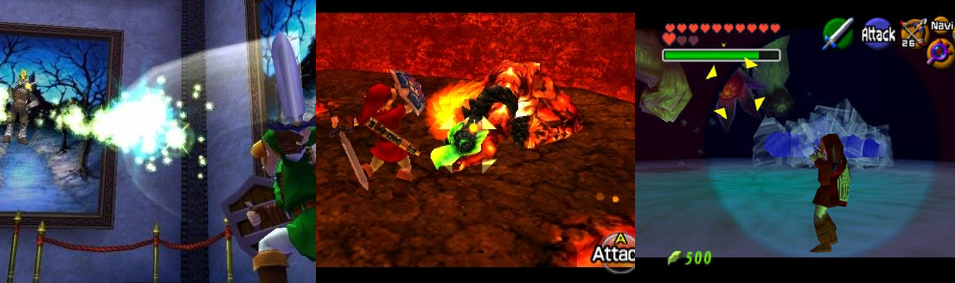
Even in its original Nintendo 64 incarnation, Majora’s Mask had Ocarina of Time beat hands down when it comes to visuals. Although the game always had a bit of a blurry look thanks to it taxing the console (and the Expansion Pak) to its limits, the graphical upgrade was apparent right away in something as simple as Link actually having his sash and his jumping animations being more dynamic. In the 3DS version, the visuals are as improved as they were in Ocarina of Time 3D, reducing the blur in favour of clarity, adding more emotion to Link’s face, and allowing players to immerse themselves in the world (and induce a headache) with the 3D slider. At first glance, Majora’s Mask seems like a smaller sandbox to its predecessor; you spend a lot of time in one central location and there are only four Temples, after all. However, the opposite quickly proves to be true; not only are there more NPCs onscreen at any one time, their personalities, positions, and roles change across the three-day cycle, adding an unexpected level of depth and emotion to this bizarre adventure. In addition to a day and night cycle and each area of Termina sporting different weather effects and seasons, the world is far more diverse than before. Great Bay, for example, is a vast beach home to the Pirate’s Cove, Gerudo Lagoon, and Zora Cape, a coral-like town that puts Zora’s Domain to shame. Similarly, the Southern Swamp sees Koume and Kotake offer a boat ride through the sweltering foliage, a confusing monkey-filled maze, and the nigh-impenetrable Deku Palace, where the woodland folk don’t take kindly to strangers.
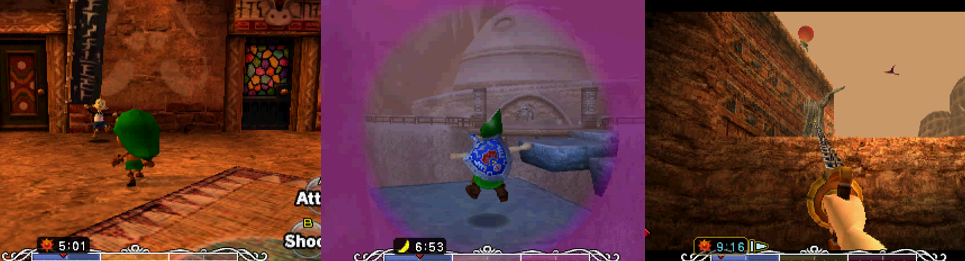
Easily the most impressive area, for me, was Snowhead Mountain. Like Zora’s Domain, Termina’s Goron population have been crippled by inclement weather; in this case, a raging blizzard. Snow and ice covers the environment and the weather has claimed many Goron lives and hides many secrets but, unlike in Ocarina of Time, the snow will melt when you best Snowhead Temple, just as the Southern Swamp with become more habitable. Sadly, travelling back in time undoes these actions and you’ll need to beat the Temple bosses again to re-restore the lands, but just the fact that you can undo the damage done to Termina and see NPCs celebrating in their newfound lives adds so much more gravitas to the game. It compels you to journey on and assist more NPCs, which rewards you with more lore and items, and makes Termina so much richer compared to the more stagnate Hyrule in Ocarina of Time. Ikana Canyon is a desolate, dangerous area filled with undead monsters, rolling rocks, an abandoned village, and the forgotten ruins of Ikana Castle, with its light-based puzzles and spooky inhabitants. The Stone Tower that leads you to the Stone Tower Temple is quite the feat, requiring you to scale it in various creative ways, all before you even flip the Temple on its head to tackle it upside down. Even exploring Termina Field is an adventure in itself; all sorts of respawning enemies lurk in the grasslands, and you can visit the observatory, Romani Ranch, and discover numerous hidden areas all by experimenting with your weapons, mask abilities, and exploring the rich and detailed world. Although the Song of Soaring, Bunny Hood, and Goron abilities make traversal simple, you can rescue Epona and race around on her as Young Link to tick off another desire from Ocarina of Time (though I admit that I rarely used her since she can’t access every area).
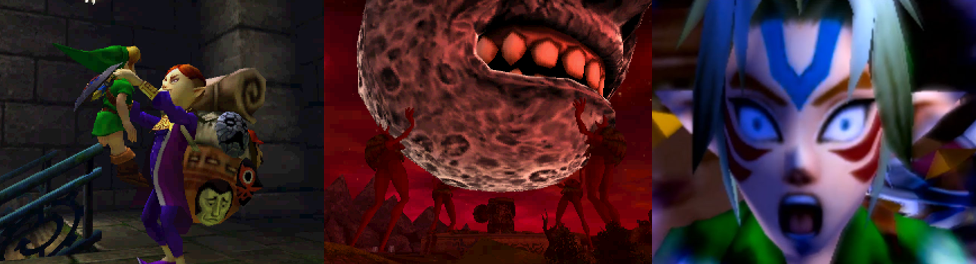
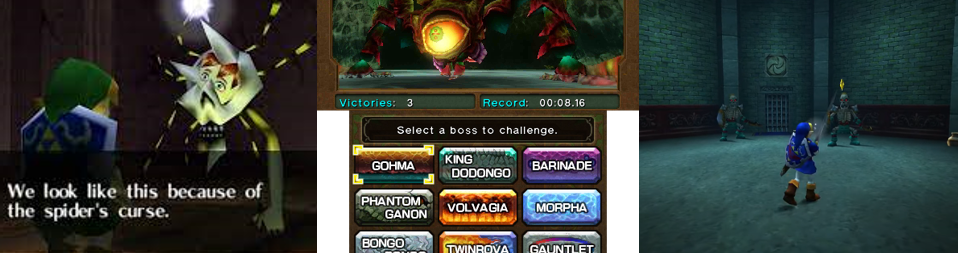
Majora’s Mask is easily one of the most bizarre and bleak Zelda adventures. Right from the beginning, the story starts with a melancholy tone, with Link wandering the lands in search of Navi, only to have his horse and ocarina stolen by the Skull Kid and his mischievous fairy companions, lost in a strange land, and transformed into a Deku Scrub! Like in Ocarina of Time, Link is partnered with a fairy, but Tatl is no Navi; she’s rude, obnoxious, and rarely gives much help when searching for an enemy’s weak spot. Over the course of the game, the two find common ground as Tatl’s concern for her friend and her brother, Tael, grow, and Link’s courage is called upon again to aid the aggressive and slightly demonic Happy Mask Salesman in retrieving Majora’s Mask. Most interactions take place using the in-game engine and simple text boxes, but horrific (thankfully skippable) cutscenes play every time you put on a transformation mask, suitably dramatic cutscenes play when Temples rise up or NPCs are laid to rest to increase Link’s abilities, and you’ll get helpful reminders when day turns to night turns to day and the countdown to destruction looms closer. Speaking of which, the grim-faced Moon looms ominously overhead, growing closer and closer and causing small earthquakes. NPCs become more fearful or flee as the game progresses, and woe befall anyone who lets the timer runs out and must watch the Moon obliterate the land! While many of the assets, models, and elements are recycled from Ocarina of Time, they’re all much improved, with characters constantly on the move and doing their own thing, which you can track with the Bomber’s Notebook. Many musical cues and tracks return as well, though the Termina Field Overture is far more bombastic and engaging for me, and each area boasts a fittingly twisted soundtrack that’s both familiar and unique. The 3DS version changes up the presentation a bit, redesigning the countdown timer, area intros, and tidying up the graphics and assets to really make the colours pop, add helpful guidelines to certain areas, and even mixes up the puzzles and locations of certain items.
Enemies and Bosses:
In keeping with the recycling of Ocarina of Time’s assets, Majora’s Mask returns many enemies from the previous game, such as the shield-sucking Like Likes, bat-like Keese (also in fire and ice variants), crab-like Tektites, Poes, Wolfos, crow-like Guays, Peahats, Octoroks (and their larger cousins), Deku Babs, Lizalfos and Dinolfos. Anyone who’s played Ocarina of Time will know how to tackle these enemies, which usually comes down to firing arrows or strategic use of L-Targeting, and the same is largely true of many of the new enemies featured here. You’ve got your normal, smaller foes like beetle-like Hiploops, electrical Dragonflies, Giant Bees, and skeletal fish, but you’ll also contend with strange foes like the Dexihand, Eyegore, and Goron-like Nejirons. Snappers are best taken out by lying in wait in a Deku Flower and exploding up beneath them; snowball-tossing Eenos are susceptible to Fire Arrows; the various ChuChus can be popped to quickly earn health and ammo; and you’re better off simply defending against or firing arrows at the “Real” Bombchus that scurry about. Some enemies will better test your swordsmanship, such as the Garos and returning Gerudos and Iron Knuckles (who attack faster and more aggressively as their armour is destroyed), while you can command the Stalchilds and even avoid or converse with Gibdos and ReDeads with certain masks. Similarly, you can bypass the Death Aros altogether with the Stone Mask, must switch to sub-weapons or play the Song of Storms when touched by a Blue Bubble, and keep an eye out for the vulture-like Takkuri flying around Termina Field to avoid having your items stolen.

Each Temple houses at least one mini boss who must be overcome, sometimes multiple times, usually to obtain the Boss Key or the dungeon’s weapon. Many of these will be familiar not just to players of Ocarina of Time, but also long-time Zelda fans: Dinolfos and Iron Knuckles appear more than once and fit into this category, for example, but Majora’s Mask sees the return of series staples such as Wart and Wizzrobe. Wizzrobe is fought multiple times in multiple Temples, teleporting about, creating illusionary doubles, and attacking with fire or ice magic. Wart appears in the Great Bay Temple and is, as usual, a giant eye surrounded by bubbles that Link must destroy to get a clear shot at its pupil, while being mindful of it firing them as projectiles and bouncing around in a frenzy. The Gekko appears twice in the game, first riding a Snapper and attacked via a Deku Flower and then encased within a giant, gelatinous substance that must be frozen with Ice Arrows and shattered to attack the slippery devil. In the Ikana Graveyard, Link chases the gigantic Captain Keeta, fending off his lackeys and hacking the giant’s legs to get his attention. You must avoid his swipes and flaming barriers and pelt him with arrows to stun him, but the main issue here is keeping up with him so he doesn’t flee (but that’s what Hylia created the Bunny Hood for!) Stone Tower Temple is home to two more tough mini bosses: first up is the Garoa Master, a teleporting assassin who drops from the ceiling and attacks with a charge. Stay away from his attacks to strike back when his guard is lowered, and be sure to keep your distance when he’s beaten as he’ll blow himself up with a bomb! Defeating him earns you the Light Arrows, which are key to dispelling the bats protecting Gomess. Gomess attacks with a scythe that can cut through your shield, so be sure to jump-slash his exposed heart when you see an opening.
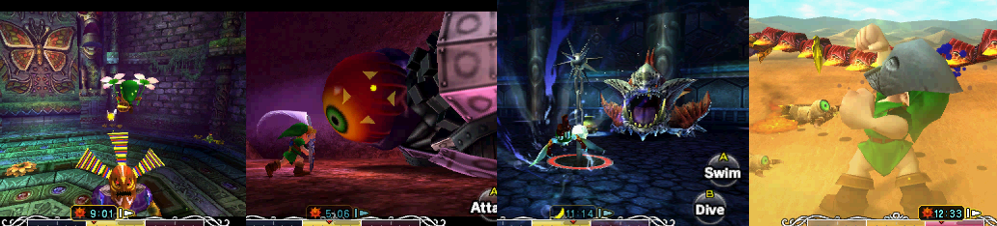
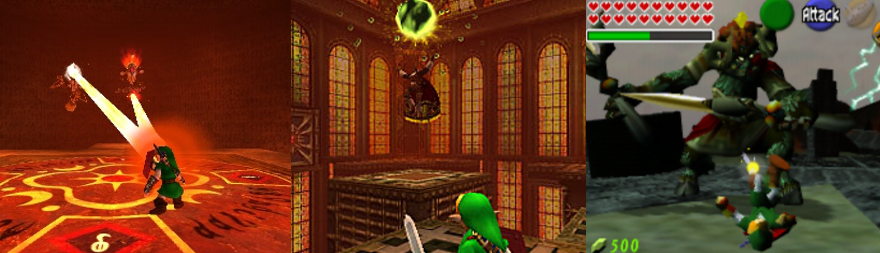
Naturally, you’ll have to best each Temple’s boss to awaken one of the Four Giants and acquire their remains. If you played Majora’s Mask on the Nintendo 64, you’ll be in for a surprise here as each boss has been fundamentally changed, somewhat simplifying them and expanding their attack patterns to allow for new ways to beat them. First up is Odolwa, a manic swordman who dances about and strikes with a gigantic blade. Originally, you’d use arrows or bombs to stun him and strike with your sword, but now you must brave being roasted alive as Deku Link to attack from above, exposing a big slimy eye that is a recurring weak spot for the 3DS version’s bosses. I always found Goht one of the more annoying bosses; the fight takes place on a never-ending track filled with ramps and Magic Jars and sees Goht gallop along, tossing bombs, causing rocks to fall, or summoning a thunder bolt. You’re encouraged to race after him as Goron Link, picking up speed to ram him and topple him over to attack his exposed eye, but you can actually just stand by the entrance and pelt him with arrows or even toss a bomb at him to speed things up. Gyorg was initially a pretty simple affair, testing your patience by having you wait on the central platform to shoot him as he jumps over then ram into him as Zora Link. Now, there’s a second phase that’s completely underwater; you must desperately avoid the mines and detach them to stun Gyorg, blasting his giant eye where possible, something made quite troublesome with the clunky swimming mechanics. Similarly, Twinmold is completely different; originally, you’d be forced to don the Giant’s Mask and attack the worm’s heads or tails with your sword while keeping your magic topped up. Now, you only earn the Giant’s Mask after pelting the boss’s first phase with arrows and must stomp about as Giant Link engaging Twinmold in a fist fight, then grab its tail when it’s stunned. Again, this is a much more aggravating boss battle because of this; Giant Link is a slow, lumbering character compared to the slipper Twinmold and your magic drains very quickly, causing the fight to drag unnecessarily.

Once they’re all beaten, you must return to Clock Town on the final day and play the Oath to Order. This summons the Four Giants and stop the Moon from falling, but causes the Skull Kid to freak out and the demonic Majora to assume full control. You’re then transported to the strangely idyllic Moon’s surface, where you must challenge four short, troublesome obstacle courses themed around each Temple. If you’ve collected every additional mask, you can trade them all in here and gain the Fierce Deity Mask, which can only be worn in boss rooms and transforms you into a hulking adult equipped with a massive sword that fires magic-draining energy beams when L-Targeting. This is the only way I’ve battled the game’s final boss, Majora itself, which has three distinct forms: Majora’s Mask, Majora’s Incarnation, and Majora’s Wrath. You can tackle each using arrows and bombs and traditional tactics, but I never have. I simply L-Target the weird, increasingly grotesque demon and fling sword beams at it until it’s defeated. Its attacks include charging at Link like a buzzsaw, shooting a reflectable beam of fire, circling at super-fast speeds, firing energy blasts, dodging your conventional attacks, and attacking with two disturbingly organic tentacle-like whips. Majora also attacks using the boss’s remains and by summoning spiky, spinning tops and can cut through your shield if you’re not careful, but none of this is a concern with the overpowered Fierce Deity Mask.
Additional Features:
There are fifty-two Heart Pieces to find all around Termina; some are hidden in secret holes, some are up trees or require your weapons to access, some are gifted to you as rewards, and some require you to complete side quests. You’ll be dancing with the Rosa Sisters, giving a weird, disembodied hand some toilet paper, stopping a timer at exactly ten seconds, checking mailboxes, and besting the shooting galleries to acquire these helpful upgrades. Your main objective throughout the game is to acquire all the different masks, which requires interacting with all the NPCs and keeping an eye on their routines with the Bomber’s Notebook. While some masks are more useful than others, each has a specific function and will allow you to get other masks, Heart Pieces, or rewards depending on who you interact with when wearing them. Similarly, it’s worth seeking out the upgrades to Link’s sword, wallet, and items, if only to further explore the world, and making sure you bank your Rupees before resetting the three-day cycle. You’ll also find many Gossip Stones placed all over that will give you hints if you interact with them while wearing the Mask of Truth, and the Sheikah Stones return from Ocarina of Time 3D to provide you with more detailed directions if you get stuck. The manual save system has been revamped, with additional Owl Statues appearing in the game (though you can’t warp to all of them), and some of the rewards and side quests have been changed. Most notably, Link can now acquire seven empty bottles (which is, admittedly, a little excessive), with the last gifted after completing a new side quest involving the Gorman Troupe. Another new feature is the inclusion of two fishing holes, which you can either pay to use or acquire a pass to fish for various fish, though there are no rewards tied to this beyond trying to snag the legendary Lord Chapu-Chapu. Since the game resets when you go back in time, there’s no Boss Rush Mode this time around and, sadly, the developers didn’t see fit to include a mirrored Master Quest mode, though you now have three save slots instead of just two.
The Summary:
The debate about which game is better, Ocarina of Time or Majora’s Mask, is seemingly never-ending and, honestly, it’s a tough choice. Majora’s Mask is definitely a more daunting challenge; I can play through Ocarina of Time with my eyes closed but I’ve never beaten Majora’s Mask without a guide, purely because I want to complete all the side quests before facing Majora at the end and have the overpowered Fierce Deity Mask on hand. Yet, Majora’s Mask is such a step up in terms of visuals, scope, and world-building. Termina feels alive in ways Hryule does not and the stakes feel so much higher since you can see how the impending doom affects the different NPCs. The three-day cycle is as daunting as it is annoying at times, resetting all your hard work but also pushing you to restore the next area and save this bizarre land. Majora’s Mask may seem smaller due to its more focused approach, but the game and its land is as big (if not bigger) than Ocarina of Time, expanding upon and improving every element of its predecessor and really making you feel the gravitas of its bleak narrative. Link may not acquire any new weapons here, but the mask-based gameplay mixes the formula up in surprising ways, changing Link’s form and altering the way you play (even if the controls can be a struggle at times). The 3DS version makes way more changes to the original game compared to Ocarina of Time 3D and, while some (like the simplified bosses and tweaked controls) can be frustrating, the benefits outweigh these issues. The expanded Bomber’s Notebook, being able to jump to specific time periods, and the changes to side quests help make the game accessible and fresh for old and new players, in my eyes. Ultimately, I think Majora’s Mask is a dark horse of the franchise; it’s an incredibly engaging experience, packed with side quests upon side quests, and more than stands alongside its predecessor as one of Link’s finest (if surreal) adventures.
My Rating:
Fantastic
Have you ever played the Nintendo 3DS remaster of Majora’s Mask? If so, what did you think to the graphical overhaul and additional features included? Which of the masks and many side quests was your favourite? Would you like to see this version ported to the Nintendo Switch to make it more accessible? Did you own Majora’s Mask back in the day? If so, did you ever tackle the final boss without the Fierce Deity Mask? Were you a fan of the three-day cycle? I’d love to hear your memories of Majora’s Mask so leave a comment below and go check out my other Zelda content!


You must be logged in to post a comment.