
January celebrates two notable dates in science-fiction history: “National Science Fiction Day” on January 2 to coincide with the birth of world renowned sci-fi writer Isaac Asimov, and 12 January being when Arthur C. Clarke’s HAL 9000 was created. Accordingly, I dedicate January to celebrating sci-fi in all its forms.

Released: 4 August 2015
Originally Released: 22 May 2000
Developer: Rare
Metacritic Scores: 97 / 8.3
Also Available For: Nintendo 64, Nintendo Switch, Nintendo Switch 2, Xbox 360, Xbox One, Xbox Series S
Quick Facts:
One of the biggest UK-based videogame developers, Rare cemented their legacy with the classic first-person shooter (FPS) GoldenEye 007 (1997) but lost the James Bond license to Electronic Arts (EA). Taking inspiration from science-fiction movies and television shows, Rare crafted an original sci-fi shooter that vastly improved upon GoldenEye 007’s game engine and mechanics. Perfect Dark’s development was tumultuous and taxed the Nintendo 64 hardware, resulting in plans to incorporate the Game Boy Camera and Transfer Pak being scrapped. Perfect Dark was met with critical acclaim, though a spin-off was cancelled and the game’s prequel was universally derided.
Gameplay and Power-Ups:
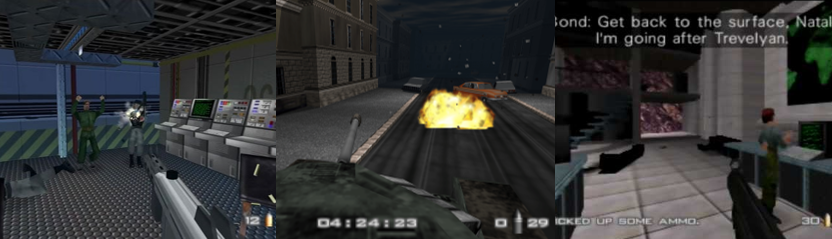
As the spiritual successor to one of the greatest first-person shooters ever made, it should be no surprise that Perfect Dark focuses on gun combat, stealth, and accomplishing various objectives across its nine missions. While the game allows two players to play solo simultaneously with one of its controller settings, allowing one to move and interact and the other to aim and shoot, Perfect Dark also offers co-operative play and “counter-operative” play, in which players actively try to interfere with each other in a single playthrough. “Perfect” Agent Joanna Dark is a spy working for the Carrington Institute, allowing GoldenEye 007’s mechanics to be expanded upon and refined. Though you can change the controller setup, I always found the “classic” controls to be the best so I was interacting with the environment (opening doors, activating consoles, and such) with A, cycling through weapons with B and Y, manually reloading with X, and using the Right Bumper to switch to my weapon’s secondary function. The Left Trigger aims, the Right Trigger fires, and I crouched behind cover (crates, desks, and such) by pressing in the left stick. You can also toggle a few options from the menu (such as the crosshair, auto aim, and the blood), create and name multiple save files, and pick from three difficulty settings. As in GoldenEye 007, these not only increase the intelligence and durability of enemies but also add additional objectives to each mission to provide a greater challenge. Upon clearing a mission, you’re presented with your performance, which tracks how long you took, your accuracy, your kills, and other stats and also displays any cheats you unlocked. As Perfect Dark is a more futuristic setting than GoldenEye 007, Joanna utilises shields to extend her health, slows time with the “Combat Boost” item, and utilises gadgets like infrared goggles and various scanners to detect objectives. However, like Bond, Joanna fails missions if she destroys key equipment or kills too many innocents, so you can’t be too trigger happy.
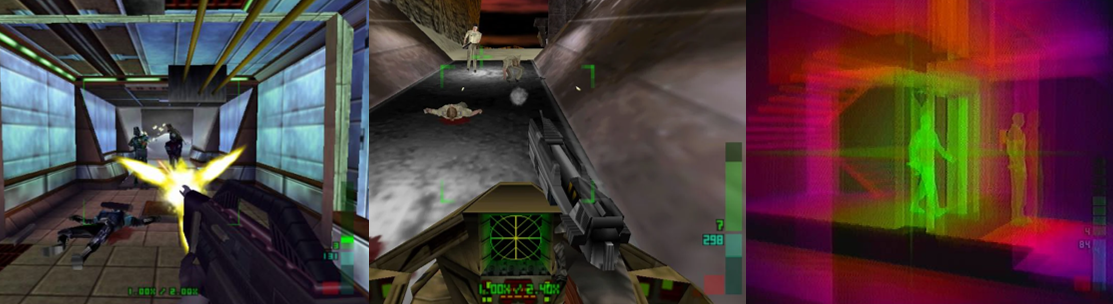
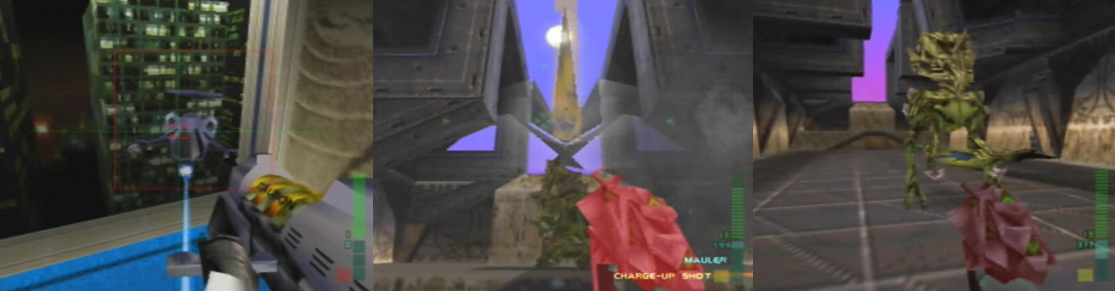
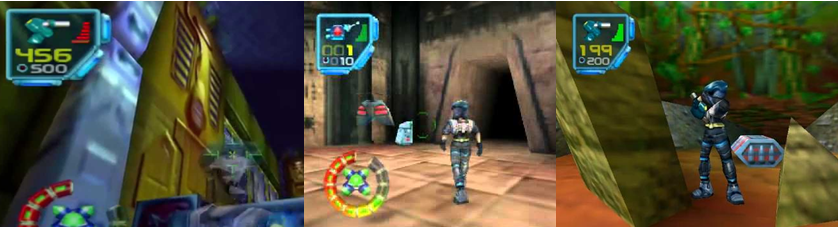
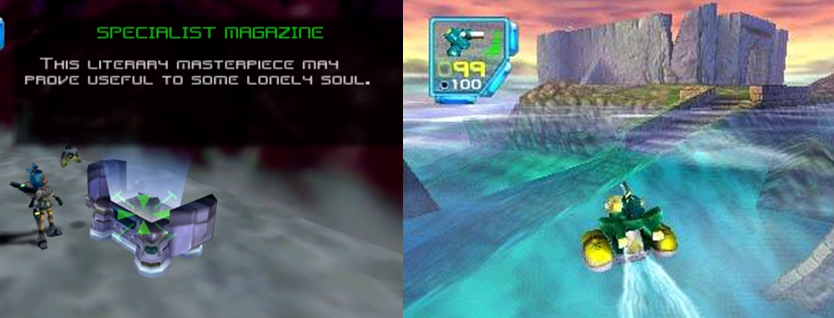
Anyone who’s played GoldeneEye 007 may be familiar with some of Joanna’s weapons. The standard issue Falcon 2 isn’t a million miles away from the Walther PP7 or the DD44 Dostovei, the DY357 Magnum is functionally identical to Bond’s Cougar Magnum, the super powerful RC-P120 is essentially an upgraded RC-P90, and Joanna also utilises grenades and various mines. Joanna also gains a wrist laser, a hunting knife, and utilises a sniper rifle in the second mission, alongside blasting enemies with a high-powered shotgun and blowing attack choppers out of the sky with a rocket launcher. There are plenty of new toys to play with as well, such as a wrist-mounted crossbow, a gun that masquerades as a laptop, the super fun Cyclone machine gun, and high-powered assault rifles that seem ripped right out of Aliens (Cameron, 1986). Thanks to its sci-fi narrative, players also wield various alien weaponry, such as the super slick Maian firearms and the more destructive weapons used by the vicious Skedar. These include the sniper-like FarSight XR-20 with its infrared mode and wall piercing rounds, the rapid-fire Callisto NTG, and the grinder-like Mauler. Every weapon has two functions, with the primary fire being a standard shot and the secondary varying between weapons. While most pistols have a melee function, Joanna can punch out or disarm targets, kill or subdue, or switch to a weapon’s explosive shot. This makes your Dragon a grenade launcher or allows you to toss it as an explosive, lets you deploy the Laptop Gun as a sentry or expel an entire Cyclone clip, has the MagSec 4 fire a three-burst round, and sees some weapons to lock-on to targets. The RC-P120 comes with a limited cloak, the shotgun can be switched to a double shot, and the K7 Avenger can highlight nearby threats. It’s fun discovering each weapon’s secondary mode and you can hold multiple weapons at once, and even bring up a weapon wheel, though your arsenal switches out between missions and some unlockable weapons don’t have secondary modes. Joanna can also utilise explosive crates and barrels, hoverbikes, and even turrets to help take out or bypass enemies, though sometimes you’ll need a stealthier approach. At least two missions (on “Agent” difficulty) require you to change into an outfit and hold off from killing to infiltrate areas, which is fun even with the time limit, and you must sometimes bring explosive crates to cracked walls to progress.
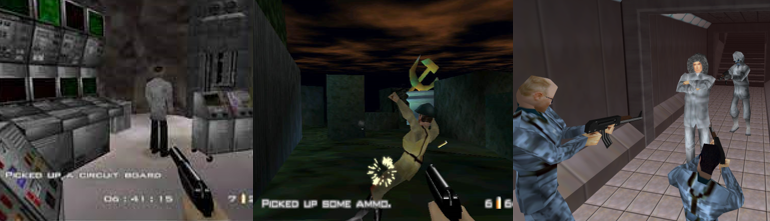
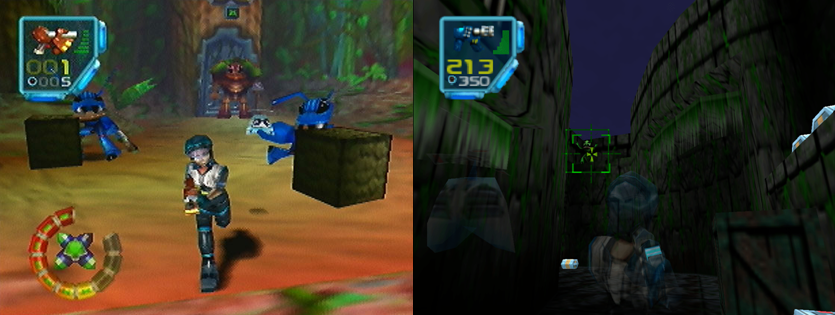
Some missions see you escorting a non-playable character (NPC), like the sentient laptop Doctor Caroll, or pushing the unconscious Maian “Elvis” to safety in Area 51. Elvis fights alongside you numerous times, gleefully taking out enemies from afar and up close and activating alien technology to open new paths for you. Joanna also works alongside Jonathan Steinberg of the Central Intelligence Agency (CIA) at one point and has to get the United States President to safety more than once. Thankfully, these NPC allies are more capable and durable than Natalya Simonova and are often protected by shields. Your objectives change depending on the difficulty you’re playing, but generally you must reach certain areas (lifts, rooms, etc), disable security systems (either manually, with a device or by decoding a password, or by coercing nearby NPCs), obtain items (key cards, evidence, disguises, prototype weapons, etc), and reach the exit. Sometimes, you’re given or must obtain a weapon that must be saved to complete your objectives, such as tossing a timed mine to detach a spacecraft from Air Force One or affixing target amplifiers to the correct Skedar ruins. Other times, you must reprogram service robots, capture (non-lethally subdue) or eliminate specific targets, such as the President’s clone or malicious dataDyne Corporation executive Cassandra De Vries. You must go to infrared to cover Elvis as he activates teleportals on an alien ship, switch to the CamSpy to photograph targets or listen in on meetings, rescue hostages when the Skedar infiltrate the Carrington Institute, and eliminate the monstrous aliens to gain control of their attack ship. By far the worst mission, for me, has always been “Chicago – Stealth”, which sees you recover your equipment, create a division by setting a taxi to explode, avoiding an indestructible drone, and sneaking into the G5 building before the guards lock the doors. You must also prepare your escape route, place a tracking device, and avoid killing the undercover CIA agents. “Crash Site – Confrontation” is also tricky as it’s a very wide, open area full of enemies, turrets, and cliffs you can fall down. While the radar helps, it’s easy to get lost or accidentally kill the wrong President, and tricky to find your way at times. “Skedar Ruins – Battle Shrine” can also be needlessly obtuse at times with its narrow passages, dark, maze-like interiors, and randomly generating which ruins must be targeted each playthrough.
Presentation:
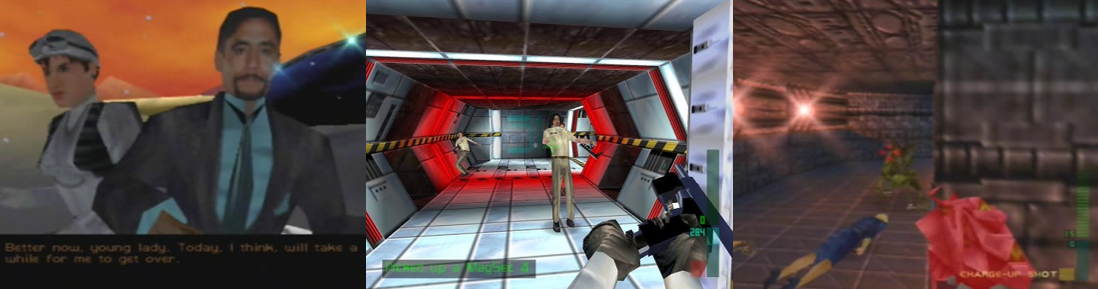
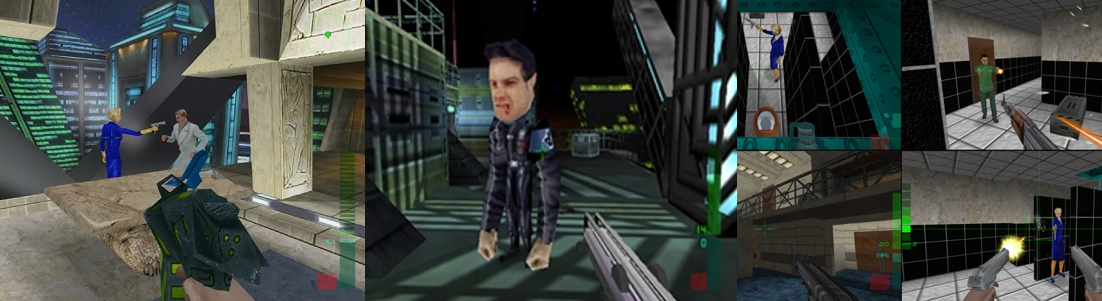
Everything that made GoldenEye 007 an instant classic returns in Perfect Dark, but amplified and refined thanks to the game utilising the Nintendo 64 Expansion Pak. While characters’ mouths don’t move in cutscenes, all cutscenes are fully voiced and there’s a greater emphasis on narrative here, with some missions being interrupted by cutscenes to change the environment and objectives. While Joanna isn’t nearly as iconic as Bond, she’s a decent character, with some wit and snark about her, though she’s outshined by the smart-mouthed Elvis whenever they’re paired together. While it might not seem like a big deal now, Perfect Dark has so many fun little touches that make it and impressive game, such as Joanna visibly (and uniquely) reloading each weapon, her vision going blurry when hit by melee attacks, and her talking and reacting to events and NPCs as you play. Enemies are more expressive than ever, shouting when they spot you, jumping for cover, limping and screaming and running when shot at, and not only even surrendering but also double crossing you at times! You can disable the blood but you really shouldn’t as blood now splatters on the environment and enemy bodies even stay on the ground, allowing you to easily see where you’ve been. Enemies also punch and kick up close, rush to alarms, sometimes utilise a cloak or shield, and non-lethal NPCs sometimes betray you when you coerce them. Glass shatters when you shoot it, areas are sometimes plunged into darkness, and environments are littered with little touches, from wine cellars, pictures, desks, and consoles to bizarre alien architecture and sprawling, futuristic laboratories. Unlike GoldeneEye 007, which sometimes struggled when too much was happening, Perfect Dark is slick and stable no matter how many enemies are coming for you and the textures (while retaining that signature blocky aesthetic) are more detailed and varied than ever, with Joanna and her enemies switching up their outfits and weapons each mission.
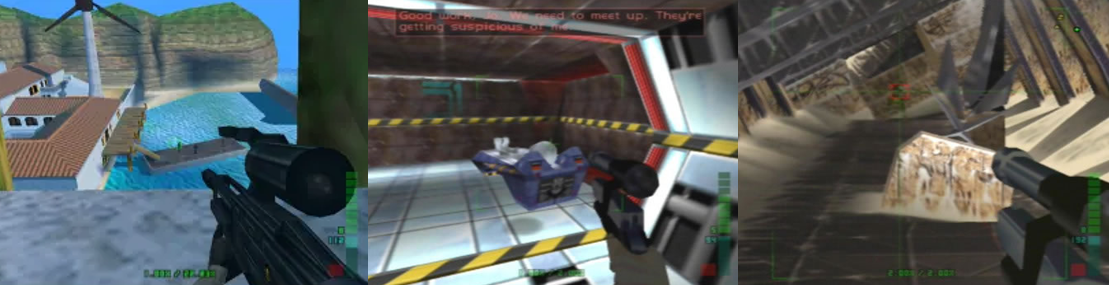
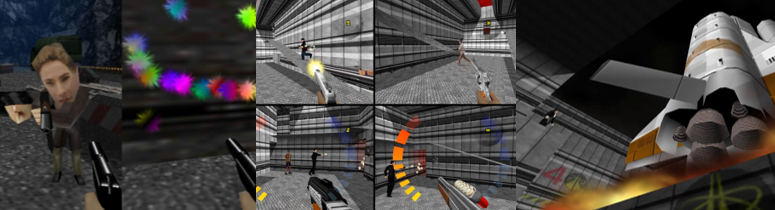
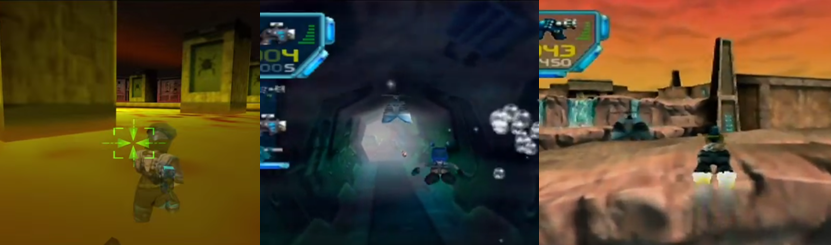
Perfect Dark also boasts a hub world, the Carrington Institute, where you can freely explore the controls, chat with NPCs, and even test your shooting skills at the range. This area is repurposed for one of the game’s final missions, which is a great touch as it’s quite harrowing seeing the normally serene hallways crawling with Skedar. Joanna’s assignment starts simple enough with her infiltrating the towering dataDyne skyscraper, an area you must first descend into and then escort Dr. Carrol through after liberating him from the shiny, high-tech (if repetitive) labs beneath the structure. After that, Joanna takes out snipers and eliminates dataDyne soldiers who’ve captured Daniel Carrington at his villa, exploring his luxurious abode and reactivating the wind generator. While Perfect Dark owes a lot of its visual identity to Blade Runner (Scott, 1982), this is most keenly felt in “Chicago – Stealth” where you’re on the rainswept streets of a cyberpunk city filled with skyscrapers and dingy alleyways. The interior of the G5 building isn’t much to shout about but things pick up when you infiltrate Area 51, with you bypassing the outer defences and taking a freight elevator down to the futuristic lab where scientists are preparing to eviscerate Elvis. Joanna also explores a couple of snowy environments that put GoldeneEye 007’s “Surface” missions to shame, with “Crash Site – Confrontation” being an intimidatingly large map filled with smouldering debris from the crashed Air Force One and alien ships. Air Force One recalls GoldenEye 007’s claustrophobic “Train” mission but hides some fun nooks and crannies to explore, alongside a tense escort mission as you get the President to his escape pod. Once the alien plot really kicks in, you’ll be exploring the sprawling ocean vessel Pelagic II before forming a brief and ill-fated partnership with Cassandra aboard the Skedar attack ship. This sees you running around the ominous, threatening alien craft with few resources but soon backed up by Maian reinforcements. Finally, you explore some ruins on the Skedar home world, a surprisingly restricted, arid landscape full of ancient structures and canyons, where cloaked Skedar roam and their hidden army awaits in an alien lab.
Enemies and Bosses:
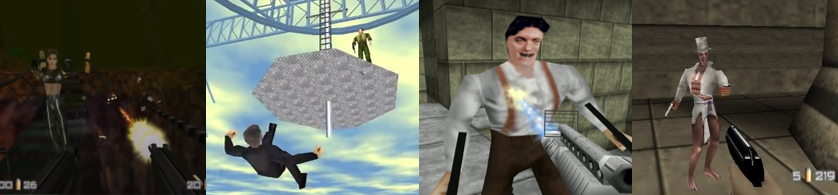
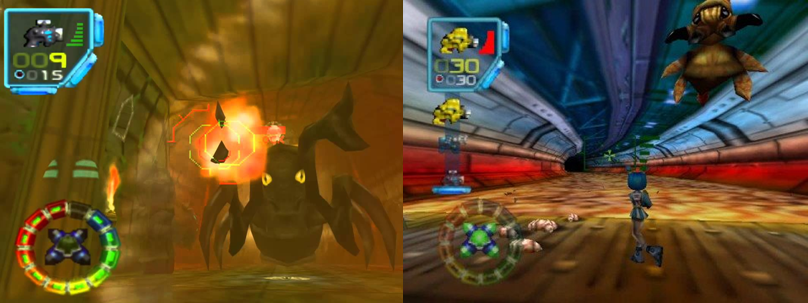
Joanna’s primary opposition throughout the game, even when the Skedar come to the forefront, are the various soldiers of the malicious dataDyna Corporation. These come in a few different forms and wield various weapons, such as regular infantryman carrying CMP-150s, masked shock troopers using Dragons, and green-clad troopers. Cassandra is protected by female, shotgun-wielding bodyguards and snipers patrol the rooftops of Carrington’s villa. G5’s various guards are functionally similar, though many give you the run around with their cloaking devices or are quick to sound alarms when they spot you. DY357 Magnum-carrying Federal agents appear in “Chicago – Stealth” alongside a high-powered, shielded drone that’ll gun you down on sight, while Area 51 is protected by various troopers carrying MagSecs, grenades, and SuperDragons. You must also contend with technicians who try to drug you, corrupted Secret Servicemen who riddle you with Cyclone bullets on Air Force One, and towering, blonde-haired brutes who are actually Skedar in disguise! The Skedar come two forms: a smaller, less threatening minion and the larger, much more vicious warriors. While the smaller Skedar appear in packs, the larger ones can be cloaked and carry the devastating Reaper and Slayer, as well as biting and slashing up close. Still, most enemies can be put down with a few good shots, or immediately with a bullet to the head, but you must always be wary of enemies appearing from previously locked doors, taking cover behind barricades, tossing grenades, or swarming from thin air when alarms are raised.
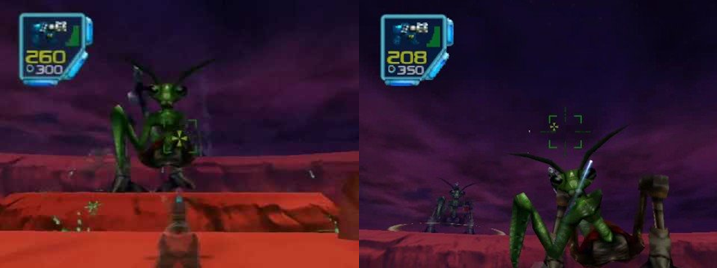
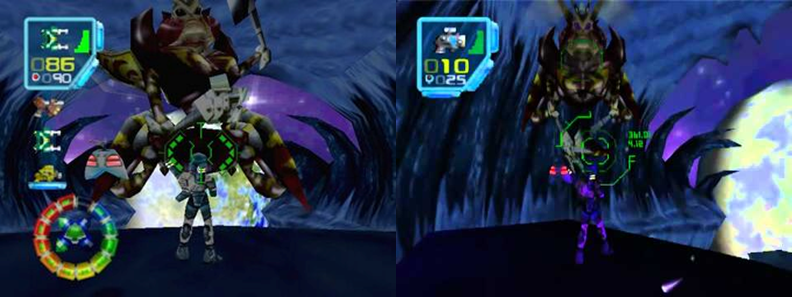
Like GoldenEye 007, there aren’t really any traditional bosses in Perfect Dark, with some exceptions. When playing “dataDyne Central – Extraction” on “Special” or “Perfect” Agent, you must grab a rocket launcher to blow an attack chopper out of the skies before it cuts you (and/or Dr. Carrol) to shreds. G5’s robot drones can also cause a headache as, while the drones in “Crash Site – Confrontation” can be destroyed (unlike the one in “Chicago – Stealth”), their laser cannons are tough to avoid and you must be quick (or discover the higher path) lest the President is executed. Turrets also appear (though less frequently than in GoldenEye 007) and you’ll run into the corrupt Trent Easton a couple of times (though he ultimately dies in a cutscene). The Skedar that patrol “Attack Ship – Covert Assault” are particularly difficult to deal with as you don’t have a gun or much ammo, forcing you to rely on your knife or fists. Cassandra’s bodyguards must all be eliminated to clear the final part of the first mission, and the towering blonde men could be said to be mini bosses despite how easily they go down. Indeed, the only true boss is the Skedar king fought at the end of the game. After escaping the labyrinthine caves and eliminating his secret army, you battle the king in a throne room of sorts, dodging his rockets and projectiles and taking out any minions he spawns. You’ll quickly see that the king is protected by an impenetrable shield; however, you can significantly weaken this with a charged shot from the Mauler. This sees the king take a few seconds to regenerate, in which you must fire another charged shot at the spiked obelisk behind him. Repeat this enough times, chipping away at the ruin, and a cutscene eventually plays in which the Skedar king is crushed and the day is saved. Three more Skedar kings appear in a bonus mission where you play as a Maian soldier; though these can be fought more traditionally, they’re by no means less lethal.
Additional Features:
There is loads to unlock in Perfect Dark and loads of replay value packed into the game. Every mission hides a mysterious piece of cheese that, while useless, is fun to spot. You can tackle every mission on different difficulties to challenge yourself, visit different areas, and accomplish different, more difficult objectives. You can play the main campaign alongside (or against) a friend and explore the Carrington Institute hub world and take on a series of tutorial training scenarios that not only teach you the basics and complexities of the controls but also unlocks a virtual reality duelling simulator where you engage in firefights with various characters. There’s also a shooting range where you’ll unlock classic GoldenEye 007 weapons if you achieve a “gold” rating and, like in that game, clearing missions with fast times on various difficulties unlocks some fun cheats. These grant you invincibility, extra shields, unlimited ammo, and all guns but also enlarge characters’ heads, speed up your punches, shrink characters, and allow you to play as Elvis! Clearing the game on each difficulty unlocks bonus missions, such as another visit to the dataDyne tower, this time as Mr. Blonde (in possession of a limited cloak) to apprehend Cassandra, a return to the Skedar home world (as and alongside Maians) to defeat three more Skedar kings, and another mission where Elvis battles through the G5 building. This version of the game also comes with twenty Achievements, with three earned by beating all three difficulty settings, one for clearing the first mission, one for completing one mission in co-op and another for clearing a mission in counter-operative mode, and another for killing enemies in various ways. You’ll also get Achievements for destroying Carrington’s wine collection, destroying five security cameras, and earning all the leaderboard crowns. Additionally, Rare Replay (Rare, 2015) features bonus materials related to the game and you can create save states when playing on the Nintendo Switch.
Like GoldenEye 007, Perfect Dark also boasts a multiplayer deathmatch mode, the “Combat Simulator”, though again this is vastly improved! Now, you can not only select a character to play as but can also customise them to your liking, setting up weapon load outs (or choosing from a preset list) and setting kill, time, or score limits, handicaps, and even the music. There are loads of game options to pick from, such as a standard free-for-all and team-based deathmatches, one-hit kills, slow or fast movement, disabling the radar and/or auto aim, and highlighting players or items. You can play a couple of “capture the flag” variants where you either claim a briefcase or capture an enemy base, score points by hacking terminals, or pursue a randomly selected target. There are sixteen maps to play on once you’ve unlocked them all, with all but three reusing and recycling assets from the main game. Honestly, you won’t be playing on any of these maps as the classic GoldenEye 007 “Facility” map has been recreated as “Felicity” and is the only map you’ll ever need (though two other classic arenas are also available). At the end of each round, all players receive some stats showing how well they played and are given a ranking that either commends them or chastises them for “camping” or playing dishonourably. Perhaps the best aspect of the Combat Simulator is that you don’t need friends to play as you can customise “Simulants” of various difficulties to play alongside or against you, changing their behaviour and weapons to suit your gameplay. There are also thirty challenges to complete in this mode, with you awarded up to three stars for completing them, which task you with playing each loadout against different Simulants with different weapon sets and rules. This sees you playing king of the hill with only pistols, using cloaking devices and N-Grenades, fighting in slow motion, or desperately trying to keep hold of the briefcase while one-hit kills are enabled. I wasted so much time on this mode back on the Nintendo 64 and it’s honestly such a blast to play that it baffles me more online only, asymmetrical games didn’t include this for offline single player.
Final Thoughts:
As a massive fan of GoldenEye 007 as a kid (and to this day), I naturally snapped up Perfect Dark for the Nintendo 64 and played it to death. I marvelled at how visually superior it was to is predecessor, how the controls and gunplay were refined and enhanced, and at how much more lively and interesting enemies and environments were. I loved how packed full of little details and content the game was, from the co-op and counter-operative modes, to the unlockable cheats and weapons, to the incredibly addictive Combat Simulator and it’s other challenges. Decades later, I jumped at the chance to experience the game in high definition as part of Rare Replay and I wasn’t disappointed. The graphics and gameplay had only been enhanced further, resulting in a slick, smooth game that makes shooting baddies and saving aliens a blast. However, Perfect Dark has some flaws. The improved graphics highlight the odd textures, some areas are either too dark or you’re blinded by lights, and some missions can be needlessly challenging since the objectives are so obtuse. I’ve never been a big fan of Joanna either and find her a bit obnoxious and annoying, but the main reason Perfect Dark loses out on a perfect score is simply that it isn’t GoldenEye 007 and I always found myself choosing that game over this one because of how powerful nostalgia is. That’s definitely unfair as Perfect Dark is a five-star game, but I’ve always felt a touch of sadness that it wasn’t a true GoldenEye 007 sequel. Still, this is a fantastic FPS game and perhaps the best FPS on the Nintendo 64. The sheer amount of unlockables and options make it well worth the money and it’s one of the few games that really got the most out of the console. While it’s a shame it released too late in the day to make as big an impression as GoldenEye 007, I always enjoy revisiting it and have a greater appreciation for it now than I did as a teenager.
My Rating:
Great Stuff
Were you a fan of Perfect Dark? Do you agree that it’s better than GoldenEye 007 in every way except for nostalgia? What did you think to Joanna’s character and the improved graphics? Were you a fan of the bonkers sci-fi plot or did you find it a bit out of left field? Which mission and/or weapon was your most or least favourite? ere you a fan of the Combat Simulator? Would you like to see more of Perfect Dark and what are some of your favourite sci-fi-orientated videogames? Tell me what you think about Perfect Dark in the comments, then check out my other sci-fi content, and support me on Ko-Fi if you want me to play more Perfect Dark videogames.


You must be logged in to post a comment.